Tag Archive for: studio

Sometimes bad is good

Lightmeters rule

Yeah, you probably already know I love my lightmeter.
But don’t think it’s always perfect.
Ok let me rephrase that.
When you meter the light with a light meter you will get the “perfect” exposure for the subject directly behind the meter (when using an incident meter).
But sometimes using that setting will get you perfect exposed images but it can also be boring.

Today we take a look at what happens when you start to experiment.

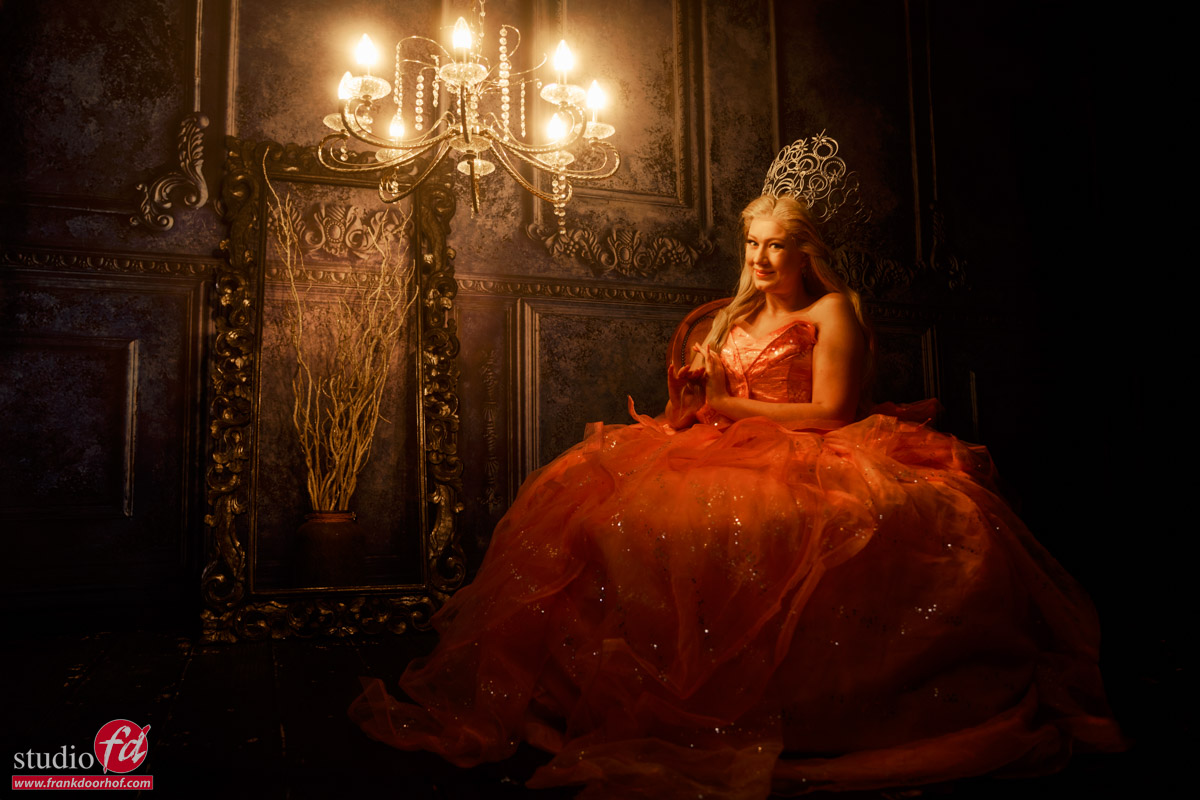
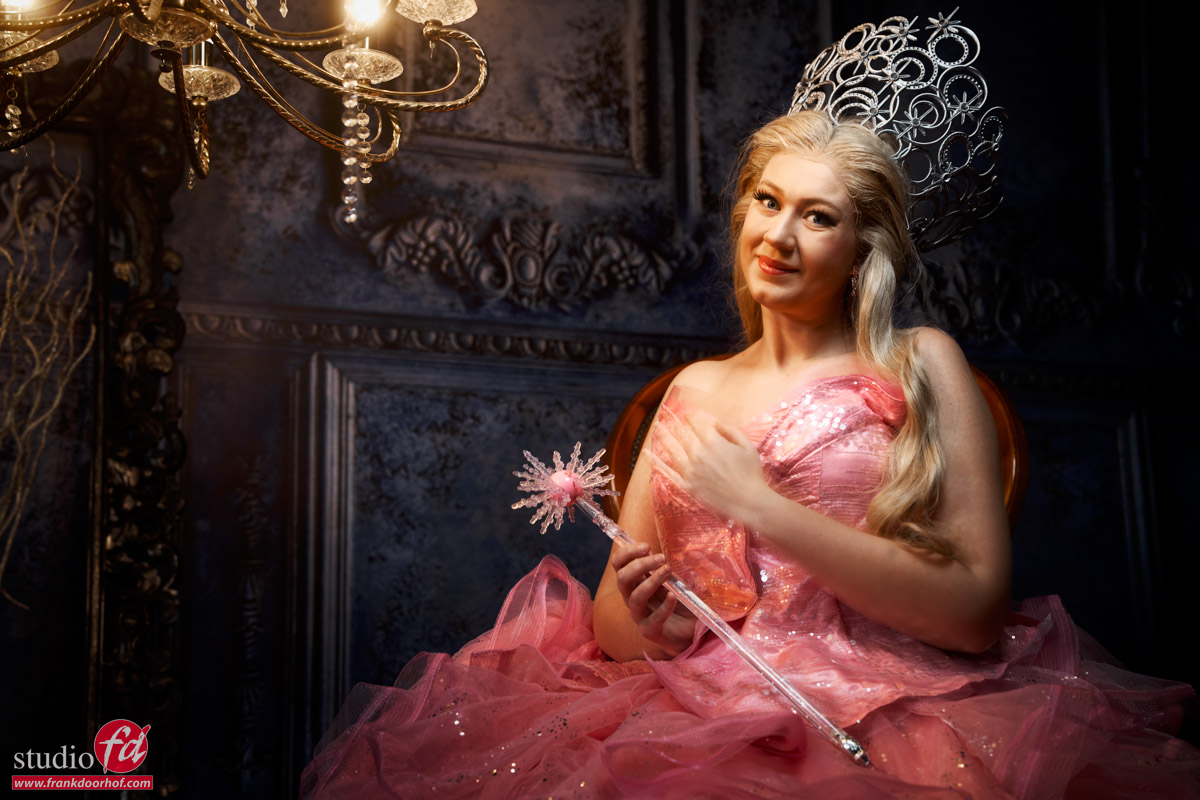
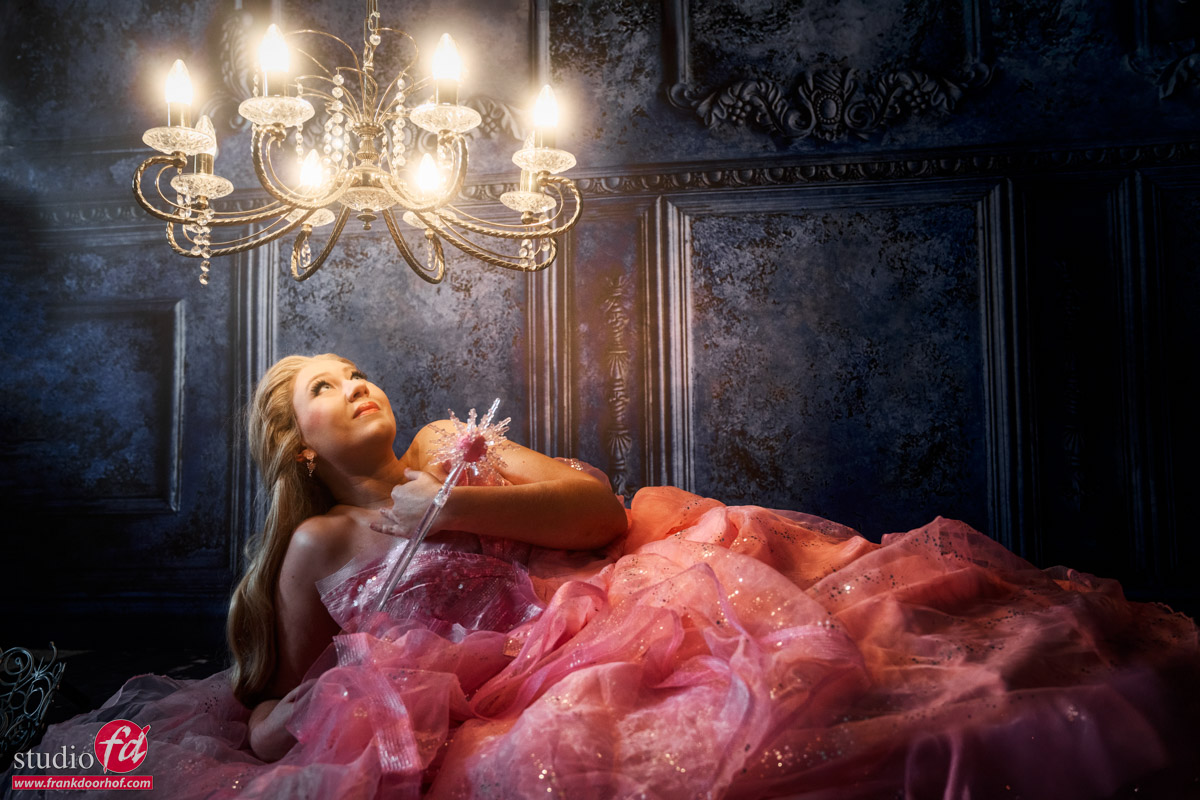
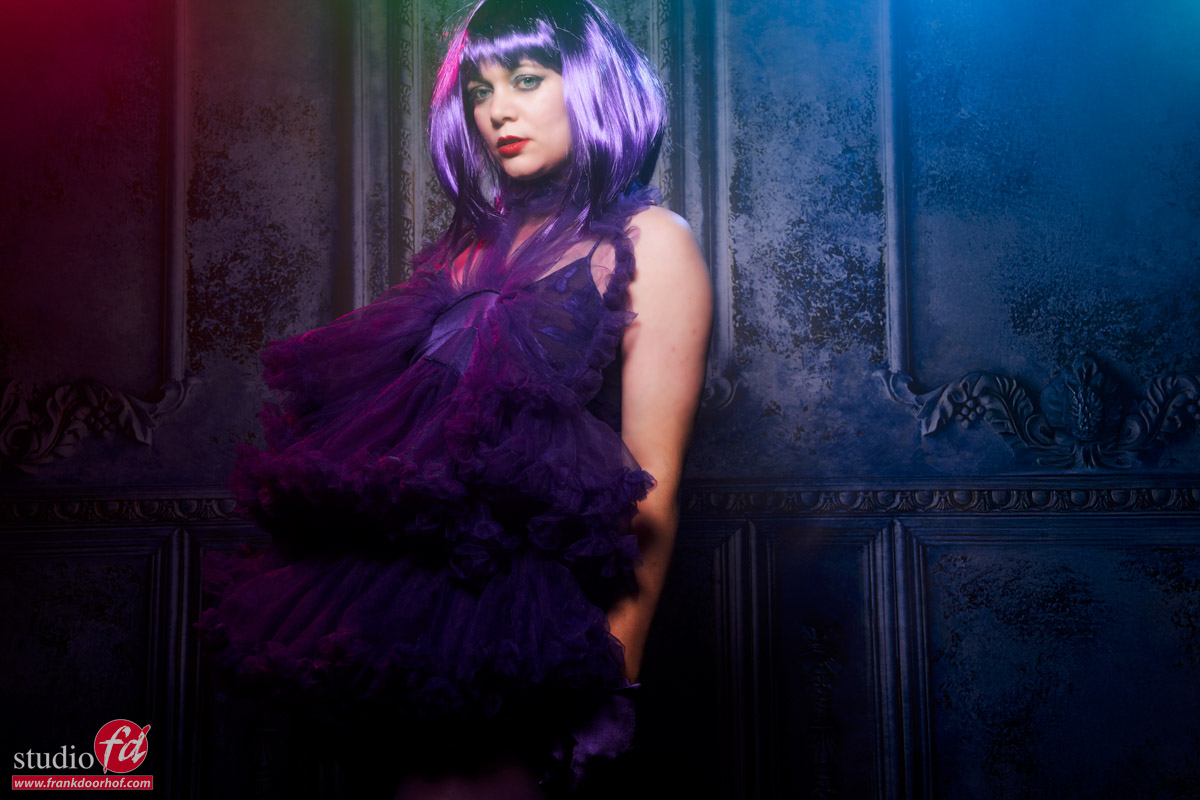
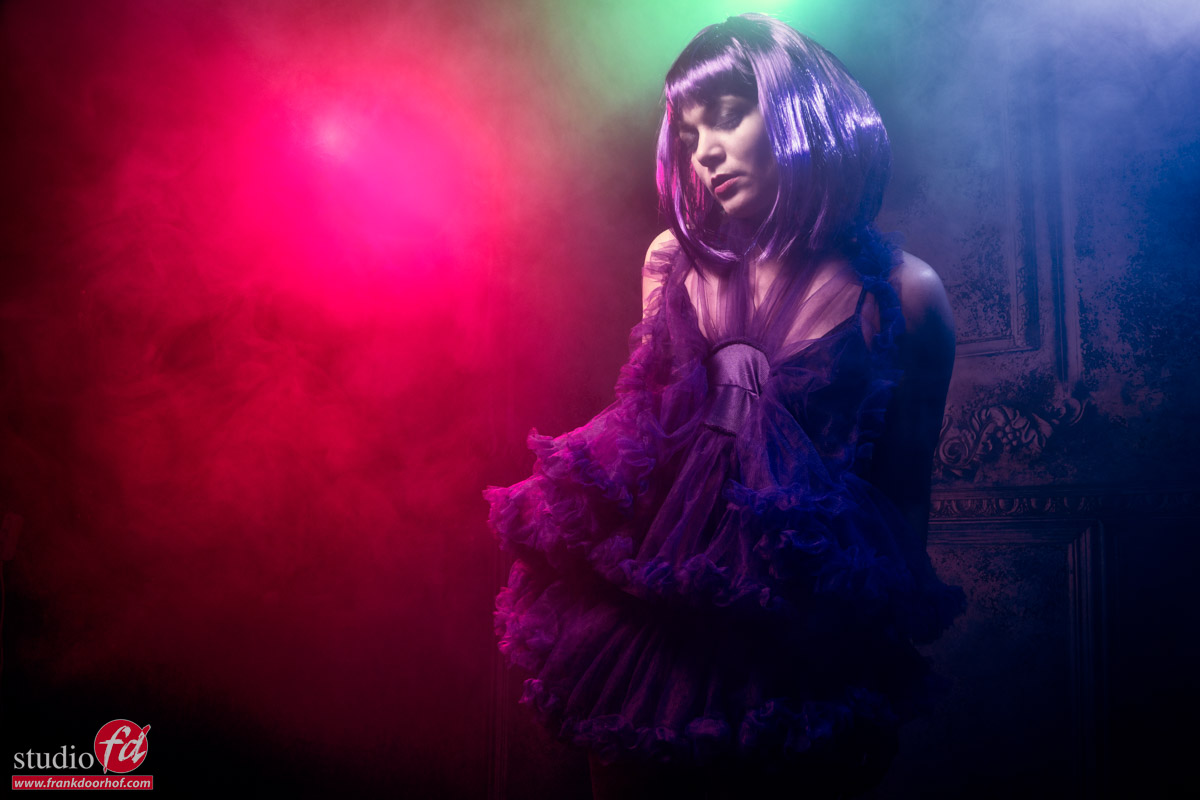
This is the properly exposed shot.
Nadine’s face is lit correctly and I’m using a very slight fill with blue and red gels on Geekoto GT200’s
But as you can probably already spot there is also a slight green hue… and that’s correct just above Nadines head there is also a green gel, but in this shot it’s on a very low setting.

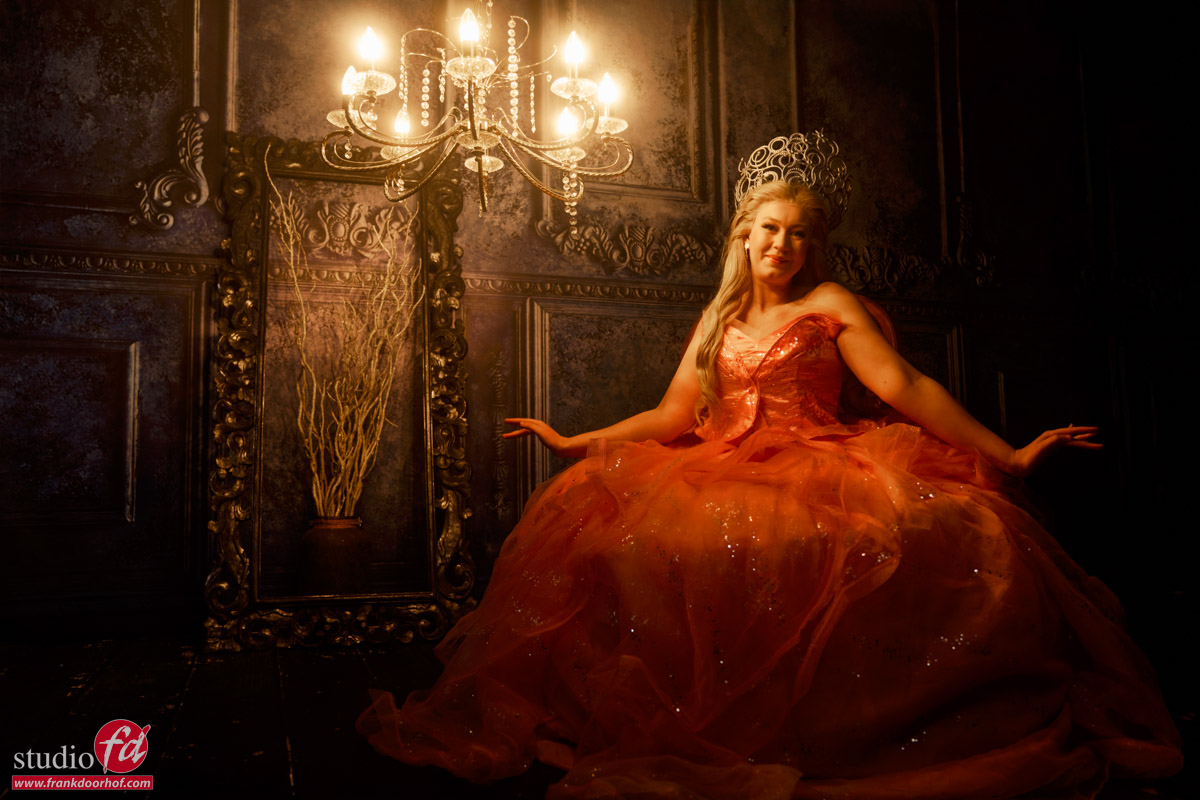
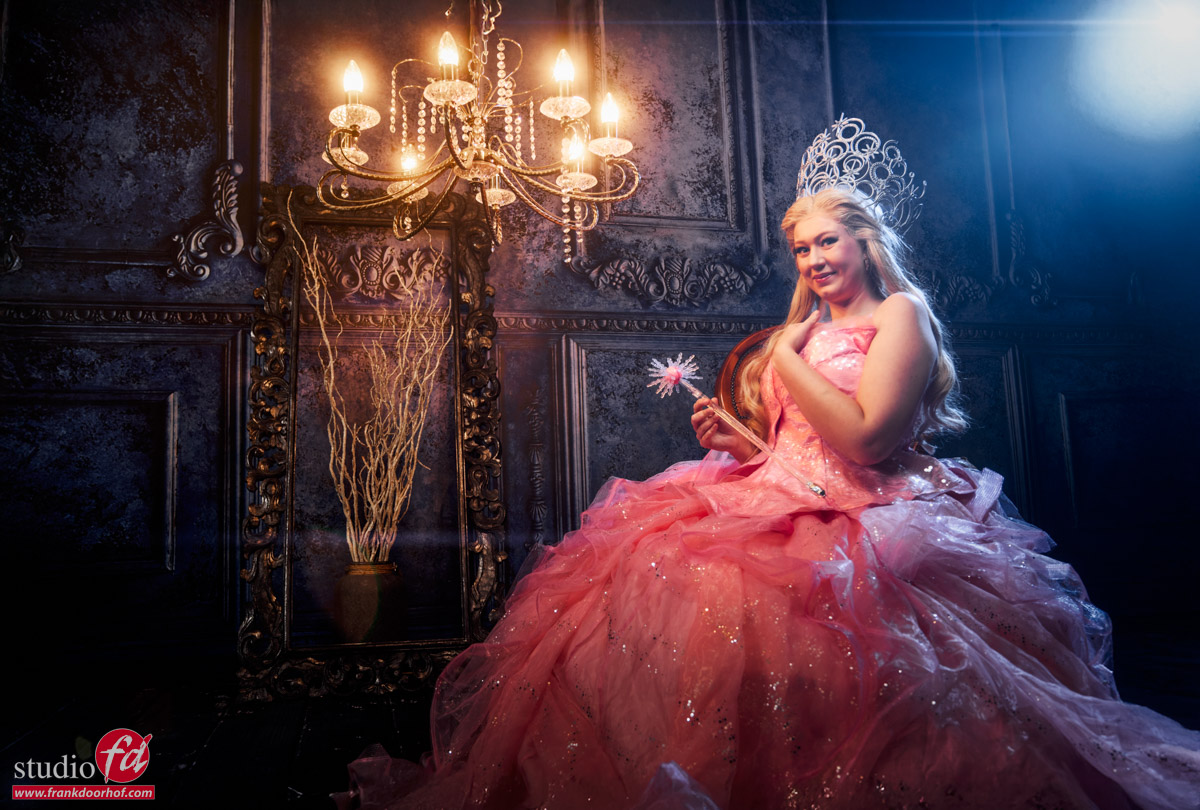
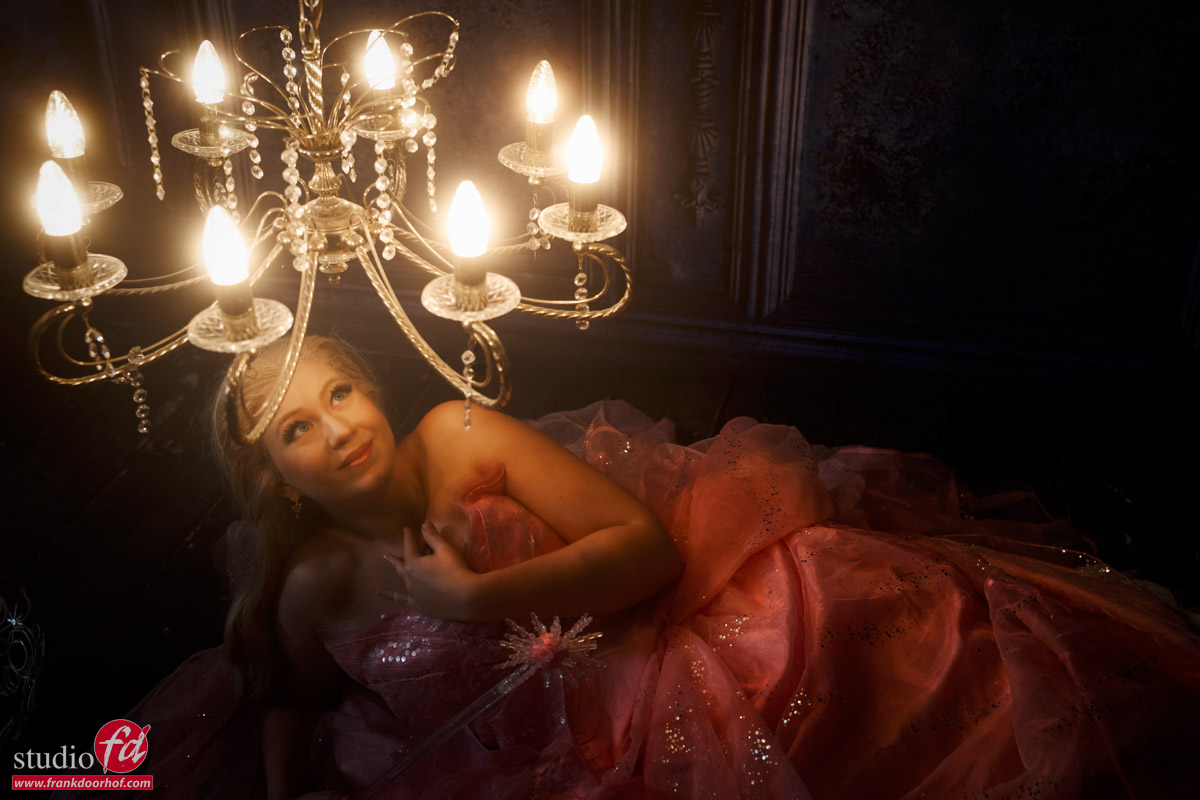
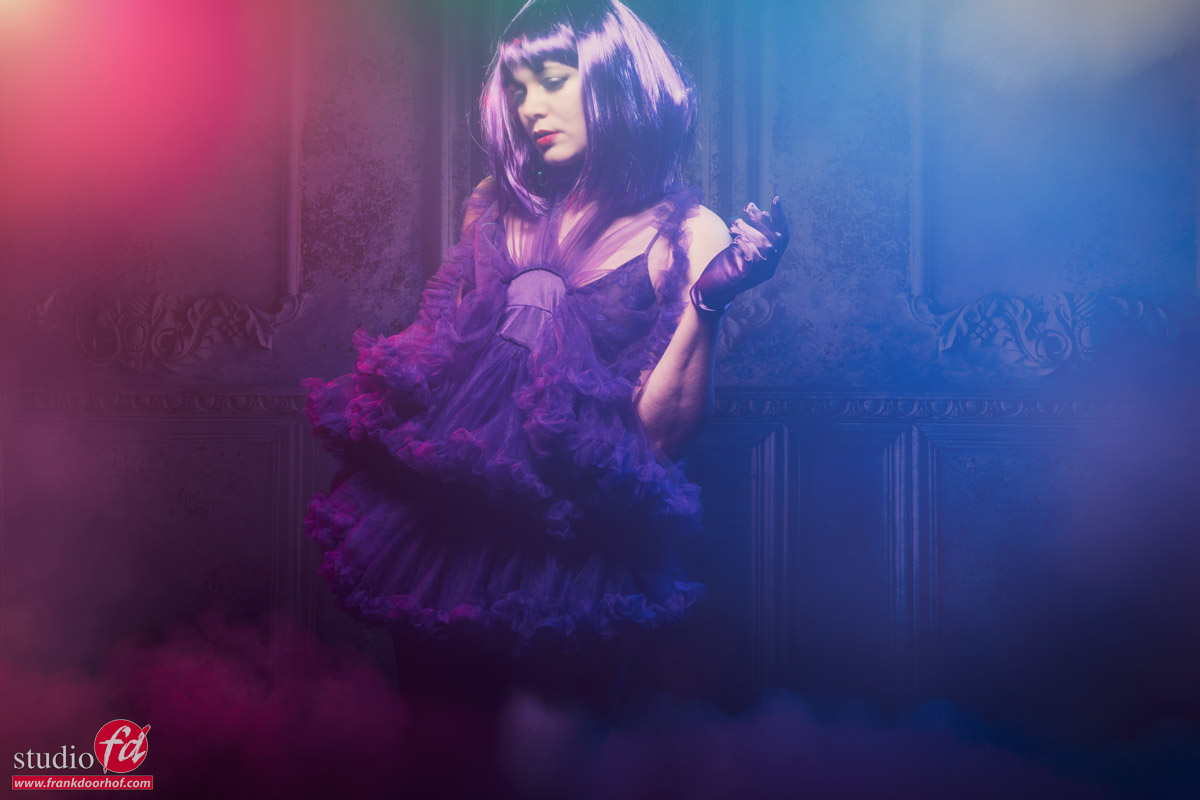
So let’s start adding some “oomph” with changing the output of the gelled strobes.

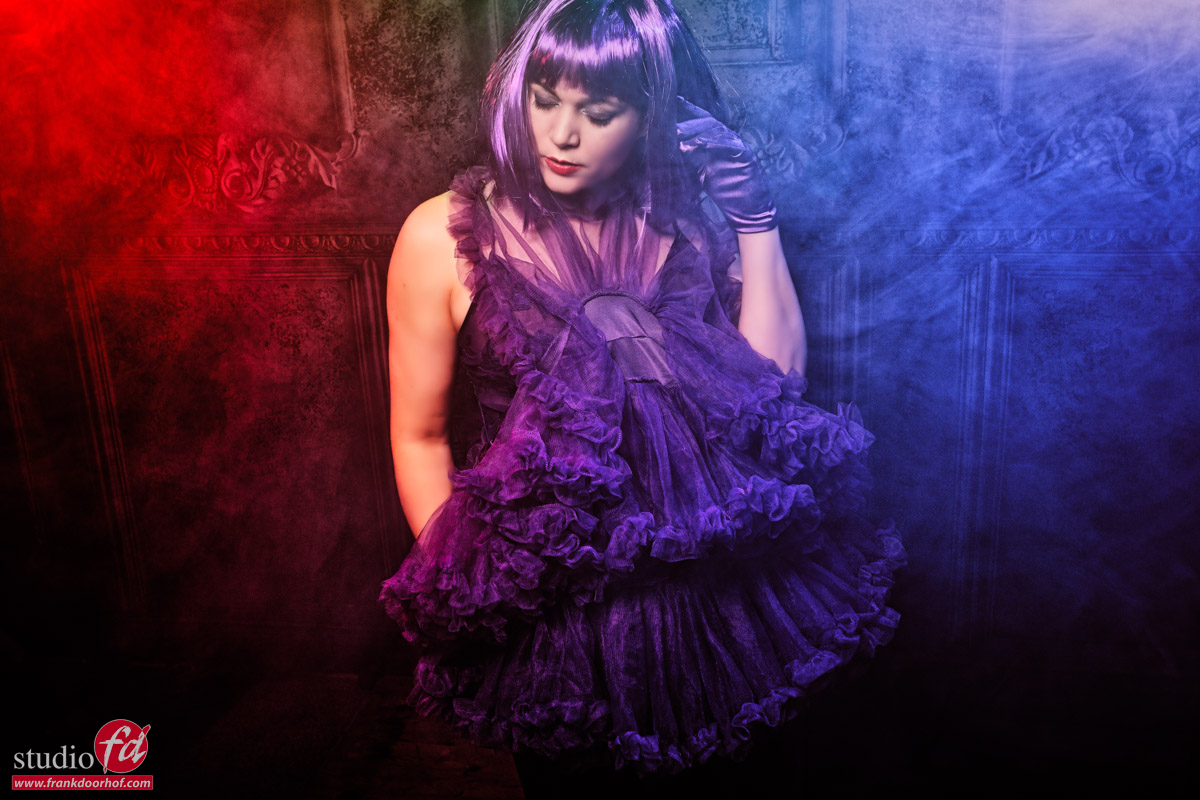
Now that we give more power to the gels you also start to see the smoke a lot more.
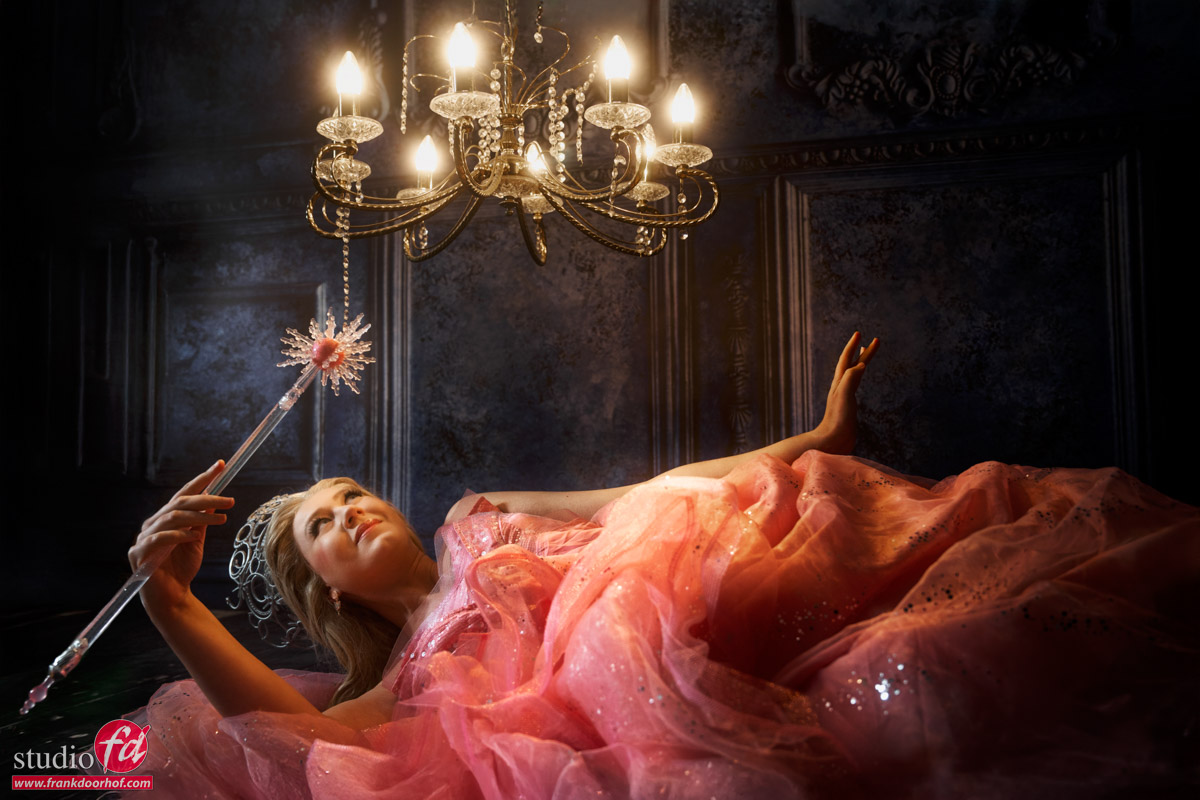
I did change my angle for this image, I love the way the clothing just leads the viewer when viewed from a slightly higher angle.
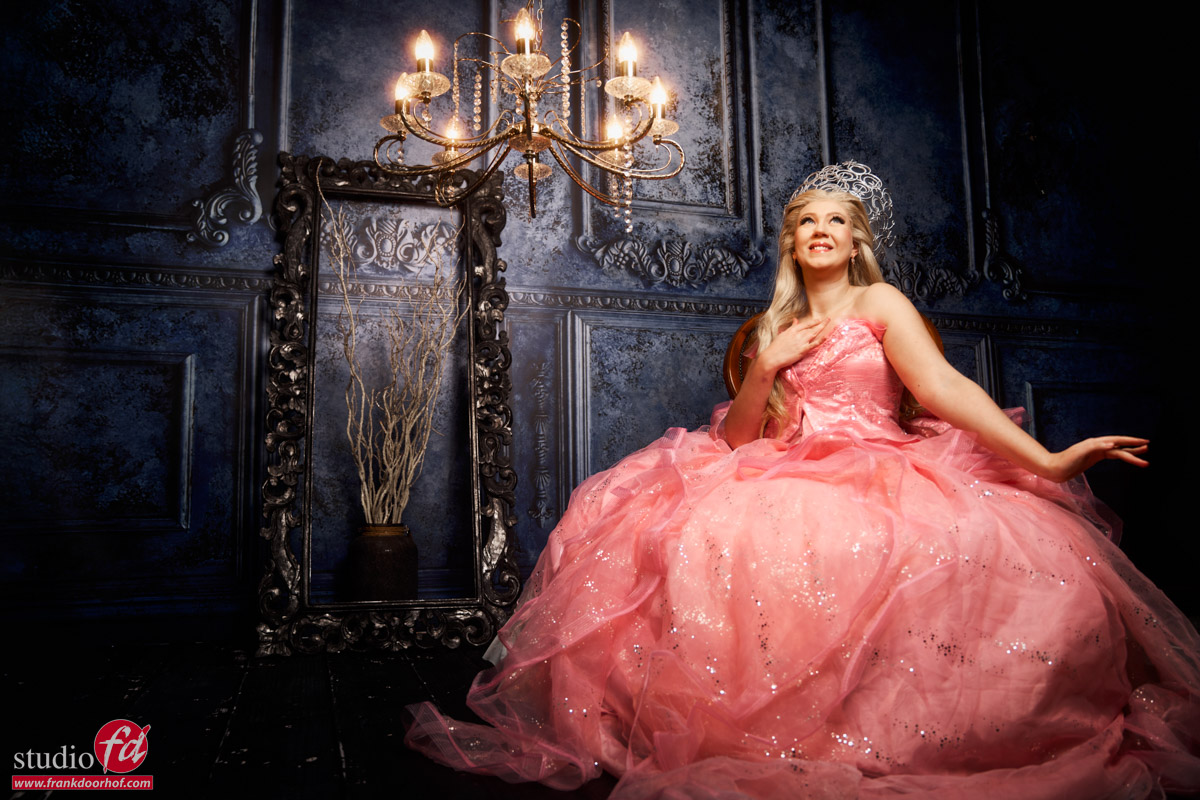
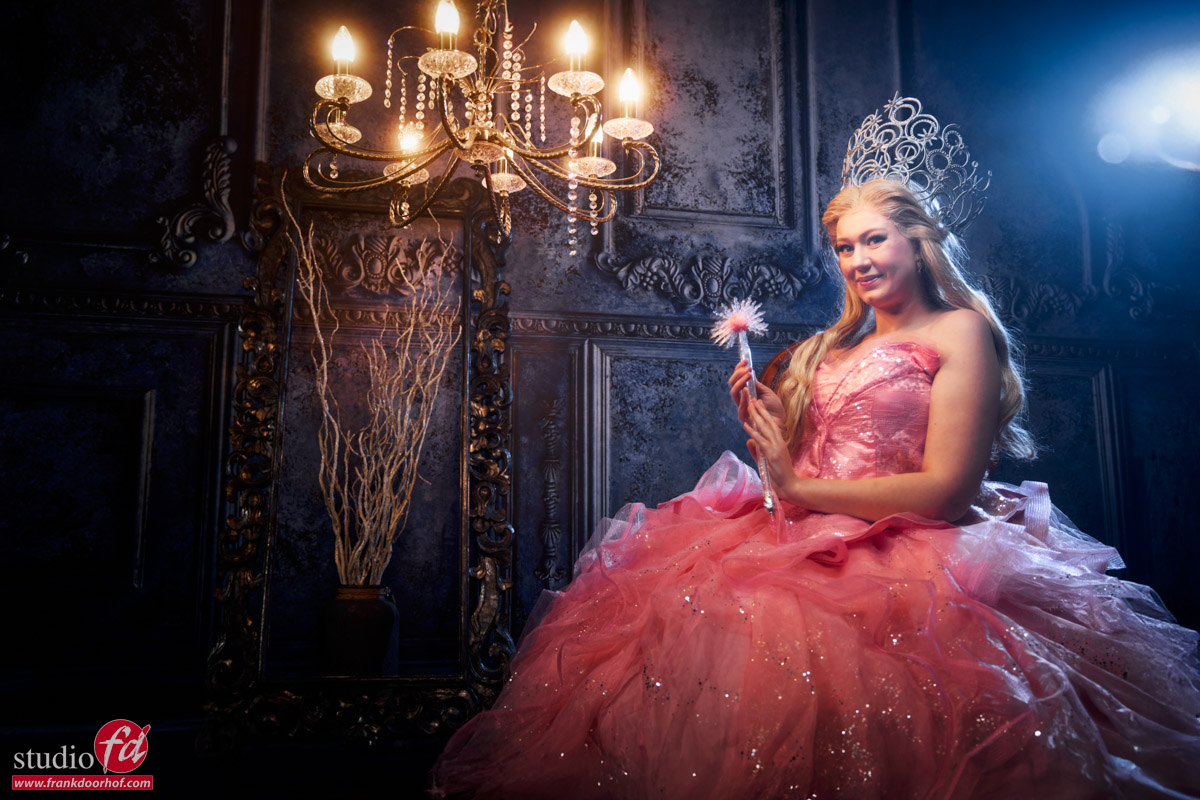
Add some more …..

This is the moment where I started to open up the aperture a bit more.
You can do this by raising the output on your strobes, or just opening up the aperture, the disadvantage of the aperture method is that you change the “output” for all strobes equally, when you use a remote control and groups you can have total control.

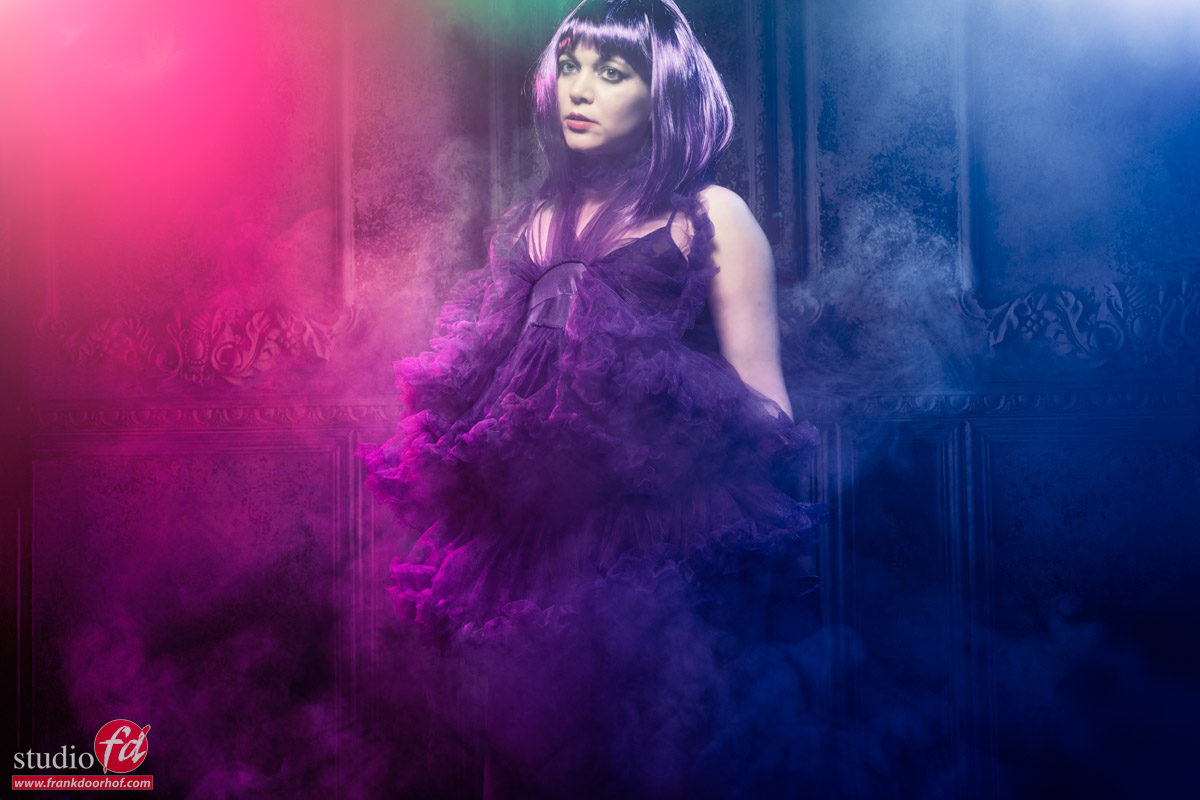
Now this is still the area where you might think the exposure is actually pretty accurate, it’s a bit bright, but that’s about it.
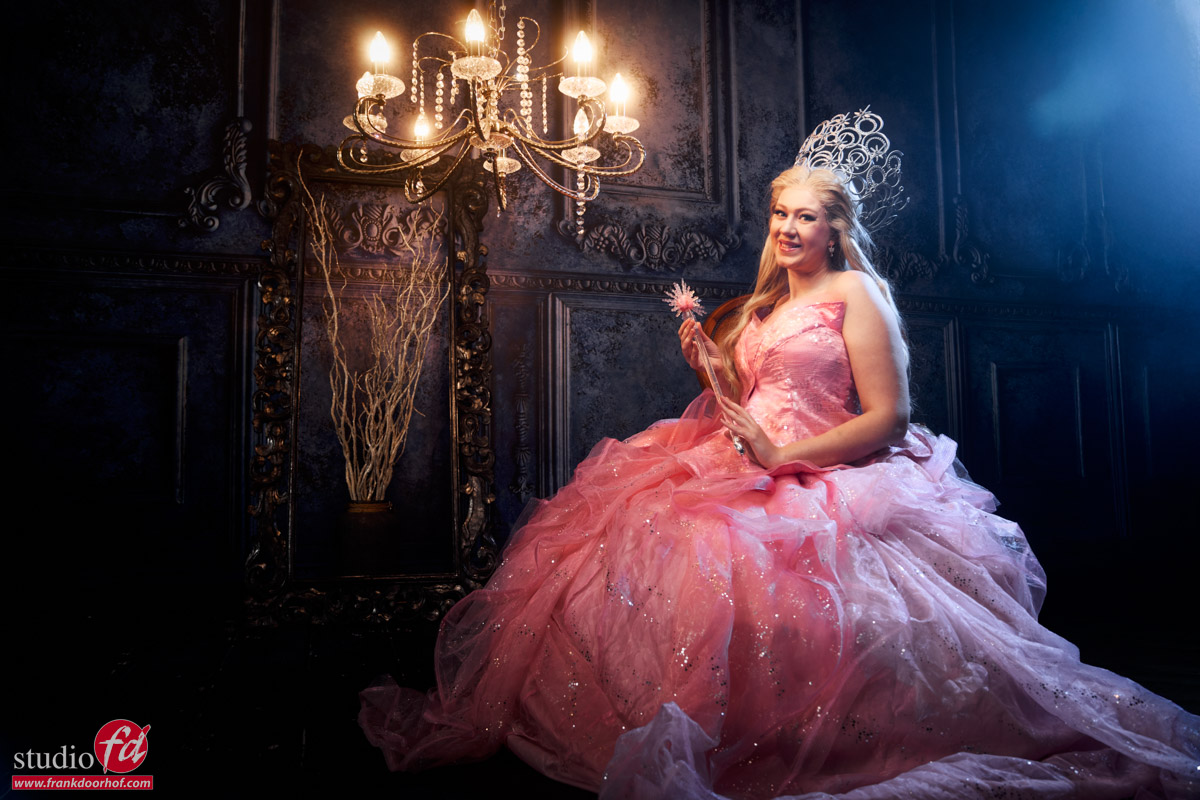
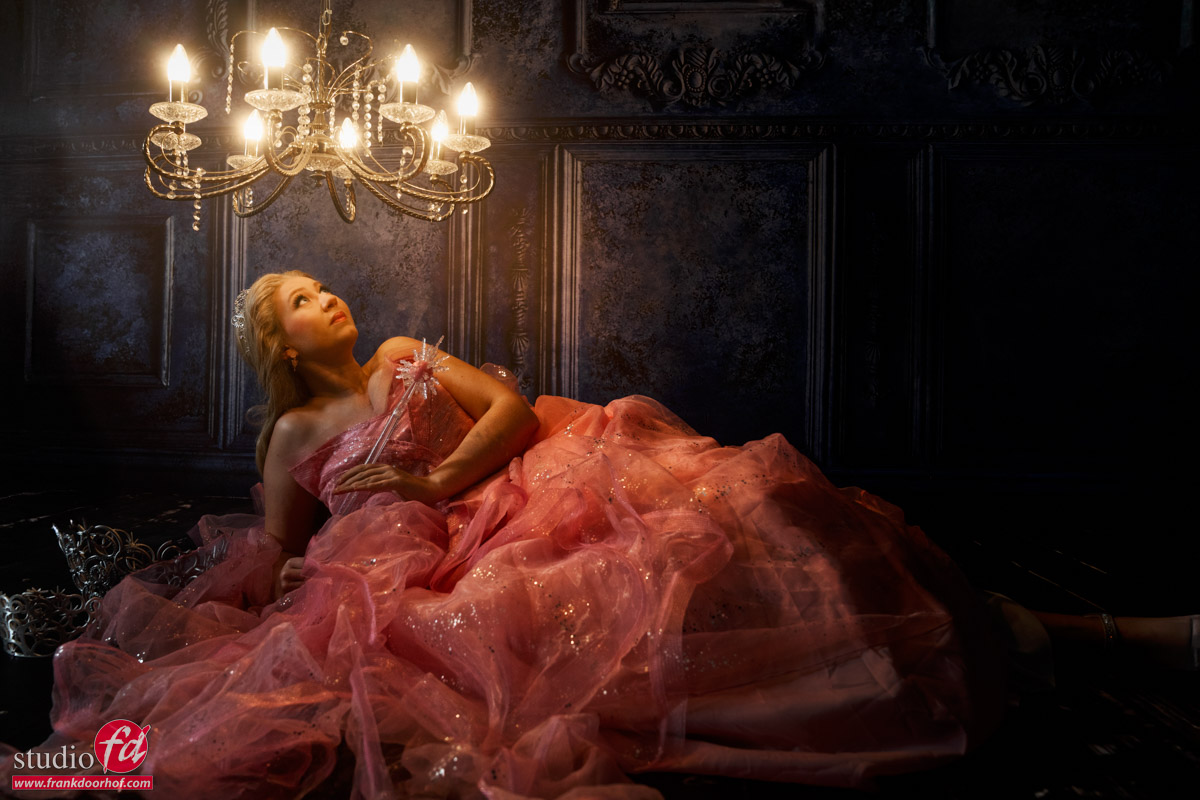
So let’s go a bit further.

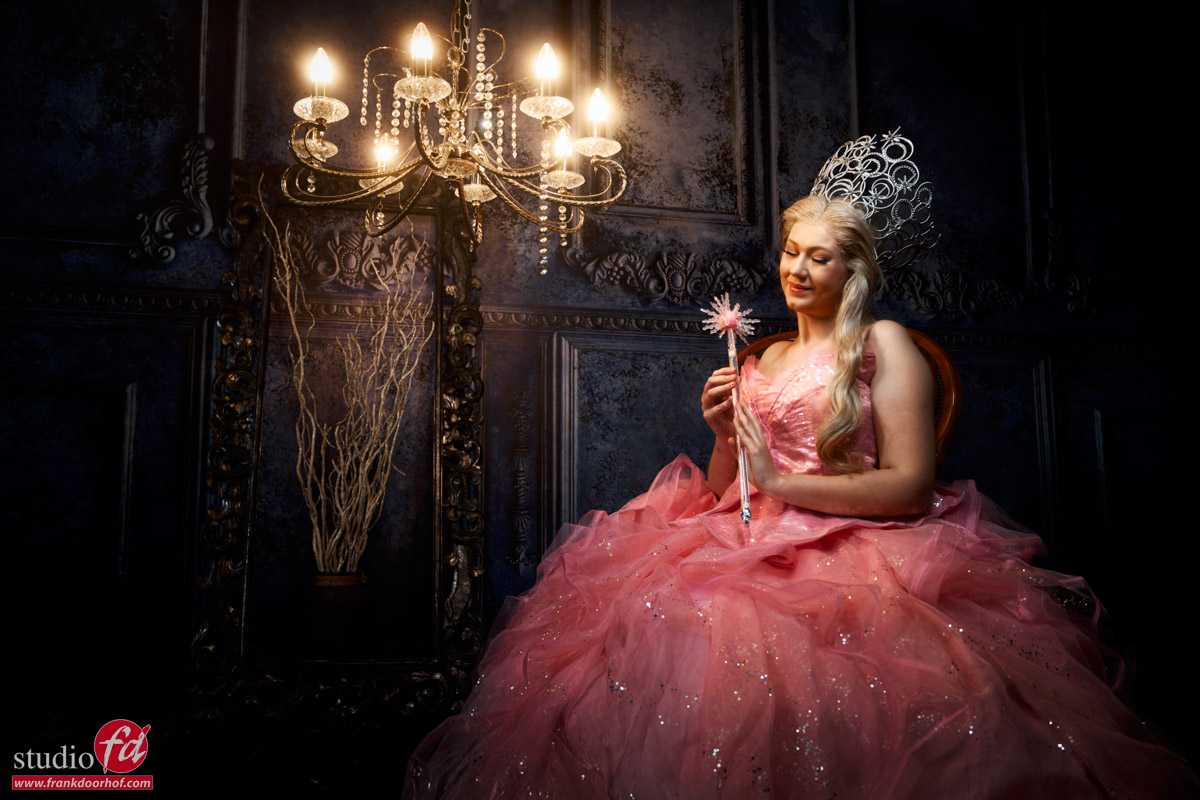
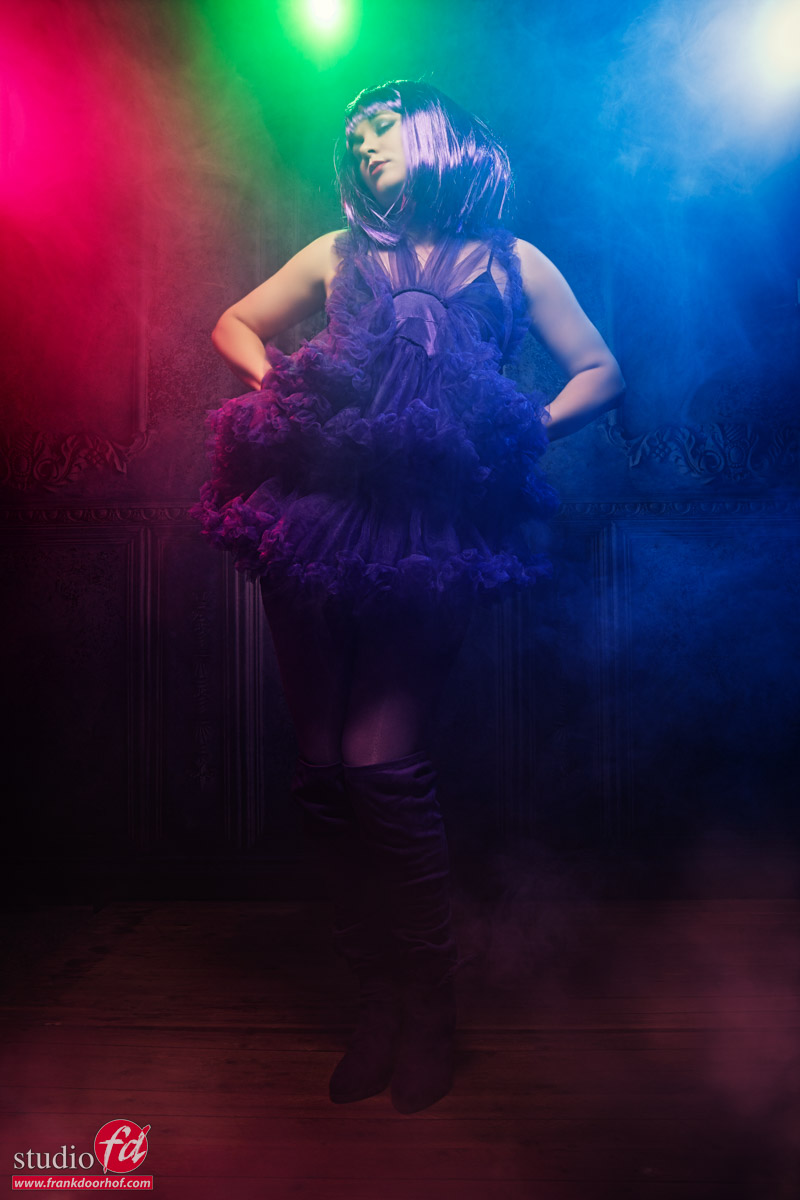
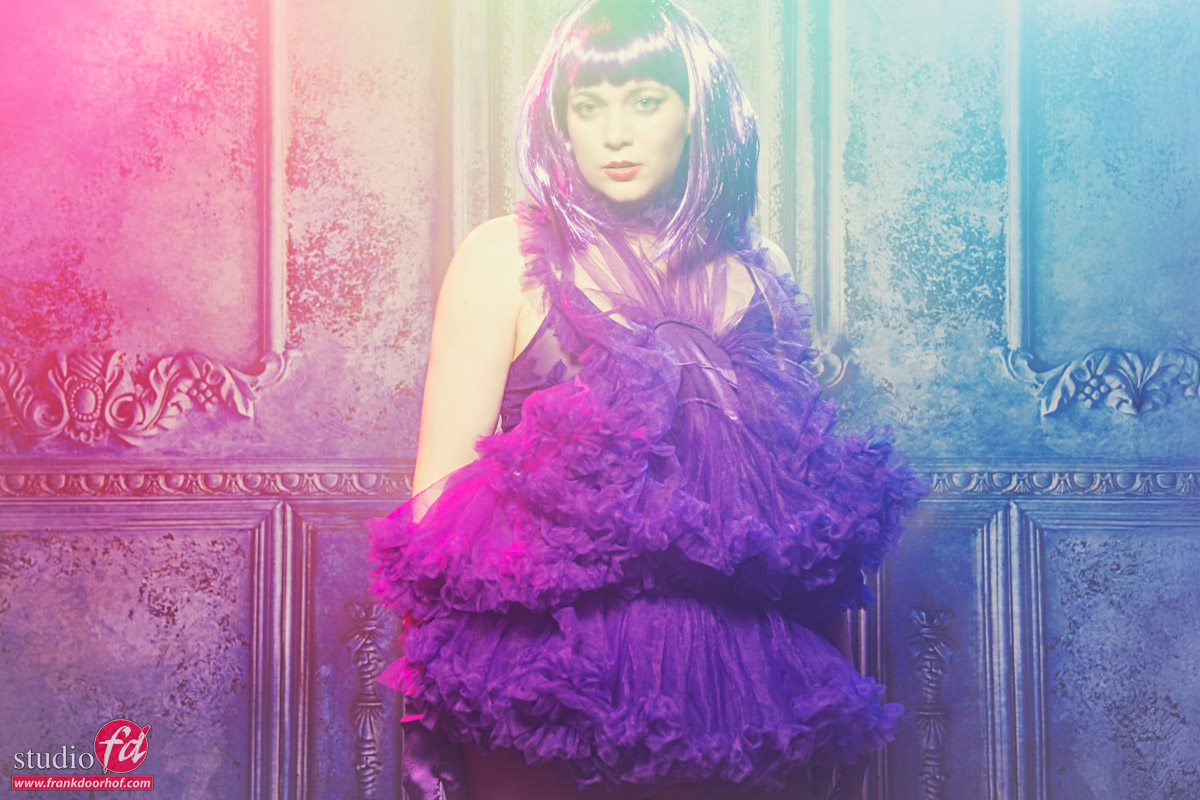
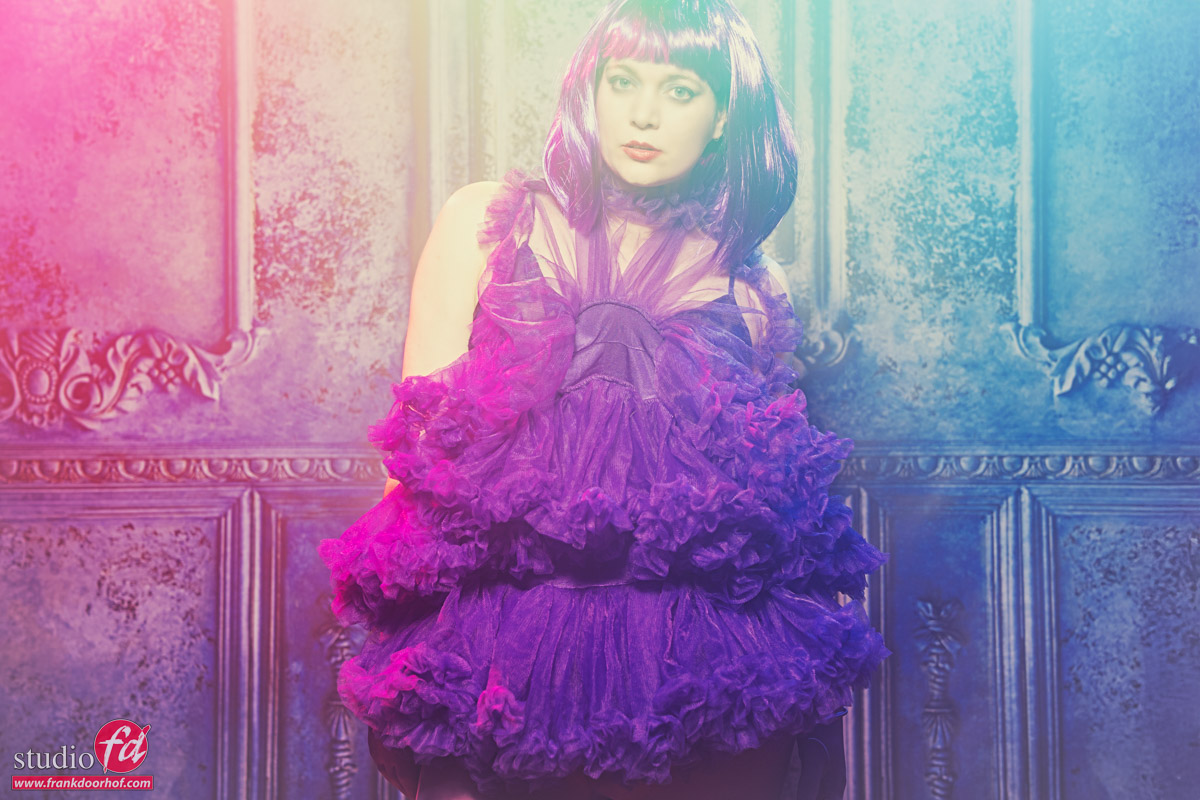
Pastel and inspired by K-pop

Don’t worry I’m still a rock/metalhead, but I do love the look you often see with K-pop bands.
Add to this some pastel like colors and the inspiration for the next shots was done.

here I’m really overexposing the shots, including the gelled strobes.
You might think that it would look horrible (and maybe you do actually and that’s fine :D) but I think it works really well for this setup.

Of course you can also create these effects in Lightroom or Photoshop.
But you will lose some details in the shadows when you have to recover to much shadow detail, also the way the colors mix over the total range will be different and more “rough”. Doing it in camera/on set is not only much more fun but also gives you a great insight in how colors mix and light works.

This is why during the workshops I always try to shoot images standard and also experiment with at least 1-2 different solutions.

Workshops

Want to learn everything about light control?
Want to visit a workshop where it’s not just shooting a model with a fixed lighting setup, but see how the setup is build and adjusted to the taste of the group?
And of course learn how to work with poses, backgrounds, small sets, styling, retouching and a lot more…..

If this all sounds awesome, visit fotografie-workshops.nl and book your workshop.
If you don’t speak Dutch, no problem, let us know a few weeks in advance and we can switch the workshop to English.
Not possible to travel to The Netherlands?
We got you covered with our 1:1 online workshop.
We have a full streaming setup in our studio. 4 detail cameras and of course the retouching software so you can see every detail and of course ask questions during the day. Plus you get all the RAW files after the workshop.


Free video tutorial about mixing flash with continuous light

It’s one of those questions

That always comes back, and we’ve discussed it several times on the blog.
But because video is always better, today a free 2 hour tutorial about mixing light sources.

But first I’ll show you the results from the video, and give you a short explanation of the setup.
Due to the different lighting setups I have chosen to edit the final results also with different looks which I think fits the mood.
During the video you see the lighting setups and also part of the retouching process in Lightroom, Photoshop, BorisFX and Luminar Neo

Chandelier

Strobes are fun, but just a chandelier can be great too.

Mixing the chandelier with strobes

In the following shots I started with the Geekoto Lantern, and later switched to the Geekoto Quicky softbox, both on the Geekoto GT400.
As you can see the difference is clearly seen between the more focussed lightsource and the lantern which spreads the light out much more.
In the later shots I compensated with the light output of the chandelier by changing the shutterspeed. (explained in the video)

More focussed lightsource.

And of course it’s always fun to add some extra color.
Here I’m using the Rogue magnetic system on the Geekoto GT200 with a blue gel
The black diffusion filter helps with the lens flare.
You can always add some extra “oomph” to your lens flares with software like BorisFX, which I used in the first shot.
The lens flare is there, but it just gives it something extra.

Back to the chandelier

In the final part of the tutorial I switch back to the chandelier, but with a different setup.
This setup goes into detail about the inverse square law and shadow problems when shooting closeup light sources.

The tutorial

After seeing the results I hope you are looking forward to the tutorial.
The tutorial is part of our Digital classroom series, which you can find on our YouTube channel.
If you want to learn more about lighting in small groups check fotografie-workshops.nl for the Dutch workshops and events.
If you don’t speak Dutch and let us know a few weeks in advance we can switch the workshops to English.
And if you are not able to travel, no problem, we have a great setup for 1:1 (group) workshops online Online 1:1 workshops

Chewie takes the stage

Sometimes it just happens

While setting up for a digital classroom episode Chewie thought it was fun to keep jumping on the chair.
(When you watch the live stream you can actually see him trying to steal the show several times.)
And when your dog jumps into a set, it’s of course time to take some shots.

I hope you guys enjoy Chewie the black labradoodle studio dog.

And yes, we also do pet photography 😀


VIDEO : Using light very creatively

Using light in different ways is fun

And gives you something unique.

Geekoto’s Beauty Dish is a very versatile modifier.
In this video Frank explains how to be very creative with this Beauty Dish.
Including behind-the-scenes video and results

Spoiler: it’s about angles and using or not using diffusion.

Want to learn everything about light control?
Want to visit a workshop where it’s not just shooting a model with a fixed lighting setup, but see how the setup is build and adjusted to the taste of the group?
And of course learn how to work with poses, backgrounds, small sets, styling, retouching and a lot more…..

If this all sounds awesome, visit fotografie-workshops.nl and book your workshop.
If you don’t speak Dutch, no problem, let us know a few weeks in advance and we can switch the workshop to English.
Not possible to travel to The Netherlands?
We got you covered with our 1:1 online workshop.
We have a full streaming setup in our studio. 4 detail cameras and of course the retouching software so you can see every detail and of course ask questions during the day. Plus you get all the RAW files after the workshop.