Tag Archive for: studio

Is that really Prince, the pop star?

Is that really Prince, the pop star?

No, it’s not, but…

The images in today’s blog were inspired by Prince, but you probably will see that right away. And Prince, the pop star, isn’t alive anymore. Read more about the Prince look-alike photoshoot

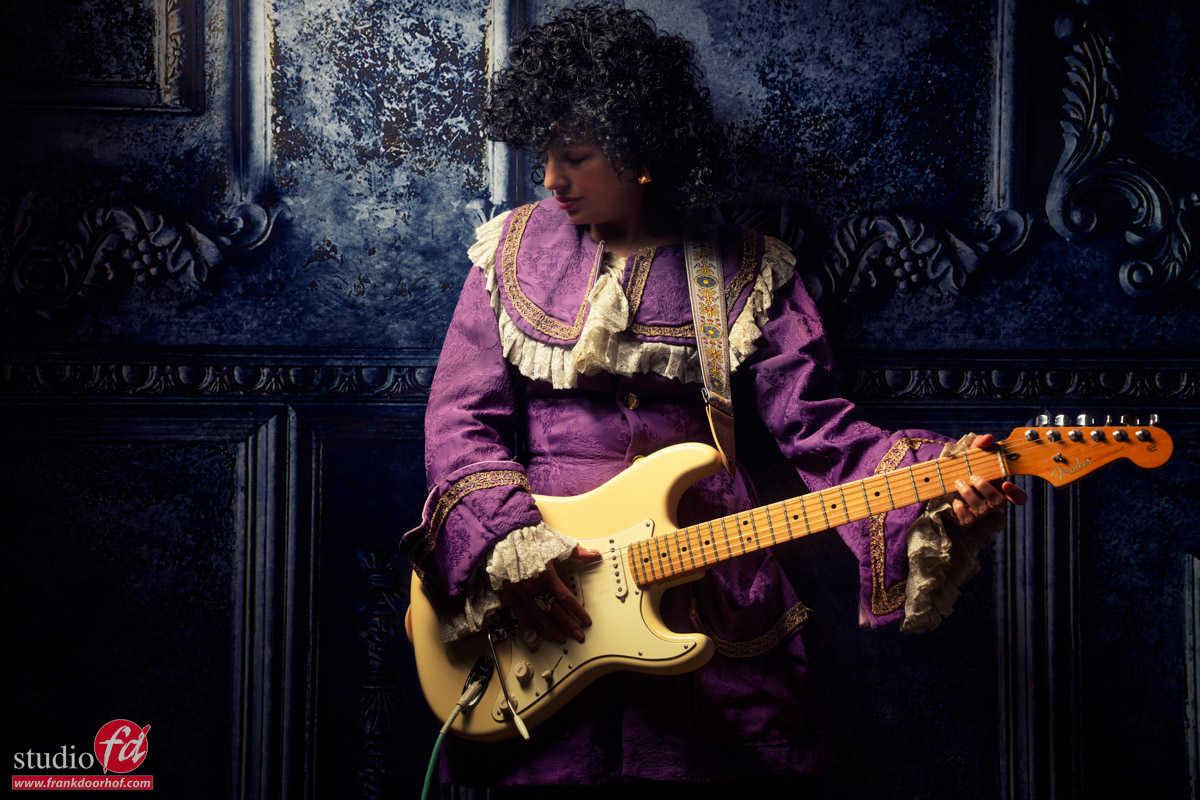
These images were shot as one of the sets of an online workshop with our model Felisa.
When I hear “Prince,” immediately some images will jump into my mind, one of the most famous, of course, being Purple Rain.
But when you try to copy something as close as possible to the original during a workshop, the chance you will fail is highly likely.
So what I normally will try to do is take a few examples and try to mix them into something “unique” but still with the “vibes” of the original.

So, how do we start, with a pop star look-alike shoot?

As you know, I love guitars and also collect some.
Although that means I can always select a cool guitar for a photoshoot, it doesn’t mean I have every guitar for everyone.
Prince was well-known for his unique guitars and awesome designs, not something I have lying around.

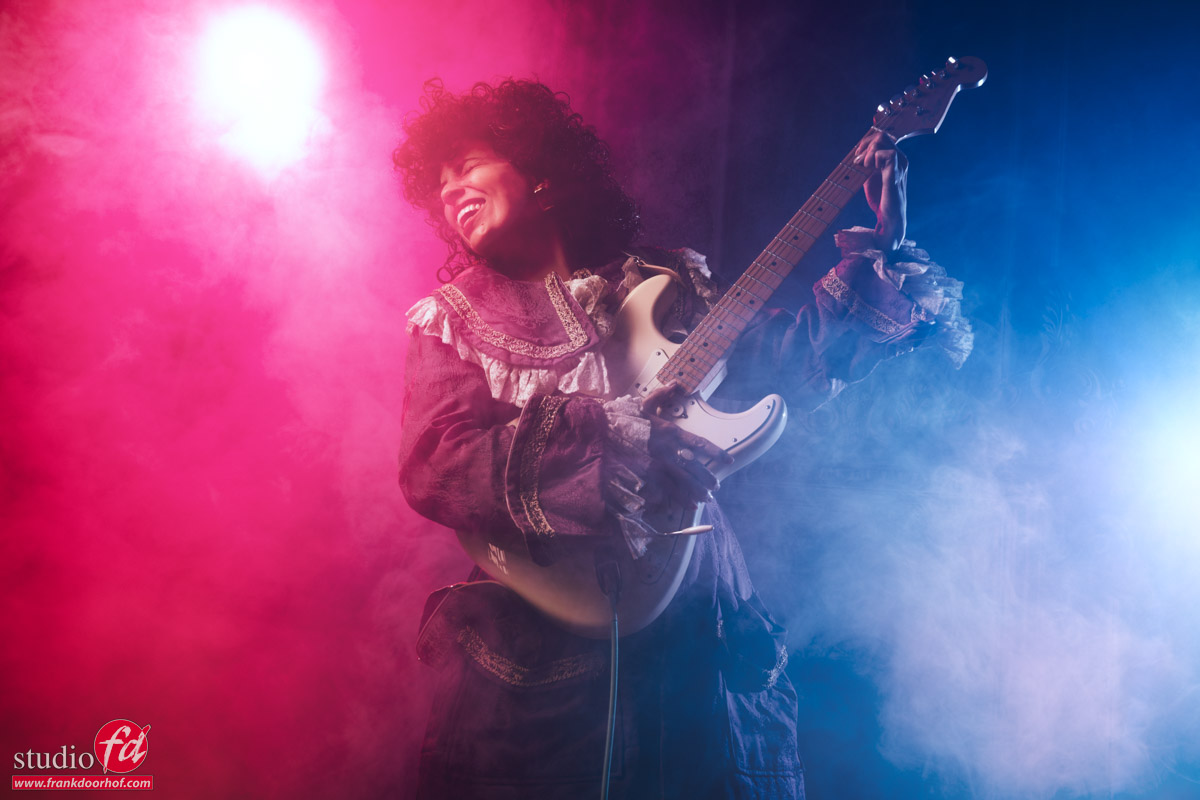
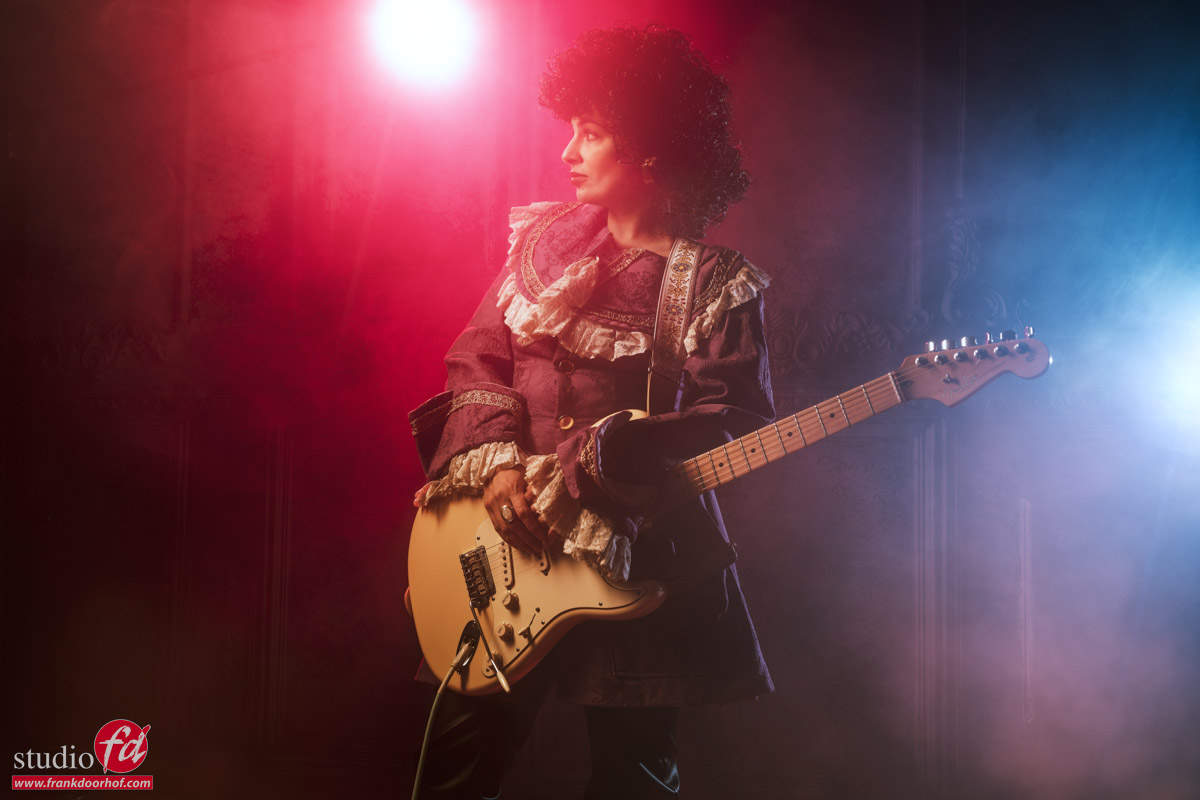
A white Stratocaster however, is so iconic, and there are actually some images online with Prince playing Strats, I decided that was the safest bet.

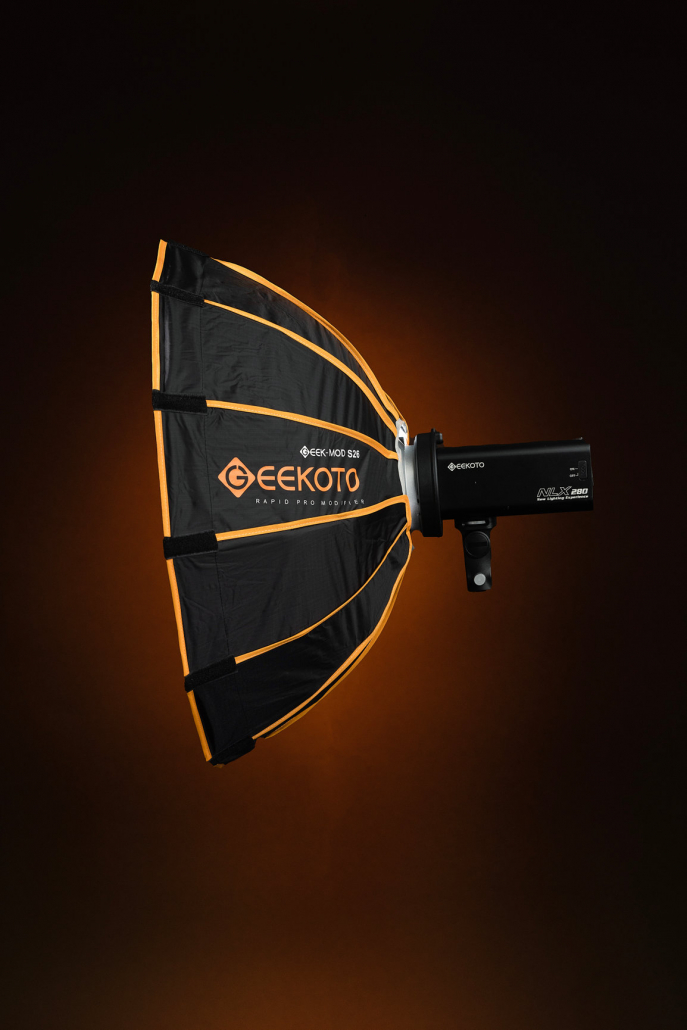
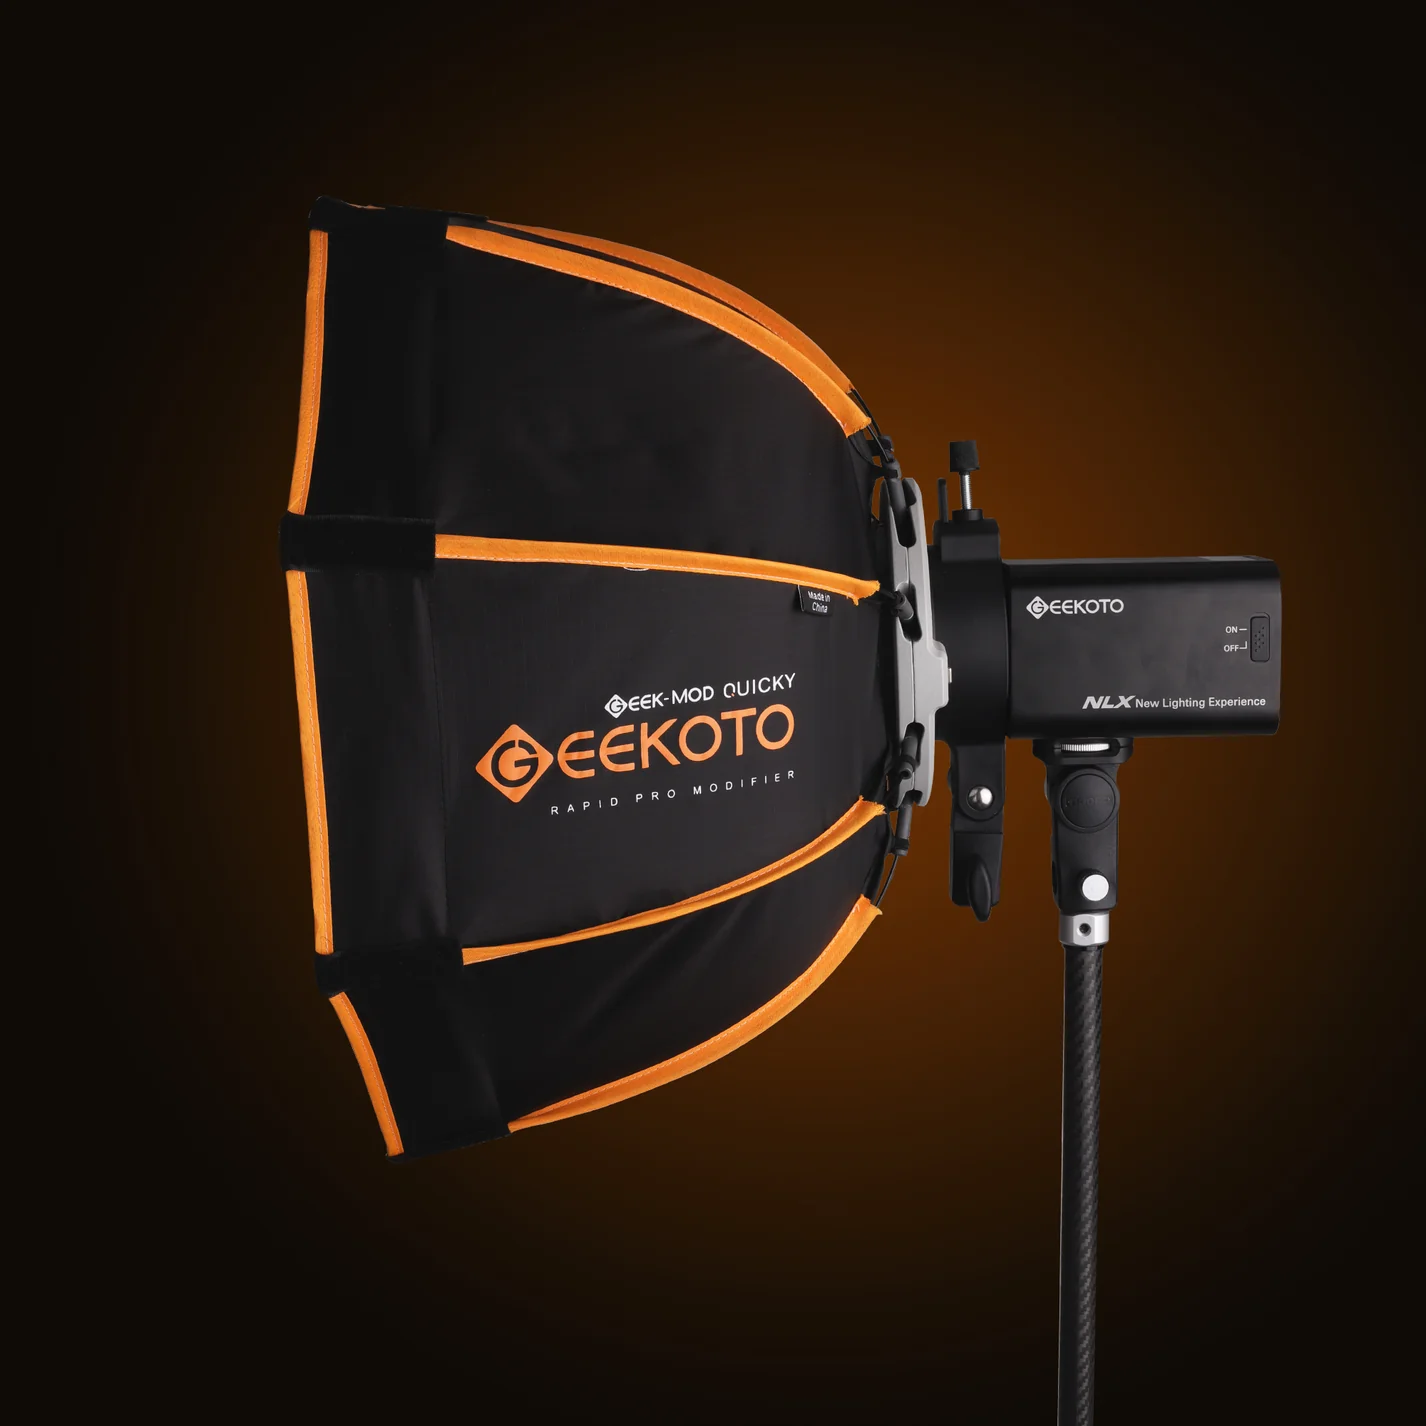
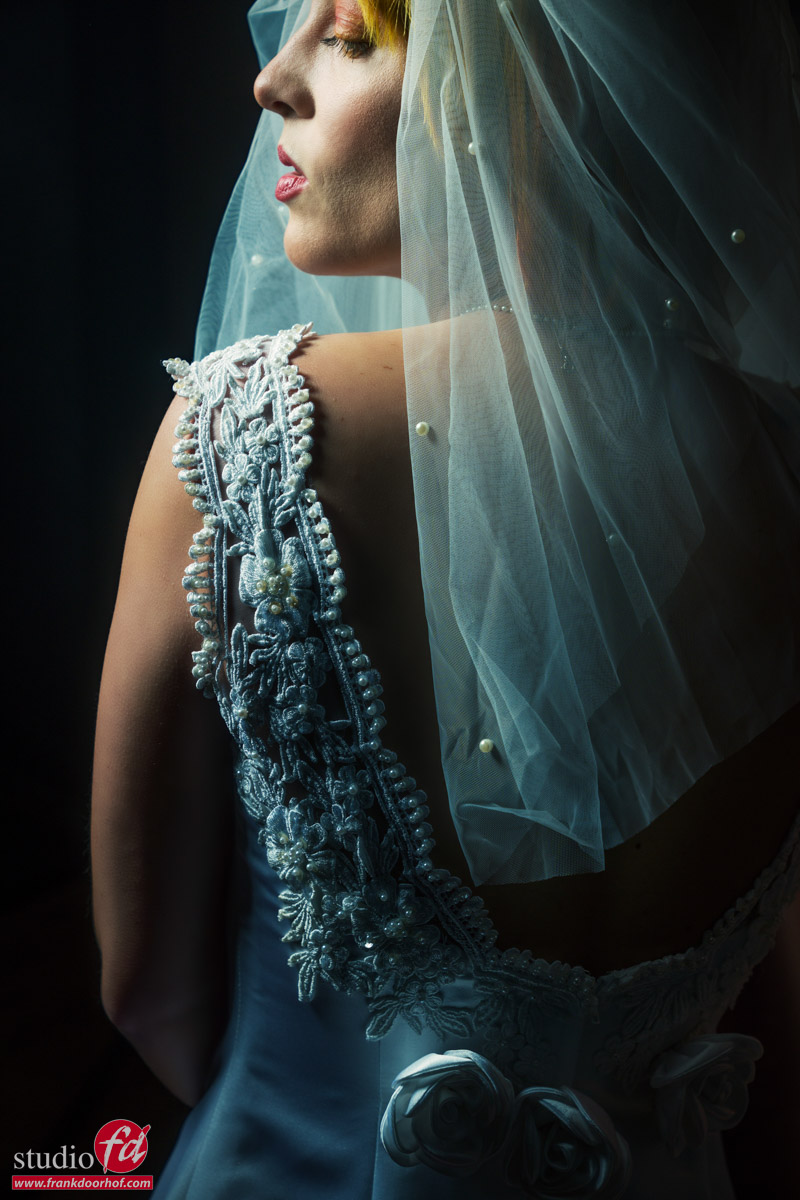
For the first setup, I’m using a Geekoto medium striplight on our model in a horizontal position and aimed slightly down.
This way, I can get a nice gradient on the wall and beautiful light on the model. It’s one of my favorite setups, and because the strip is horizontal, you also get enough light on the model from the front without losing that “high contrast” look.
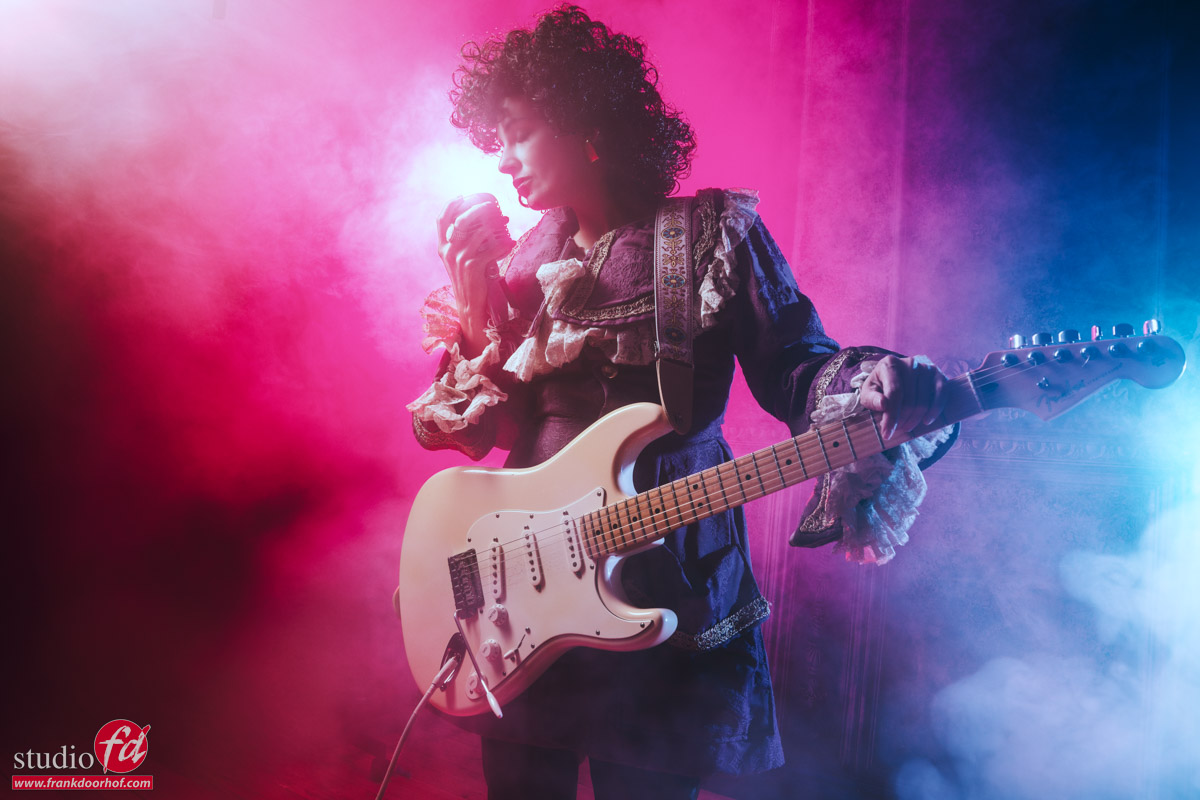
Prince the look-alike photo shoot

But……
It’s not bad, but we wanted more.
And what is always cool to bring in when you want more…. right
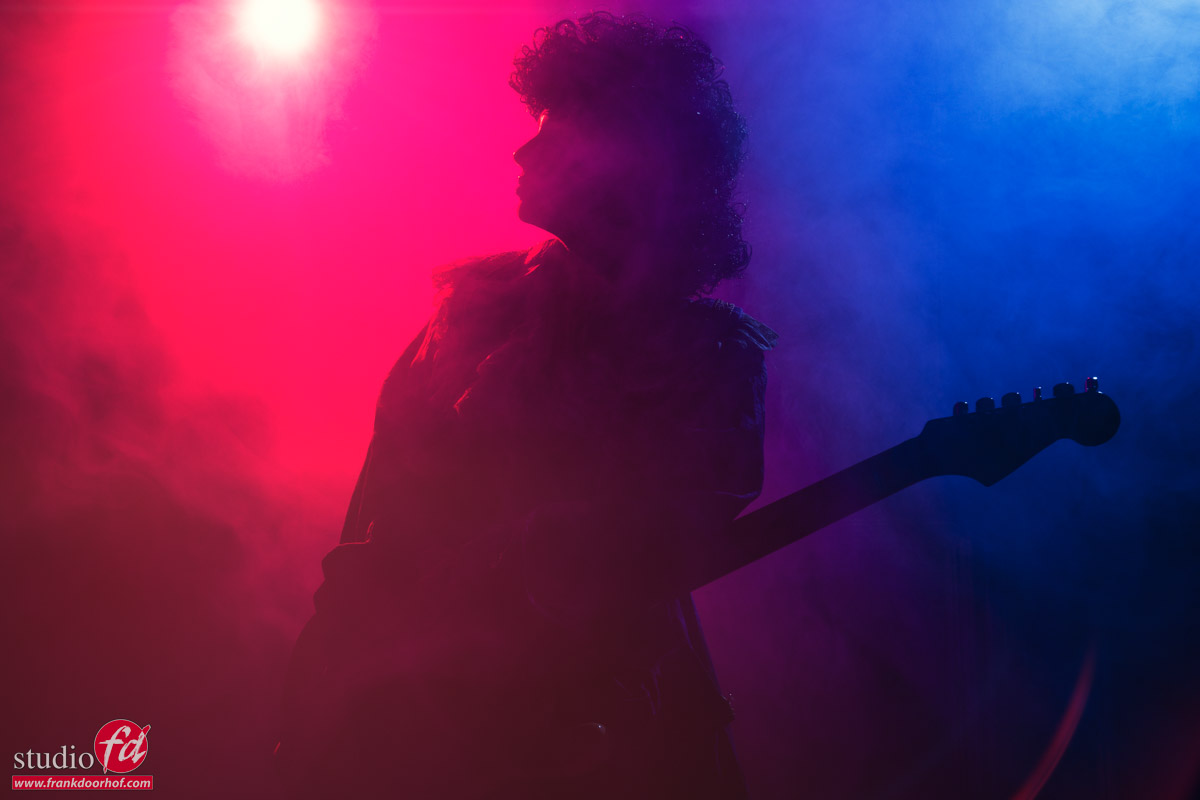
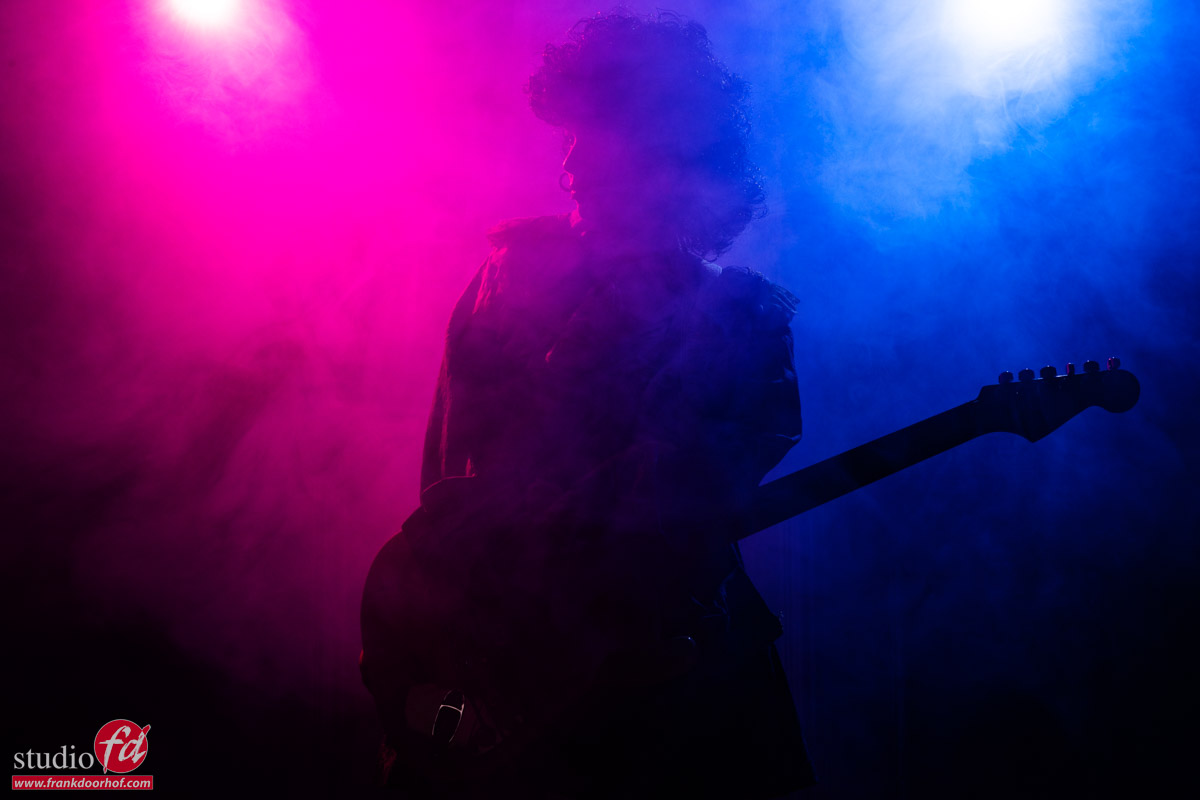
Smoke and gels

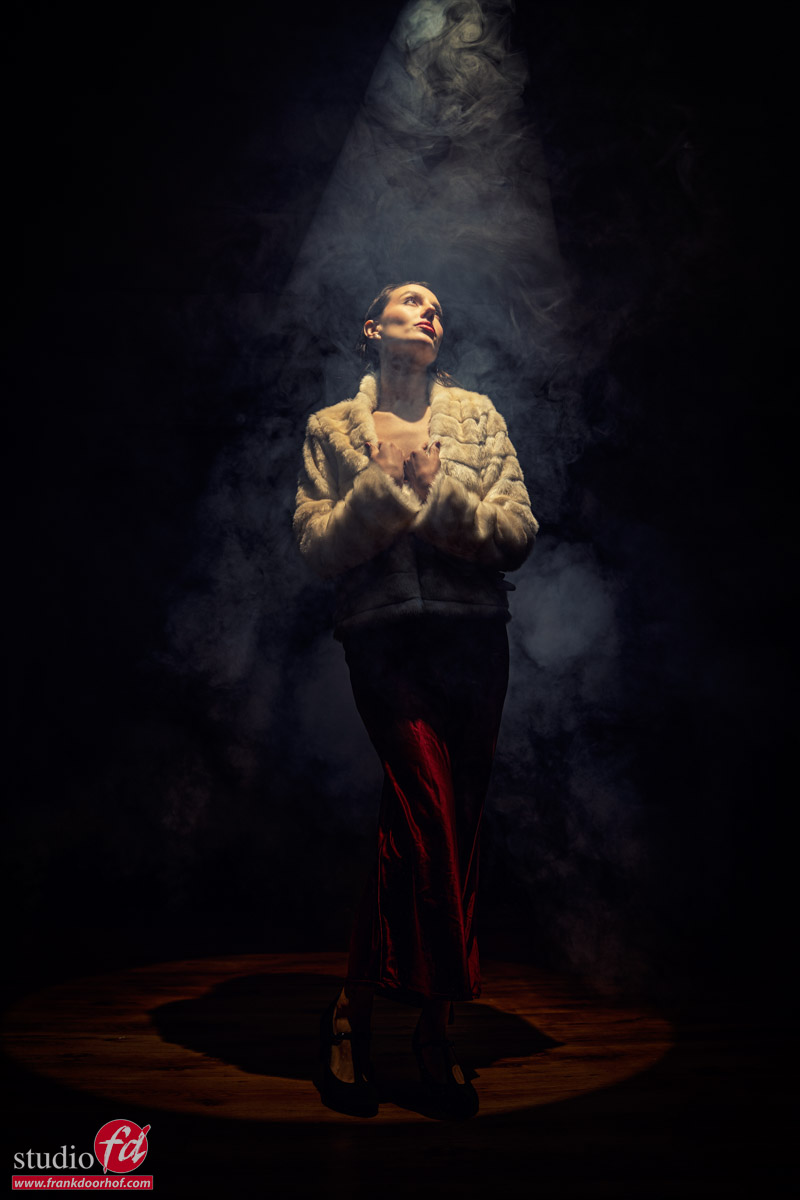
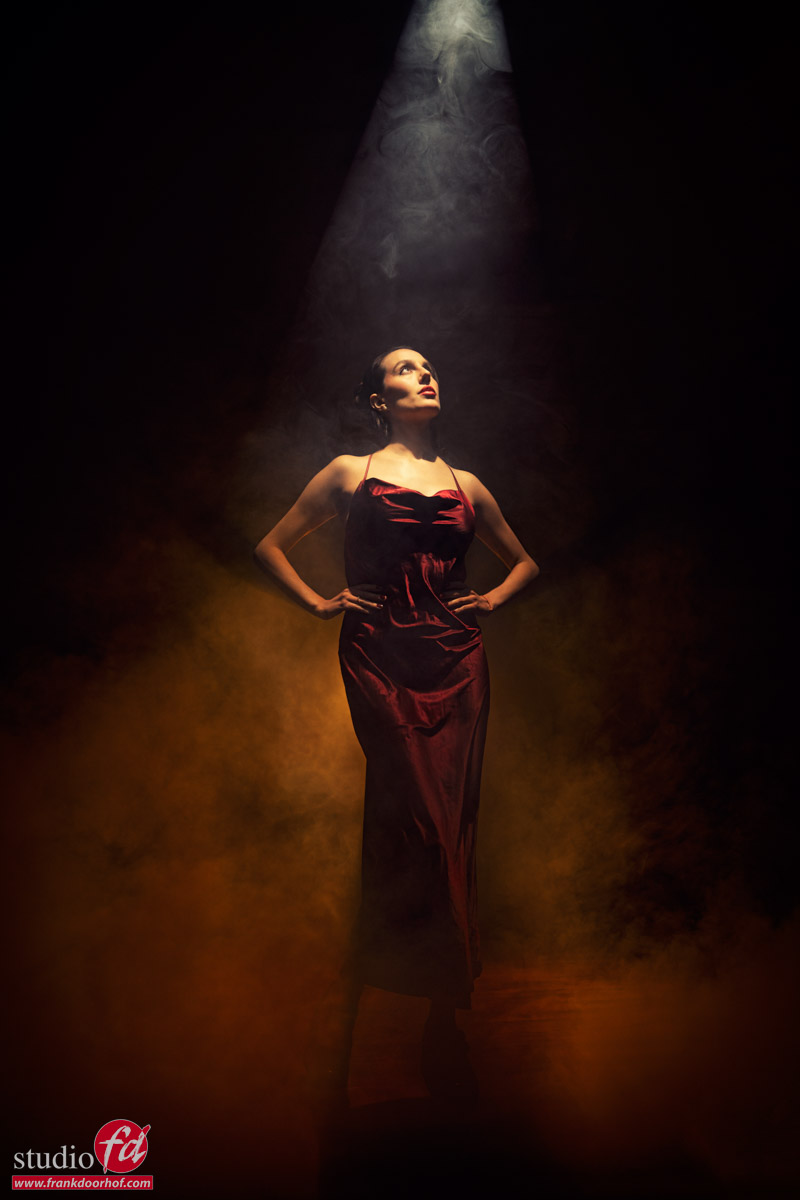
As soon as you start to add smoke, there is a lot you have to think about.
First of course, you want to make sure that the whole “smoke screen” is even and nicely fills up the scene.
But when you want to see smoke, it really helps if you light it from the back or sides.
If you light it from the front, it will reflect back, and you end up with blown-out images.
When you light it from the back, you can get some really nice effects.
And because it’s a rock star, we also needed some color gels.

With the gels, you can choose to leave them out of the frame, which prevents the hotspot in the center, and gives a great, deep, saturated color.
But with a rock star, I decided to leave them in the frame, mimicking stage lights.

Now it’s a matter of moving around the model and getting the shots.

For the gels, I’m using our Geekoto GT200’s with the Rogue magnetic system and gels.

Prince, the look-alike photo shoot

Prince look-alike photo shoot

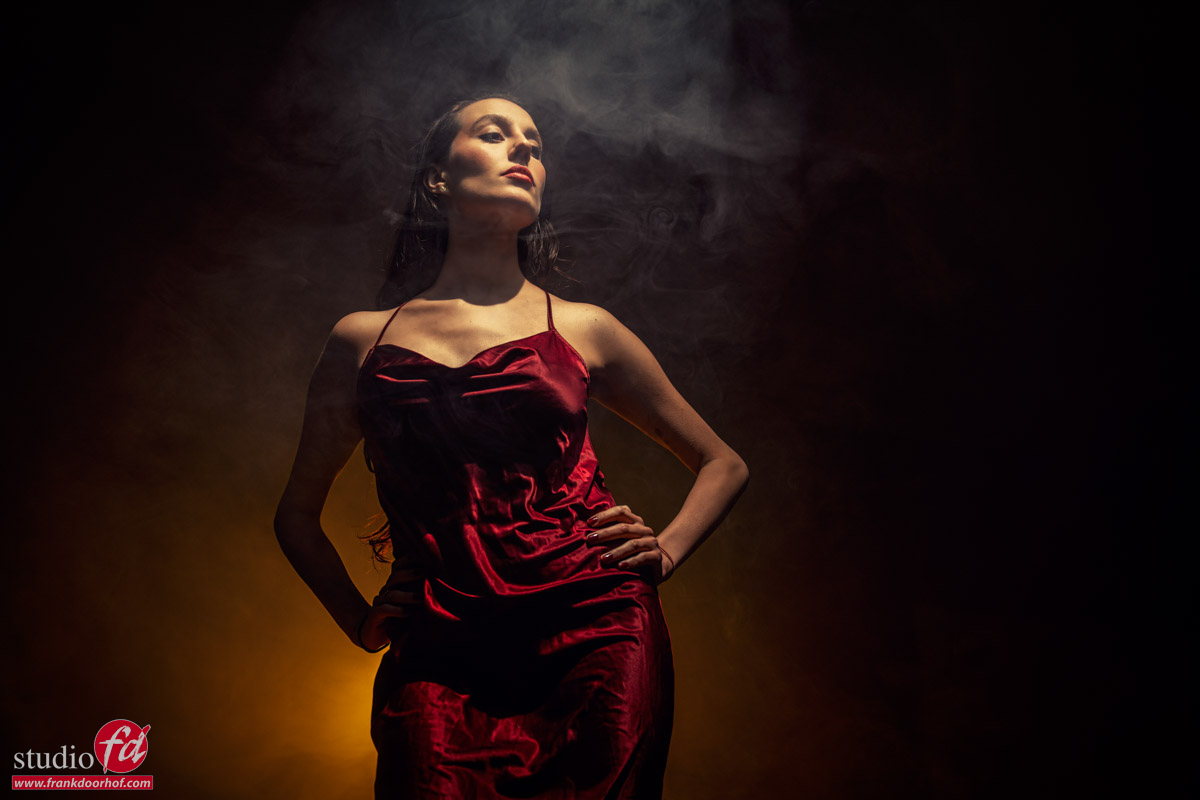
A different mood for Prince

When you visit one of my workshops, you will find out that in most sets I’m not only moving around the model and choosing different angles, but also experimenting a lot with the balance between the strobes.

With the Geekoto remote control, I mostly set up my strobes as  follows
A: Main light
B: Background light
C: Colored Lights
D: Second colored lights

This way, you can quickly change the balance between the groups.
In most cases, I’m using a max of 3 strobes, so it’s an easy way to quickly set everything up and change on the fly.

In the following images, I’m only using the gelled lights.
And of course, taste is very personal, but I always love this effect.

Conclusion of the Prince look-alike photo shoot.

Lighting is always important in a set, but always try to experiment with different angles to shoot under, but also with the balance between the strobes.
Especially when working with colored lights, it’s not always the best way to shoot something with the “correct” exposure or “perfect” face light. Sometimes leaving the face light away is actually perfect.

And if you don’t like the results…..
DEL and empty trash, and now you know what you don’t like. In most cases, you might be surprised I think. 😀

More about using color gels and smoke in this blog: A special tribute, with Nadine 

Or this video about a getting a witch right in camera with leds and strobes 


An awesome glamour lighting technique to focus your light

Some lighting setups are just awesome

And for me this is one of them.

As the main lightsource I’m using the Westcott Lindsay Adler optical snoot.
The advantage of the optical snoot is that you can focus the light beam and get some real nice very sharp lighting effecting.
I love using it straight on the model or on the background, or like you see here, to create some special effects.

The trick of course is smoke, otherwise you don’t see the beam of light.
But also make sure you place the light slightly in front, otherwise the model has to look straight up.
But I think a video will explain this much better 😀

And some more of the final results

Want to visit one of the workshops?
Check fotografie-workshops.nl for the agenda and more information.
The workshops are normally in Dutch, but if you let us know a few weeks in advance we can switch to English.
But of course also 1:1 workshops are possible, in real life and even online.
If you want to learn, we have a solution.

Become an instant lighting expert (sort of)

Some lighting setups are special

It’s no secret I love to work with the more focussed light sources.
Let’s first explain what a focussed light source is.

When I talk about focussing the light it can mean two things.

  1. We use an optical snoot like the Westcott Lindsay Adler projector.
  2. We use grids or narrow light sources to aim the light on our subject.

Today it’s about the second one.

See what your light does

We get a lot of questions about what kind of light shapers someone should get to start with a studio.
In all honesty it’s very hard to tell, it all depends on the work that you do, and sometimes a Lantern is great, and sometimes you really need something like the Quicky.

But there are some things you might not know/realize about the design of a softbox that can help you determine which softbox fits your needs.

It’s all about the design

Let’s take a look at two of my favorite Geekoto soft boxes for focussed lights.
First up the 26″ softbox and next to it the Quicky

When you follow the rods of the softbox you can see that both soft boxes are totally different in the way they aim the light.
And this gives you some really nice lighting options.

With the S26 you can light a model from pretty close by and still get that nice “focussed” look but benefit from the very fast light fall off. which makes the S26 great for on location work where you want your model to jump out, but also want a very rapid light fall off. The S26 is great for this kind of work

When we look at the Quicky you can see that the rods are much more bent, and this means the light is much for focussed. This has a very nice advantage I personally love to use.

When I shoot a full body model I love to have the effect of a spot light on her face with a very nice light fall off showing just enough detail at the bottom to let the model blend nicely with the floor. (of course depending per shot). In the past I would use a snoot or reflector with grid on the face of the model. This meant a rather harsh light source on the face (so loads of makeup) and also a rather fast light fall off.

Light fall off can easily be solved with a large umbrella or for example the Geekoto lantern to fill in the shadows to the point you like.
There is one problem with this technique. The more I have to fill the less control I have over the light fall off. I can control a focussed light source but a large umbrella is a lot harder to adjust for light fall off when used as fill.

This is where the Quicky comes in as a huge problem solver.
Because the Quicky has a lot more diffusion and is in essence a “soft”box the quality of the light on the face of the model is a lot nicer, especially for female models, but due to it’s design it can be placed a lot further away from the model and still get a very nice “spot light” effect on the model. Because I can move the Quicky further away I can now also light more of the background with a less harsh light fall off than a snoot or reflector with grid.

And, for me the biggest advantage, the light fall off is a lot smoother than a snoot/reflector and larger, so I only need my fill light for the last part, which makes the final results a lot smoother.

Here you see the Quicky lighting almost the complete model, and the Lantern is used in the back just to open a the shadows ever so slightly.

Lighting setup :
Geekoto GT400 with the Lantern as fill
Geekoto GT400 with the Quicky as main light

And one without the blue accent light.
(a Geekoto GT200 with a Rogue magnetic blue gel)

If you buy products from our Webstore you support our work.
We are the official distributor for the brands on our website, I use them in my daily work and highly recommend checking them out.

Finding the right angles and visualizing them

This is one of those things I struggled with a lot

and still sometimes it totally surprises me when I check my images later in Lightroom.
When someone asks me “what is the perfect lens” I often tell them my story.

When I started with photography I thought the 70-200 f2.8 was the lens that ruled the model photography business. (don’t ask me why).
And in all honesty it is an awesome lens for portraits, it’s great to fit your model jumping around on a relatively narrow backdrop, and the lens was razor sharp and focused great. So no reason to switch.

Due to a defect I had to work with my 24-70 for a while and although I was a bit worried that I would miss the 70-200 I was actually pleasantly surprised. To make a long story short, my 70-200 f2.8 is still unused in the safe.

Why the 24-70?

Working with the 24-70 gives me a few different choices I did not have with the 70-200.
The 70-200 always compresses the scene and that’s great for throwing the background out of focus, but at one point it also becomes a “trick”.
When I started with the 24-70 I found I loved to actually shoot at 35-50 a lot more than with I thought.
And slowly I started to experiment with 24 and that was it.
The extra depth you can give to a shot, and draw the attention of your viewer to the your subject is highly addicitive.

There is however a problem

With a compression it’s important to not go too far, because you will just squeeze your model to a flat 2D looking cartoon character.
But with the wide angle the same can happen, but in this case it can also give you the result you like when used correctly.
So it’s important to know how to work around this “distortion”.

A camera doesn’t see “depth” it will render objects closer to the camera larger than objects further away from the camera in relation to the closest distance. In other words if you stand really close to your model and use a 24 mm you will get a lot more effect than the photo you see above.

Now this can go wrong when we start to introduce props into the set.
And because video is always easier in these kind of situations we shot a tutorial.