Freezing motion while painting with Light
Adding energy through zooming and camera movement
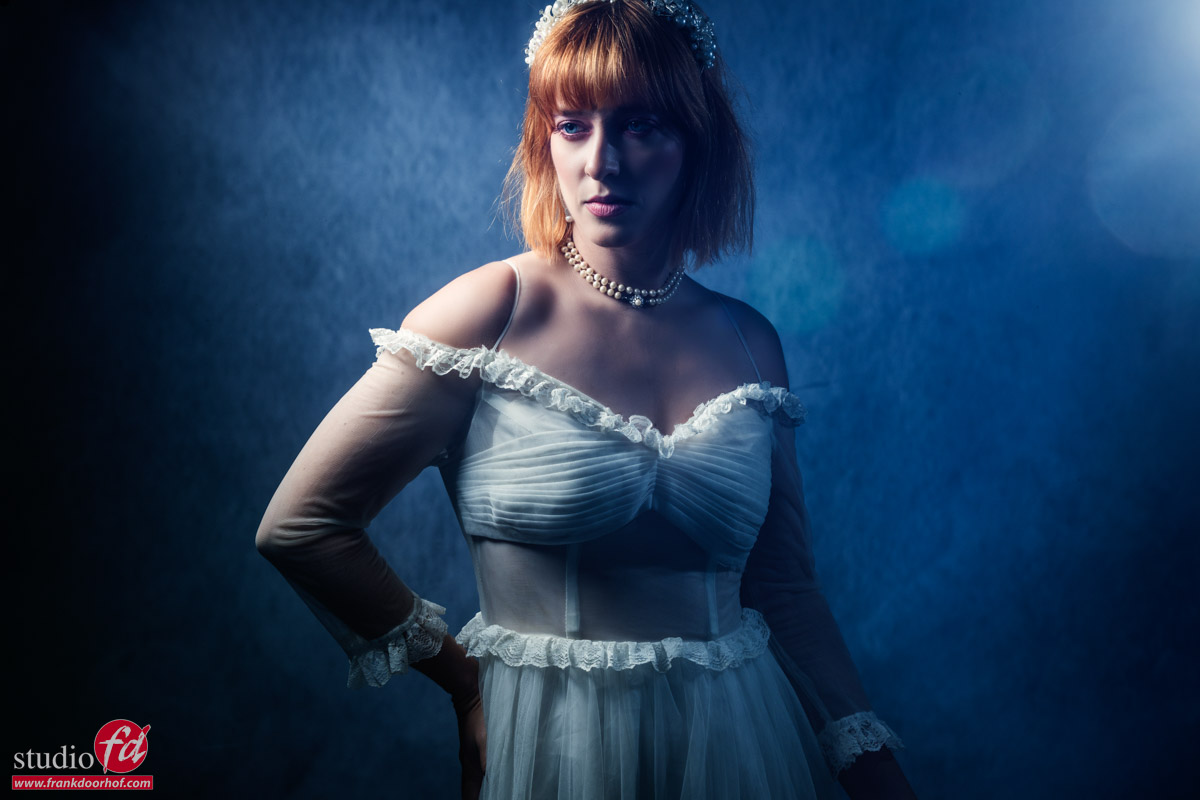
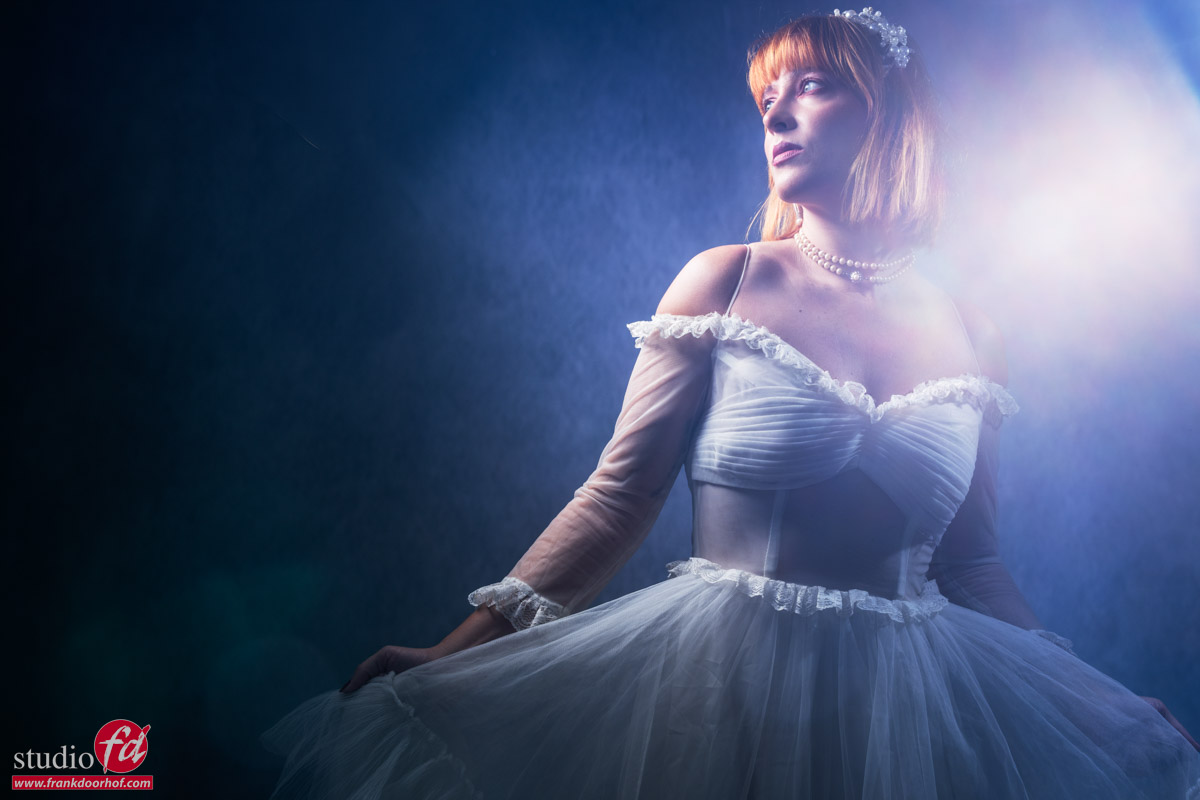
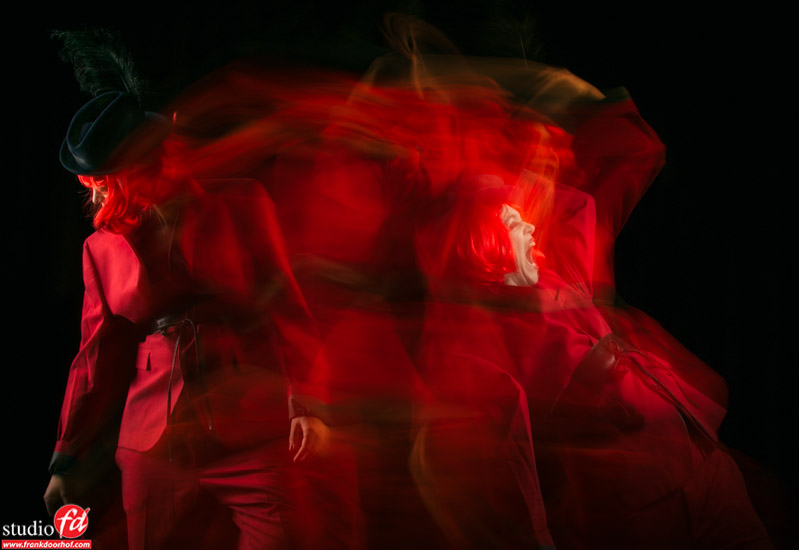
One of the questions I often get during workshops is how to create images that feel dynamic while still keeping the subject sharp. The answer is surprisingly simple: combine a flash that freezes the subject with continuous light and intentional camera movement.
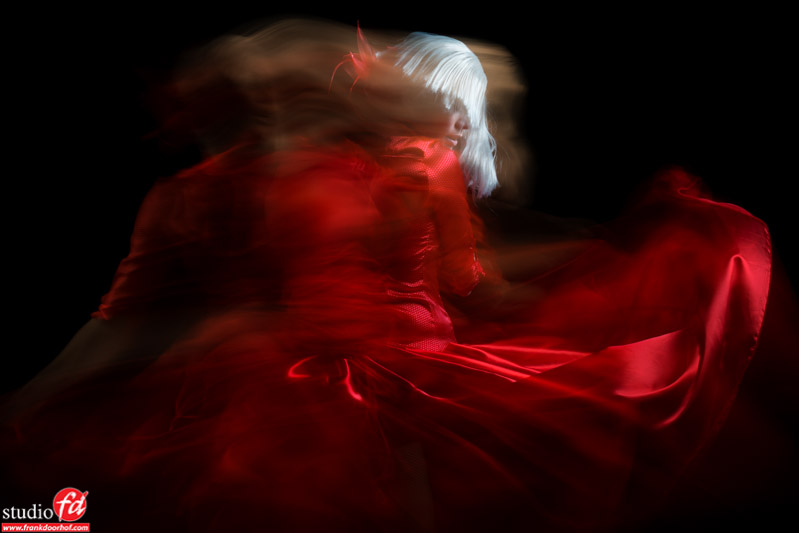
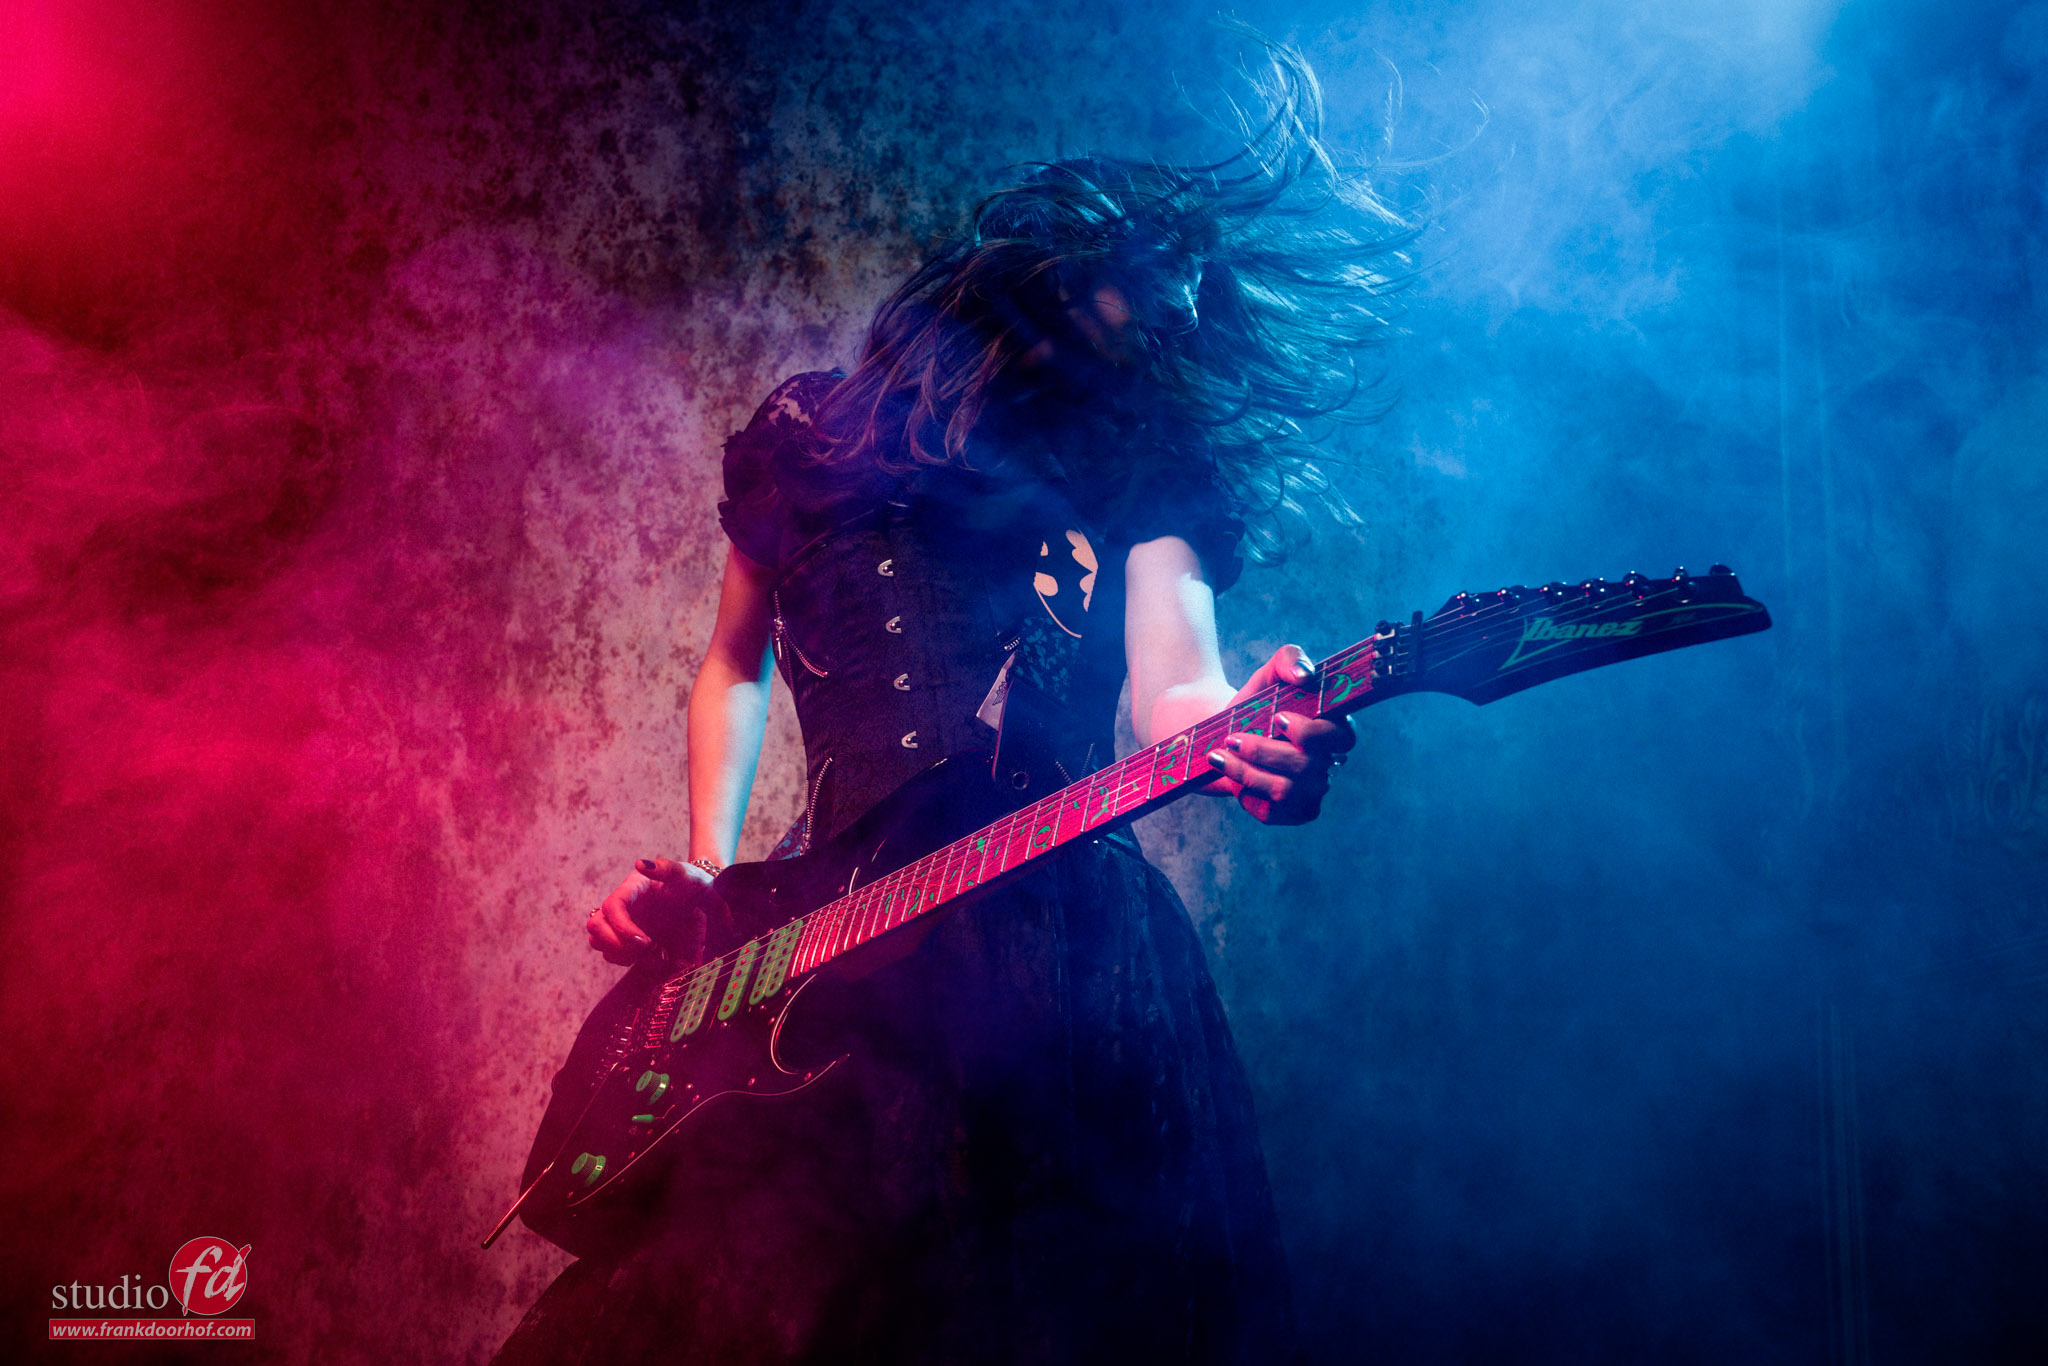
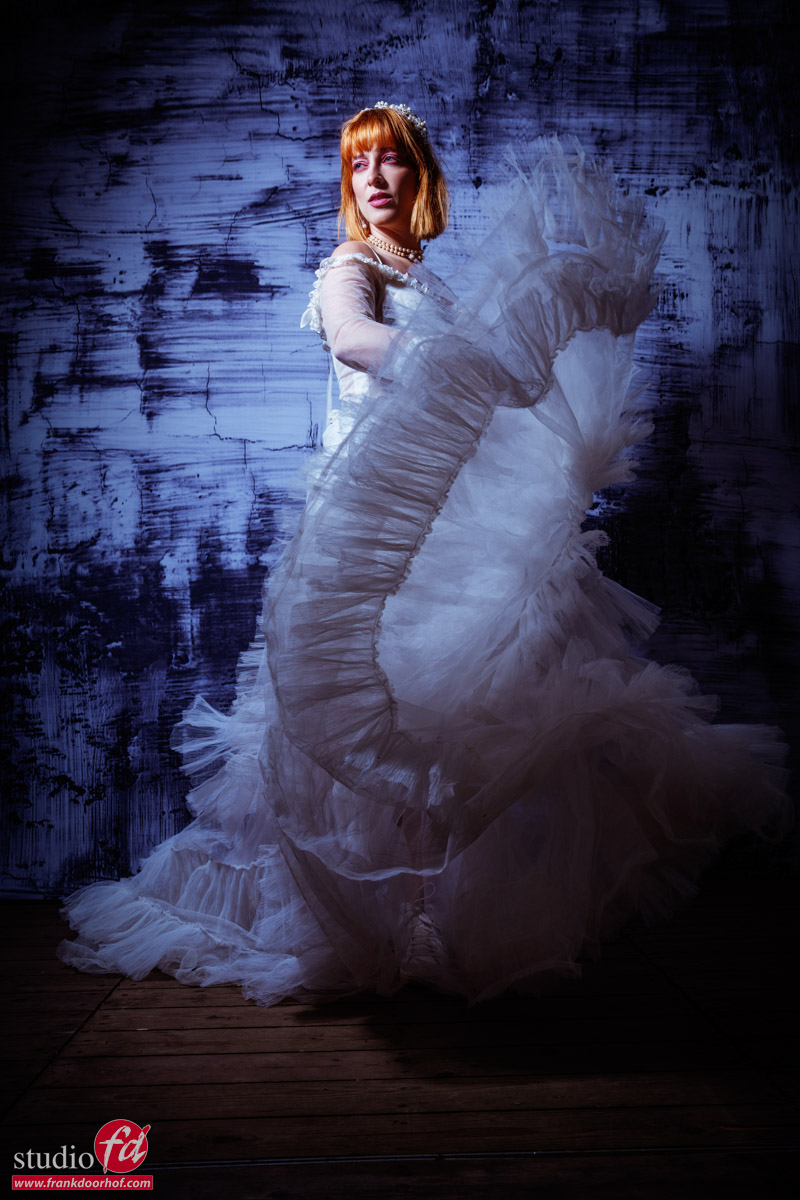
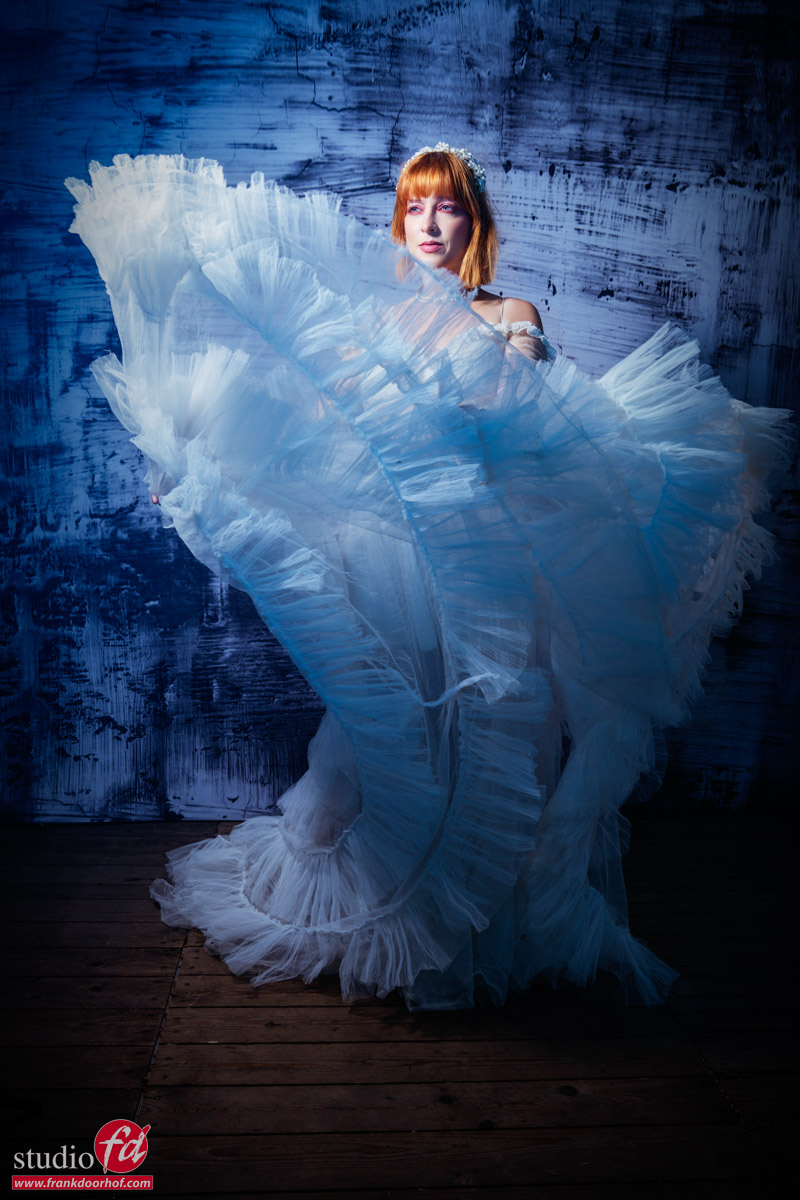
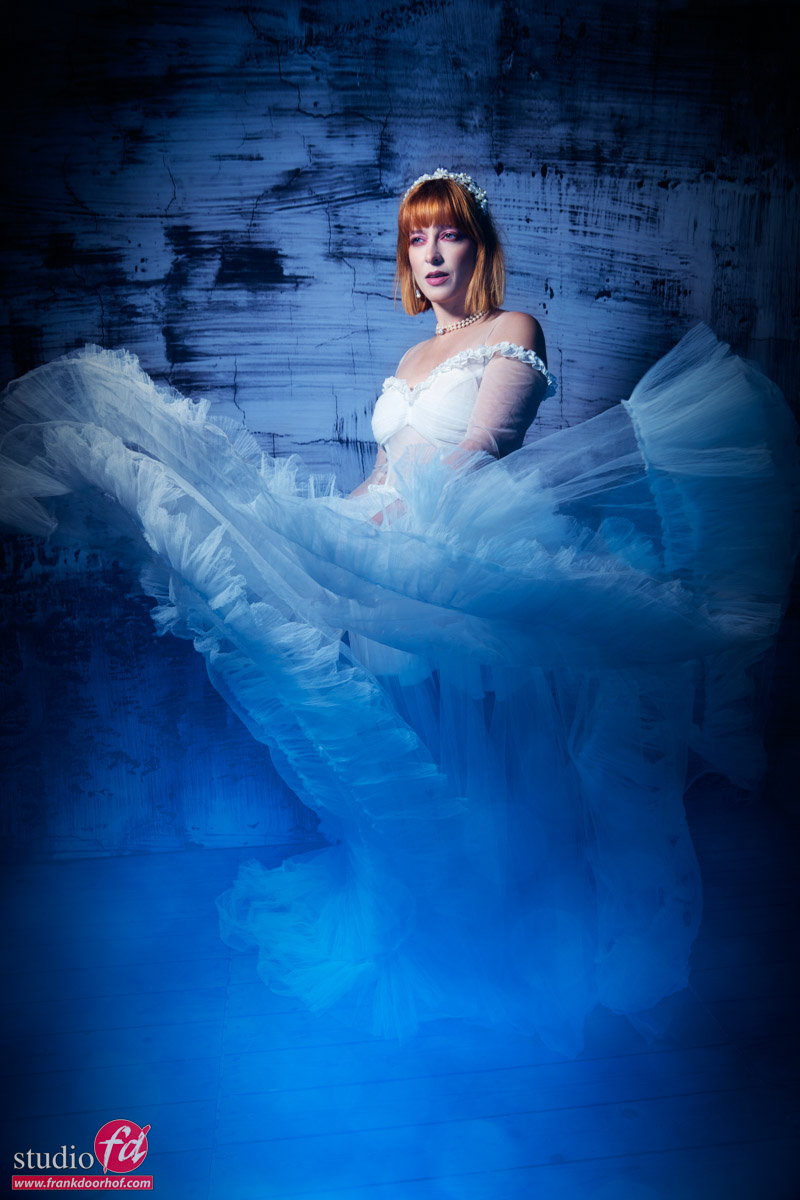
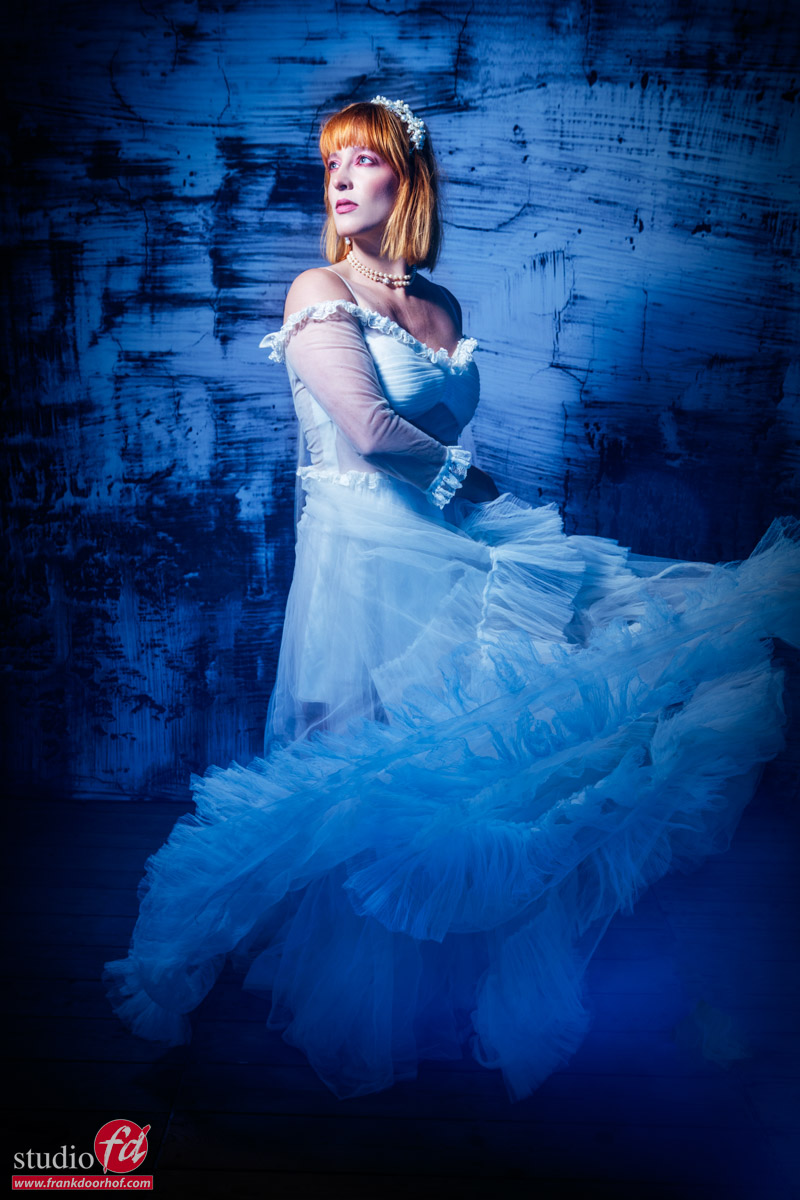
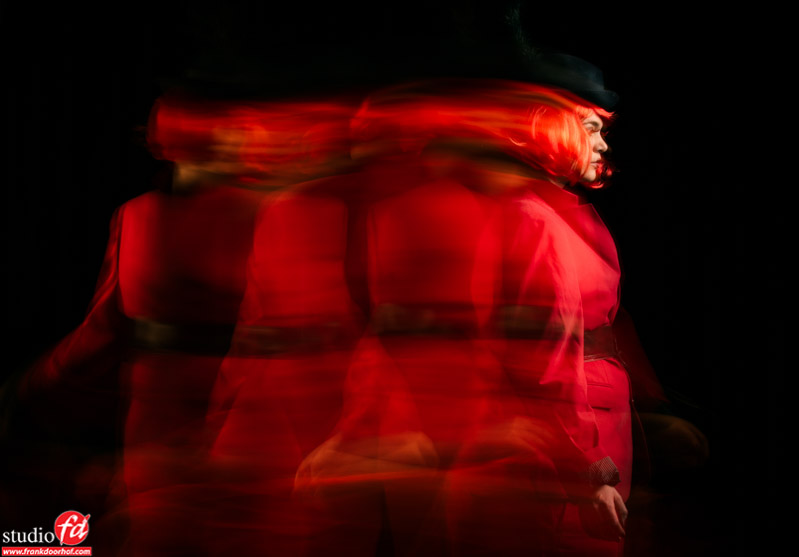
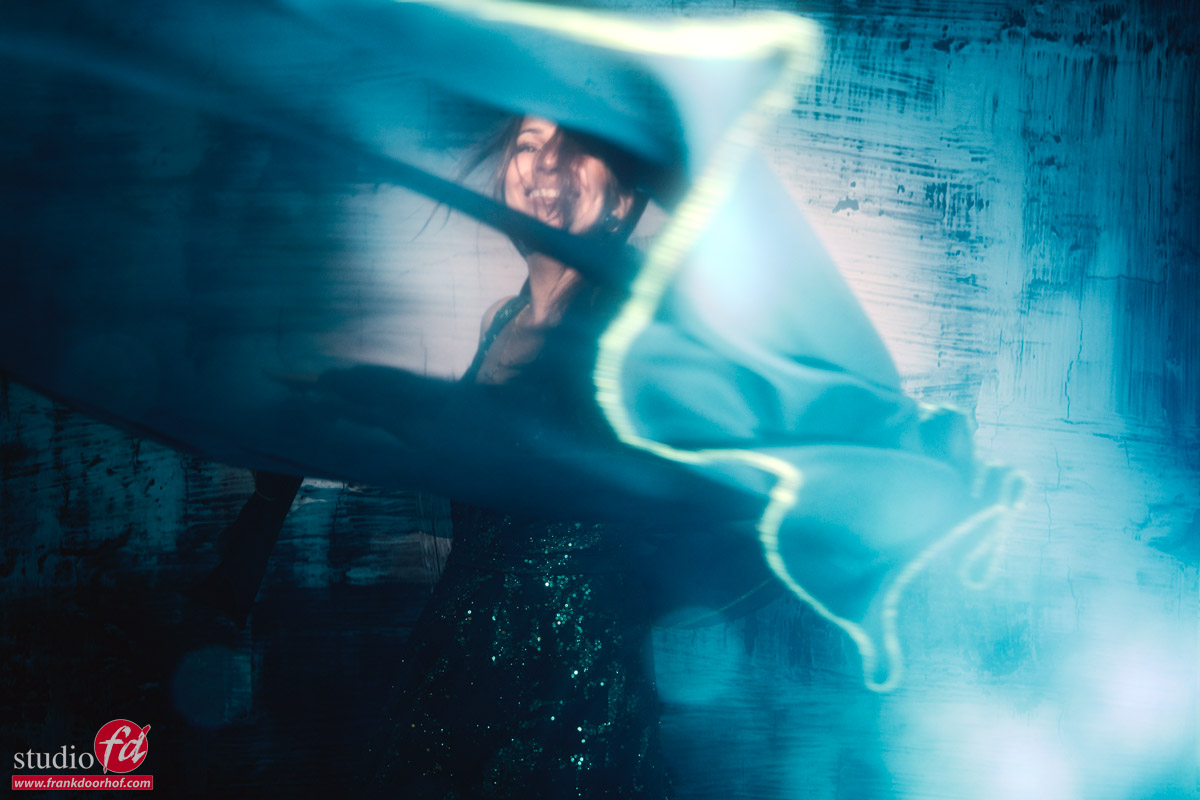
This technique allows you to create photographs that have both structure and chaos. The flash captures a razor-sharp moment, while the ambient or continuous light creates streaks, swirls, and motion trails around it. The result is an image that feels alive. There is one big problem with this technique….. it’s like a box of chocolate, you never know what you’re going to get.
Understanding the Principle
When you work with a longer shutter speed, every movement of the camera records as a blur. Normally that’s something photographers try to avoid, but in this case we use it creatively.
The trick is that the flash duration is incredibly short.
Even if your shutter is open for half a second, the flash freezes the subject for only a tiny fraction of that time, literally freezing the motion.
That burst effectively freezes the model, while the rest of the exposure records the movement from continuous lights.
Think of it as combining two photographs into a single frame:
- The flash creates the sharp image.
- The continuous light creates the motion effect.
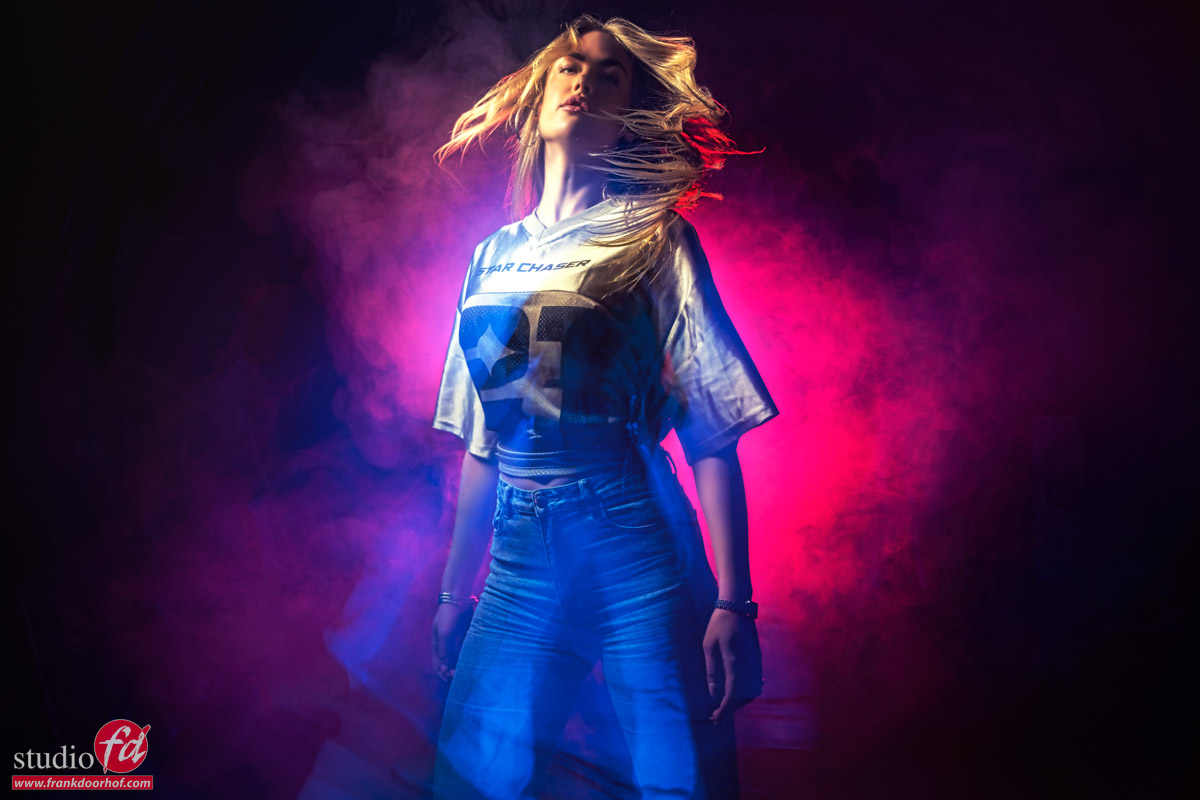
The Basic Setup
A simple setup might include:
- One flash with a softbox as the main light.
- One or two LED lights in the background.
- A shutter speed between 1/4 and 2 seconds.
- ISO 100–400.
- An aperture that balances both light sources, which in most cases means wide open to let in as much available light as possible.
Start with the continuous light lighting your subject correctly. Once you have that exposure, you can now setup the strobe.
Do take into account that when your continuous light moves it will not “burn in” like a stable light source, so you can get away, or actually need a longer shutterspeed. This is also a part experience.
Zooming During the Exposure
One of the most dramatic effects comes from zooming the lens while the shutter is open.
Set your zoom lens to a longer focal length and begin the exposure.
During the exposure smoothly zoom toward a wider focal length or vice versa.
The continuous lights will stretch into dramatic lines radiating from the center of the frame.
If the flash fires near the end of the exposure (second curtain sync), the subject remains sharp while the zoom effect creates a sense of speed and energy.
This works especially well with:
- Concert photography
- Fashion portraits
- Automotive photography
- Creative editorial work
The key is smooth movement. Sudden jerks often create distracting patterns, which can also be interesting of course.
Moving the Camera
Instead of zooming, try physically moving the camera.
You can:
- Rotate the camera in a circular motion.
- Move it vertically.
- Move it horizontally.
- Draw figure-eight patterns.
Each movement produces a different signature.
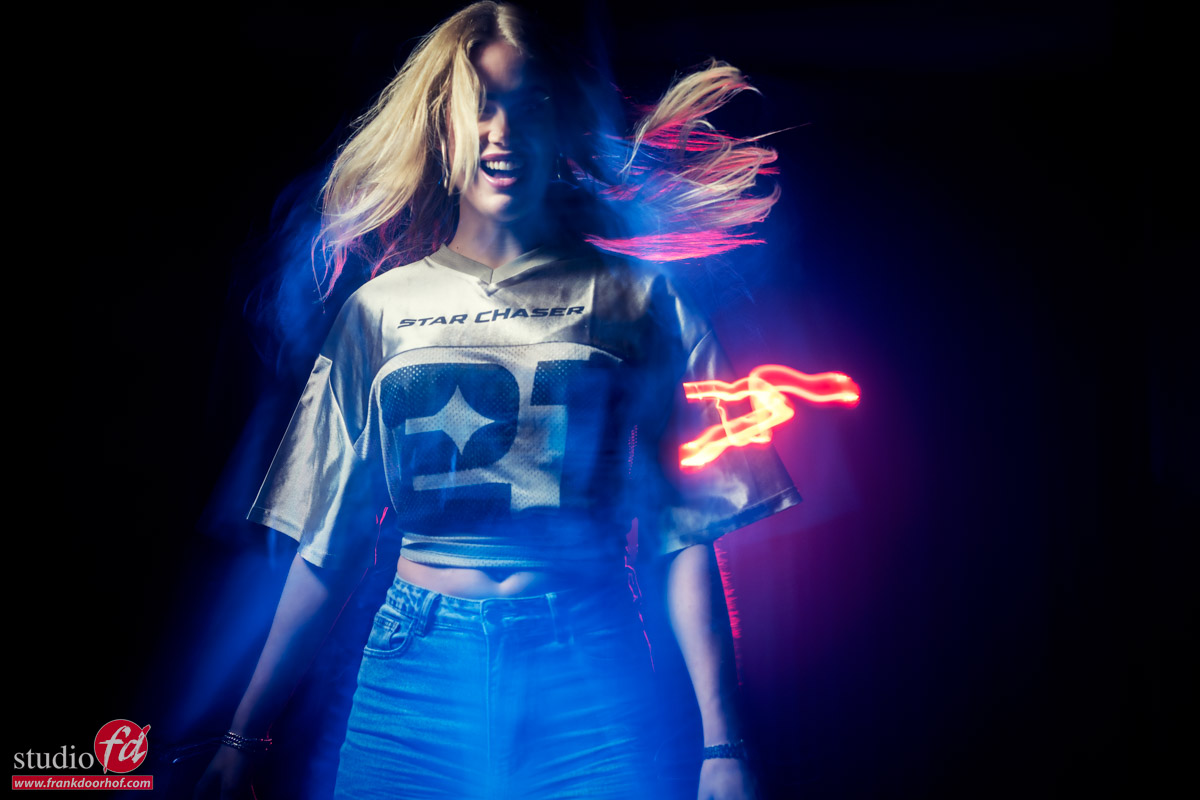
Circular motion often creates a vortex-like effect, while vertical movement can make lights appear as dramatic columns.
Don’t be afraid to experiment. Some of the most interesting images come from movements that seem completely wrong when you first try them.
Rear-Curtain Sync
A feature that can dramatically improve this technique is rear-curtain synchronization.
With rear-curtain sync, the flash fires at the end of the exposure rather than at the beginning.
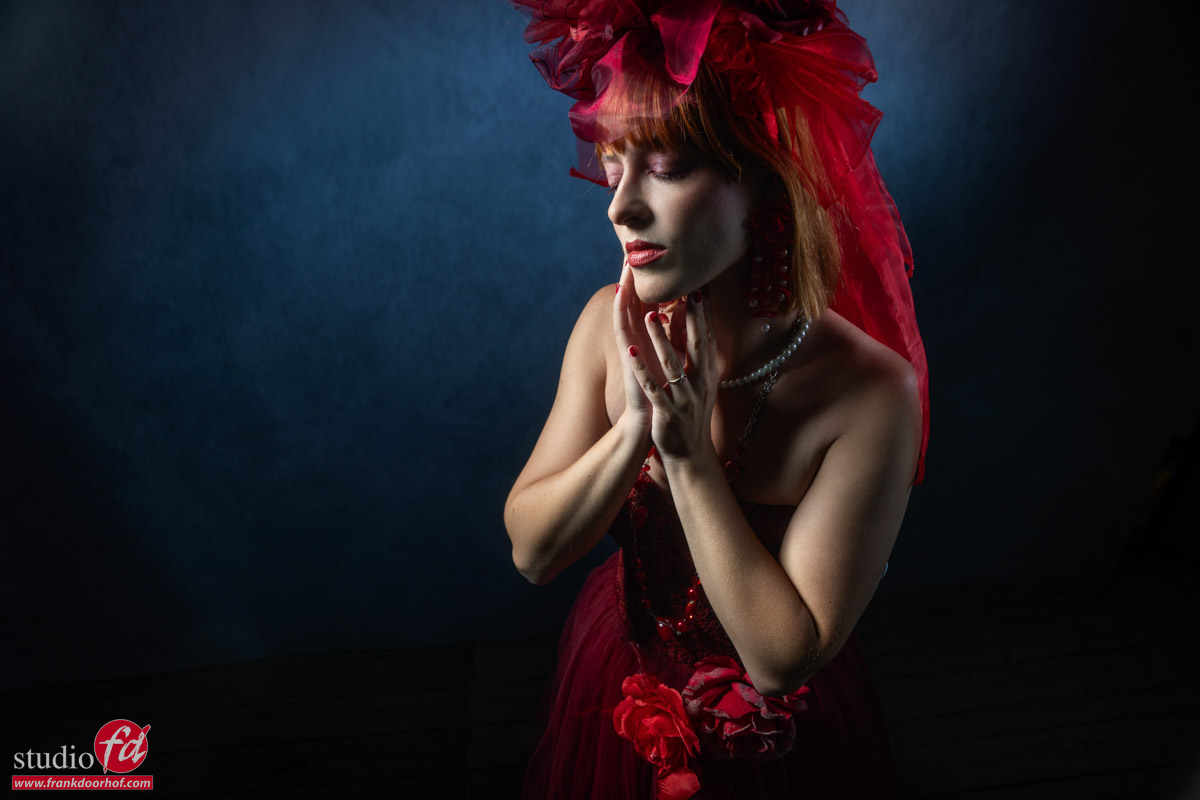
This means the motion trails appear to lead naturally into the frozen subject. Our eyes interpret this as movement rather than a mistake, making the image feel much more intentional.
Choosing the Right Continuous Lights
LED tubes, RGB panels, and handheld light wands are perfect tools for this technique.
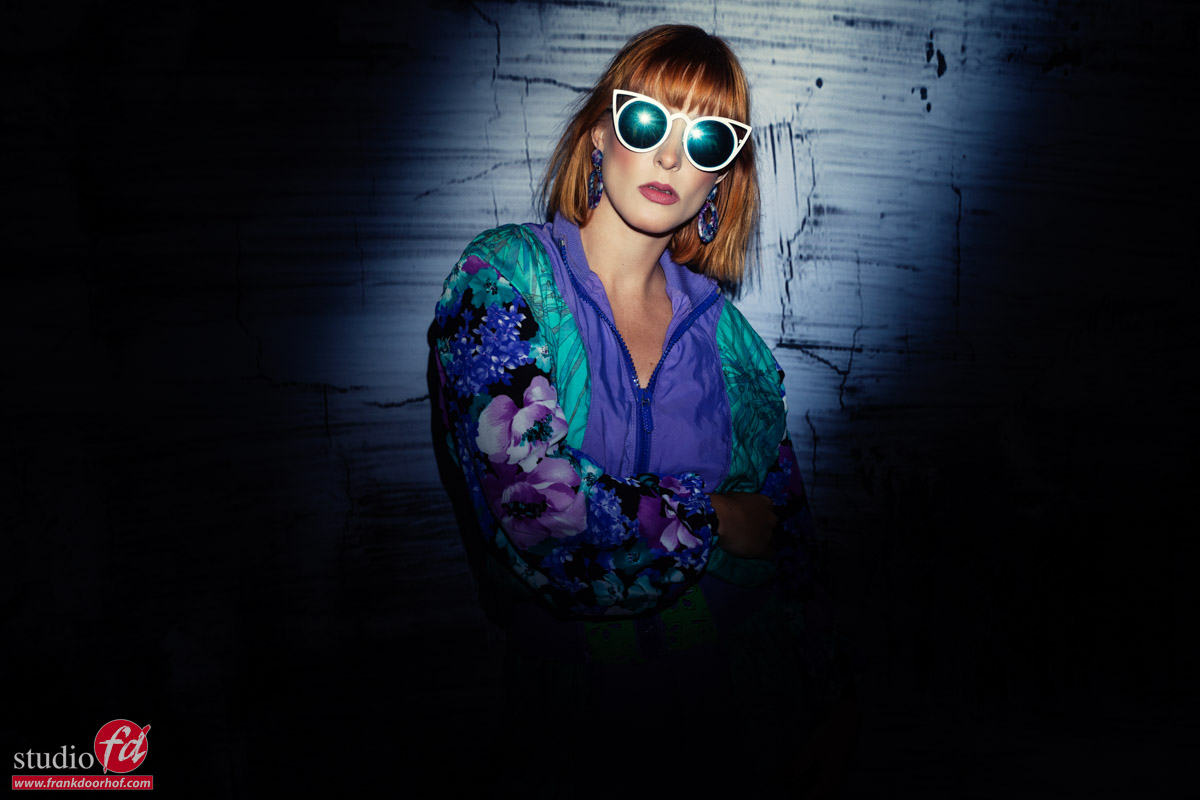
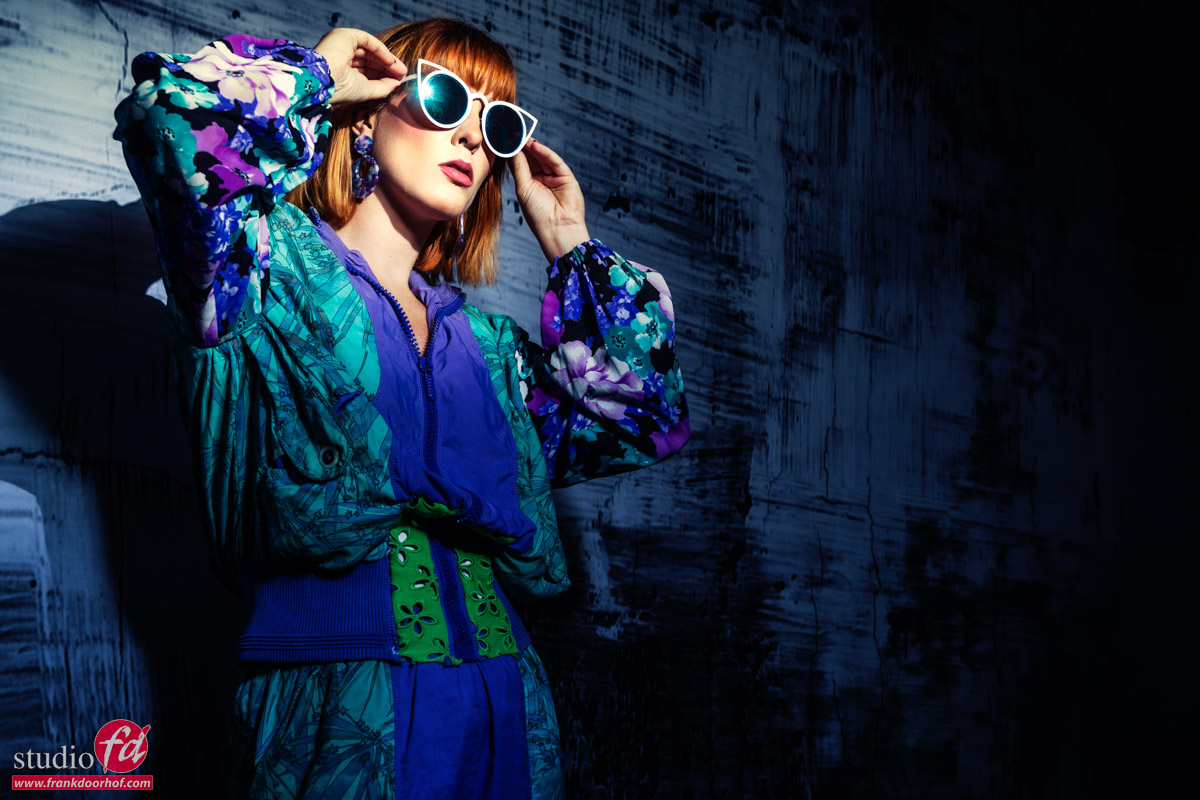
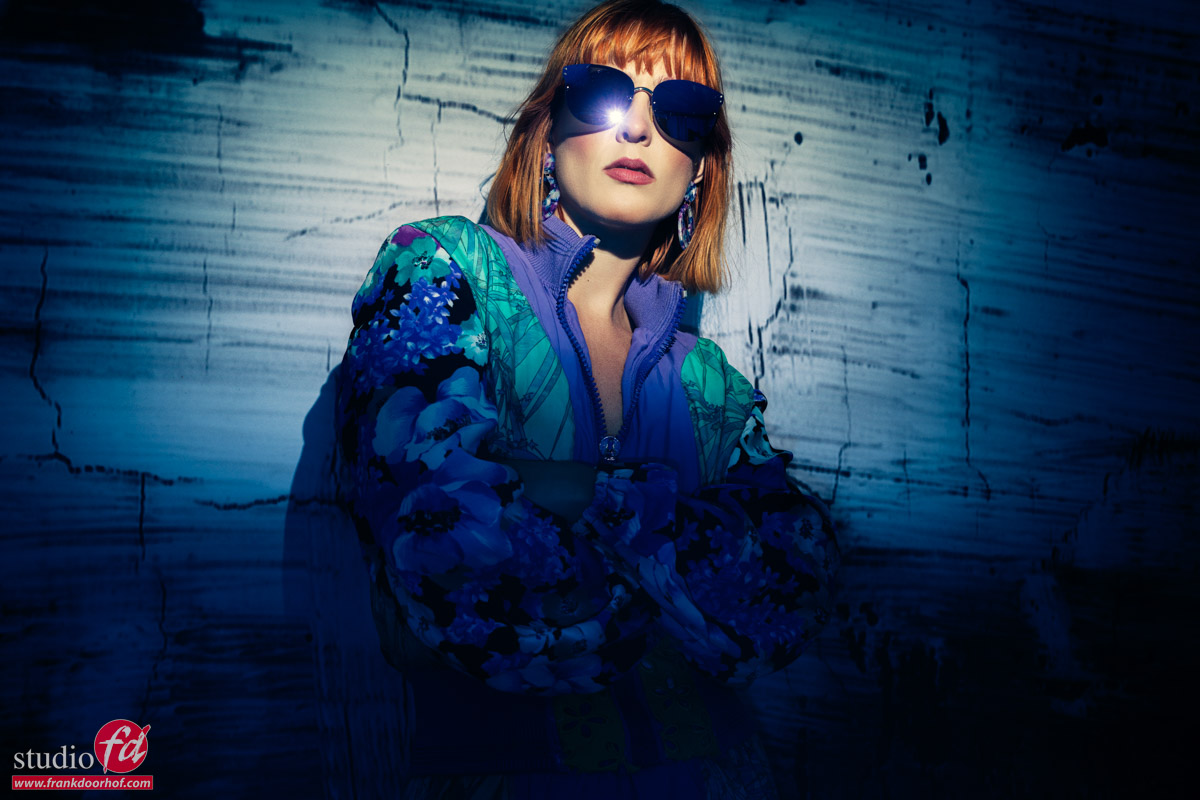
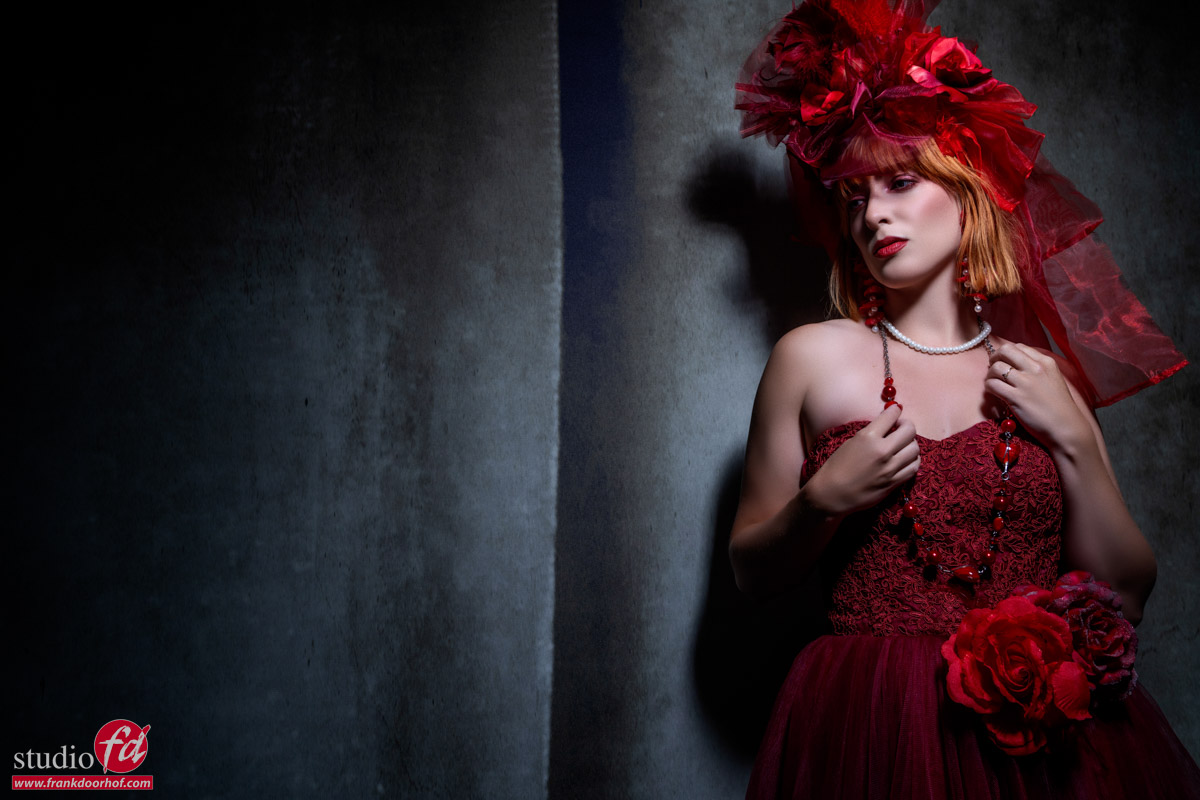
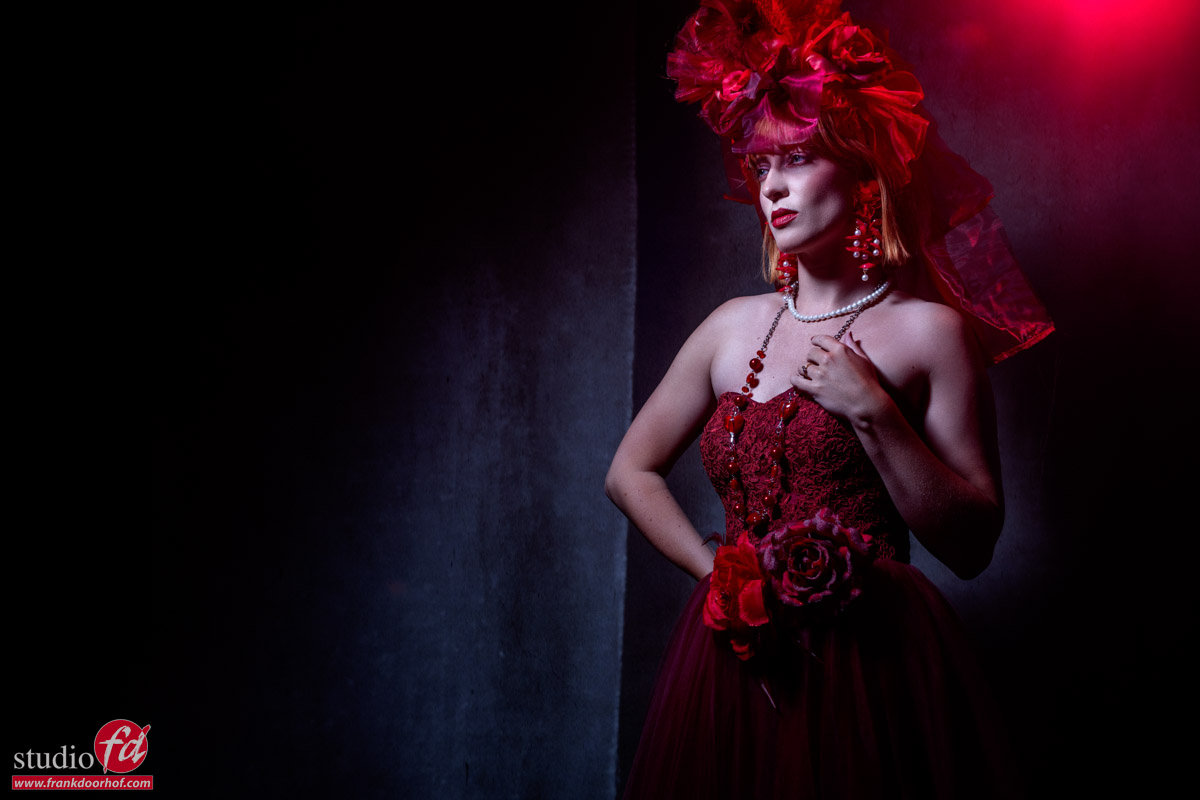
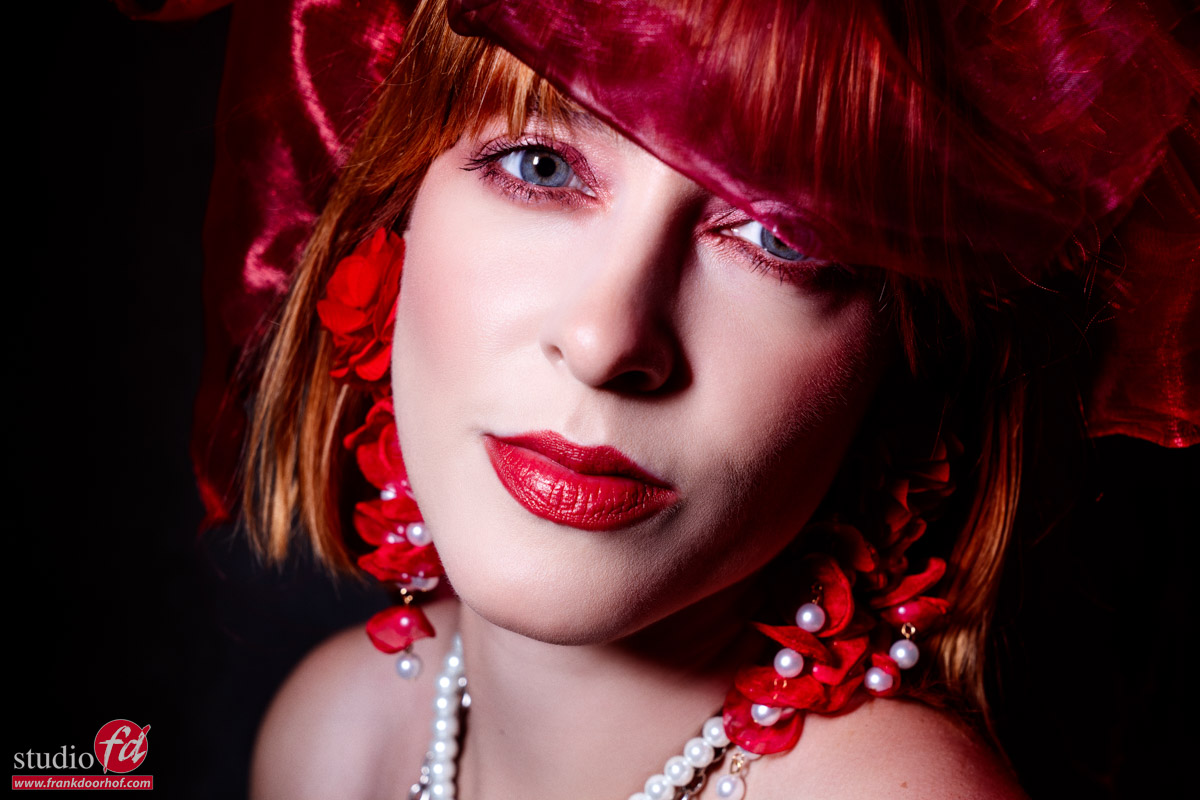
Bright colored lights create stronger streaks and add another layer of creativity. Blues, reds, and magentas often work particularly well because they separate visually from the neutral tones produced by the flash. The more contrast you create between the flash-lit subject and the moving light trails, the more dramatic the final image becomes.
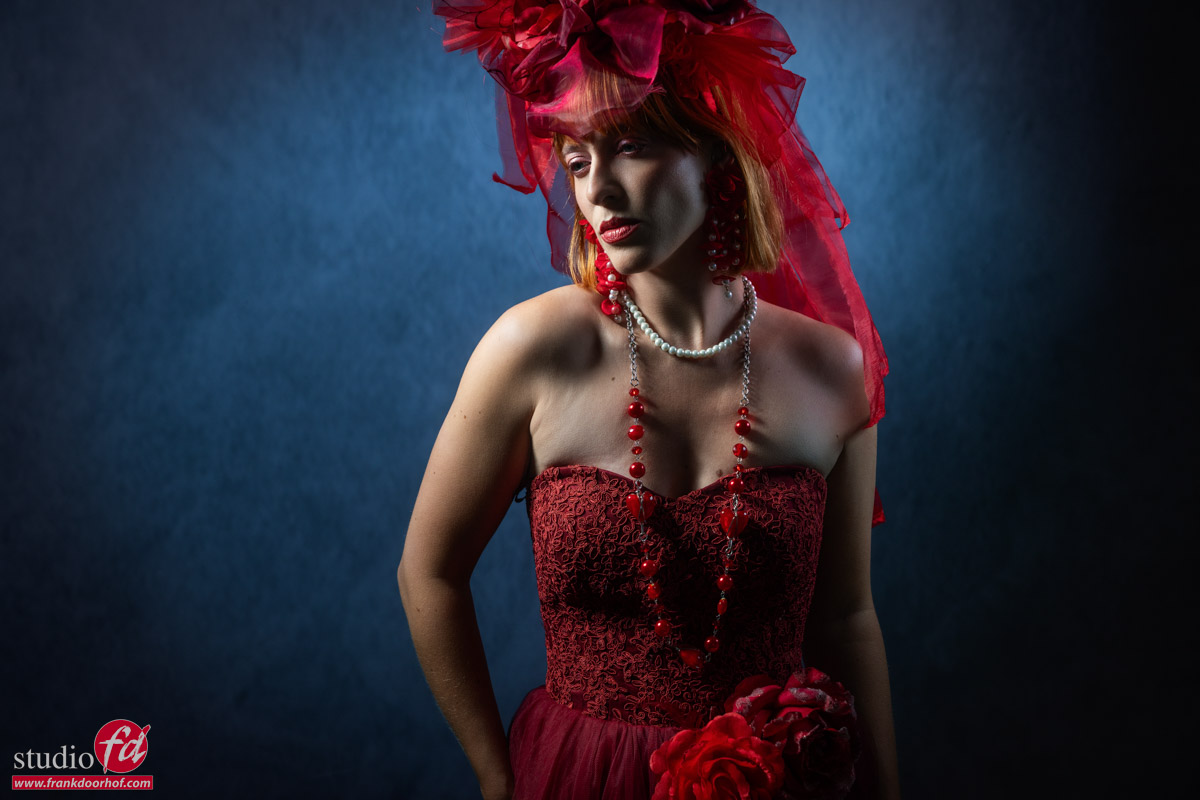
When I shoot setups like this I will make sure the strobe only hits the body of my model on the areas where I really need it (remember that the continuous lighting also fills in the shadows) and when I include movement I will make sure the face of the model is in the frame when the strobe fires, but immediately out of the frame when I move. This way the models face is not influenced by the continuous lighting anymore and stays natural and super sharp….. as always mix and match. sometimes it’s great to have this effect, sometimes not. It’s art 😀

Experiment and Embrace Imperfection
The biggest mistake photographers make with this technique is trying to control every detail. Forget about it.
Creative motion photography rewards experimentation.
Change the shutter speed. Move faster. Move slower. Zoom in. Zoom out. Rotate the camera. Try different colors.
You may shoot fifty frames before finding the one that truly works—but that one image will often have far more impact than a perfectly static photograph.
Photography is not always about eliminating motion. Sometimes the most exciting images are created when you deliberately invite motion into the frame and then use light to control exactly what remains sharp. By combining flash, continuous light, and camera movement, you can create photographs that capture both a moment and the feeling of movement itself.
Want to learn a lot more and see it in action?
I’m teaching a full class on freezing motion the creative way during the “Photographing people event”
See this blogpost for more information and booking your seats (it’s an online KelbyOne event)