The Platypod bracket and bounce
Some products will change your workflow
And some won’t and end up in your closet. This blog is about the Platypod Bracket and Bounce
We all know those products, it looks awesome, and at a trade show, high on GAS (Gear Acquisition Syndrome), we buy it.
But when you’re home, it’s often a disappointment.
In my experience, it’s the ways you can use a product.
As you probably know, I love products that are designed by photographers, for photographers.
And today I can introduce something new for you guys.

Platypod
One of the most frustrating parts of a system is that you cannot expand it, and often the way you can adjust it is limited.
But the biggest frustrating part and also the most dangerous is when you cannot lock the system. I’ve tested countless systems that looked great, but when I tightened it as tight as it could, it still turned or twisted in use. And when you mount cameras or lights, this is something you never want to see.
Platypod already has a whole system with tripod replacement plates and loads of accessories
If you want to mount something…. Platypod has a solution.
Bracket and Bounce
When we got the new bracket and bounce in, I was pleasantly surprised by the fact that we kept finding uses for it.
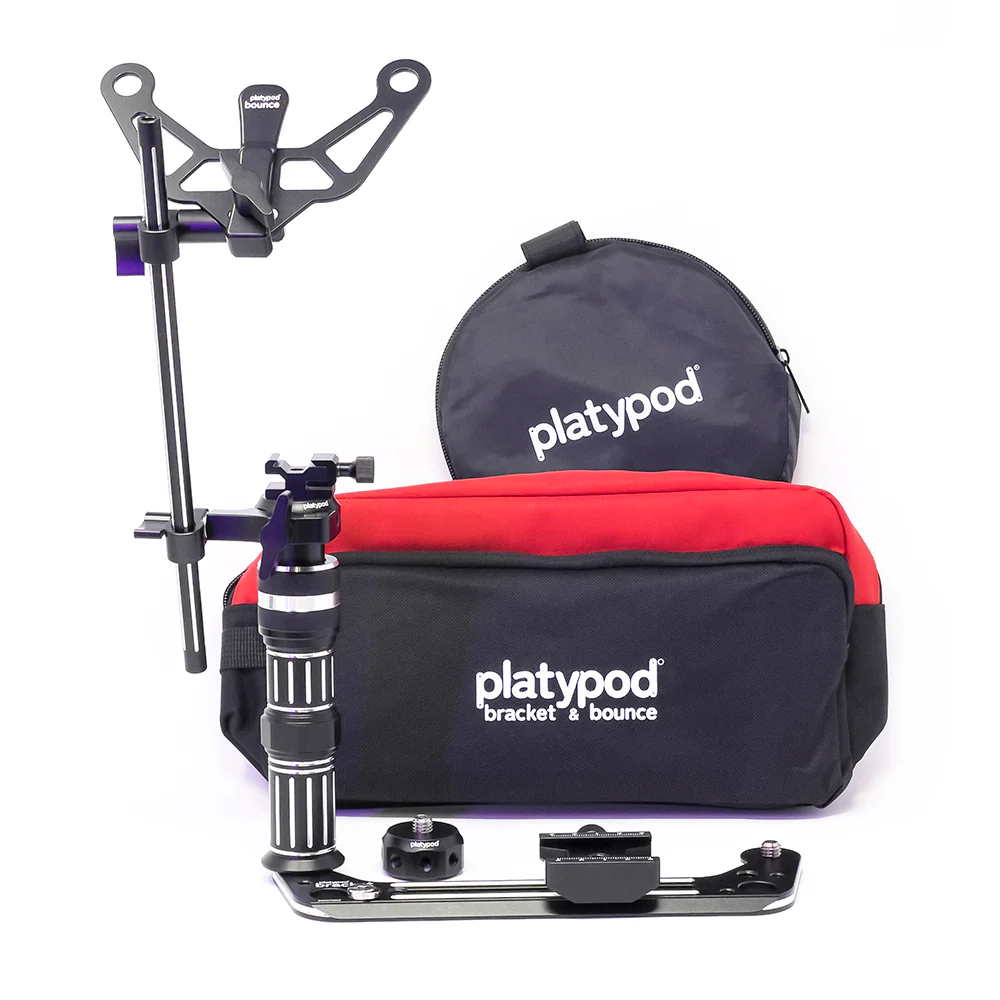
In the box you find a complete system to build a very versatile bracket system that is still lightweight and has a lot of connections.
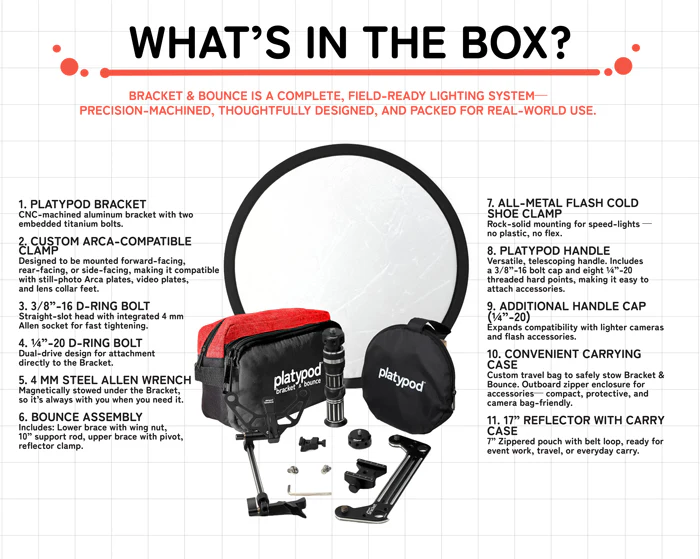
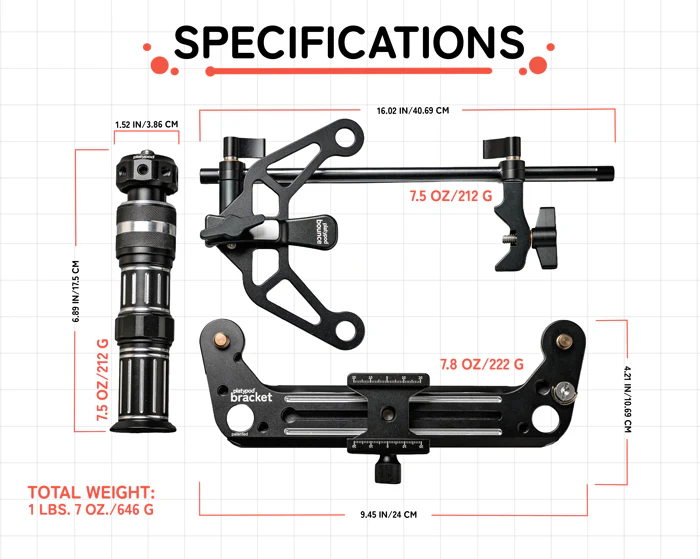
As you can see, we have a lot of parts.
And that’s just the start of what you can build; it’s like lego 😀
First, let’s take a look at the bounce part.
The Platypod Bracket and Bounce fro event photographers
Sometimes you don’t have the room to bring a whole studio, and you can only use one tripod.
Well, don’t worry, you can still get a nice off-camera kind of look.
The bracket and bounce can be used as a bounce system (hence the name).
You just connect the handle and the bounce kit (included), and you’re ready to shoot.
A little bit of bounce can go a long way.
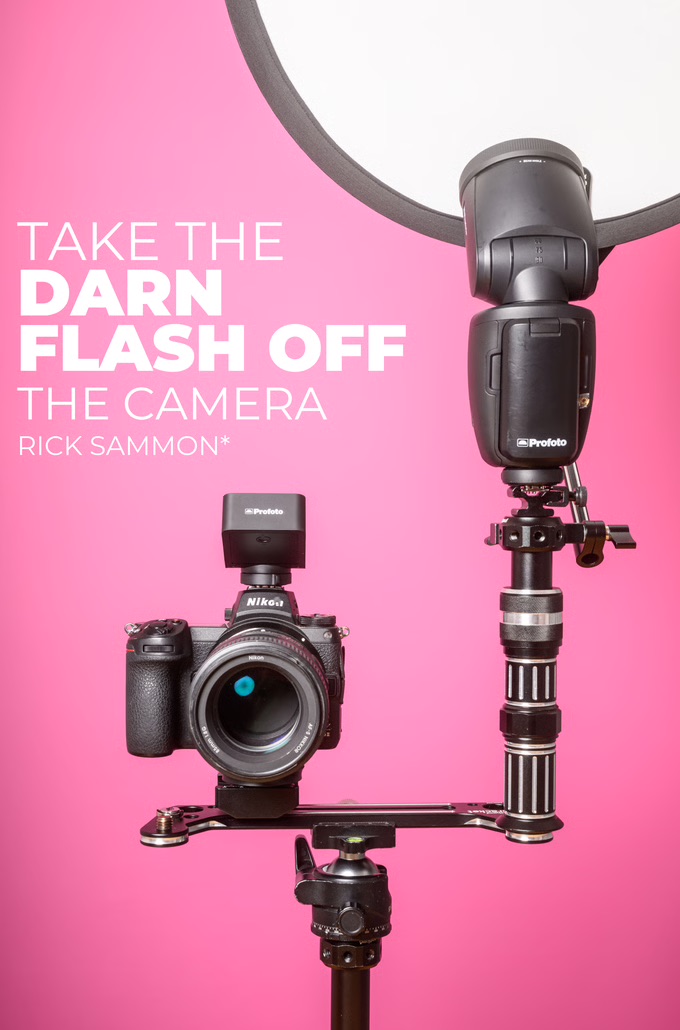
Now, in all honesty, this is not how we are going to use it.
I mostly use my flash off-camera on a stand, but we do have some other really cool ideas with the bracket.
The Bracket and Bounc for video and photography
Let’s start with photography.
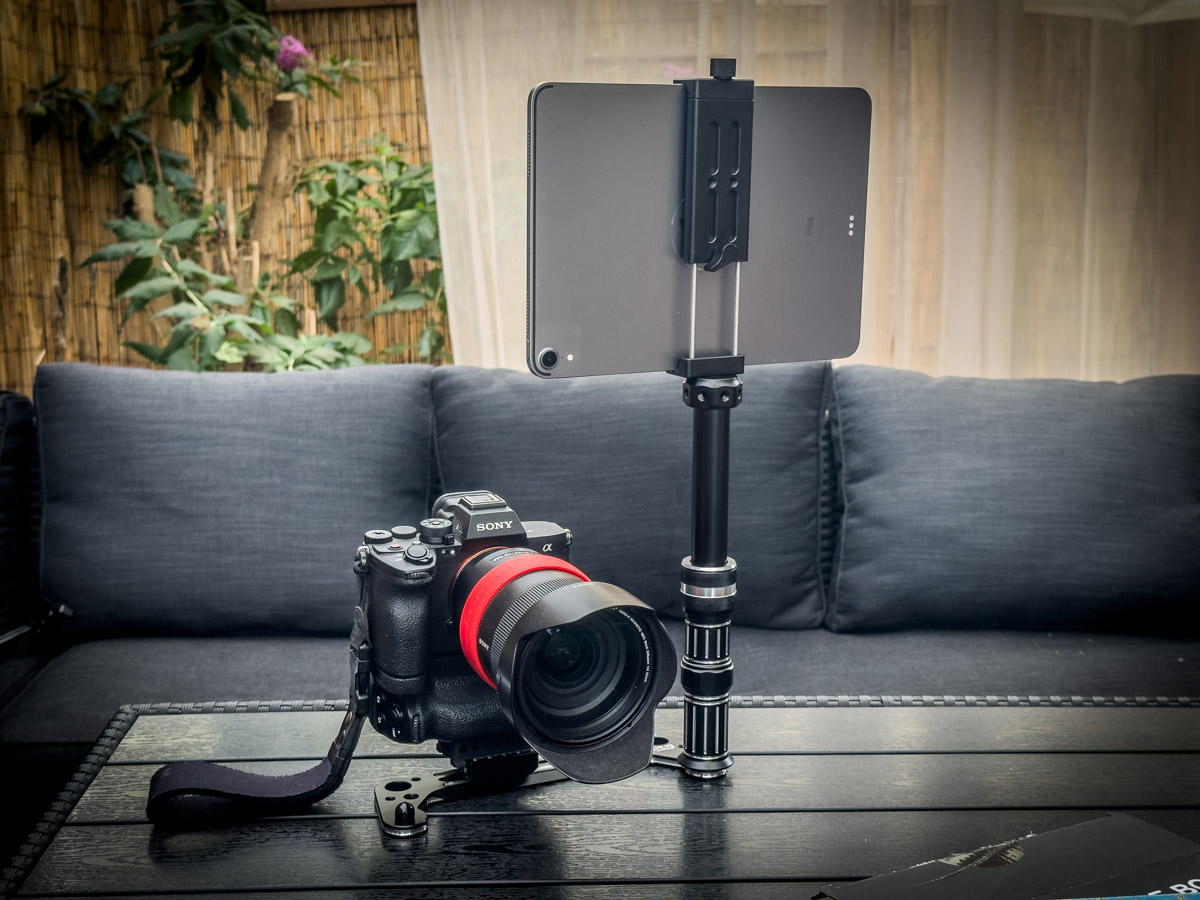
There are plenty of situations where we are on location, and there is no room for a monitor, but I still want my client, or attendees during a workshop, to be able to see the photos coming in while shooting.
The cool thing about the Platypod system is that you can connect everything.
So I got the Platypod Tab (a great holder for your iPad)
Mounted the included handle and voila. Running Cascable on the iPad, and you have a super easy-to-carry-around system for tethering.
 But there is more.
Next week we are recording a few videos for the Digital Classroom tips series, and I think the bracket and bounce will be absolutely awesome for videographers who want to be flexible.
Think about the following options
On the handle, you can mount a gooseneck and use that to perfectly aim your LED panel or LED tube.
But what about getting a second handle and using one side for the light and the other one for your iPad or Phone?
Now you can use the iPad when you’re behind the camera as a large screen to even make manual focus a breeze.
Or what do you think about turning the iPad around and using it as a huge display so you can see yourself, and by positioning next to the lens or above the camera you are still looking straight into the lens. This is a huge update compared to shooting with a flip-up screen. When I sit behind the desk, it’s impossible to judge the image from my flip-up screen, but an 11″ iPad is perfect.
And talking about the iPad, how about using it as a teleprompter?
Video light from one side and the iPad from the other, with the camera in the middle, will be my favorite video setup from now on.
The Platypod Bracket and Bounce is available now via: frankdoorhof.com/shop
Some videos about the Platypod Bracket and Bounce
Seeing is always better than reading for these kinds of things.
So we made a small unboxing video for you.
For the bounce system in action, I can highly recommend checking out the video by Scott Kelby.
In the video, he demonstrates how to take great location portraits with the Bracket and Bounce.
And who can do a better complete walkthrough than our own Larry?