 https://frankdoorhof.com/web/wp-content/uploads/2026/06/Marit-June-20-2026-16-Edit.jpg
830
1200
Frank Doorhof
https://frankdoorhof.com/web/wp-content/uploads/2015/03/studioFD_Logo-1FV.png
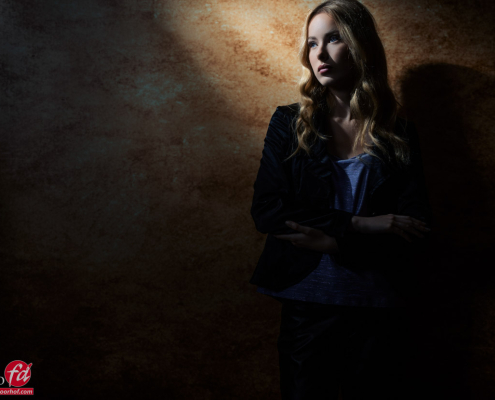
Frank Doorhof2026-07-13 18:00:182026-07-13 13:30:07Composition is often overlooked
https://frankdoorhof.com/web/wp-content/uploads/2026/06/Marit-June-20-2026-16-Edit.jpg
830
1200
Frank Doorhof
https://frankdoorhof.com/web/wp-content/uploads/2015/03/studioFD_Logo-1FV.png
Frank Doorhof2026-07-13 18:00:182026-07-13 13:30:07Composition is often overlooked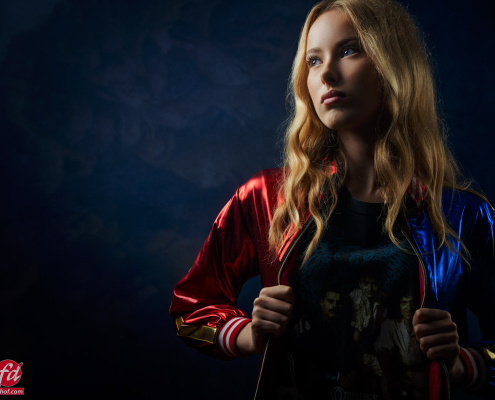 https://frankdoorhof.com/web/wp-content/uploads/2026/07/Marit-June-20-2026-23-Edit.jpg
800
1200
Frank Doorhof
https://frankdoorhof.com/web/wp-content/uploads/2015/03/studioFD_Logo-1FV.png
Frank Doorhof2026-07-09 18:00:352026-07-03 18:08:47A better Rembrandt lighting
https://frankdoorhof.com/web/wp-content/uploads/2026/07/Marit-June-20-2026-23-Edit.jpg
800
1200
Frank Doorhof
https://frankdoorhof.com/web/wp-content/uploads/2015/03/studioFD_Logo-1FV.png
Frank Doorhof2026-07-09 18:00:352026-07-03 18:08:47A better Rembrandt lighting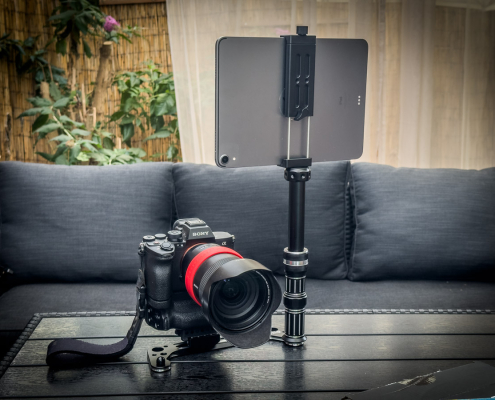 https://frankdoorhof.com/web/wp-content/uploads/2026/07/platypod-unboxing-mounting-system-July-09-2026-14.jpg
900
1200
Frank Doorhof
https://frankdoorhof.com/web/wp-content/uploads/2015/03/studioFD_Logo-1FV.png
Frank Doorhof2026-07-09 17:52:262026-07-09 18:27:49The Platypod bracket and bounce
https://frankdoorhof.com/web/wp-content/uploads/2026/07/platypod-unboxing-mounting-system-July-09-2026-14.jpg
900
1200
Frank Doorhof
https://frankdoorhof.com/web/wp-content/uploads/2015/03/studioFD_Logo-1FV.png
Frank Doorhof2026-07-09 17:52:262026-07-09 18:27:49The Platypod bracket and bounce https://frankdoorhof.com/web/wp-content/uploads/2026/07/IMG_4982.jpeg
1365
2048
Frank Doorhof
https://frankdoorhof.com/web/wp-content/uploads/2015/03/studioFD_Logo-1FV.png
Frank Doorhof2026-07-07 07:07:002026-07-07 07:11:3529 years
https://frankdoorhof.com/web/wp-content/uploads/2026/07/IMG_4982.jpeg
1365
2048
Frank Doorhof
https://frankdoorhof.com/web/wp-content/uploads/2015/03/studioFD_Logo-1FV.png
Frank Doorhof2026-07-07 07:07:002026-07-07 07:11:3529 years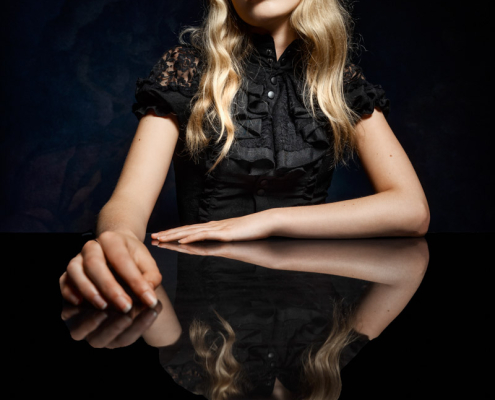 https://frankdoorhof.com/web/wp-content/uploads/2026/06/Marit-June-20-2026-43-Edit.jpg
1200
800
Frank Doorhof
https://frankdoorhof.com/web/wp-content/uploads/2015/03/studioFD_Logo-1FV.png
Frank Doorhof2026-07-05 18:00:162026-07-03 17:32:45Reflections revisited
https://frankdoorhof.com/web/wp-content/uploads/2026/06/Marit-June-20-2026-43-Edit.jpg
1200
800
Frank Doorhof
https://frankdoorhof.com/web/wp-content/uploads/2015/03/studioFD_Logo-1FV.png
Frank Doorhof2026-07-05 18:00:162026-07-03 17:32:45Reflections revisited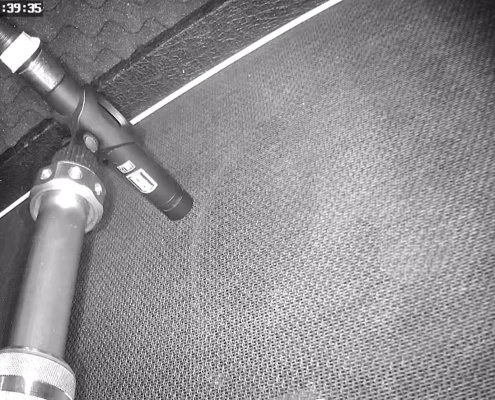 https://frankdoorhof.com/web/wp-content/uploads/2026/07/IMG_8996.jpg
1114
2048
Frank Doorhof
https://frankdoorhof.com/web/wp-content/uploads/2015/03/studioFD_Logo-1FV.png
Frank Doorhof2026-07-02 18:00:212026-07-02 10:32:46The platypod handle is really versatile
https://frankdoorhof.com/web/wp-content/uploads/2026/07/IMG_8996.jpg
1114
2048
Frank Doorhof
https://frankdoorhof.com/web/wp-content/uploads/2015/03/studioFD_Logo-1FV.png
Frank Doorhof2026-07-02 18:00:212026-07-02 10:32:46The platypod handle is really versatile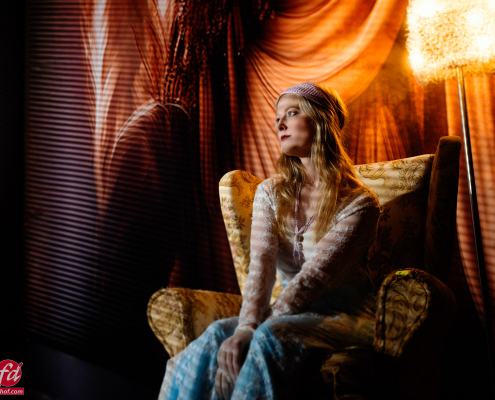 https://frankdoorhof.com/web/wp-content/uploads/2026/06/Linda-May-30-2026-13-Edit.jpg
800
1200
Frank Doorhof
https://frankdoorhof.com/web/wp-content/uploads/2015/03/studioFD_Logo-1FV.png
Frank Doorhof2026-06-29 18:00:022026-06-23 17:28:30How to shoot awesome shadows
https://frankdoorhof.com/web/wp-content/uploads/2026/06/Linda-May-30-2026-13-Edit.jpg
800
1200
Frank Doorhof
https://frankdoorhof.com/web/wp-content/uploads/2015/03/studioFD_Logo-1FV.png
Frank Doorhof2026-06-29 18:00:022026-06-23 17:28:30How to shoot awesome shadows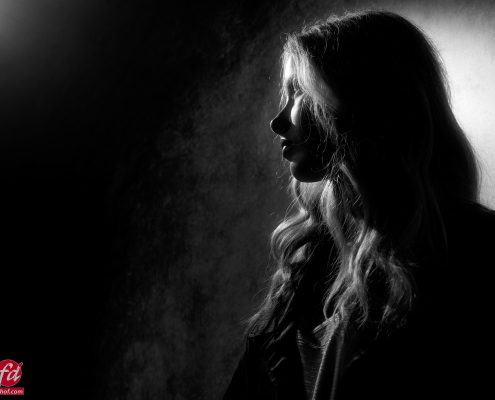 https://frankdoorhof.com/web/wp-content/uploads/2026/06/Marit-June-20-2026-17-Edit.jpg
800
1200
Frank Doorhof
https://frankdoorhof.com/web/wp-content/uploads/2015/03/studioFD_Logo-1FV.png
Frank Doorhof2026-06-26 18:00:092026-06-23 17:22:41Direction of light
https://frankdoorhof.com/web/wp-content/uploads/2026/06/Marit-June-20-2026-17-Edit.jpg
800
1200
Frank Doorhof
https://frankdoorhof.com/web/wp-content/uploads/2015/03/studioFD_Logo-1FV.png
Frank Doorhof2026-06-26 18:00:092026-06-23 17:22:41Direction of light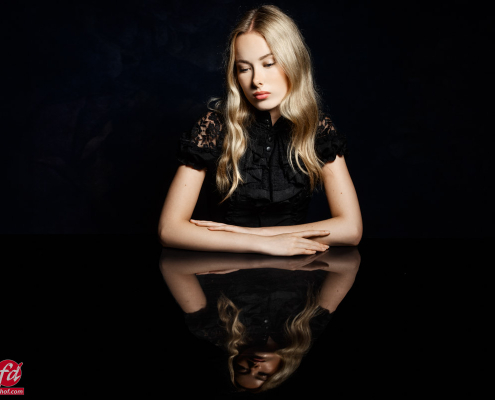 https://frankdoorhof.com/web/wp-content/uploads/2026/06/Marit-June-20-2026-39-Edit.jpg
800
1200
Frank Doorhof
https://frankdoorhof.com/web/wp-content/uploads/2015/03/studioFD_Logo-1FV.png
Frank Doorhof2026-06-23 18:00:492026-06-23 17:21:58Creative reflections
https://frankdoorhof.com/web/wp-content/uploads/2026/06/Marit-June-20-2026-39-Edit.jpg
800
1200
Frank Doorhof
https://frankdoorhof.com/web/wp-content/uploads/2015/03/studioFD_Logo-1FV.png
Frank Doorhof2026-06-23 18:00:492026-06-23 17:21:58Creative reflections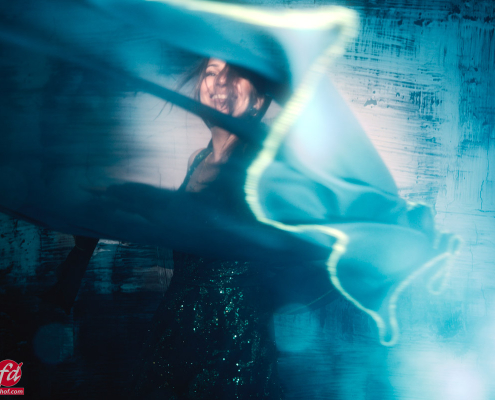 https://frankdoorhof.com/web/wp-content/uploads/2026/06/Felisa-June-06-2026-10-Edit-copy.jpg
800
1200
Frank Doorhof
https://frankdoorhof.com/web/wp-content/uploads/2015/03/studioFD_Logo-1FV.png
Frank Doorhof2026-06-20 18:00:442026-06-16 15:06:09Freezing motion while painting with Light
https://frankdoorhof.com/web/wp-content/uploads/2026/06/Felisa-June-06-2026-10-Edit-copy.jpg
800
1200
Frank Doorhof
https://frankdoorhof.com/web/wp-content/uploads/2015/03/studioFD_Logo-1FV.png
Frank Doorhof2026-06-20 18:00:442026-06-16 15:06:09Freezing motion while painting with Light https://frankdoorhof.com/web/wp-content/uploads/2026/05/Claudia-Kelby-one-141-Edit.jpg
800
1200
Frank Doorhof
https://frankdoorhof.com/web/wp-content/uploads/2015/03/studioFD_Logo-1FV.png
Frank Doorhof2026-06-17 18:00:522026-06-14 12:41:09Watch this before buying light shapers
https://frankdoorhof.com/web/wp-content/uploads/2026/05/Claudia-Kelby-one-141-Edit.jpg
800
1200
Frank Doorhof
https://frankdoorhof.com/web/wp-content/uploads/2015/03/studioFD_Logo-1FV.png
Frank Doorhof2026-06-17 18:00:522026-06-14 12:41:09Watch this before buying light shapers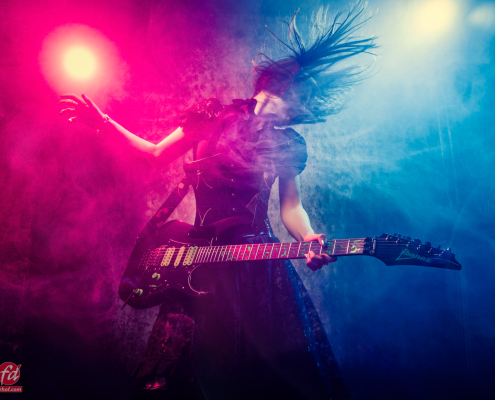 https://frankdoorhof.com/web/wp-content/uploads/2025/01/Felisa-68-January-11-2025-Edit.jpg
1366
2048
Frank Doorhof
https://frankdoorhof.com/web/wp-content/uploads/2015/03/studioFD_Logo-1FV.png
Frank Doorhof2026-06-14 12:40:292026-06-14 13:47:39Today is music day
https://frankdoorhof.com/web/wp-content/uploads/2025/01/Felisa-68-January-11-2025-Edit.jpg
1366
2048
Frank Doorhof
https://frankdoorhof.com/web/wp-content/uploads/2015/03/studioFD_Logo-1FV.png
Frank Doorhof2026-06-14 12:40:292026-06-14 13:47:39Today is music day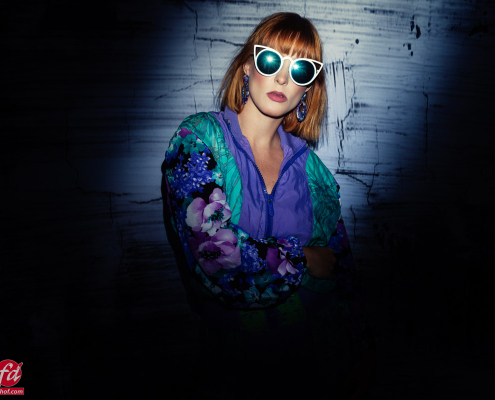 https://frankdoorhof.com/web/wp-content/uploads/2026/06/Claudia-June-07-2026-55-Edit.jpg
800
1200
Frank Doorhof
https://frankdoorhof.com/web/wp-content/uploads/2015/03/studioFD_Logo-1FV.png
Frank Doorhof2026-06-11 18:00:582026-06-09 22:50:41FotoFair 2026 day 2
https://frankdoorhof.com/web/wp-content/uploads/2026/06/Claudia-June-07-2026-55-Edit.jpg
800
1200
Frank Doorhof
https://frankdoorhof.com/web/wp-content/uploads/2015/03/studioFD_Logo-1FV.png
Frank Doorhof2026-06-11 18:00:582026-06-09 22:50:41FotoFair 2026 day 2 https://frankdoorhof.com/web/wp-content/uploads/2026/06/1_Frank-Doorhof.png
1350
1080
Frank Doorhof
https://frankdoorhof.com/web/wp-content/uploads/2015/03/studioFD_Logo-1FV.png
Frank Doorhof2026-06-09 15:55:012026-06-09 15:55:01The Photographing people conference
https://frankdoorhof.com/web/wp-content/uploads/2026/06/1_Frank-Doorhof.png
1350
1080
Frank Doorhof
https://frankdoorhof.com/web/wp-content/uploads/2015/03/studioFD_Logo-1FV.png
Frank Doorhof2026-06-09 15:55:012026-06-09 15:55:01The Photographing people conference https://frankdoorhof.com/web/wp-content/uploads/2026/06/Felisa-June-06-2026-46-Edit.jpg
800
1200
Frank Doorhof
https://frankdoorhof.com/web/wp-content/uploads/2015/03/studioFD_Logo-1FV.png
Frank Doorhof2026-06-08 18:00:182026-06-19 16:54:09Fotofair results day 1
https://frankdoorhof.com/web/wp-content/uploads/2026/06/Felisa-June-06-2026-46-Edit.jpg
800
1200
Frank Doorhof
https://frankdoorhof.com/web/wp-content/uploads/2015/03/studioFD_Logo-1FV.png
Frank Doorhof2026-06-08 18:00:182026-06-19 16:54:09Fotofair results day 1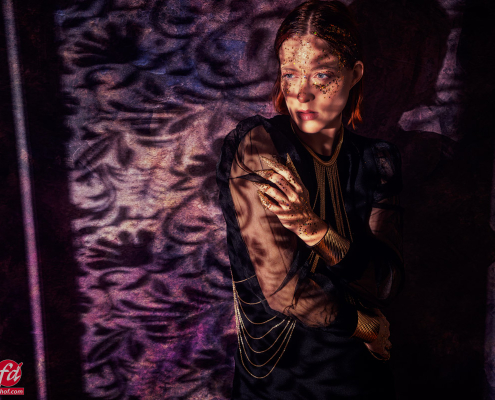 https://frankdoorhof.com/web/wp-content/uploads/2026/05/Claudia-Kelby-one-201-Edit.jpg
800
1200
Frank Doorhof
https://frankdoorhof.com/web/wp-content/uploads/2015/03/studioFD_Logo-1FV.png
Frank Doorhof2026-05-27 18:00:272026-05-16 16:40:00A room divider
https://frankdoorhof.com/web/wp-content/uploads/2026/05/Claudia-Kelby-one-201-Edit.jpg
800
1200
Frank Doorhof
https://frankdoorhof.com/web/wp-content/uploads/2015/03/studioFD_Logo-1FV.png
Frank Doorhof2026-05-27 18:00:272026-05-16 16:40:00A room divider https://frankdoorhof.com/web/wp-content/uploads/2026/05/Claudia-Kelby-one-188-Edit.jpg
800
1200
Frank Doorhof
https://frankdoorhof.com/web/wp-content/uploads/2015/03/studioFD_Logo-1FV.png
Frank Doorhof2026-05-24 18:00:562026-05-16 16:39:51Just a torch some gels and cartboard
https://frankdoorhof.com/web/wp-content/uploads/2026/05/Claudia-Kelby-one-141-Edit.jpg
800
1200
Frank Doorhof
https://frankdoorhof.com/web/wp-content/uploads/2015/03/studioFD_Logo-1FV.png
Frank Doorhof2026-05-21 18:33:422026-05-18 17:30:29A new KelbyOne class
https://frankdoorhof.com/web/wp-content/uploads/2026/05/Claudia-Kelby-one-188-Edit.jpg
800
1200
Frank Doorhof
https://frankdoorhof.com/web/wp-content/uploads/2015/03/studioFD_Logo-1FV.png
Frank Doorhof2026-05-24 18:00:562026-05-16 16:39:51Just a torch some gels and cartboard
https://frankdoorhof.com/web/wp-content/uploads/2026/05/Claudia-Kelby-one-141-Edit.jpg
800
1200
Frank Doorhof
https://frankdoorhof.com/web/wp-content/uploads/2015/03/studioFD_Logo-1FV.png
Frank Doorhof2026-05-21 18:33:422026-05-18 17:30:29A new KelbyOne class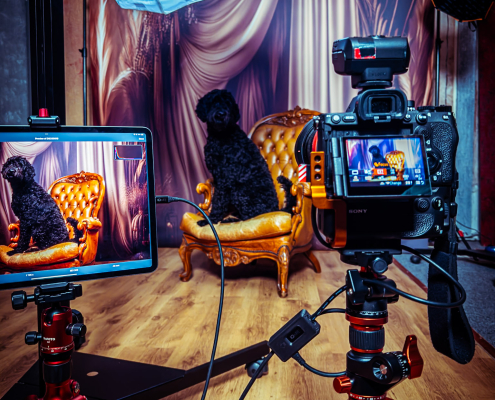 https://frankdoorhof.com/web/wp-content/uploads/2025/08/Chewie-als-model-October-24-2024-5.jpg
2048
1536
Frank Doorhof
https://frankdoorhof.com/web/wp-content/uploads/2015/03/studioFD_Logo-1FV.png
Frank Doorhof2026-05-18 19:40:202026-05-18 19:40:20Read this before damaging your camera
https://frankdoorhof.com/web/wp-content/uploads/2025/08/Chewie-als-model-October-24-2024-5.jpg
2048
1536
Frank Doorhof
https://frankdoorhof.com/web/wp-content/uploads/2015/03/studioFD_Logo-1FV.png
Frank Doorhof2026-05-18 19:40:202026-05-18 19:40:20Read this before damaging your camera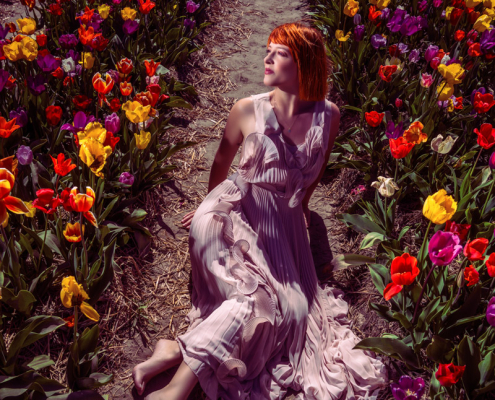 https://frankdoorhof.com/web/wp-content/uploads/2026/05/Claudia-April-30-2026-128-Edit.jpg
1200
800
Frank Doorhof
https://frankdoorhof.com/web/wp-content/uploads/2015/03/studioFD_Logo-1FV.png
Frank Doorhof2026-05-17 18:00:522026-05-18 17:11:33Watch this before shooting on location
https://frankdoorhof.com/web/wp-content/uploads/2026/05/Claudia-April-30-2026-128-Edit.jpg
1200
800
Frank Doorhof
https://frankdoorhof.com/web/wp-content/uploads/2015/03/studioFD_Logo-1FV.png
Frank Doorhof2026-05-17 18:00:522026-05-18 17:11:33Watch this before shooting on location