About technique and more.

Between two walls and different lights

In these shots you can see our model Anna Matthea between two walls……. you say what?


In our studio we use different kind of backgrounds, mostly the studio walls are painted in special structures and colors to function as backgrounds, but we also have several “movable” walls. In this shot we used two of these walls in a very steep angle and let Anna Matthea pose between them.


Lighting setup was very simple…. just a single 100W lightbulb, nothing more.

Anna Matthea February 14 2015 0366

Read more

Using some simple props to make it work

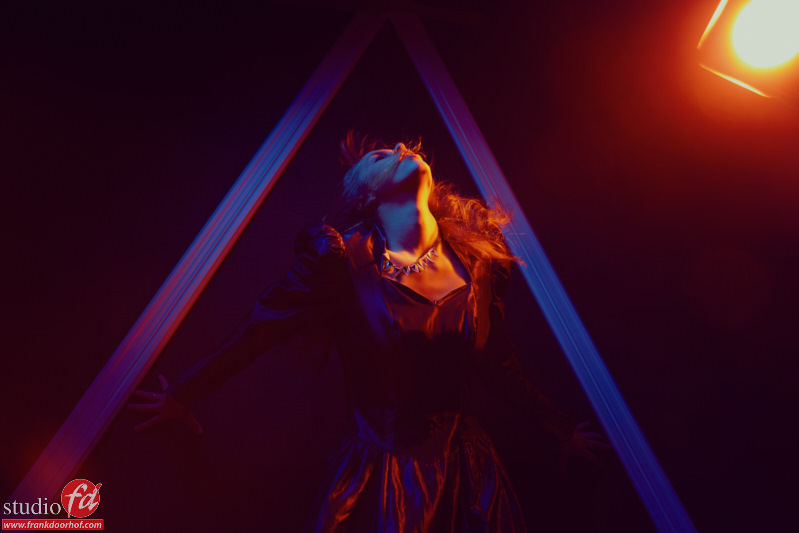
Sometimes the most simple solutions can be actually the best, well at least make a shoot a lot more interesting. During the workshop with Anna Matthea we were working with this snakeskin background and I wanted to make it a bit more interesting. Because we are building some sets we had these baseboards laying around so I thought it would be nice to use them as leading lines in this shot.


The connection to the background was very simple, use some ductape (I still agree that if all ductape in the world would disappear the world would collapse).

Anna Matthea February 14 2015 0810

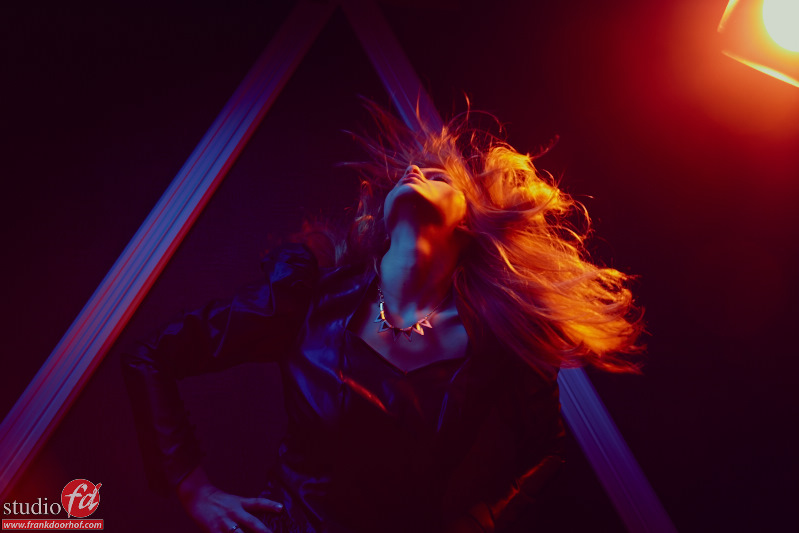
I used one gridded strobe on the model from the left (image left) and one red gelled strobe from the right (image right), by including the strobe in the image I got a little bit of lens flare which I loved. Because I balanced my color (manually) around a middle point between red and neutral I got this beautiful blue hue in the skin of the model.


To make the shot more interesting I choose a lower angle to shoot from and let the model move her hair around to create some extra “slam” to the image.
As one of the students found out, it indeed looks a bit like an 80’s rock album cover.
Read more

The complete picture

We all know that adding motion is often that little thing that makes a photo jump out, however always also remember that it’s still very important to keep you eye out for the styling, in this sample shot for example I did not only add the motion but also matched the clothing to the hair of the model and the background.


Often people ask me how to improve their photography or they see they are missing something and in 99% of the cases it’s not a matter of a bad photo but more a matter of giving attention to 2 parts of the 5 parts that make a great shot… now don’t think I consider my shots to be great 😀 but I do always try to mix and match everything together, and because it often looks like a complete shot you don’t see how much care we take for the little things like for example a gridded spot to give a bit more contrast to the clothing and putting the vignetting around the model.

Chantal_November_21_2014_0169
So try to make your shots “complete” think about the complete picture and see if it ALL fits together. Sometimes it’s a very small change you need to make for a huge difference.

Capture One main features : QF Ep 42

In this blogpost a bit of attention to our videowebpodcast “Quite Frankly”
In this videowebpodcast I always share photography related tips and tricks which range from retouching to shooting people/models/street and travel, as long as it’s photography related and I love it… well I share it.


Over time I got a lot of questions about why I use Capture One in my workflow so I decided it was time for a quick overview of the topics which I love in Capture One and I’m sure you will love too, especially if you shoot tethered.


Here is the episode, and remember that when you want to buy Capture One you can use the code AMBDOORHOF for a cool discount :