The amazing Rogue snoot
Rogue amazing snoot for creative photographers (and all others)
It’s no secret that Rogue creates some of the most creative light-shaping tools on the market.
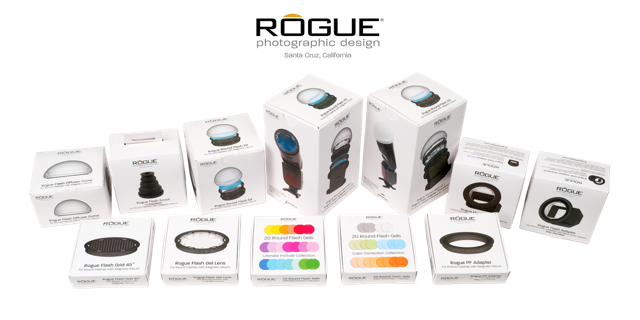
Last year they released their hugely successful magnetic system for speedlights and round flashes (like Godox, Geekoto, Profoto, Westcott, etc) containing the omnidirectional dome, grids, and gel holders, including color and correction gels. This is already a very complete setup, but recently they added an amazing snoot to the system, and I mean amazing 😀
As you all know I love to play with light. And I love products that don’t lock me into one or two uses but also can be used creatively. I always called it “gear that invites the creator to be used in ways it might not directly be designed for”. Think about the FlashBenders which started out as a high-end bounce card but quickly grew into a complete lighting system including accessories for a gridded strip light, a softbox, and a snoot. You can even get different accessories to combine with the FlashBender, but even without any modifiers, it’s already incredibly flexible as a background light because you can literally bend the light.
But let’s focus on the snoot
The snoot is fully collapsable so it doesn’t really take up any space in your bag, and Rogue could of course just give you a snoot that….well is collapsable… but why stop there, right?
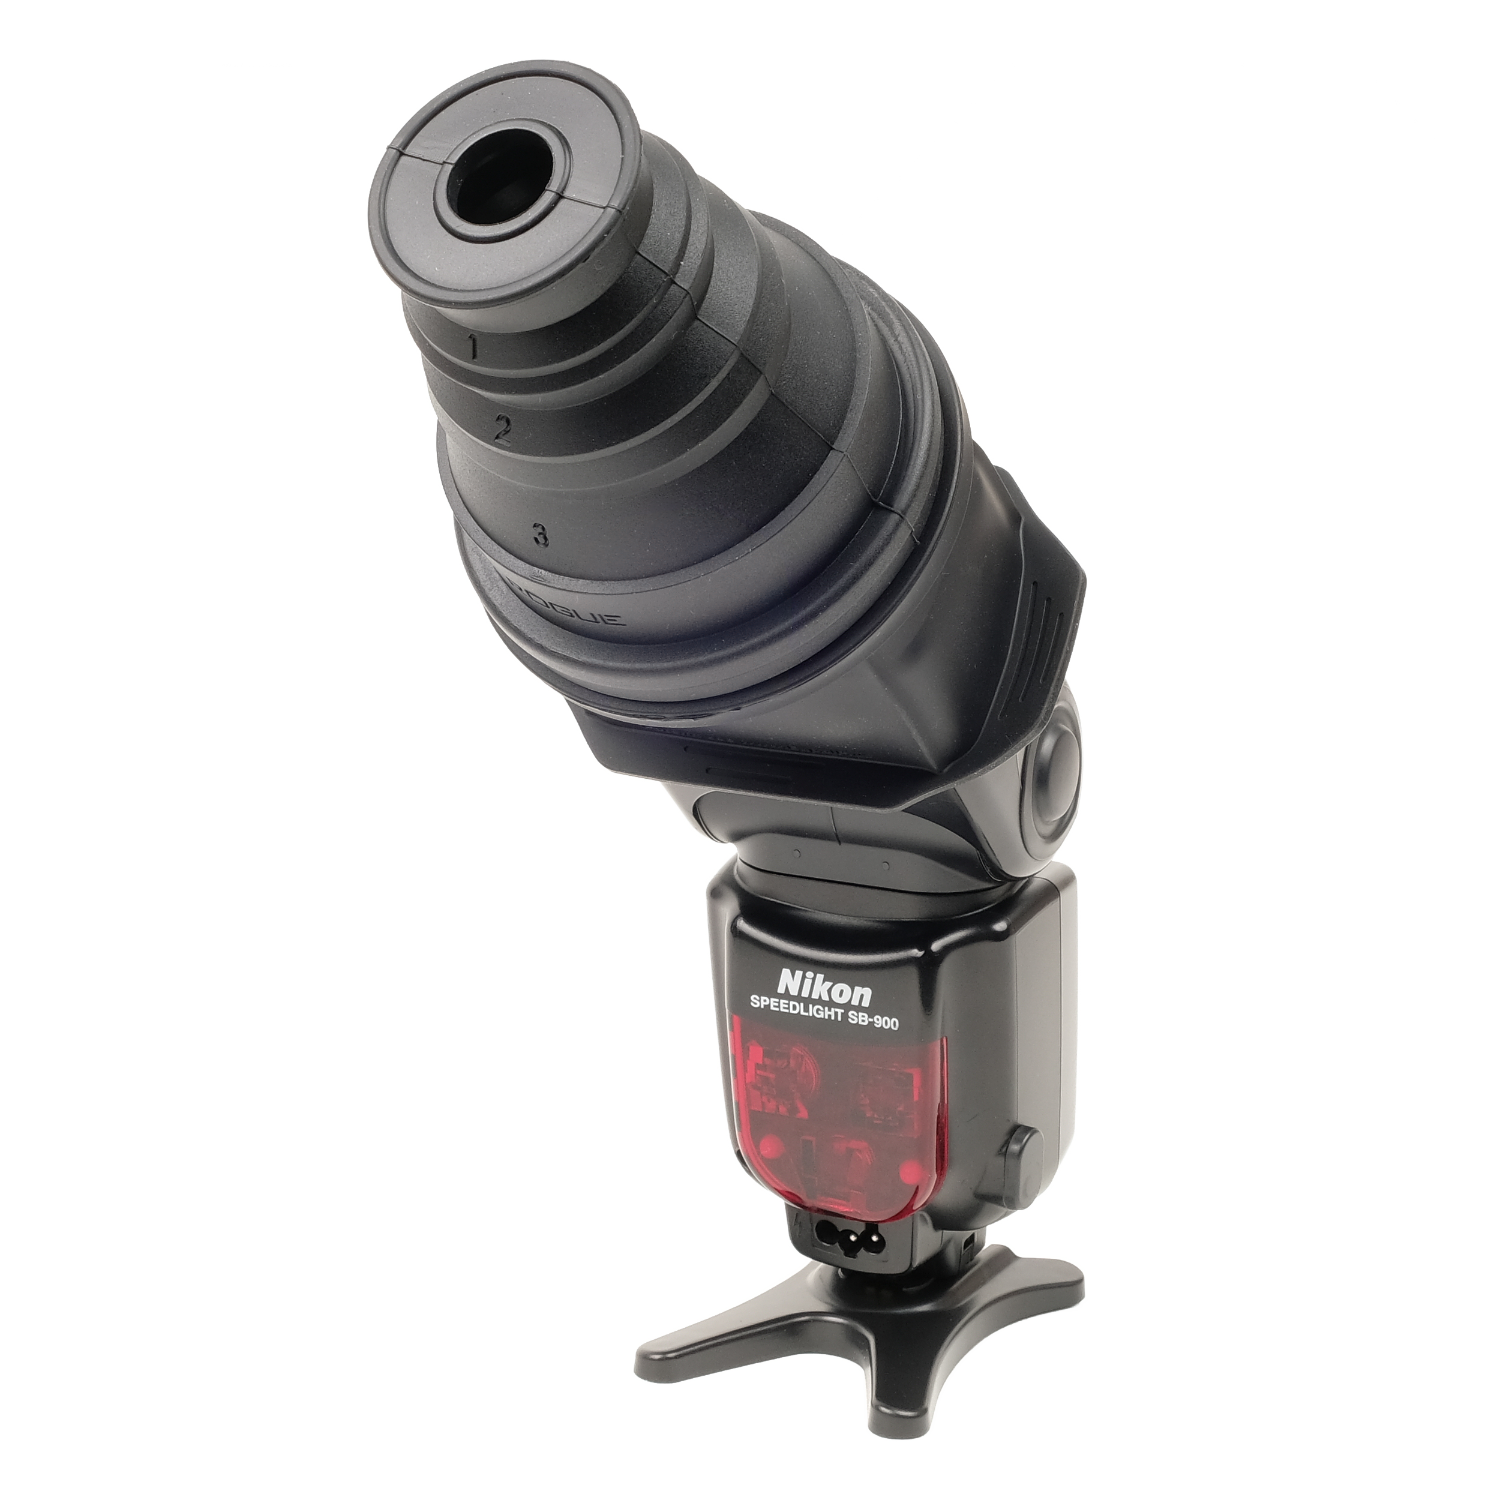
The snoot fits round flashes but with an adapter also your rectangle speedlights
So they created a snoot that has 4 different settings, from relatively wide to a very focused beam of light, but wait… there is more about this amazing Rogue snoot. When we look at the snoot it’s a round modifier, so meaning when you place it on a round strobe it will create the familiar round light beam we all love and mimics the theater spots to really make your subject jump out or just add a touch of light on the face/eyes or whatever you want to jump out, the snoot is a very cool light shaper.
So I already told you the snoot can create 4 different beams of light, but think about this.
If you place it on a speedlight you need to use a gel holder with a diffusion gel, a simple white gel that creates the round effect you also get with round strobes…. but…. what if… indeed you don’t use the gel holder?
Indeed you get the form of your speedlight, which is rectangular, and this is what I absolutely love to use with the snoot, I’ve written about it before but we are a bit further in time and I just keep finding amazing things to do with the snoot.
Some examples
First of all, you can use the rectangular look on a portrait, or just to make your model’s eyes jump out a bit more (been there done that and it works). But after doing that a few times I started to think…. “what if we use the strobe not horizontally but vertically”
Because of the rectangular light shape, this is a really powerful tool to really create tight lighting setups.
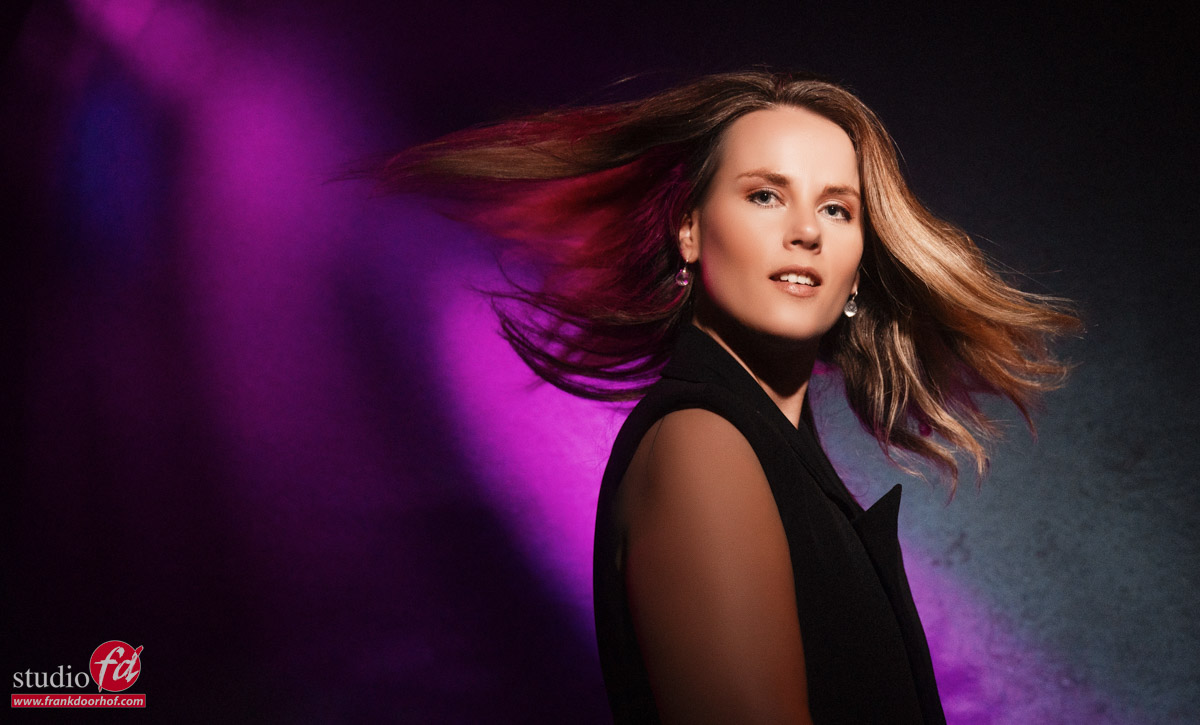
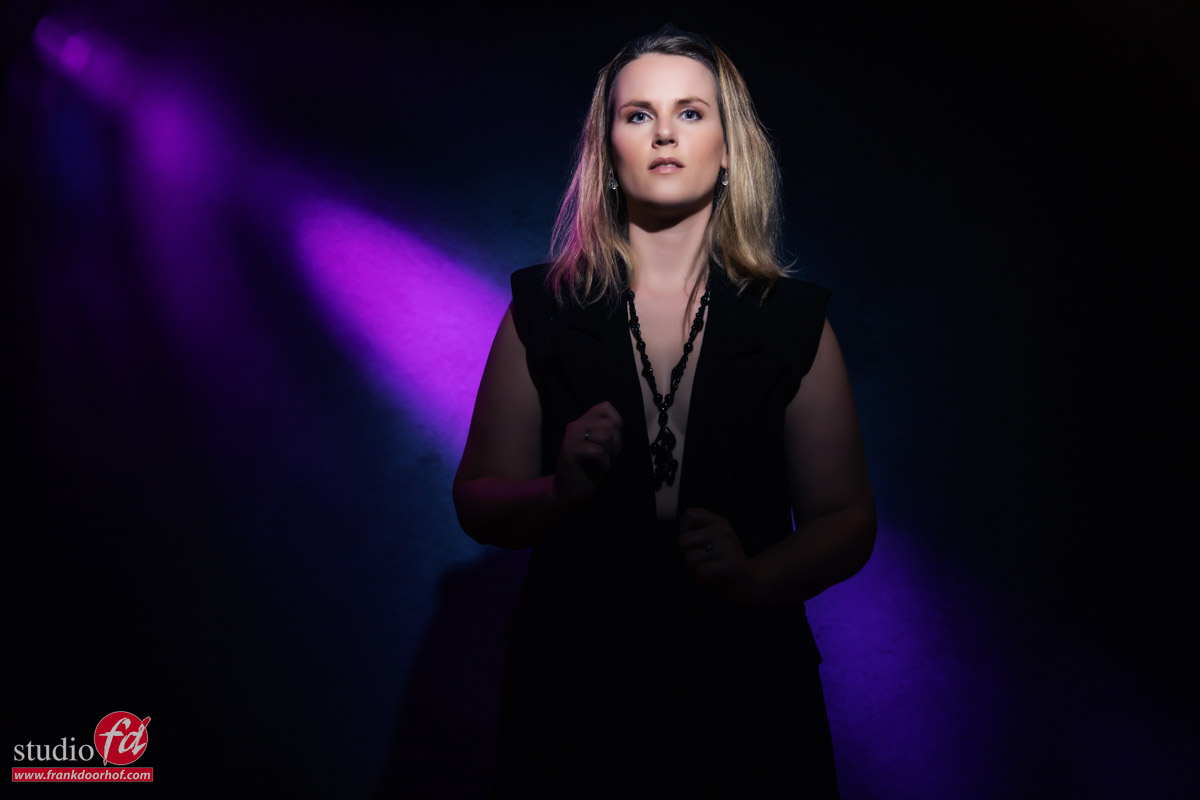
Here you see two examples where I used a boom stand to get the strobe into a vertical position and use the snoot on the setting I liked to create a sort of vignette around our new model Wendy.
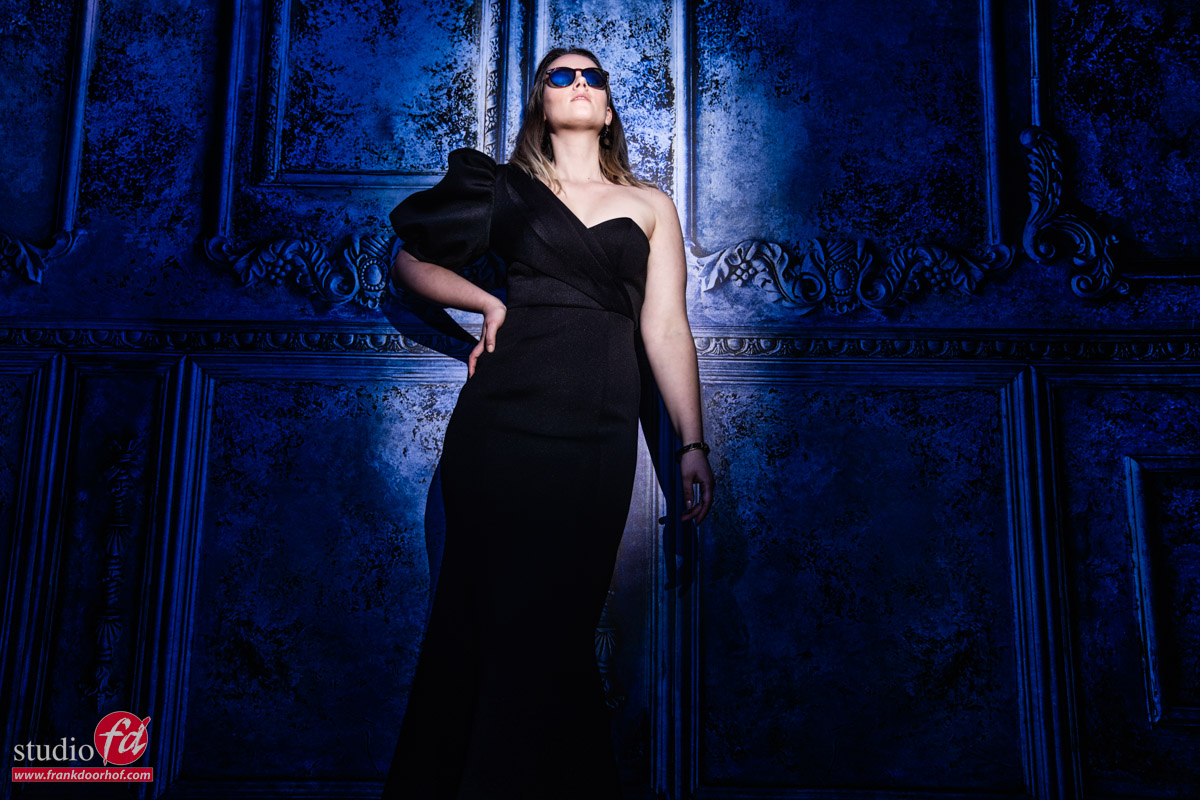
In this shot, you can see that I’m using our ClickBackdrops Antique Navy wall and shooting from a low angle to create a bit more tension in the shot. If I would have used a striplight with a grid I would have come really close to this but the striplight has to be really close to the model. So close it’s almost impossible to shoot it like this. And with a normal round strobe… well you just can’t create this effect easily, unless you block off the light with flags, which (let’s be honest) on location (and even in the studio) is a lot of work to get right and not a setup you get perfect 1,2,3.
By simply angling the strobe on the stand you can create this effect really easily. After that, it’s a matter of setting the snoot to the position where you get the right coverage and fine-tuning it by changing the distance. Easy peasy 😀
Adding lens flares
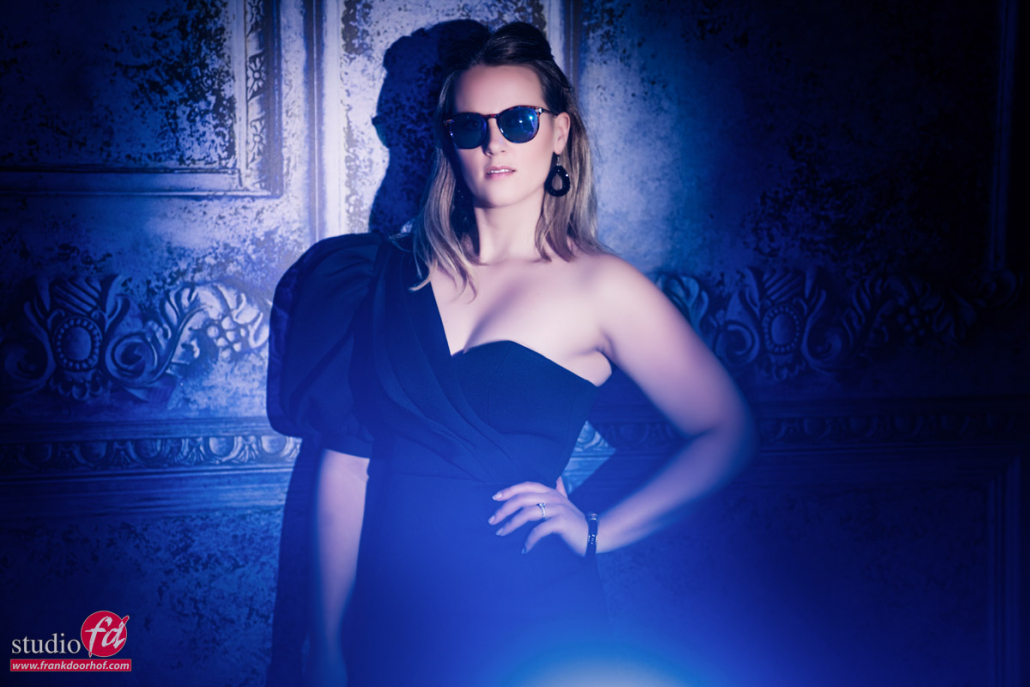
Now of course we also love lens flares, but getting them so close to the background is often not easy. Especially when you want to also open up the shadows with some color (and who doesn’t :D). So in the next shot, I used a second strobe fitted with the dome from the magnetic system and placed it just in front of the camera lens, by changing the distance to the lens I can have full control over the amount of lens flare I get, while not influencing the shadows I open up. This is an insanely flexible setup that I use more and more and is actually very hard to do with studio strobes but a breeze with the dome.

I moved the snoot slightly to the right in this shot to get a nice shadow that is also opened up with the blue from the dome. Normally I’m not a fan of eye-height lighting but in this case, I absolutely loved the outcome so I just left the snoot in a slightly lower position than I would normally do.
But that’s just the start….
I love the old-fashioned photos from the ’70-’90s and the classics like Harcourt, George Hurrell, etc.
Photos where they really knew how to create a mood in the images but also where you could find unique and intriguing patterns on the background. One of the solutions I use a lot (and love) is the Westcott Lindsay Adler projector where you can use gobos or even the built-in blades to create sharp (or soft) patterns on the background, but let’s be honest… it’s not a cheap solution (although from what you get it’s one of the most interesting on the market in my opinion).
Another solution is of course to use plants, ladders, etc. to cast shadows on the background, a much cheaper solution but also a bit harder to get something you really like. So I started to think… with all the different ways you can use the snoot, what if I would use it under an extreme angle on the background, add a gel, and play a bit with the angles of the snoot itself. And the results actually surprised me a lot.
This is just the first test I did with this. I’ll create a video about this in the coming weeks, but it’s really super easy to do. Just play with the angle itself, but you can also play with the snoot itself, creativity is your only limitation :D. Thank you Rogue for this amazing snoot.
I took this picture with the snoot folded in a weird way. Because the snoot is so flexible, it’s not a problem
Conclusion
As you can see you can get some really nice and funky patterns on the background with the amazing Rogue snoot, and it really makes the shot a lot more interesting.
Can’t wait to start using this on more complex lighting setups and backgrounds. But I couldn’t wait to share this already with you guys. I just love it when light shapers really wake up the creativity in a photographer :D.
More info about RogueFlash on the following sites :
www.rogueflash.com
www.rogueflash.nl
If you have any questions about the amazing Rogue snoot or want to know what you need for your strobes just drop us an email and we always try to respond the same day.
Disclaimer:
As you probably know I’ve been working with Rogue/Expoimaging for many years and also had input on the Frank Doorhof FlashBender products In April 2022 we made the next step, and after being an ambassador for over 10 years, we became the distributor for Rogue in the Benelux.
First of all… I’m not for sale 😀
So I would never promote any product I’m not 100% convinced about or use myself, so all the reviews and enthusiasm I show for these products are 100% honest. I’m fully aware that building trust takes years and can be broken down in seconds so we value that a lot.


