Tag Archive for: round flash

Outside fashion shoot for sunglasses with extreme styling and flash Part II : let’s talk gear

Because size matters, also outside

Today Part II from the workshop “Working on location in Emmeloord”
In this workshop, the challenge is to use not-so-interesting locations and create awesome shots.
In the previous blogpost we showed set 1 and talked a bit about the gear, today we dive a little bit deeper into the deep reflector. What gear do you need for an outside fashion shoot?

But first, let’s take a look at the setup.

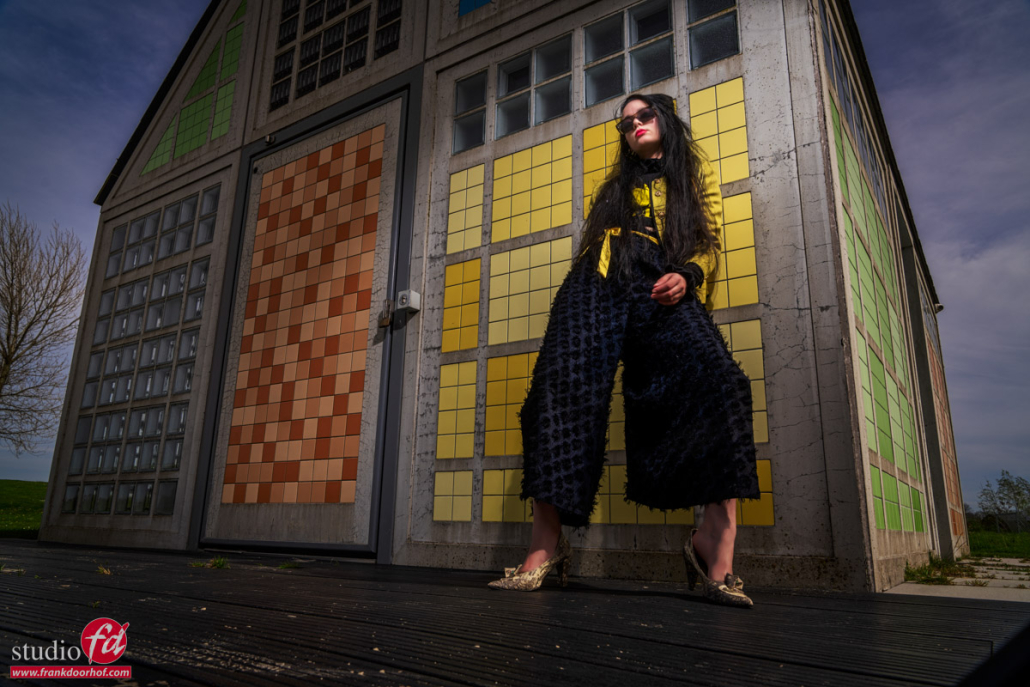
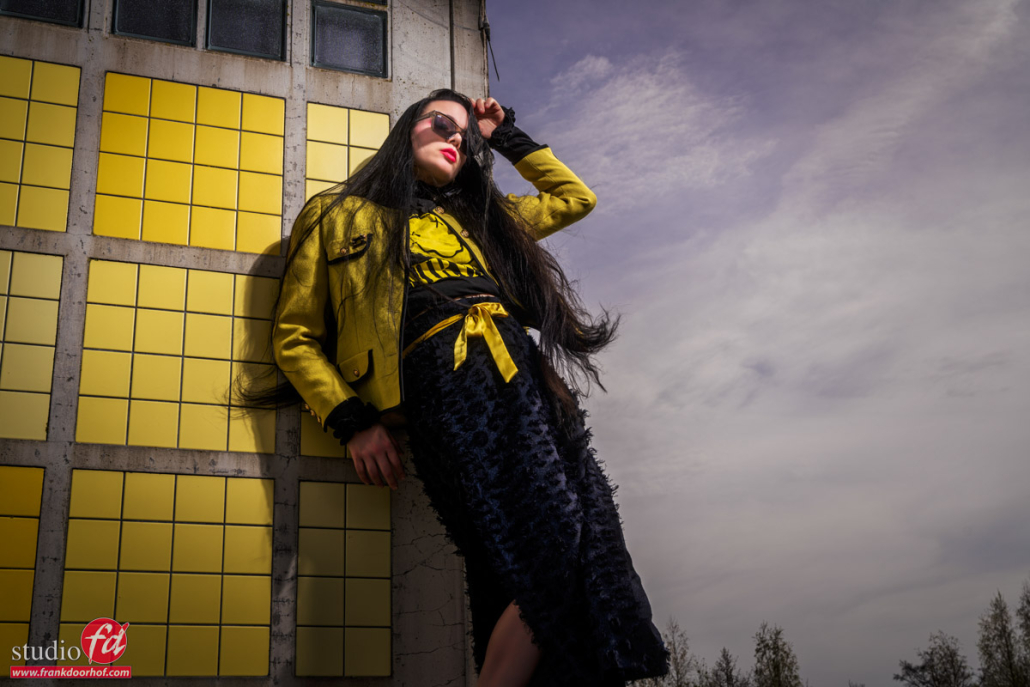
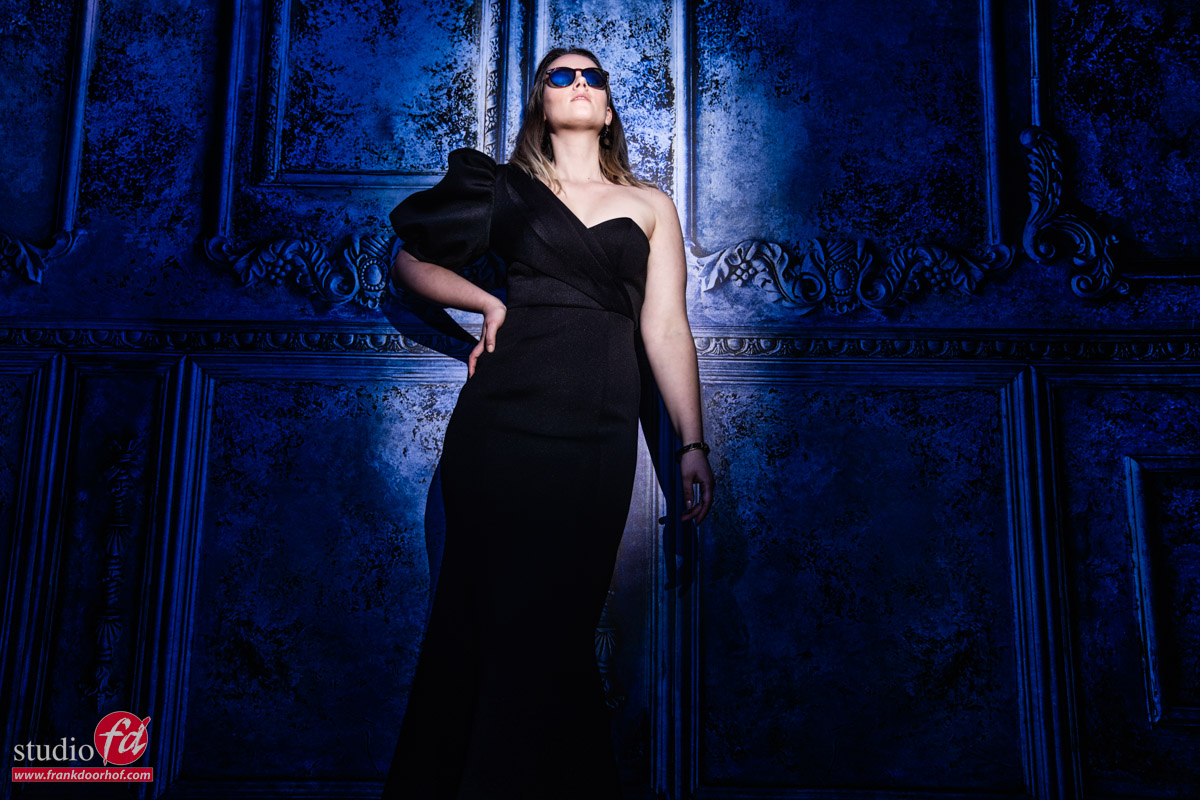
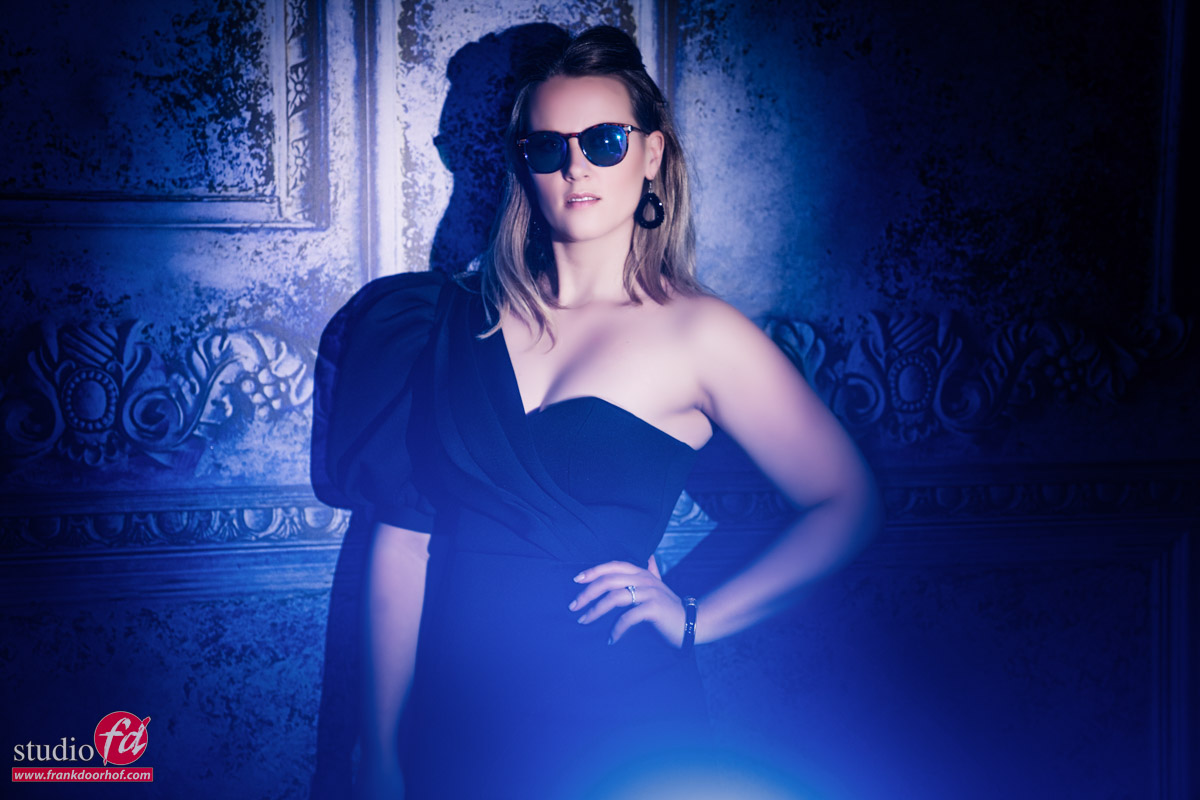
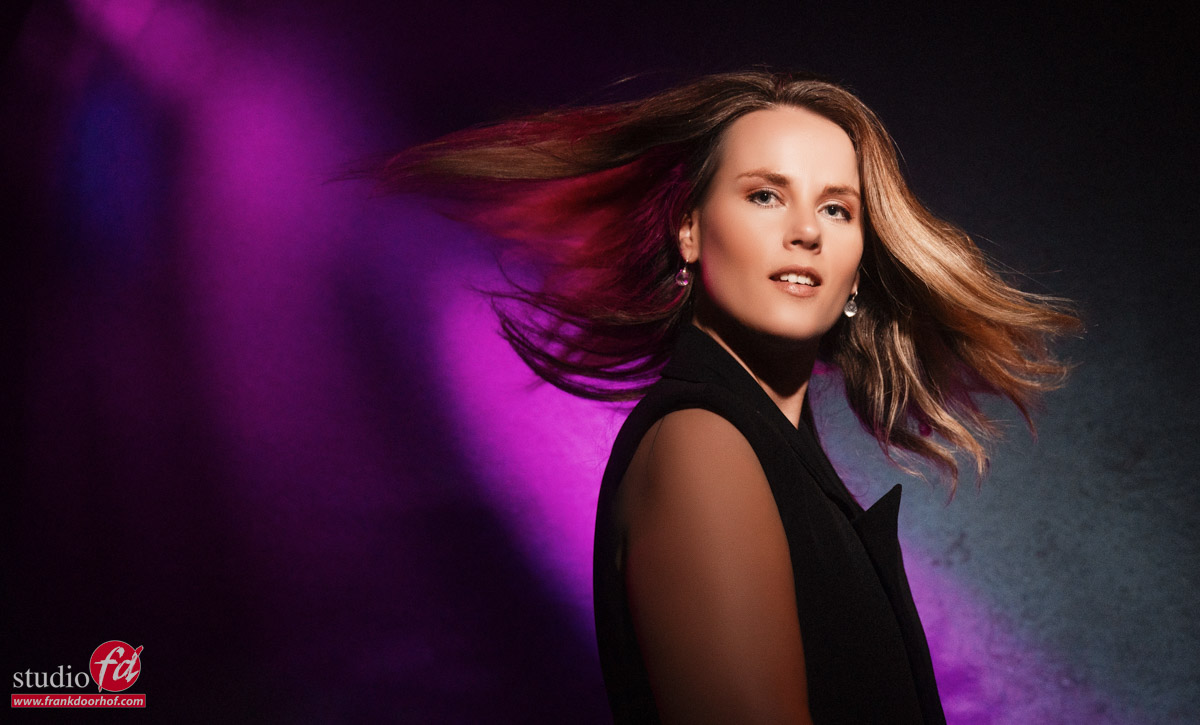
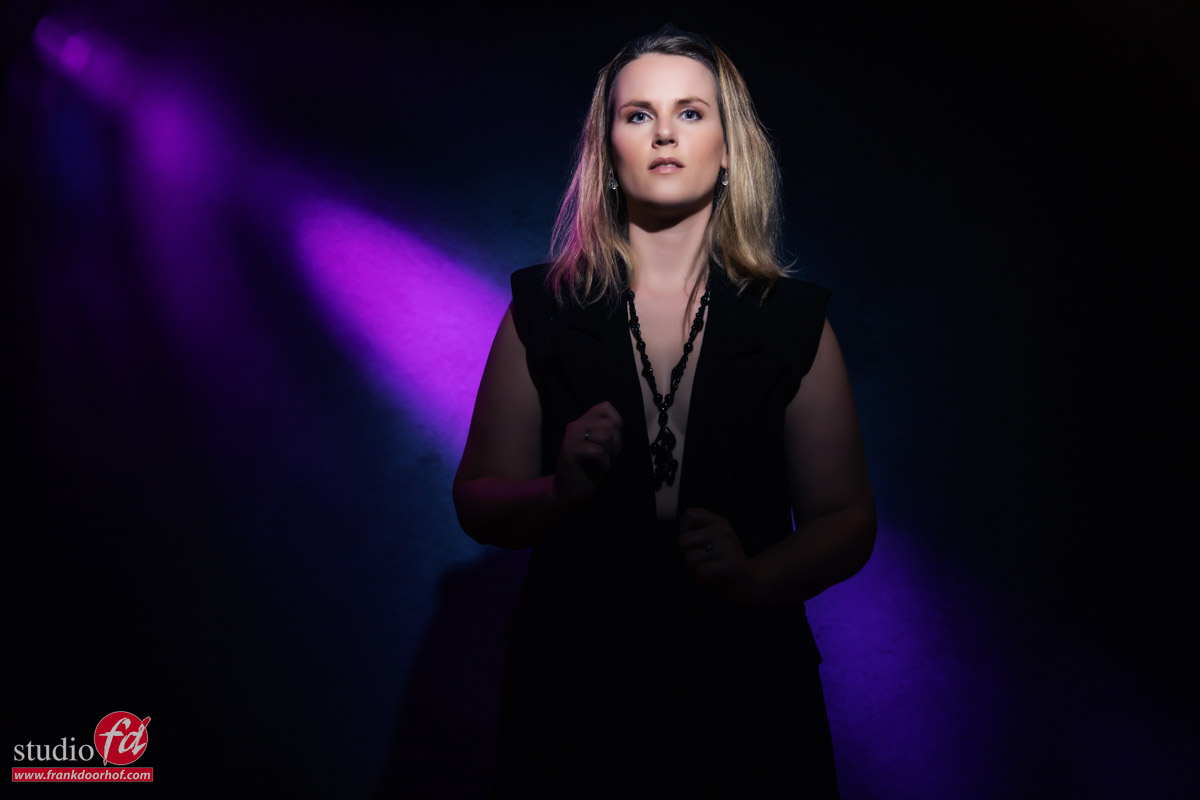
The third set we used during the workshop (set II will follow the next time) was a small house near the beach. This is an interesting location but in all honesty, I had the most trouble with this one to create something interesting. But by using the lines in the location and changing my angles of shooting, I think we got some interesting looks.

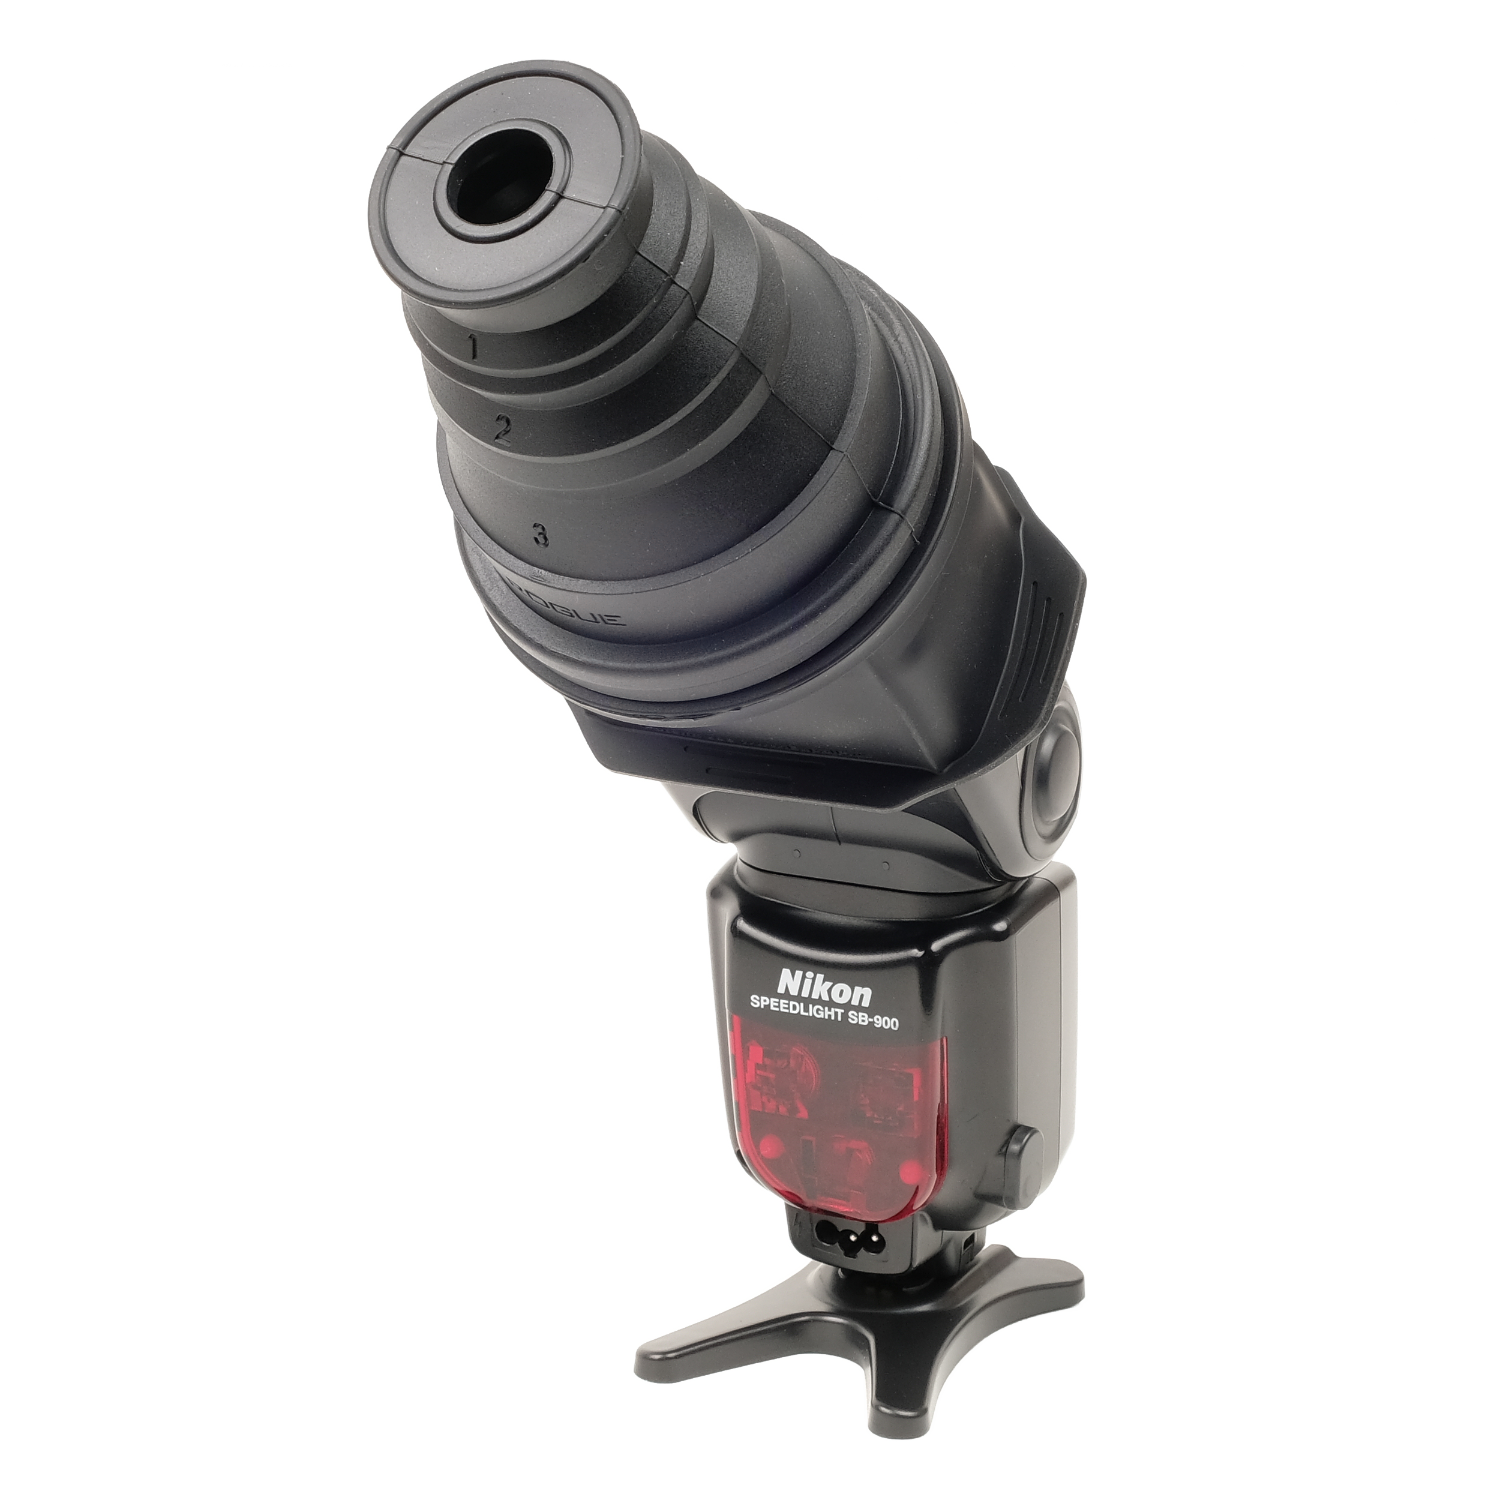
For the images, I used our Geekoto GT200 and a large reflector

An outside fashion shoot, gear

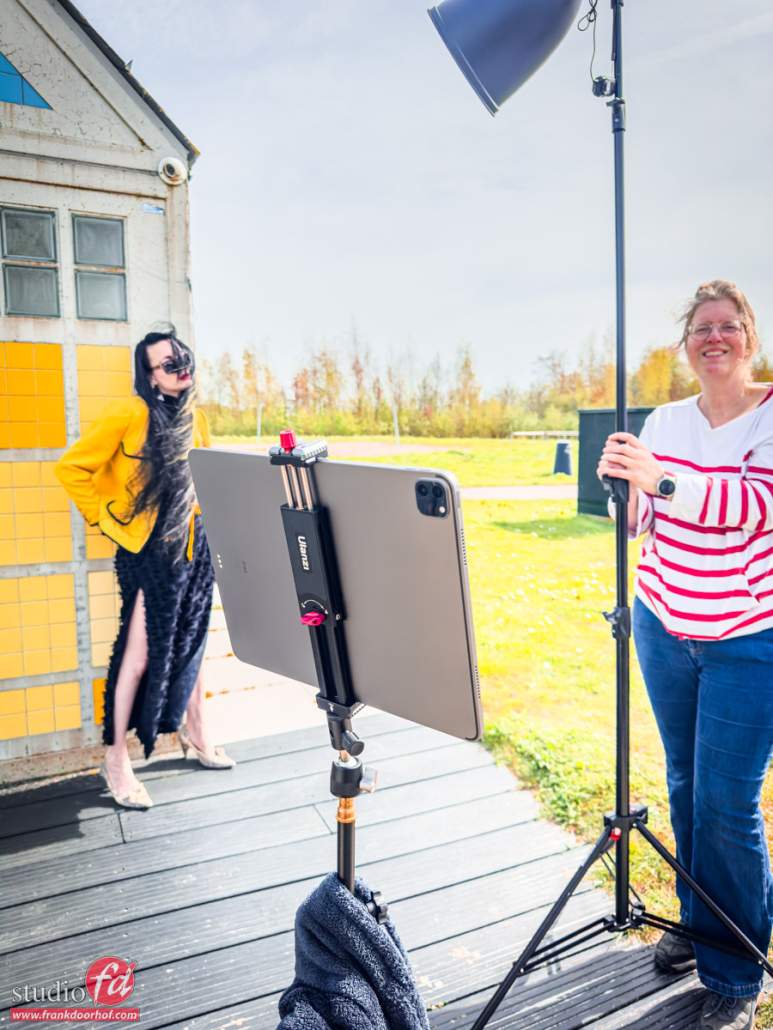
Outside my favorite gear is of course Annewiek, but also my iPad in the Ulanzi iPad holder and a large reflector.

Outside Fashion Shoot Gear, the must-have reflector

As you can see this is a pretty large reflector.
And that’s exactly the reason I love using those on location.
The thing is that even with a 200W strobe you are still not “killing” the sun from let’s say 3 meters distance. And when you love those Day2Night shots or love to shoot HSS you will have to run almost constantly on full power. But even with fill-in flash…. ok you get the idea without any reflectors even a 200W hybrid strobe with HSS is not perfect for all day Day2Night photography

However, as soon as we add light shapers, the story becomes different.

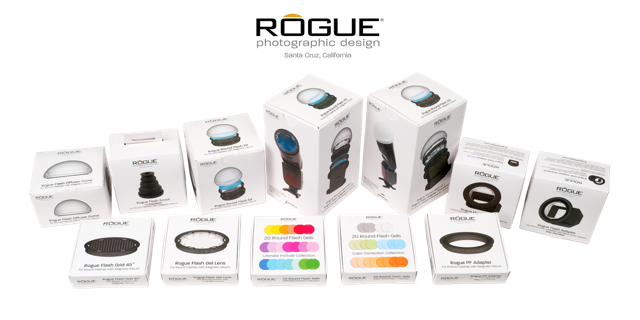
When we add a striplight like the Rogue flashbenders or any other brand of course we will actually lose light output compared to the bare strobe.
But luckily we can also add light to the output.

You probably also know from studio use that reflectors can have a huge impact on the light output of your strobes. And the same goes for outside. We are using a Bowens converter to hold our Geekoto and connect the reflector. The reason the reflector is so deep is that it will focus the light more the deeper the reflector (on average, it also depends on the material of course). In usage, this can mean the difference between shooting a strobe on 1/3rd power instead of full power, and that is something you really notice.

As a bonus I love the look of these deeper reflectors, they are not as harsh as some smaller reflectors but they still give a tremendous deep shadow and high contrast. If you order one make sure you also order a grid if that’s available. I’m using a generic brand from AliExpress, if you are shooting with Hensel it’s called the 14″ reflector (which is even larger than this one) and for Elinchrom it’s called the MaxiLight or MaxiSpot. I highly recommend getting one for outside work. The reflector is really my favorite gear on an outside fashion shoot.


The iPad solution is another must-have for your shoot on location

As you can see in the image I’m using an iPad on location.
I’ve been using MacBooks for years but the disadvantage of a MacBookPro is that they are very fragile on location, they can easily fall, attract dust like crazy, and have loads of openings to collect dirt. Plus they are very expensive to replace or repair.

The iPad on the other hand can be securely fastened to just one stand with the awesome Ulanzi holder (we got so many questions about it that we added it to our webshop).
The nice thing about the iPad is that it will run all day on one charge and the light output is really nice for outside work, as long as there is no direct sunlight hitting the screen of course.

During this workshop I shot wireless to the iPad but in 99% of the cases I’m using an IQwire USBc-USBc 15meter tether cable to shoot to the iPad using CasCable. I’ve been using this combination for a while now and it never disappointed me. If something goes wrong the advantage of the iPad is that you just close an app and start it again and it all works fine again. But to be complete I’ve experienced a super smooth workflow so far with little to no problems. This is also the main reason you see me using the iPad more and more during shows. Especially with Adobe releasing great updates to their Lightroom and Photoshop apps which makes the iPad a real workstation nowadays.

Especially on location, you want gear you carry around easily and don’t have to be afraid that something falls during the hike to the next location.


The results

Ok let’s take a look at the results from the third set during this workshop (next time set 2)

Model/Styling: Nadine
Sunglasses: Sparks
www.fotografie-workshops.nl for the Dutch workshops
www.frankdoorhof.com/shop for my gear

Outside Fashion Shoot Gear

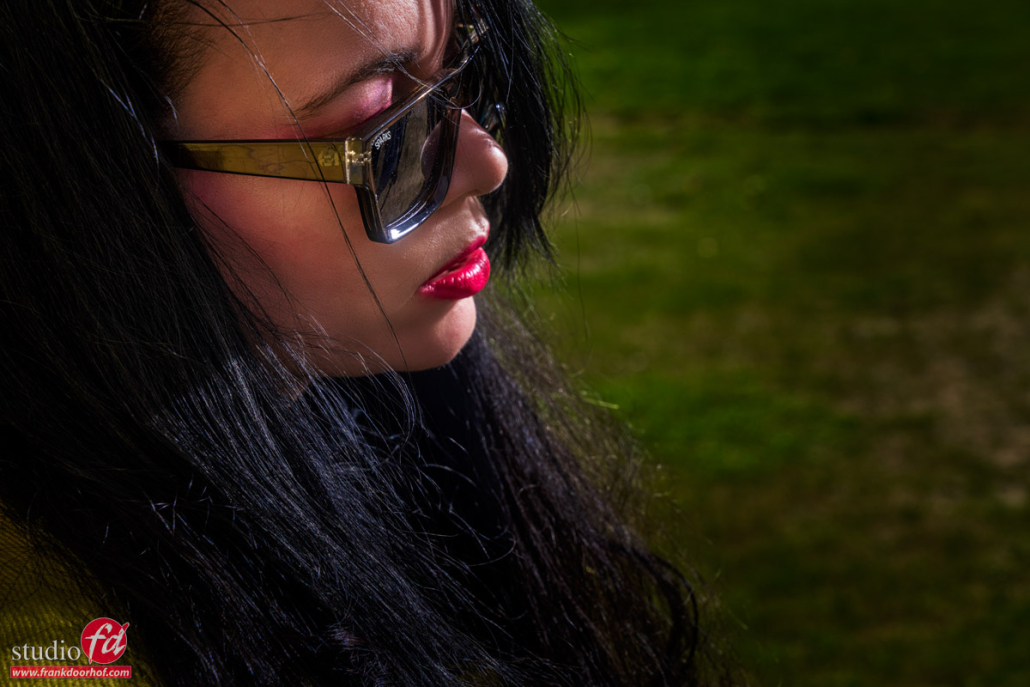
Just a bit more light on the model’s face with the reflector

Outside Fashion Shoot Gear


Behind the scenes during the workshop in Oss with Geekoto small flash

In todays episode of the vlog we take you behind the scenes during our workshop in Oss.
This is the second and final part of the vlog about the workshop weekend that started in Pelt Belgium.

During the workshops the theme was “working with small strobes to create great images”, so we used our Geekoto strobes and accessories from Rogue and Nanlite to show you don’t need to break the bank, and can carry a complete studio in your bag to get great images.

With the Geekoto’s I’m able to bring my camera, lightmeter, 3 strobes with grips, 2 Rogue magnetic systems, Flashbender and Rogue Umbrella, iPad etc all in one backpack or rolling case. That’s very nice if you love working on location but don’t want to shoot different images than in the studio. And with 200-250 and 400W versions supporting ETTL and HSS you will be able to work under almost every situation. If it’s too dark, or if you want to work in the studio, there also is the option of using the build in modelling light.

For us the Geekoto is the perfect hybrid between a speedlight and studio strobe.


In case you missed it…
Here is part I

The amazing Rogue snoot

Rogue amazing snoot for creative photographers (and all others)


It’s no secret that Rogue creates some of the most creative light-shaping tools on the market.
Last year they released their hugely successful magnetic system for speedlights and round flashes (like Godox, Geekoto, Profoto, Westcott, etc) containing the omnidirectional dome, grids, and gel holders, including color and correction gels. This is already a very complete setup, but recently they added an amazing snoot to the system, and I mean amazing 😀


the complete Rogue magnetic kit including Snoot

As you all know I love to play with light. And I love products that don’t lock me into one or two uses but also can be used creatively. I always called it “gear that invites the creator to be used in ways it might not directly be designed for”. Think about the FlashBenders which started out as a high-end bounce card but quickly grew into a complete lighting system including accessories for a gridded strip light, a softbox, and a snoot. You can even get different accessories to combine with the FlashBender, but even without any modifiers, it’s already incredibly flexible as a background light because you can literally bend the light.

the Rogue FlashBender v3 XL with grid on a speedlight

But let’s focus on the snoot

The snoot is fully collapsable so it doesn’t really take up any space in your bag, and Rogue could of course just give you a snoot that….well is collapsable… but why stop there, right?

The snoot fits round flashes but with an adapter also your rectangle speedlights

The snoot fits round flashes but with an adapter also your rectangle speedlights

So they created a snoot that has 4 different settings, from relatively wide to a very focused beam of light, but wait… there is more about this amazing Rogue snoot. When we look at the snoot it’s a round modifier, so meaning when you place it on a round strobe it will create the familiar round light beam we all love and mimics the theater spots to really make your subject jump out or just add a touch of light on the face/eyes or whatever you want to jump out, the snoot is a very cool light shaper.

So I already told you the snoot can create 4 different beams of light, but think about this.
If you place it on a speedlight you need to use a gel holder with a diffusion gel, a simple white gel that creates the round effect you also get with round strobes…. but…. what if… indeed you don’t use the gel holder?

Indeed you get the form of your speedlight, which is rectangular, and this is what I absolutely love to use with the snoot, I’ve written about it before but we are a bit further in time and I just keep finding amazing things to do with the snoot.

Some examples

First of all, you can use the rectangular look on a portrait, or just to make your model’s eyes jump out a bit more (been there done that and it works). But after doing that a few times I started to think…. “what if we use the strobe not horizontally but vertically”

Because of the rectangular light shape, this is a really powerful tool to really create tight lighting setups.
Here you see two examples where I used a boom stand to get the strobe into a vertical position and use the snoot on the setting I liked to create a sort of vignette around our new model Wendy.

model Wendy in the light of the snoot for the Navy Wall

In this shot, you can see that I’m using our ClickBackdrops Antique Navy wall and shooting from a low angle to create a bit more tension in the shot. If I would have used a striplight with a grid I would have come really close to this but the striplight has to be really close to the model. So close it’s almost impossible to shoot it like this. And with a normal round strobe… well you just can’t create this effect easily, unless you block off the light with flags, which (let’s be honest) on location (and even in the studio) is a lot of work to get right and not a setup you get perfect 1,2,3.

By simply angling the strobe on the stand you can create this effect really easily. After that, it’s a matter of setting the snoot to the position where you get the right coverage and fine-tuning it by changing the distance. Easy peasy 😀

Adding lens flares

Now of course we also love lens flares, but getting them so close to the background is often not easy. Especially when you want to also open up the shadows with some color (and who doesn’t :D). So in the next shot, I used a second strobe fitted with the dome from the magnetic system and placed it just in front of the camera lens, by changing the distance to the lens I can have full control over the amount of lens flare I get, while not influencing the shadows I open up. This is an insanely flexible setup that I use more and more and is actually very hard to do with studio strobes but a breeze with the dome.

I moved the snoot slightly to the right in this shot to get a nice shadow that is also opened up with the blue from the dome. Normally I’m not a fan of eye-height lighting but in this case, I absolutely loved the outcome so I just left the snoot in a slightly lower position than I would normally do.

But that’s just the start….

I love the old-fashioned photos from the ’70-’90s and the classics like Harcourt, George Hurrell, etc.
Photos where they really knew how to create a mood in the images but also where you could find unique and intriguing patterns on the background. One of the solutions I use a lot (and love) is the Westcott Lindsay Adler projector where you can use gobos or even the built-in blades to create sharp (or soft) patterns on the background, but let’s be honest… it’s not a cheap solution (although from what you get it’s one of the most interesting on the market in my opinion).

Another solution is of course to use plants, ladders, etc. to cast shadows on the background, a much cheaper solution but also a bit harder to get something you really like. So I started to think… with all the different ways you can use the snoot, what if I would use it under an extreme angle on the background, add a gel, and play a bit with the angles of the snoot itself. And the results actually surprised me a lot.

This is just the first test I did with this. I’ll create a video about this in the coming weeks, but it’s really super easy to do. Just play with the angle itself, but you can also play with the snoot itself, creativity is your only limitation :D. Thank you Rogue for this amazing snoot.

the Rogue amazing snoot can make wonderful patterns on the background

I took this picture with the snoot folded in a weird way. Because the snoot is so flexible, it’s not a problem

another image with the amazing Roug snoot, folded in a weird form

Conclusion

As you can see you can get some really nice and funky patterns on the background with the amazing Rogue snoot,  and it really makes the shot a lot more interesting.

Can’t wait to start using this on more complex lighting setups and backgrounds. But I couldn’t wait to share this already with you guys. I just love it when light shapers really wake up the creativity in a photographer :D.

More info about RogueFlash on the following sites :
www.rogueflash.com
www.rogueflash.nl

If you have any questions about the amazing Rogue snoot or want to know what you need for your strobes just drop us an email and we always try to respond the same day.


Disclaimer:
As you probably know I’ve been working with Rogue/Expoimaging for many years and also had input on the Frank Doorhof FlashBender products In April 2022 we made the next step, and after being an ambassador for over 10 years, we became the distributor for Rogue in the Benelux. 
First of all… I’m not for sale 😀
So I would never promote any product I’m not 100% convinced about or use myself, so all the reviews and enthusiasm I show for these products are 100% honest. I’m fully aware that building trust takes years and can be broken down in seconds so we value that a lot.

The new Rogue Flash Snoot will blow you away…

You might think “why so enthusiastic about the Rogue Flash Snoot, Frank?”
Let me explain.

I love using my Hensel strobes in the studio or on location. But sometimes there are situations where it’s not feasible to bring larger strobes, but luckily there is the speedlight. Or the new (very popular) round strobes. When using speedlights I also want modifiers that are lightweight and don’t take up a lot of space in my bag (preferably it should fit my back pocket). Check out the video about the Rogue Flash Snoot below.


In 2022 Rogue released their brand new magnetic system.

When I first looked at the system it contained an omnidirectional dome, a gel holder, and grids. It was already a very flexible set, but in the video below, I show you their latest addition to the magnetic system… the Rogue Flash Snoot.

A snoot makes it possible to really pinpoint your model. Especially with speedlights that are placed further away from a subject a snoot is essential and makes a huge difference. But Rogue didn’t just release a snoot, they actually made it possible to use the snoot in 4 different ways. And when you’re using speedlights even 8 different ways, which makes this snoot incredibly flexible.

You might wonder why you need 4 settings in the Rogue Flash Snoot.

The reason is pretty simple. When we work on location it’s not always possible to place the lights exactly where we want. With the zoom function on your strobe, you can focus the light slightly but in most cases, you need a lot more focus. And that’s where the snoot comes in. The reason you can use it in 4 different ways is that with each setting you create a slightly smaller circle, meaning you can focus the light very flexibly. In most situations, this makes the Rogue snoot a really valuable asset in your kit which makes it possible to really fine-tune your light if you can’t move the light as flexibly as you would like. Combine the snoot with a gel and you can use it for a really nice accent light on the background or a very small part of your subject.

You can order the snoot on www.frankdoorhof.com/shop or in your favorite store that sells Rogue products.

Here are some other images I took with the Rogue Flash Snoot

and here.