You already saw the video, the results with the Huawei P20 Pro and now….. drumroll…. it’s time for…. well the official photos.
We used a mix of lighting setups ranging from mixing natural light with one strobe for a minimal fill in, to 4 strobes to light a whole train, but we also discussed using gels to create a surreal image, and finally we even dragged out the Californian Sunbounce for some real sun lit shots (I love that sunbounce, although the models disagree, it’s REALLY bright).
During the workshops I always try to explain the theory behind the techniques because I strongly believe that photography is not just about lighting or a model, it’s about understanding light, and when you got that down you can start the real creative process.
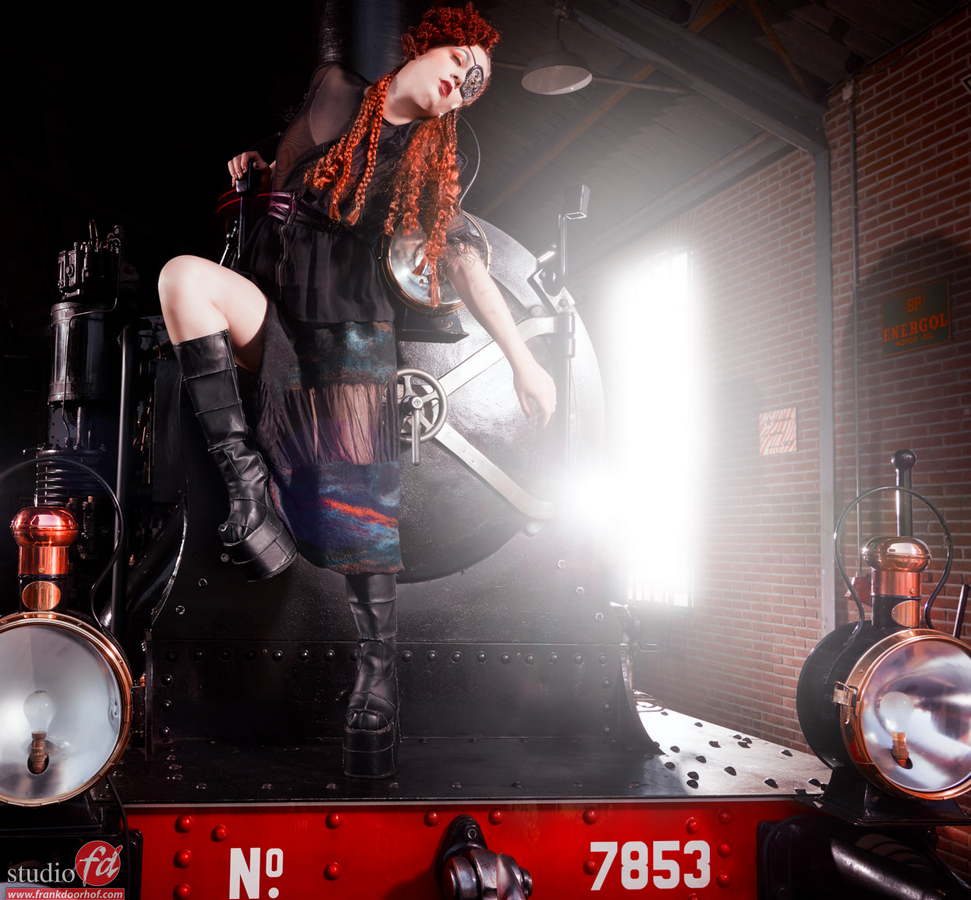
The first set was inside and we used 4 strobes to light the set.
But as always…. also take some shots with 1-2-3 so you always have choices later.


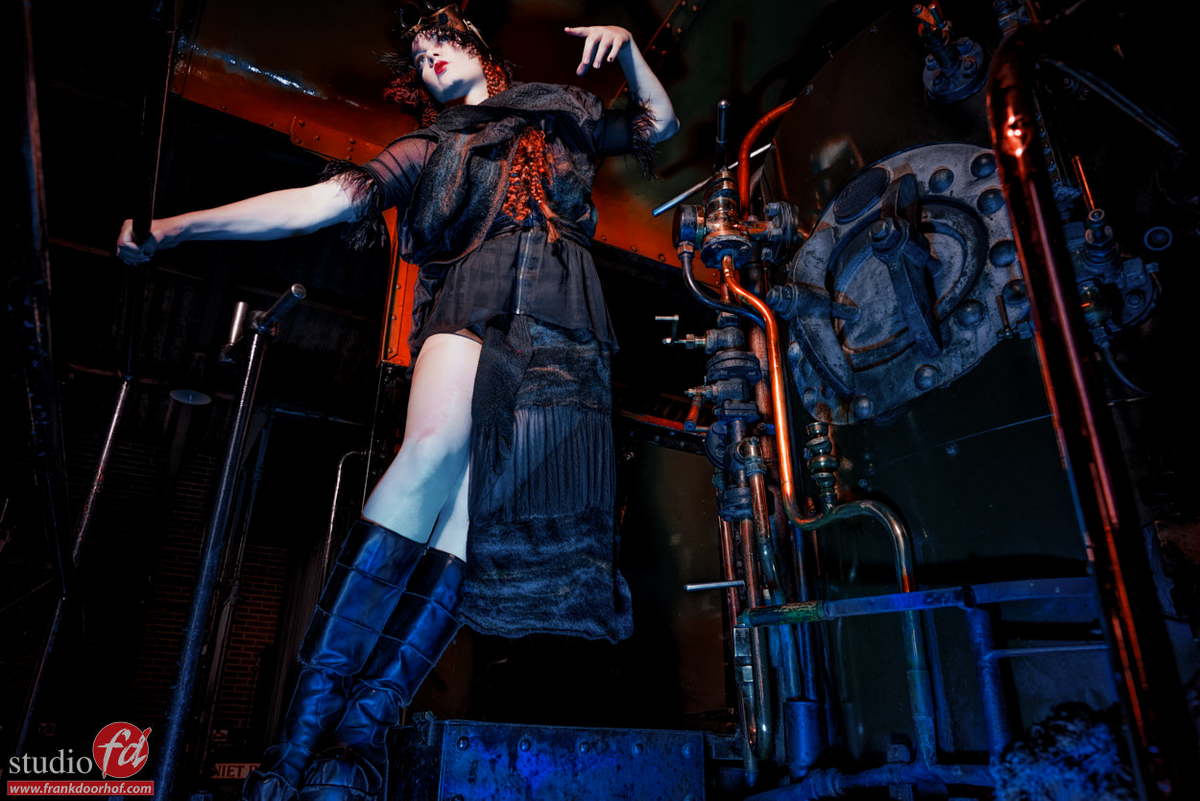
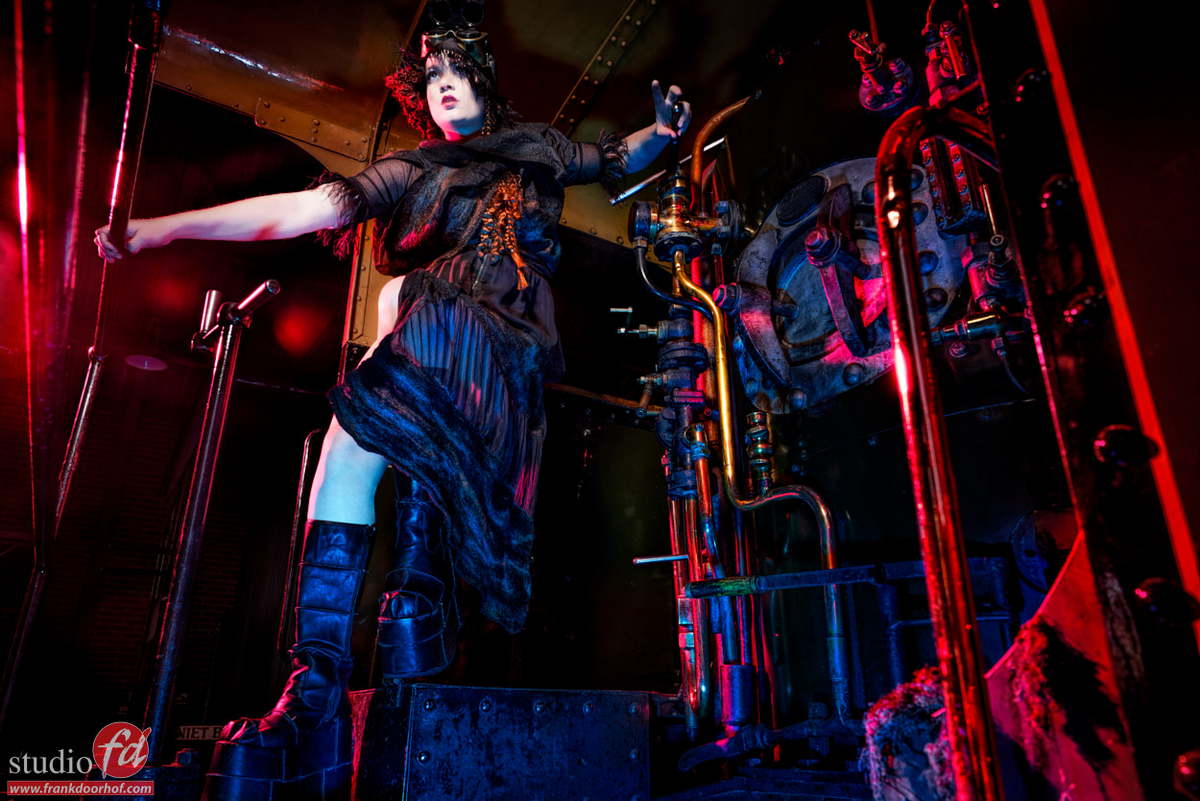
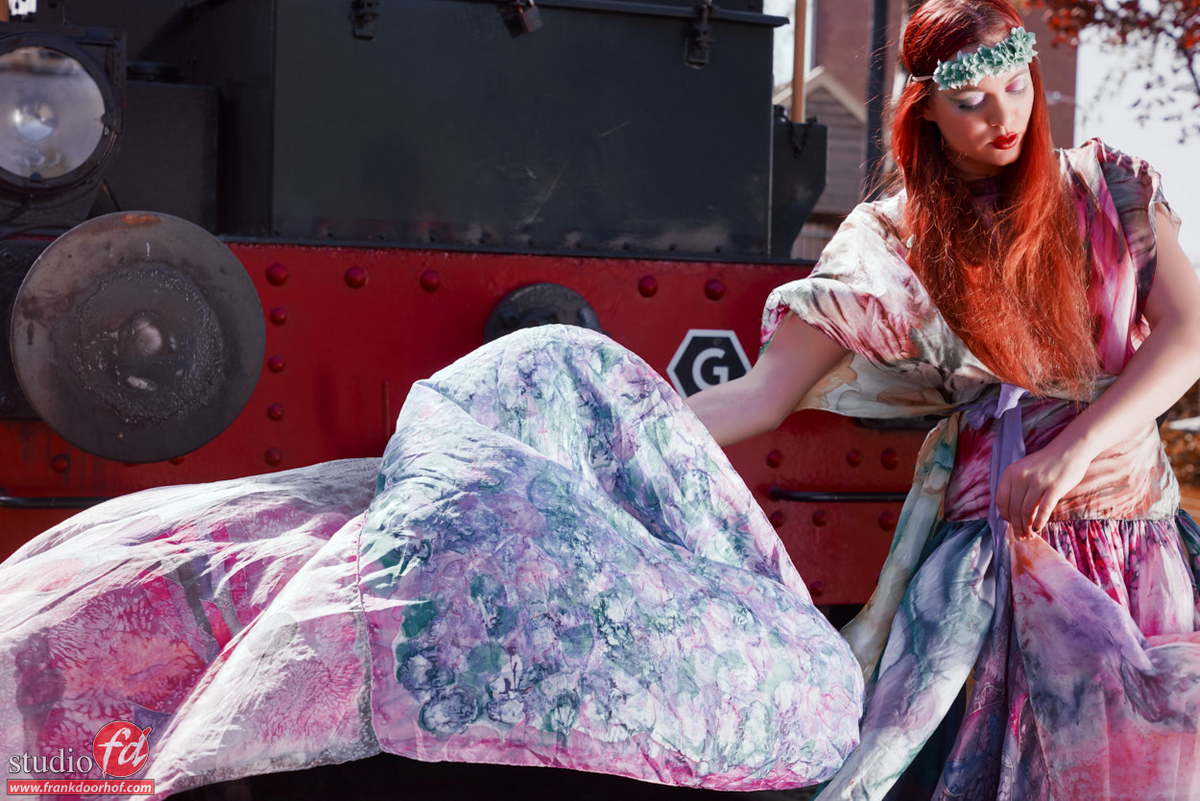
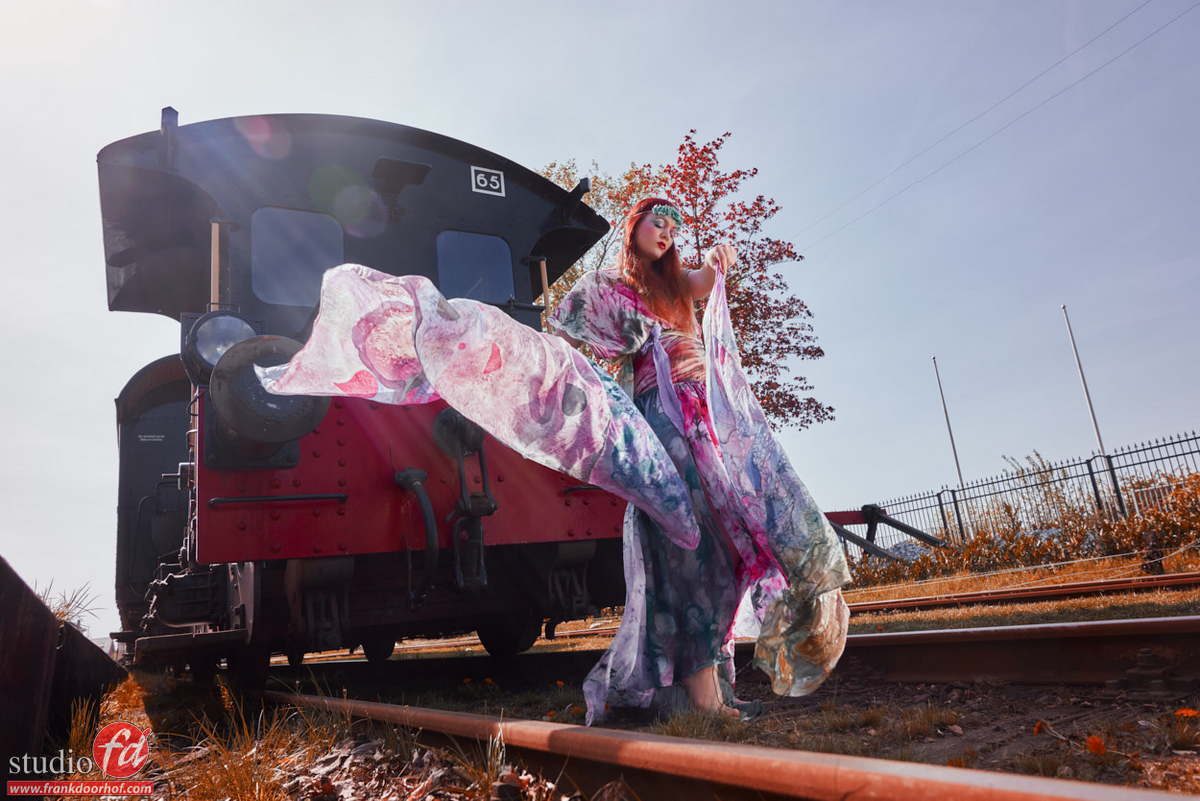
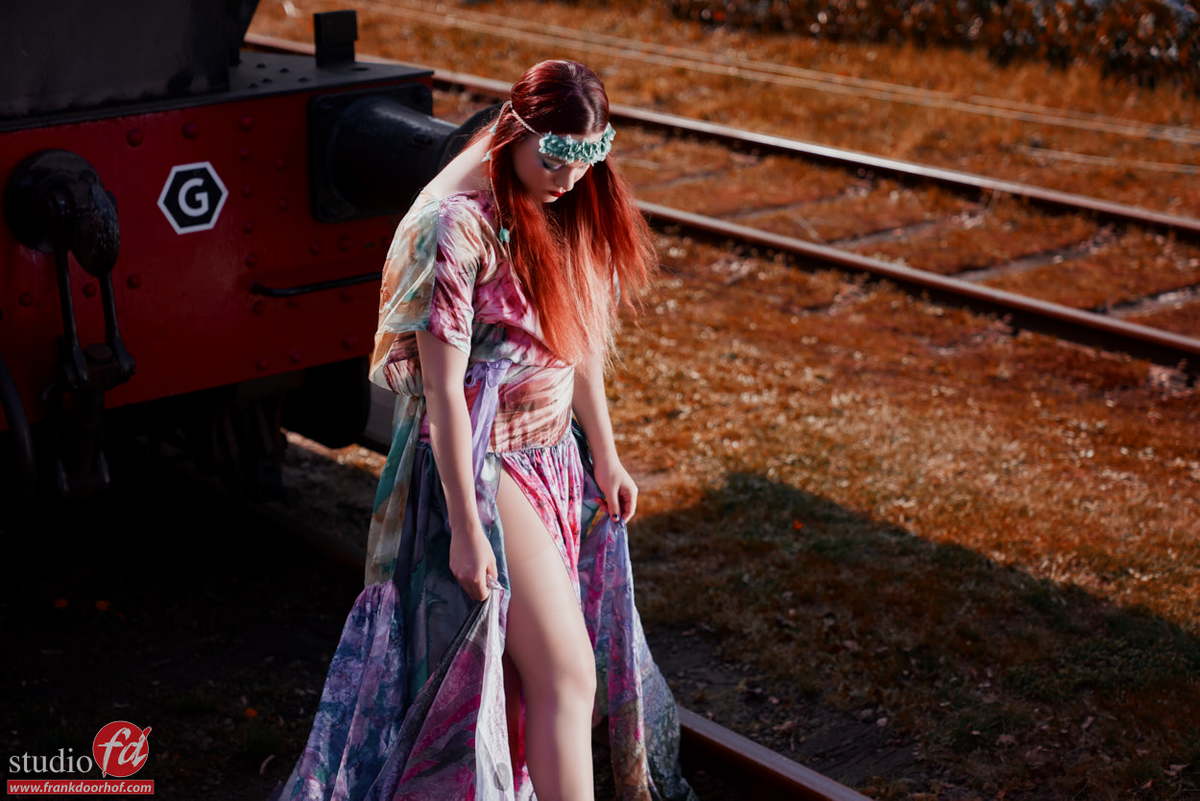
Next set was behind this train and we used one light on the model, one underneath with a blue gel and one with a red gel.
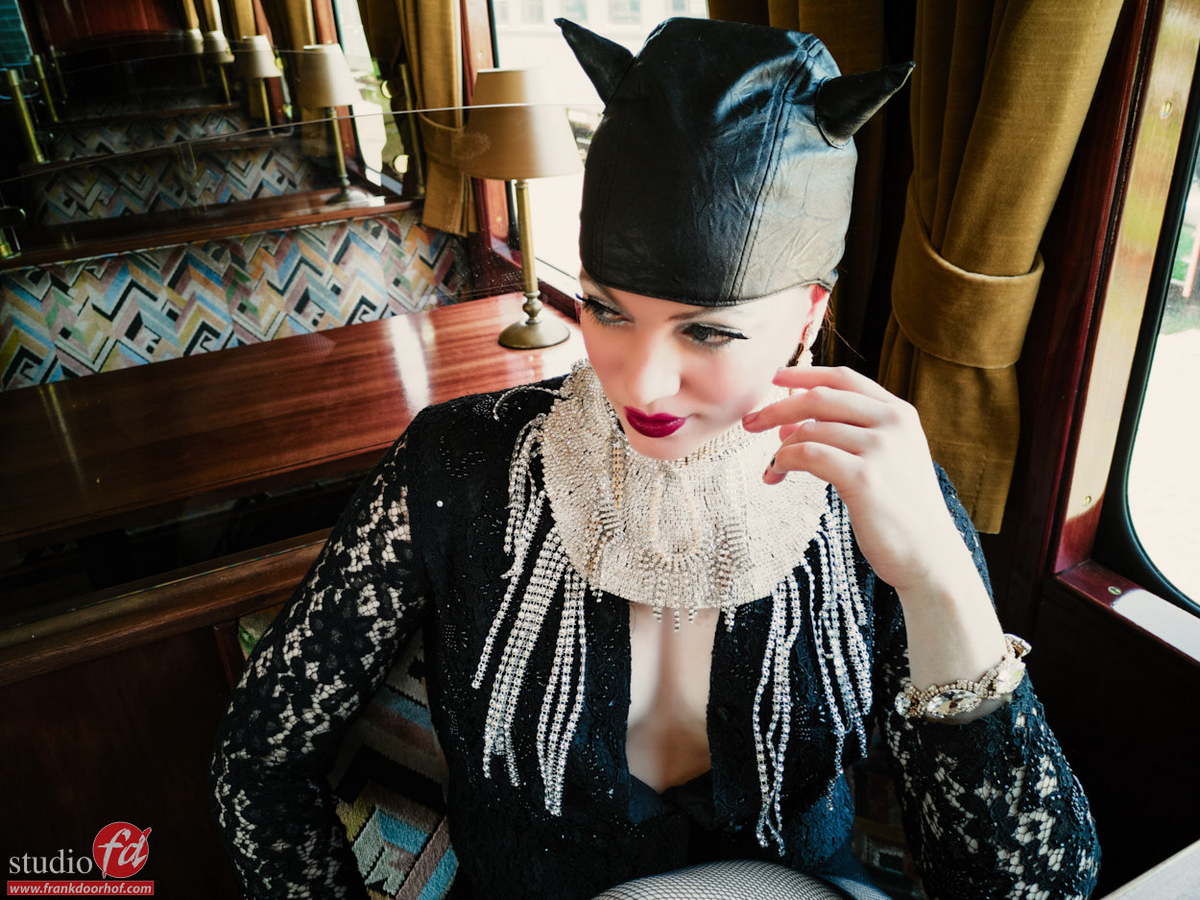
After this it was time for lunch and we continued after lunch (how fitting) in the restaurant.
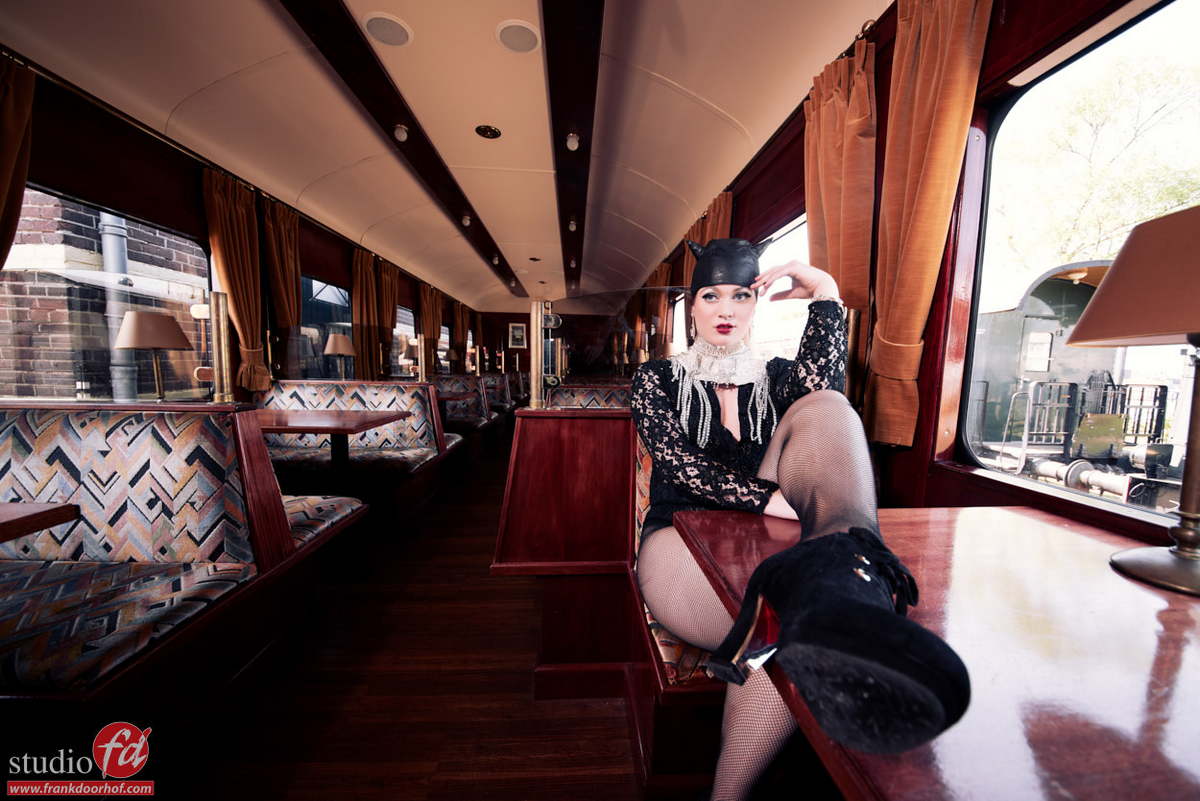
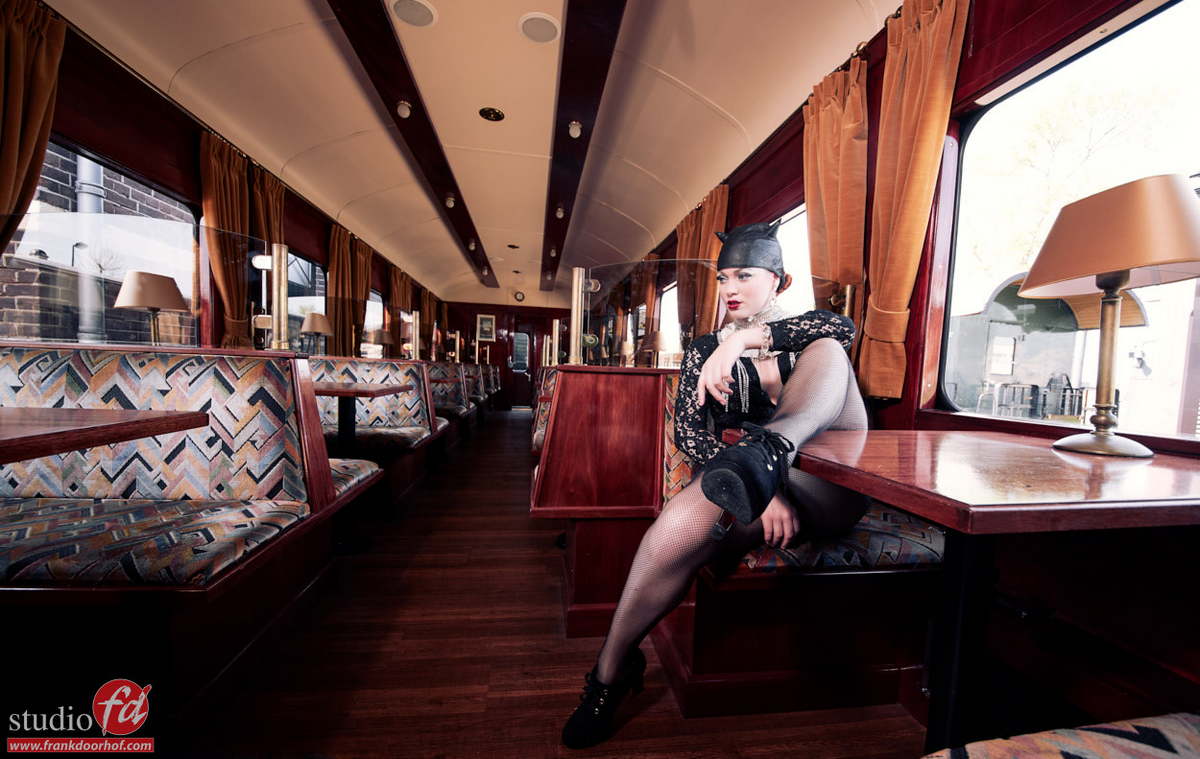
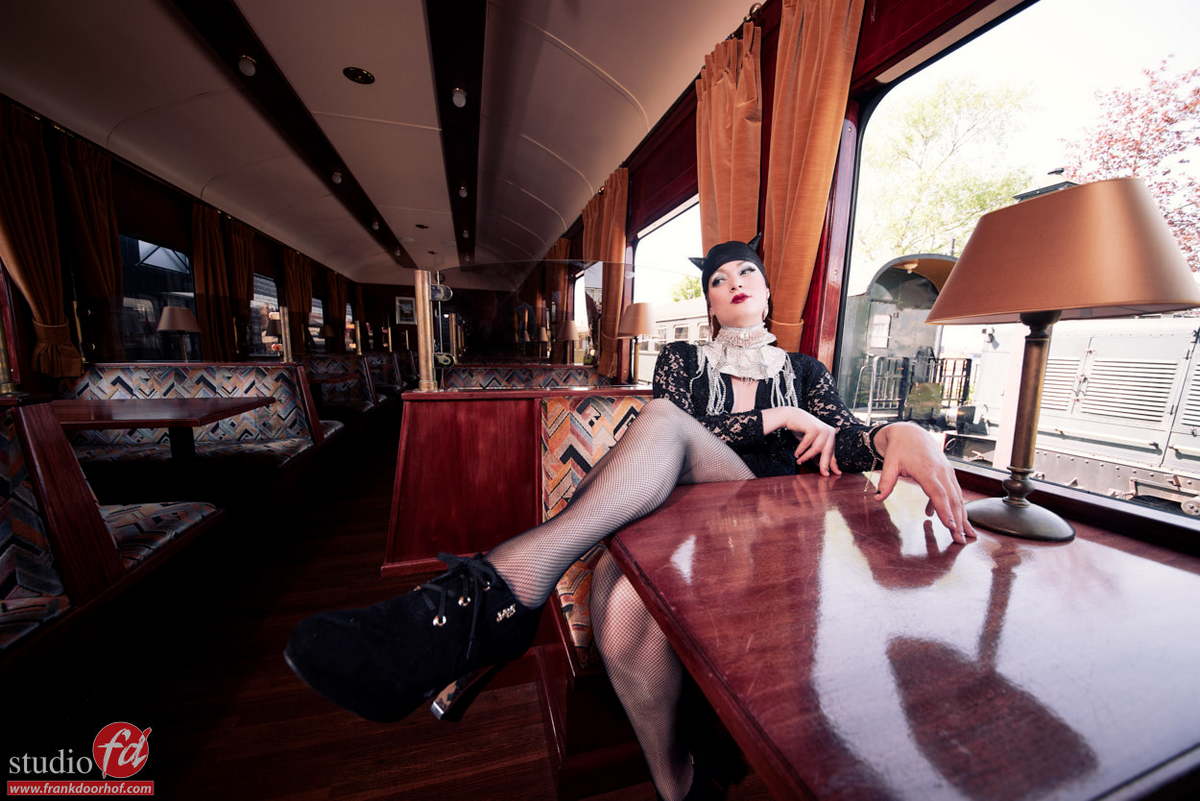
Here is was all about using the available light and how to add a strobe to just give a small amount of extra light, but without being noticed in the final shot… unless you would turn it off. So a lot of explanation about metering was involved, it’s easy if you get it, but often people overthink this process.
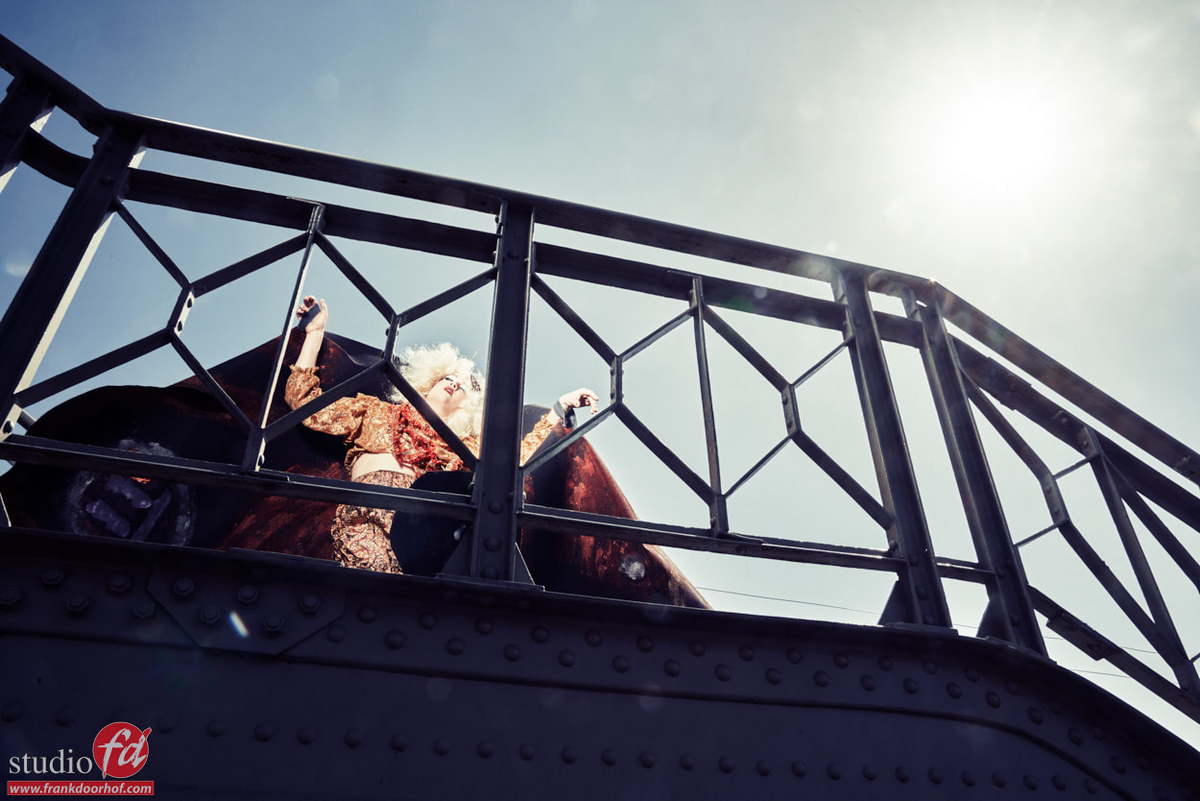
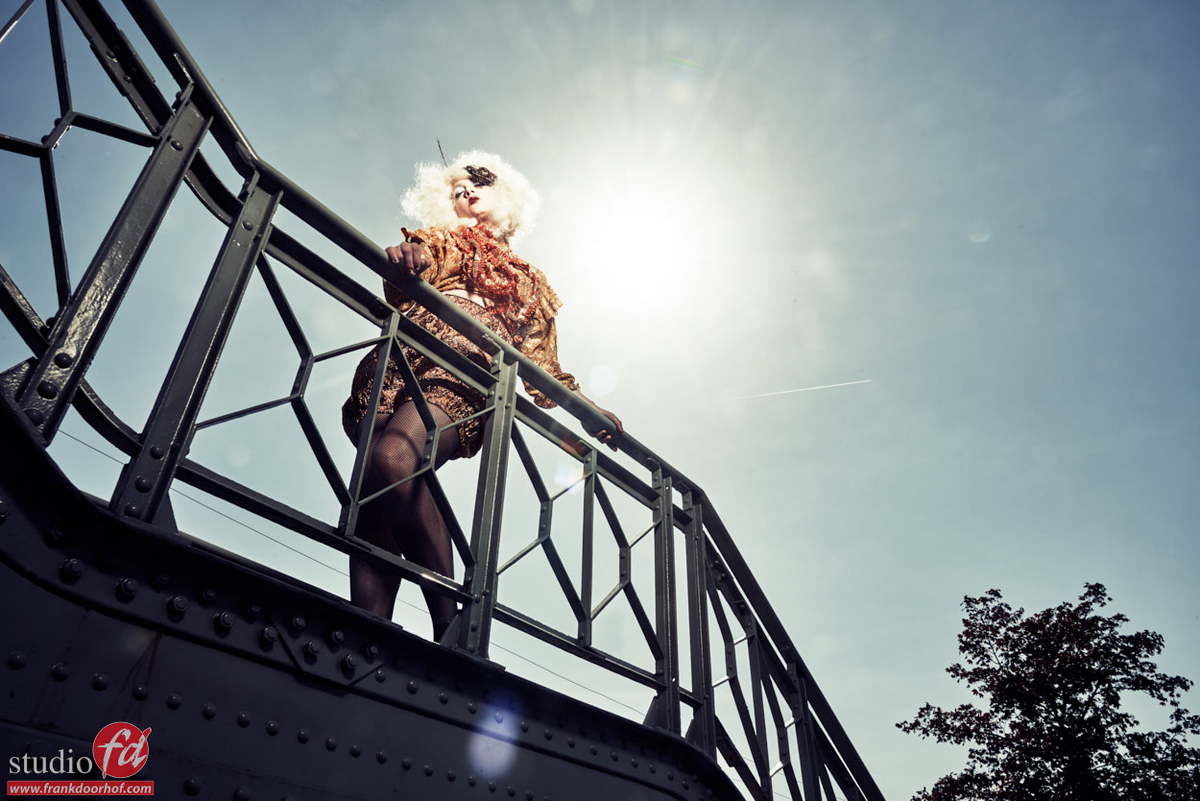

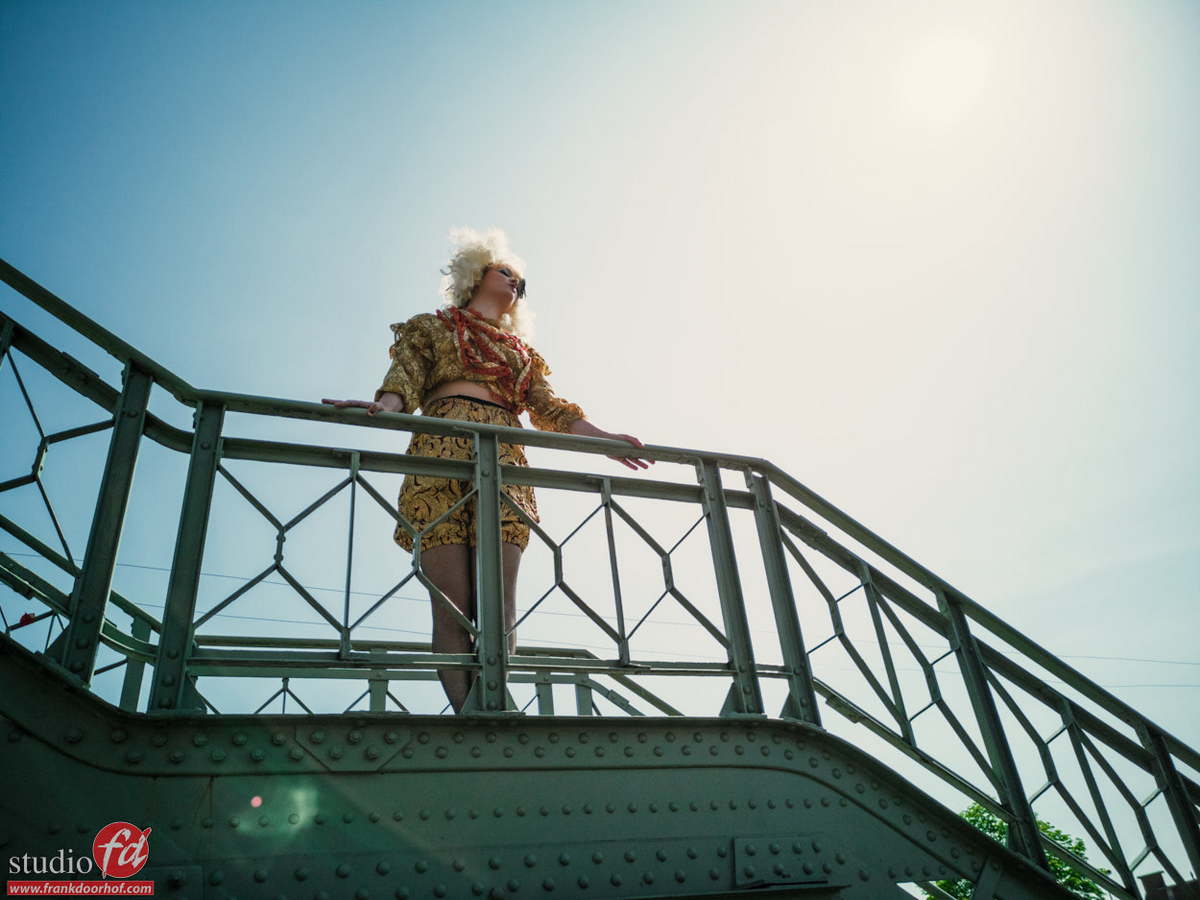
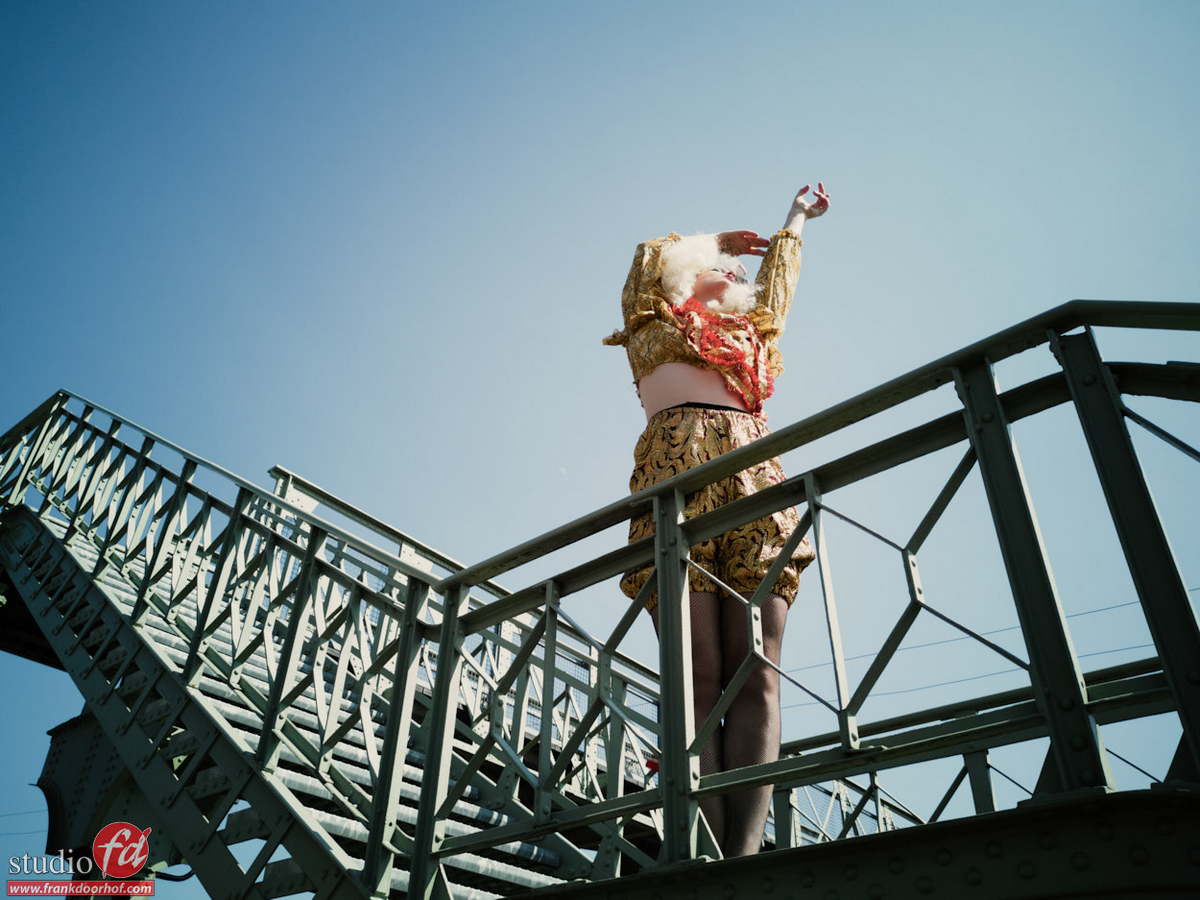
After that shot it was the opposite, using strobes on full power to fight the sun, and it was very suny. We ended up with F22 ISO50 (the max for most cameras without the use of ND filters), I always love this kind of shots. And playing with the bridge was of course a challenge on it’s own.
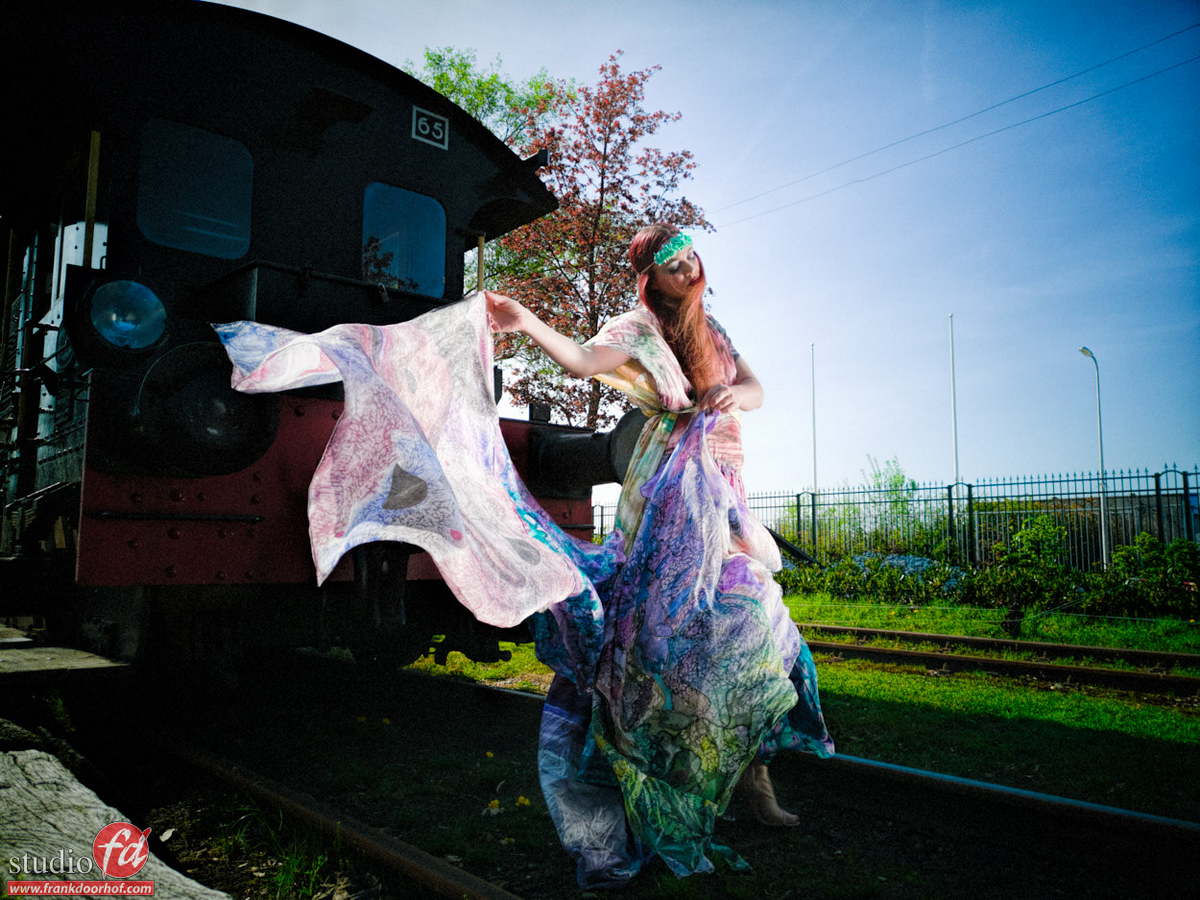
And finally… because it was such nice weather we grabbed the Californian Sunbounce and did some natural light shots (well ok, bounced light). Somehow I really love this set.


And no it was not that color in real life… I did change it with a touch of IR in Alien Skin Exposure 3.
Now if you think “Wow I would really love to visit one of those workshops” I have really good news.
May 4/5 we have an Ultimate weekend in our studio in Emmeloord which is a 2 day workshop and were we not only do studio work but also go out and shoot some cool shots in nice locations in our area. For more info on that workshop visit https://frankdoorhof.com/web/tours/ultimateweekend/
Now if the Netherlands is too far away…. maybe you are available on June 10th in New Jersey where we will be for a full day workshop, also including outside and inside locations (little bit of an urbex location), for more info visit https://frankdoorhof.com/web/ny-5/
And finally we also will be visiting the “open air museum” in Arnhem on July 13th in the Netherlands. For more info visit https://frankdoorhof.com/web/13-juli-openlucht-museum-arnhem/
Like this:
Like Loading...
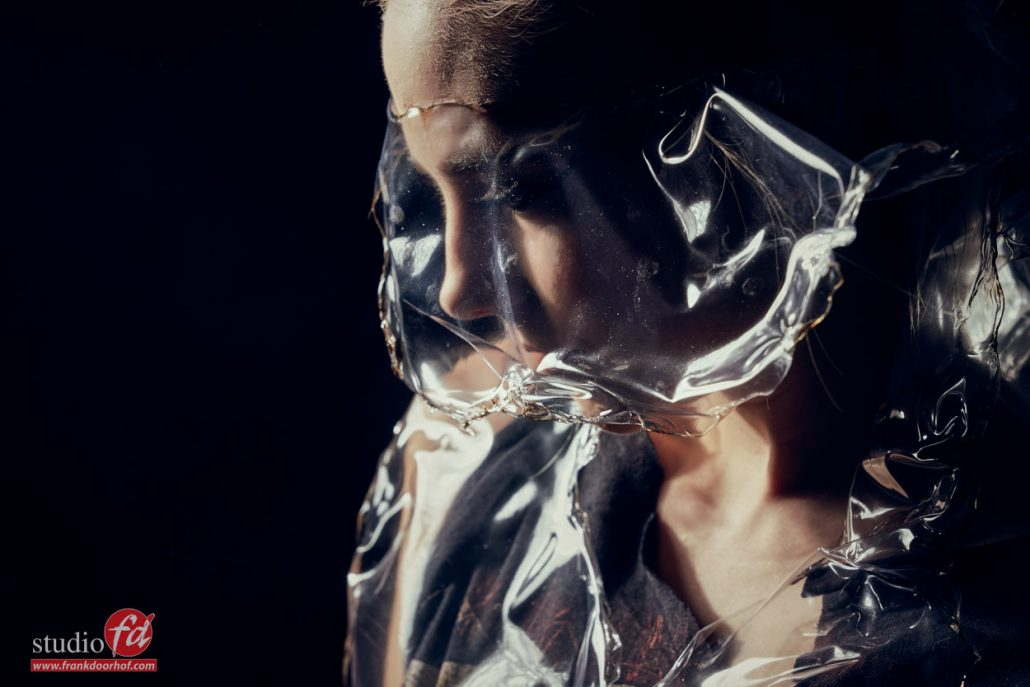
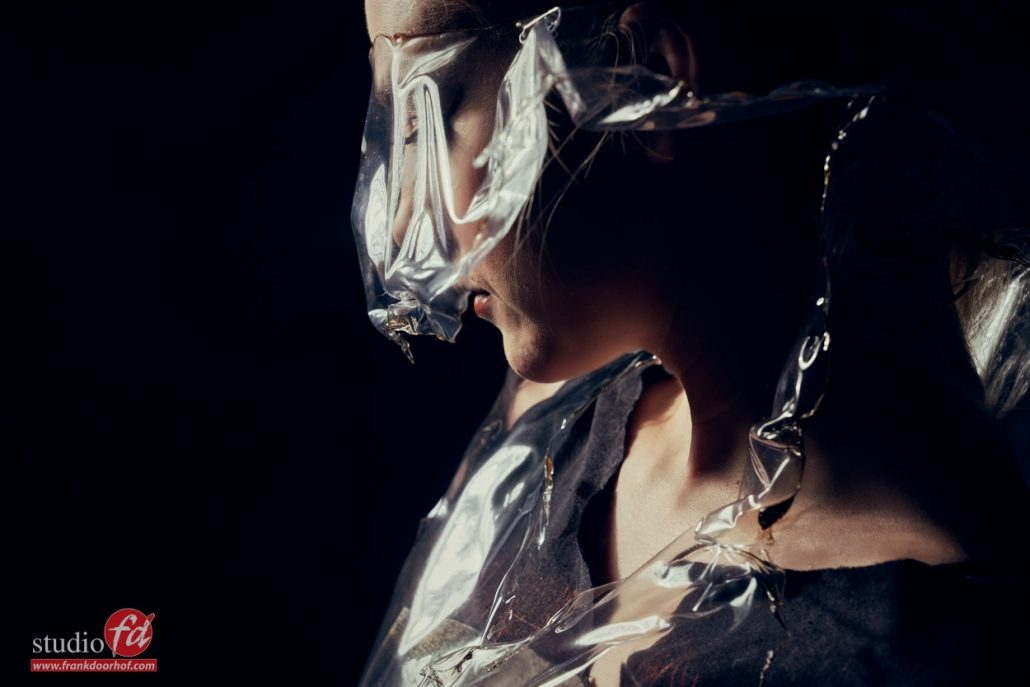
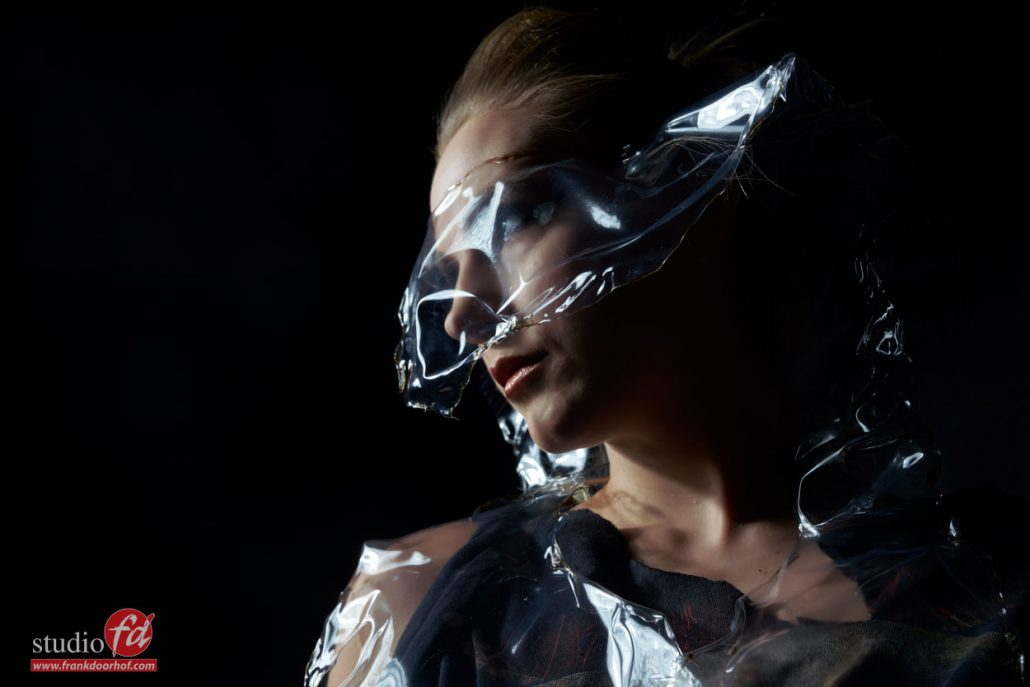
 Believe it or not but this was shot during a tradeshow demo at professional imaging this year. With Nadine as my stylist you can always expect some cool things. In this case she used plastic that she worked on with a torch to create this crazy effect. To photograph something like this is a delight, it’s really an eye catcher due to the reflection, the shapes etc. And it’s relatively easy to do as you could have seen on stage, where Nadine actually did this live.
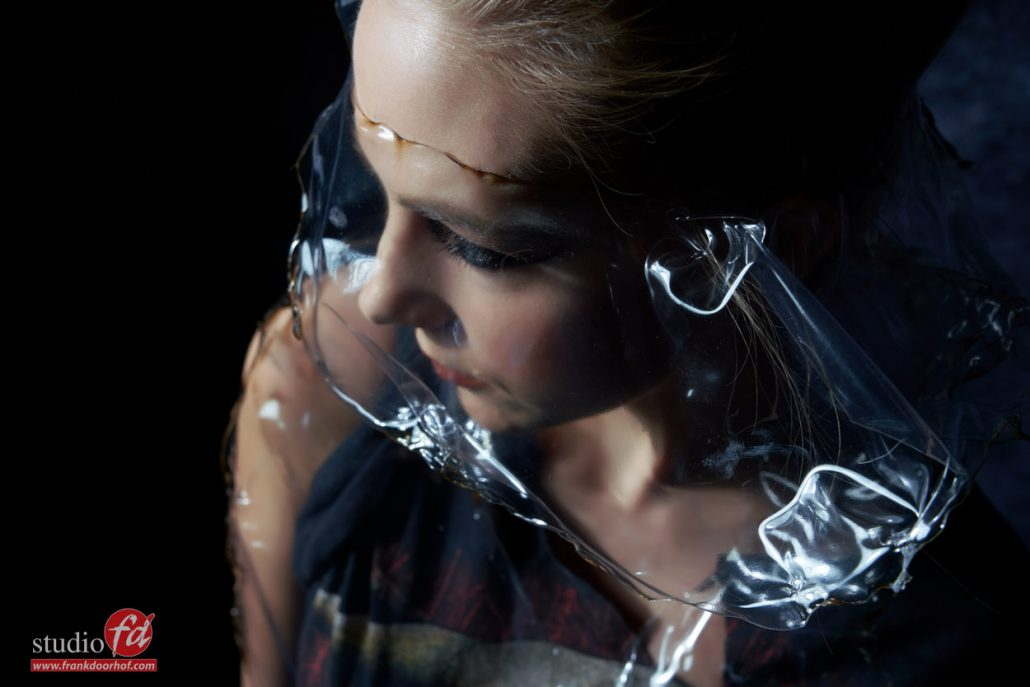


You must be logged in to post a comment.