Tag Archive for: tip

Tip: Directional lighting or character lighting

One of the first things people ask me when they visit our studio is why I use so many soft boxes with grids.
And I understand, in a lot of studios you will find plenty soft boxes but often without grids. Of course it depends greatly on what you do with your light and what your personal style is, that goes without saying.


I always explain it as follows
“Light is the paint you tell your story with, but it also dictates the character of your model/subject”


Now what do I mean with this.
I strongly believe that if you shoot a model in jeans and tanktop you have to be lighting wizard and have a great model to make something that’s really WOW because well… there’s not much going on. Now as soon as you throw in styling and a great location things get interesting and even with a huge softbox images can already look awesome, but you actually look at the styling and background “Only”.


Light can be manipulated and what photographers often don’t realize is that light can actually enhance a character of the model/subject. Think about Peter and the Wolf (Sergei Prokofiev) which in essence is a learning tool for children to learn the different instruments in an orchestra, but it’s so much more. Every instrument has it’s own “voice/character” you immediately hear if something is BAD, big, small, happy, old etc. it’s actually a stunning piece of work when you think about it. Now how do we translate this to lighting?


Very simple.
If you want something to be bright and friendly use large soft light sources.
If you want something eerie, aggressive or full of character use harder light sources.
Now you don’t hear me say you can’t shoot an elf with harsh light… but it doesn’t really make sense if you want something to be nice and free.


Hollywood uses this technique for… well for ever. They even add a lot of toning to this. Think about the Matrix with it’s distinct green and blue tones, or Titanic with it’s beautiful reds, but also Saving Private Ryan with the high shutter speed material and damaged almost BW material… the list goes on an on and on, and still for a lot of photographers light is …. well just light.


Try to image a story with every single shot and adjust your lighting to this.
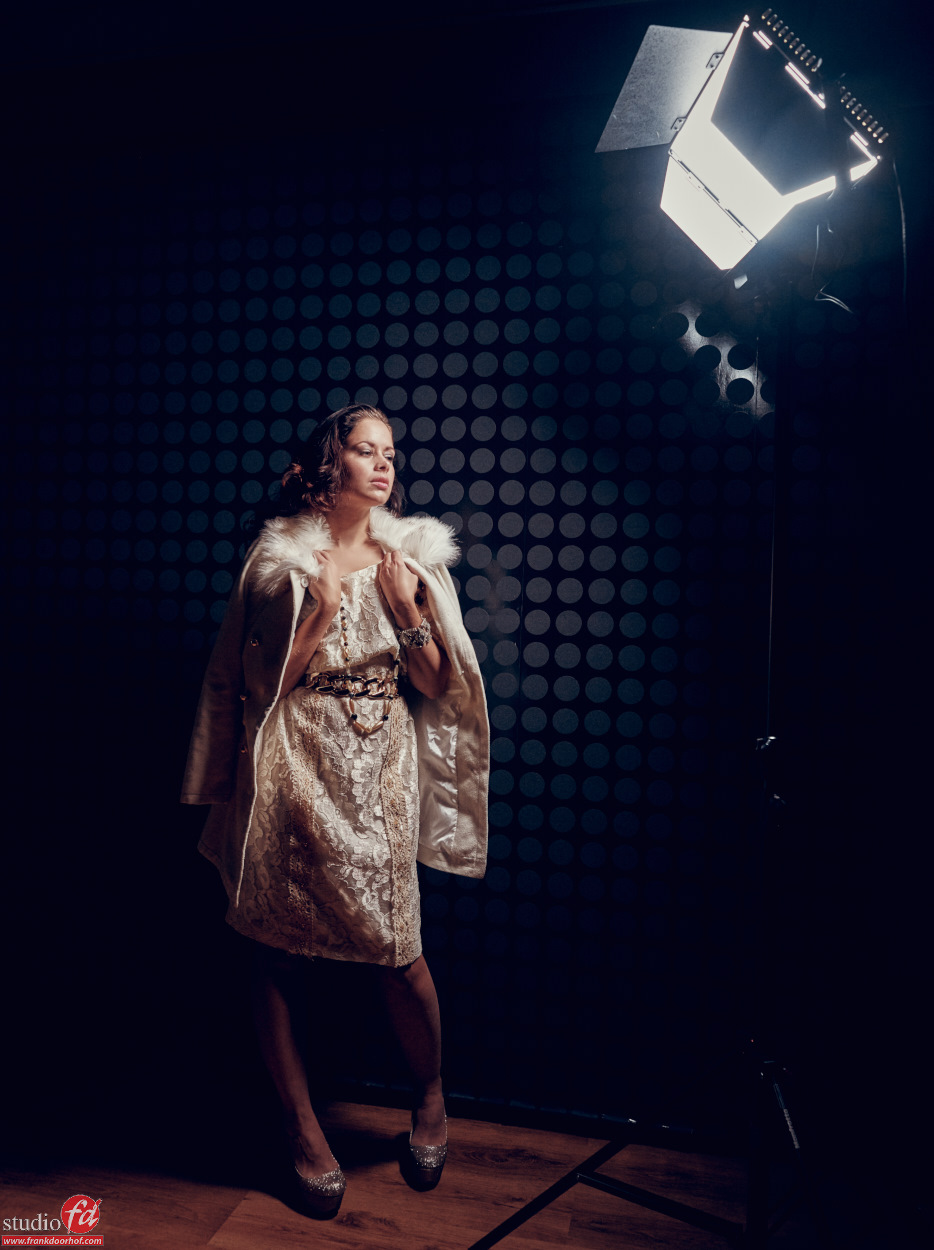
This is one of the reasons I love to be able to really steer my light (hence the grids), it opens up a lot of possibilities. But there are of course a lot more different sources you can use, for example the Westcott Ice Light (but make sure you use the barn doors), or what about led panels (we use LedGo), the possibilities are endless as soon as you start to see light as character.


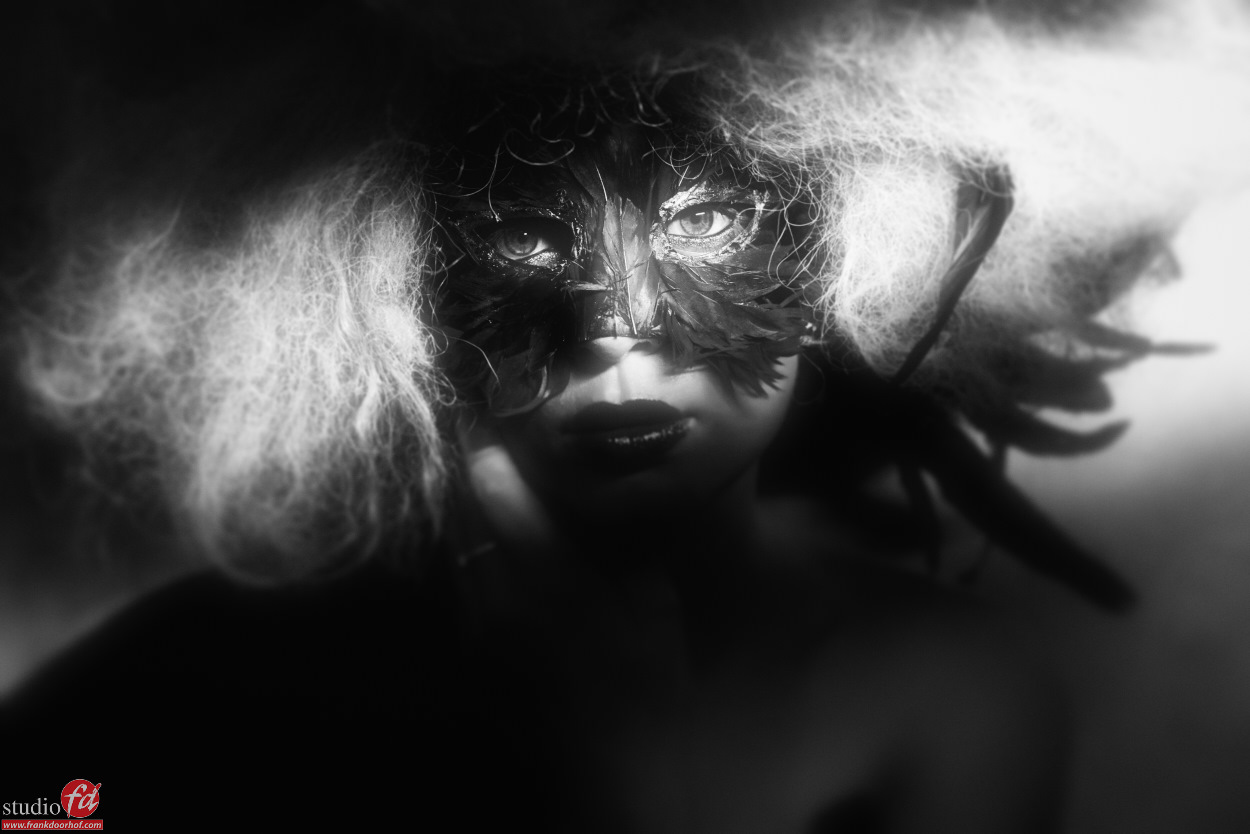
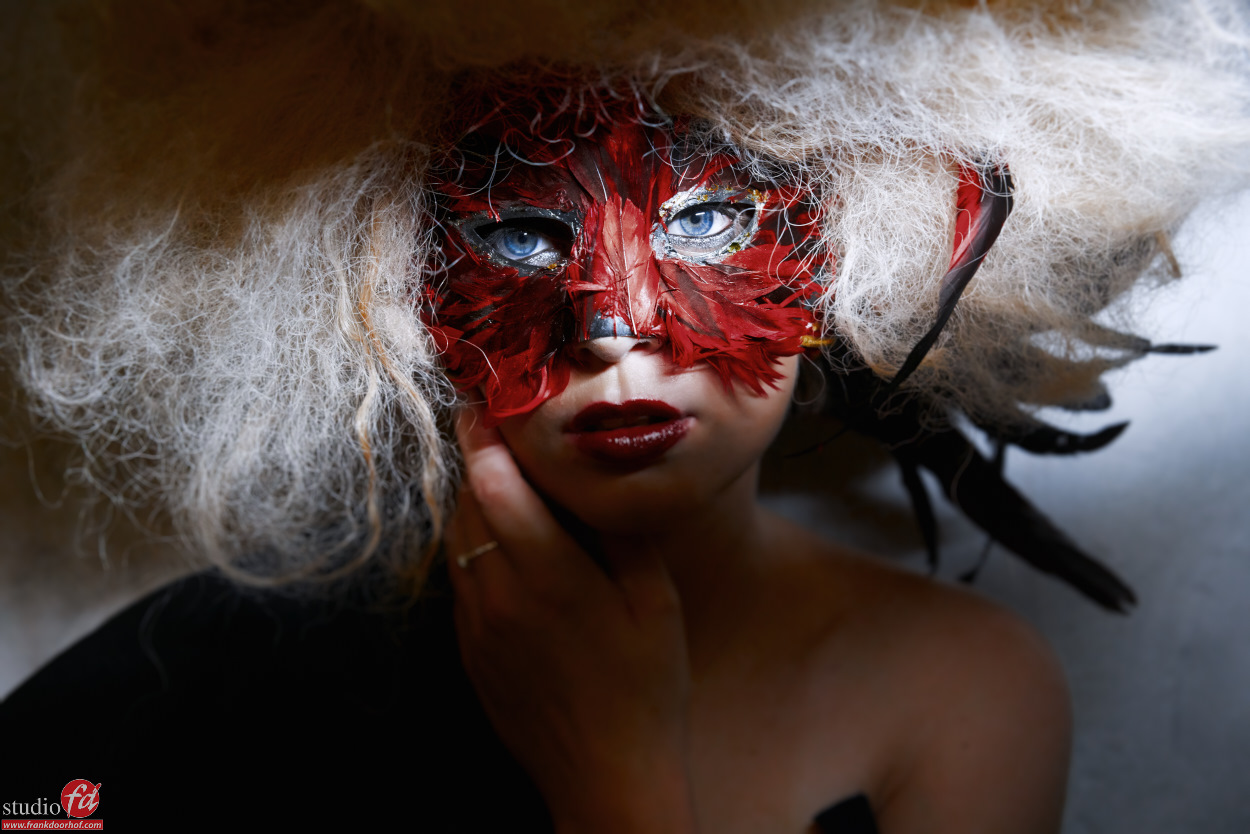
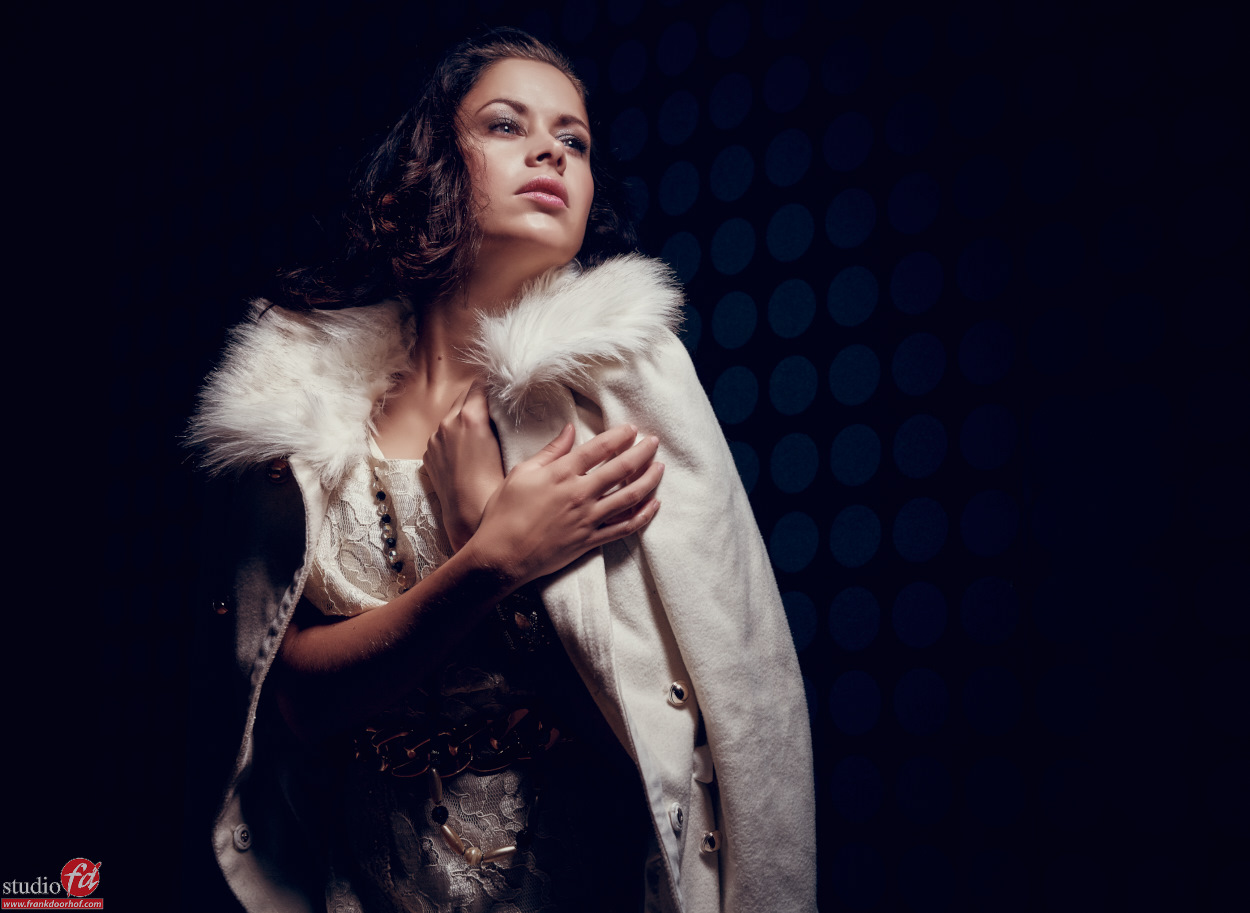
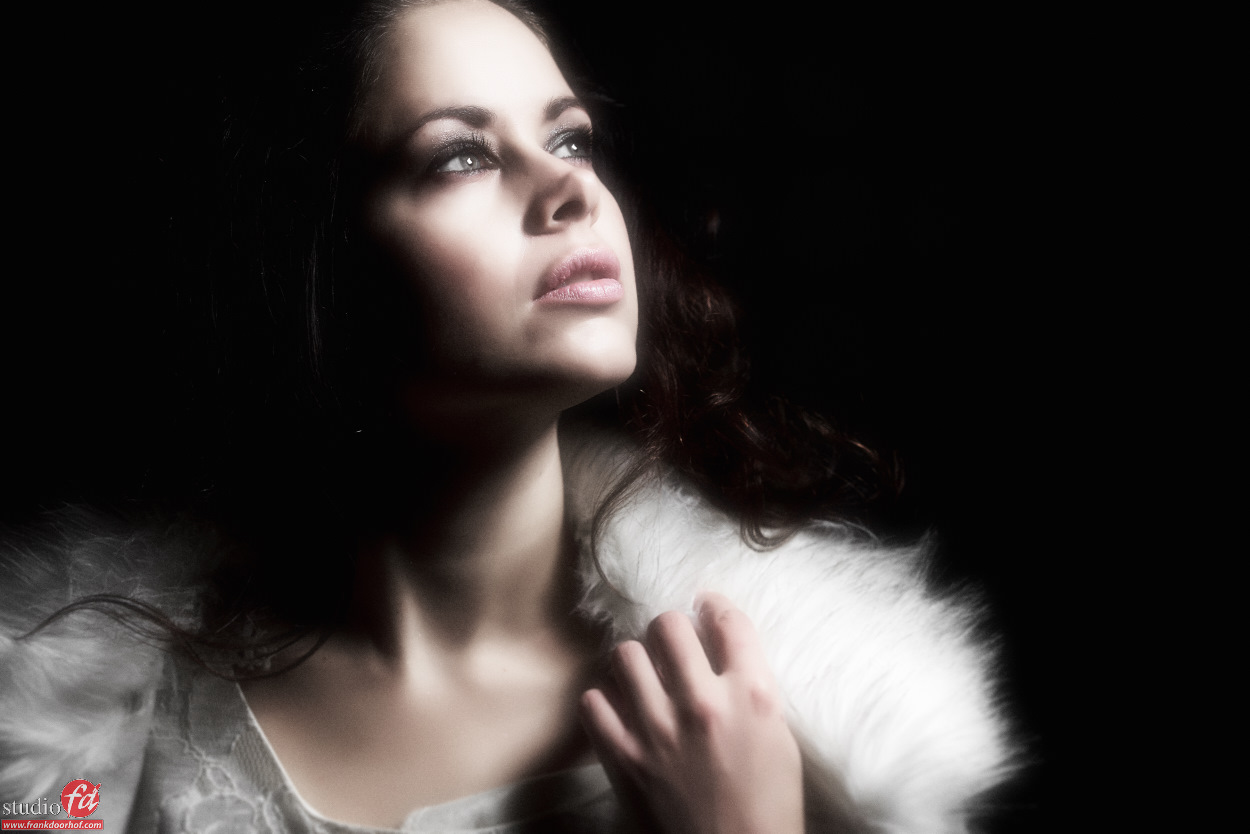
For example here two images from Nadine shot with VERY directional and aimed light.


Nadine Digital classroom September 23 2015 0347 BW

Nadine Digital classroom September 23 2015 0347

So the next time you shop for lighting make sure you are able to add grids later on, we love to work with a company called Honeycombgrids who makes grids for almost any modifier you will probably use, and they are pretty inexpensive (highly recommend them)
But most of all realize that light actually creates character, and shadows are the soul of a shot.
Good luck.


Want to learn more on model photography check out my book Mastering the model shoot and our instructional videos (via this site), or of course check out kelbyone.

tethering without wires

I love Sony cameras, but sometimes I feel a little bit left out in the cold by manufacturers, I even sometimes feel they don’t care or don’t realize that Sony is really very fast becoming a major (if not THE major) player. For example I’ve been bugging CamRanger since day 1 for Sony support, their response is very basic… it won’t work and it will never work because Sony doesn’t support it…. well it’s weird that Capture One for example shows live view (which according to CamRanger is not possible…. don’t get me wrong I LOVE Camranger, heck I would buy one if they would support Sony in a heartbeat.


What do we/I really need?
Something a lot of manufacturers seem to miss.
For me personally I don’t need to see my live view, I don’t need to do settings or anything else fancy, I just want my images to come in, preferable the JPGs in small sizes, show the images and that’s it.


Now where do I want it?
The new iPad pro has me all excited, and yeah I know it’s “just” an iPad but the screen size is very handy for us on location and I strongly believe that (because it’s Apple) Adobe and other app makers will start making apps especially for the iPad pro and to be honest I see myself working on an iPad Pro much more than on my MBP when flying or traveling. So my initial thoughts was to use the Sony Remote control software to shoot tethered to my iPad Pro during workshops (which we now already sometimes do during location workshops with small groups) and that works flawless, however…. we can’t get the files to my MBP, so I was actually looking into that and while searching for solutions I found a company called DSLRdashboard


You might know their software for iPad, iPhone and Android, but you might not know they also have a desktop version, well at least I didn’t, and it works flawlessly just connect the Sony via their smart remote app to the wifi network and start the software, search for Sony and within seconds you’re up and running. And it’s fast, plus we tried it out throughout the whole studio area and we have pretty good coverage everywhere, so I’m very happy with this. Now the only thing Sony needs to fix is that the EVF doesn’t work in smart remote (which it did in the past).


But is that all?
No.
While doing my research online I more and more became convinced that although CamRanger might not support Sony there must be another solution, the CamRanger is in essence a rebranded and customized TP-Link router so what did they do, well very quickly you will find out that there is a firmware flash option that will run a modified firmware on the router and that will actually transmit your files, as long as the camera has a PC-Remote option, which the Sony has. So I thought “why doesn’t it work”… and the more I looked online the more it puzzled me, according to all the programers it would work with any camera that has PC-Remote and according to the app makers it wouldn’t work…. but what doesn’t work. If you read closely they all talk about the fact that Sony doesn’t allow to change settings etc. but I don’t care about that, I just want the files to come in and I couldn’t care less about time-lapse etc.


So I decided to just order the TP-Link somewhere and as soon as it’s in I’m gonna try to make it work to transmit just the JPGs, so keep looking at my blog and social media for this, I could be totally wrong but in my opinion it should be possible to do it, if the Sony smart Remote can make a connection and transfer RAW or JPGs why not via a router, what’s the difference if you only need JPGs…. I’m not a programmer but it doesn’t seem like much to just show images to students right?  we will see 😀


Anyway, long story short.
Here is a video in the digital classroom series on wireless tethering, and I also included a tip to shoot tethered with your iPhone without the need for internet 😀
Make sure to subscribe to my channel and share the link 😀

Feathering the light

One of the most powerful things you can do with light is actually something that is often not used by most photographers.
Every light source has a similar behavior (some more some less), the middle is pretty harsh and bright and the more you go to the edges the softer but also dimmer the light gets. With some light sources this is less obvious and with some it’s very obvious but the following trick works for all.


When we “normally” light a model we are used to aim the light source directly at the model, meaning the model is in the hotspot, however this also means that the light falls off near the model in all directions. In other words the model is in a sort of “bubble” of light. Normally this is not really a problem, but if you place your model next to a wall and you want less light on the wall this is often not so perfect. This is where feathering comes into play.


If you feather your light you actually aim your light away from the model and in essence you light the model with the sides of the light, meaning less power but also in almost all cases a nicer light quality (softer).


In this example you can see the effect with our model Sanne and a LedGo led panel we normally use for video.
The wall is highly reflective and when you light your model in the hotspot the image will not be pretty (to say the least), by feathering you can create some very nice vignetting on the wall, get some nice light on the model and the end result is much more pleasing. Of course you can still walk around the model for less or more contrast as you can see in the examples.


Sanne October 16 2015 0023

the setupSanne October 16 2015 0054

Sanne October 16 2015 0070

Sanne October 16 2015 0084

Sanne October 16 2015 0097


A quick tip about light and the car

You must have at one point heard the expression :
“always carry your camera because it’s so fricking difficult to make a picture when you don’t have it”
And this is 100% true.
Even when we travel I always have my camera close by and I make no joke when I tell you that some of the most interesting shots were actually taken through the windshield of our car, it’s a totally different view than you’re actually used to, and sometimes the cars windshield actually helps in the lighting by adding some “funky” stuff. Now don’t get me wrong, a lot of these images end up in the pile “I love them but nobody is allowed to see them” but sometimes I really like a shot that much that it ends up in my portfolio.


While driving back to the Mandalay in Vegas we had to stop for a traffic light and the sun just hit the hotel (which has a very distinct golden hue) and the women wanting to cross the street. Now for some this might just be a picture/snap shot but I just loved the overal look and golden glow plus the added backlighting. If you don’t like the shot, no problem but remember that there can always be something that’s fricking awesome and you better have your camera handy……because otherwise you miss the shot.


Now how do you set the camera?
When driving I often have it set on auto ISO with a minimum shutter speed of 1/500 this way I know that if the car is moving you can always get something interesting…now do remember I don’t tell you to shoot while driving (blink blink) but it could happen, of course this is stupid and dumb…. but then again if you’re careful enough you could take some cool shots…. but just to make sure that you understand, this is DANGEROUS not only for yourself but most of all for the people around you so when doing this make 100% sure you do it safe, NO picture is worth hurting yourself or others.

Nevada  (484 of 513) August 14 2015