Tag Archive for: model

Some fun model shots with the Huawei P20 pro (review Part III)

Just for fun some shots I took with the Huawei P20 pro during todays workshop at #alabfotostudio
And of course you want my opinion on the phone so far….

Well in all honesty it really blows my mind to see what this phone/camera can do. The OS experience, or let me say the “look and feel” is ok, but I like the Samsung OS just a tad better, mostly because I can place more apps in a folder, it would be possible on the Huawei but somehow they choose to probably “copy” Apple and only add a few, I loved the Note 8 for just letting me use a lot of space on screen when the map was open.

The navigation with the home button if fricking awesome and I’m already fully used to that and I don’t see any need for the bar anymore, this is “perfect”. The screen is more than OK, the speed is good, battery life is very very good, I did charge a little bit in between and ended day 2 with 25% left, I guess I charged maybe a max of 40% in total during these two days, the Note8 wouldn’t make it till the end of the day, just like my iPhones.

I do experience some issues with BT disconnecting when an app is running in the background but this seems to be an issue with Ore0 8.1 someone told me and not Huawei, let’s hope Android fixes this in the near future, it’s not a big deal (and probably why my battery life is so long) but it’s a bit annoying when I run my iTPMS system in the RV in the background.

But most of all the camera…..
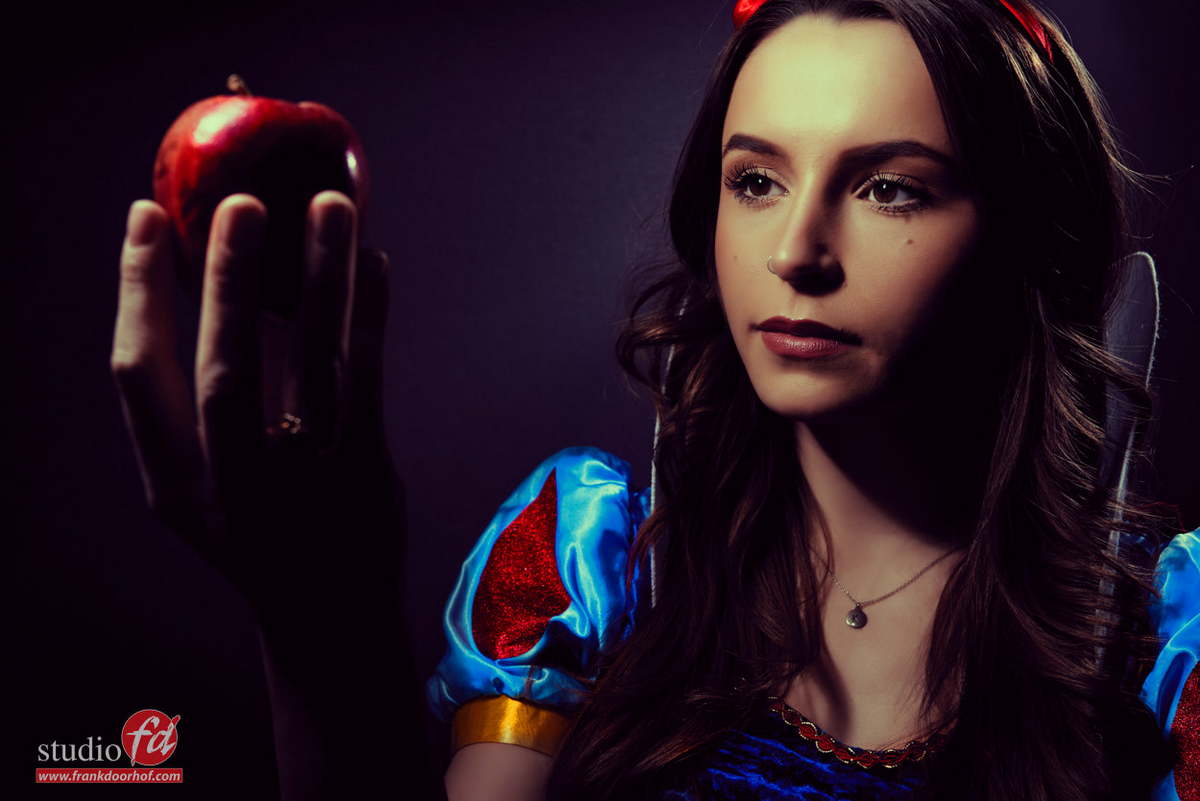
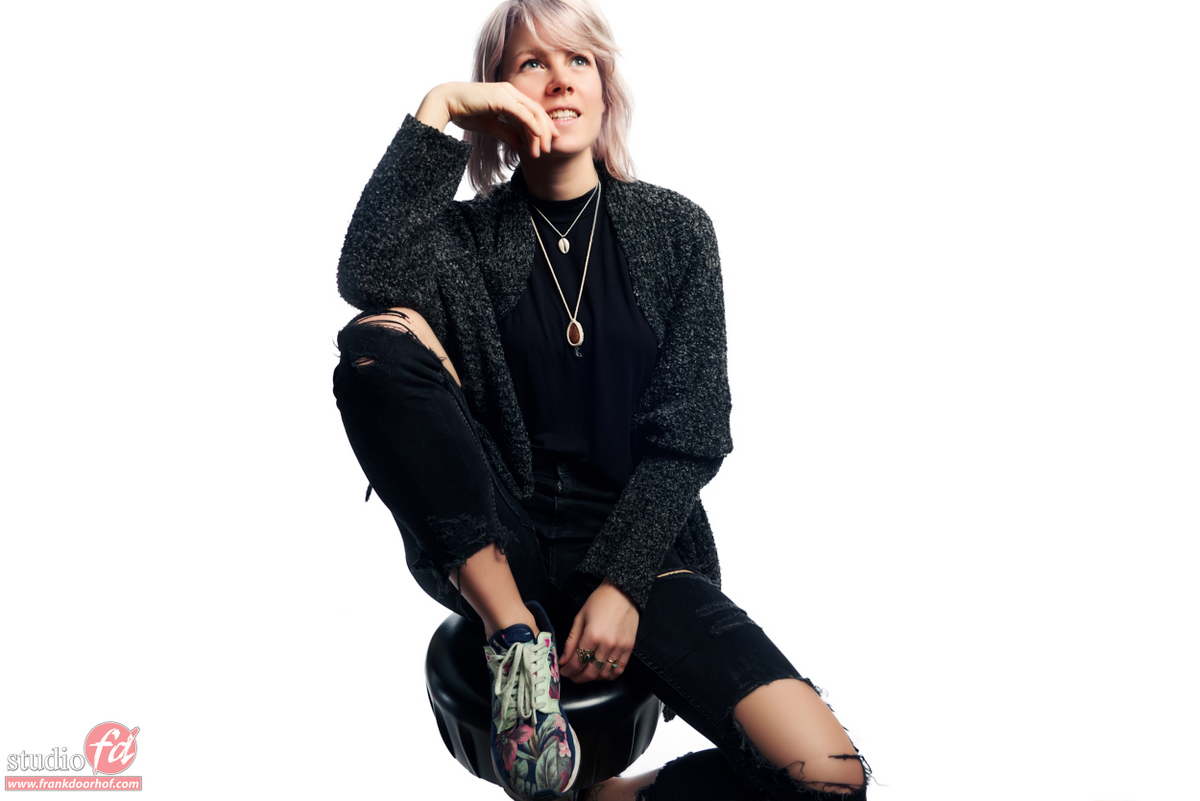
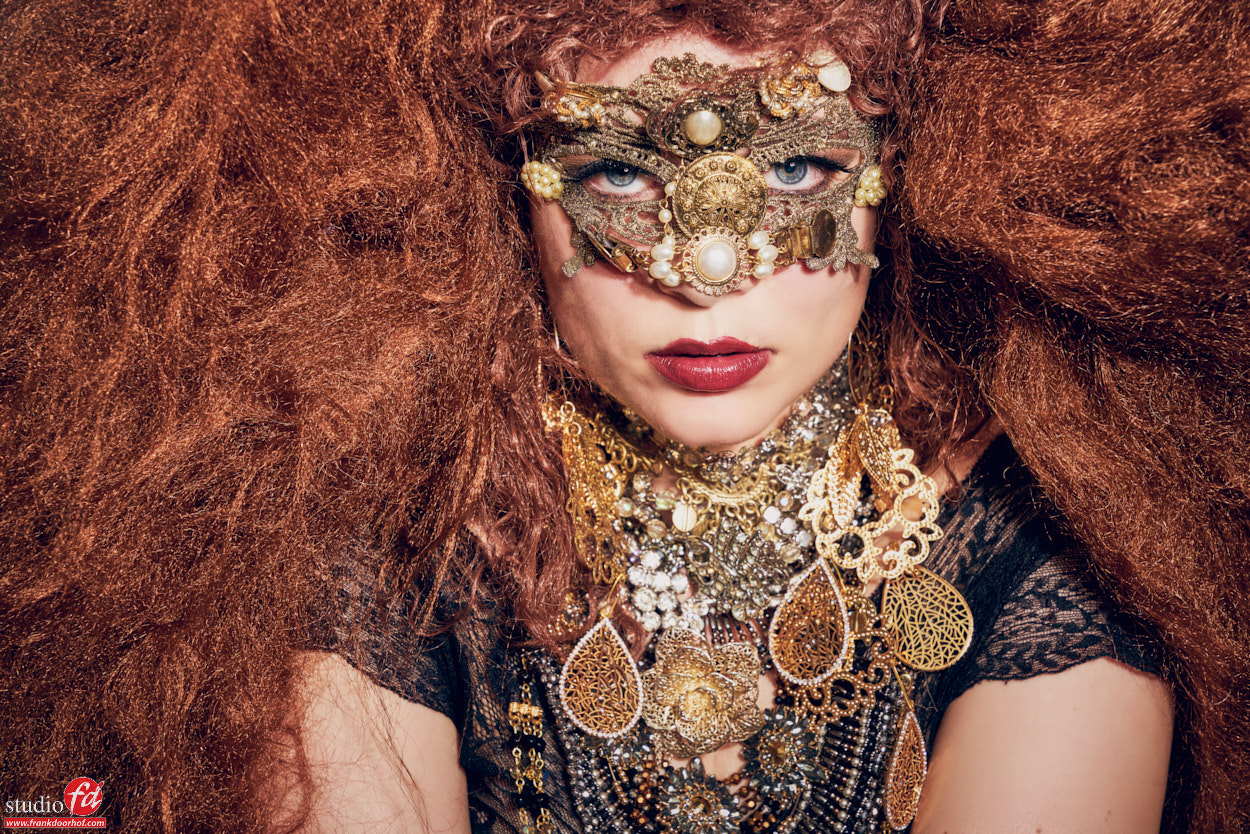
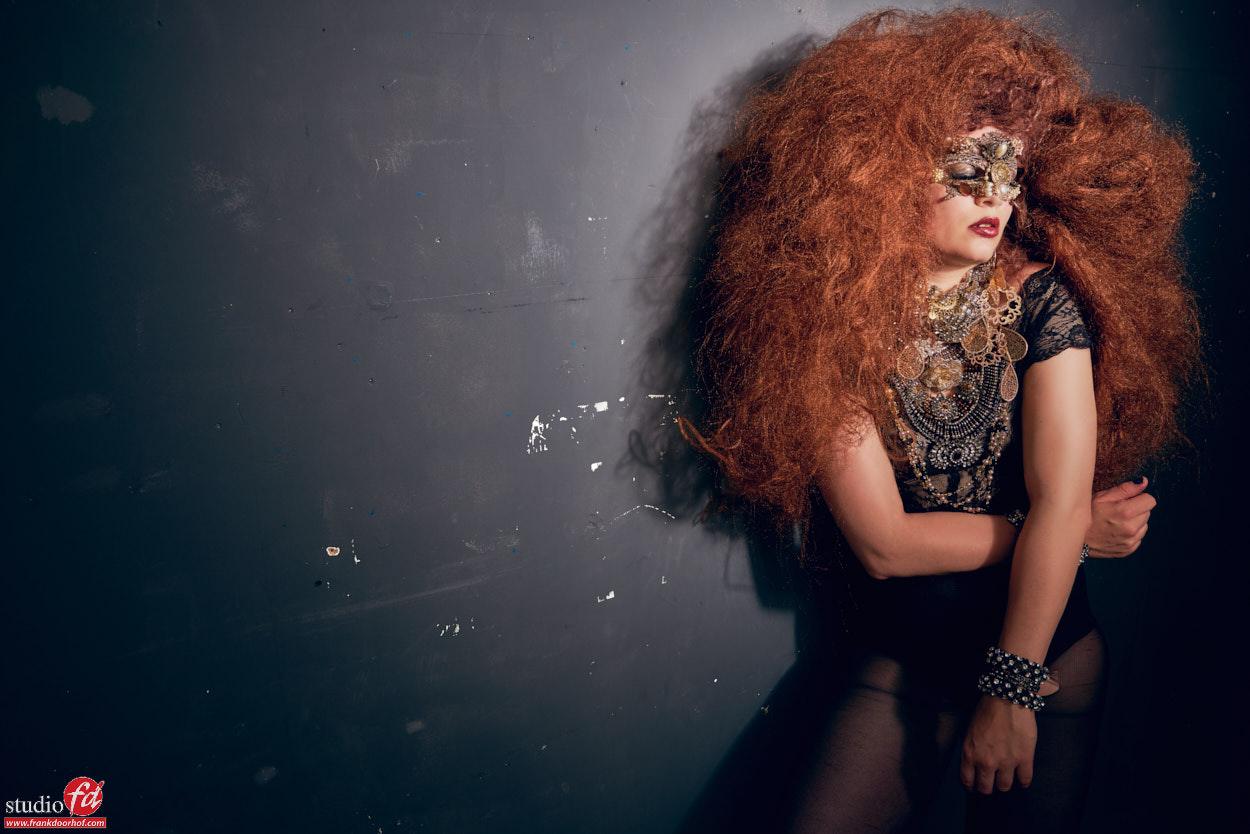
I expected the 40MP camera to be ok in good light and actually very bad in normal lighting situations I experience in the studio. Everytime I get a new Phone I try some modelshots with it, and always I end up laughing a bit… not because they are so good but more at the advertising guys claiming “the camera reinvented” yes sure…. in bright light its great but don’t even think about more challenging situations…. the P20 Pro IS different, trust me.

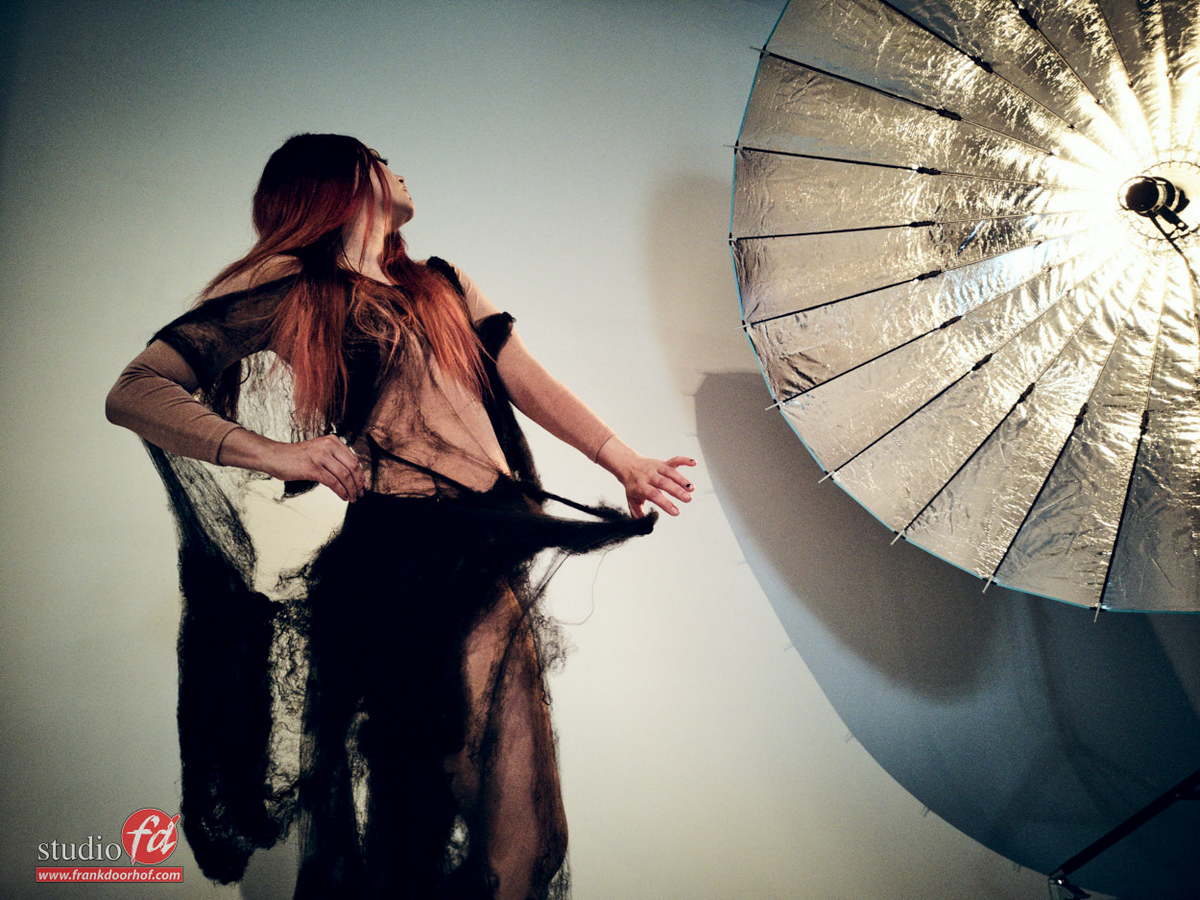
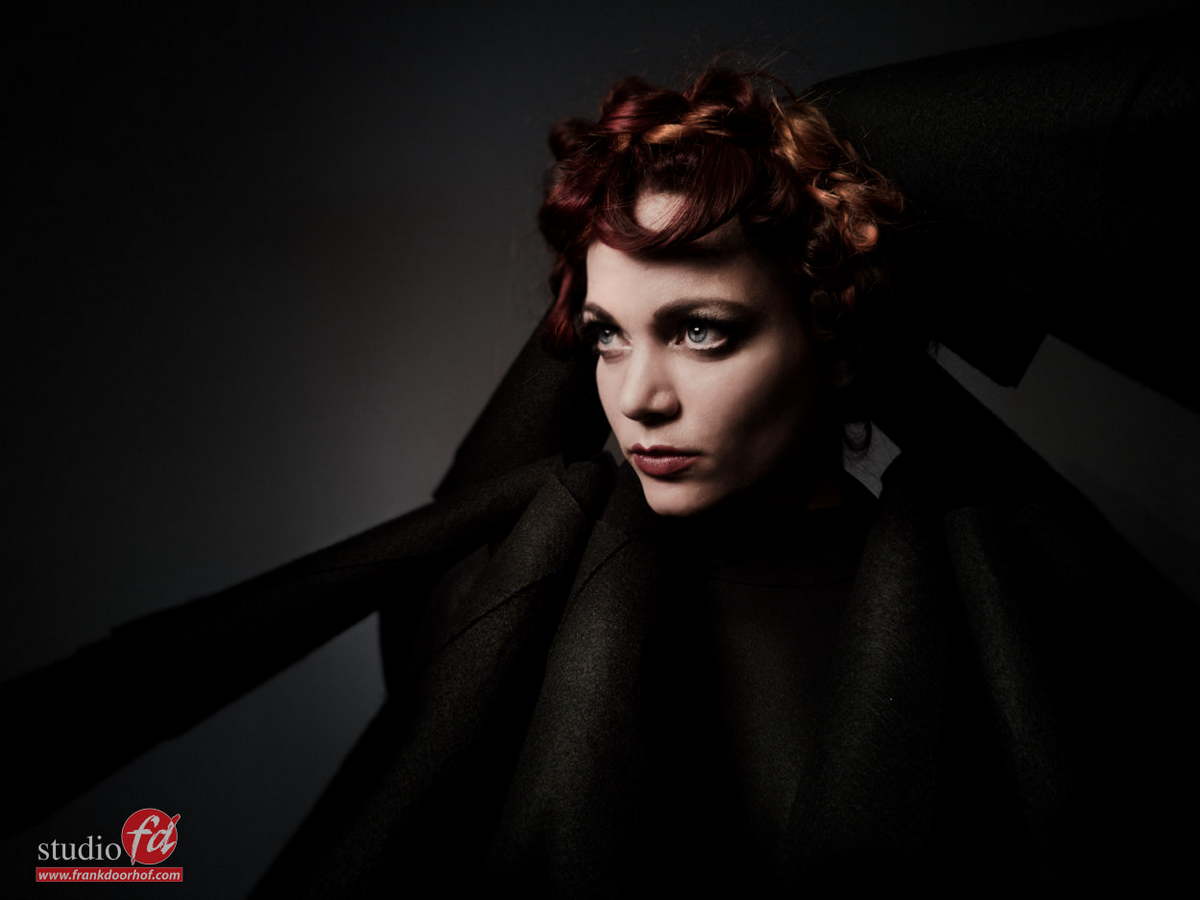
I’ve shot the images in this blogpost with the P20 pro with the modelling lights from the Broncolors, and to be fair, these modelling lights are a lot less bright than the Elinchroms I have in our studio so I expected the results to be worse than the Note8, especially because the light is so much lower in intensity…. now I’m not gonna tell you it beats or even equals my 42MP Sony A7RIII, FAR from…. but man is this one SWEET camera, the images are pinsharp and can actually be pushed pretty far. Nadines outfit was pretty dark and I was able to use the dodge tool to get back some details from the blacks without any real sacrifice to the shots WOW.

I still have my 30 days return policy…..
Not going to use it.
LOVE the camera, and this is all 40MP, imaging what you can do with the pixel”binding” at 10MP, I can’t wait to take this baby out with me during a street shoot, or with proper ledpanel lighting, I think it will blow everyone away.

Many reviews online focus on the 10MP performance, or JPG. I really have to stress that although those are far from bad (in fact for a smartphone they are really good), but where the camera really shines is in RAW, now I understand that for some people the RAW workflow from a phone doesn’t sound appealing, my answer is just very simple…. if you want quality don’t shoot JPEG, unless you need to… which in the case of the P20 Pro means…. nightshots, even panoramas I would shoot in RAW 40MP and just stitch them together in Lr.

Zooming…. I won’t really use, I’ll just crop in on the 40MP RAW file, because the zoom essentially is just 10MP and it’s JPEG, I can probably get a better quality by just cropping in on the RAW file. The nightmode is something else… I really hope that in the future something like this is also possible with 40MP RAW files (far future) because that mode is VERY addictive. I constantly see myself looking for situations where I can try it out 🙂


Anyway…. let’s show you the images I shot today.


Model/stylist : Nadine

The perfect lens……

Let’s talk a bit about lenses and looks.
The image we open with was shot during a workshop with a 70mm setting on a 24-70 lens. Is this the perfect/best way to shoot this scene?….. well let’s see.


“Frank what is the perfect lens for…..”
I don’t know how often I get this question, but let me put it this way…. it’s a lot

Now let’s start by saying that the perfect lens/camera is the one that you have with you… but… well that’s a bit of a cliche, so let’s give you a real tip in todays blog.

EVERY lens has it’s own character.
What I mean with this is that even between let’s say 2 50mm lenses you can see a difference. For example I sometimes love to shoot with older M42 lenses which via an adapter are connected to my Sony camera. Thanks to the peaking (focus assist) focusing is easy and fast with manual lenses. The cool thing about these lenses is that they give your images a distinct look which I personally really like. I also have some Leica lenses from the R series and those lenses are almost pure magic.. but that’s for another post (if you guys are interested in that just let me know in the comments below).

Back to todays tip.
Often it’s regarded that wide angles are “less” good for portraits or model photography than longer lenses. However I would like to point out that this is not entirely true. The main difference between a longer and wider lens is “distortion” now don’t take this too literally, but there is a totally different look to a wide angle which would indeed make it less “flattering” to shoot a portrait with from close by. On the other hand….. if you use that distortion to your advantage you can do some cool stuff like for example this.

If I shoot this with a longer lens the effect is much less prominent.

In essence you always have to remember that a camera doesn’t see depth.
The only thing it does is render objects that are close larger and objects that are further away smaller. When you shoot with a wide angle you are actually (in this case) closer to the apple and the model is much further away compared to the distance to the apple. Meaning you get this “distortion”.

Now if you make use of it, like in this example you can actually make it work for you.
Remember the image we opened with?
That’s how you would normally shoot it in the studio, but if you shoot it more wide, in my opinion the shots comes way more alive.

Now I do have to add a side note.
I really don’t like images that are shot with wideangles without being “shot” with a wide angle. In other words if you shoot a portrait like you would normally shoot a portrait with a sub 30mm lens (Full Frame) I often find the distorting taking me away from the shot. However when you use that “distortion” to work with the shot like in the sample with Anouk on the stool I really feel that the wider angle shot gives me a much more flowing image (if that makes sense). It has less compression so to say. (a term often used for longer lenses by the way).


Feel free to show your images with wide angles.

For much more tips visit www.frankdoorhof.com/videos and download our instructional videos
Or subscribe to www.youtube.com/frankdoorhof for free instructional material
And of course get my book “Mastering the modelshoot” via your favorite bookstore or amazon 

Santa Cruz here we come….

Teaching workshops on location is one of the most challenging and exciting things, not only for me but also for the attendees of these workshops.
On July 15th I’ll be visiting Santa Cruz for a one day workshop in cooperation with our friends of Expoimaging with the theme “The magic of the small flash”.

In this workshop I’ll teach the group a lot of techniques for the use of speed lights in many different situations ranging from inside to outside, fill in flash and fighting the sun (day to night).

This is a small group workshop and at the moment we only have 3 seats left, so head on over to Watsonville Santa Cruz workshop July 15th 2016 on the site to book your seat and find more information.

Tip : The most simple location can be awesome

Often I hear photographers complain about the lack of great locations…
I always tell them “the best locations are in your head, and often right in front of you”.
Somehow it sometimes seems that if there isn’t a great location the creativity is gone, or is it just that……

In my opinion every location is great to photograph, but I often do look for certain extras like contrast, grunge (rough) and color, OR the lack of it. The more rough the better in all honesty, on the other hand something really static and modern can also be awesome, as you can see there is always something if you WANT to see it.

As I joke I sometimes say “put on your photographers eyes and hunt, don’t look for opportunities but try to find uses for what you see” this is a different mindset but often helps a lot.

Now if you add a little bit of styling to it (or a lot like in this case) you’re on the way to a great shot.
These shots were done during a workshop in Manchester with Nadine, a very simple light setup with one Elinchrom beauty dish with grid straight at Nadine. The wall didn’t look like much but I loved it, and seeing the responses from the attendees as soon as the images came in… they did too.

Nadine June 8th 2016 Manchester  0285

Nadine June 8th 2016 Manchester  0289