Frank Doorhof
  • Blog (articles)
  • Rent our studio space
  • MAIN SHOP
    • MAIN SHOP
      • Orders
      • Account details
      • Downloads
      • Addresses
      • Lost password
      • Cart
      • Checkout
      • Terms webshop
      • Return policy
      • Privacy Policy
      • Privacy Statement in3. Dutch customers only. When you want to pay in 3 parts
  • IQwire Tether Cables
  • Rogue Modifiers
  • Geekoto Flash and Modifiers
  • Platypod
  • Click Backdrops
  • PORTFOLIO
  • Learning with Frank
    • Dutch workshop agenda
    • Workshops
    • A Year With Frank
    • Online 1:1 workshops
    • 1:1 workshops in English
    • Portfolio review by Frank Doorhof
    • Patreon
  • Support our work
  • Merchandise
  • Digital Classroom LIVE
  • Our YouTube channel
  • Biography Frank Doorhof
  • Services
  • Discounts etc
  • I need help
  • Menu Menu
  • Shopping Cart Shopping Cart
    0Shopping Cart
  • Link to Facebook
  • Link to X
  • Link to Youtube
  • Link to WhatsApp

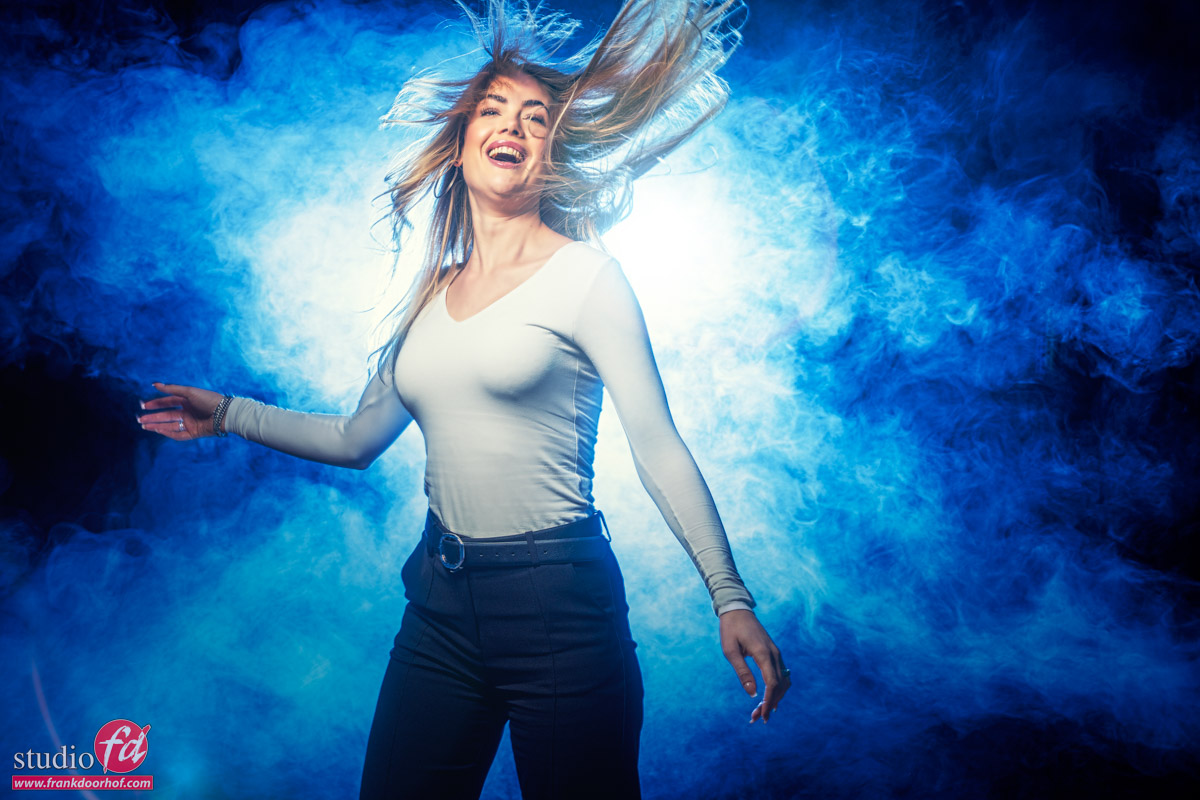
Using separation with smoke to glue the scene

18-04-2026/in blog, Visions and technique/by Frank Doorhof

Sometimes it’s not black and white

People often claim that “this is the way” and “the only way”.
For photography I always think “there are more ways to do it”.
And that goes without a doubt when we work with smoke.

When I explain using smoke I often explain it’s best to first built the background and then use a small puff of smoke on the front.
This is indeed a great way to use the smoke to glue the set together, but that doesn’t mean  that you always have to use smoke in the front. Sometimes it can be great to have a real cut out effect. Especially with smoke.

So let’s take a look at the difference.
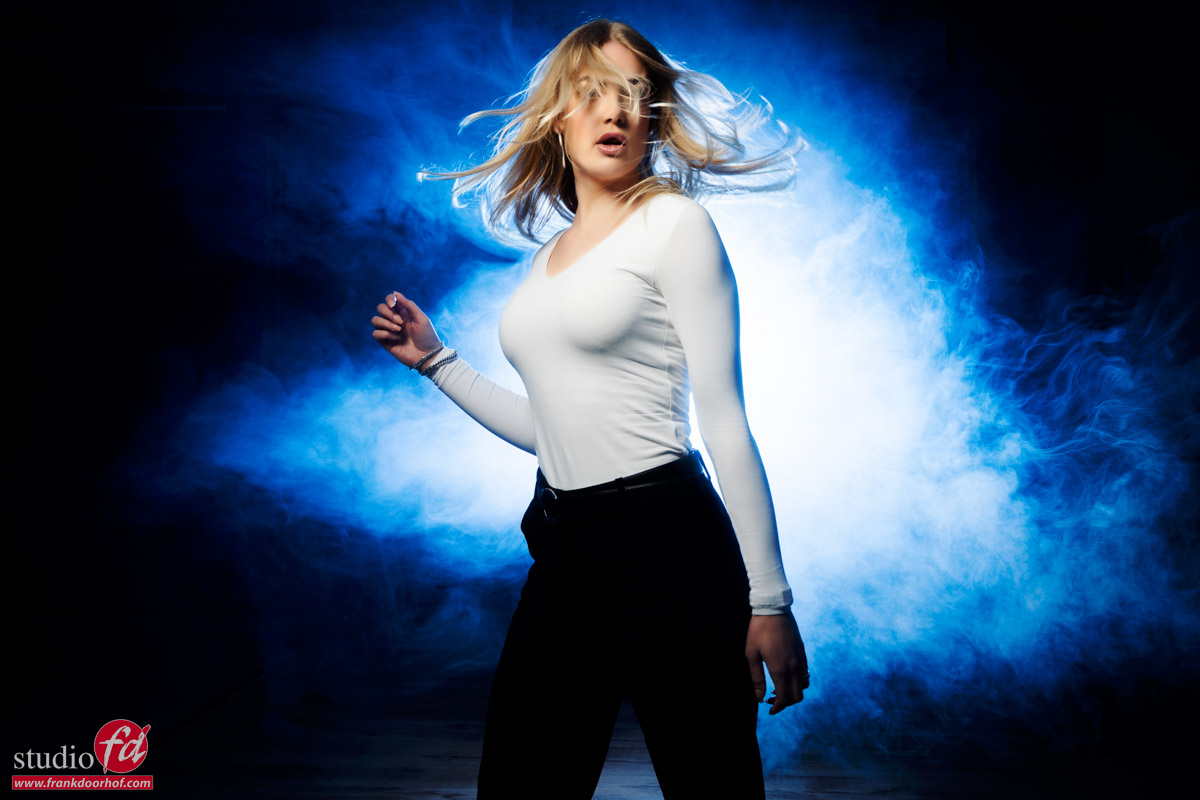
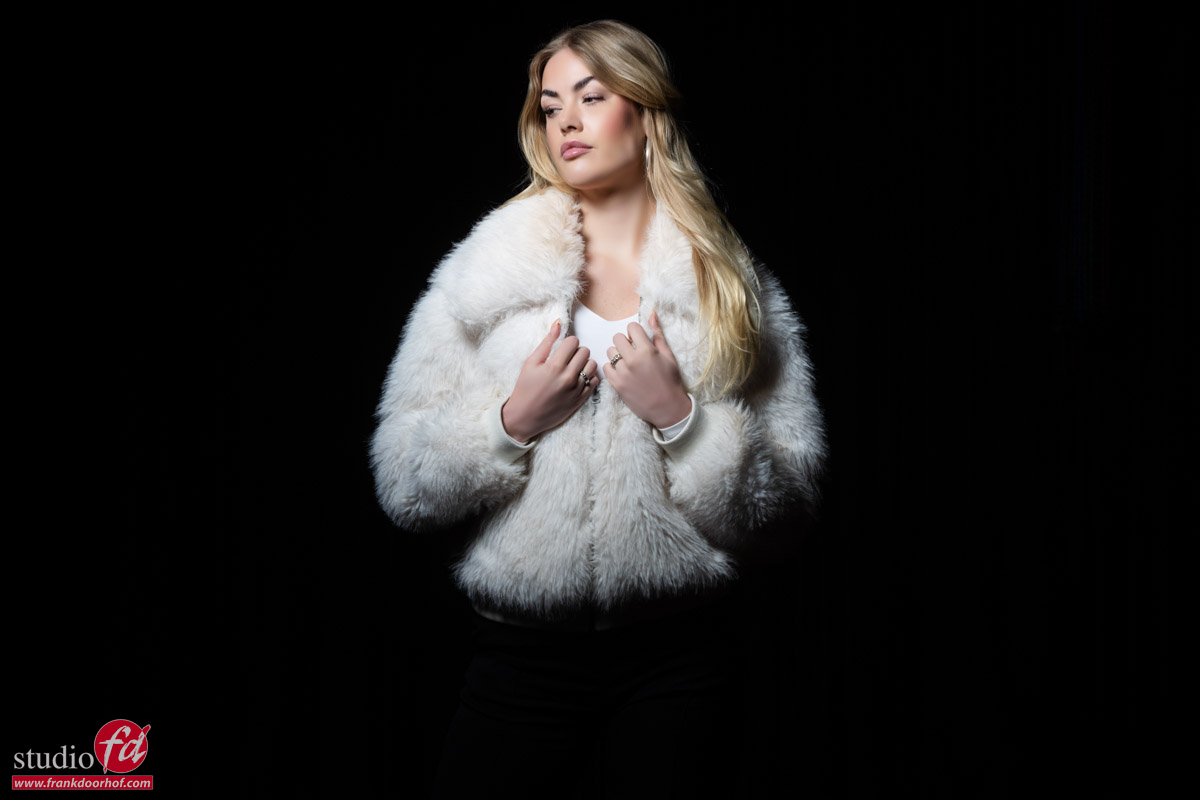
In this image I’m using no smoke on the front.
One strobe is behind the model aimed at her back, and we only used the smoke machine in the back.
The result is in this case a loss in detail in the black pants.
Would she be wearing lighter pants you would probably see some faint details, but it will be very dark.
The contrast between the background and the foreground does create a very nice image.

However if you want to glue the scene together a bit more, It will help to use a little bit of smoke in the front.
Aim the machine at the floor and wait for the smoke to drift up.
By using the floor you are in essence bouncing the smoke, making it more diffuse/haze, which works a lot better when you just want a slight “glue” effect.

Depending on how much you use it will look a little bit like this.
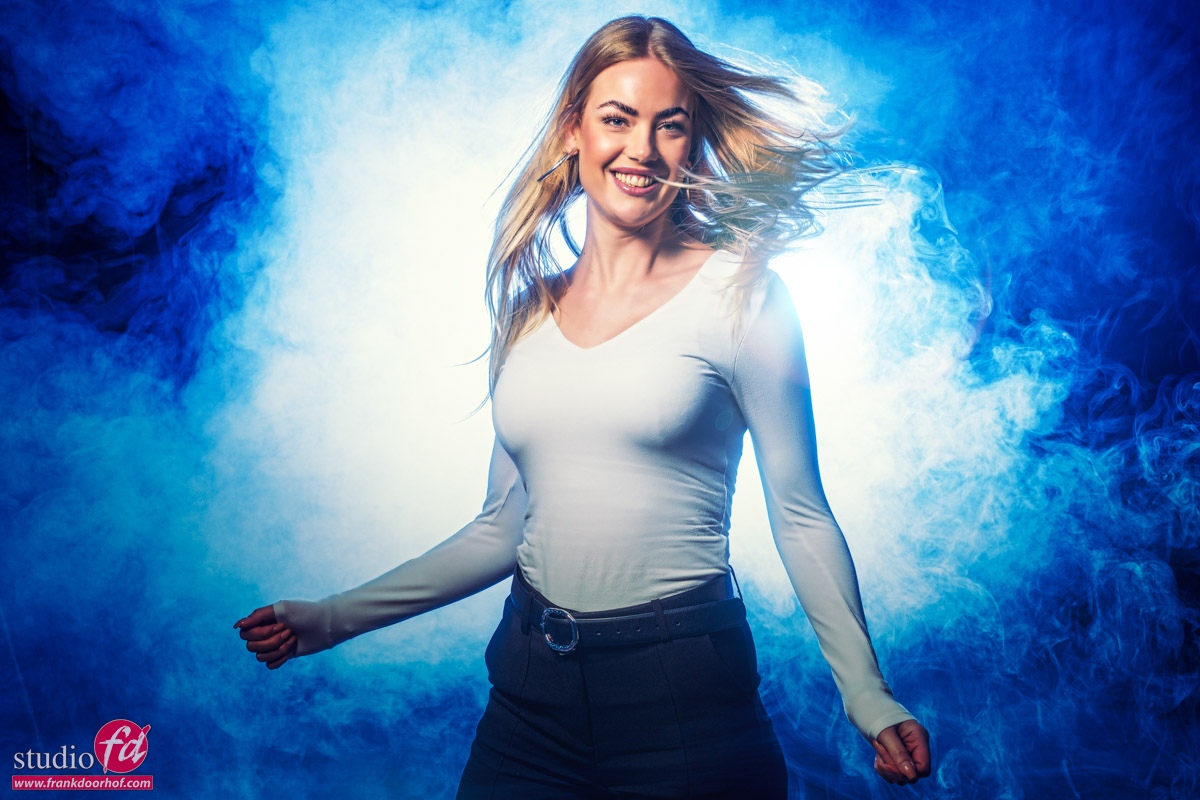

For me this is more natural, but loses that high contrast a bit of the first one.
In other words, both can work, but will give you a different look.

It’s always smart to first shoot a few images with only the back, smoke will often look like it’s gone but will still bounce back some light. So first shoot the background 😀
It also works great with portraits.
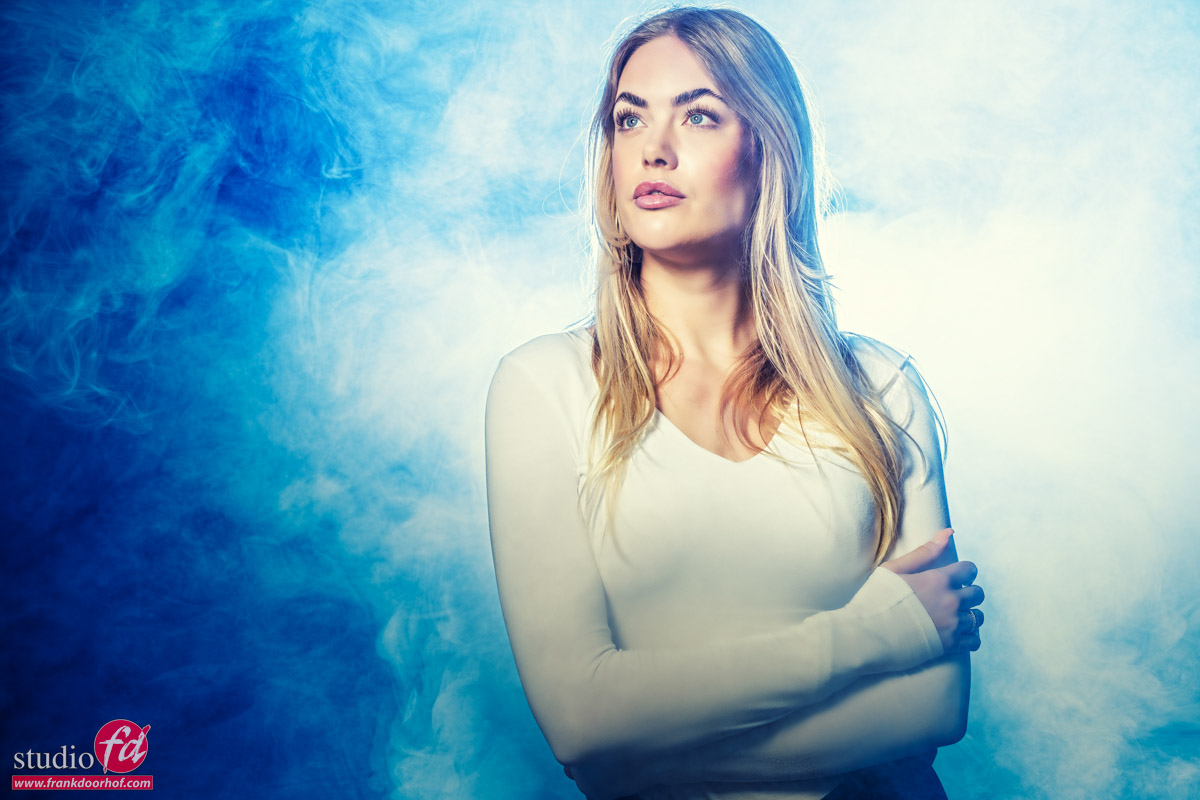
Next time we will start to add some effects in the smoke .

Workshops

Want to learn everything about light control?
Want to visit a workshop where it’s not just shooting a model with a fixed lighting setup, but see how the setup is built and adjusted to the taste of the group?
And of course learn how to work with poses, backgrounds, small sets, styling, retouching, and a lot more…..

If this all sounds awesome, visit fotografie-workshops.nl and book your workshop.
If you don’t speak Dutch, no problem, let us know a few weeks in advance, and we can switch the workshop to English.
Not possible to travel to the Netherlands?
We got you covered with our 1:1 online workshop.
We have a full streaming setup in our studio. 4 detail cameras and of course the retouching software, so you can see every detail and of course ask questions during the day. Plus, you get all the RAW files after the workshop.
https://frankdoorhof.com/web/wp-content/uploads/2026/04/Isabelle-April-04-2026-16-Edit.jpg 800 1200 Frank Doorhof https://frankdoorhof.com/web/wp-content/uploads/2015/03/studioFD_Logo-1FV.png Frank Doorhof2026-04-18 18:00:052026-04-14 16:38:44Using separation with smoke to glue the scene

Don’t do this but in this case do exactly that

16-04-2026/in blog, Visions and technique/by Frank Doorhof

Backlighting the right way

When I started with model photography I remember that the first time I used a backlit model I was over the moon with the results.
“Wow it looks like an aura”…. and indeed it did. And maybe it was in my advantage that we didn’t have 65MP cameras at that moment, because there are some things that you can better not do.

And one of those is backlighting your model from the back.
Now you might wonder..”Frank you promised us more about smoke”.
Indeed, so continue reading and it will all be clear.

Normal backlighting

When I use “backlighting” at the moment I mostly use two striplights from the back creating accents on the model.
In fact I don’t call it backlighting but accent lighting, because in essence the light is not coming from the back anymore.

So why no strobe behind the model?
Let’s take a look at an example.

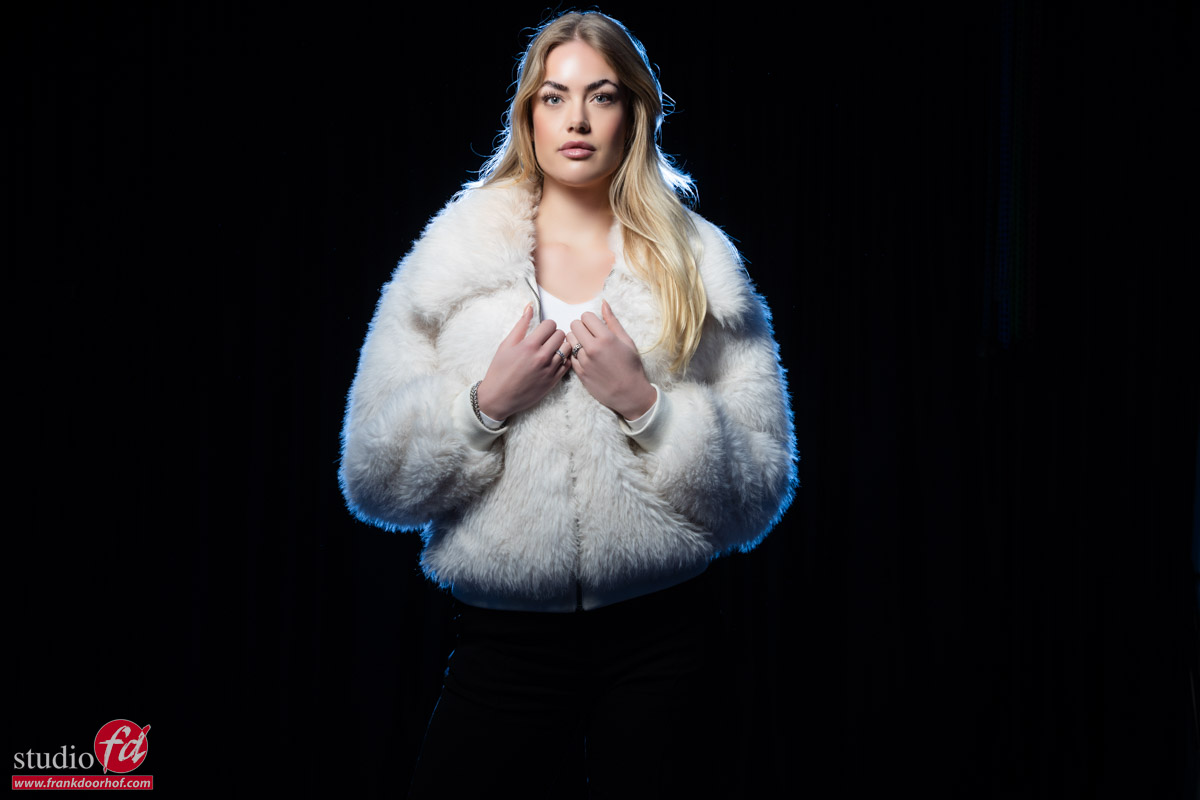
Here is our model Isabelle against a black backdrop.

To be honest there is nothing wrong with this shot lighting wise.
But let’s say we bought two strobes, so we have to use them, right :D?

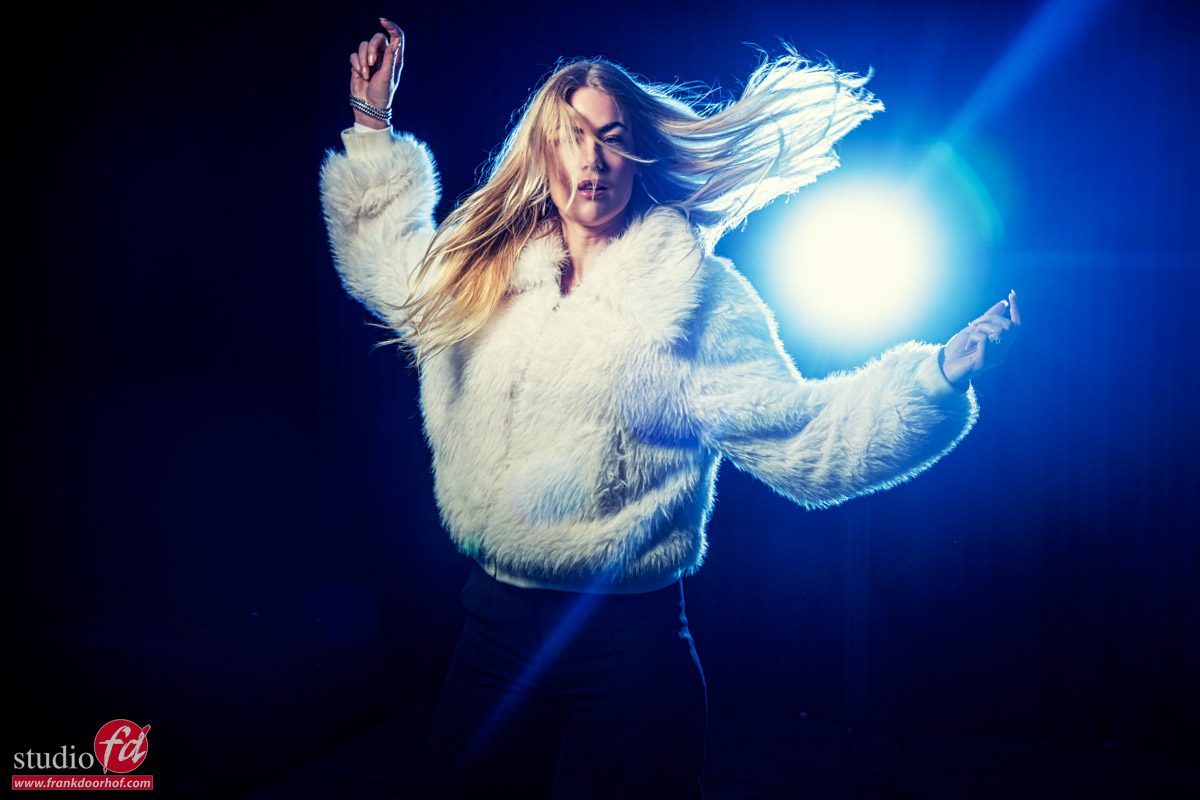
In the next image I’m using a strobe behind my model with a blue gel.
It’s placed directly behind my model, just I did when I started out.
The only difference is that the strobe I’m using here has a slightly less spread in the light, but I placed it further back to create the same effect.

Well there we go.
I remember I was really happy with this result when I started out.
But when you zoom in, you can see the dust in the studio, the hairs almost look artificial and also the accents doesn’t really “wrap around” my model.
In short, it’s not my favorite way of lighting.
Later on I did try to solve this by hanging a small softbox with loads of extra diffusion material on the ceiling of the studio aimed at the model from the back. This worked great as a hair light, but when I started using the one or two strips from side the effects became a lot better.

But as mentioned before.. it’s not about a standard lighting situation.
We are in the middle of a series on smoke.
And as mentioned in Part I, smoke works also as a diffuser. So that means that although I don’t see a lot of my strobe at the moment, that will change completely when I start adding the smoke. In fact this will create an effect we can’t achieve with lights on the side.

So in this case we have to use a setup that will “not work” in normal setups but is great for smoke.

So we can’t do anything with this without smoke?

If you know me, you will know that there is always an alternative way to use a setup.
So what about not blocking the light, but let the model move around and have the light blast straight into the camera creating some cool lens flare effects and accent lighting on your model.

If you place the strobe almost next to the model, the model will be lit by the softer sides of the light and you can put the strobe on full power for very nice and full lens flares.
In this case we used it as it was, just to show an option during the workshop.

Next time we will start to glue the set together with smoke.
So make sure to check back for the next episode in our smoke in the studio series.

Workshops about (mixing) lights

Want to learn everything about light control?
Want to visit a workshop where it’s not just shooting a model with a fixed lighting setup, but see how the setup is built and adjusted to the taste of the group?
And of course learn how to work with poses, backgrounds, small sets, styling, retouching, and a lot more…..

If this all sounds awesome, visit fotografie-workshops.nl and book your workshop.
If you don’t speak Dutch, no problem, let us know a few weeks in advance, and we can switch the workshop to English.
Not possible to travel to the Netherlands?
We got you covered with our 1:1 online workshop.
We have a full streaming setup in our studio. 4 detail cameras and of course the retouching software, so you can see every detail and of course ask questions during the day. Plus, you get all the RAW files after the workshop.

https://frankdoorhof.com/web/wp-content/uploads/2026/04/Isabelle-April-04-2026-4-Edit.jpg 800 1200 Frank Doorhof https://frankdoorhof.com/web/wp-content/uploads/2015/03/studioFD_Logo-1FV.png Frank Doorhof2026-04-16 18:00:192026-04-14 16:35:33Don’t do this but in this case do exactly that

If you want to use smoke you have to check out this

14-04-2026/in blog, Visions and technique/by Frank Doorhof

Smoke in the studio is always fun

So today, part I in a series on smoke, or some people call it mist.
I’ve been using smoke almost immediately when I started with model photography in my own “studio”.
Somehow, smoke is magic during a photo shoot.
I often joke that if the model is “so-so” or the set is awful, just pump in some smoke, and you have a killer shot. Of course, it’s not that easy, although in essence it does work that way, smoke is a real mood maker.

Let’s first talk about the smoke itself

In our studio, we use two different kinds of machines.
For the whole set, I’m using two smoke machines with a water-based solution.
I highly recommend using water-based solutions if you are using the smoke with electronics in the same room.

For local smoke, I’m using two handheld smoke machines.
These are “oil-based” and will leave a small residue on materials where the smoke is concentrated.
A big advantage of these machines is that you can use different accessories, and for example, can create a dry ice effect with more like mist, literally sticking to the floor.

I’m using two machines for the following reasons.

For the water-based machines, it’s a matter of being able to work faster. The water-based machines often cool down during a shoot and need to warm up again. When you have two, you can in most cases use the second one when the first one is warming up. Two machines also help to build up the smoke more evenly. One can take care of the back while the other gives a few puffs on the front.

With the smaller machines, it’s simply a matter of having more smoke.

smoke on the background
And finally, let’s talk about the fluid

When you buy smoke fluid, you can probably choose the thickness.
In our studio, we use a medium thickness.
For studio work, this works best for us. When we want thick plumes, we use more smoke; for a haze, it’s a matter of using a little bit of smoke and just waiting. At one point, just like freezing motion, you learn exactly how the machines work and how the smoke reacts.

How to light smoke?

Lighting it can be tricky.

In a lot of cases, you might think that your lighting is too dark on the bottom of the frame, so you add some extra lights to open up the shadows, only to find out that when you start adding smoke, there is way too much light on the bottom. What is going on?

Smoke acts like a diffuser, reflector and a mood maker.
Meaning if you add smoke to a scene, a lot of things will change.
The first thing you have to take into account is that smoke will act the same way as a fog bank when you drive in your car.
Meaning when you place your light straight on your model, the chance you will see a big white glow instead of your model is almost 100%.
So when you place your main light, it works best if you place it under a slight to extreme angle. Don’t worry about a shadow side; we will solve that later on.

Also, the distance of your light can make a huge difference.

The first thing that changes with the distance is, of course, the light fall off, but also the area the light hits. With smoke, however, it’s more about the closer the light is to your subject, the less chance of too much smoke accumulating, creating an ugly white blob in the corner.

If you use a lot of smoke on the opposite side of the light (we often push the smoke towards the accent light), you will be surprised how much light is bounced back on the shadow side of your model. It’s like millions of small reflectors bouncing the light back (which in fact happens).

smoke and some movement

As you can see here, I’m using a blue gel in the background aimed at the back of my model (Isabelle). Due to the smoke and the limited “field of view” of the strobe, I’m getting a beautiful lighting effect behind my model. Add some motion and ….. done 😀

Or is it not that easy… well, yes and no.
For the answer, come back for the next blog post in our smoke series.

Workshops

Want to learn everything about light control?
Want to visit a workshop where it’s not just shooting a model with a fixed lighting setup, but see how the setup is built and adjusted to the taste of the group?
And of course learn how to work with poses, backgrounds, small sets, styling, retouching, and a lot more…..

If this all sounds awesome, visit fotografie-workshops.nl and book your workshop.
If you don’t speak Dutch, no problem, let us know a few weeks in advance, and we can switch the workshop to English.
Not possible to travel to the Netherlands?
We got you covered with our 1:1 online workshop.
We have a full streaming setup in our studio. 4 detail cameras and of course the retouching software, so you can see every detail and of course ask questions during the day. Plus, you get all the RAW files after the workshop.


https://frankdoorhof.com/web/wp-content/uploads/2026/04/Isabelle-April-04-2026-18-Edit.jpg 800 1200 Frank Doorhof https://frankdoorhof.com/web/wp-content/uploads/2015/03/studioFD_Logo-1FV.png Frank Doorhof2026-04-14 18:00:522026-04-14 19:51:56If you want to use smoke you have to check out this

Plexiglas is great for backdrops

7-04-2026/in blog, Visions and technique, Webinars and instructional videos/by Frank Doorhof

Do you hate wrinkles in the floor?

With most photographic backgrounds, you risk wrinkles on the floor.
Models walk around, and if you want the floor to be 100% wrinkle-free, you can, of course, opt for vinyl or ProFabric, but when you use materials like ProFold or other softer materials, we have a solution for you.
And the cool extra benefit… it gives a great reflection on the floor, especially with seamless paper; it can be a great way to spice up a shot. In fact, for perfect white backgrounds, I find plexiglass vital to get a natural effect and cool reflection.

Today, I show you how we use it on our ProFold background material

https://frankdoorhof.com/web/wp-content/uploads/2026/02/Linda-K-February-07-2026-28-Edit-Medium.jpeg 427 640 Frank Doorhof https://frankdoorhof.com/web/wp-content/uploads/2015/03/studioFD_Logo-1FV.png Frank Doorhof2026-04-07 18:00:462026-03-29 12:59:52Plexiglas is great for backdrops
Page 2 of 3123

Newsletters

Subscribe to our newsletter for updates, discounts, and much more

English news letter
Dutch news letter

Interesting links

Here are some interesting links for you! Enjoy your stay :)

Snel naar

  • Blog
  • Learning with Frank
  • News etc
  • Reviews
  • Shop products & books
  • Contact

Contact

Studio Frank Doorhof:
Constructieweg 8
8305 AA Emmeloord

The Netherlands
+31-6-14522327

Or Email : info@frankdoorhof.com


© Copyright 2000 - - Frank Doorhof
  • Link to Facebook
  • Link to X
  • Link to Youtube
  • Link to WhatsApp
Scroll to top Scroll to top Scroll to top