Frank Doorhof
  • Blog (articles)
  • Rent our studio space
  • MAIN SHOP
    • MAIN SHOP
      • Orders
      • Account details
      • Downloads
      • Addresses
      • Lost password
      • Cart
      • Checkout
      • Terms webshop
      • Return policy
      • Privacy Policy
      • Privacy Statement in3. Dutch customers only. When you want to pay in 3 parts
  • IQwire Tether Cables
  • Rogue Modifiers
  • Geekoto Flash and Modifiers
  • Platypod
  • Click Backdrops
  • PORTFOLIO
  • Learning with Frank
    • Dutch workshop agenda
    • Workshops
    • A Year With Frank
    • Online 1:1 workshops
    • 1:1 workshops in English
    • Portfolio review by Frank Doorhof
    • Patreon
  • Support our work
  • Merchandise
  • Digital Classroom LIVE
  • Our YouTube channel
  • Biography Frank Doorhof
  • Services
  • Discounts etc
  • I need help
  • Menu Menu
  • Shopping Cart Shopping Cart
    0Shopping Cart
  • Link to Facebook
  • Link to X
  • Link to Youtube
  • Link to WhatsApp

You will never get this

28-04-2026/in blog/by Frank Doorhof

The unrepeatably shot

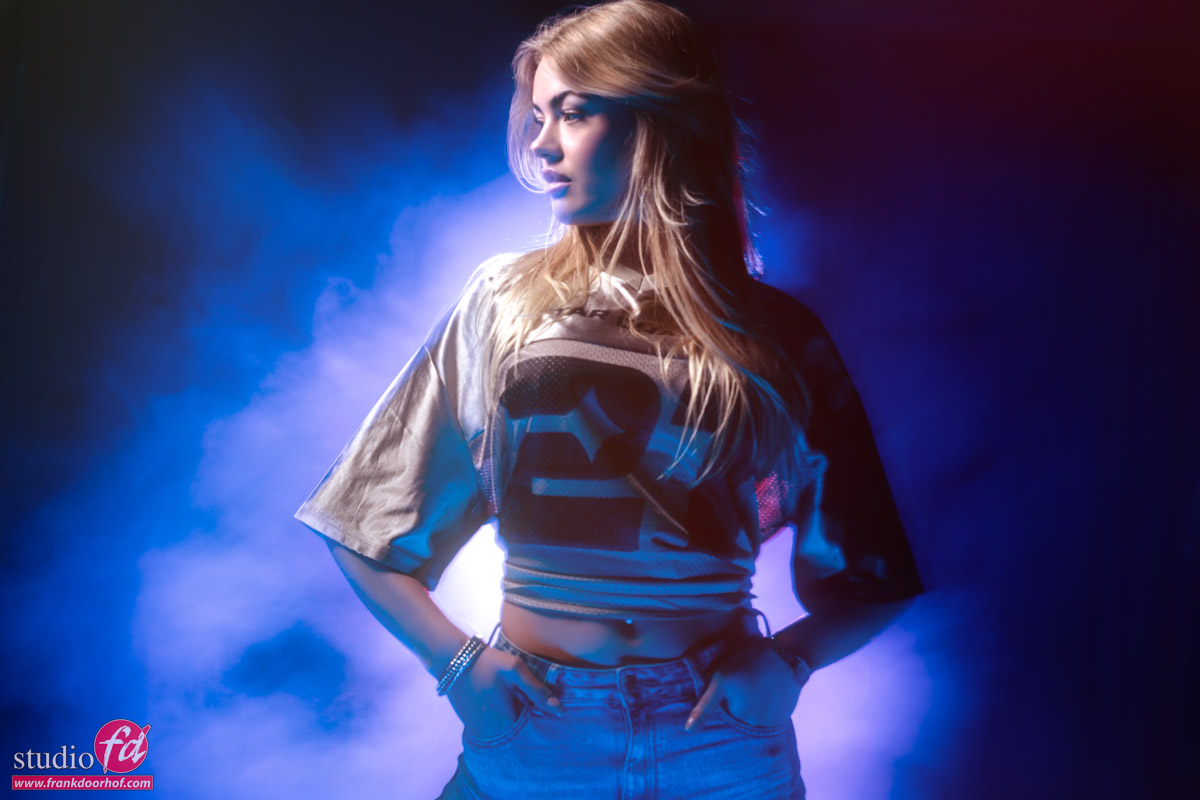
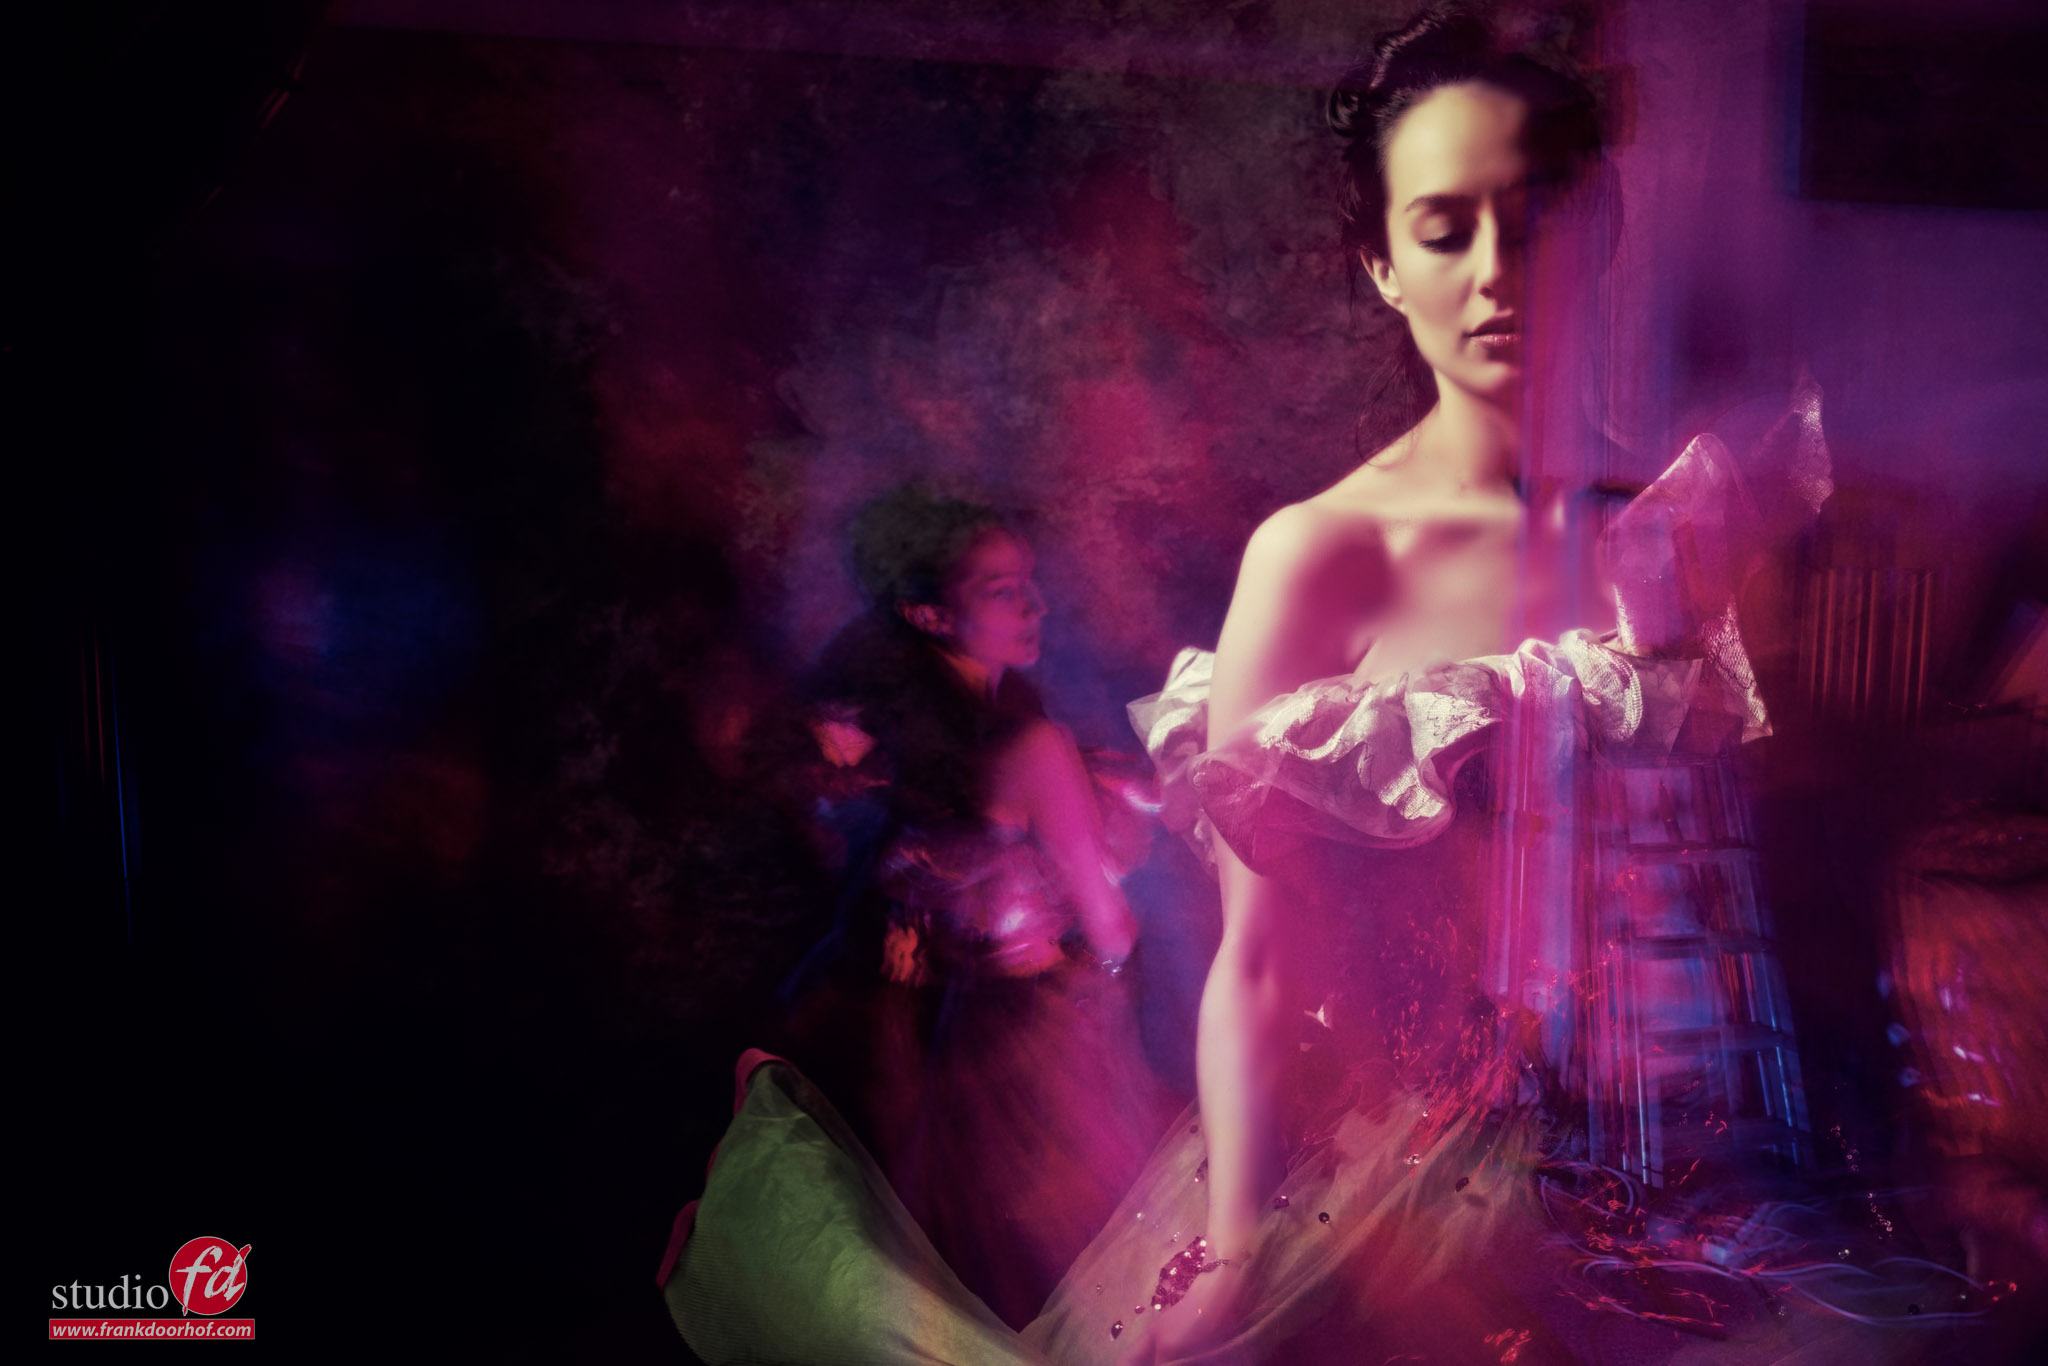
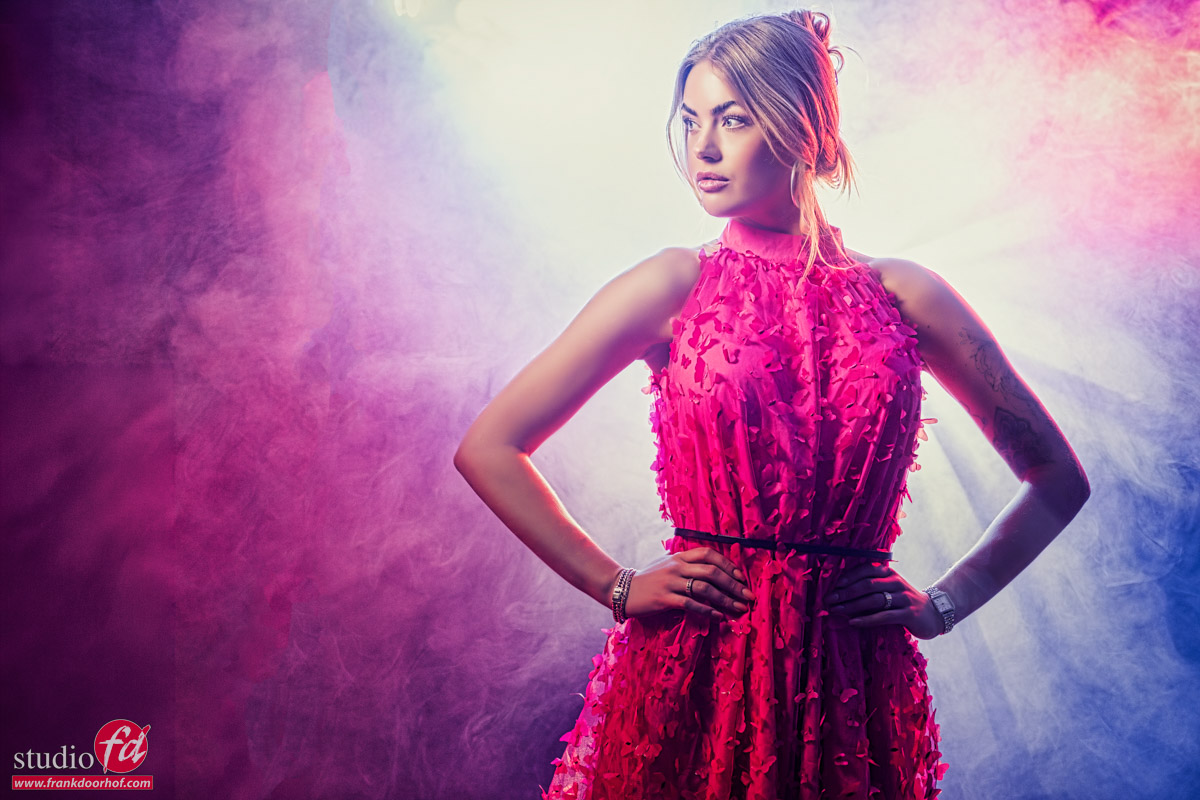
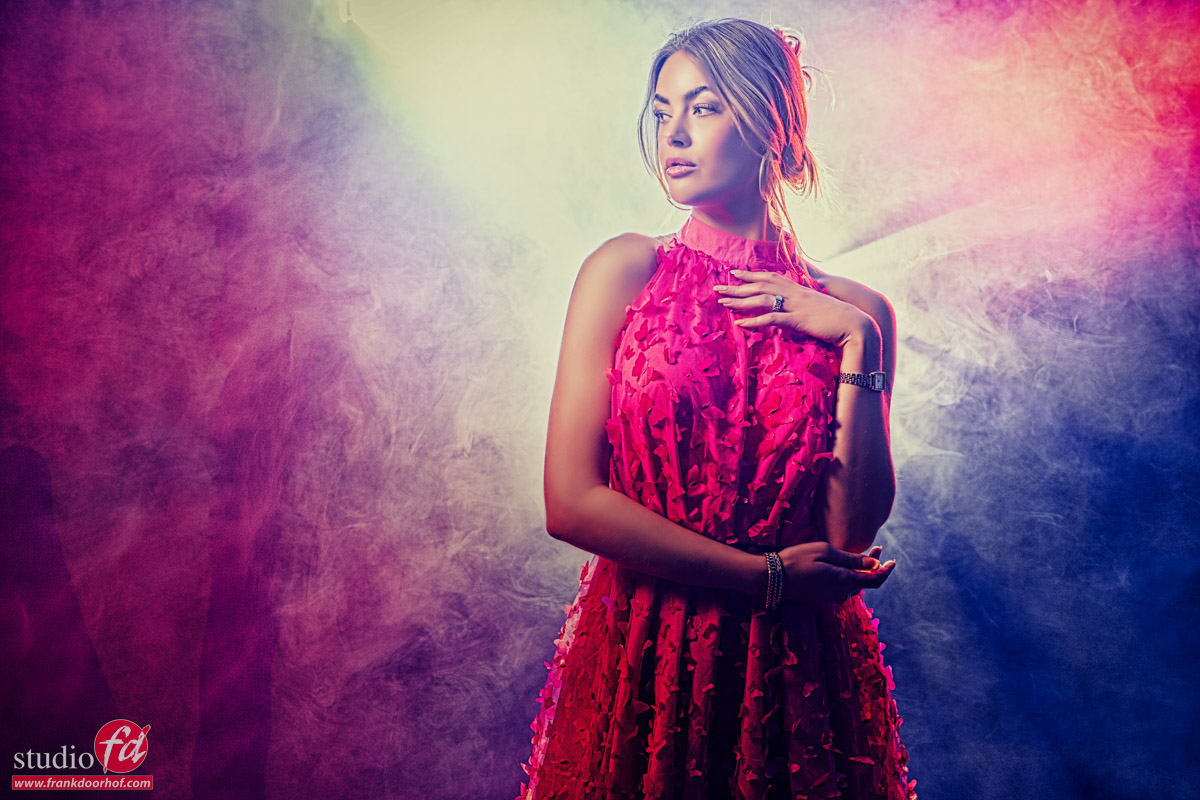
You will never get this shot the same twice, and neither will I, by the way. Because the images I’m using today are all unique and can never be made the same way again. Of course, this is true for most photos, but in this case, it’s not even possible to come close. So what am I talking about, an unrepeatably shot?

Adding motion with smoke

Today, it’s a new article in our smoke series.
And we already talked about using strobes, backlighting, and creating patterns, but today we are doing something very creative.

In previous blog posts and videos, you have seen me work with a technique called “dragging the shutter”.
What this means is that I use a strobe to freeze my model but leave the shutter open to let in more ambient light. This will create a mix of a frozen model (by the strobe) and a more blurred version of the model due to the movement and the ambient light.

In most cases, I’m using a shutter speed of 1-2 seconds.
When you add some smoke, the results become really interesting.

When the strobe fires, it will freeze the model and the smoke.
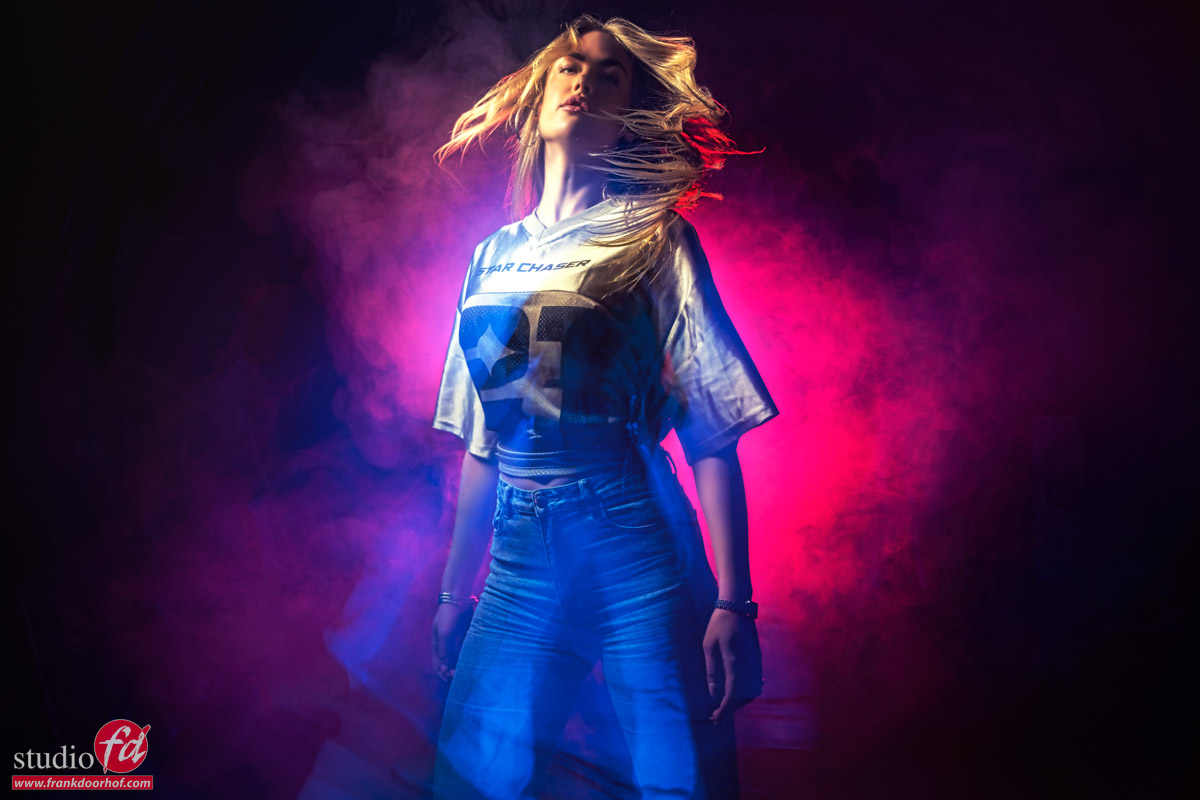
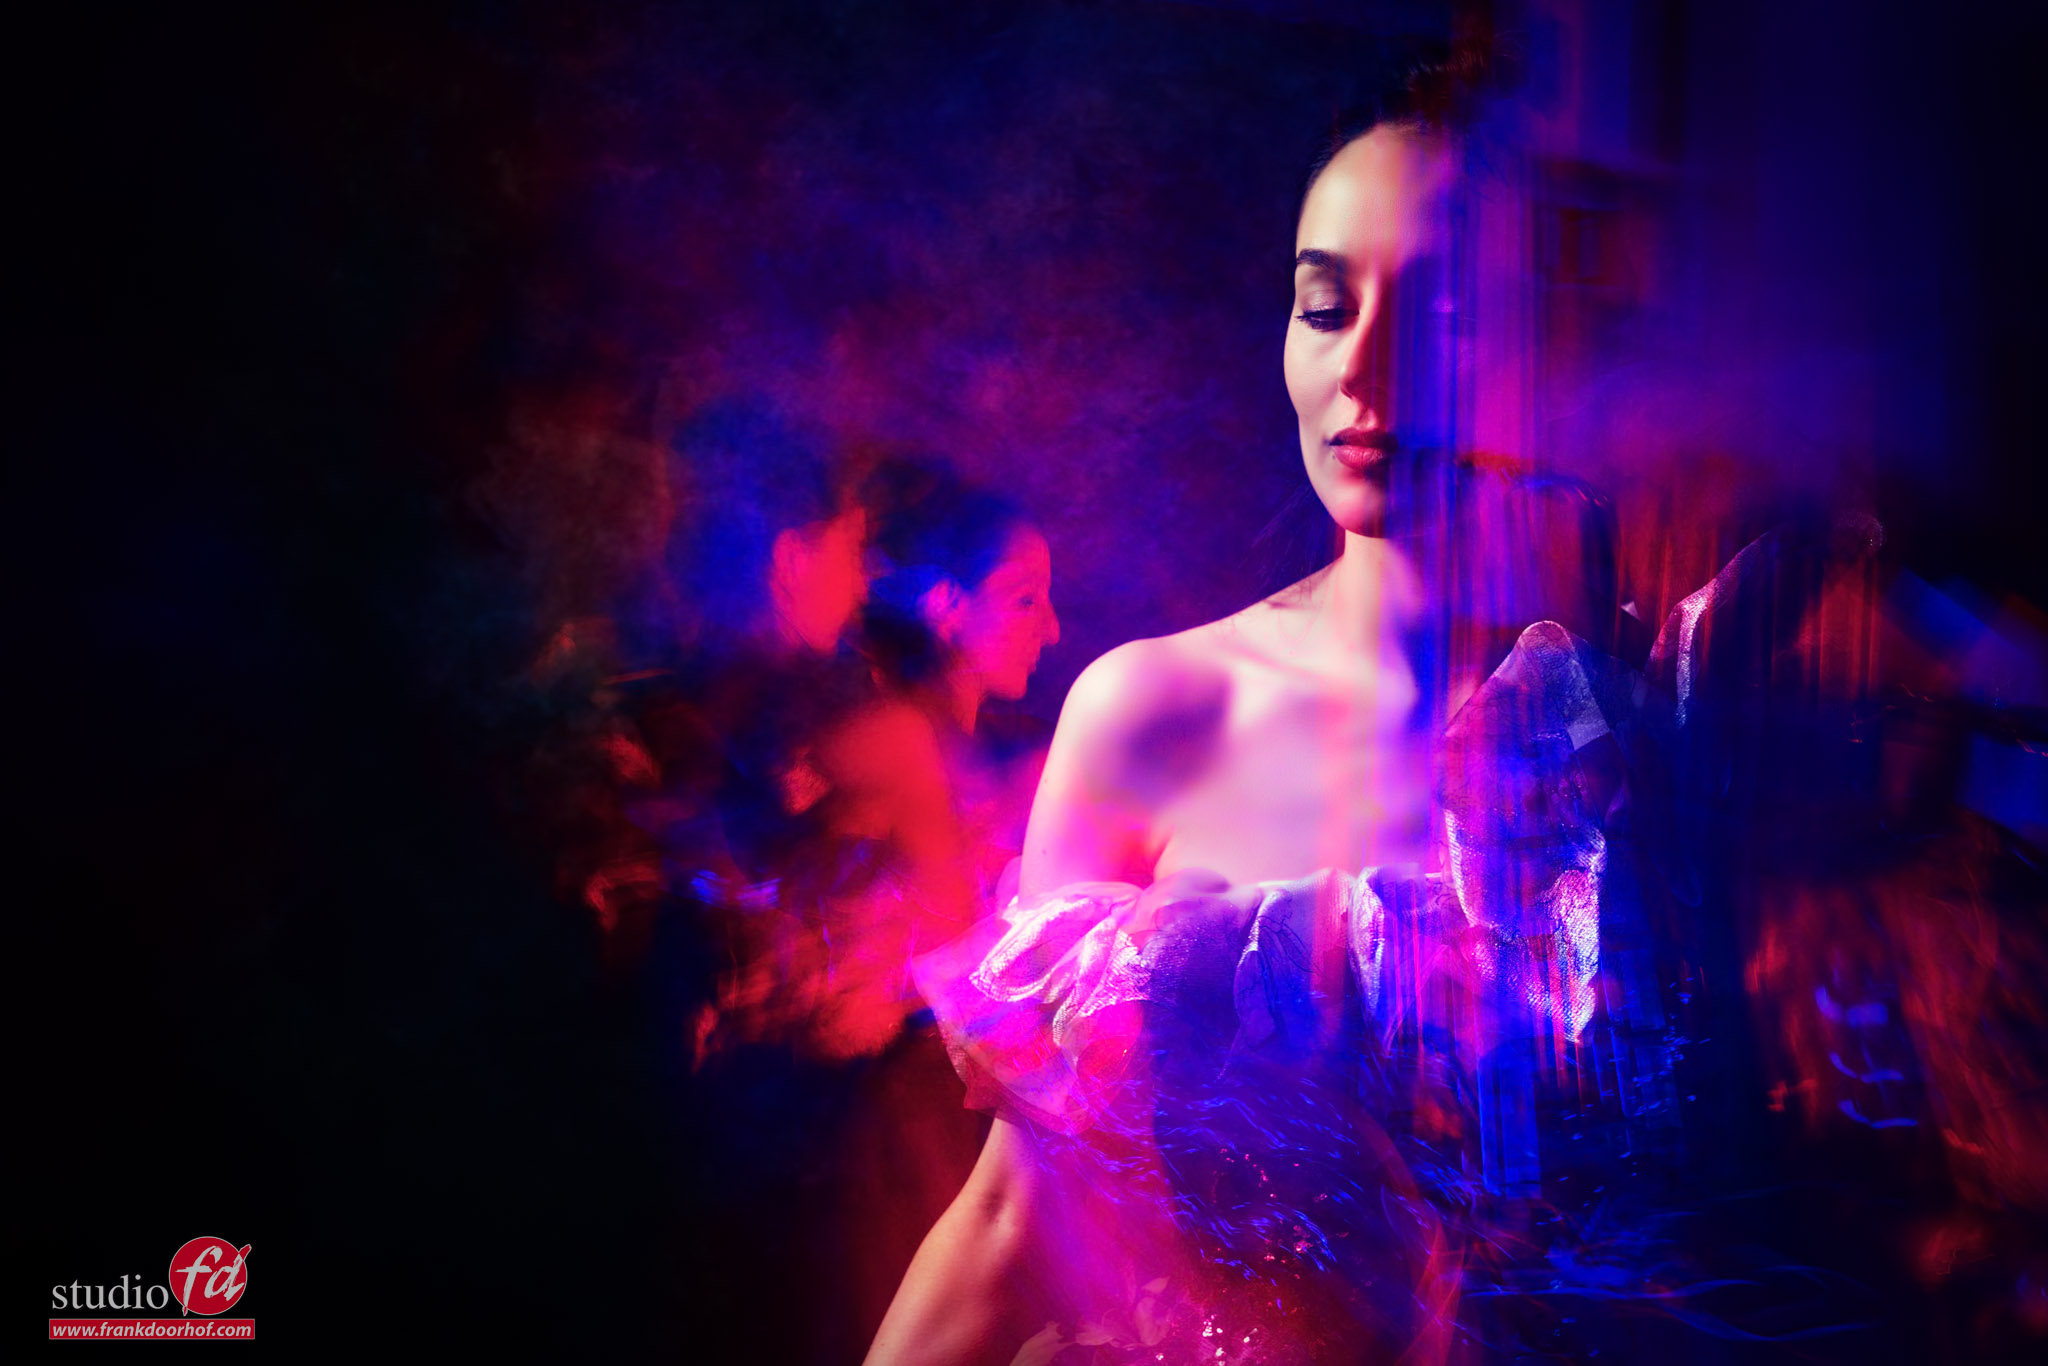
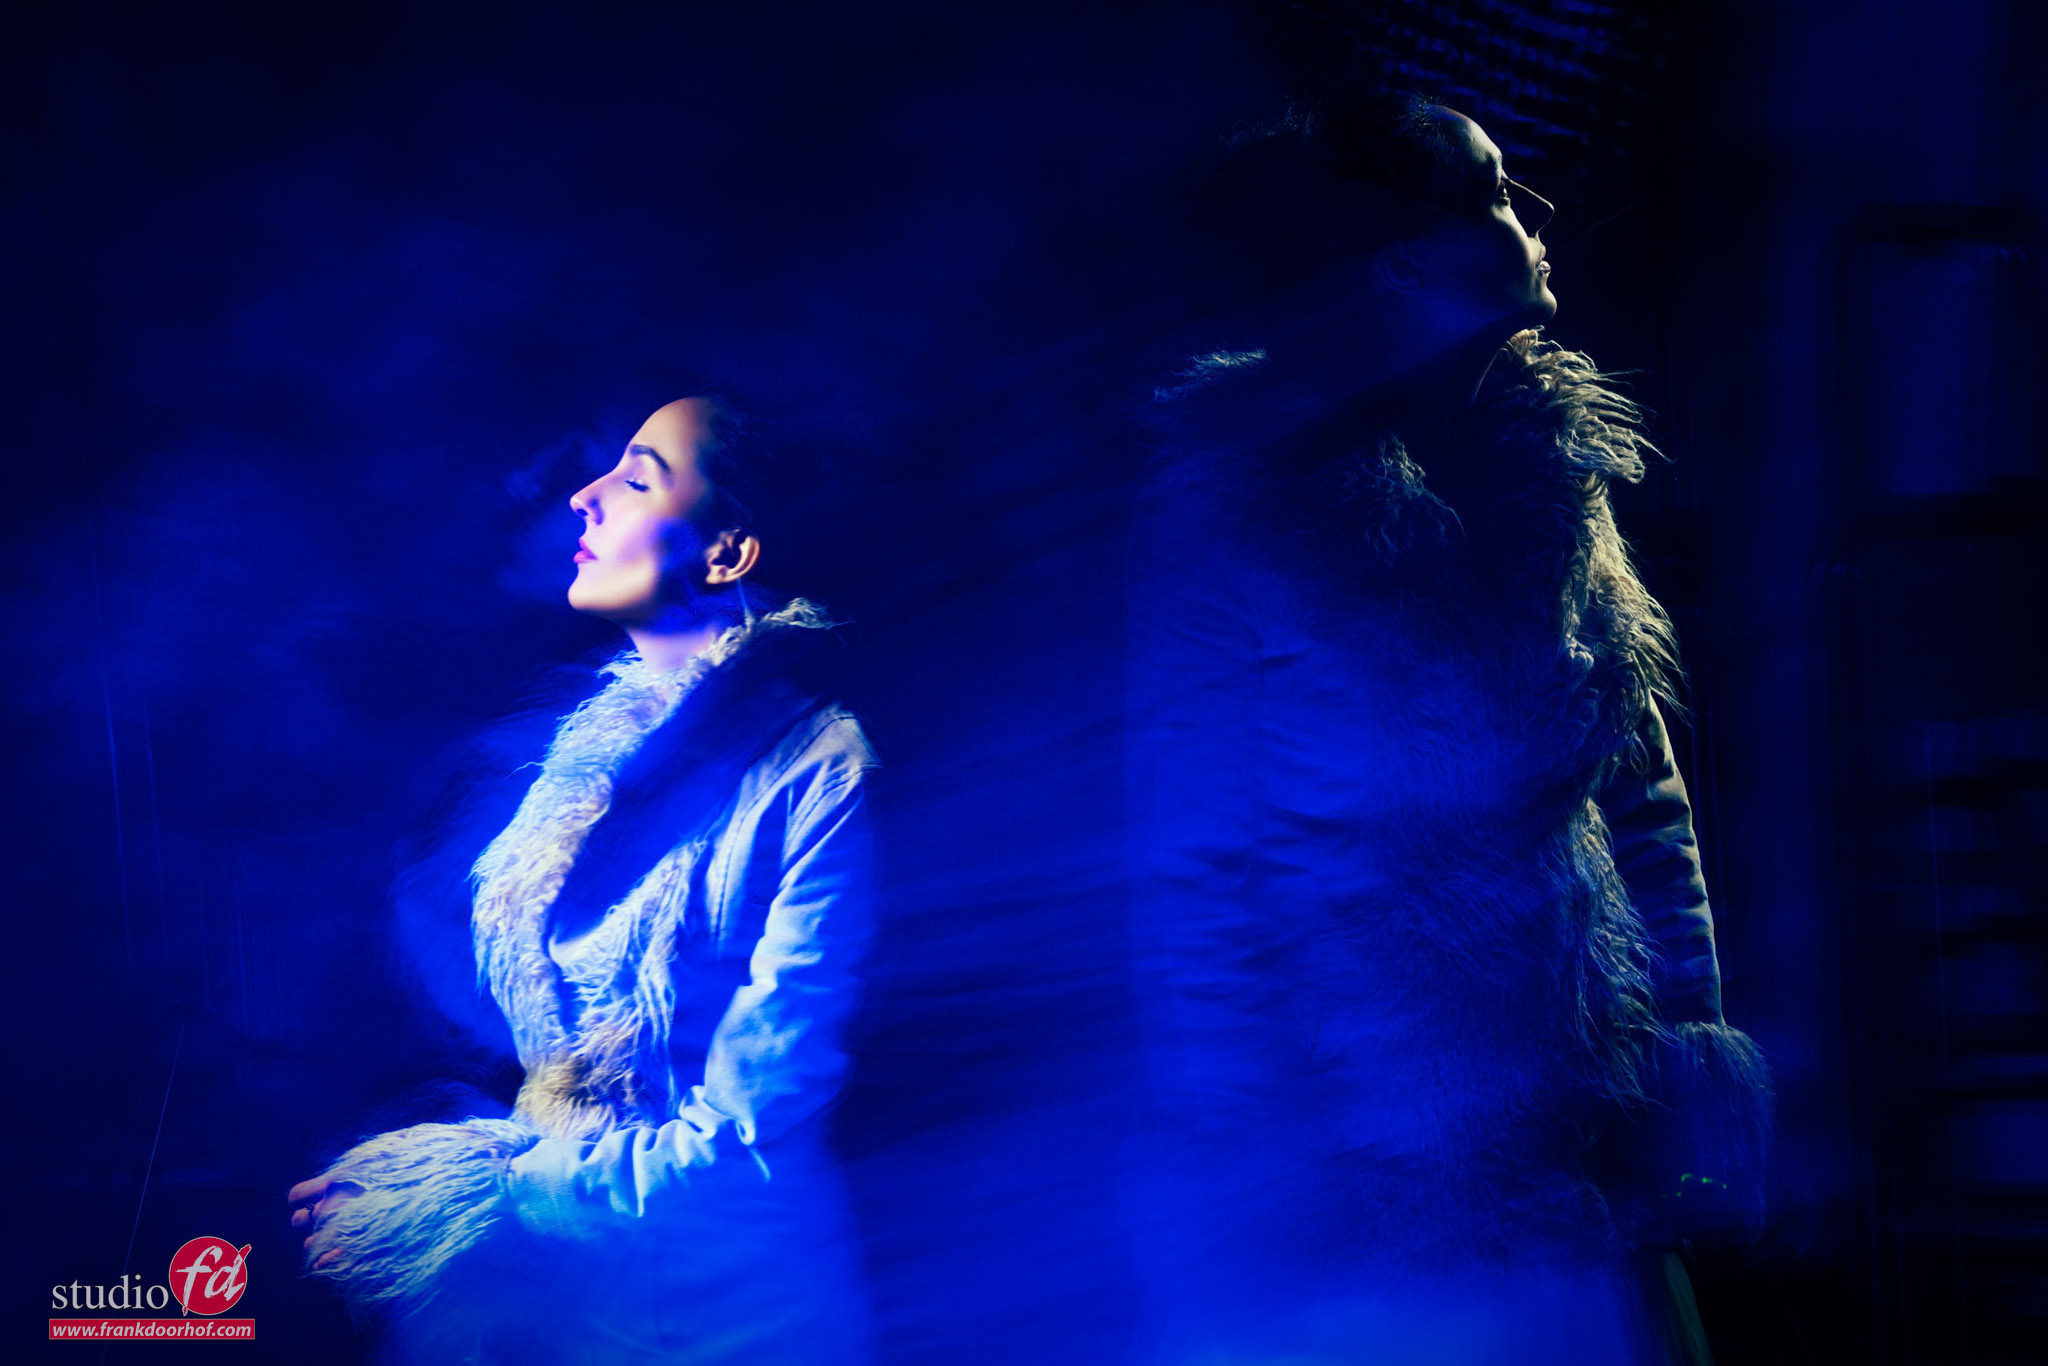
But during the longer shutter time, the smoke will continue to move, and also the model will create movement, which can be seen in her outlines but also in the smoke.
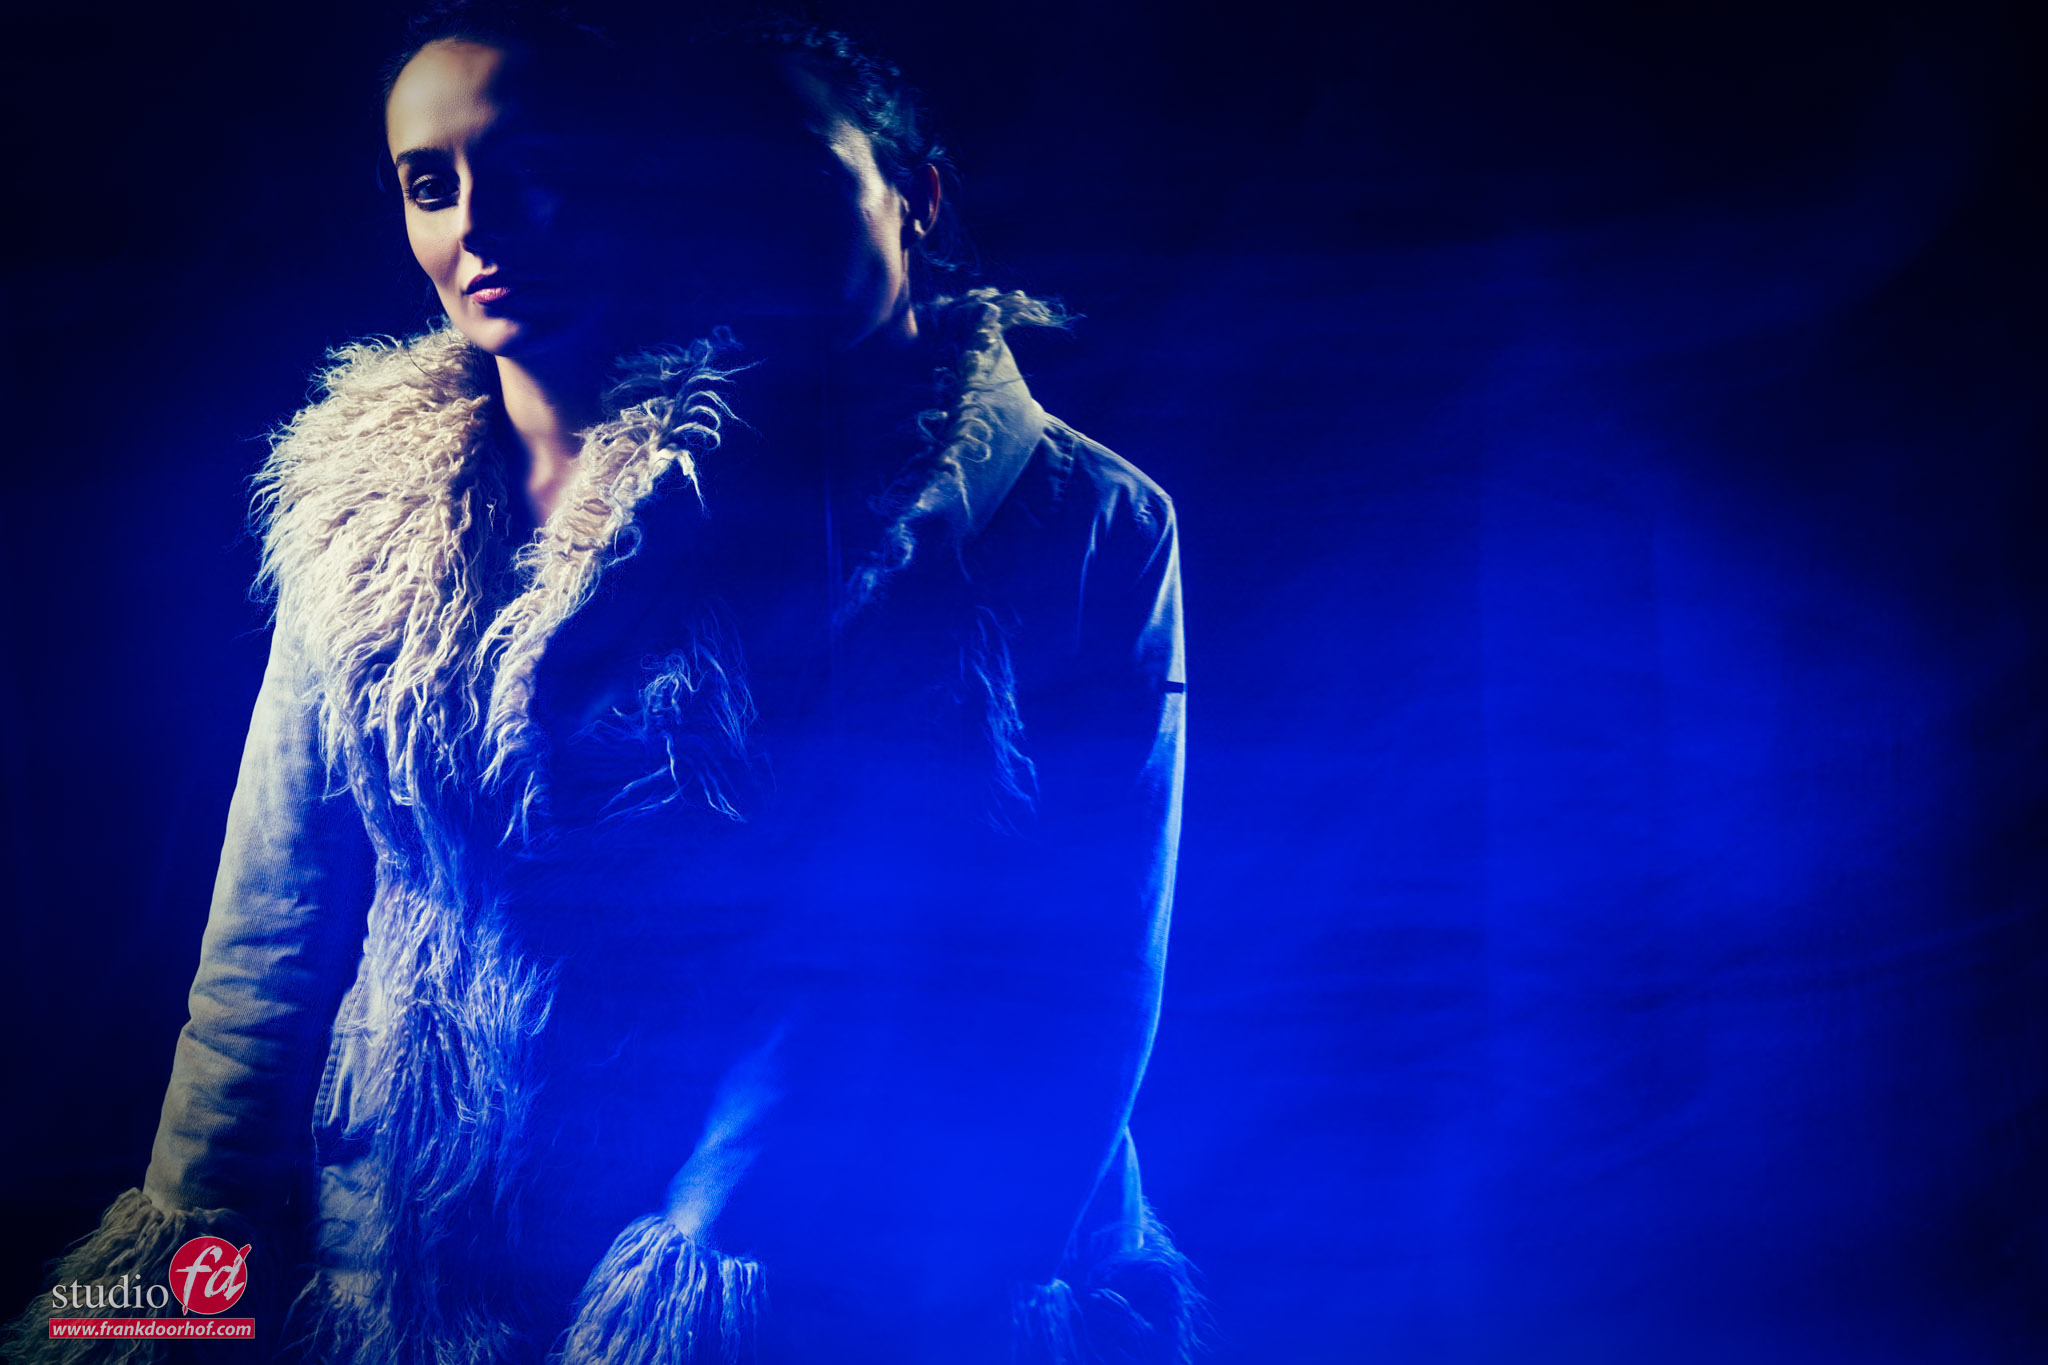
When you shoot this just as a portrait, it does look a bit weird. But in a good way.

For lighting, I’m using a small softbox like our Quicky from Geekoto on our model Isabelle.
From the sides, I’m using two Geekoto GT200’s with the Rogue Magnetic System gels.

As soon as I start adding some more smoke, the effect is already getting a lot nicer.
the unrepeatable shot


Movement

But this is still with a model that doesn’t move.
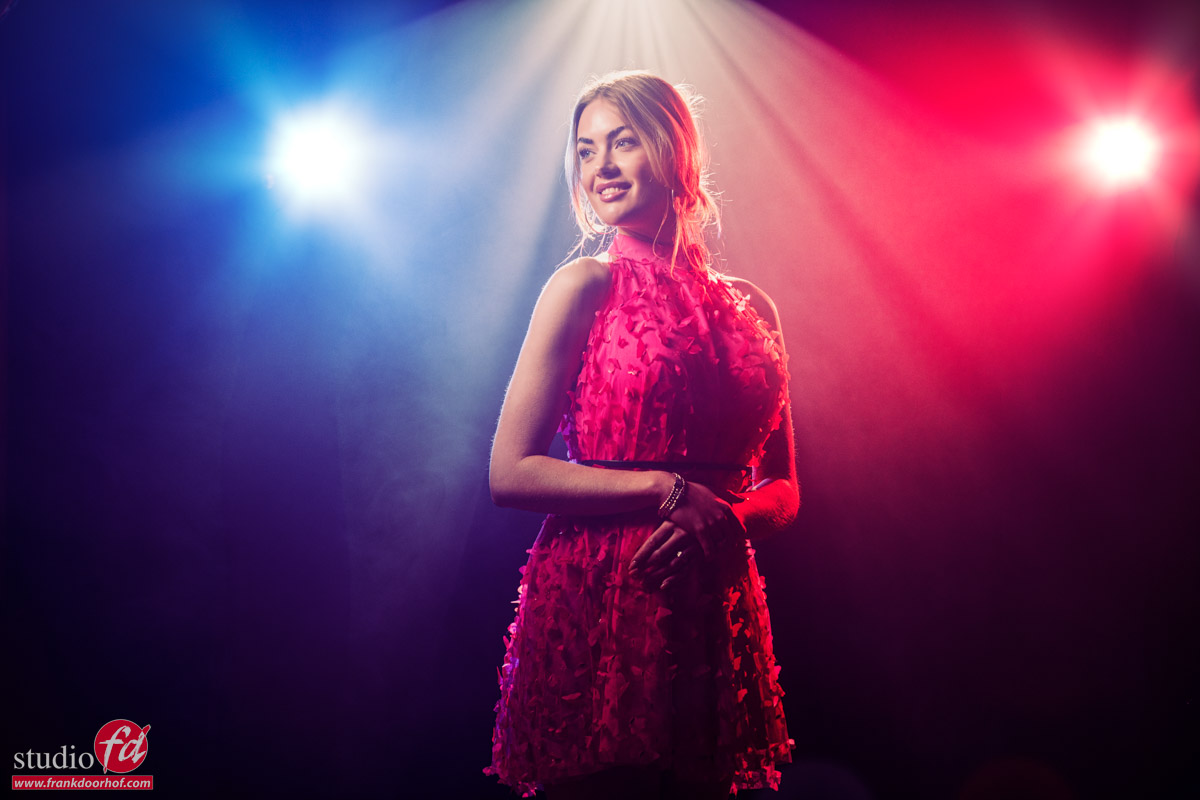
In the next setup, I’m leaving the modeling lights on for the colored backlights.
In this setup, I’m also using a Nanlite Pavo tube on the floor set to a blue tint.
It’s aimed at the floor to tame the output because it was too bright, and a nice extra effect was that it would make the light more diffuse.

As you can see, just shooting a portrait like this is not really a “WOW what great moment”.
But what when we start adding some motion?
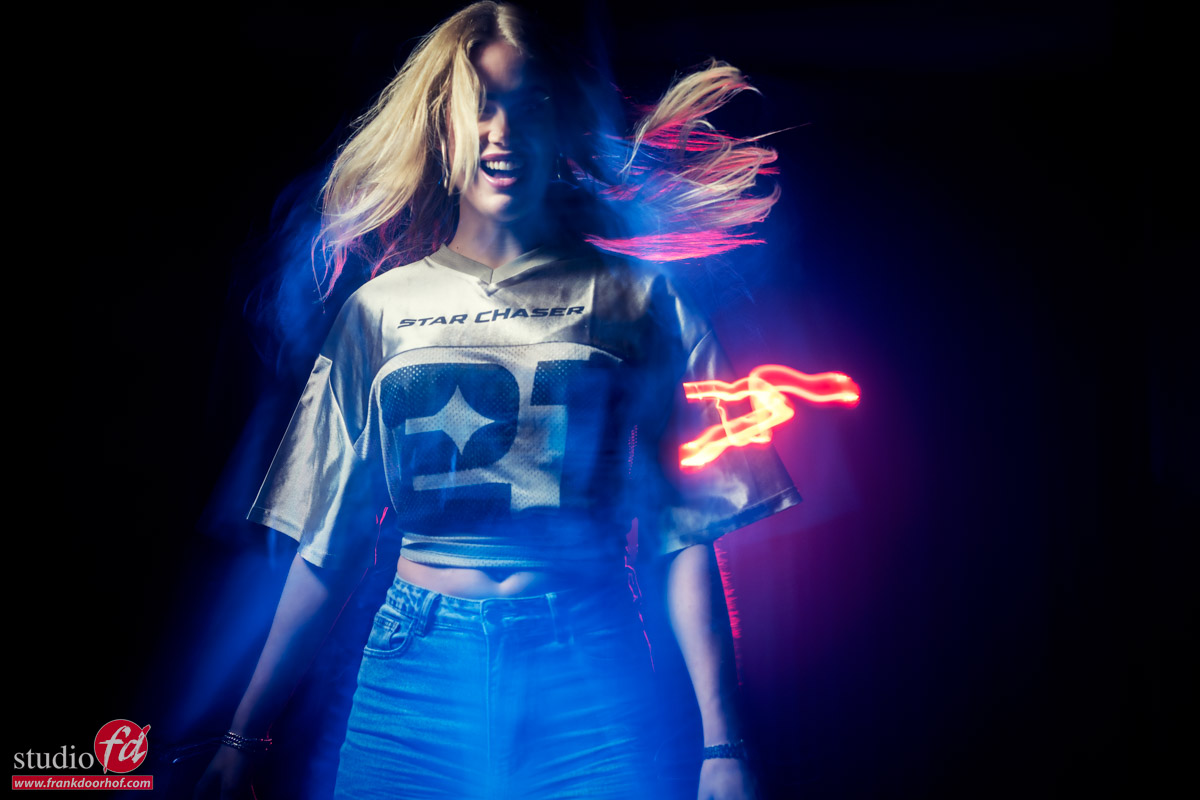
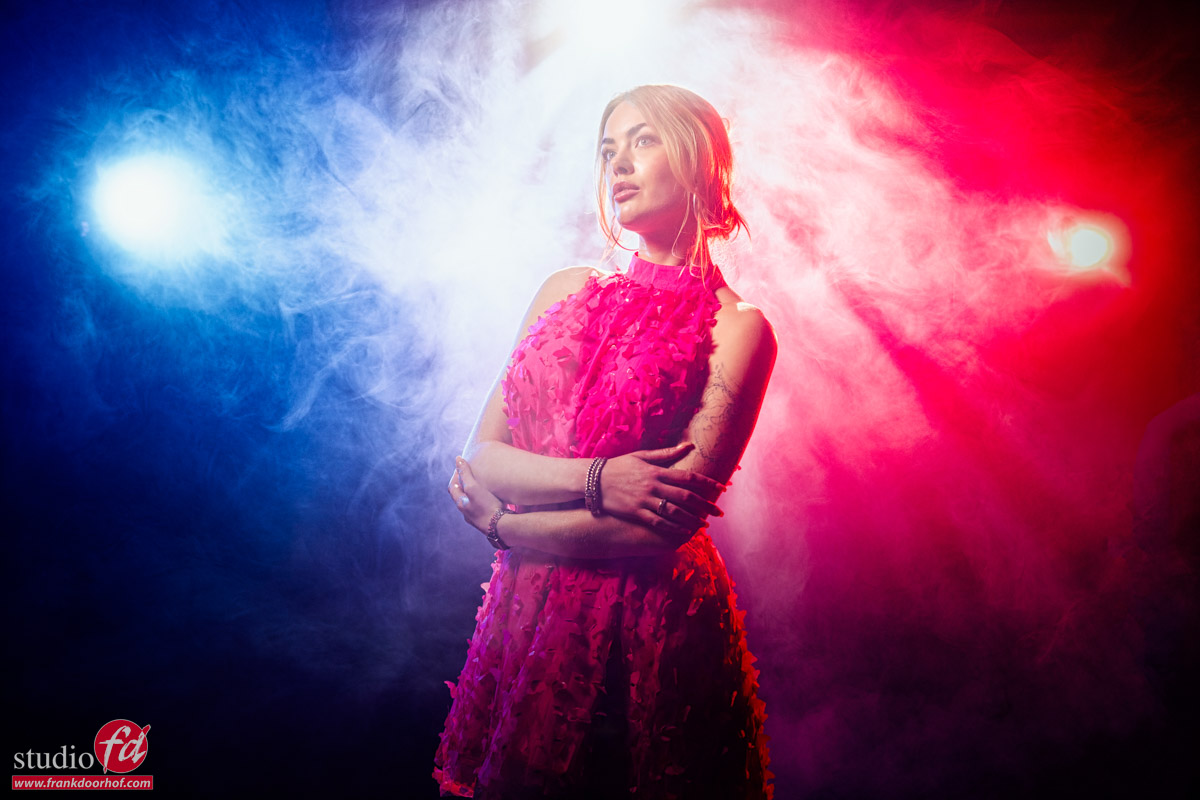
In this case, I’m asking the model to turn very fast and stand still as soon as the strobe fires (just like we would do with freezing a jump or standard motion).
When you move your camera, you can get some cool effects from the backlights; sometimes it will shine through the body of the model, but we just call that creativity due to time limits.

So let’s up the ante a bit more.
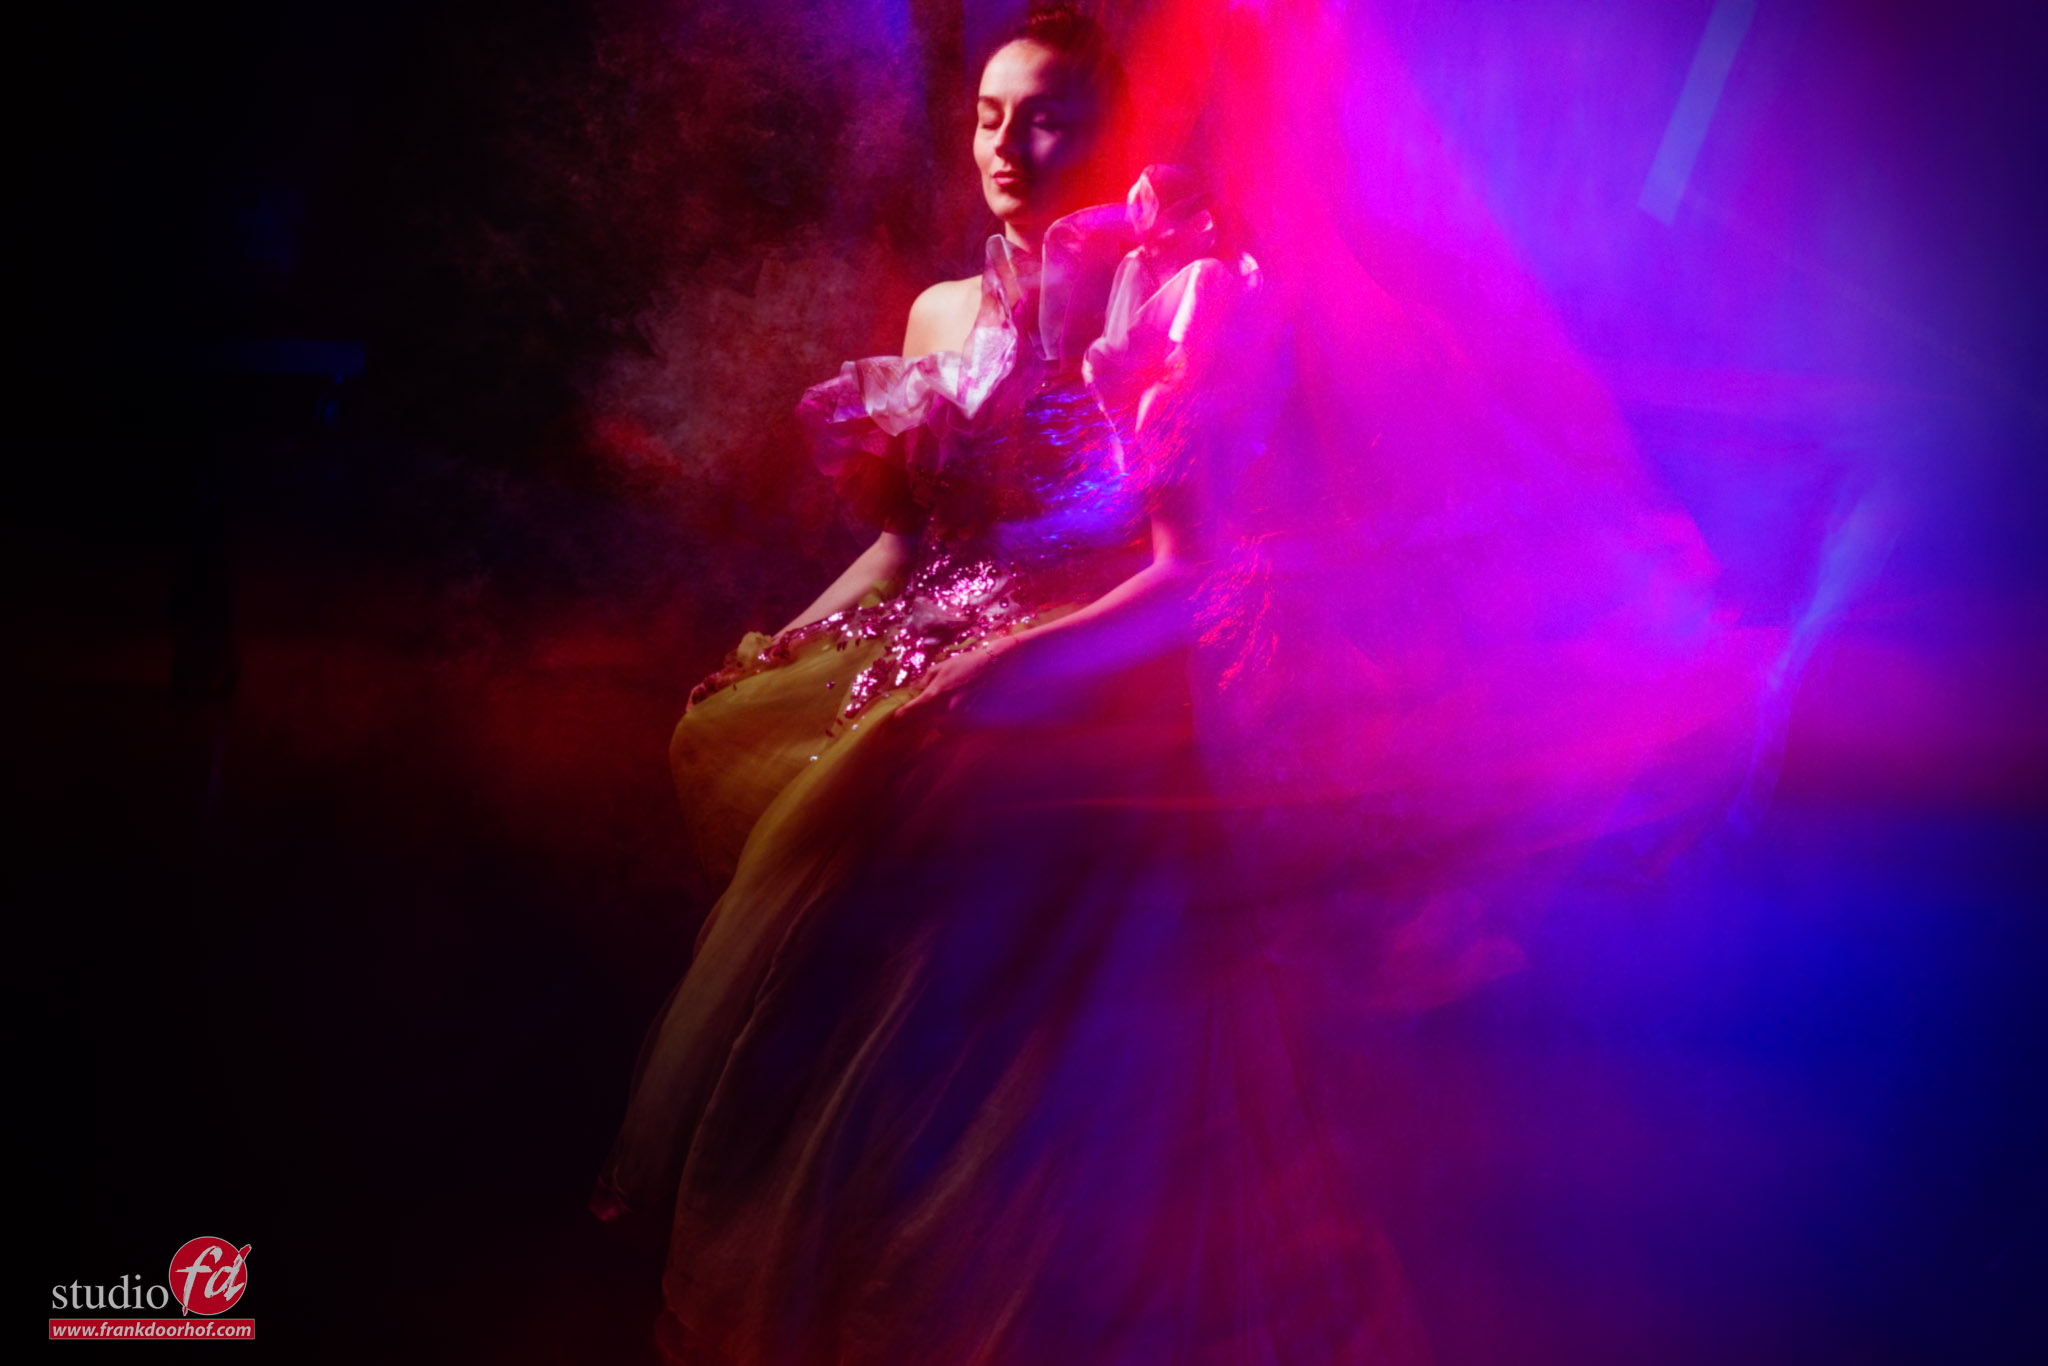
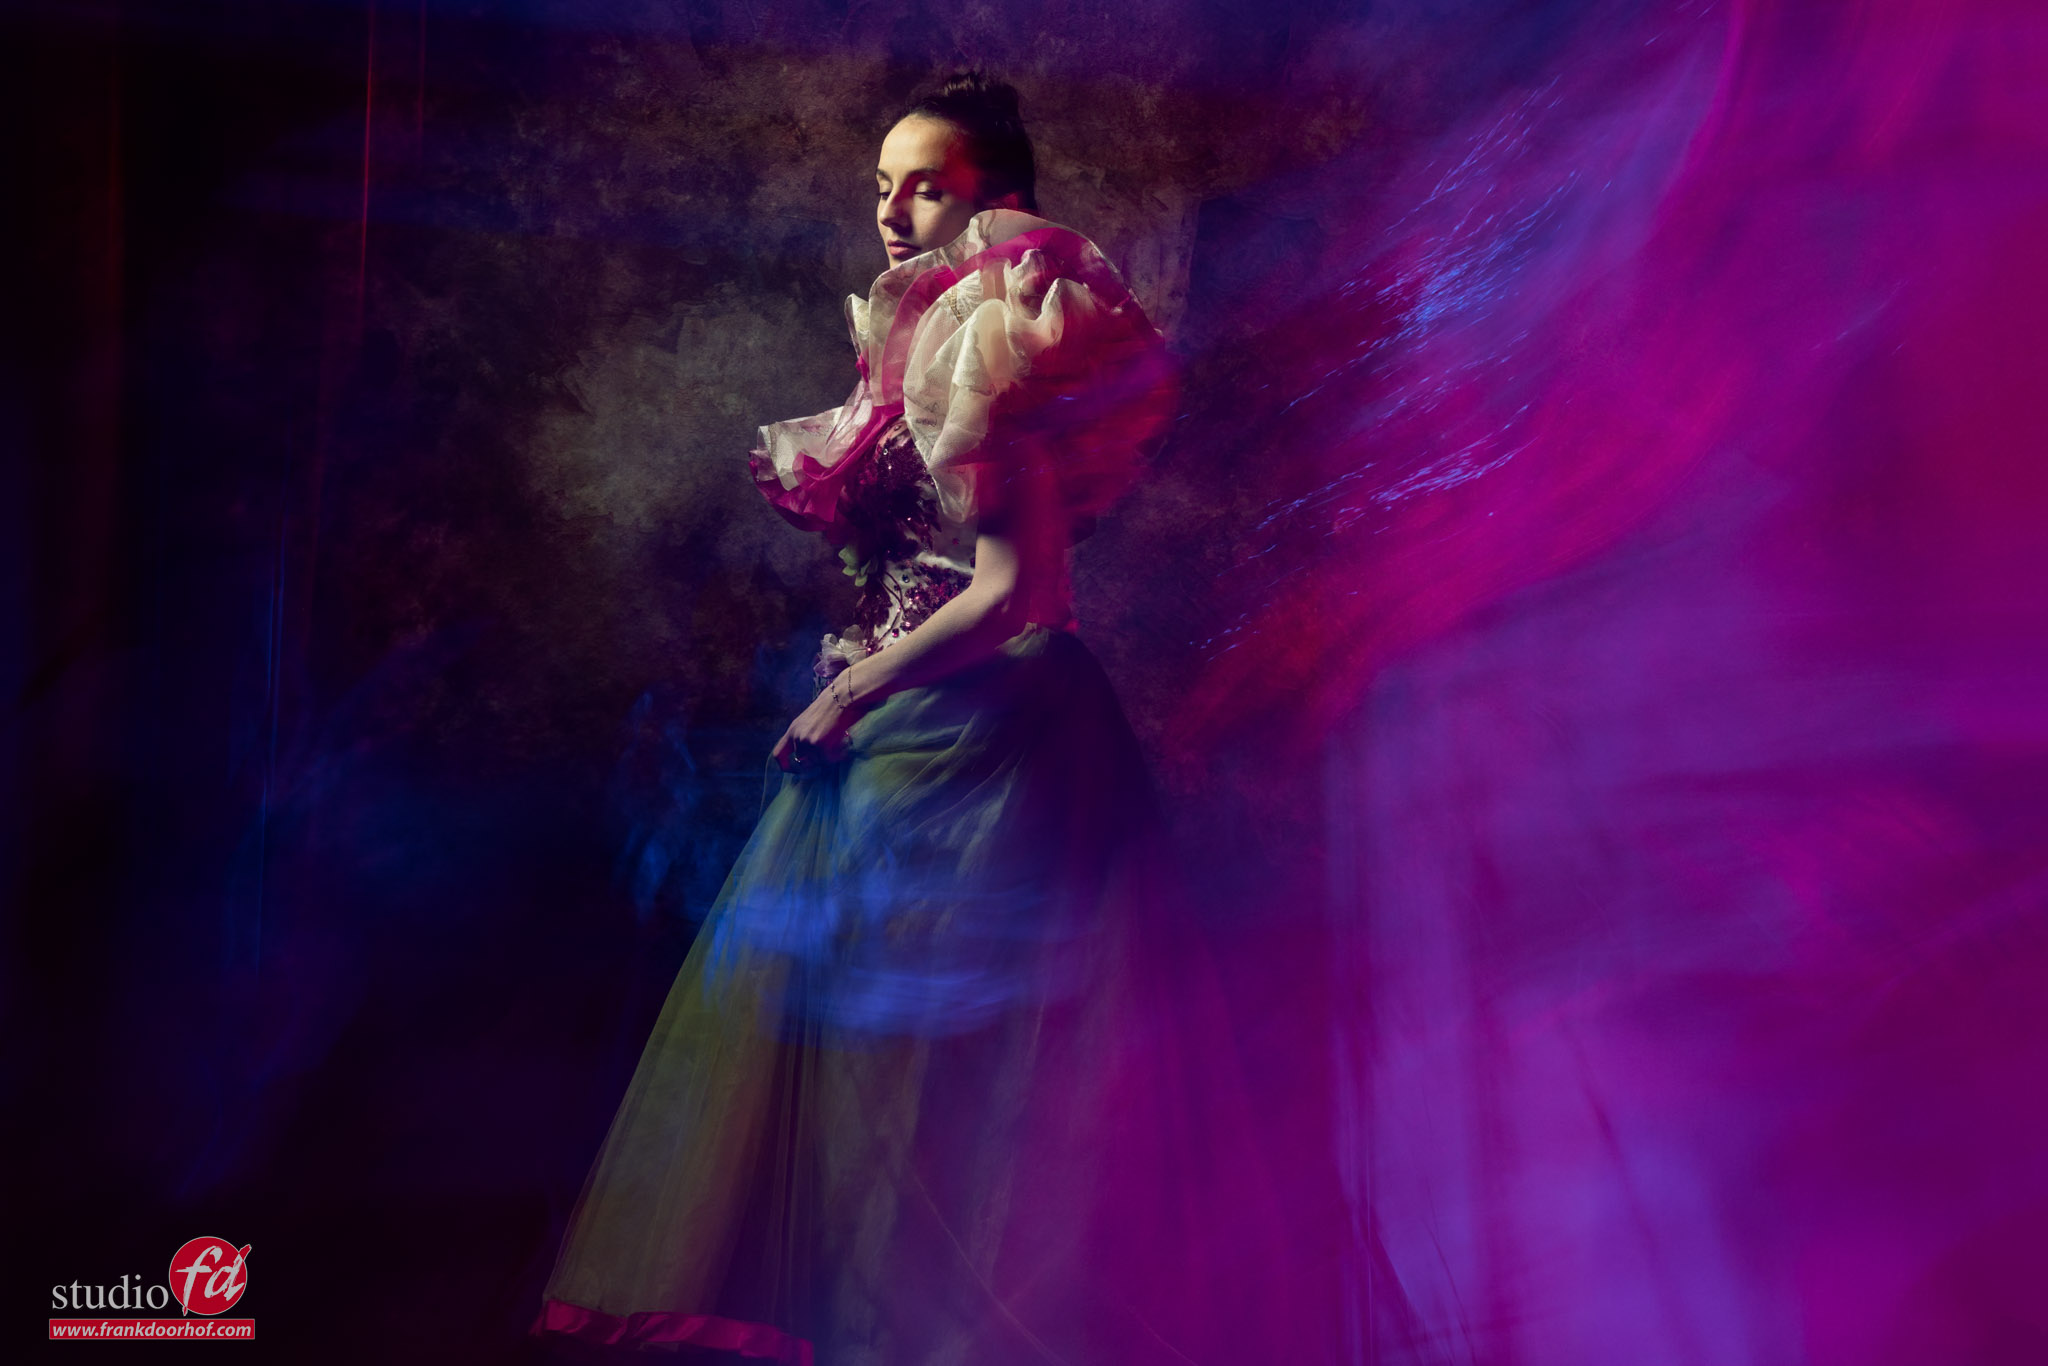
For the following shots, I’m also turning and zooming the camera for all kinds of “weird” and “cool” effects.
And when you’re lucky, you sometimes capture two strobes in unique places.
Who needs Photoshop 😀
(Actually, I do, I love Photoshop, and all these images are edited in Photoshop)

the unrepeatable shot

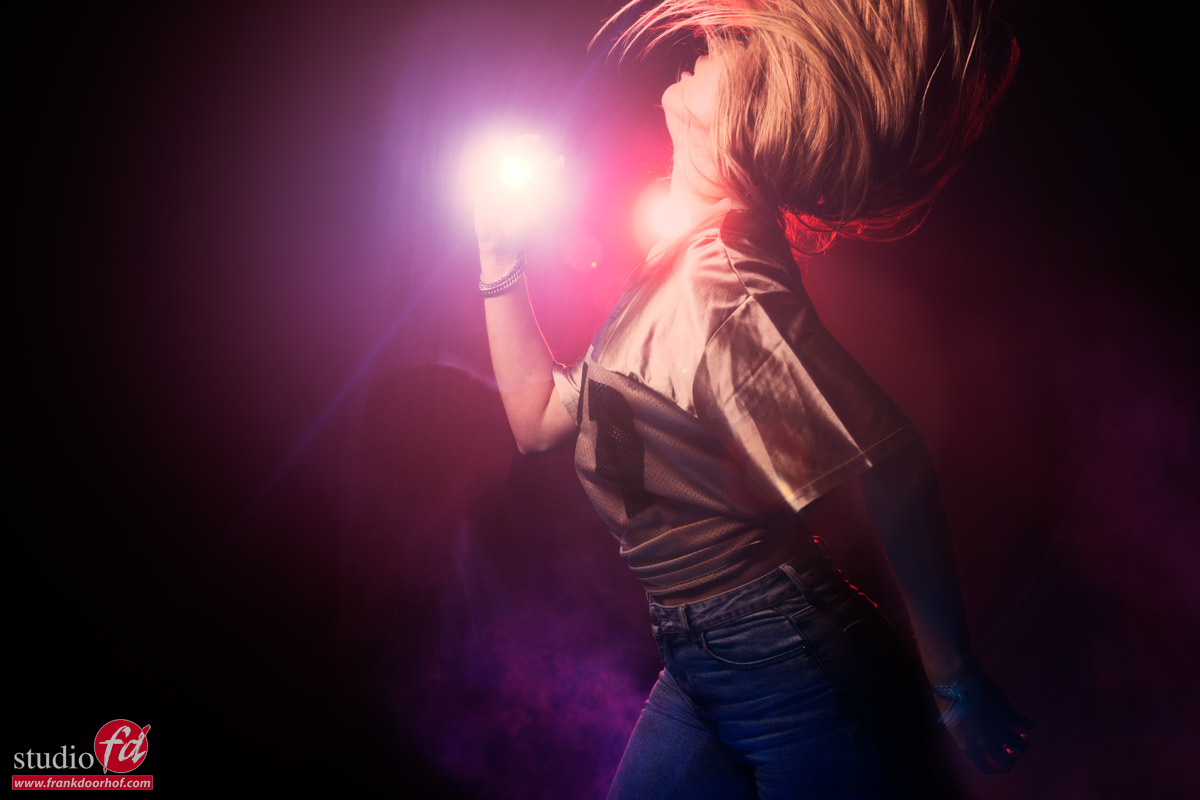
And of course, you can also go for a lot more extreme movements.
These were shot during a different workshop without smoke.

Cool effects, you will never get again

Of course, you can add great effects in Photoshop.
For example, I love plugins like BorisFX and use them mostly for the film effects, but you can add some awesome lens flares and smoke effects that would really enhance images like this.
For me, adding lens flares on set is part of the fun, but when you miss a lens flare in a shot because you framed the shot incorrectly, you could add some pretty convincing ones from BorisFX.

When you’re in the studio and want some really unique images that are always different, but always cool.
Try adding long exposures and flash combined with strobes and colored lights.
Move the camera, zoom in/out, and be surprised by the outcome.
“It’s like a box of chocolates, you never know what you’re going to get.”

Workshops

Want to learn everything about light control?
Want to visit a workshop where it’s not just shooting a model with a fixed lighting setup, but see how the setup is built and adjusted to the taste of the group?
And of course learn how to work with poses, backgrounds, small sets, styling, retouching, and a lot more…..

If this all sounds awesome, visit fotografie-workshops.nl and book your workshop.
If you don’t speak Dutch, no problem, let us know a few weeks in advance, and we can switch the workshop to English.
Not possible to travel to the Netherlands?
We got you covered with our 1:1 online workshop.
We have a full streaming setup in our studio. 4 detail cameras and of course the retouching software, so you can see every detail and of course ask questions during the day. Plus, you get all the RAW files after the workshop.

https://frankdoorhof.com/web/wp-content/uploads/2026/04/Isabelle-April-04-2026-71-Edit.jpg 800 1200 Frank Doorhof https://frankdoorhof.com/web/wp-content/uploads/2015/03/studioFD_Logo-1FV.png Frank Doorhof2026-04-28 18:00:522026-04-29 14:26:12You will never get this

Speed up your workflow with Reblum

24-04-2026/in blog, Reviews/by Frank Doorhof

Skin retouching has always been “a thing.”

This blog is about Skin retouching with Reblum. Ever since I started with model photography, one of the hottest topics has been skin retouching.
Let’s first talk about why you should do it and how Reblum comes into the picture.
Because we didn’t need it with film… right?

Well, not really.
First of all, when people only used film in most beauty shots. Filters were used to make the skin glow, and thus make it look just like in the movies, nice and soft.
And also remember that with film, the surface never was 100% straight. Focus was never 100% accurate, and the film itself didn’t have that insane 100% artificial build that film had.
With digital, we have insane quality in lenses. 60MP sensors that now focus on the sensor itself, so our images are razor sharp without any possible pitting for our models.

In other words, you won’t just see all the skin details; no, you will literally see stuff you don’t even see yourself in the mirror; the camera is ruthless.

But luckily, we don’t have to shoot with soft focus filters (you still can, of course).
In fact, I’m always shooting with a K&F Black diffusion filter. Which is awesome for backlighting and does give a very slight glow to skin; it’s hardly visible, and I mostly use it for smoother and larger lens flares.

Photoshop for skin retouching

I don’t remember the first versions of Photoshop (I did start with Lightroom 1.0), but Photoshop did change the world for Photography.
When I started with skin retouching, it was pure hell. It took hours when you wanted pro-quality. And it was just boring and repetitive work that you would rather not do.
If you ever hear someone say, “dodge and burn the skin,” it means literally going over every pore and taking them out with highlights and shadows to make sure you keep the original structure.

Later on, we all started to develop smarter ways to do skin retouching.
Photoshop got more filters, and in essence, it was possible to get an ok skin retouch that was good enough for the internet.
One of the disadvantages of the automated skin retouching plugins was that they didn’t really do a good job. It was often more like a Barbie doll than a human. And getting that detail back was often solved by adding a noise layer. When you look at some magazines from the 90s-2000s, you know what I mean.

I actually created a simple action in Photoshop to bring detail back in the skin, but it’s not the real detail.
So, is there a perfect solution?

The perfect solution

Like with almost everything (except, of course, my wife), there is no perfection in life.
And that also goes for skin retouching.
Over the years, I’ve tried several solutions, and some I really liked, but most were slow, changed my whole model (even before AI), or just didn’t work on high-resolution images.

Nowadays, I mostly use Luminar NEO, which does a great job in most cases, and you can even stack effects.
If you are looking for an all-around solution for looks, slight retouch work, portrait work, and a lot more, Luminar NEO is one I can highly recommend.
However, it has one huge drawback for me. I love using presets and that is the Achilles heel; even on my M4 Pro MBP, it takes a while to load all my presets.
But don’t let that hold you back, it’s still one of the best all-round solutions.

Enter Reblum for skin retouching

I love the expression “keep it simple, stupid.”
Or the Steve Jobs approach, “one button is already one too many.” Well, ok, he didn’t say it like that, but you know what I mean.

The first time you look at the interface of Reblum, you might be a bit disappointed.
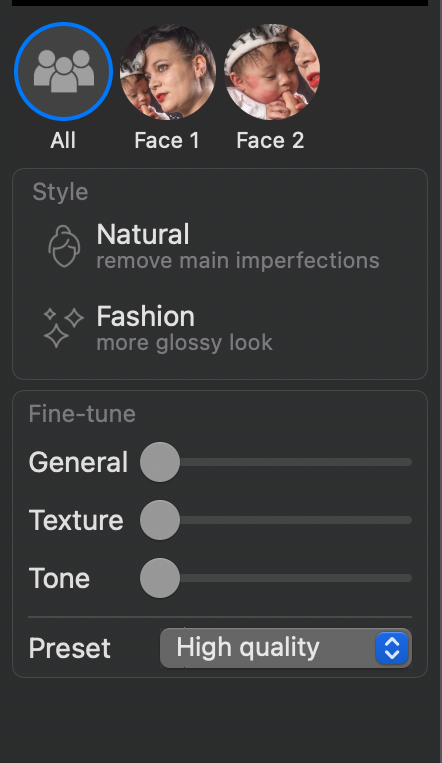
Reblum for skin retouching Yes, that’s it.
Well, not really, there is also an eye on the bottom for the before and after.
And export.
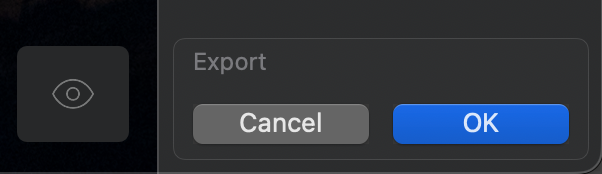
So we have two options and three sliders. Is that really all you need?
My first response was no.
But let’s be honest, what more do you actually need…..
If you run it in Photoshop, you can use Photoshop for masking if necessary, but in all honesty, everything I ran through it was fine and didn’t need any masking.

How you can use Reblum, and where it shines

There are many solutions for skin retouching. But what I really like about Reblum, and the reason you are reading this review, is the speed and integration into any workflow.
Reblum works under Lightroom, Photoshop, and Capture One.
For me, it’s key to work on 1 image, finish the image, and open the next one. I hardly work with batches, but even for me, Reblum speeds up my workflow a lot.
Reblum can be run straight from the top in Photoshop (recently used filters). And it will just run the filter on your present image, and after that, you can start the rest of your retouch process.

And it’s fast, and I mean really fast!
On my M4 Pro MBP you don’t really it working on 60MP files, its just there almost instantly.
It means my workflow has been considerably shortened, which is always a good thing 🙂

Reblum skin retouching, examples

So let’s take a look at 2 examples.<br class=”yoast-text-mark” />>Of course, I can redirect you to their website, but you never know if a company cherry picks photos (I’m 100 sure everyone does). And of course, there is nothing wrong with that, but I think real-life examples are always done best with your own images. And Reblum gives you a 7-day trial version so you can, of course, test it out for yourself.

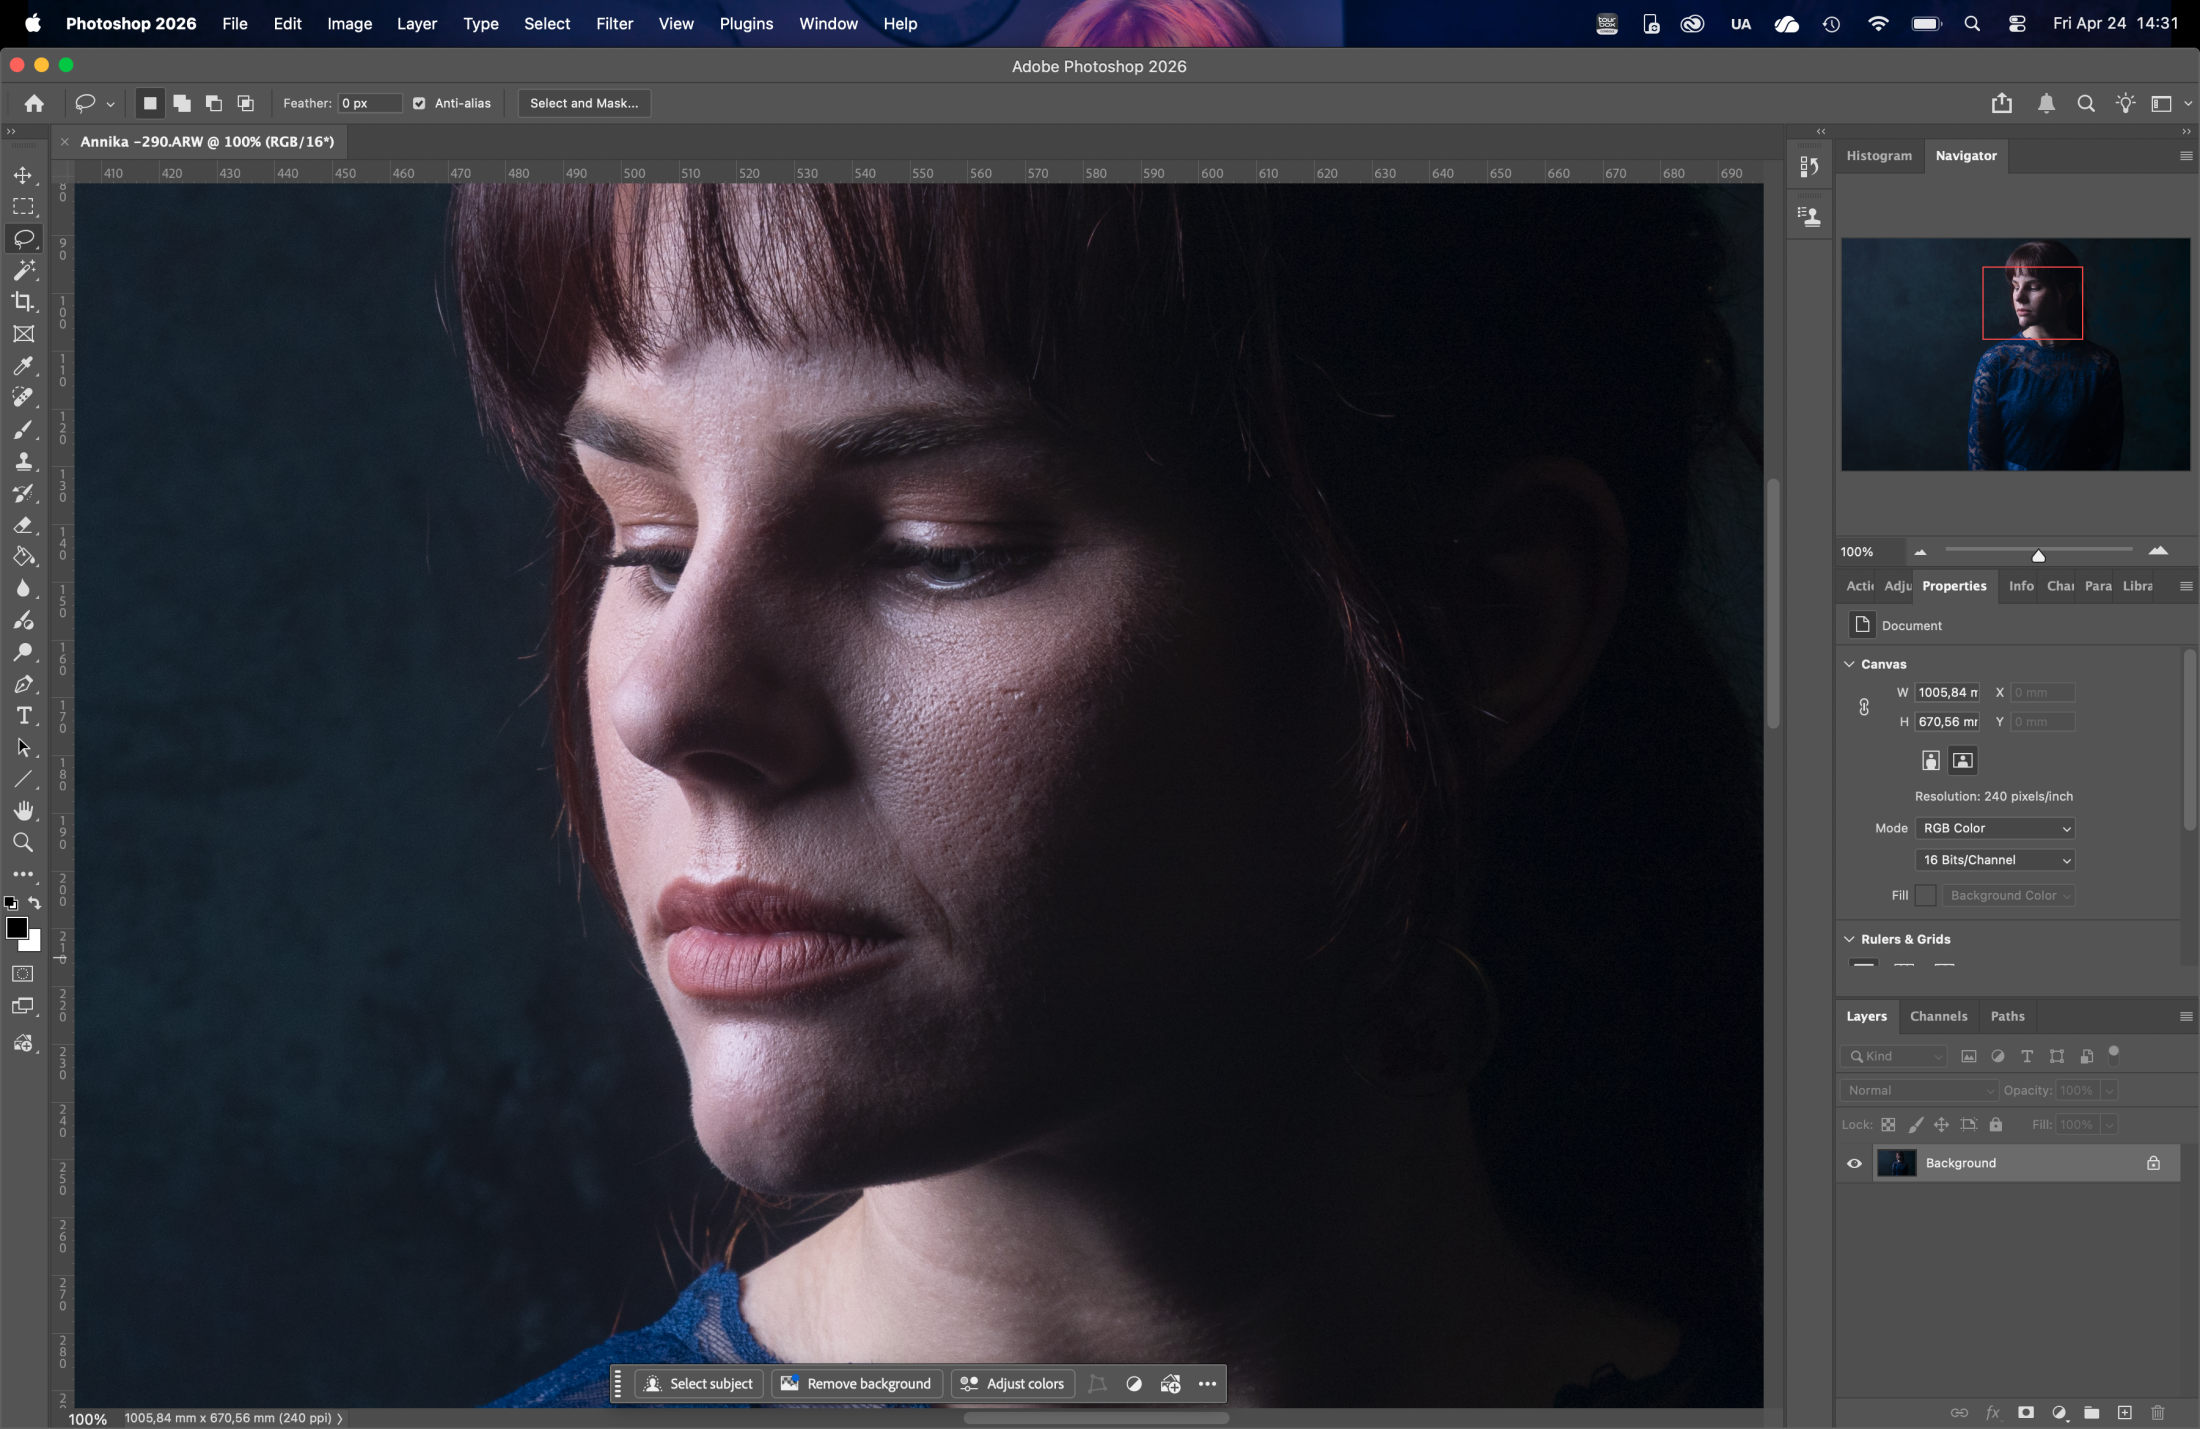
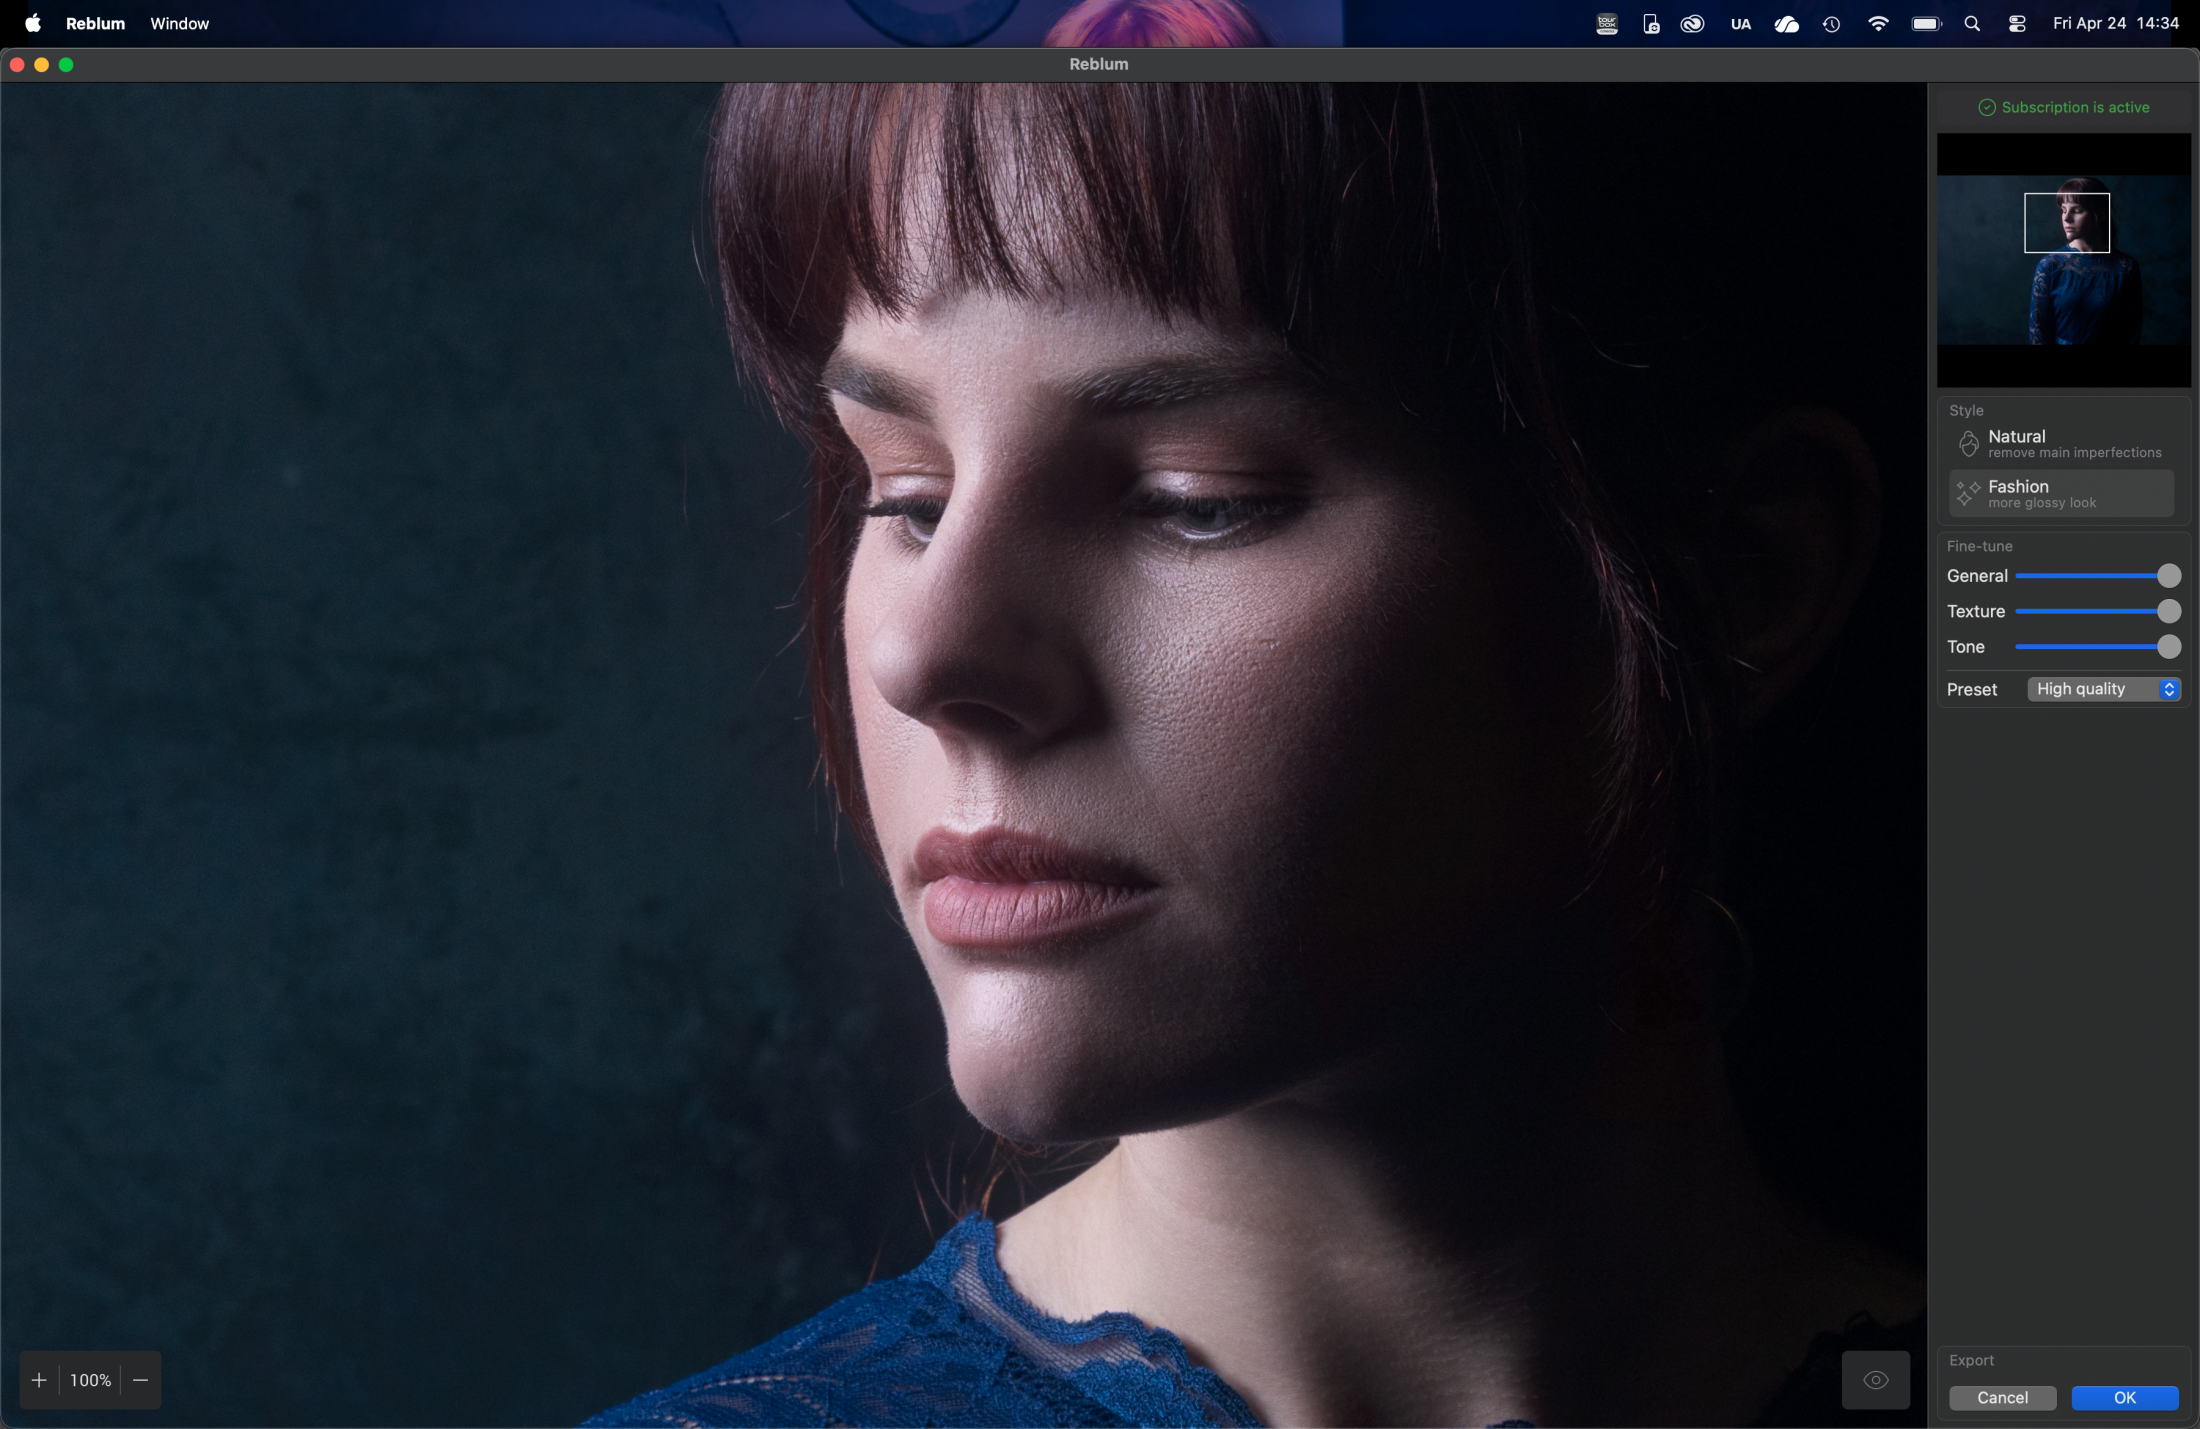
The first image is a standard high contrast portrait. I like to keep some pores on the cheeks, which keeps the model looking real.
But I don’t like it to be “rough” due to shadows and color differences.
With most skin retouching software, it’s great on flat light and a model looking straight into the camera. But it becomes a lot harder when a model is at an angle, and you are using high contrast lighting.
So… that’s what I tried.
reblum skin retouching

If you are looking for Barbie skin, you are in the wrong place, as you can see.
But for me, this is the “perfect” retouch. Loads of detail in the skin, but it looks so much “fresher” and natural. On the original image, you really see the relentlessness of the camera and the harsh lighting (not something you always want your model to see).
The retouched image keeps all the contrast in the skin, but it smoothens out the things you don’t want in the skin.
For me, this is the preferred way of retouching. I sometimes call it “retouching around the pores”.

But how about a shot that we did with our model Nadine?
We did a quick shoot with Nadine after the birth of her daughter, and we had a little less time for makeup. So let’s see how Reblum skin retouching works its magic.
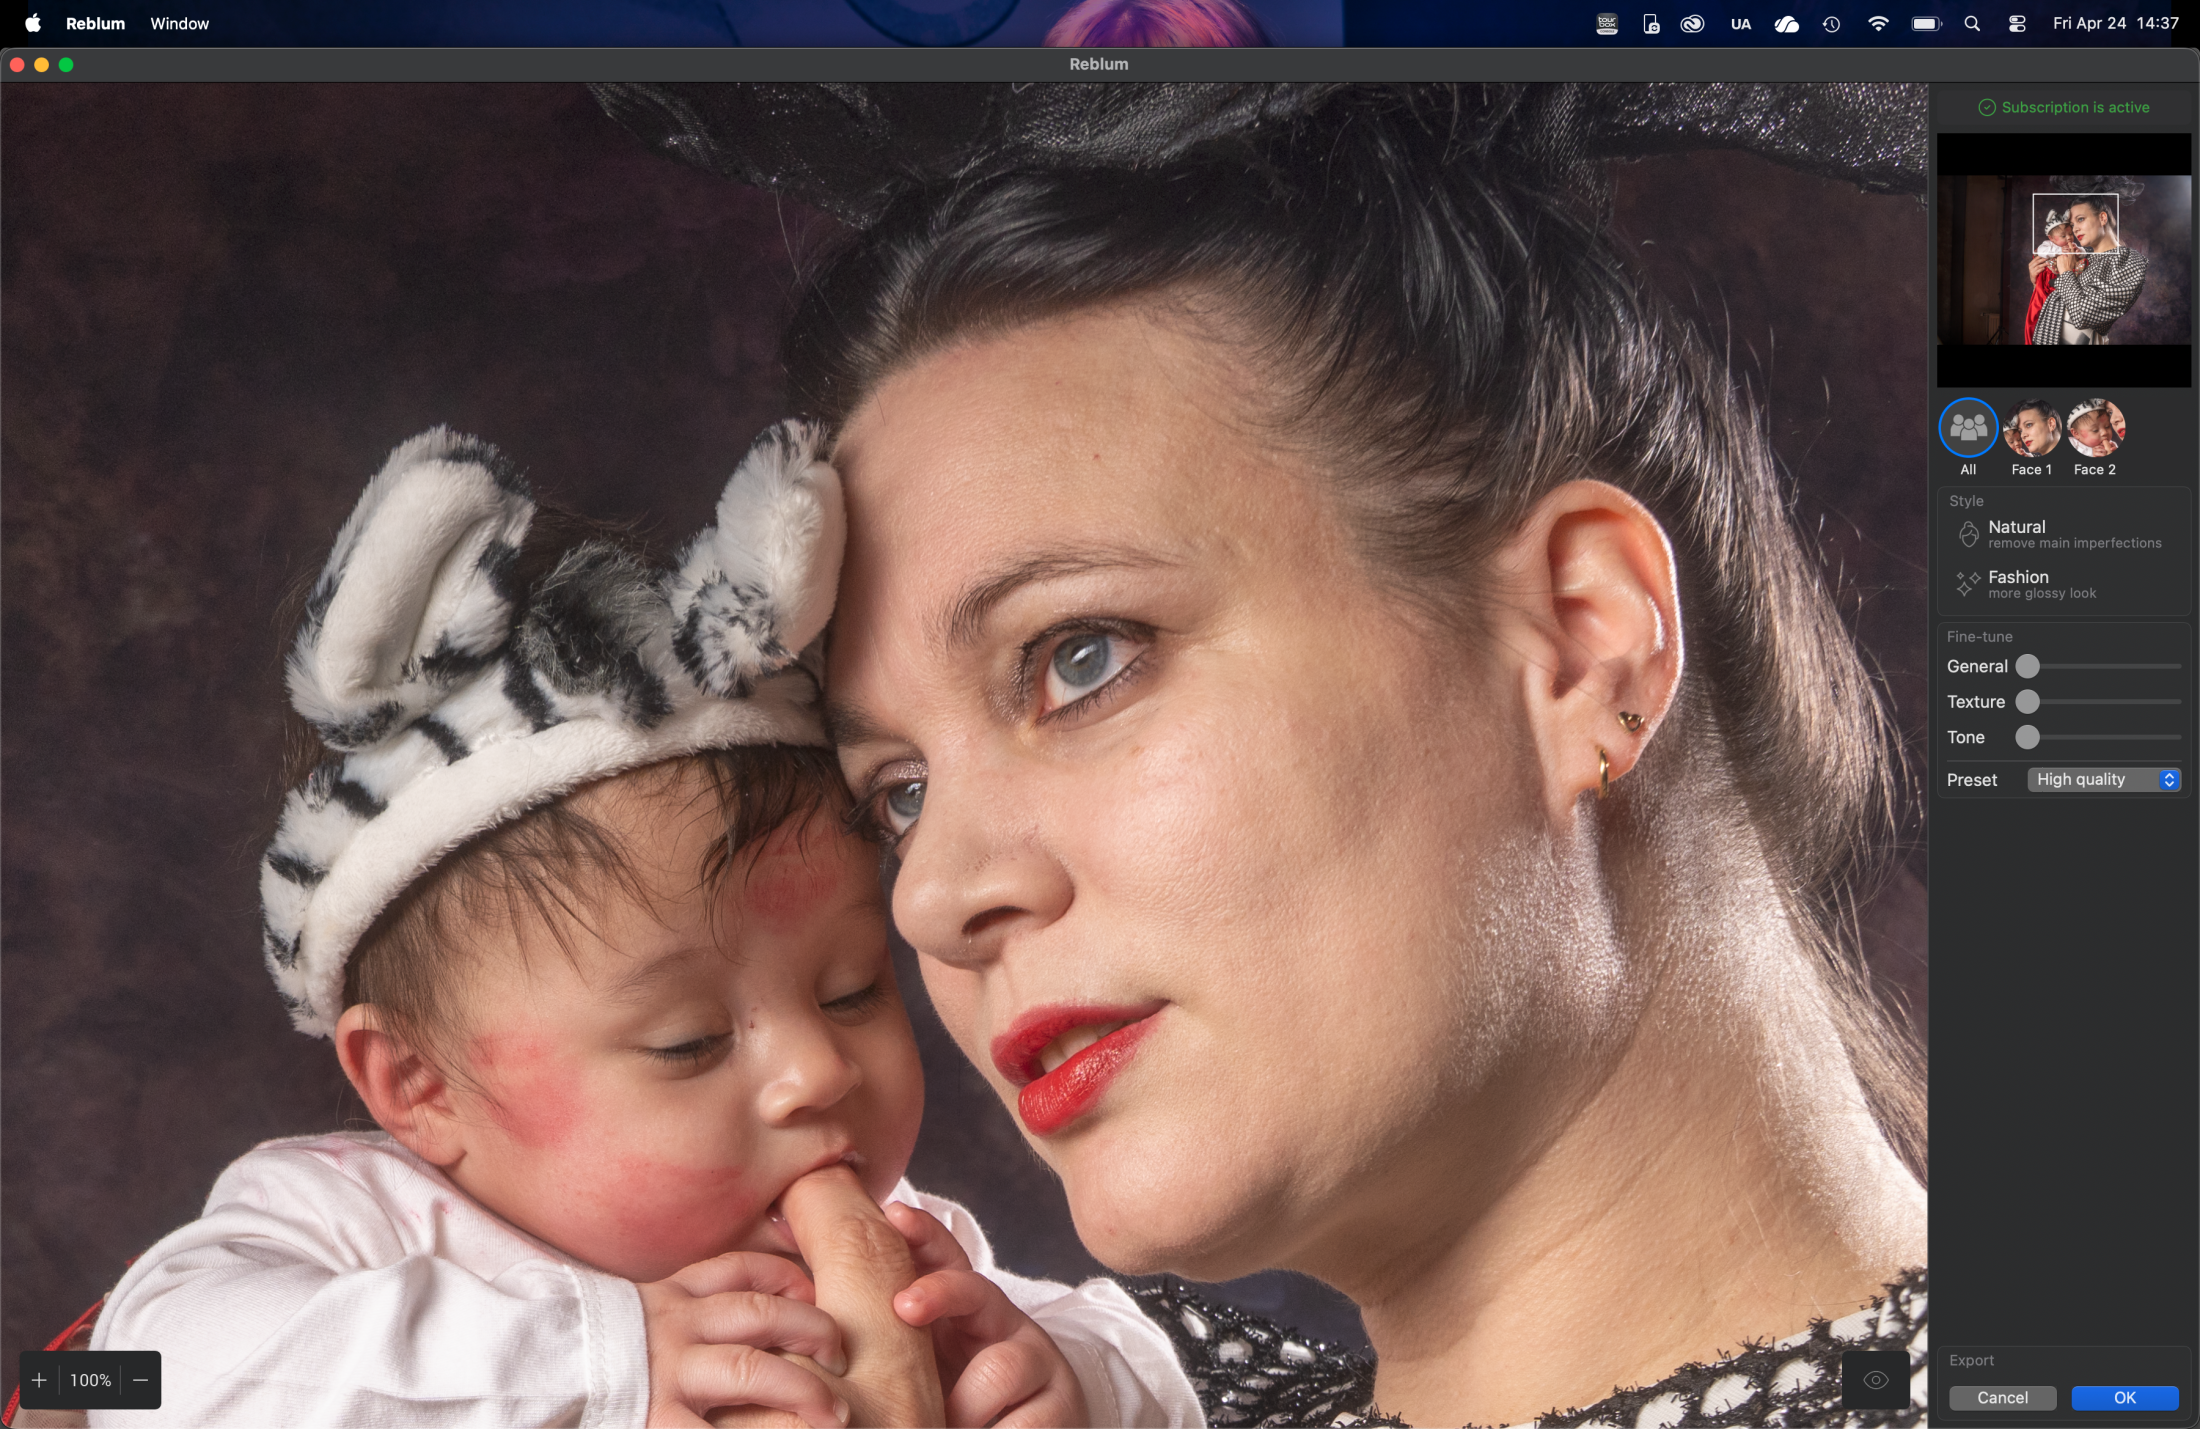
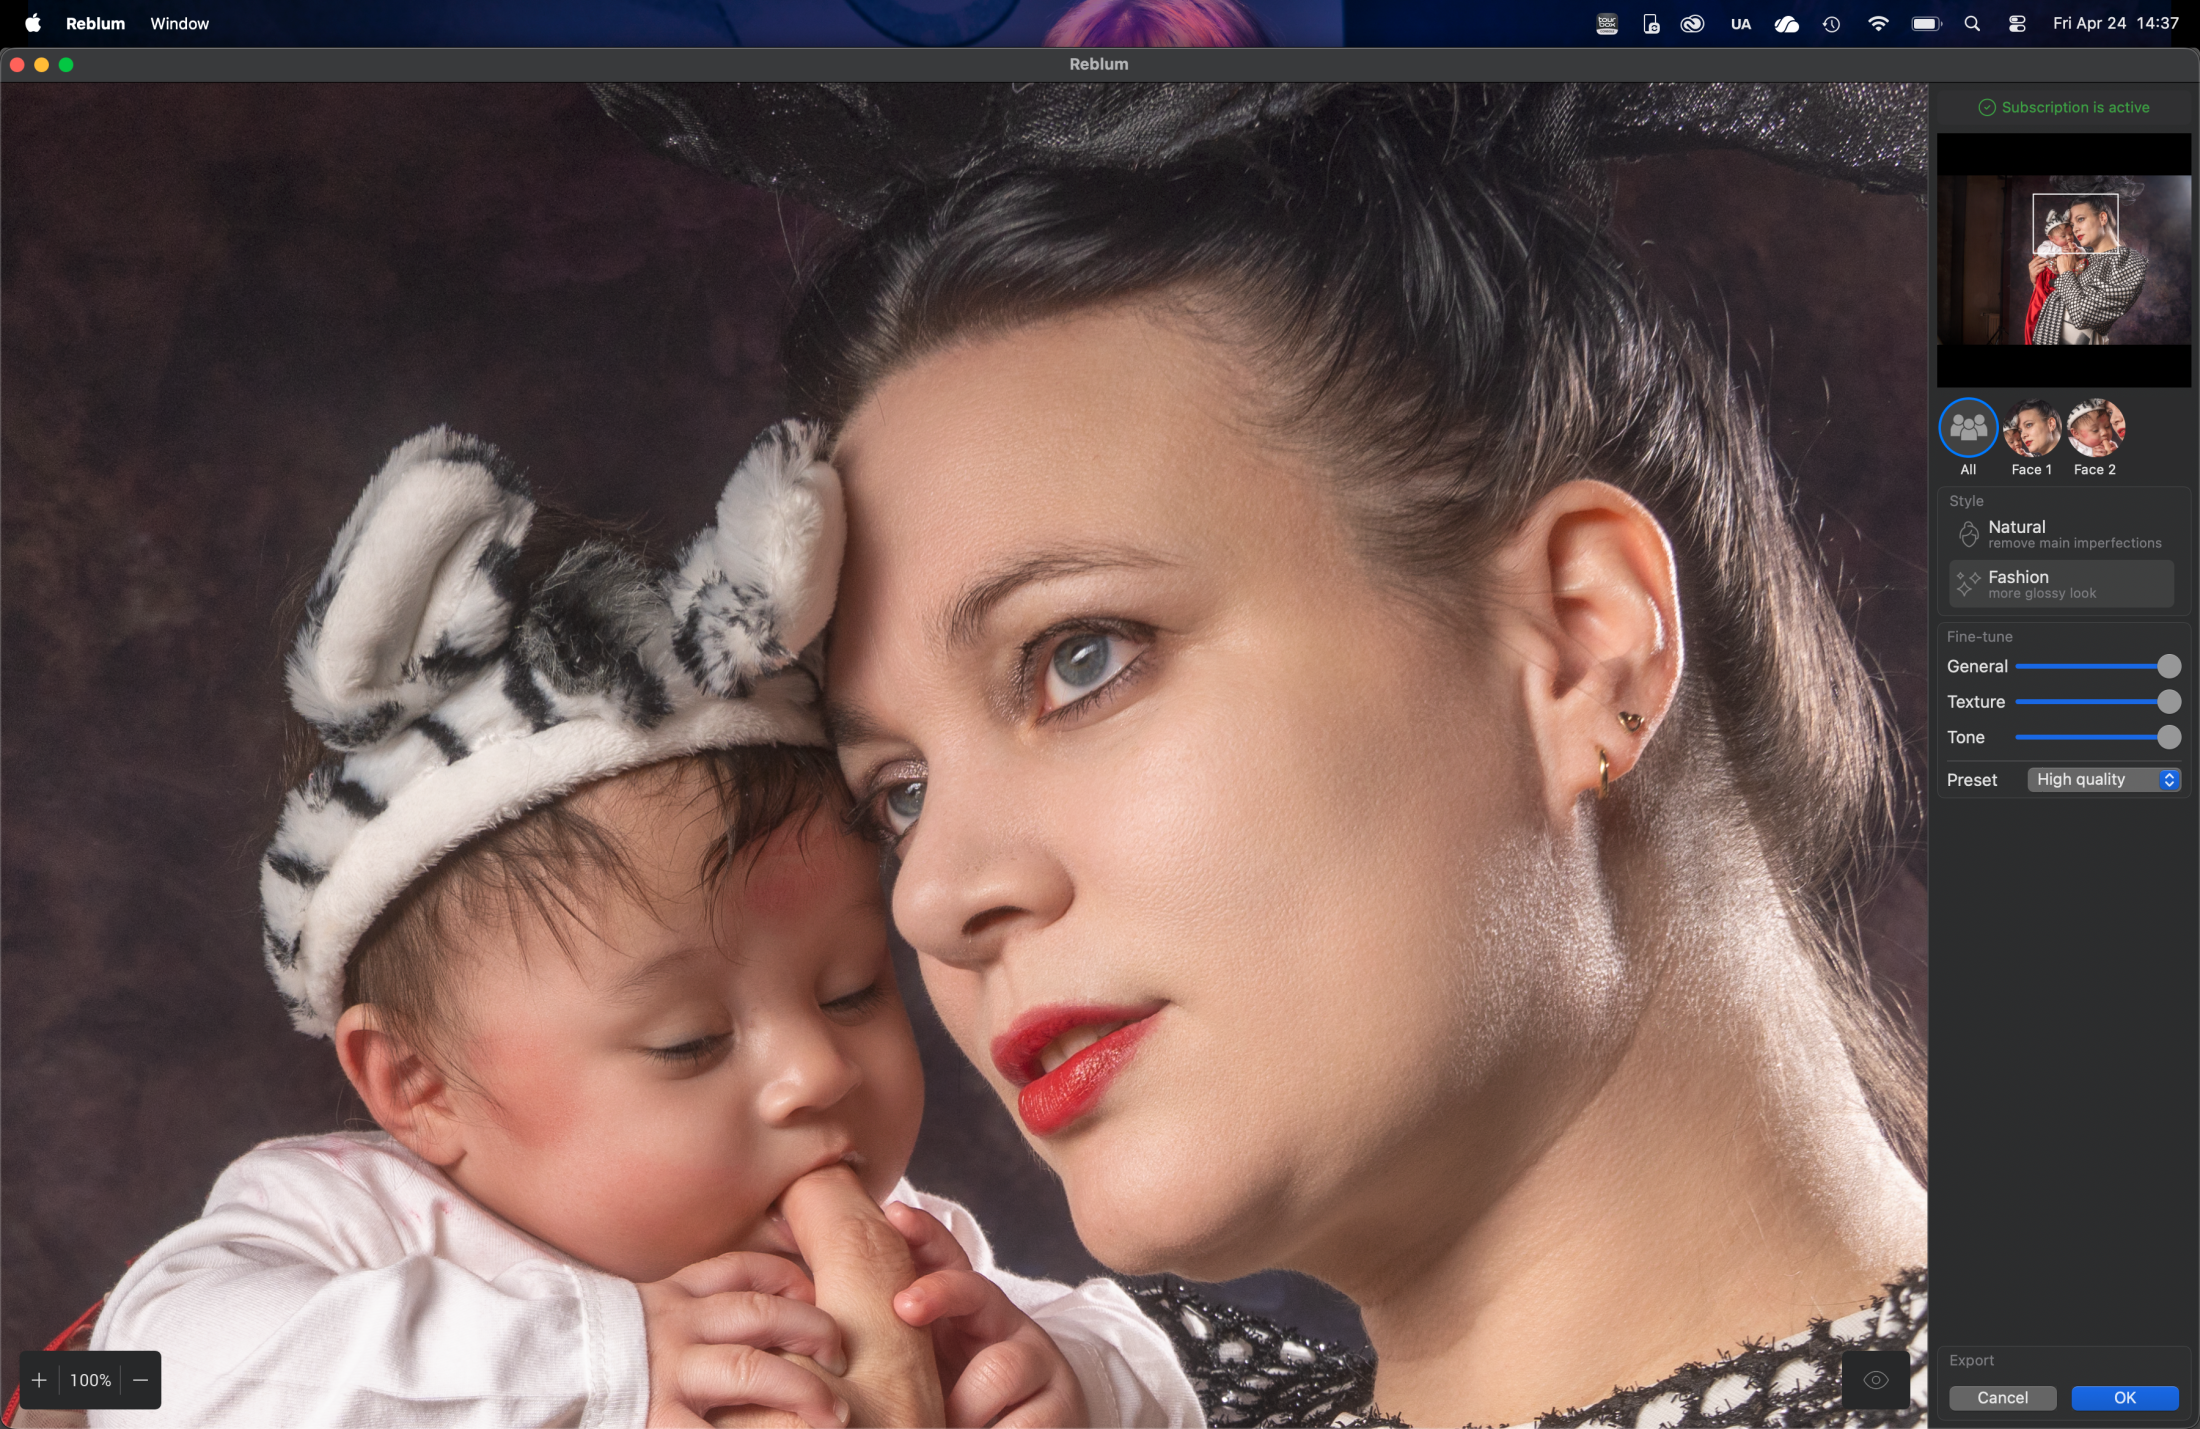
It detected two faces, and in this case. I show you how it worked on both faces.
Of course, you can also uncheck faces, so for example, only the ladies are retouched and the men keep their roughness.

So in essence, you really don’t need more than a few sliders.

General is great for control over the effect.
Texture is exactly what it says; it controls the details and the “sharpness” in the skin.
This is a slider that is really interesting to play with.
Tone works wonders on some models that have different colors in their skin, or it can smooth out colors, as you can see in the example above. I wanted to disable the filter for the baby, but it actually shows you exactly the power of the tone slider; this is not to be underestimated. It’s a slider that I used a lot when working in Capture One. And can make a huge difference.

Fashion vs Natural

In all honesty, the difference is very slight.
The Fashion setting is a bit more “aggressive” and would, for me, be the standard setting for flash photography.
For event photography like weddings, I would prefer natural in most cases.

Weddings….?

Reblum is awesome for event photographers.
When I started the review, I was not 100% convinced it would fit in my workflow or if it would stand out from other solutions.
And in just the skin retouching part, there is a lot of competition. In just batch processing, there are also other solutions. However, I think that Reblum just takes the best from all and combines them in one blazingly fast and super simple plugin. It does batch processing, and …. well, it just works. What more do you need… honestly?

Well ok because you asked

While I was testing Reblum skin retouching, I found myself using it more and more in my standard workflow.
Especially when combining it with BorisFX for the film looks it speeds up my workflow a lot.
But there is one thing I would love to see added.
“Eyes are the soul of the shot,” and I would love to see them add just a simple slider that will lighten up the eyes, nothing more, just a bit more light.
When I mailed Reblum with this request, I got a very quick reply…. “working on it.”

Conclusion: Do I like Reblum skin retouching?

The market for plugins is overwhelming, and

I’m pretty sure there are more solutions out there.
For me, Reblum is interesting for the way it can speed up your workflow. Especially when you shoot events and have to work through hundreds of shots. This will shave off hours or make it possible to deliver much higher quality photos to your client, simply because now skin retouching is a press of a button.

Another thing I really like is the one-time buy and get a lifelong license idea.
Let’s be honest, we already pay a lot o

f money to listen to a streaming service for music (where you can also find my music), and also watching TV and movies is getting more expensive by the year.
The thing I really hate is paying for plugins. I have no problems with the Creative Cloud concept; you get a boatload of software for a price that is a LOT cheaper than upgrading every year (we did that in the past, and trust me, that was painful). Both Apple and Adobe deliver a lot of goods for the money.

But paying for every photo, simple plugins, or one piece of software really has to stop!

OR give the option for a lifetime license.
Reblum runs locally, so no Ai us used to train on your photos. You don’t have to buy credits, and you can choose a subscription or a lifelong license for use on 2 machines.
For me, this is the perfect mix, and I’m using the lifelong license.
Now, as with most reviews of software, the software was gifted to me, but I would also have chosen the lifelong license.

So, if you are working with boatloads of photos and want to have a simple but great solution for skin retouching, I think Reblum will fit your needs perfectly.
But also, if you’re like me, working on 1 photo at a time speeds up your workflow, and the results are good enough for publication. For high-paying jobs, I would do a proper check and some extra retouching, but with most budgets nowadays, this works like a charm.

You can download a trial version from their website.
If you use our link when buying, you also support our work, and you get a cool 20% discount.

As always, the review is done 100% without input from the manufacturer.
I’ve also declined two reviews this week of software that I liked but did not stand out.
I try to only select products to review that can really add something to my and your workflow.

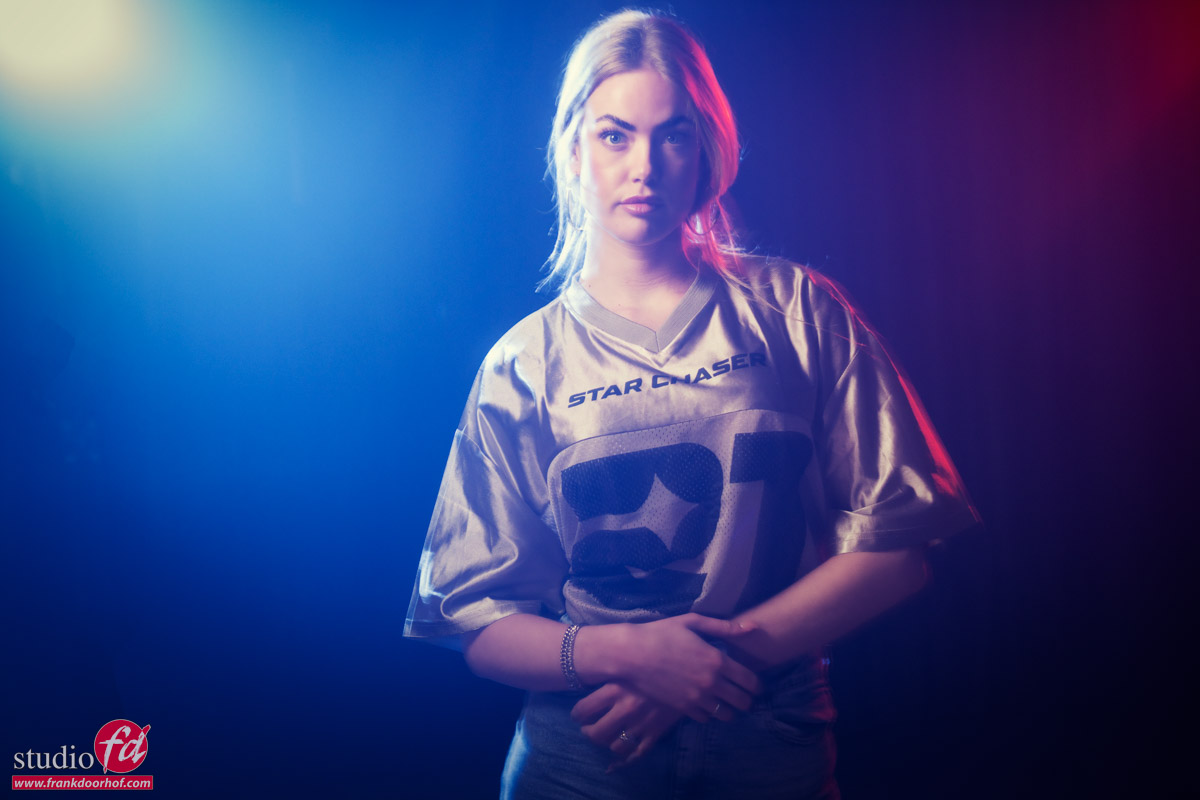
 

https://frankdoorhof.com/web/wp-content/uploads/2026/04/Reblum5.png 763 442 Frank Doorhof https://frankdoorhof.com/web/wp-content/uploads/2015/03/studioFD_Logo-1FV.png Frank Doorhof2026-04-24 18:00:272026-05-11 15:19:49Speed up your workflow with Reblum

A new model

23-04-2026/in blog, News etc/by Frank Doorhof

We are always looking for new models

For the workshops, it’s always nice to work with new talent.
And today I love to introduce our new model, Marit.
Marit is a participant in the “Miss Netherlands” and actually lives nearby,  what a coincidence.

Testshoot

Before we start using a model for the workshops, I always ask them for a short test shoot.
During this test shoot, we mostly talk about the workshops, but I also take some shots, of course.
Nothing spectacular, but it helps seeing how a model interacts with the camera and, of course, how they move.
I love working with motion, so a model that can move and keeps a “straight” face is a big plus.

Today in the blog, the results from Marit’s test shoot.
You will be seeing her in the workshops soon.

For the shots, I’m using the Sony A7RV
Geekoto GT 400
Geekoto Quicky softbox with grid
And a beautiful ClickBackDrops background, the “Black Wash ProFabric“.

new model marit new model marit

Workshops

Want to shoot with our new model, Marit, and learn everything about light control?
Want to visit a workshop where it’s not just shooting a model with a fixed lighting setup, but see how the setup is built and adjusted to the taste of the group?
And of course learn how to work with poses, backgrounds, small sets, styling, retouching, and a lot more…..

If this all sounds awesome, visit fotografie-workshops.nl and book your workshop.
If you don’t speak Dutch, no problem, let us know a few weeks in advance, and we can switch the workshop to English.
Not possible to travel to the Netherlands?
We got you covered with our 1:1 online workshop.
We have a full streaming setup in our studio. 4 detail cameras and of course the retouching software, so you can see every detail and of course ask questions during the day. Plus, you get all the RAW files after the workshop.

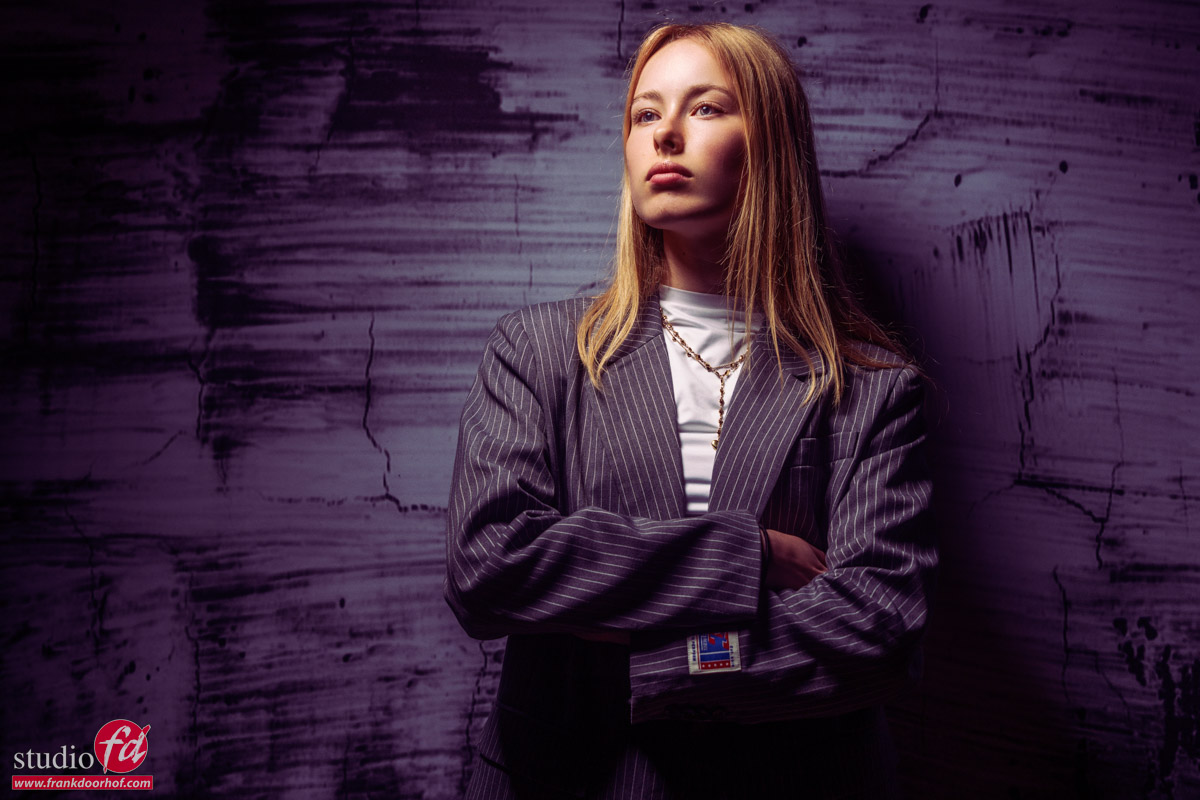
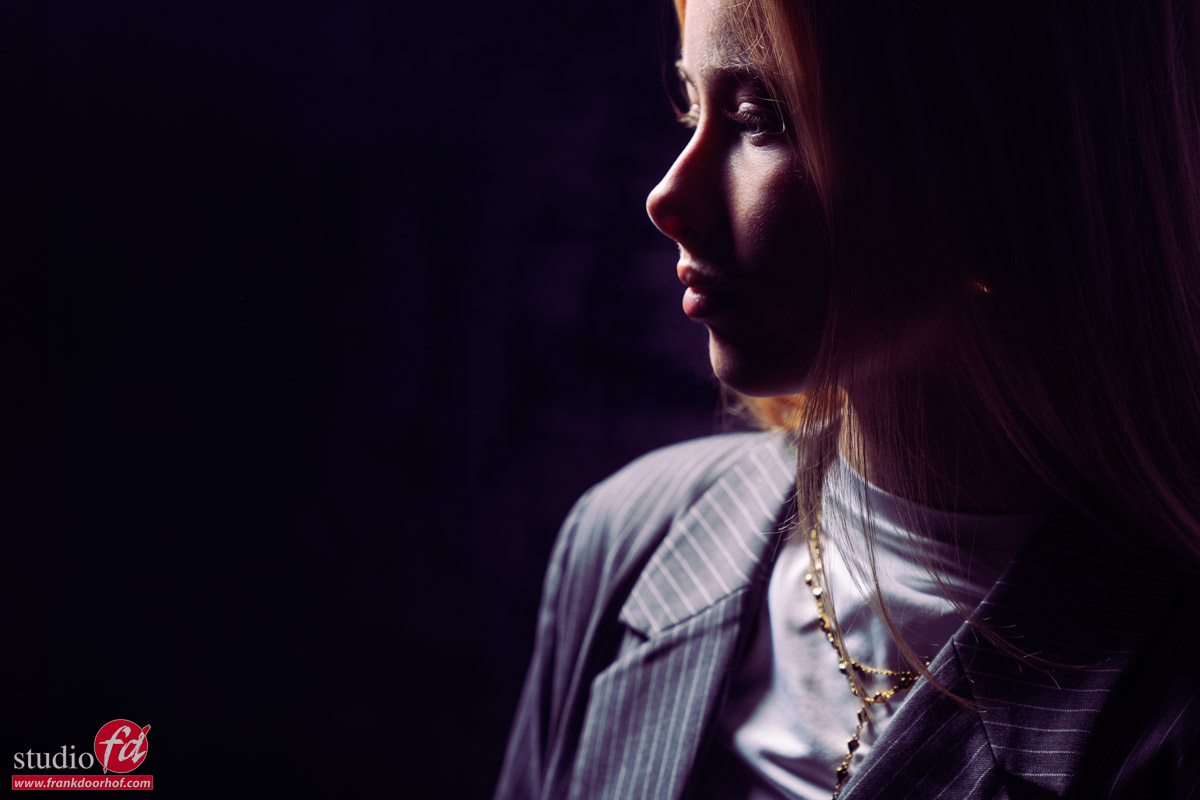
https://frankdoorhof.com/web/wp-content/uploads/2026/04/Marit-April-22-2026-9-Edit.jpg 800 1200 Frank Doorhof https://frankdoorhof.com/web/wp-content/uploads/2015/03/studioFD_Logo-1FV.png Frank Doorhof2026-04-23 18:00:502026-04-22 17:00:19A new model

That Hollywood effect

20-04-2026/in blog, Visions and technique/by Frank Doorhof

It’s weird but it does work

When we watch movies there is one thing that always draws my attention.
The flashlights.
Let me explain.

When I walk in a dark room and use my flashlight I can see the whole room light up, and… well that’s about it.
Well unless there is a LOT of dust in a room, but in those case I’ll be gone very fast.

So why is it that in almost every movie when someone enters a room there is distinct beam of light from the flashlight?
Well…. because it looks cool and draws you more into the movie.

So how do they do it?

You probably will know, but just in case.
You can get these effects by using a very nice focused flashlight and make sure the room is filled with haze, a very light smoke that is hardly visible.
In the previous posts we already talked about backlighting smoke, and that’s exactly what happens, and because the beam of light is very focused you can see the beams of light.

So how can we create something like this in our studio?

There are several solutions to create patterns in the smoke.
Of course you can chose to use a flashlight and no strobes. With modern cameras and great high iso performance this will be no problem.
When using strobes you can use for example a snoot, or a reflector with a very narrow grid and place the strobe far away from something that will project your pattern in the smoke. You can use branches, a ladder etc. As long as the strobe is far away it will create nice effects.

However if you want to do it easily and much better…

Use a gobo projector

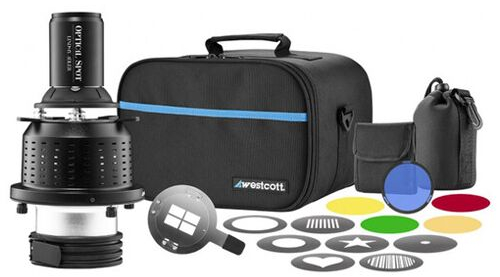
Probably one of my favorite toys in the studio is the Westcott Lindsay Adler optical spot.
This is a device you place in front of your strobe and you can use the blades to create a light pattern but you can also place metal discs with patterns that can be projected in the smoke.
The unique feature of a gobo projector is that on the front you will find a lens that will literally focus the pattern from the gobo. This means you can place the projector close to your subject and have 100% control over the sharpness of the patterns.

So let’s take a look at how this looks.

Ok that might be nice, but how about adding two extra strobes?
By adding some colors you can spice up a shot, especially with smoke.
I’m using two Geekoto GT200s with the Rogue Magnetic system gels.
When you add too much smoke the pattern will disappear, during the workshop I often have less time to let the smoke disappear, so as you can see in the following results the smoke was a bit too thick for an optimal effect.

As you can see, adding the colors totally transforms the scene into something completely different.
Personally I like them both, but my preference are the ones with color.
However having the patterns from the back did lose some impact, so at one point we decided to raise the stand and let the projector aim down at our model.
This way the pattern will cut through the smoke a bit different and make it more visible, even when using a bit more smoke.

More fun

Working with smoke is already loads of fun, but by adding patterns or/and a Gobo projector makes it a lot more fun.
I can highly recommend getting one for your studio. Especially when you like working with smoke and emulate the old masters or film noir techniques, now that I think about it, it’s also great for fashion 😀

Next time it’s about adding motion in the smoke and the model.

Workshops

Want to learn everything about light control?
Want to visit a workshop where it’s not just shooting a model with a fixed lighting setup, but see how the setup is built and adjusted to the taste of the group?
And of course learn how to work with poses, backgrounds, small sets, styling, retouching, and a lot more…..

If this all sounds awesome, visit fotografie-workshops.nl and book your workshop.
If you don’t speak Dutch, no problem, let us know a few weeks in advance, and we can switch the workshop to English.
Not possible to travel to the Netherlands?
We got you covered with our 1:1 online workshop.
We have a full streaming setup in our studio. 4 detail cameras and of course the retouching software, so you can see every detail and of course ask questions during the day. Plus, you get all the RAW files after the workshop.


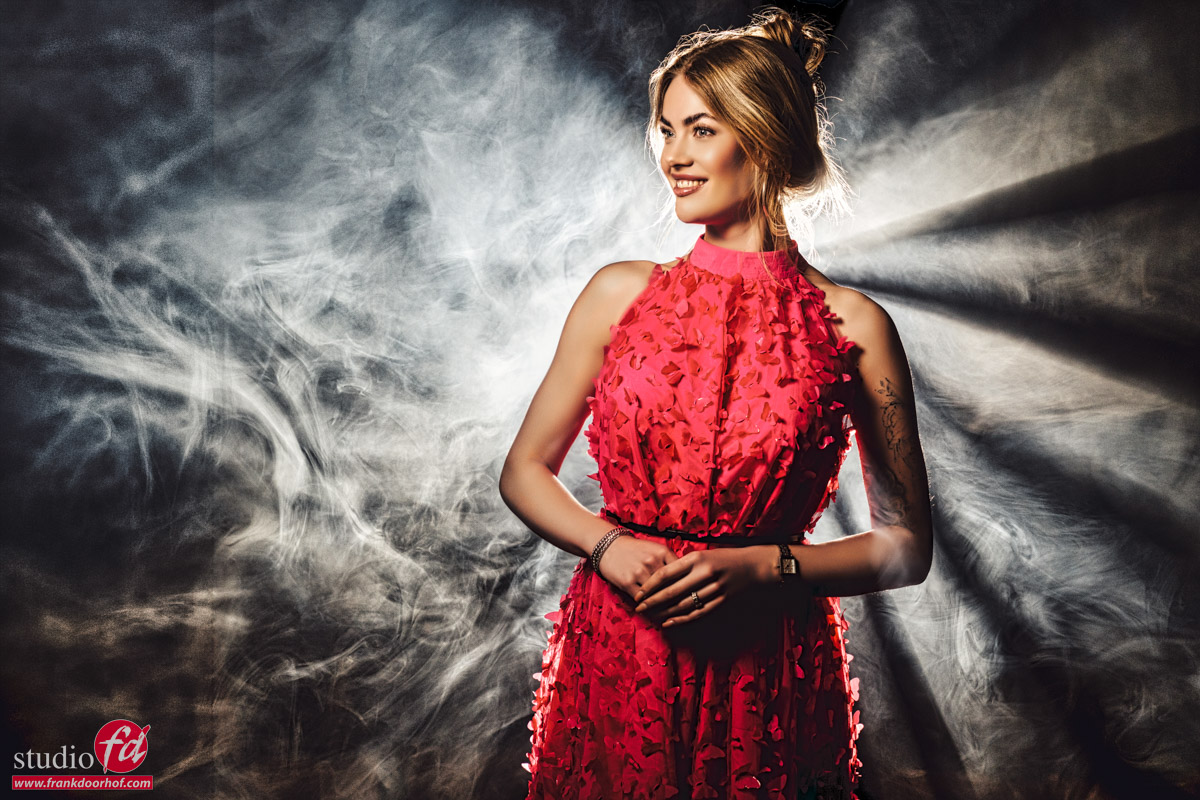
https://frankdoorhof.com/web/wp-content/uploads/2026/04/Isabelle-April-04-2026-37-Edit.jpg 800 1200 Frank Doorhof https://frankdoorhof.com/web/wp-content/uploads/2015/03/studioFD_Logo-1FV.png Frank Doorhof2026-04-20 18:00:572026-04-14 17:03:38That Hollywood effect
Page 1 of 3123

Newsletters

Subscribe to our newsletter for updates, discounts, and much more

English news letter
Dutch news letter

Interesting links

Here are some interesting links for you! Enjoy your stay :)

Snel naar

  • Blog
  • Learning with Frank
  • News etc
  • Reviews
  • Shop products & books
  • Contact

Contact

Studio Frank Doorhof:
Constructieweg 8
8305 AA Emmeloord

The Netherlands
+31-6-14522327

Or Email : info@frankdoorhof.com


© Copyright 2000 - - Frank Doorhof
  • Link to Facebook
  • Link to X
  • Link to Youtube
  • Link to WhatsApp
Scroll to top Scroll to top Scroll to top