How to mix light sources flash and continious
There is a lot to say for powerful strobes.
But always remember that now a days cameras have no problem at all with ISO200-400-800 or even 1600. Alle are perfectly usable in a studio setting. So although a 1000W strobe with spotlight sounds awesome in the studio it’s unusable because even on the lowest setting you will break the X-sync which prevents most studio strobes to shoot above 1/125 of a second.
Mostly in modern studios you can get away with 100-200-400w strobes, and in most situations you don’t even have to raise your ISO above 100, a little bit depending on the light shaper of course because every light shaper will take away or add light output depending on the material.
A fresnel for example will give you a tremendous light output compared to a striplight with narrow grid.
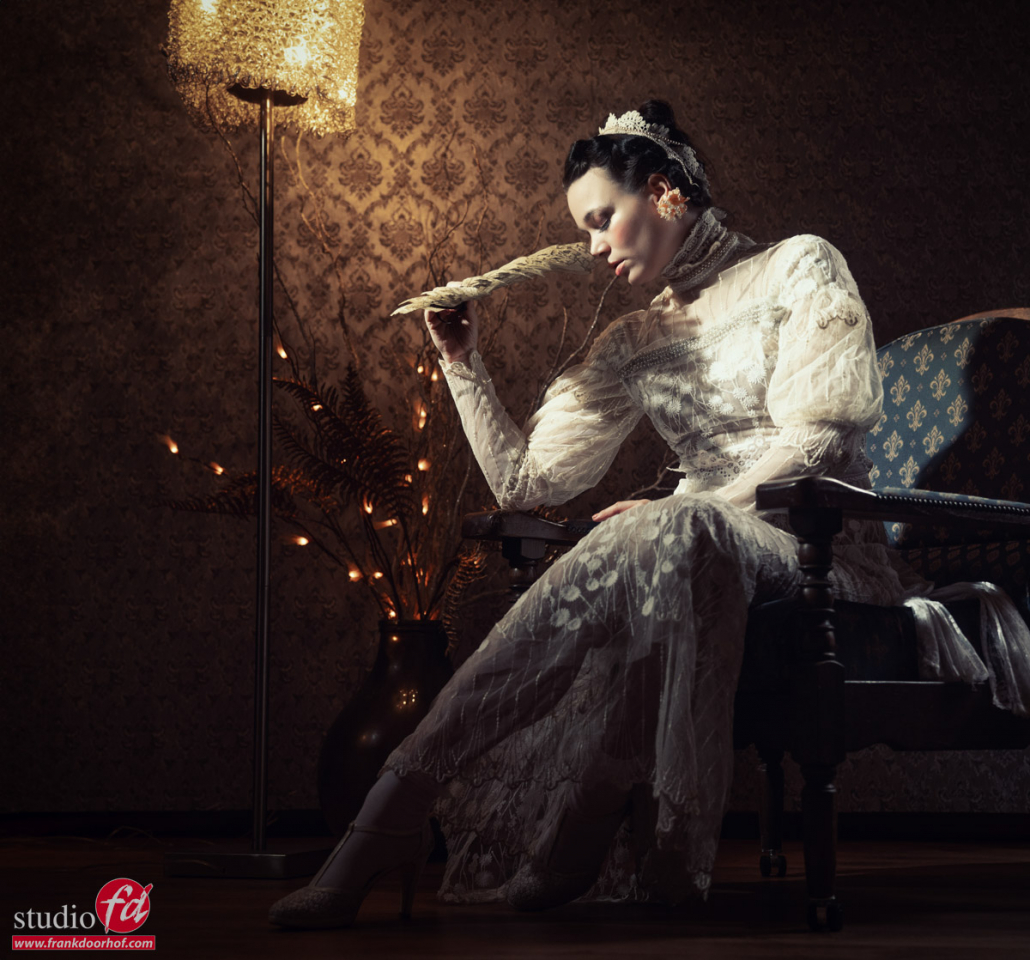
So when we start to combine light sources we have to realise that we are mixing an often very faint light source, for example tungsten lightbulbs or Christmas lights with a very high powered light source like a strobe.
As you can probably guess the problem is not in the output, it’s actually in the lack of output.
This is why when you buy new strobes it’s very important to not only focus on output, but mostly on the amount of stops you have available. A 200W strobe with 3 stops of range is much less usable than a 400W strobe with 7 stops of range. So one might think to get the 200W strobe when mixing in very faint light sources, but in this case the 400W actually works better because you can put it a lot lower in output.
Also the modifier you chose will have a huge impact.
I love using my own Frank Doorhof flashbender for these kind of shots, I will use it in the striplight with grid setting for this. It will still spread enough for a 3/4 body shot from relatively close, but it’s also very narrow on the sides preventing spill light. It’s really perfect for these setups. But I also often use strip lights or even an umbrella feathered to the extreme edges for these kind of shots. During the workshops I always vary so it’s clear it can be done with almost everything, but the flashbender is the best solution in this case 😀

What I normally do is setup the mainlight source (strobe).
I will set the strobe on the lowest setting and meter the light. At that moment I don’t care if it’s f2.8 ISO3200.
When I know the strobe output I know that when shooting on f2.8 ISO3200 I will get a properly lit model on every shutter speed as long as it’s below 1/125 (x-sync)
Now I will turn on all the extra lights and take the first shot on 1/125.
In most cases it will be nice but a little but too dull for the continuous light.
The trick is now that by lowering your shutter speed you can let in more of the continuous light and “build” the perfect exposure.
As long as you don’t change the ISO or aperture your strobe will be constant and with the shutter speed you control the continuous lighting to the effect you like.
For me personally this is one of the things I love to do with the Geekoto strobes.
Seeing they have their heritage in the speedlight family they have a huge range going from 1/128 to 1/1 which is a huge range and often means that if you choose your lightshaper with some grids you probably not even have to shoot on the lowest setting 😀
I hope the next time you have to combine light sources you remember that the ISO/Aperture determine the strobe and the shutter speed the continuous light.
PS.
Remember that in most cases light sources can/will vary in colortemperature.
You can chose to do nothing and just mix them, which can be great.
Or (much better) make sure you have a so called color correction kit with gels you can place in front of your strobes to mimic the color temperature of the light source you mix with the strobes. A calibrite colorchecker, or white balance card is essential to get it all in sync.
Here you can find our color correction kits
For round strobes, speedlights and magnetic systems.


