Which RAW software DxO vs Capture One vs Lr
I think that on software this is probably one of the most asked questions “Frank which RAW convertor do you use and which one do you advise?”
Well let me start with saying that there is no 100% best solution, in this blogpost I can only tell you what my experiences are and my results, the problem is that all three convertors are strong in certain areas and less strong in others but none is the strongest in all. So in this post I will tell you my opinion and how I use them, this might differ from yours of course.
The contenders :
DxO optics 9.5
Lightroom 5.x
Capture One
First lets look at my opinion on them and when/why/how I use them.
Lightroom
I think it’s no secret that Adobe is a huge company and their products are among the best photographers use, in fact it’s the standard for most professional workflows. Adobe has several software packages I use including Premiere for video, Lightroom and Photoshop of course, and I have to be honest I LOVE all their products, and probably that’s also the reason that they are the standard in the industry for so many people.
Lightroom is where all my files “life”, it’s my hub where I keep everything combined, make smart albums, label and keyword my images, and yeah I’m even using their GPS map module. In short Lightroom is what is on my computer screen a lot and when I search the archives it’s actually the only software I use.
DxO Optics
DxO is a company I’ve grown to love over the last few years, they have a really cool plugin for Photoshop called DxO filmpack which actually is my standard go to tinting software if I need some special looks. When I want a bit more deeper control I will use Alien Skin Exposure 6 but filmpack has some pretty awesome options. The fun part is that both filmpack and Alien Skin Exposure are both “film emulators” but still both have different looks and behaviors so this is the reason I’m actually using both on a daily basis. But that’s not the only thing they have on the market of course. Their DxO Optics 9.5 is a full blown RAW developer software solution including some of the best optical corrections on the market, and…. in my opinion the best noise reduction algoritme out there, it’s almost magic.
A lot of people however know DxO from their tests of sensors, cameras and lenses, and this is also where they got their knowledge from to build software like Optics 9.5. The first time you open up a shot and see the dialog that you can download the lens profiles and camera profiles you are a bit surprised…. why aren’t they all build in? well… because there are A LOT and they update and change them constantly, and don’t be surprised if you see your mobile phone pop up.. they really are very complete.
DxO optics I use when I have some difficult shots, loads of noise, strange distortions I want to get rid off, or when I just want to have the best optical correction out there.
The main issue for me is that DxO optics doesn’t support my Medium format files and Fuji, so I can actually only edit my Sony files in Optics, but….. in all honesty they do a pretty good job on those.
Capture One
The first time I got into contact with Capture One was when I wanted a real good solid tethering solution for my Canon camera, and Capture One was just that for me ROCKSOLID…. the RAW developing? well to be honest I never really got into it, the interface was cluttered the processing not logical and in short I did not really like the software, expect for tethering. But I can tell you loads have changed in Capture One, but one thing stayed the same, it’s a ROCKSOLID tethering solution if your camera is supported, but even if it isn’t it has a really nice feature that sets Capture One on top of my list for tethering. If you point the software from your camera towards the folder CAPTURE in Capture One and you shoot Capture One will show every image that comes in as active picture, meaning that although Capture One doesn’t do the tethering for the “outside world” it sure looks like it. Now I hear some of you say “Hey Frank Lightroom also has a hot folder option” and yeah I know but did you ever try it? I did and to be honest it’s not that good. When shooting fast it can sometimes take several seconds before Lightroom picks up the files and dumps them all at once into the folder meaning you skip the images and only see the last one, also setting up the hot folder is a bit of a “problem” it has to be an empty folder and it copies the files to another folder, with 36MP files coming in this is all slowing down the process and making unnecessary movements on your harddrive, also when you stop tethering and start again that folder has to be empty. I never really understood why software like Lightroom and DxO (which does show the images coming in but doesn’t make them active) don’t do this like Capture One, it should not be difficult to program.
Over time I’ve been playing around with Capture One more and more and the last tour we did in the UK I even “forced” myself to not even open Lightroom but do everything in Capture One, the result…. well actually this review, so let me start.
The RAW battle
Working with RAW is my only option, I’m not a JPEG shooter and I really don’t care if someone tells me that their camera makes some of the best JPEG’s out there, it like telling me that McDonalds has really great hamburgers…. sorry but it will never beat a good steak. Although there are situations where you sometimes can better visit McDonalds, for example for speed and because you just want something that will do or if you have to save money…… that’s for me the difference I will never shoot JPEG because I think it’s good enough, I’m a RAW shooter, but then again I don’t shoot anything that REALLY needs speed, although I love to shoot sports I don’t shoot it professionally (and those people I can understand sometimes might prefer JPEG).
Let’s first take away one small misunderstanding.
Some people think that if you open a RAW from Lightroom into Photoshop that Photoshop actually works with the RAW…. this is NOT true, Photoshop will work with the file after it’s been converted into the format you tell ACR (Adobe Camera Raw, which is embedded into Lightroom and opens separately in Photoshop) to convert it in, for example TIFF 16 bits ProPhotoRGB (my preference). So when opened in Photoshop ALL files are converted. The question now is…. “is RAW really RAW” and the answer is Yes it is.
Let’s make a food comparision.
If you order a ready to eat microwave diner from the supermarket not much can go wrong, you open it up, put it in the microwave and wait…. and eat. All people will taste the same unless you start adding ingredients of course, but normally it will all be the same. Things chance when you go the butcher and order a RAW steak. Now you have many different options, you can use herbs, sauces to marinate the steak, you can choose the BBQ, gril etc. to prepare the steak and you will end up with a multitude of different options. Now I know it sounds weird when we talk about photography but bare with me.
Shooting RAW means you’re shooting a file that according to your camera manufacturer will give you the best base to work with, some RAWs will have some “ingredients” build in, and some have only what’s absolutely necessary, but in essence you can’t get it better than this RAW file. However to get this into something that Photoshop understands we do have to covert this RAW into something different, and this is where actually the magic happens. Believe it or not EVERY single RAW convertor will do this differently, there is absolutely no base for how it’s supposed to be done. If we think about recent history I only have to say “Fujifilm” it took Lightroom quite some time to get this “perfect” while for example DxO still doesn’t support the FujiFilm files, but other convertors out there still do a better job than Lightroom. So there is a difference, but how much is the difference?
If you look casually to your files you will probably say “Hummmm I’m satisfied, it looks great, can’t imagine this being different”, and you are probably right to think that because let’s be honest why should there be a difference right? it looks nice? well let’s take a look at the three RAW developers and what they do.
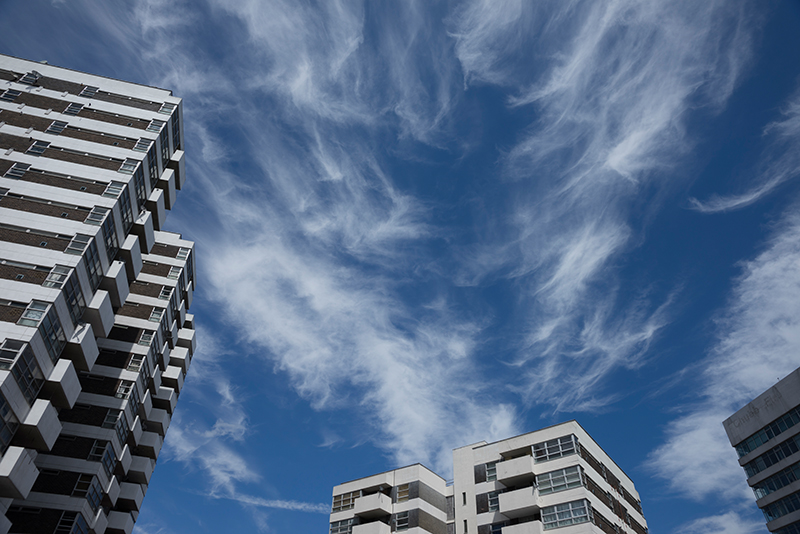
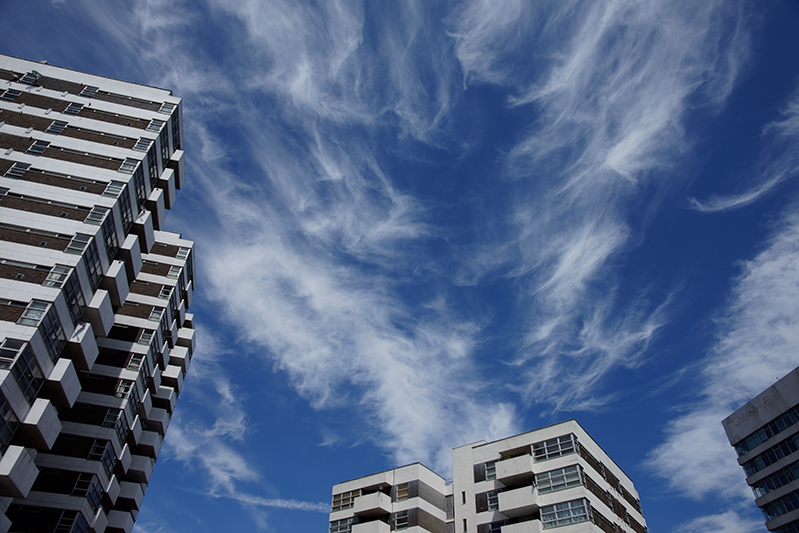
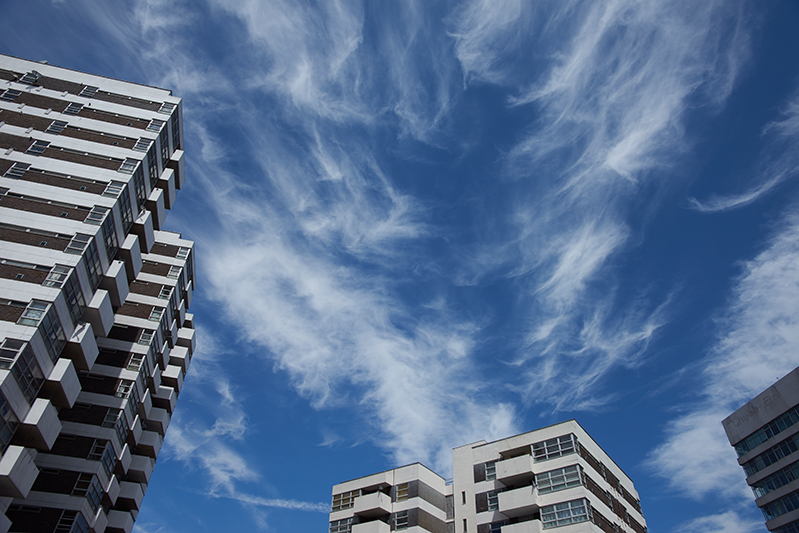
The first sample is for sharpness and is a standard blue sky shot with some buildings.
Let’s first look at the different renderings from Lr, DxO and Capture One
Lr
DxO
Capture One
As you can see they are all a bit different, and this is without touching anything, no corrections are done to the files, which were shot with the Sony A7r by the way.
At first glance I prefer the DxO rendering, but let’s zoom in
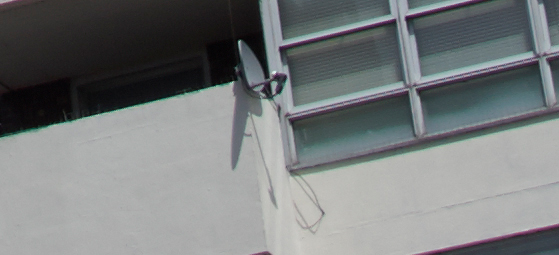
The main reason I choose this shot is for the blue sky and the detail in the shot, for example look at the wire from the satellite dish.
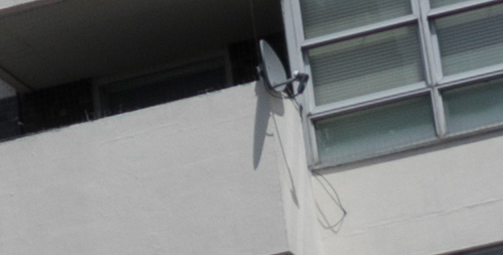
Lr
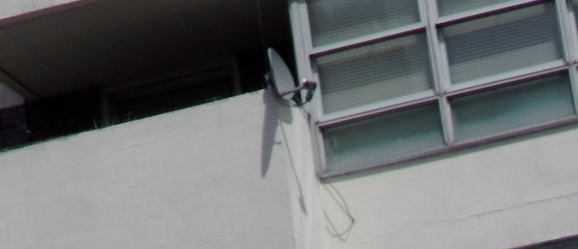
DxO
Capture One
As you can see Capture One clearly shows way more sharpness, the reason I liked DxO is also clear, it has a slightly more contrasty look the image which makes the sky a bit more saturated, but as you can see in this shot better it does close up a bit in the shadows, however when we judge sharpness Capture One is the clear winner, so let’s continue.
I love working with people and one of the things that really got my attention while working with Capture One was the rendering of fine detail in skin, hairs etc. but also the very pleasing tones in the images. Now this last thing is a bit hard to explain. In Lightroom I use a color checker passport to get the color as perfect as possible, both DxO and Capture One don’t support the use of Color checkers (which in my opinion is unbelievable for professional software) so one would expect that the color rendition is a done deal right? well as it seems it’s not as you can see in the following samples.
Let’s start with Lightroom.
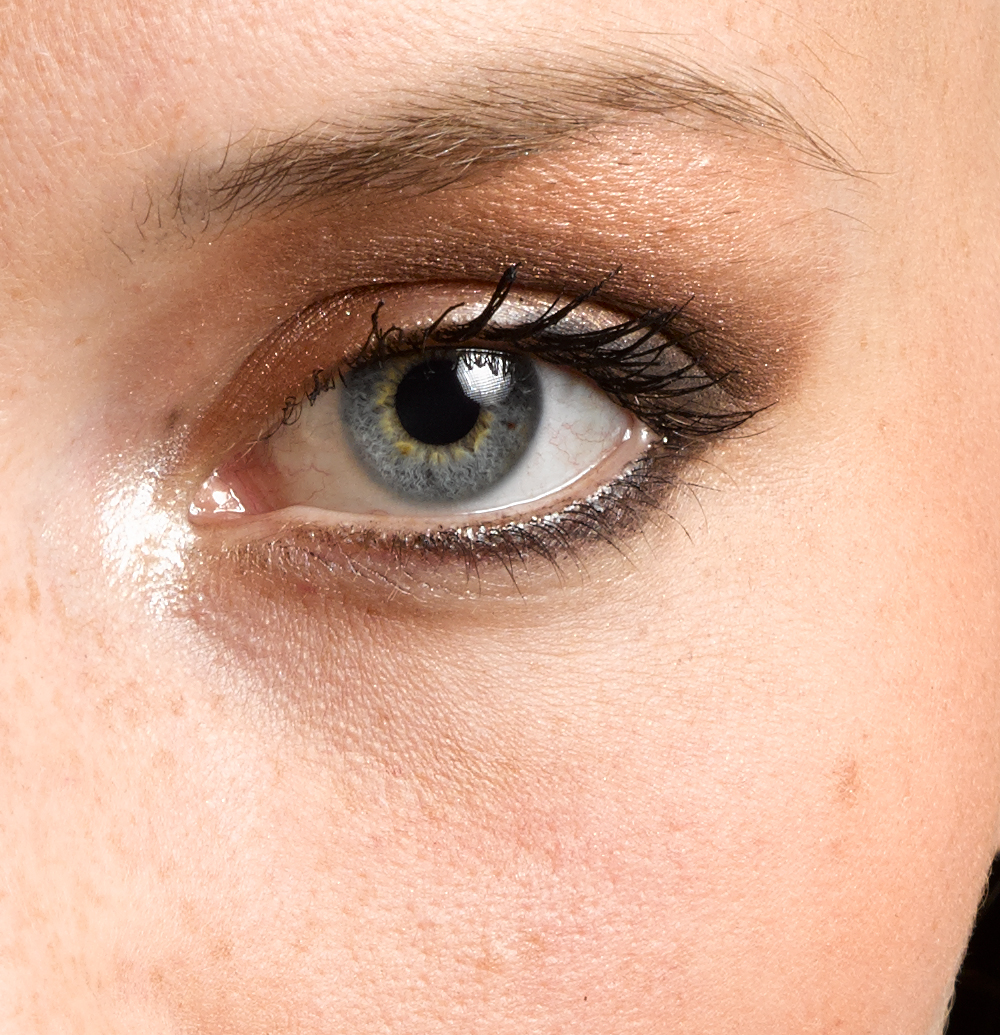
This image was shot with a Leaf Credo 60 so only Lightroom and Capture One can process this file.

Lightroom
It looks nice, but let’s compare it to Capture One.
Capture One
As you can see Capture one is A LOT more detailed.
This makes you suspect that Capture One is adding some sharpness (which is actually does indeed), but how much?
let’s try to mimic this with Lightroom.
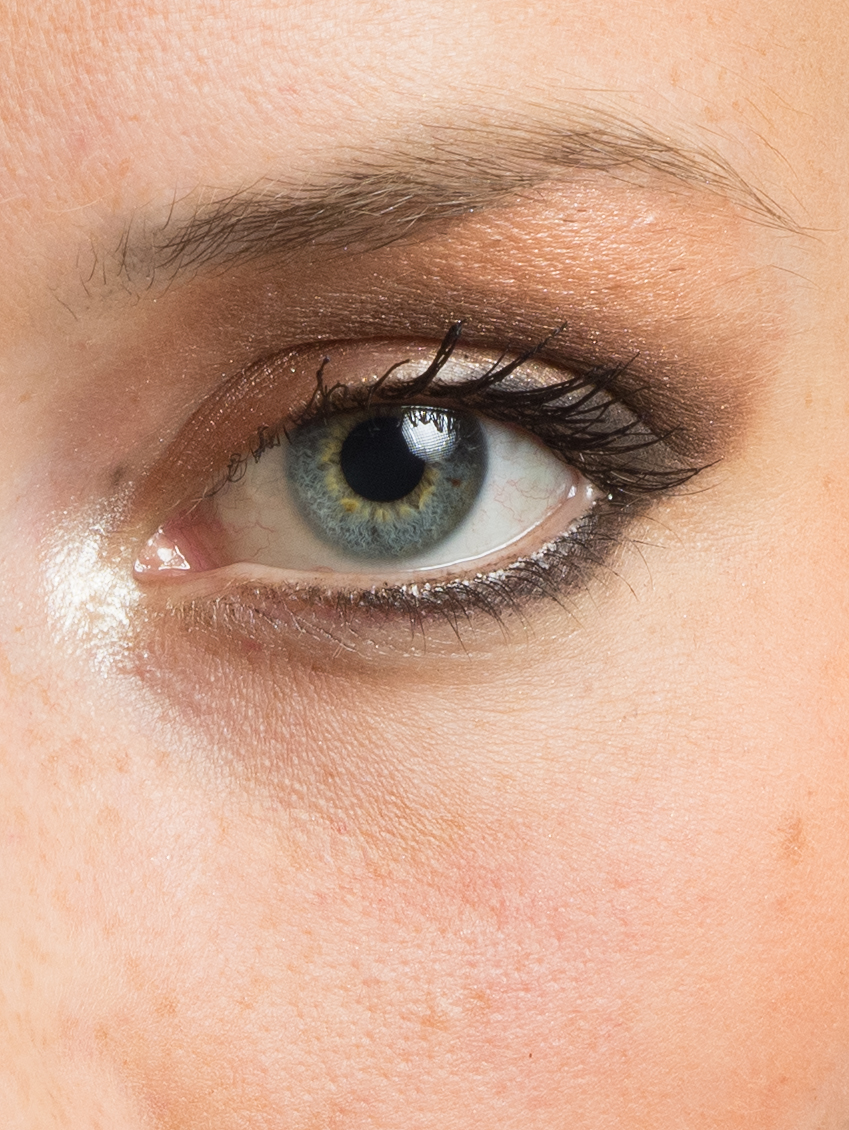
Remember that a setting of 20 in software A is not 20 in software B, and with some software a setting of 20 for image A is not the same as 20 for image B, so this can be mind boggling. What I did was to set the sharpness in Lr as high as it could go without destroying ANY of the fine details or causing ringing, and this what I got.
Lightroom processed
And although it’s indeed sharper it still doesn’t have that “pop” and “3D look” that Capture One shows. I also do like the skin tone in Capture One a lot more although with Lr the profile from the Color checker was used.
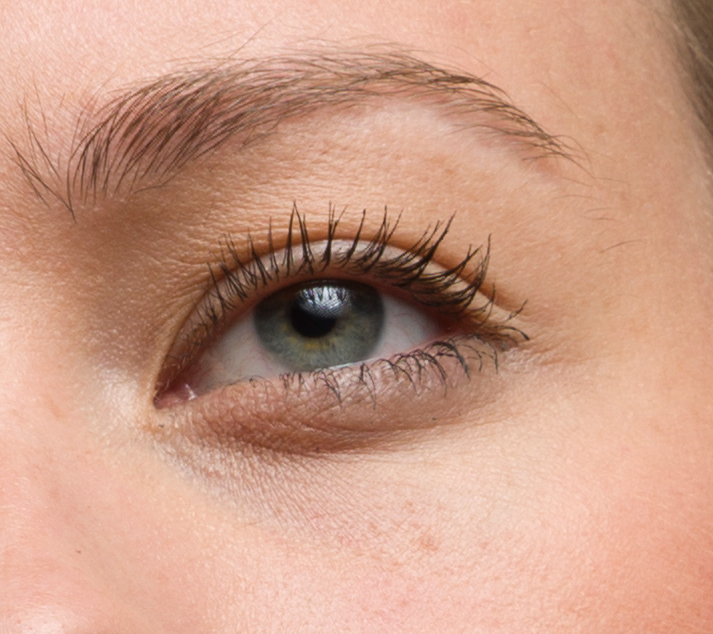
Now one could say that Capture One is meant for the Medium format files from the Phase One and Leaf digital backs, and that’s correct, it is the native software, so let’s see what happens with a Sony file, and now I use all three convertors, let’s start with Lightroom :
Lightroom
And Lightroom with a bit of sharpening

Lightroom processed
Next up is DxO
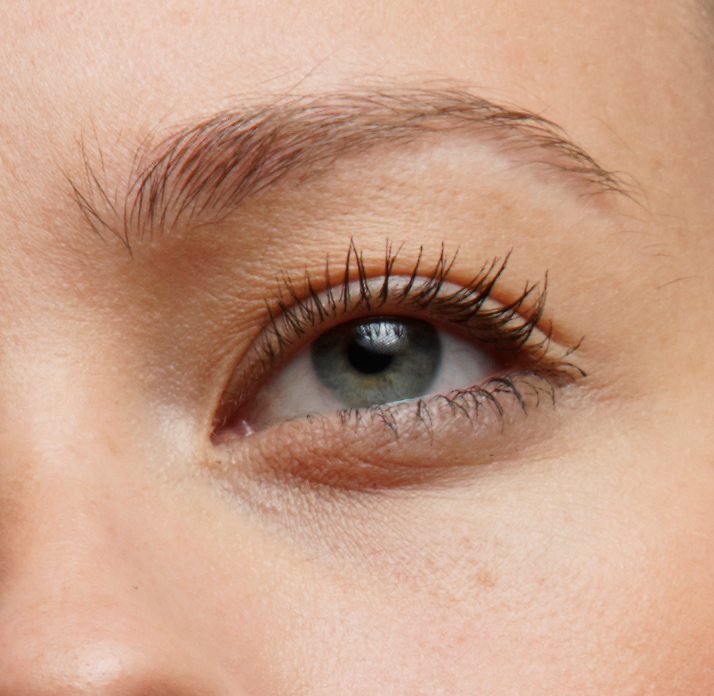
DxO
And also DxO with a bit of sharpening
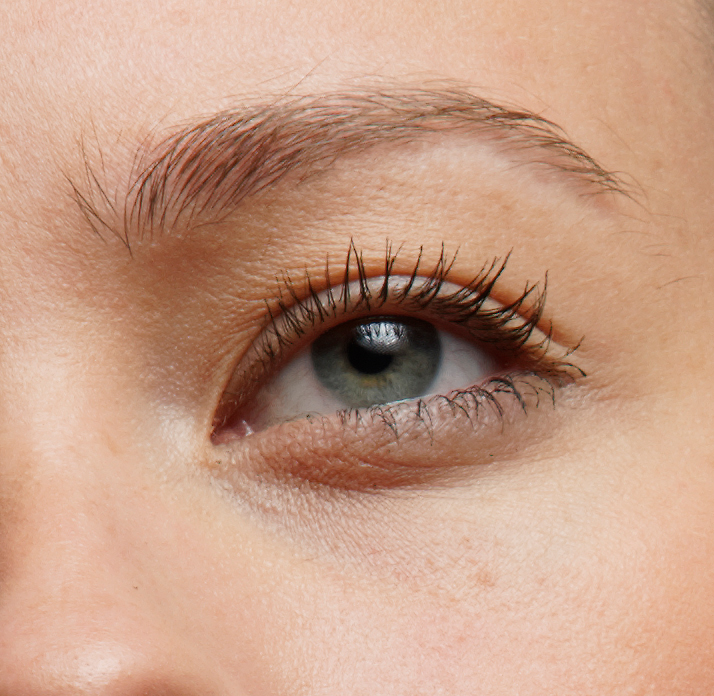
DxO processed
And finally Capture One
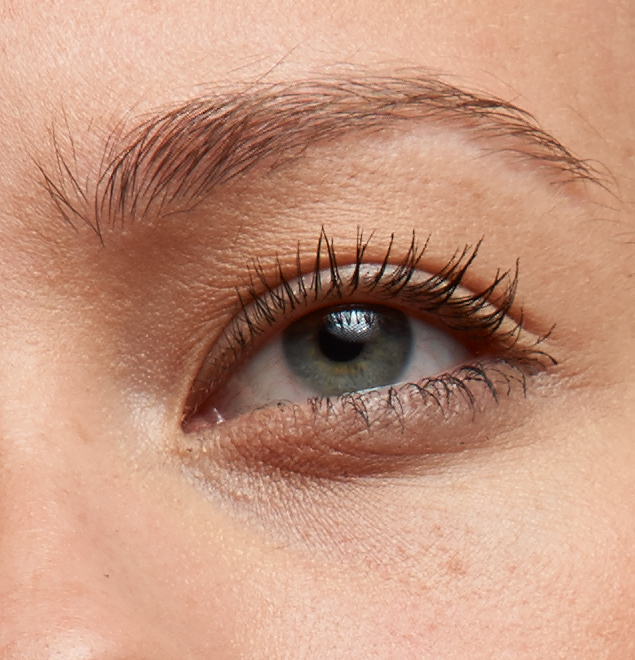
Capture One
Sharpening on the Lr and DxO file were both done in Ps with the exact same settings, in the Lr file you can see some artifacting in the eyebrows which is not visible on the Capture One and DxO shot, but the DxO shot is slightly softer overall. However again I prefer the skin tones in Capture One and when I look at for example the eye ball I feel that the Capture One rendering makes it a bit more round, which can also be credited to a slight contrast boost I see in Capture One.
Conclusion and some more
So which one is best….?
It seems Capture One right?
Well at first glance I would also say yes, but again it’s not the complete story, to get a real winner we have to look at much more and that would go way too deep for this blogpost, but let’s just scratch the surface for what I use.
Lightroom is awesome for keeping my catalogue, creating smart albums, books, printing etc. it’s in my opinion not beat by DxO and Capture One in that aspect, so without ANY doubt I would choose Lightroom for this purpose.
DxO is awesome for noise reduction, optical corrections with a click, adjustments via the autosettings, integration with filmpack and user styles are also very very good and the end results are just a big step above Lightroom, plus with the newest version the integration with Lightroom is almost seamless so you can now actually stay within Lightroom but still use DxO optics, a HUGE plus for the people that need speed but also want a big step up from Lightrooms processing power.
It seems that Capture One as a standalone (no integration with Lightroom) has the worst chance right?
Well not quite and this might surprise you, Capture One is actually my number one convertor at the moment, and I do LOVE optics 9.5 from DxO but with model photography it just can’t beat some of the things I have with Capture One, in the end it all boils down to a few things I have in Capture One that I don’t have in DxO or Lightroom and that make my life a LOT easier and editing a LOT faster.
1. Focus mask overlay
A very cool way to see if your images are in focus, Capture One shows a big green mask on all areas that contain the highest contrast, meaning in practice which are in focus. When shooting tethered with a manual camera (or wide open) this is a very cool tool when you can’t get close to your screen or if there is too much sunlight, you can REALLY see the green mask so you know you got it or not.
2. Presets and styles
Getting an unique look to your images is very important now a days in my opinion and Capture One does this via presets/styles which can be very easily created and stored. The nice thing is that you can create “variants” with different styles without wasting drive space, but best of all is that you can actually change your RAW settings even when presets and styles are active, and to top things you can even stack presets. But most off all I’m pretty familiar with filmpack and Alien Skin but I can still create looks in Capture One that I prefer to both other packages on SOME images. My main tinting is still done with DxO filmpack and Alien Skin but Capture One has great potential.
3. Layers
Within Capture One there are the options of adjustment layers, you can brush effects in, take away masks etc. It doesn’t support all settings but it does pretty well.
4. Skin
Capture One has a very powerful adjustment for skin uniformity which will actually take care of those images where the skin tone is not equal over the whole body of the model, it’s a very simple to use tool and it works “wonders”.
5. Recipes
Something a lot of users from Capture One don’t know or use (from what I heard), you can run a lot of different recipes for export at the same time, for example create a TIFF, a 4K videoframe, a 1080P videoframe and a web version with watermark (which you can move around and chance a lot more than what Lightroom allows) all at the same time in different folders, or in the same with the same or different names, it’s very easy.
6. Tethering
I wanted to start with this but decided to do it at the end.
Capture One is without a doubt the best tethering solution out there, next to the great “hot folder” option you also have the options of :
A. Focus overlay (see point 1)
B. Capture Pilot : see images on your mobile device and rate them, or even across the world
C. Overlay mode : shooting for a cover? no problem just overlay the cover
D. Styles : you can actually show each image that comes in with the style your client choose (this is also possible with Lr and DxO although DxO doesn’t support showing the active image that comes in, you have to do that manually)
Capture One grew on me, it was always on my harddrive because I needed it for tethering, over time I’ve experimented with it and always was pleased with the outcome but never really had the time to switch due to time “problems”, at the moment I’m not using lightroom for RAW developing anymore, it’s all Capture One and DxO optics 9.5
My advise:
If you’re a tethered shooter and shoot a lot of people : Capture One without any doubt.
If you’re into street and travel photography you can benefit from the awesome auto settings in DxO, the great noise reduction and optical correcting so in that case without a doubt DxO Optics 9.5
Lightroom as a RAW developer is a great allrounder everything is very easy to find and it “just works”, it does pretty well as RAW developer, the results are nice, when having to go through thousands of shots Lightroom just simply rocks, the catalogue system however is what keeps it on my harddrive, DxO is now very much interlinked with Lightroom so these two work together incredible nicely, so if you’re not into tethering and don’t need the Medium Format or Fuji support check out DxO optics with Lightroom, I think you’re gonna like it.
Which ever RAW software you choose it’s important to know there are differences, you can tweak Lr and DxO to mimic the look of Capture One and visa versa, however when you look closely the same differences will be visible the question is how important is that for you.
Disclaimer :
I’m working closely with DxO (Image Master), Capture One (Ambassador program), Adobe (Influencer program) so I can honestly say that I have absolutely no second agenda or what so every.
Disclaimer 2 :
I’ve used Sony A7r and Leaf Credo 60 files for this test, it can very well be different for your camera.
If you want a good deal on software please contact us on [email protected] or check out our discount pages.
If you want to buy Capture One get a cool 10% discount when using AMBDOORHOF as coupon code.






excellent article!
thx, spread the news 😀
That’s a nice comparison. Thanks.
I seem to remember that you were once an Aperture user but had to move away due to it’s raw support limitations. Correct?
If so, do you see Lightroom’s cataloging/library features still as better for you than Aperture’s?
Aperture was not workable for me anymore, in the end only 1 camera was supported from my cameras and that broke the deal. Lightroom supported them all.
At the moment I’m not up to speed with Aperture.
I always liked Aperture but also Lr is very fast on my setup.
Invaluable Frank, thanks, now I know that I really need all three. I use LR5 exclusively with PS as the place to go for layers and predictable tools, but tethering as you point out in LR is slow. The guys where I rent lenses etc from as needed (HotCold in Dubai) have consistently said they feel Capture One is their number 1. Your opinion is however very valuable to all of us as you really are analytical about everything, you are open to everything and in the end want the best the fastest and the easiest way, so your evaluation is research that I am unable to do since I don’t have DXO or Capture One. I also want to thank you for your constant almost daily input on a host of subjects, your time and feedback is very very appreciated.
You’re more then welcome and indeed C1 is amazing for tethering and RAW workflow 😀
Great Article Frank.
I have all three programs you review and use them myself. In recent times, I have had discussions with my friends and other photographers on LinkedIn on the merits of each program and why they may want to try them for themselves. I see the value in Lr, Capture One, and DXO Optics Pro and can say confidently that each program has its strengths and weaknesses (nothing is perfect) and actually prefer DXO Optics Pro and Capture One to Lr for processing my raw images. Which program I use is dependent on what I am shooting and the needs of the image. I also maintain that for those who photograph a lot of different styles in their photography, choosing the right Raw converter for their images makes a significant difference in workflow and their final image.
Frank, I would like to know how you use Lr to catalog your images that were processed in Capture Onee and DXO Optics Pro?
Thank you for a great and timely article.
Don
Hi,
I’m shooting tethered into C1.
I will do selecting, renaming etc. in C1.
Then I will do the whole retouching via C1 and Photoshop.
After this I export the final versions into TIFF 16bits ProPhoto and store these in the retouched folder and after this I open up Lr and sync folders importing both the raws and retouches.
…tried all of them many times and 100% agree with the article
Great article! Matches my experience. I just started using LR after I got into Adobe CC. To be honest the catalogues in C1 plain suck. So I try to get this done in LR and only keep sessions in C1. On the other hand I much more prefer the UI and processing in C1. Haven’t mastered LR on that account it seems 😉 Oh and yes tethering is just unbeaten in C1 (also C1v6 being the only one to work with my 5D at all)
Lightroom is were my images life, stay and are happy.
Only conversion and sometimes tinting is done in C1 or DxO.
One that misses in this comparison is Aperture. But the big issue is that the conclusions will be different per camera. For a Fuji it will be different than for a Nikon. Precisely that annoys me, if you’re using a mix of cameras, most of all brands. But I can tell you, a Nikon D800 doesn’t deliver the best score on LR, Capture NX-D does. And for a Fuji, it will be Iridient or Aperture (there is only a marginal differenc). The story is… I only want to use one tool, and there ends for many the whole story, so they choose LR and don’t look behind.
Why limit yourself ?
I’ve always been a fan of aperture but at one point Aperture only supported one of my cameras and not the Fuji, not the MF and not my spare Fuji, so it was getting ridiculous so I switched to Lr.
RAW conversion of both Lr and Aperture is “ok”.
It’s not bad but it’s not stellar.
When you compare it to DxO and C1 you will really see the benefit.
If you want a steady workflow based on Lr (many want this) why not go for DxO optics 9.5, 9.5 has a seamless integration with Lr, it feels like running a plugin, however the output is miles above what Lr does.
For me I don’t care doing the step extra and go for Capture One, the benefits for my MF are just way too much, the Sony files I mostly convert via DxO via the Lr method, but MF all goes straight to C1 and when I’m traveling with both the Sony and MF everything is done in C1, expect high ISO Sony files which go through DxO because of it’s awesome noise reduction (Prime)
I was the same way! Once I wrapped my head around C1 I found it the closest match to Aperture’s catalogue. Not quite as powerful but better than the (to me) overly regimented LR workflow.
Thanks for your input on the matter. I always leave my 5D Mk III home and use Fuji X20 when I’m on vacation. Until I tried C1 I’ve been bothered with artifacts and strange smudging in LR, even the latest version. It forced me to lower sharpening and not touching “clarity”, but that required a pass through Dan Margulis PPW panel’s sharpening with every single image.
I’ve been using C1 for some days now and I’m quite impressed. I tried the same RAW file in C1 as I processed in LR (whitch I thought was excellent), but C1 does a better job with details(!), colors and contrast in my opinion. I guess I need 2 raw converters now, one to catalog and one to process.
My conclusion is that I’ll never use LR for processing my X-Trans files again.
Btw.. Do you know if someone make Fuji profiles/presets for Capture One? That would be awesome.
You can make the presets very easily and there are some companies supplying them online.
Lightroom 5.x / DxO Optics Pro 10.x with Photoshop CC 2014 is a super great combination. Nothing comes close to it.
Its very good indeed, I love it.
In the dish shot I see lots of chromatic aberration in DxO and Capture One that is not present in Lightroom. Is this normal, or was it left disabled on these two?
Well I did some side to side and You are wrong the differences in sharpness comes from the clarity and under exposure try to move the clarity to +30 and the exposure to -30 and tell me if you see any differences. I always bring the pictures to DXO and put in ISO orders apply “prime” noise reduction only to the highest. export to LR as Tiff or DNG with the above mentioned settings clarity +30 and exposure – 0.30. Now I can adjust with brush and go to anothers plugins like C6 adobe photoshop with a bunch of plug gins like Imagenomic portraiture and noiseware, Magic Bullet, Red Giant software, Topaz labs, Pixels Genius. I don’t see for real any practical reason to use Phase One. It’s really slow for me and the colors adjustments I can go whit Red Giant as a plugin. Capture One lacks on plugins!!!! The Capture one have a preset to make you think that others don’t have the same sharpness. I don’t buy that!!!!
It would be interested to hear what kind of machine you’re running.
I’m running a MacPro with 2xD700 and Capture One is incredibly fast, 60 and 36MP files have almost instant preview where even Lr6 takes several seconds to build a preview.
Also developing is very fast with Capture One.
Don’t get me wrong I LOVE Lr, I use it daily, it’s where all my files are, their cataloguing and smart albums and Lr Mobile are just plain awesome, but as a RAW developer both Capture One and DxO are just better. Capture One does take a little bit of a learning curve but when you do the time (it took me a few days) you will find that the color adjustments are incredibly easy and very powerful, just like the layer options.
In the end it’s all about personal preference.
I love Lr for everything about my files except the RAW developing, when I have a Lr based workflow like on the road with travel and street photography I use DxO slingshotting back to Lr, when I’m in a tethered workflow with Capture One I will use Capture One for all my developing.
The only problem is when I want to have the use for the Colorchecker Passport I have to use Lr.
Capture One has always applied more noise removal and sharpening compared to other RAW processors… don’t confuse that for doing RAW conversions better. So often people compare at default settings, so of course C1 will look better.
In C1 you can do one click CA removal in the “lens” tab. It may be C1 Pro only, not sure.
True. In PRO version there is CA removal. But is not very good. Lr have way better crontrol over it. In fact C1 CA removal is equal to Lr “automatic” removal (which is rartely enough).
Never had this problem.
Had the problem. Wiping program, preferences and catalog, than reinstalling, solwed issue. Instructions from C1 support team.
Frank ..Really liked your comparisons ..I am always looking for options to improve pics and workflow …Do you still use Lightroom to archive/store your photos and then bring them into Capture One (I understand that DxO can be a plugin) ?
DxO can be used as a plugin indeed, and it integrates just fine into Lightroom.
My normal workflow is during travel Lightroom into DxO and back.
For fashion I do all my RAW conversions via Capture one 😀
Yes, I still use Lr to store everything and use smart albums etc.
Capture One must have a lot of bloggers on the take. I keep hearing how amazing it is so I downloaded a trial to use with my X100T. Sorry, garbage. Tons of CA, lens corrections don’t work well, slow, etc. I thought it must be able to improve on the free Fuji RAW EX Converter but no, it can’t.
I only say it because I actually love it and use it.
However I don’t use a Fuji… Fuji has a different technique.
For Leaf/PhaseOne, Sony, Canon, Nikon etc. it simply is very good, if not the best
Thank you for putting all this effort into this in-depth comparison and even more, for openly sharing the results!
Thanks for this very useful article !!!!!!! It is for the first time I fully understand the difference between those programs.
I would like to see a future illustrated article about the difference between an APS-C and a full frame camera. (in my case A6000 and A7)
In essence it’s just a crop from the full frame… thats about it 😀
nice! thanks
I’ve been using LR for a few years now but have been experimenting with Capture One 10 recently. I shoot a lot of landscapes and if I’m not careful I can end up with really washed out, white (but not totally blown) skies. Using LR, I often start with their “Auto” adjustment as a start. It frequently overexposes my pictures and if it does that I undo “Auto” and start manual adjustments initially. With LR, even if “Auto” adjust gets me close to a final exposure (for images with washed out skies), I often have to mask the sky and adjust the brightness and saturation of the sky separately.
While experimenting with C1, I set the “Auto” feature to adjust everything but white balance (auto- white balance doesn’t seem to work well for me in C1). When I use “Auto” this way in C1, 99% of the time everything is exposed correctly. The sky (even if originally washed out) comes out a nice blue, the shadows are reasonably dark but not too dark, etc. I seldom have to do more than tweak the shadows slider to reduce the shadows a bit in some cases. I am amazed at how close C1 gets me to a final image using “Auto”. I’m surprised that LR can’t do that and I’m surprised that a lot of my auto adjustments in LR result in an overexposed image.
One very simple advise.
Never use auto but just tweak the image yourself.
Auto is not something to judge software on 😉
That being said. C1 does recover more highlights and shadows.