The unrepeatably shot
You will never get this shot the same twice, and neither will I, by the way. Because the images I’m using today are all unique and can never be made the same way again. Of course, this is true for most photos, but in this case, it’s not even possible to come close. So what am I talking about, an unrepeatably shot?
Adding motion with smoke
Today, it’s a new article in our smoke series.
And we already talked about using strobes, backlighting, and creating patterns, but today we are doing something very creative.
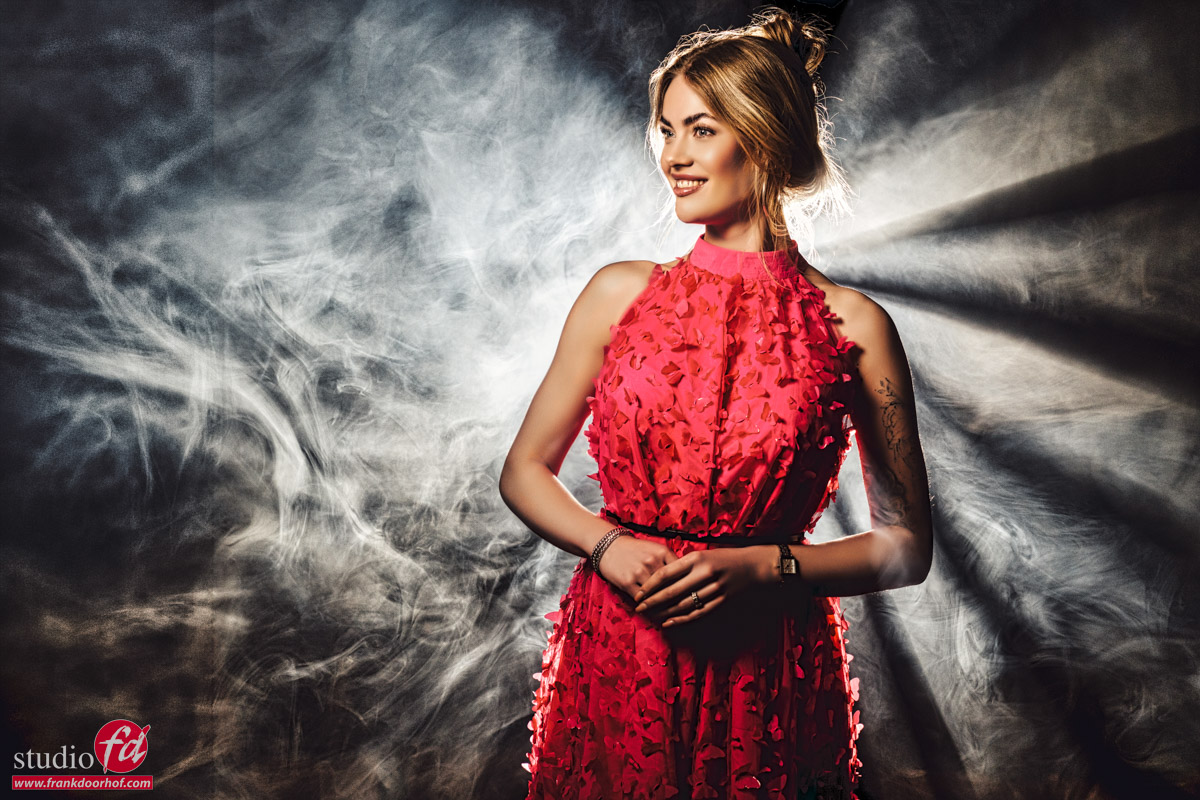
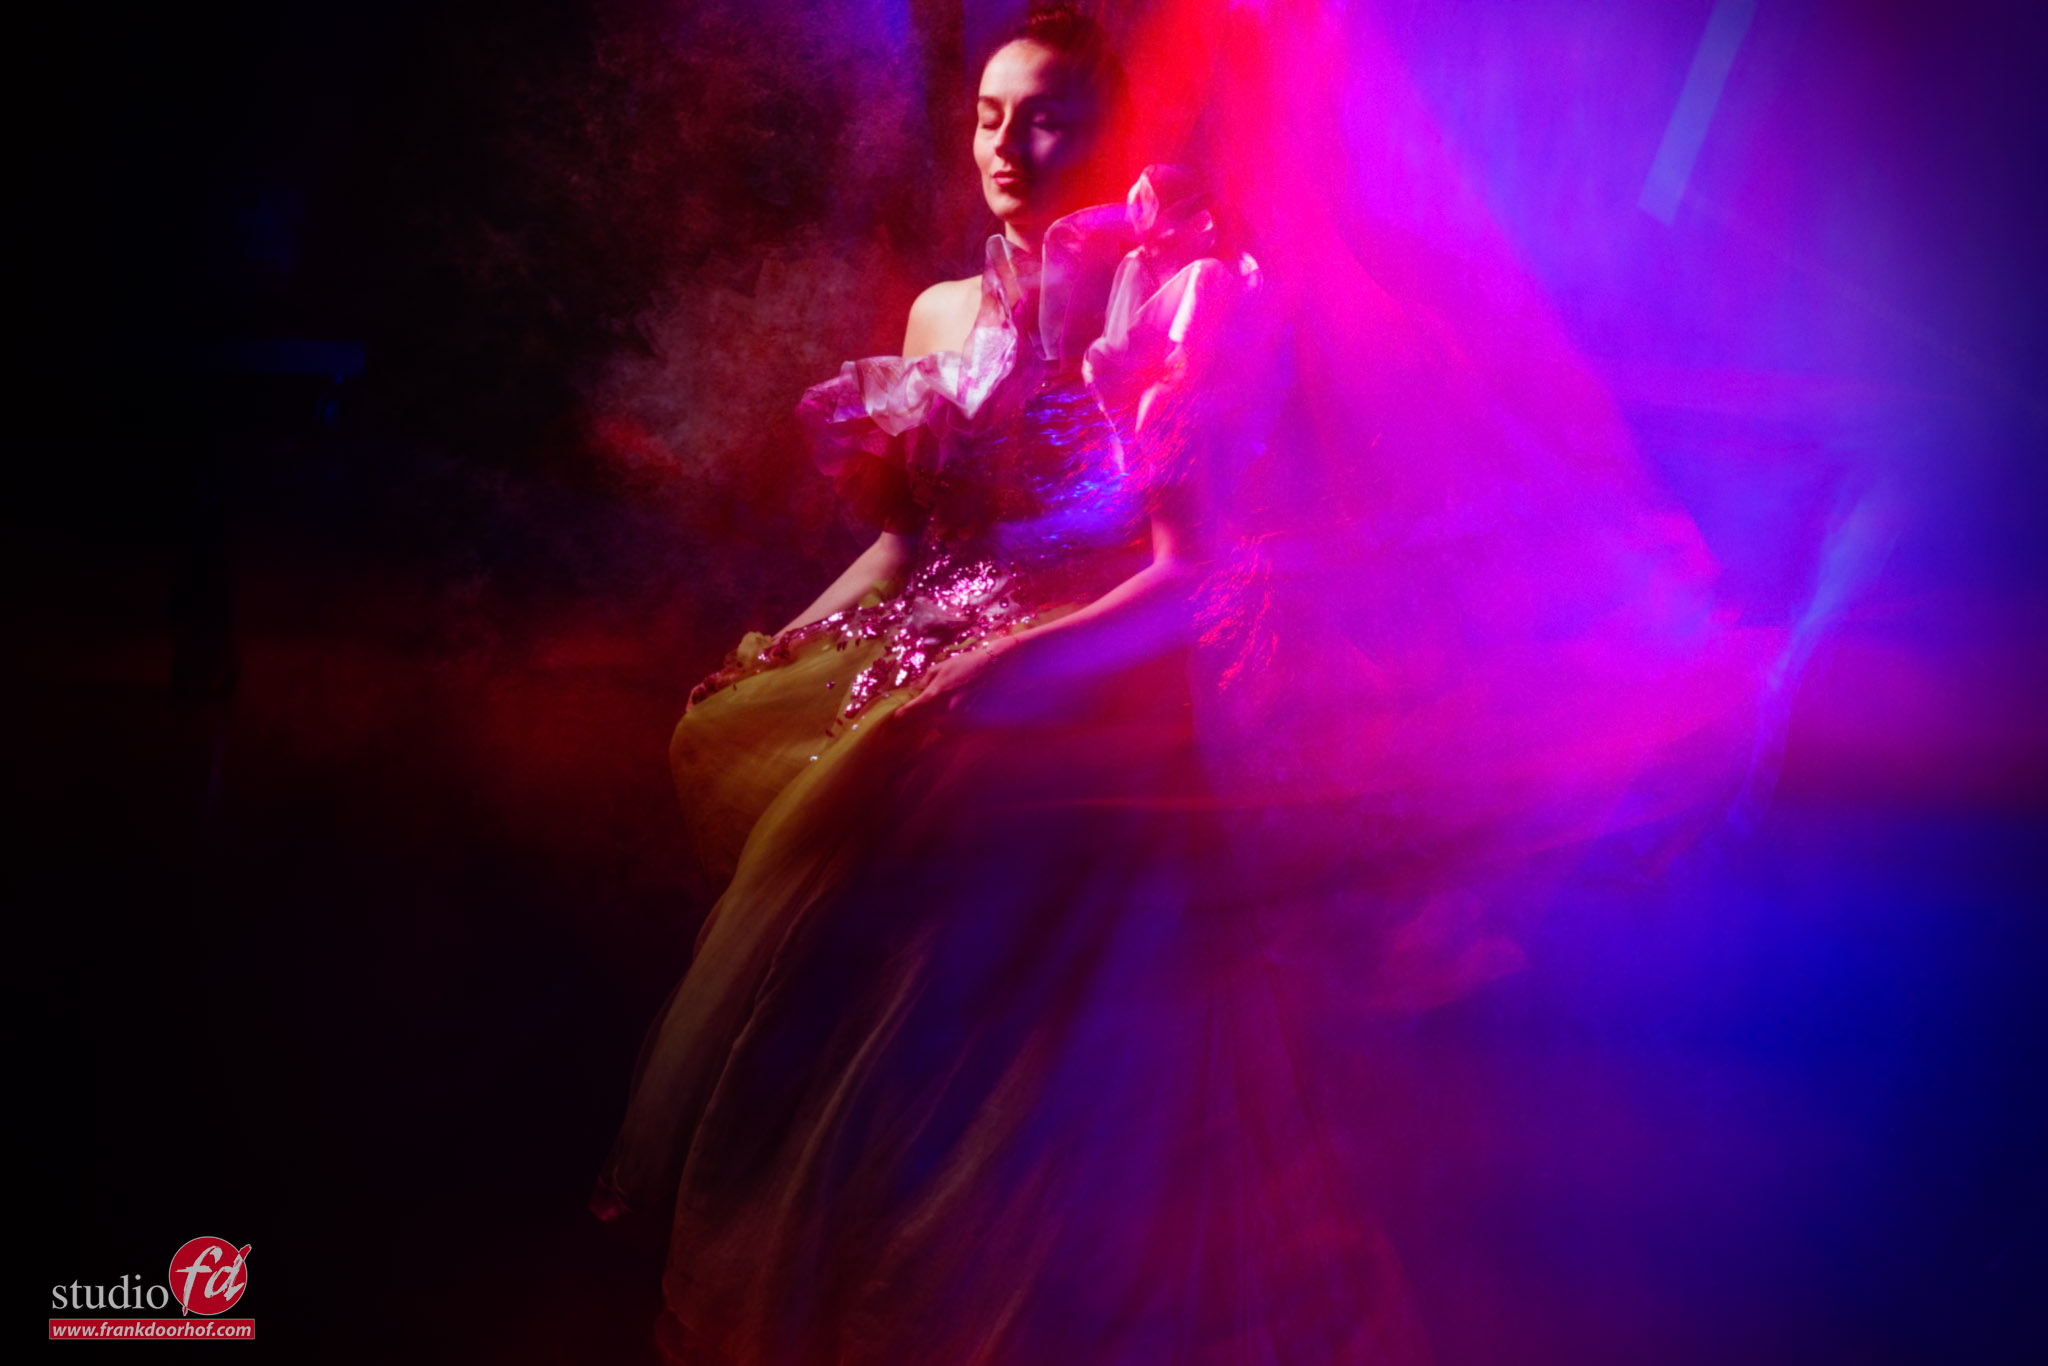
In previous blog posts and videos, you have seen me work with a technique called “dragging the shutter”.
What this means is that I use a strobe to freeze my model but leave the shutter open to let in more ambient light. This will create a mix of a frozen model (by the strobe) and a more blurred version of the model due to the movement and the ambient light.
In most cases, I’m using a shutter speed of 1-2 seconds.
When you add some smoke, the results become really interesting.
When the strobe fires, it will freeze the model and the smoke.
But during the longer shutter time, the smoke will continue to move, and also the model will create movement, which can be seen in her outlines but also in the smoke.
When you shoot this just as a portrait, it does look a bit weird. But in a good way.
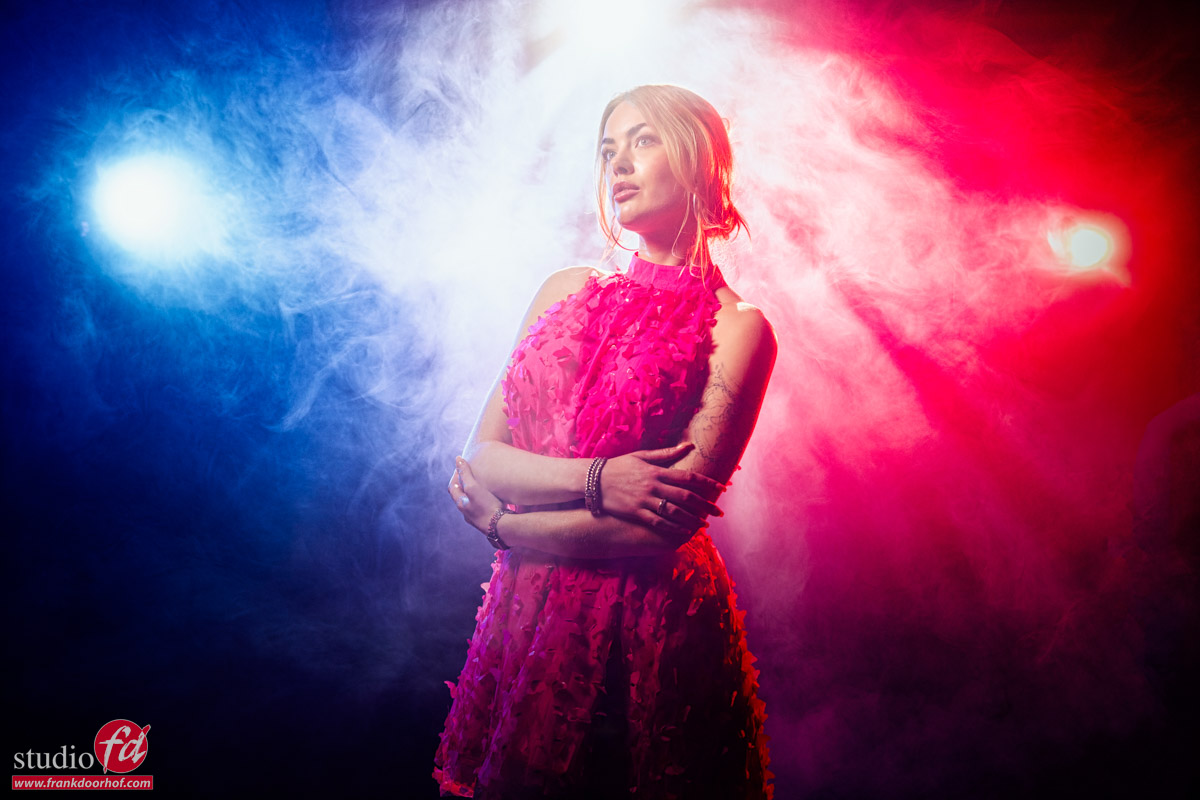
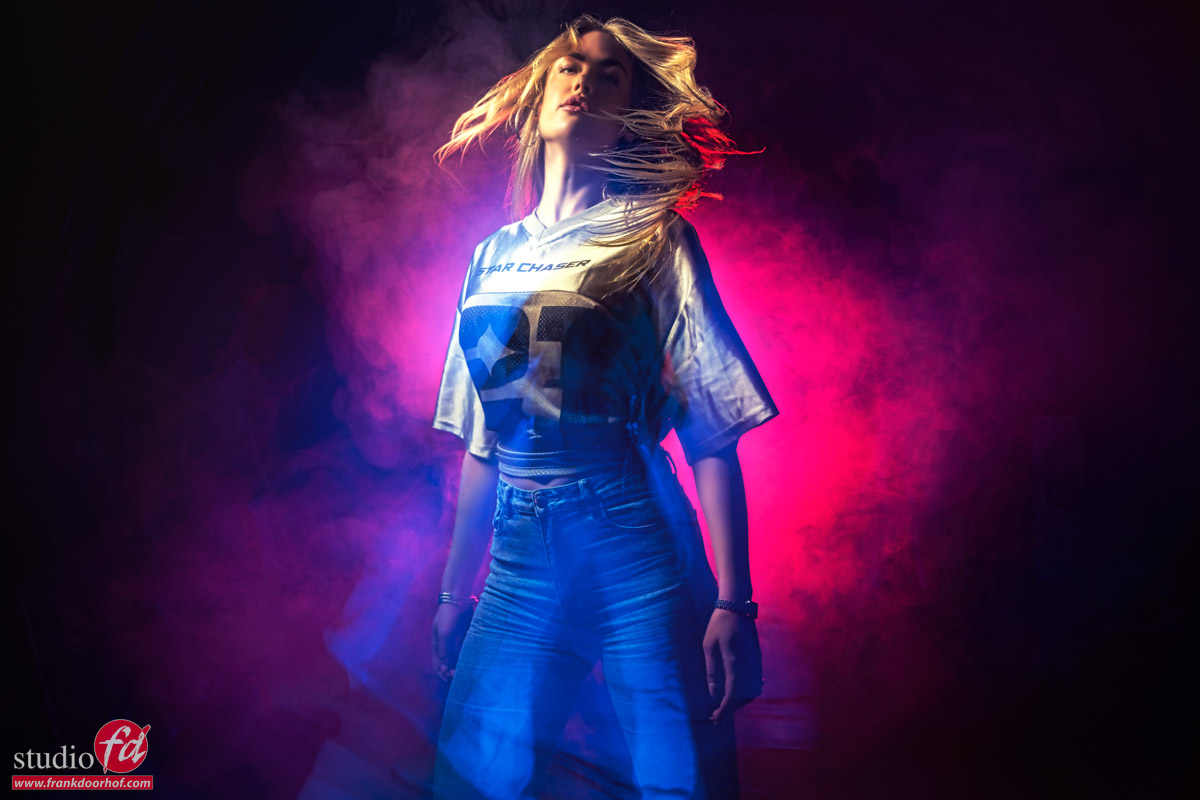
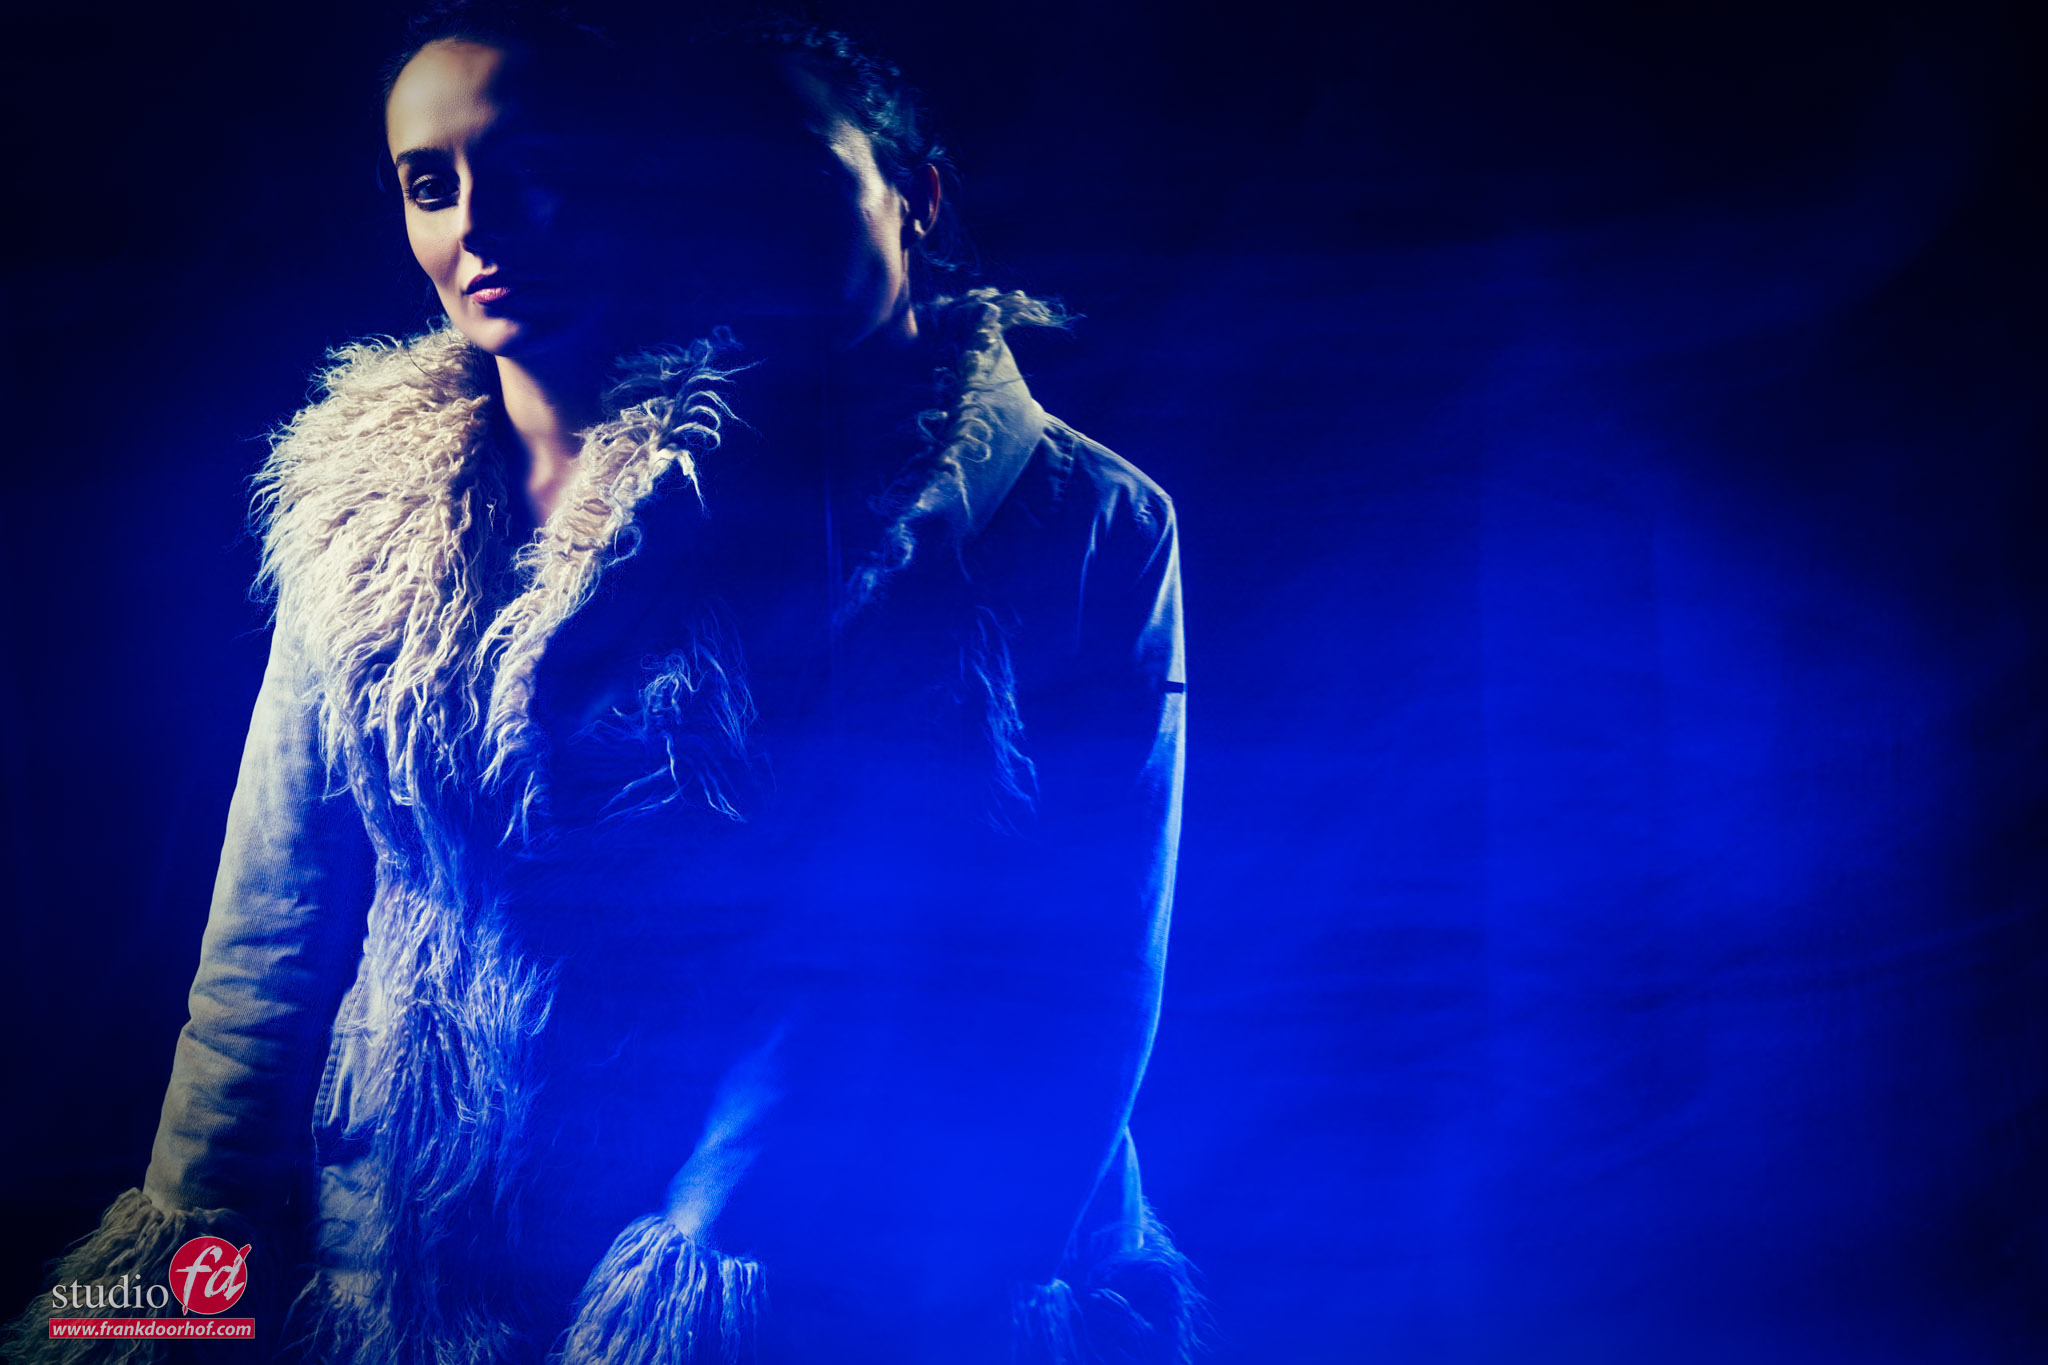
For lighting, I’m using a small softbox like our Quicky from Geekoto on our model Isabelle.
From the sides, I’m using two Geekoto GT200’s with the Rogue Magnetic System gels.
As soon as I start adding some more smoke, the effect is already getting a lot nicer.
Movement
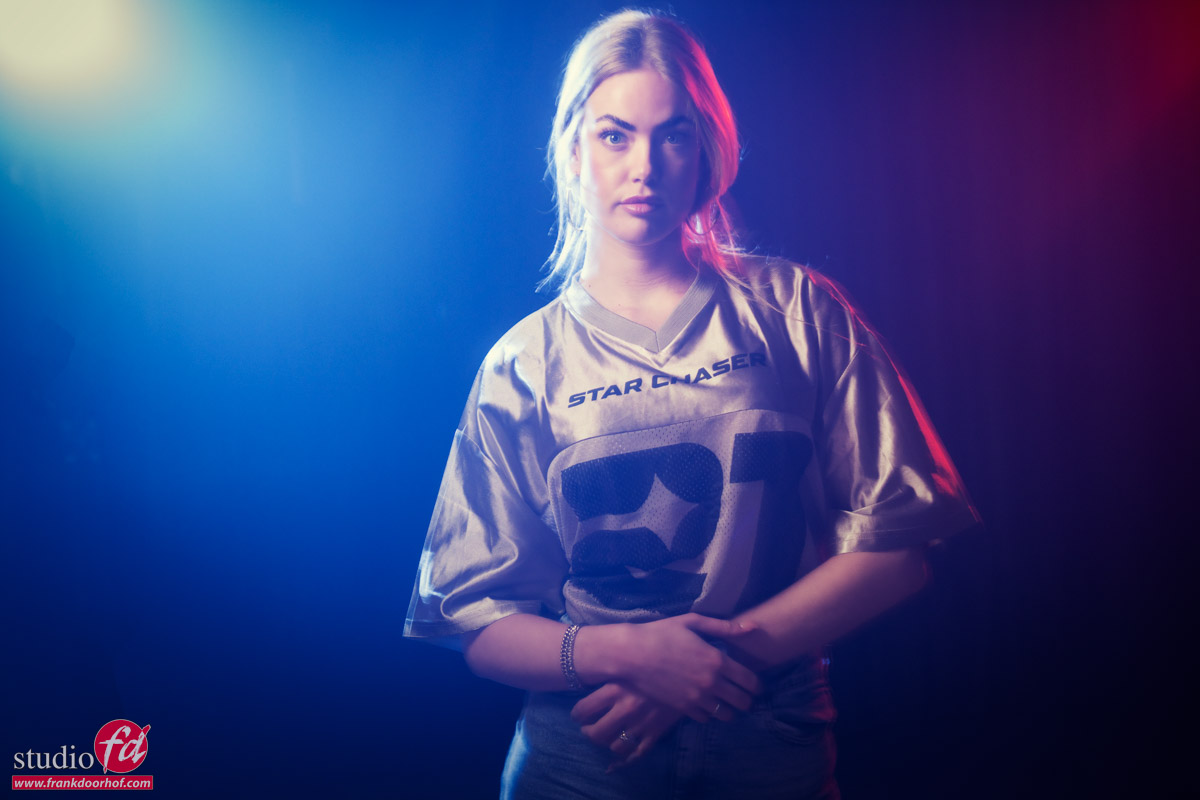
But this is still with a model that doesn’t move.
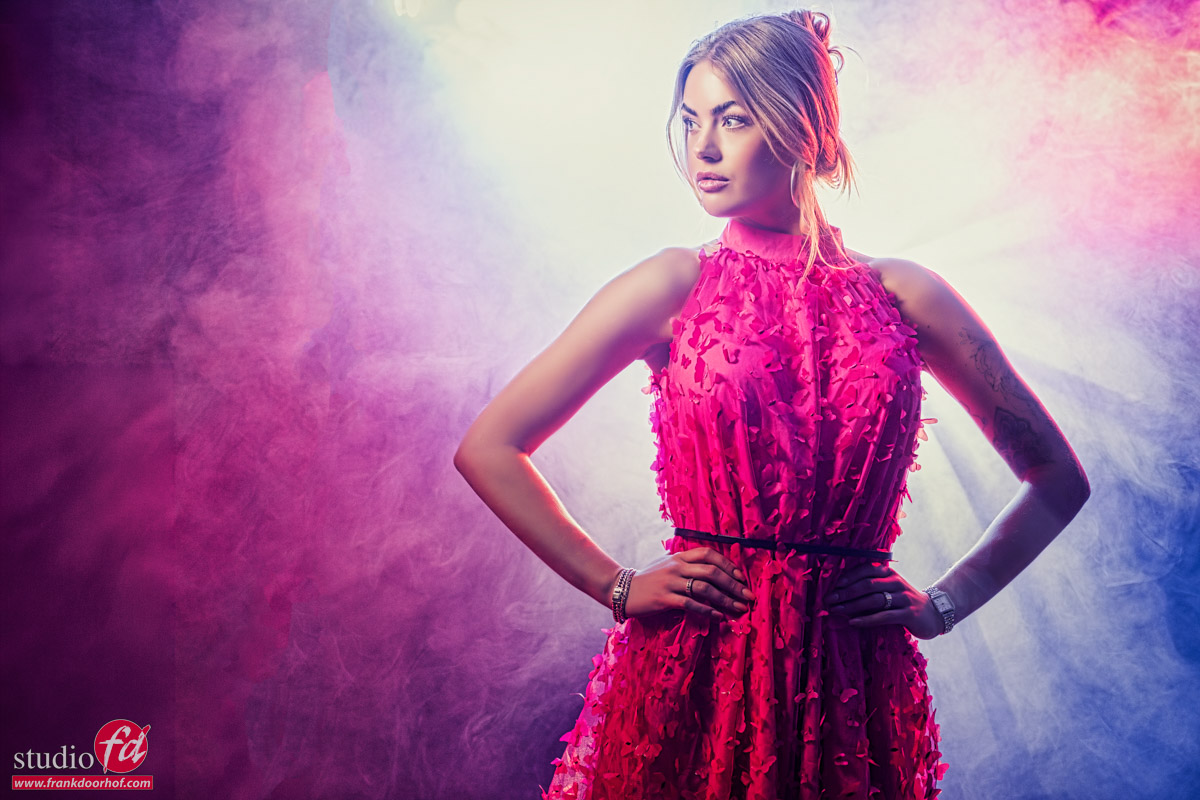
In the next setup, I’m leaving the modeling lights on for the colored backlights.
In this setup, I’m also using a Nanlite Pavo tube on the floor set to a blue tint.
It’s aimed at the floor to tame the output because it was too bright, and a nice extra effect was that it would make the light more diffuse.
As you can see, just shooting a portrait like this is not really a “WOW what great moment”.
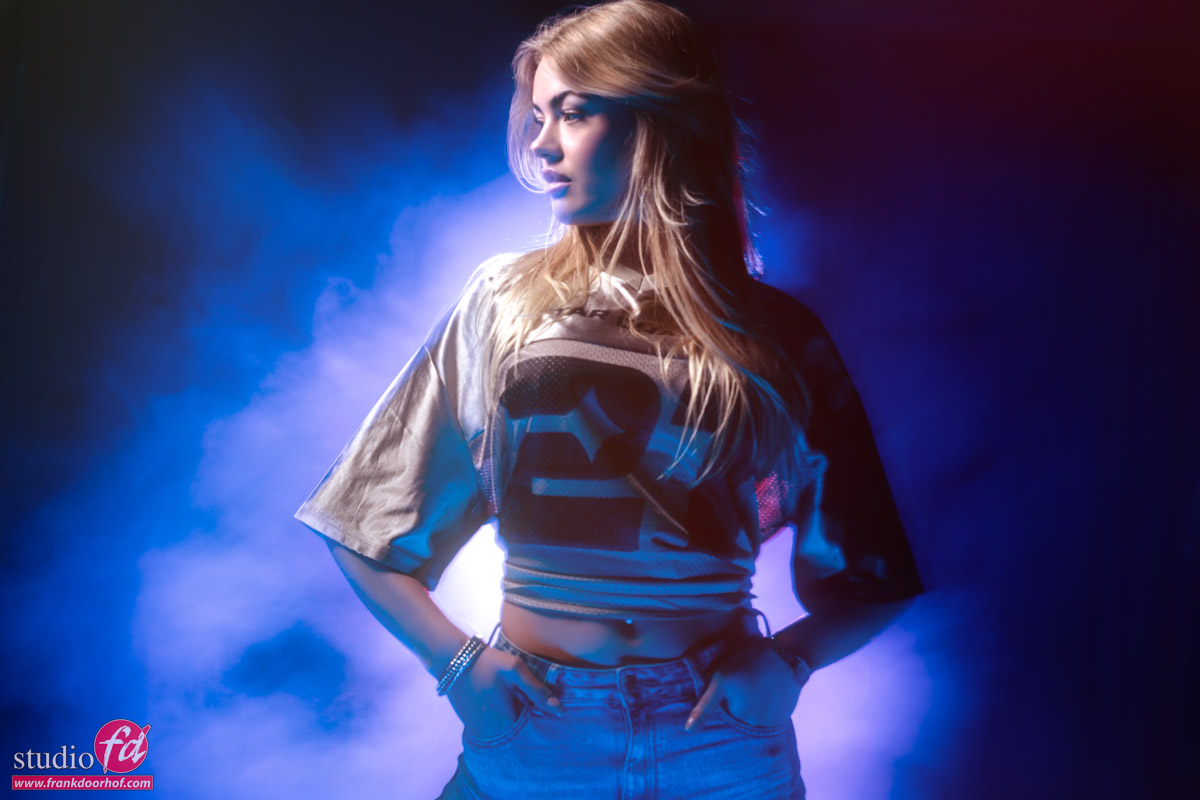
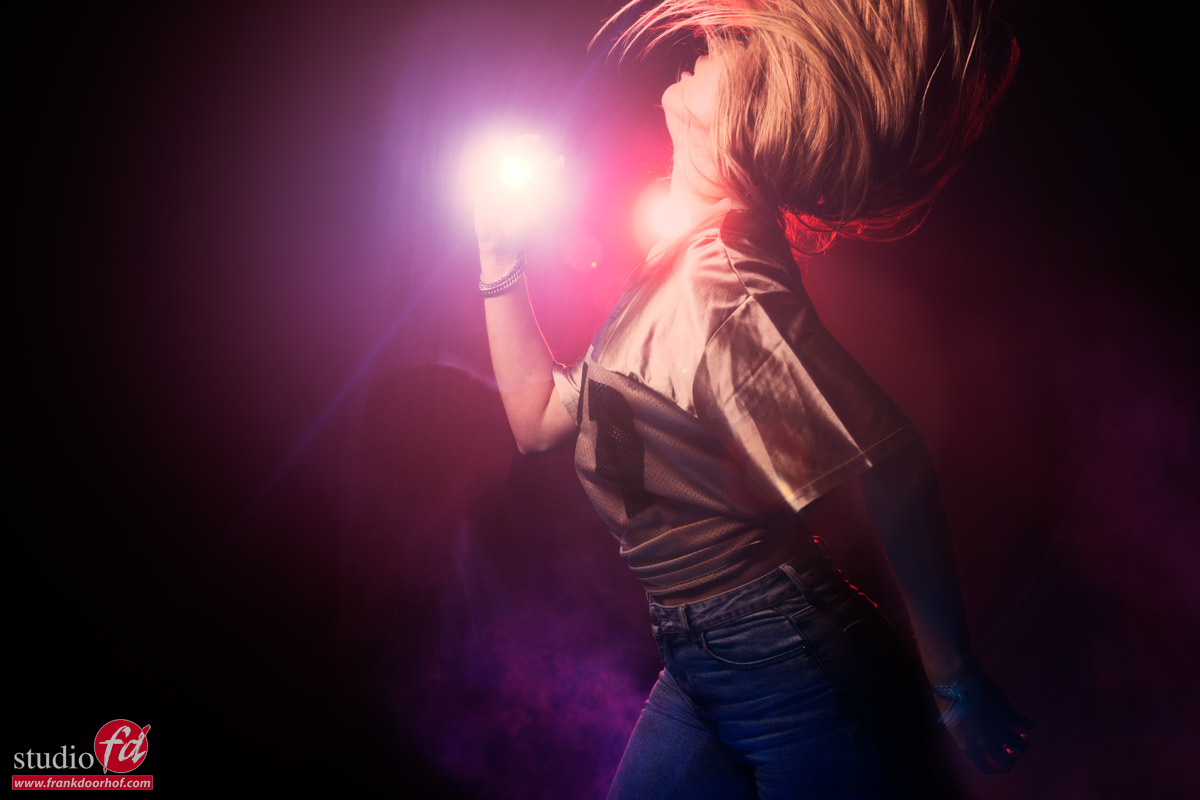
But what when we start adding some motion?
In this case, I’m asking the model to turn very fast and stand still as soon as the strobe fires (just like we would do with freezing a jump or standard motion).
When you move your camera, you can get some cool effects from the backlights; sometimes it will shine through the body of the model, but we just call that creativity due to time limits.
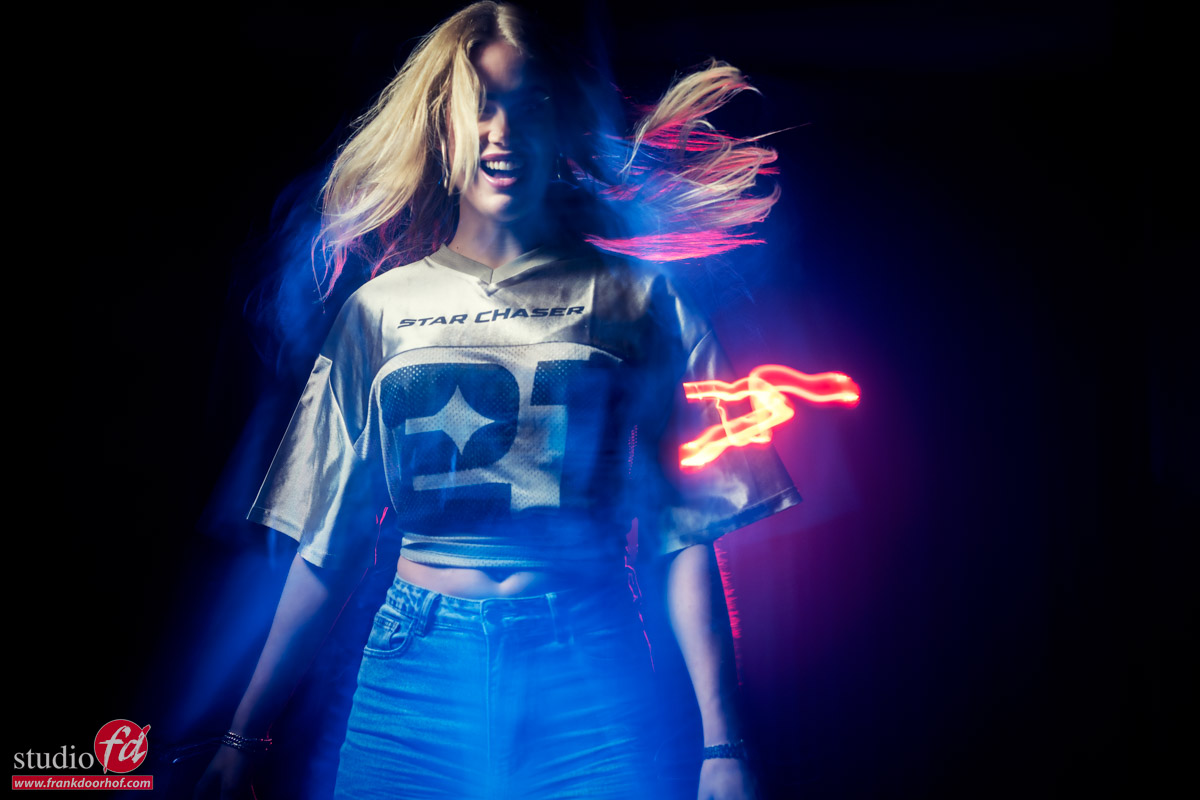
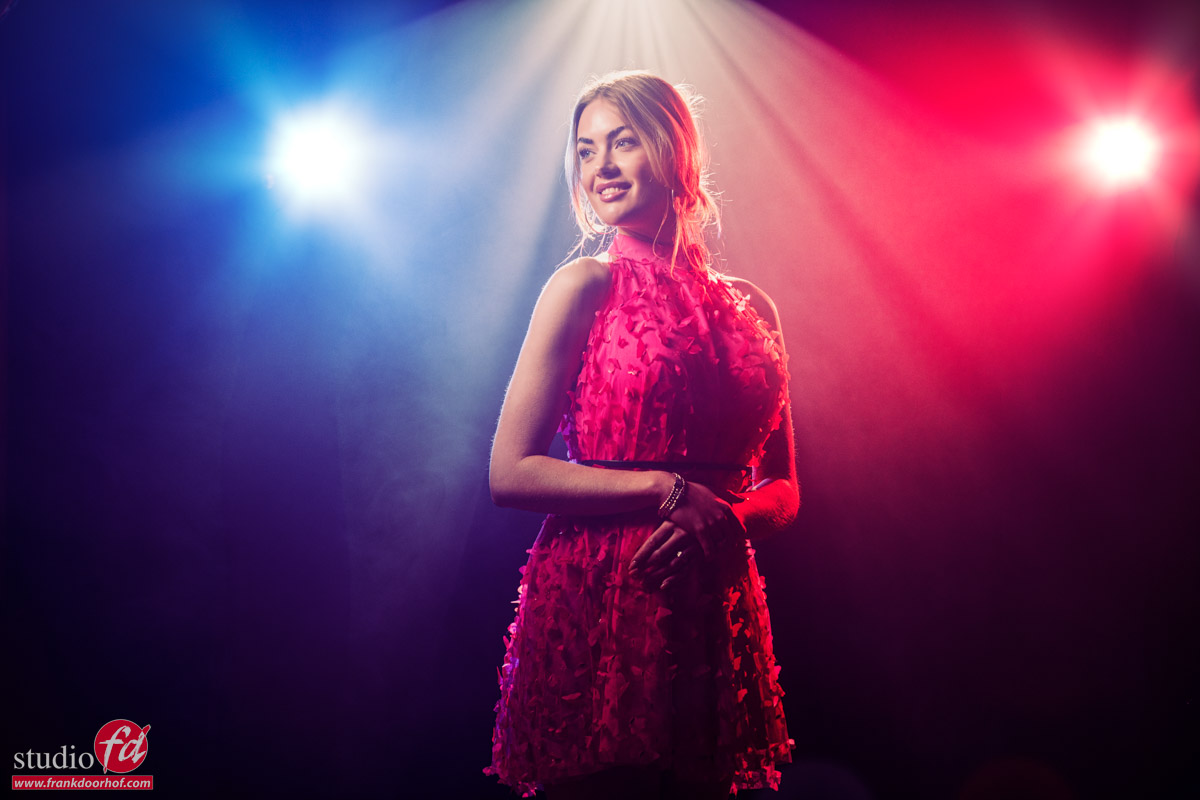
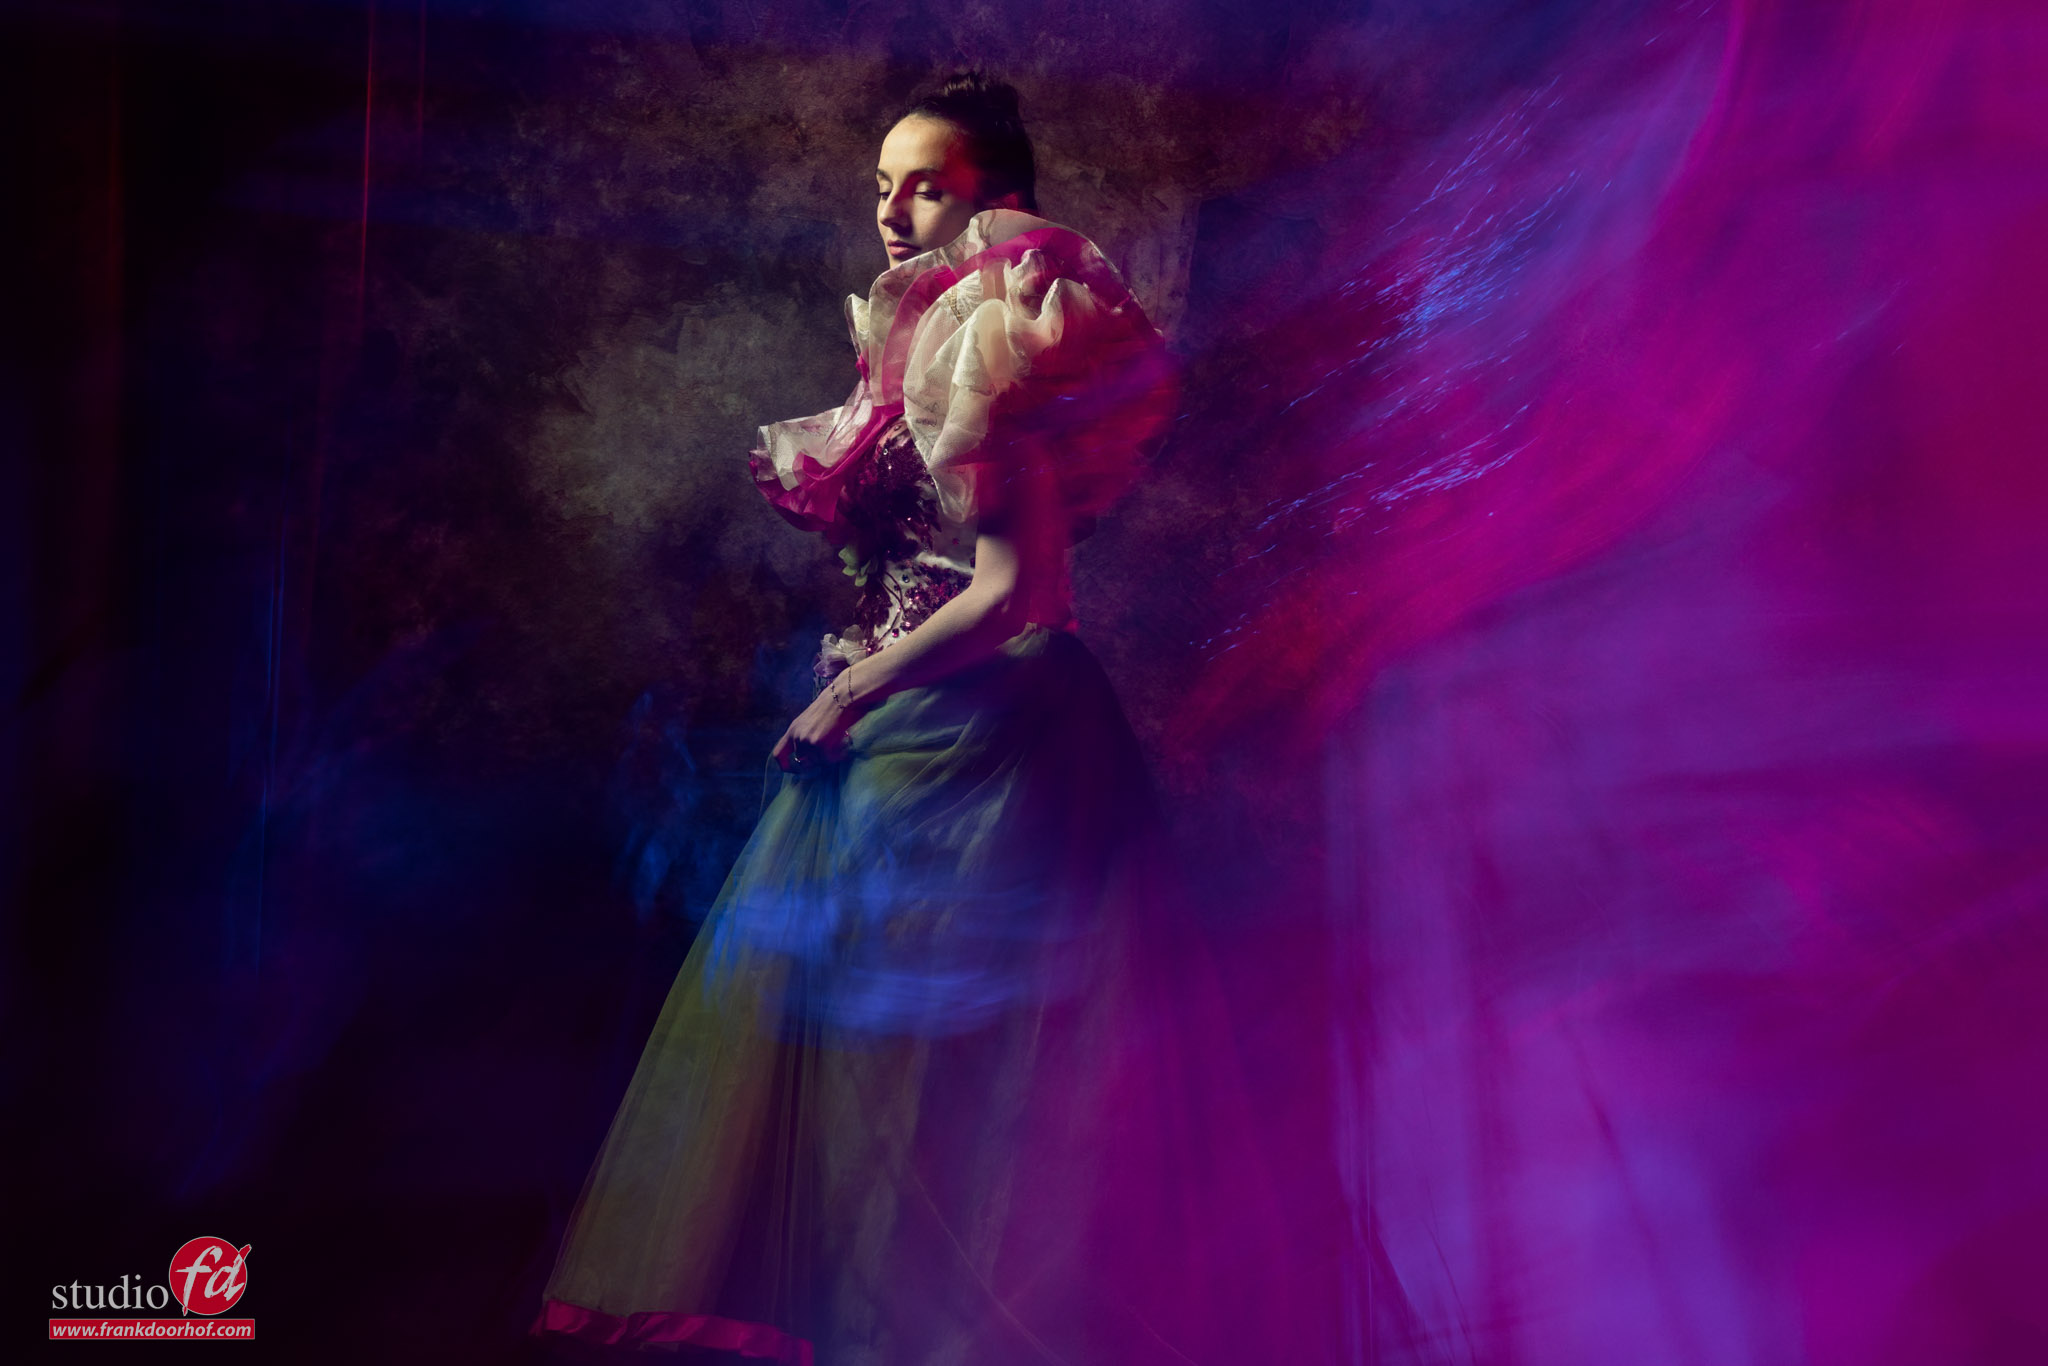
So let’s up the ante a bit more.
For the following shots, I’m also turning and zooming the camera for all kinds of “weird” and “cool” effects.
And when you’re lucky, you sometimes capture two strobes in unique places.
Who needs Photoshop 😀
(Actually, I do, I love Photoshop, and all these images are edited in Photoshop)
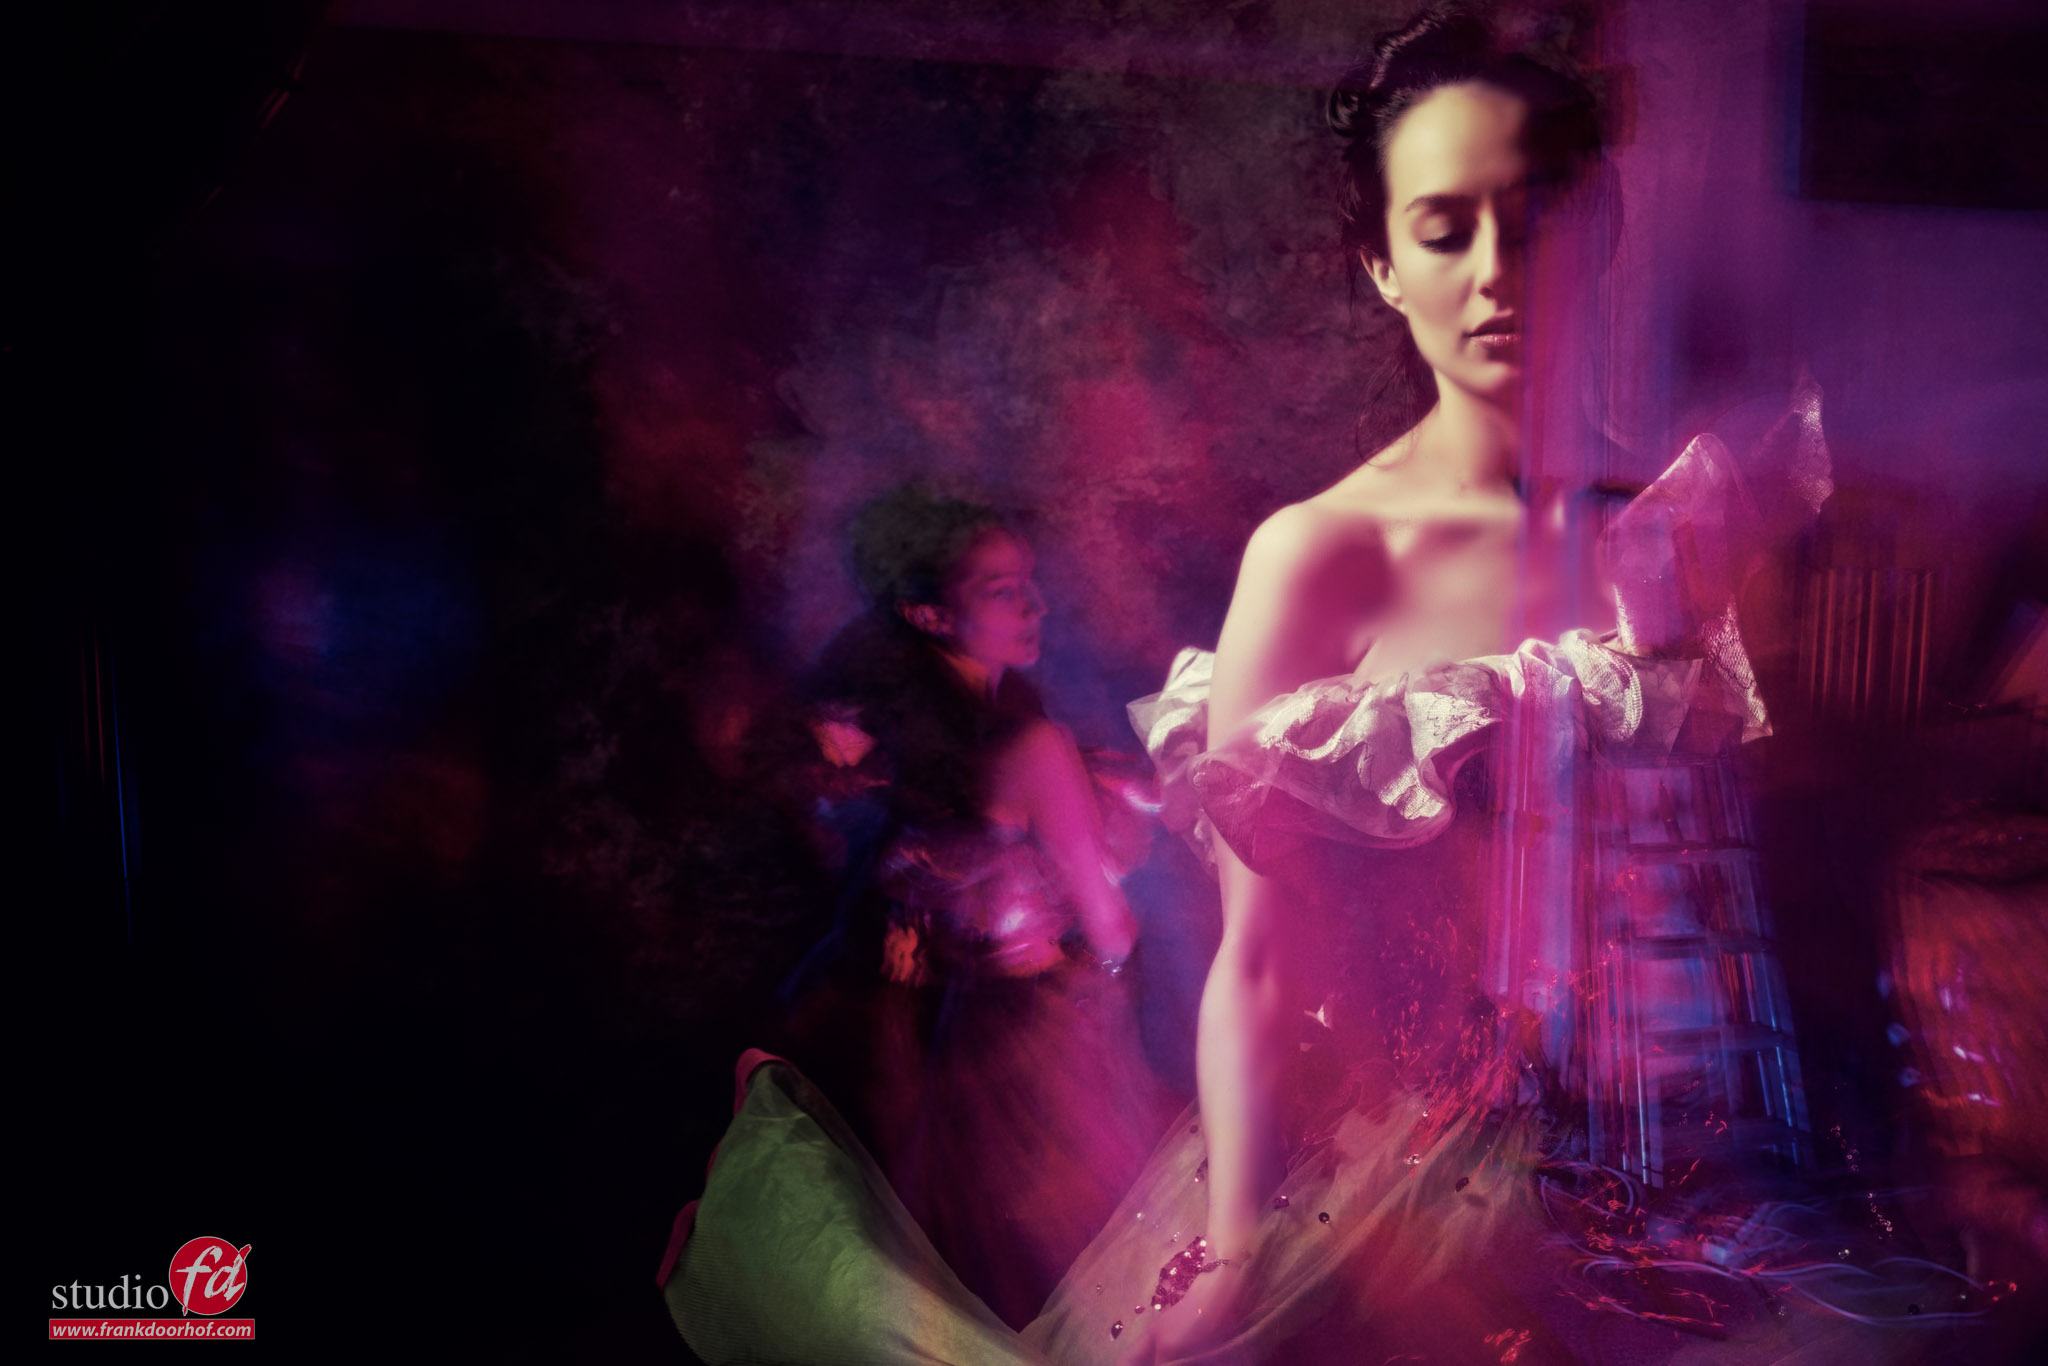
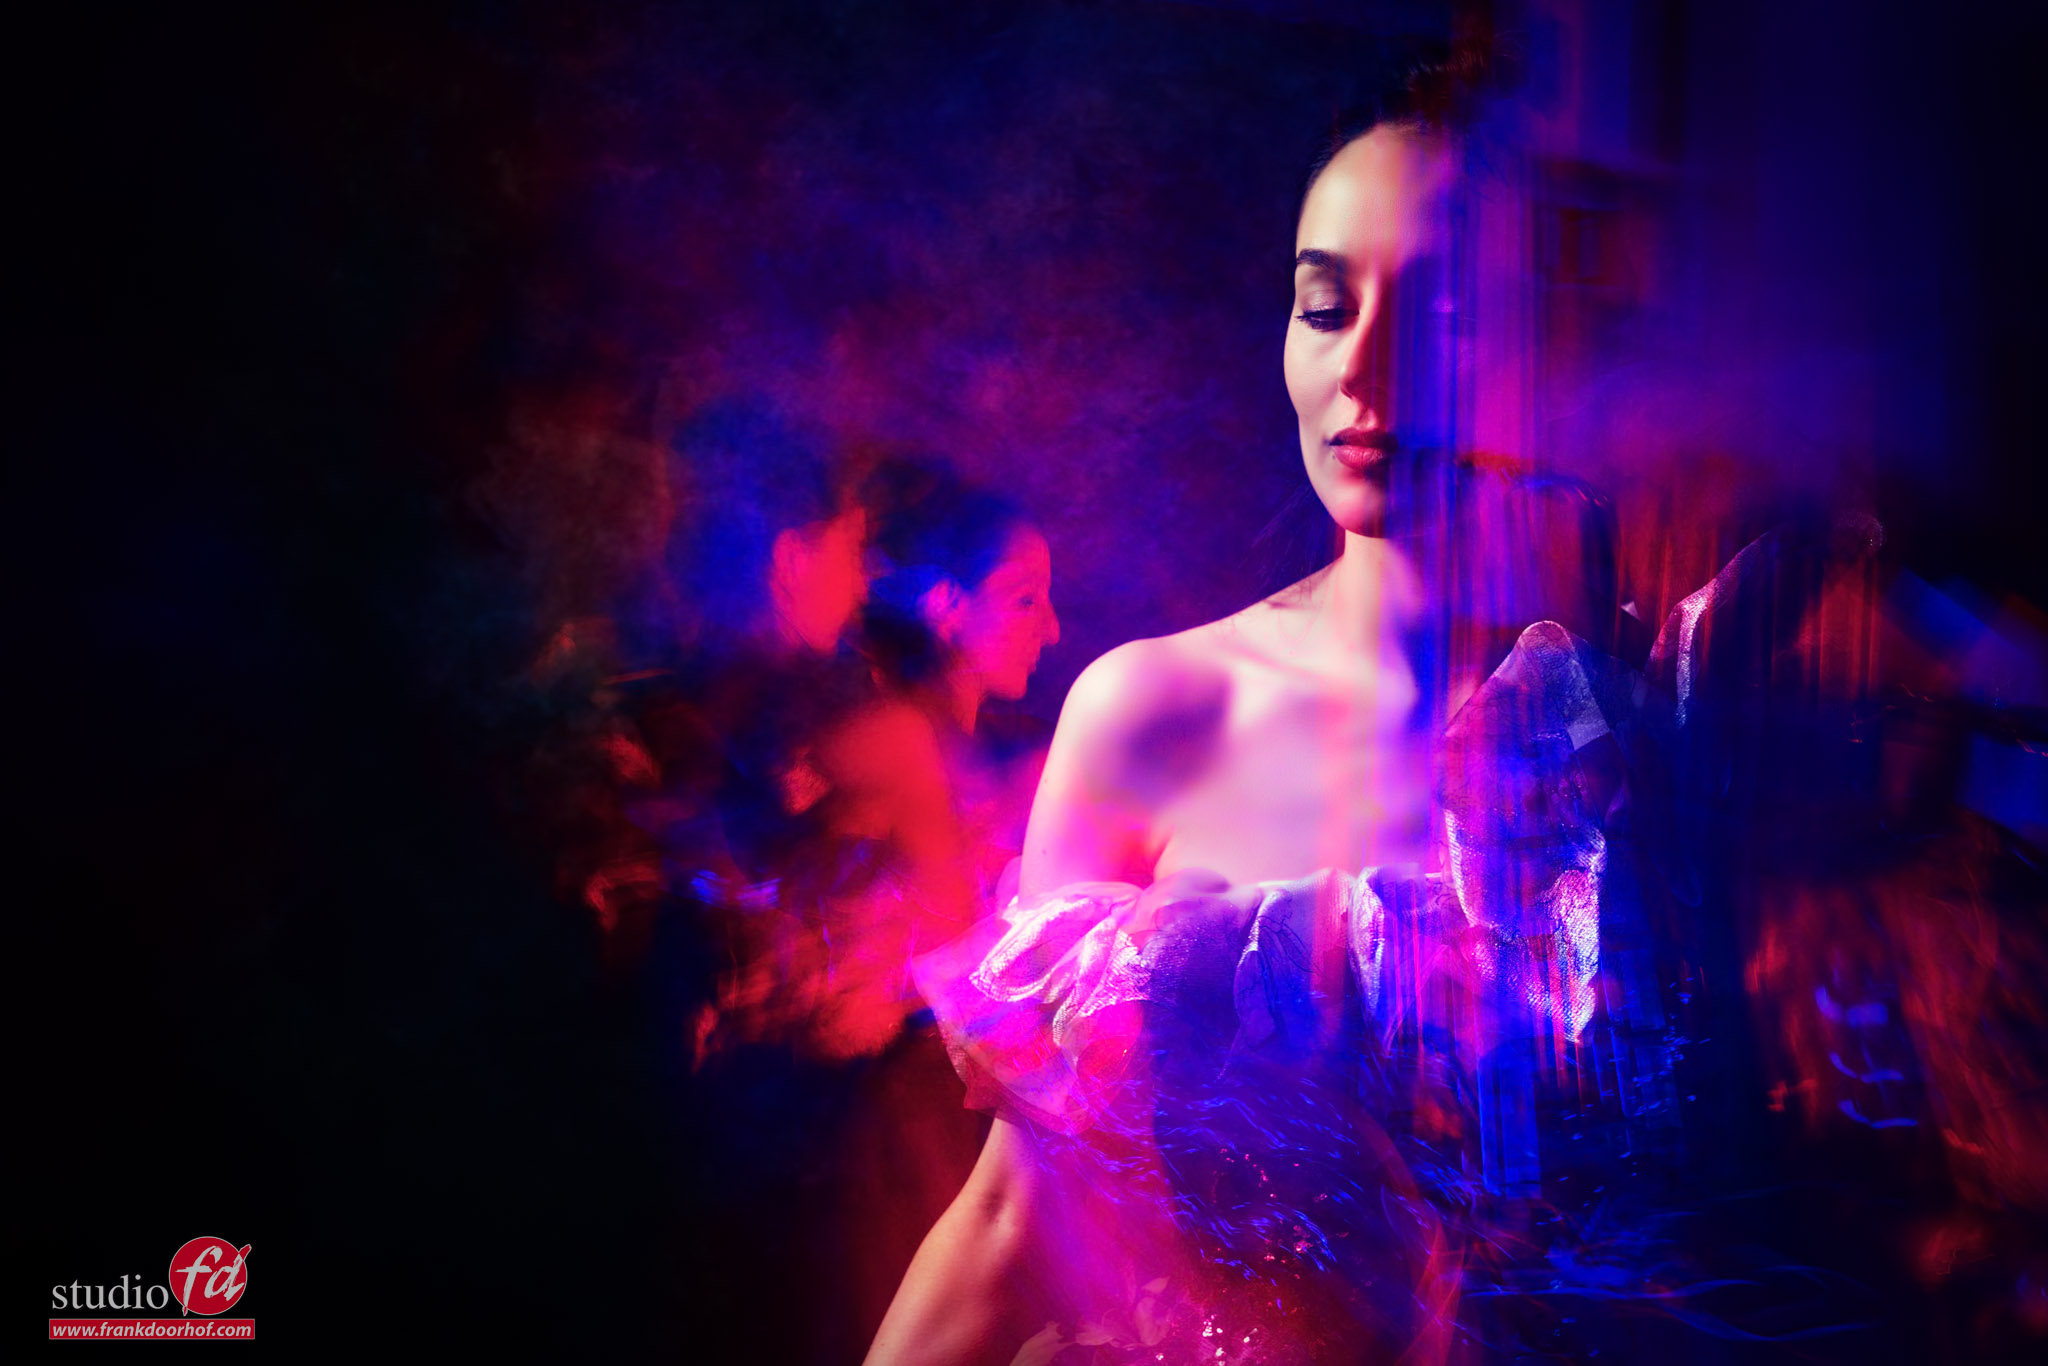
And of course, you can also go for a lot more extreme movements.
These were shot during a different workshop without smoke.

Cool effects, you will never get again
Of course, you can add great effects in Photoshop.
For example, I love plugins like BorisFX and use them mostly for the film effects, but you can add some awesome lens flares and smoke effects that would really enhance images like this.
For me, adding lens flares on set is part of the fun, but when you miss a lens flare in a shot because you framed the shot incorrectly, you could add some pretty convincing ones from BorisFX.
When you’re in the studio and want some really unique images that are always different, but always cool.
Try adding long exposures and flash combined with strobes and colored lights.
Move the camera, zoom in/out, and be surprised by the outcome.
“It’s like a box of chocolates, you never know what you’re going to get.”
Workshops
Want to learn everything about light control?
Want to visit a workshop where it’s not just shooting a model with a fixed lighting setup, but see how the setup is built and adjusted to the taste of the group?
And of course learn how to work with poses, backgrounds, small sets, styling, retouching, and a lot more…..
If this all sounds awesome, visit fotografie-workshops.nl and book your workshop.
If you don’t speak Dutch, no problem, let us know a few weeks in advance, and we can switch the workshop to English.
Not possible to travel to the Netherlands?
We got you covered with our 1:1 online workshop.
We have a full streaming setup in our studio. 4 detail cameras and of course the retouching software, so you can see every detail and of course ask questions during the day. Plus, you get all the RAW files after the workshop.