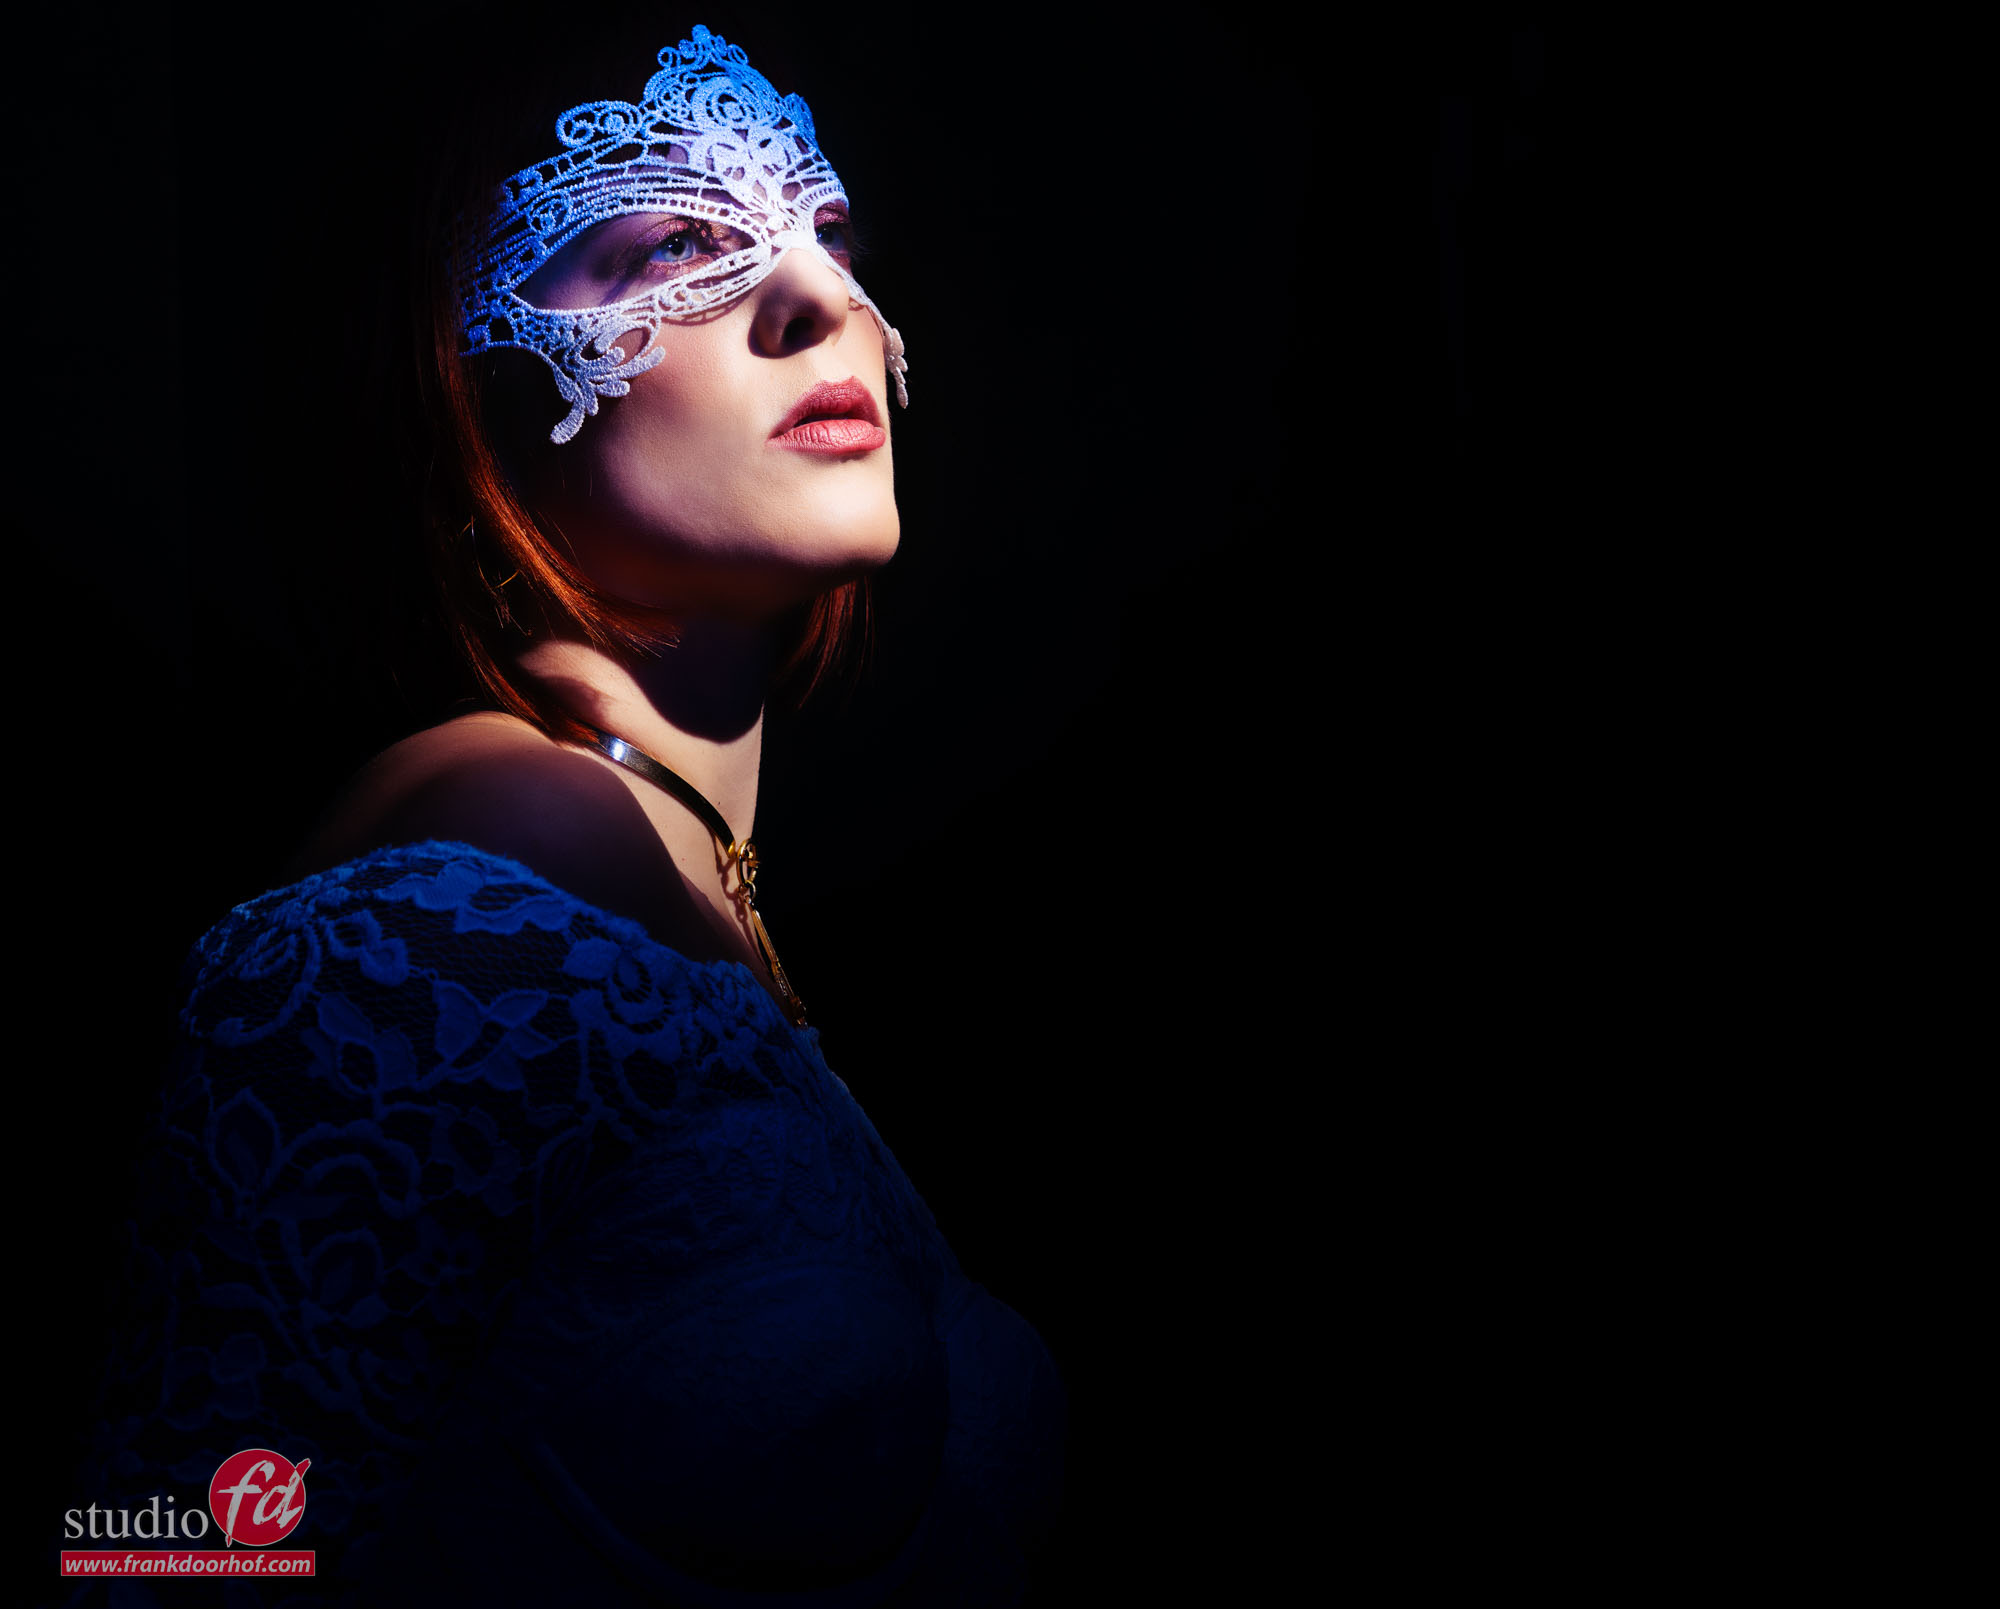
Nadine and the Rogue snoot
In todays blogpost some images we shot with our model/stylist and allround cool girl Nadine.
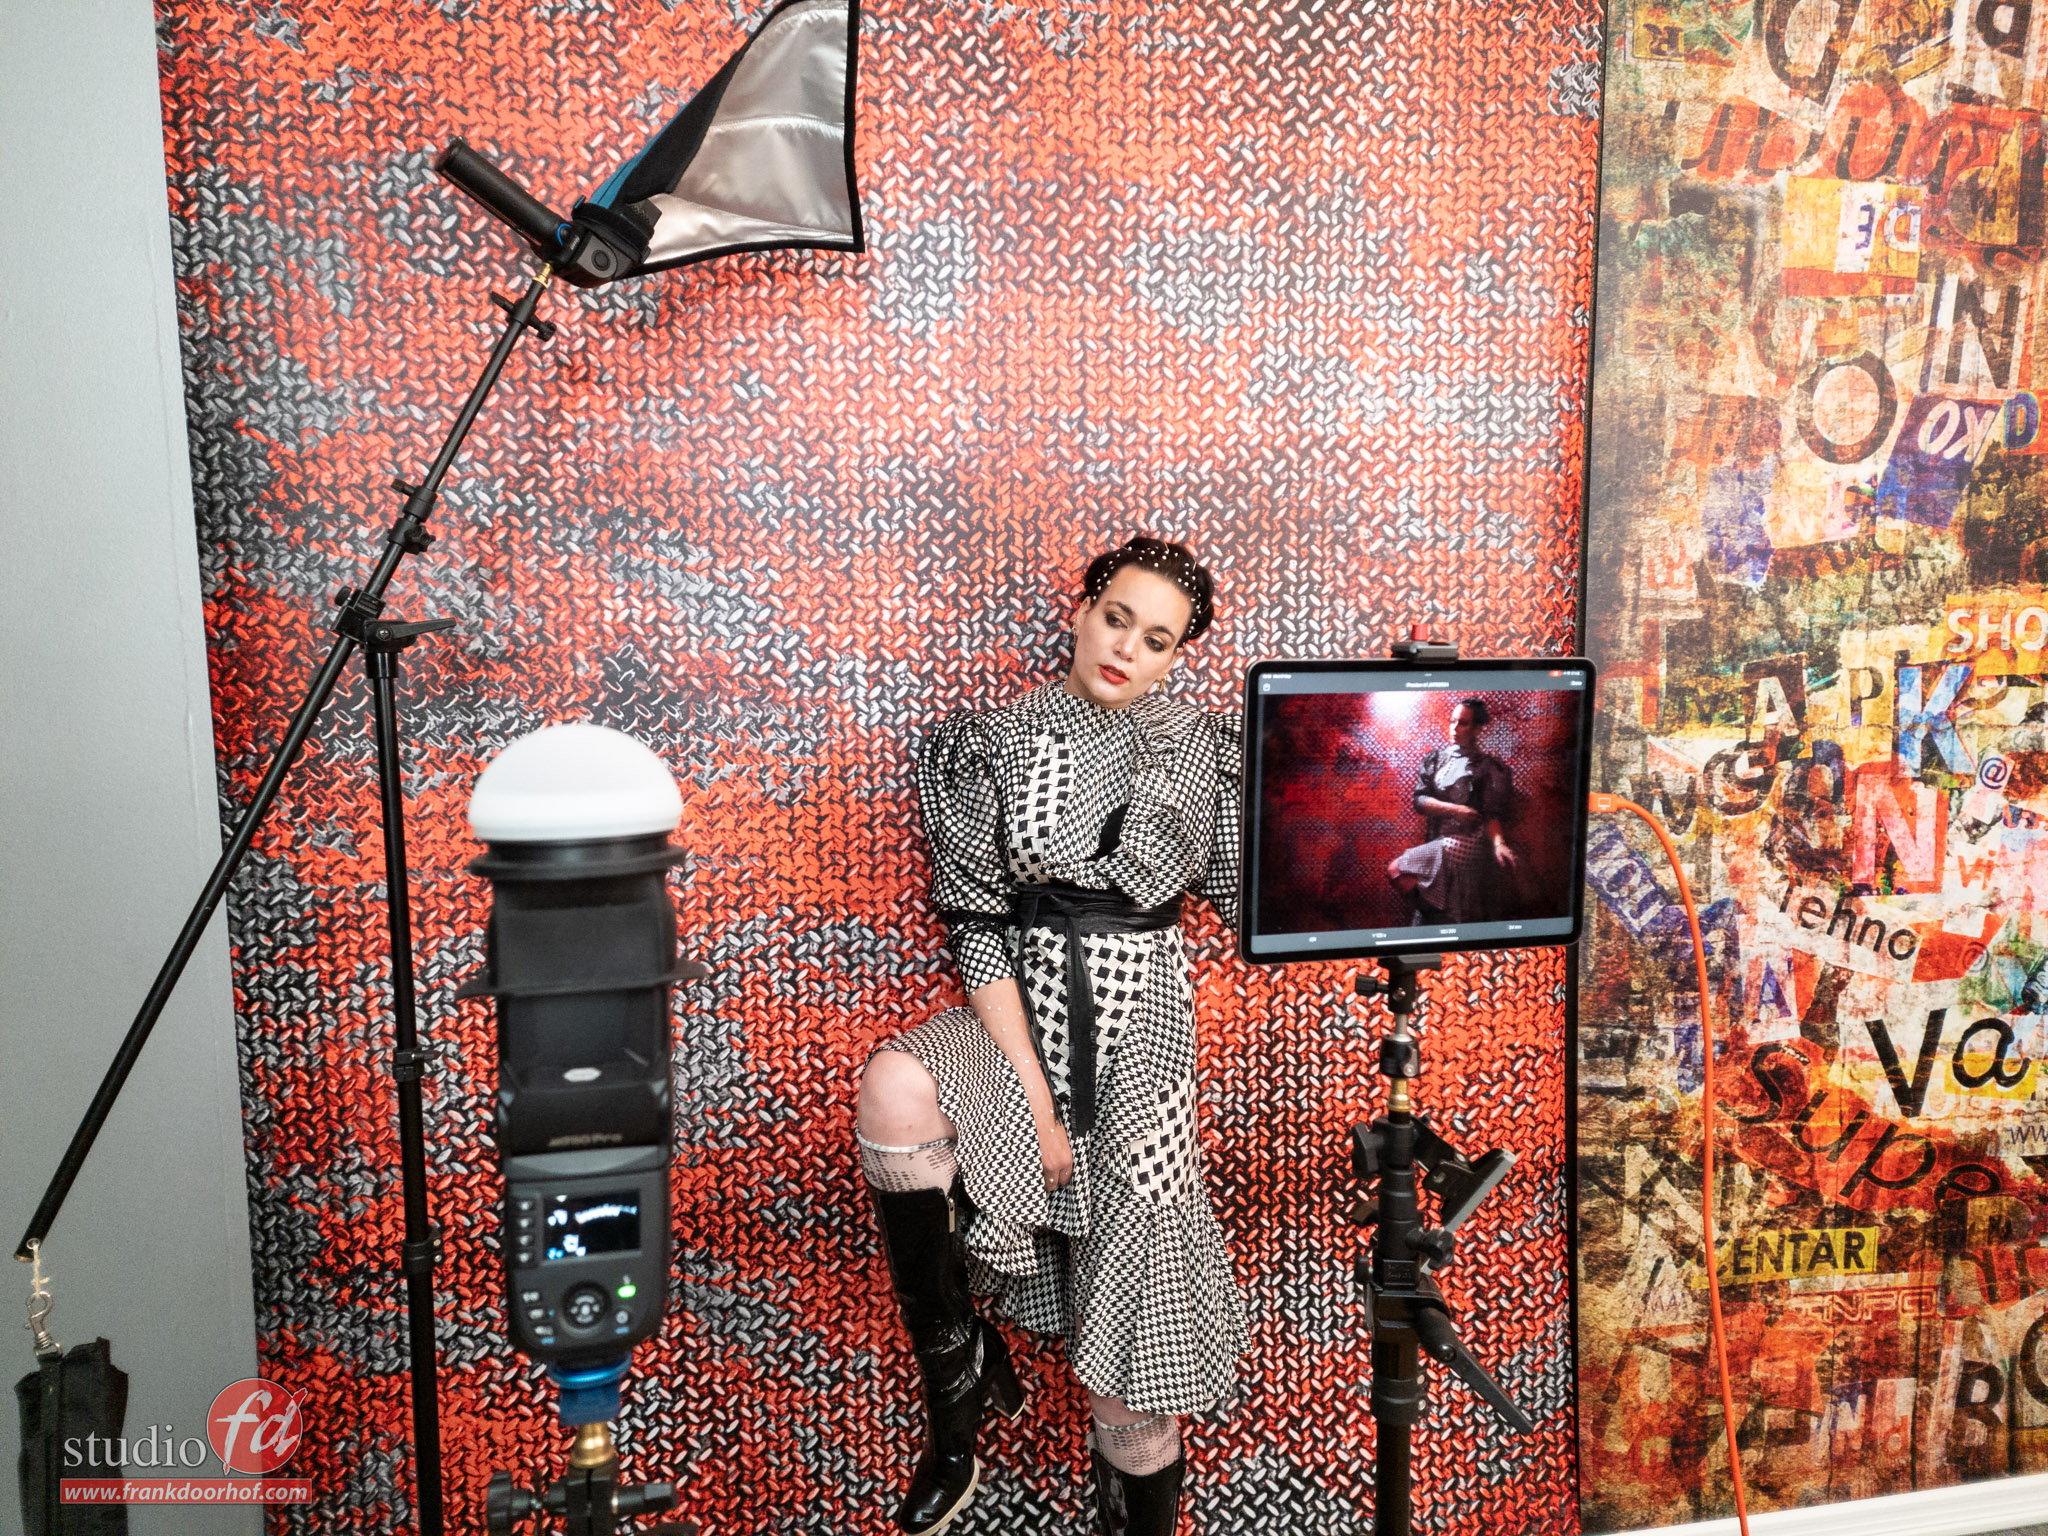
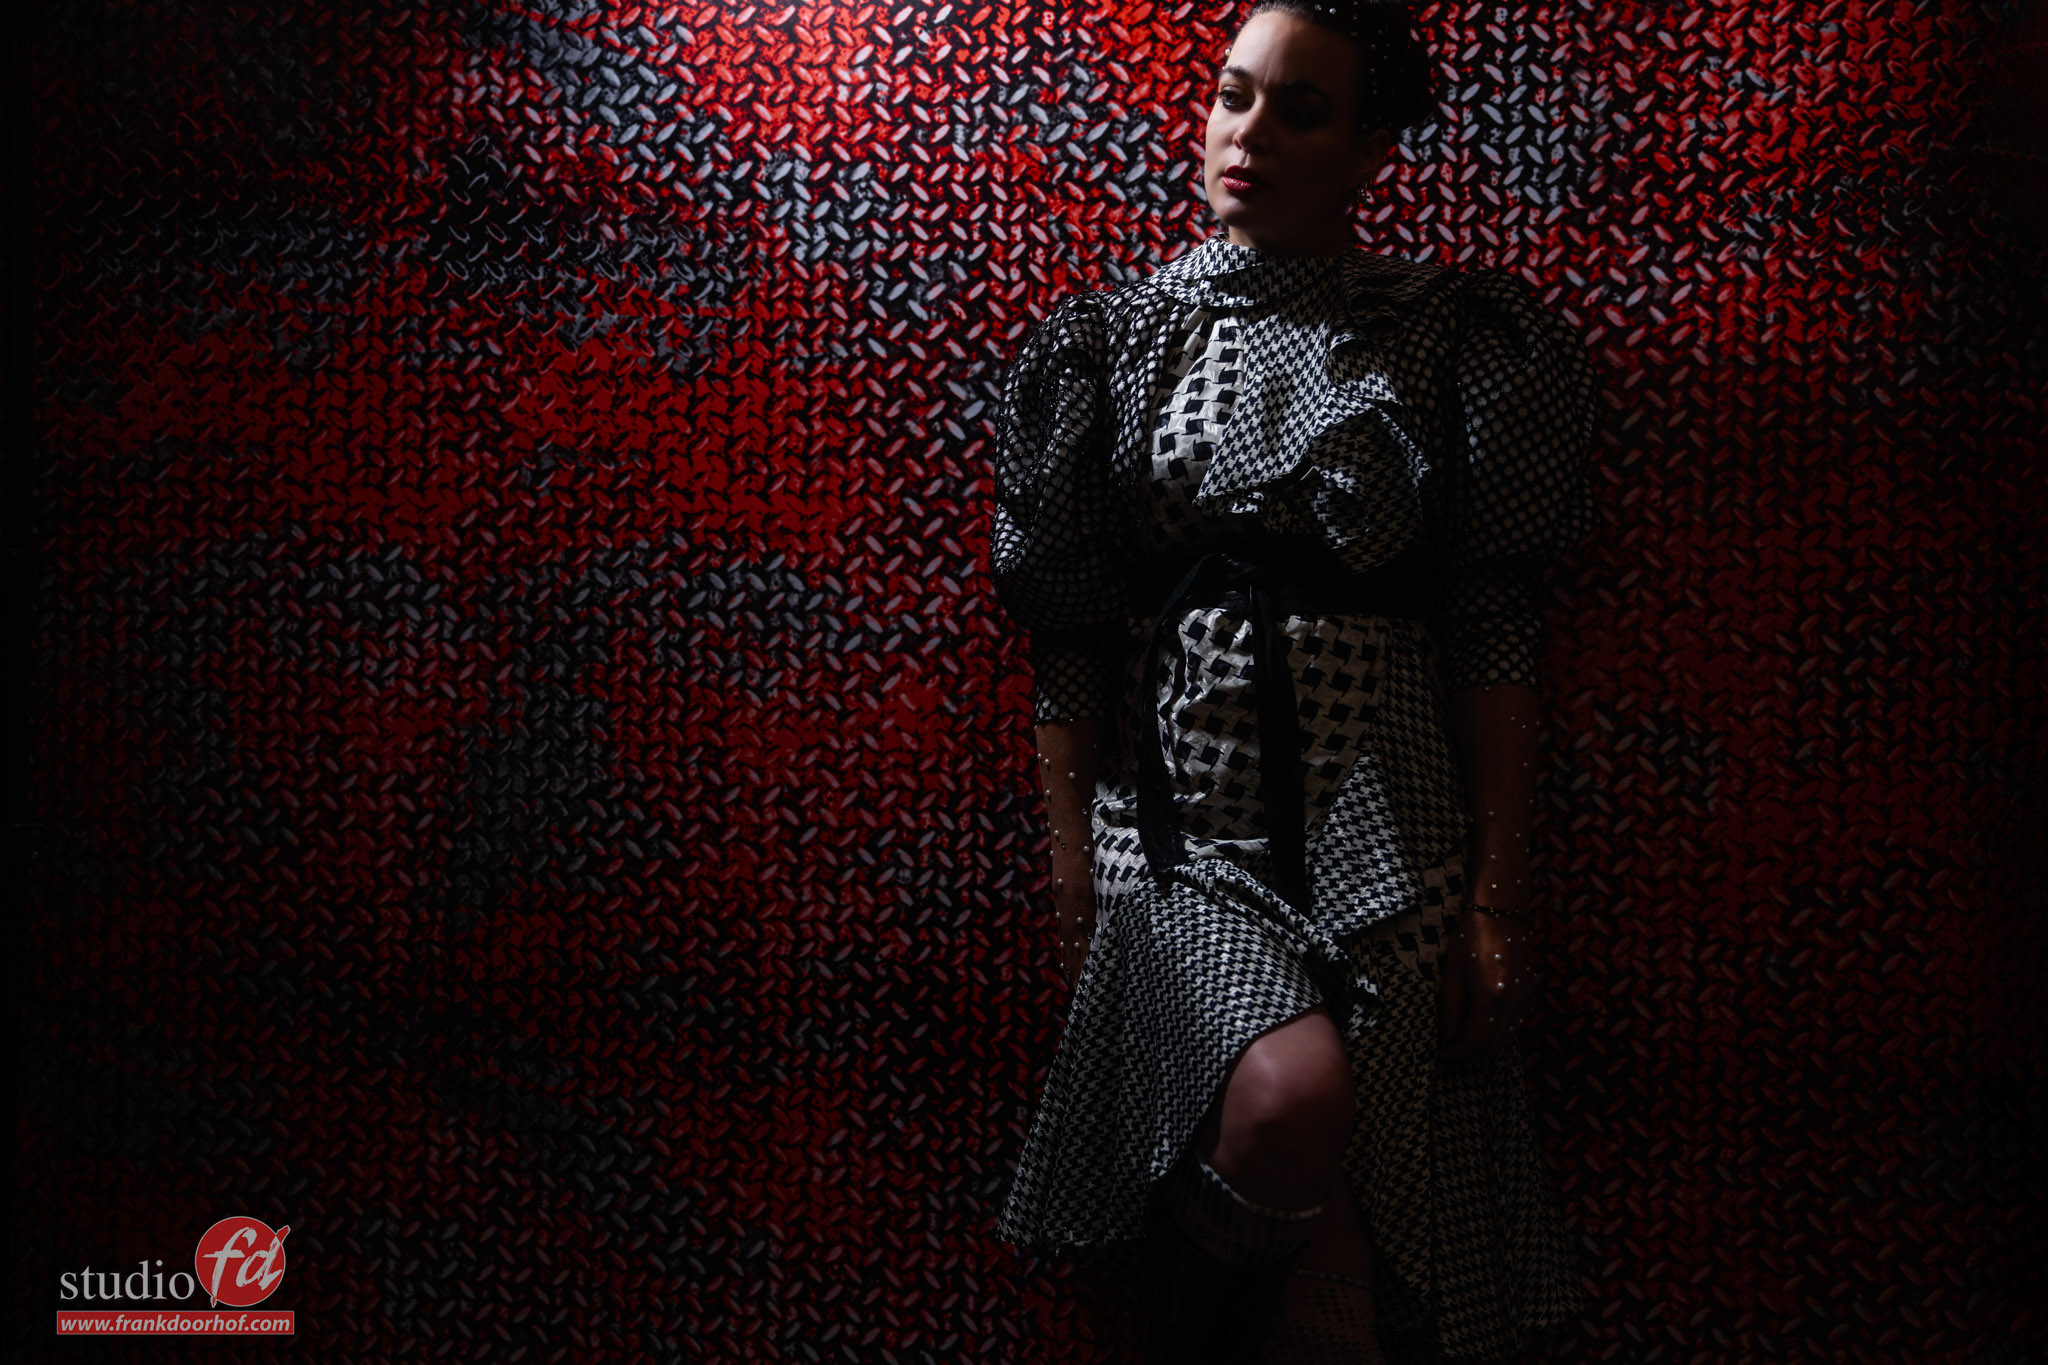
The backdrop is our Graffiti door from ClickPropsBackdrops.
I’m using our Rogue snoot here on a Nissin speedlight.
To get an extra “nasty” edge to the light I did not use a diffusion panel inside the gel holder.
You normally use this to get a more rounder “nicer” quality of light (and most of all softer), all things I didn’t want for this shoot.
So lets take a look at the images and what I changed during the set.
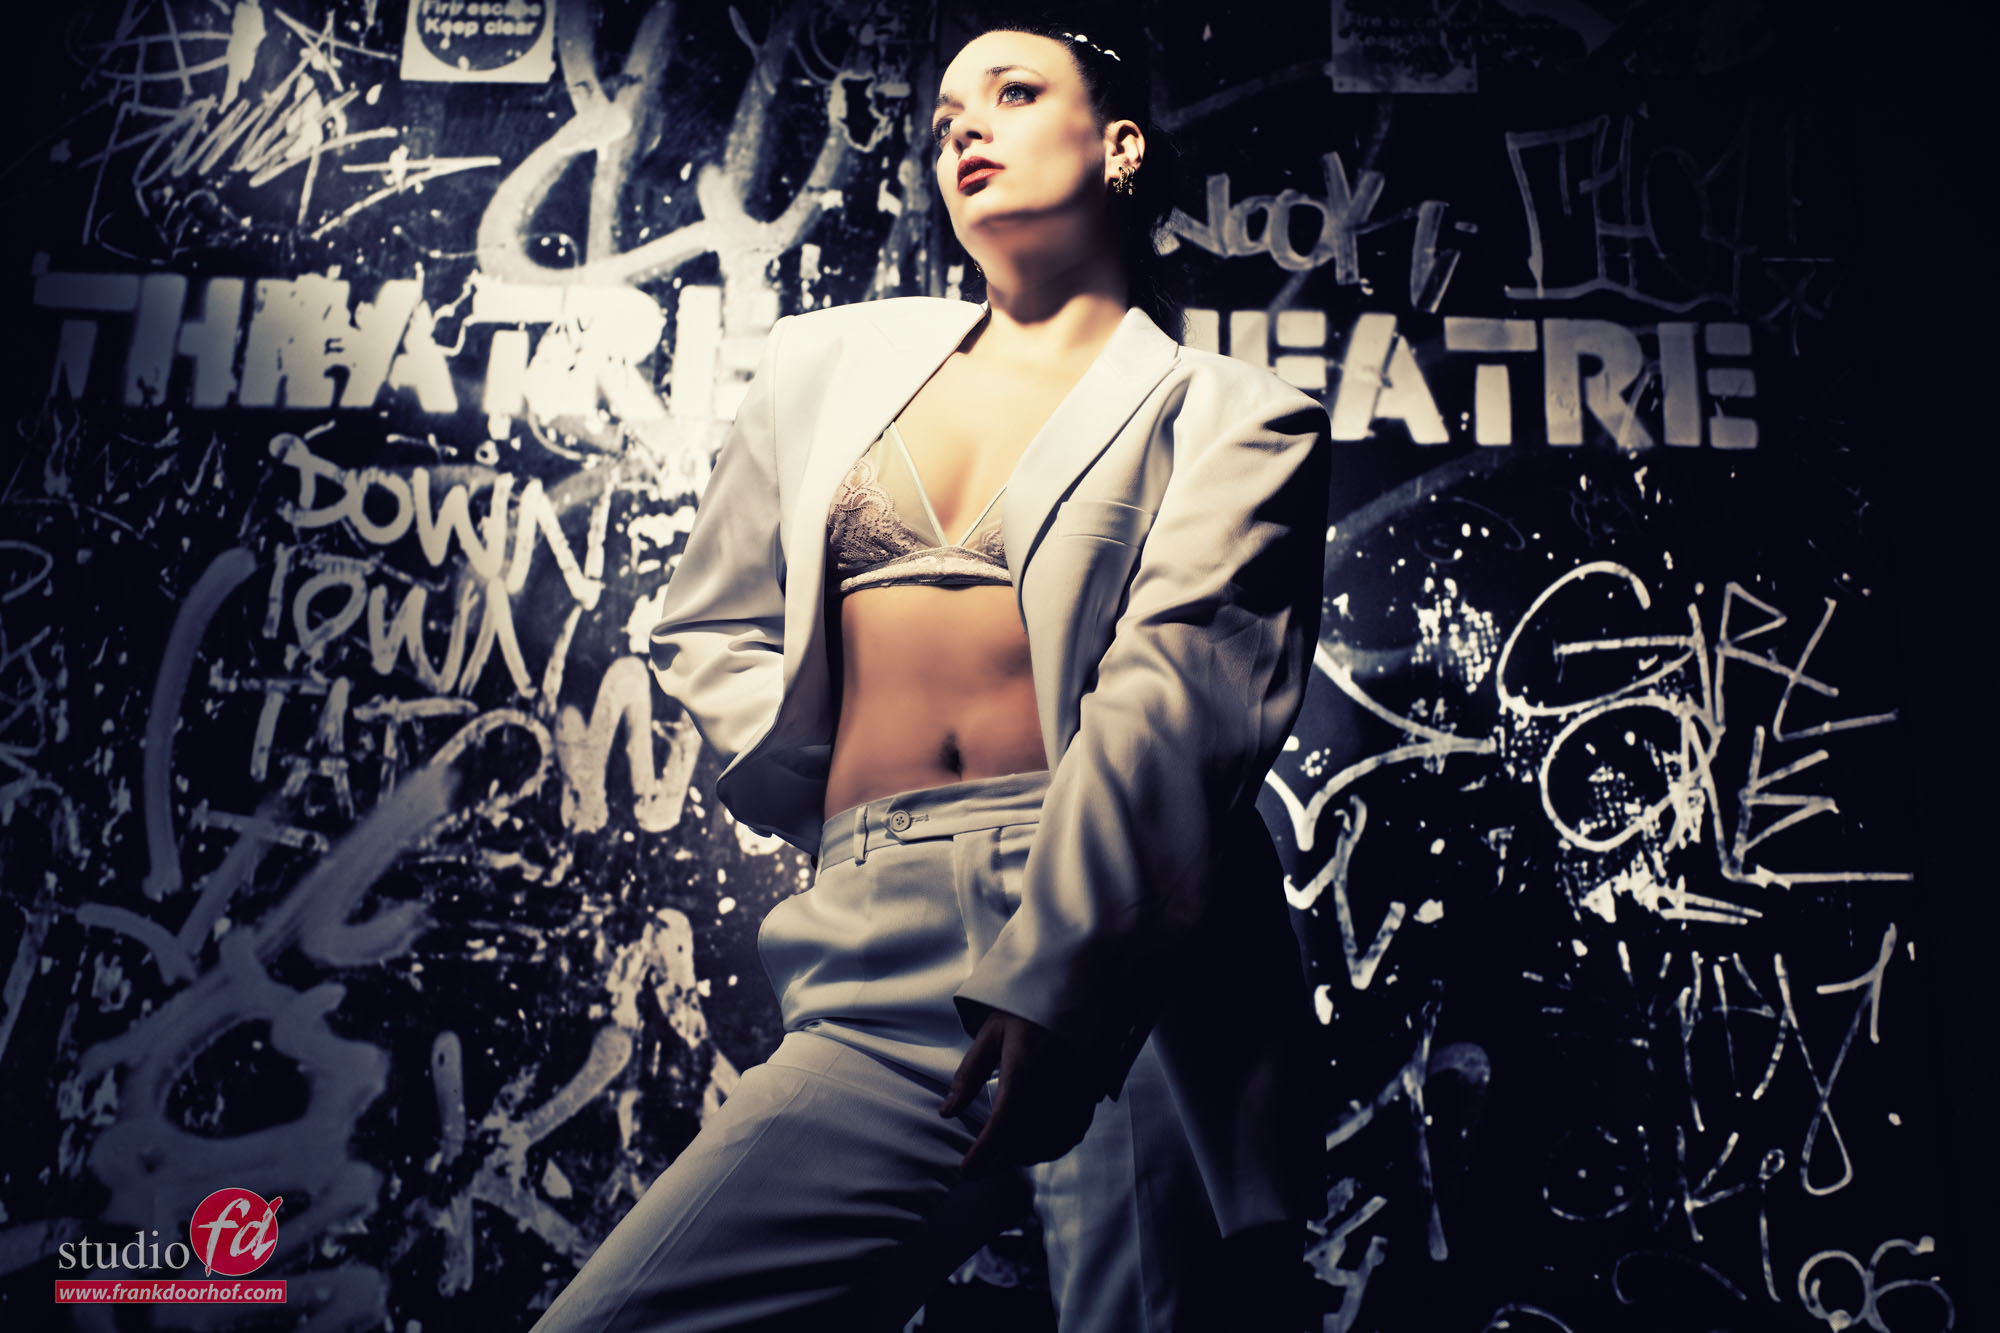
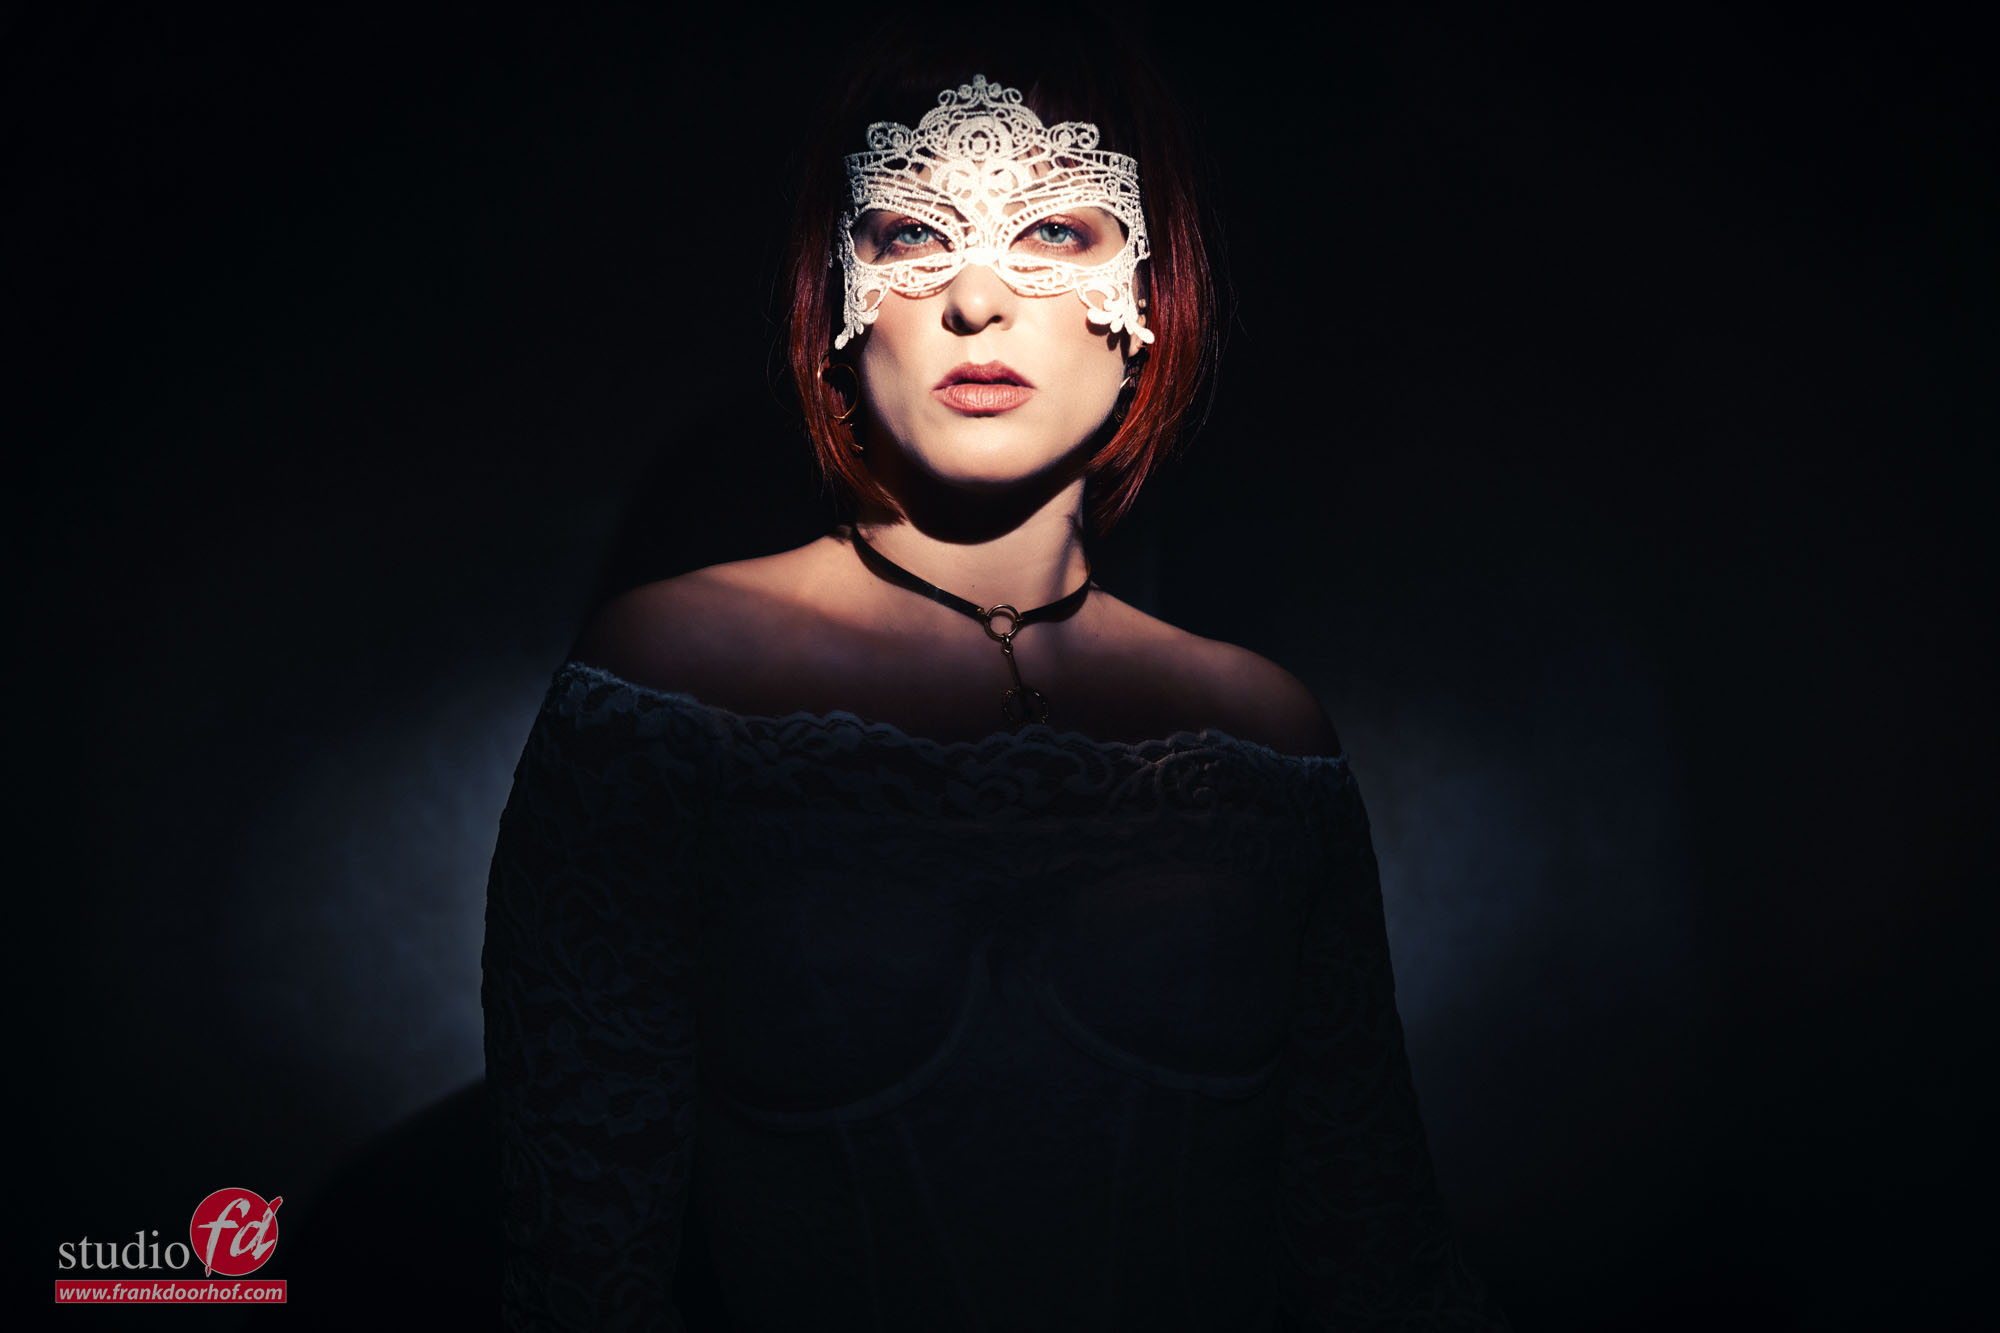
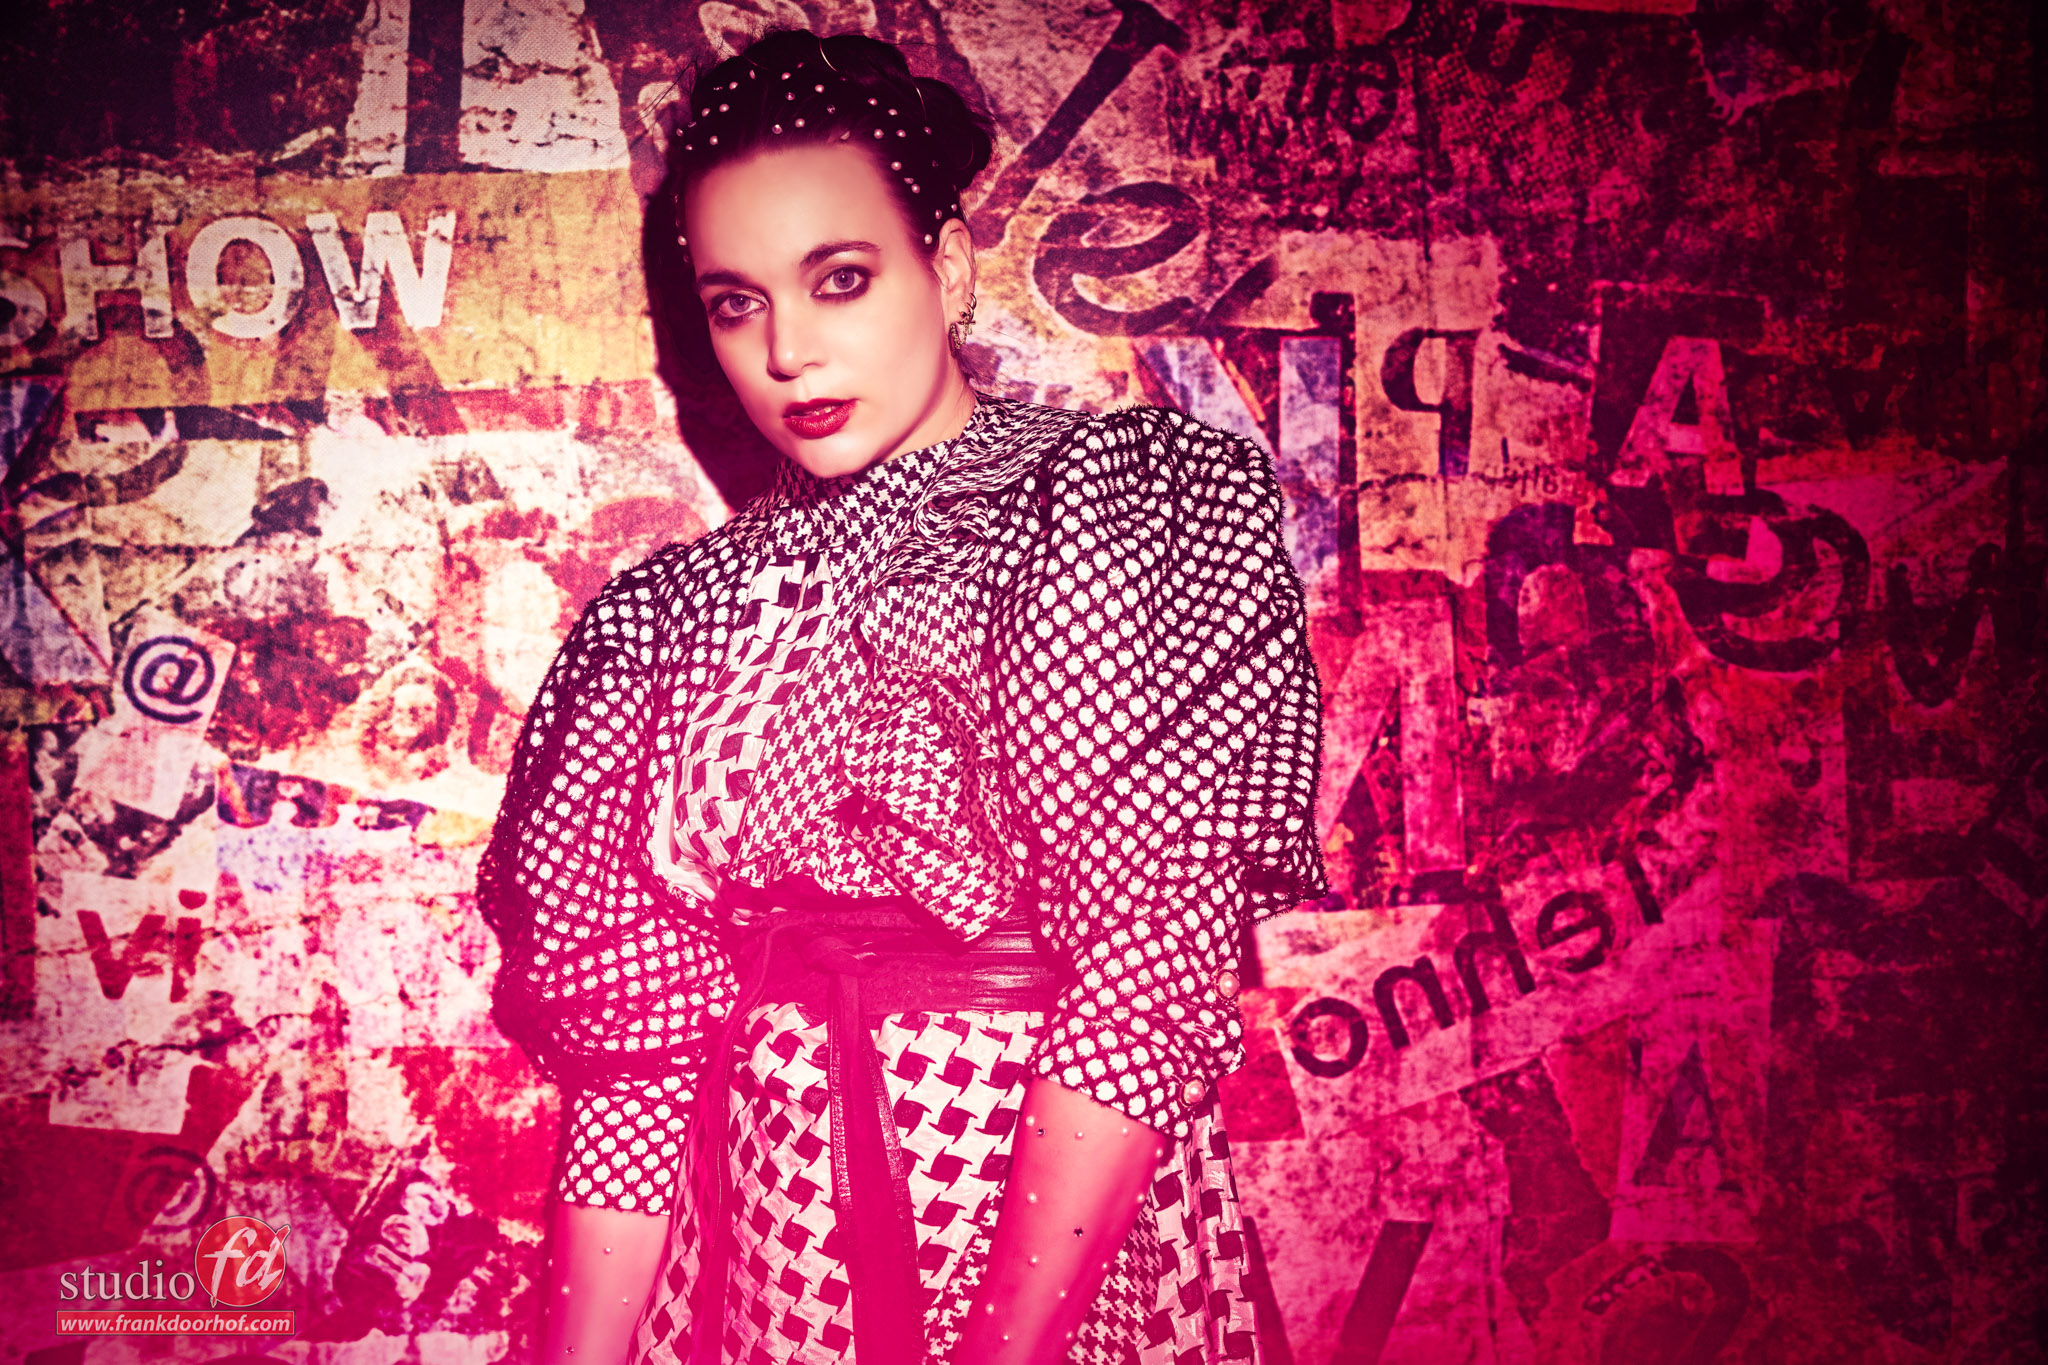
The first image was shot with just the snoot on a pretty wide setting.
I love the harsh quality of light in the center and the softer edges, it really gives the light a dual personality if you know what I mean. And for this setup I really liked that almost Rock and Roll lighting.
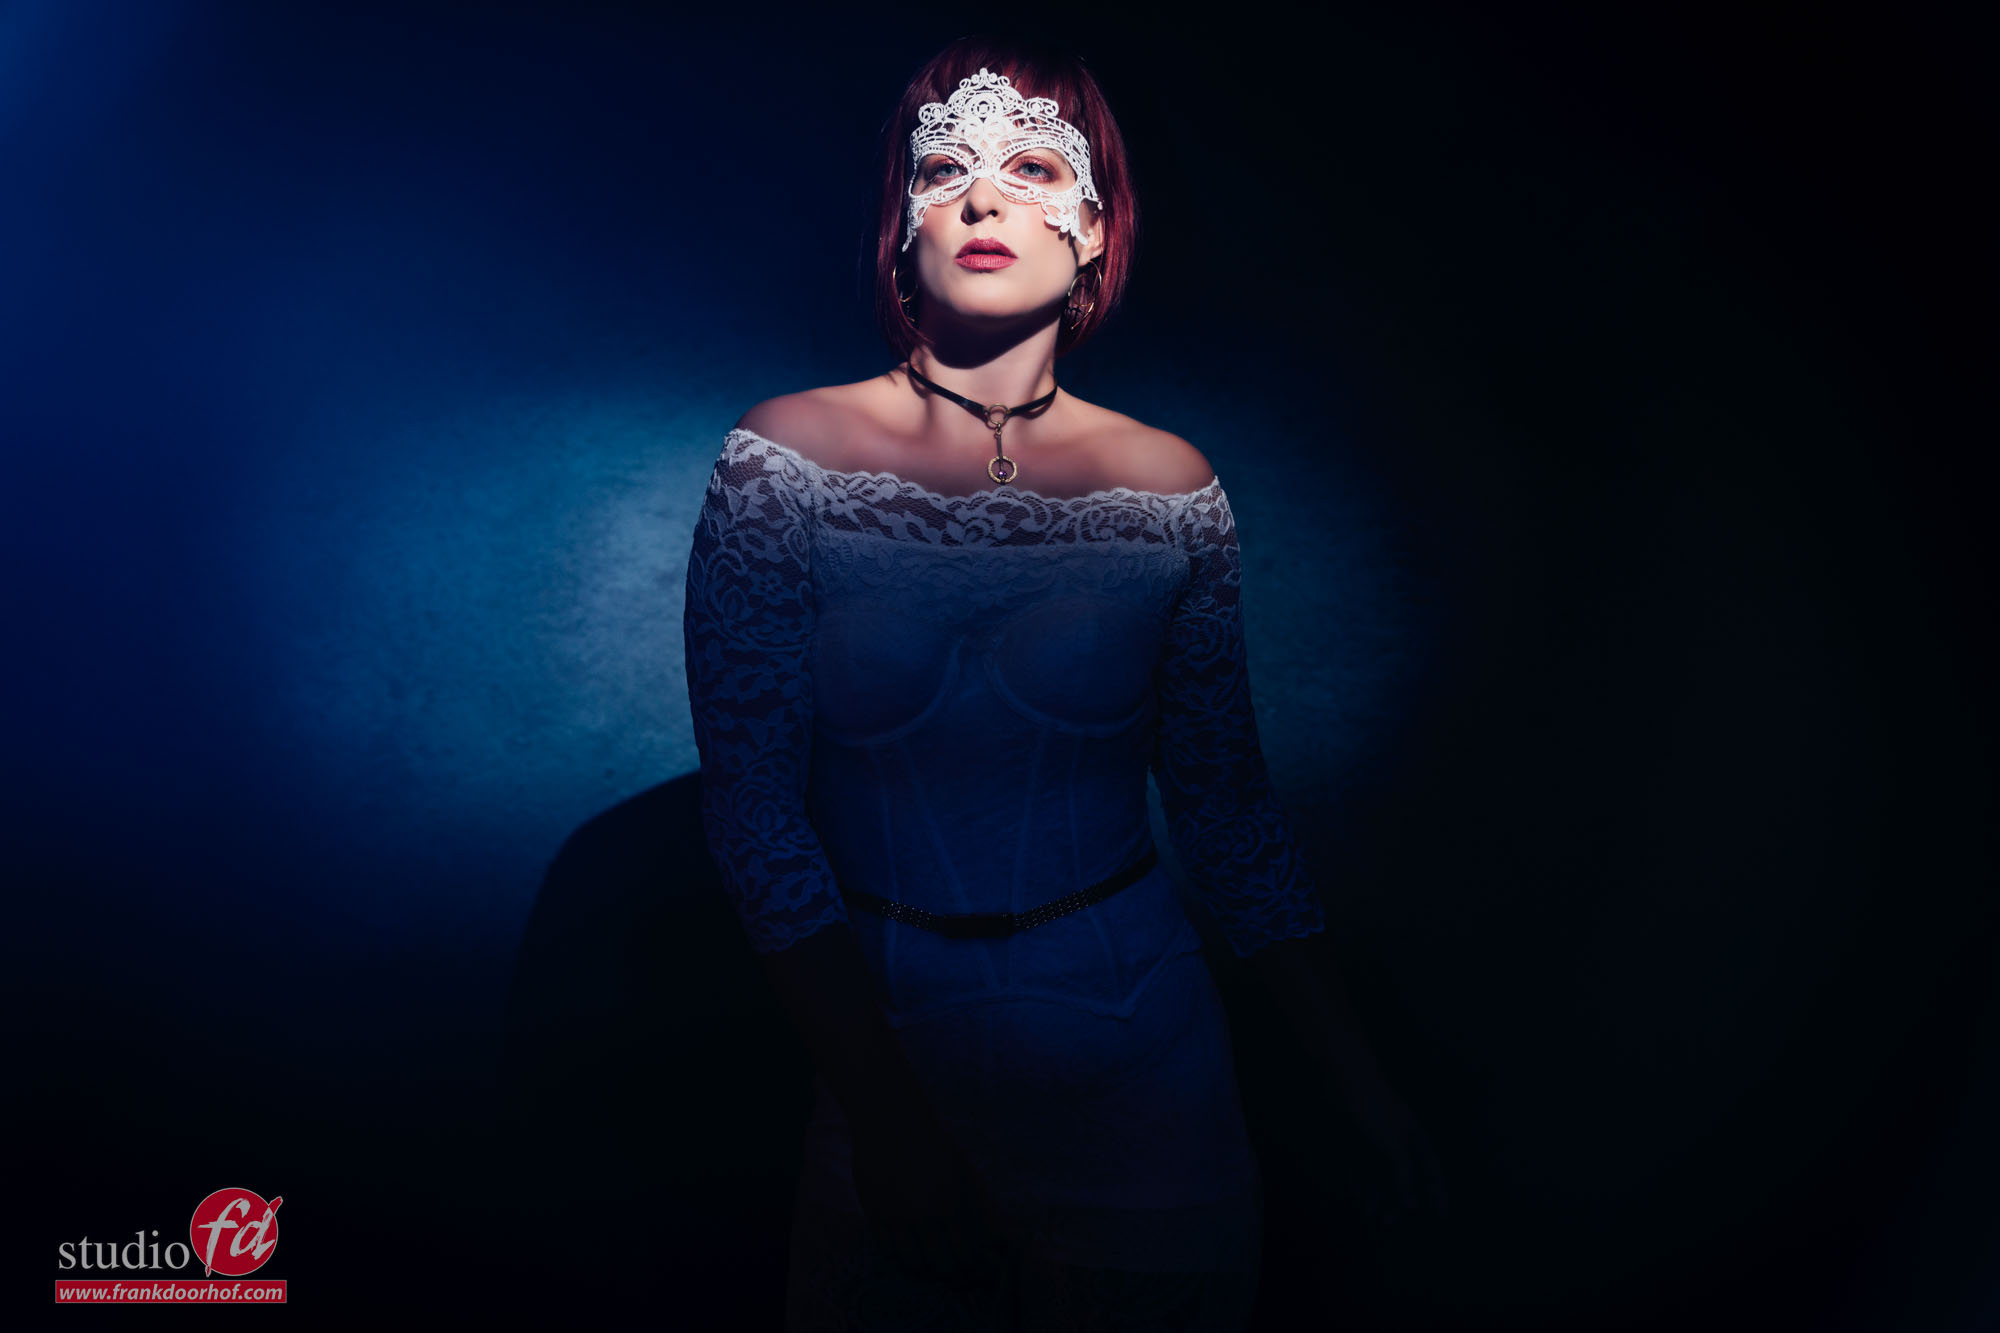
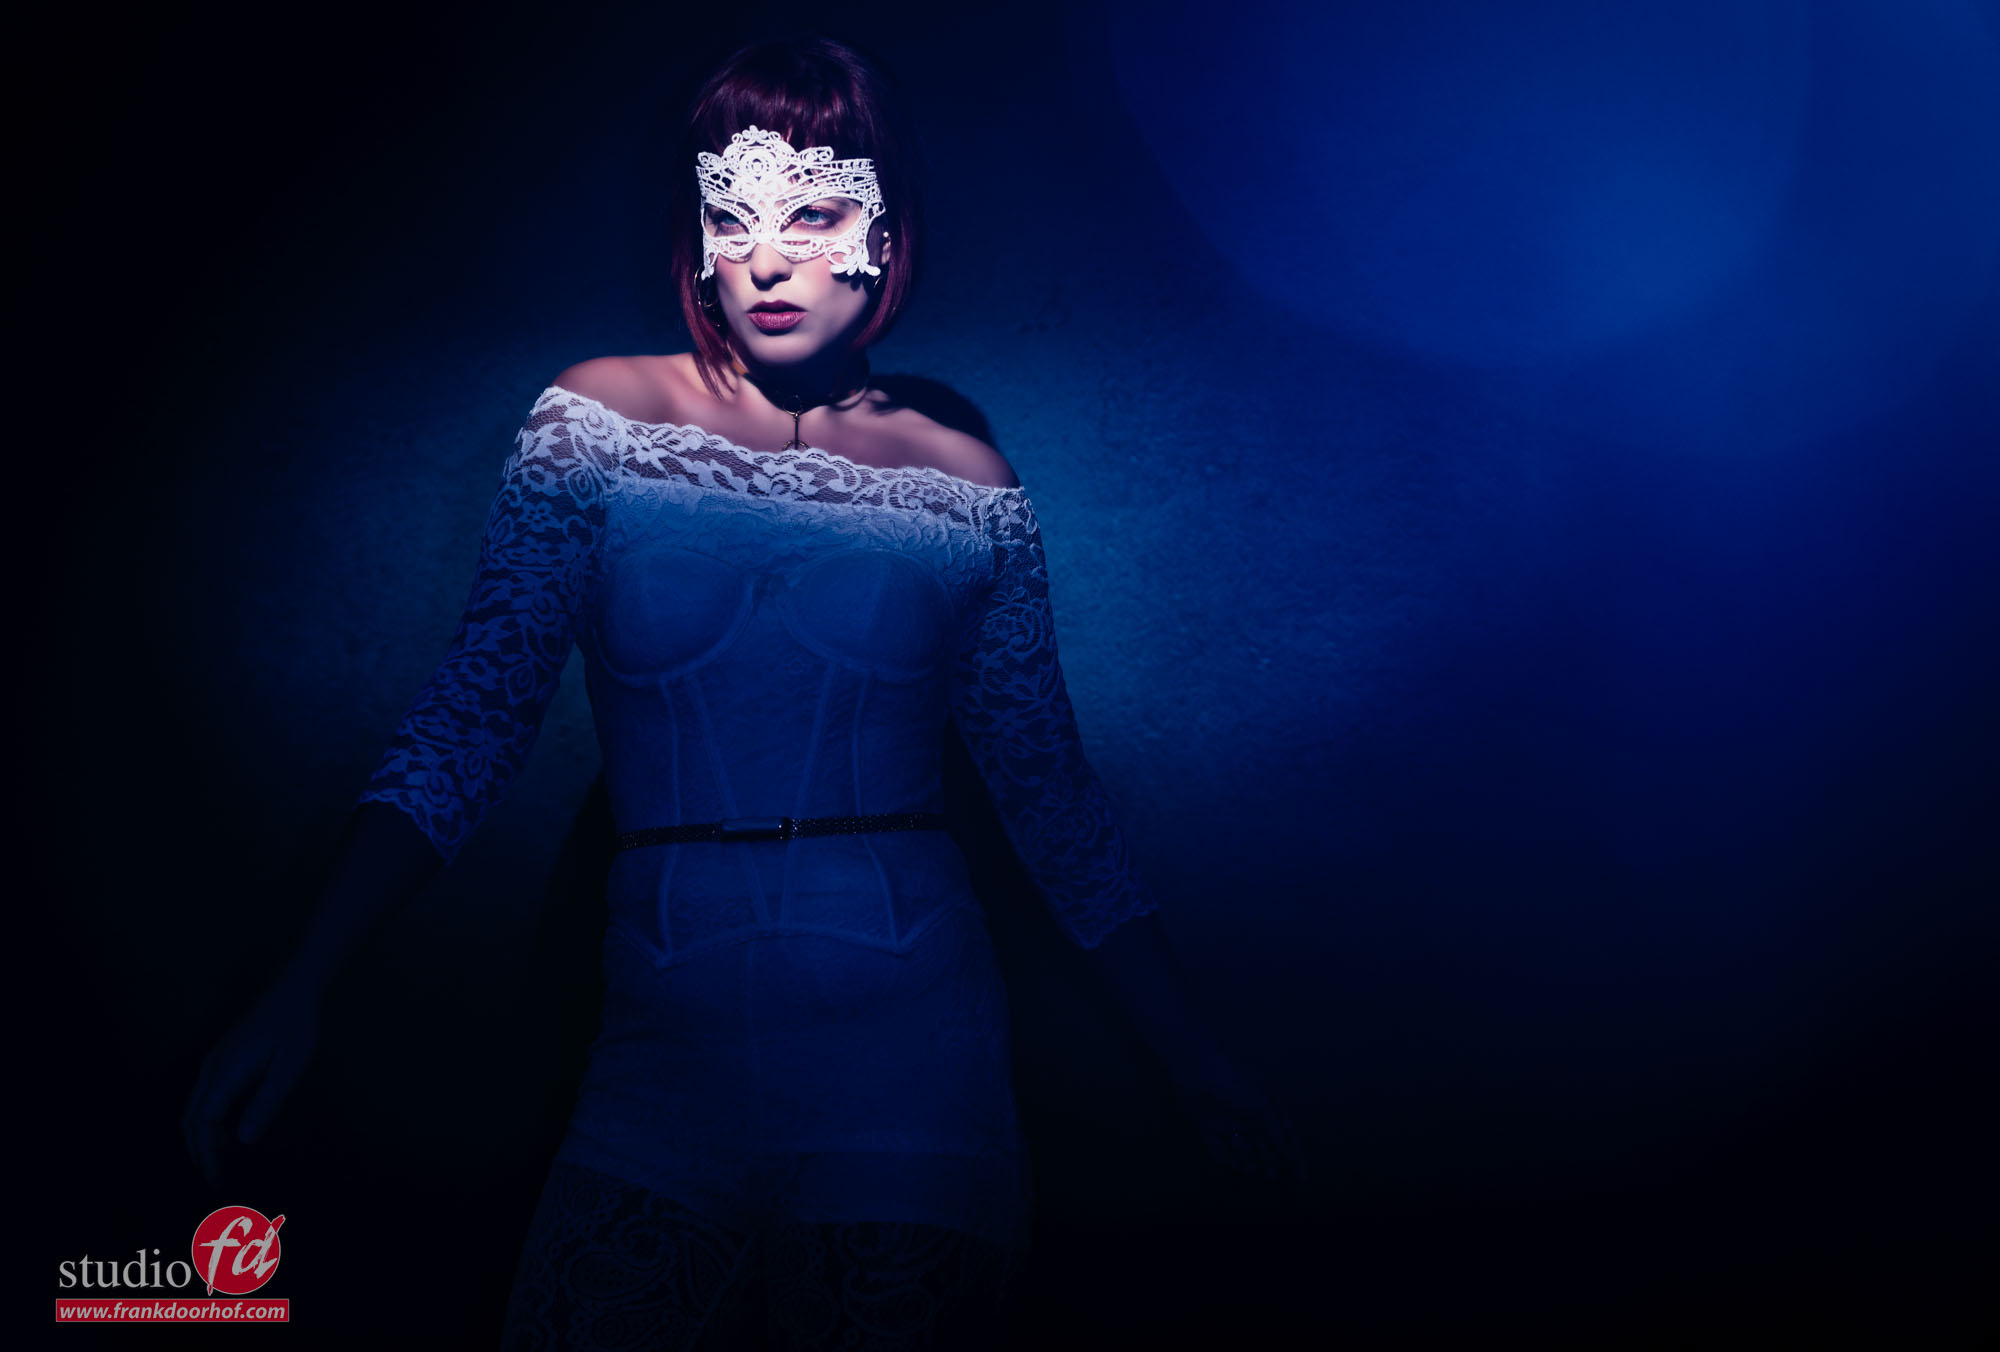
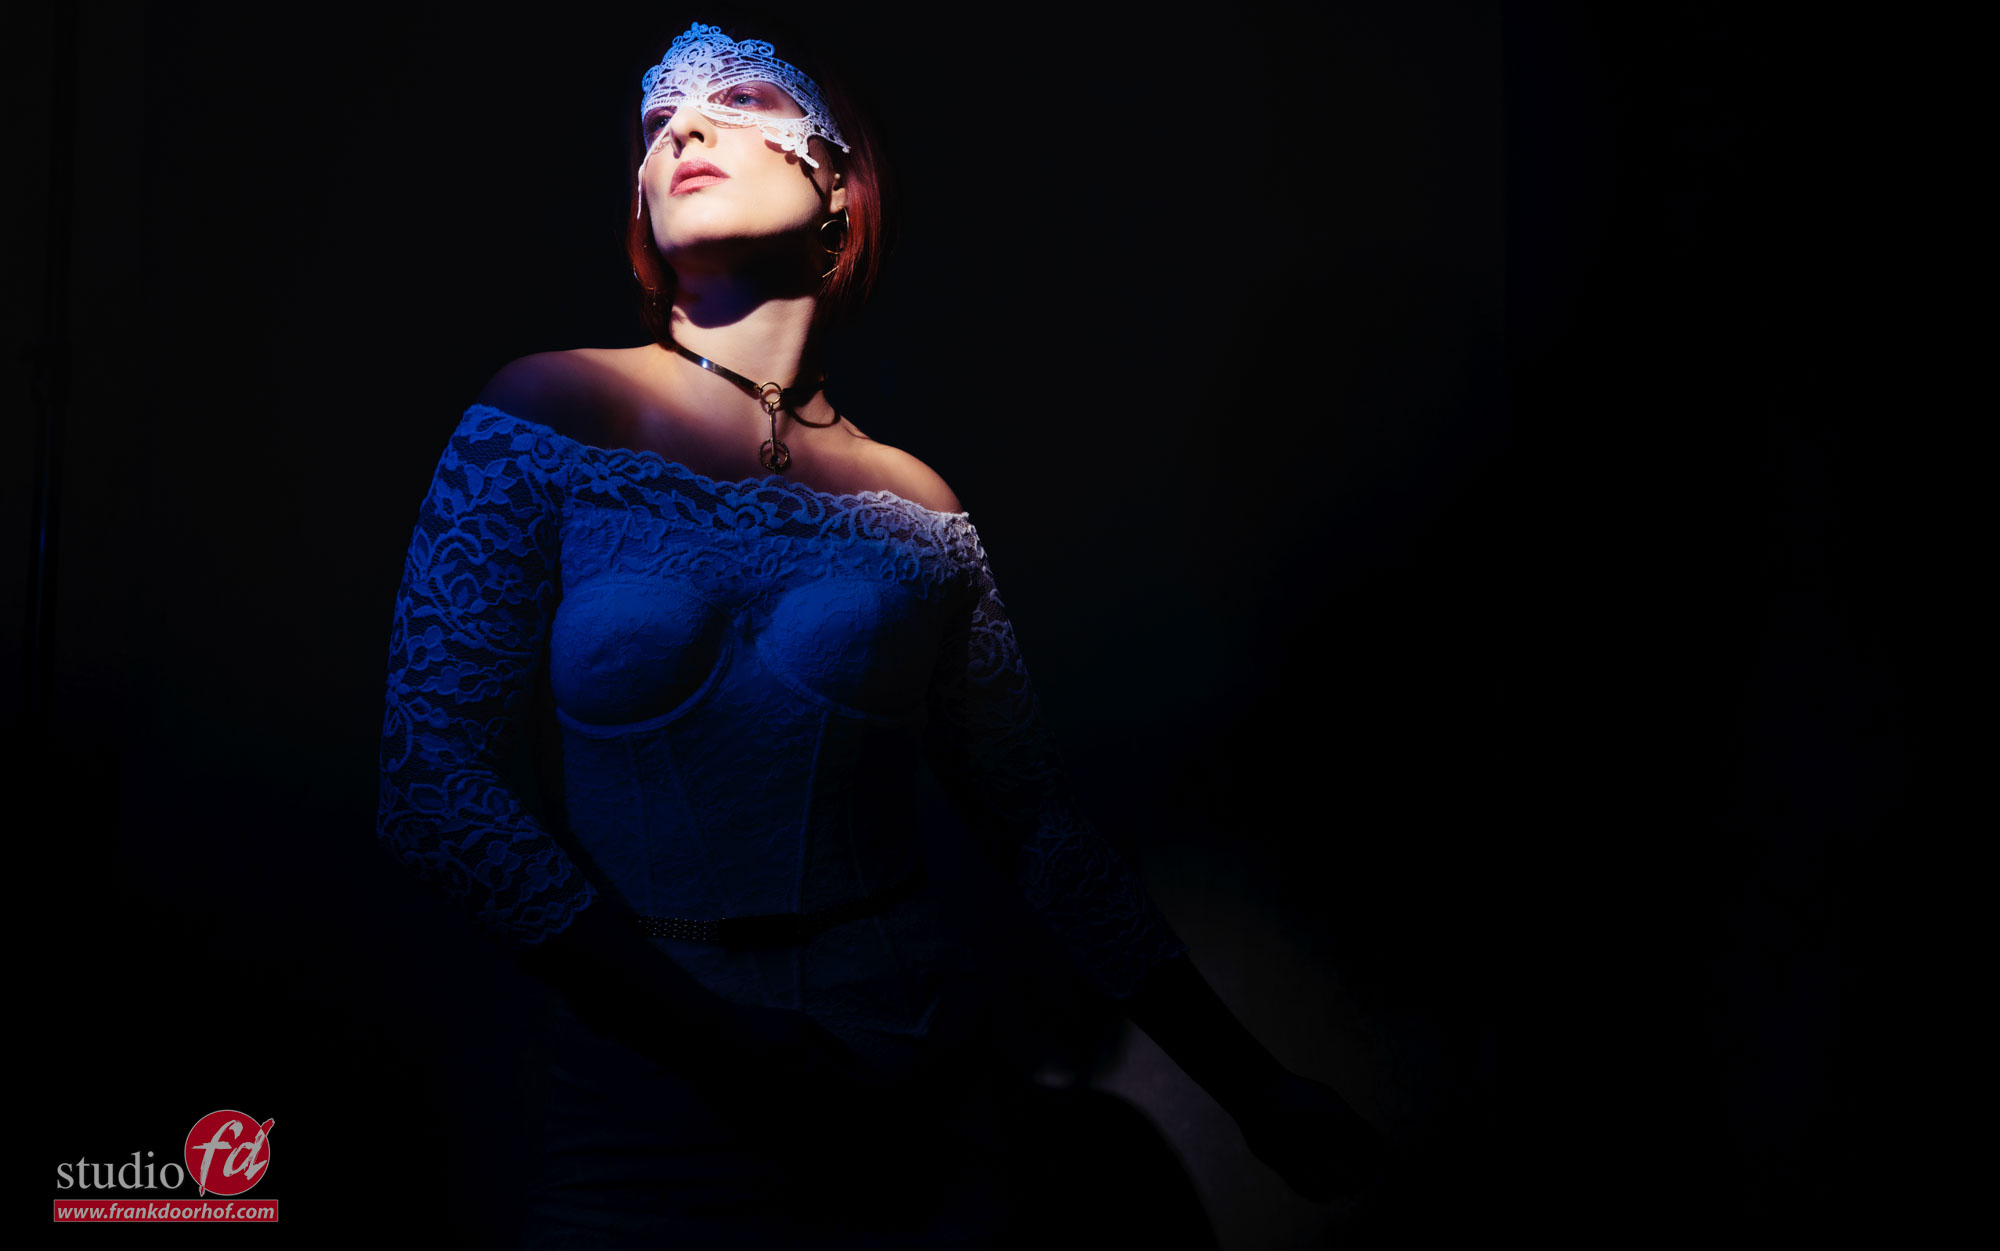
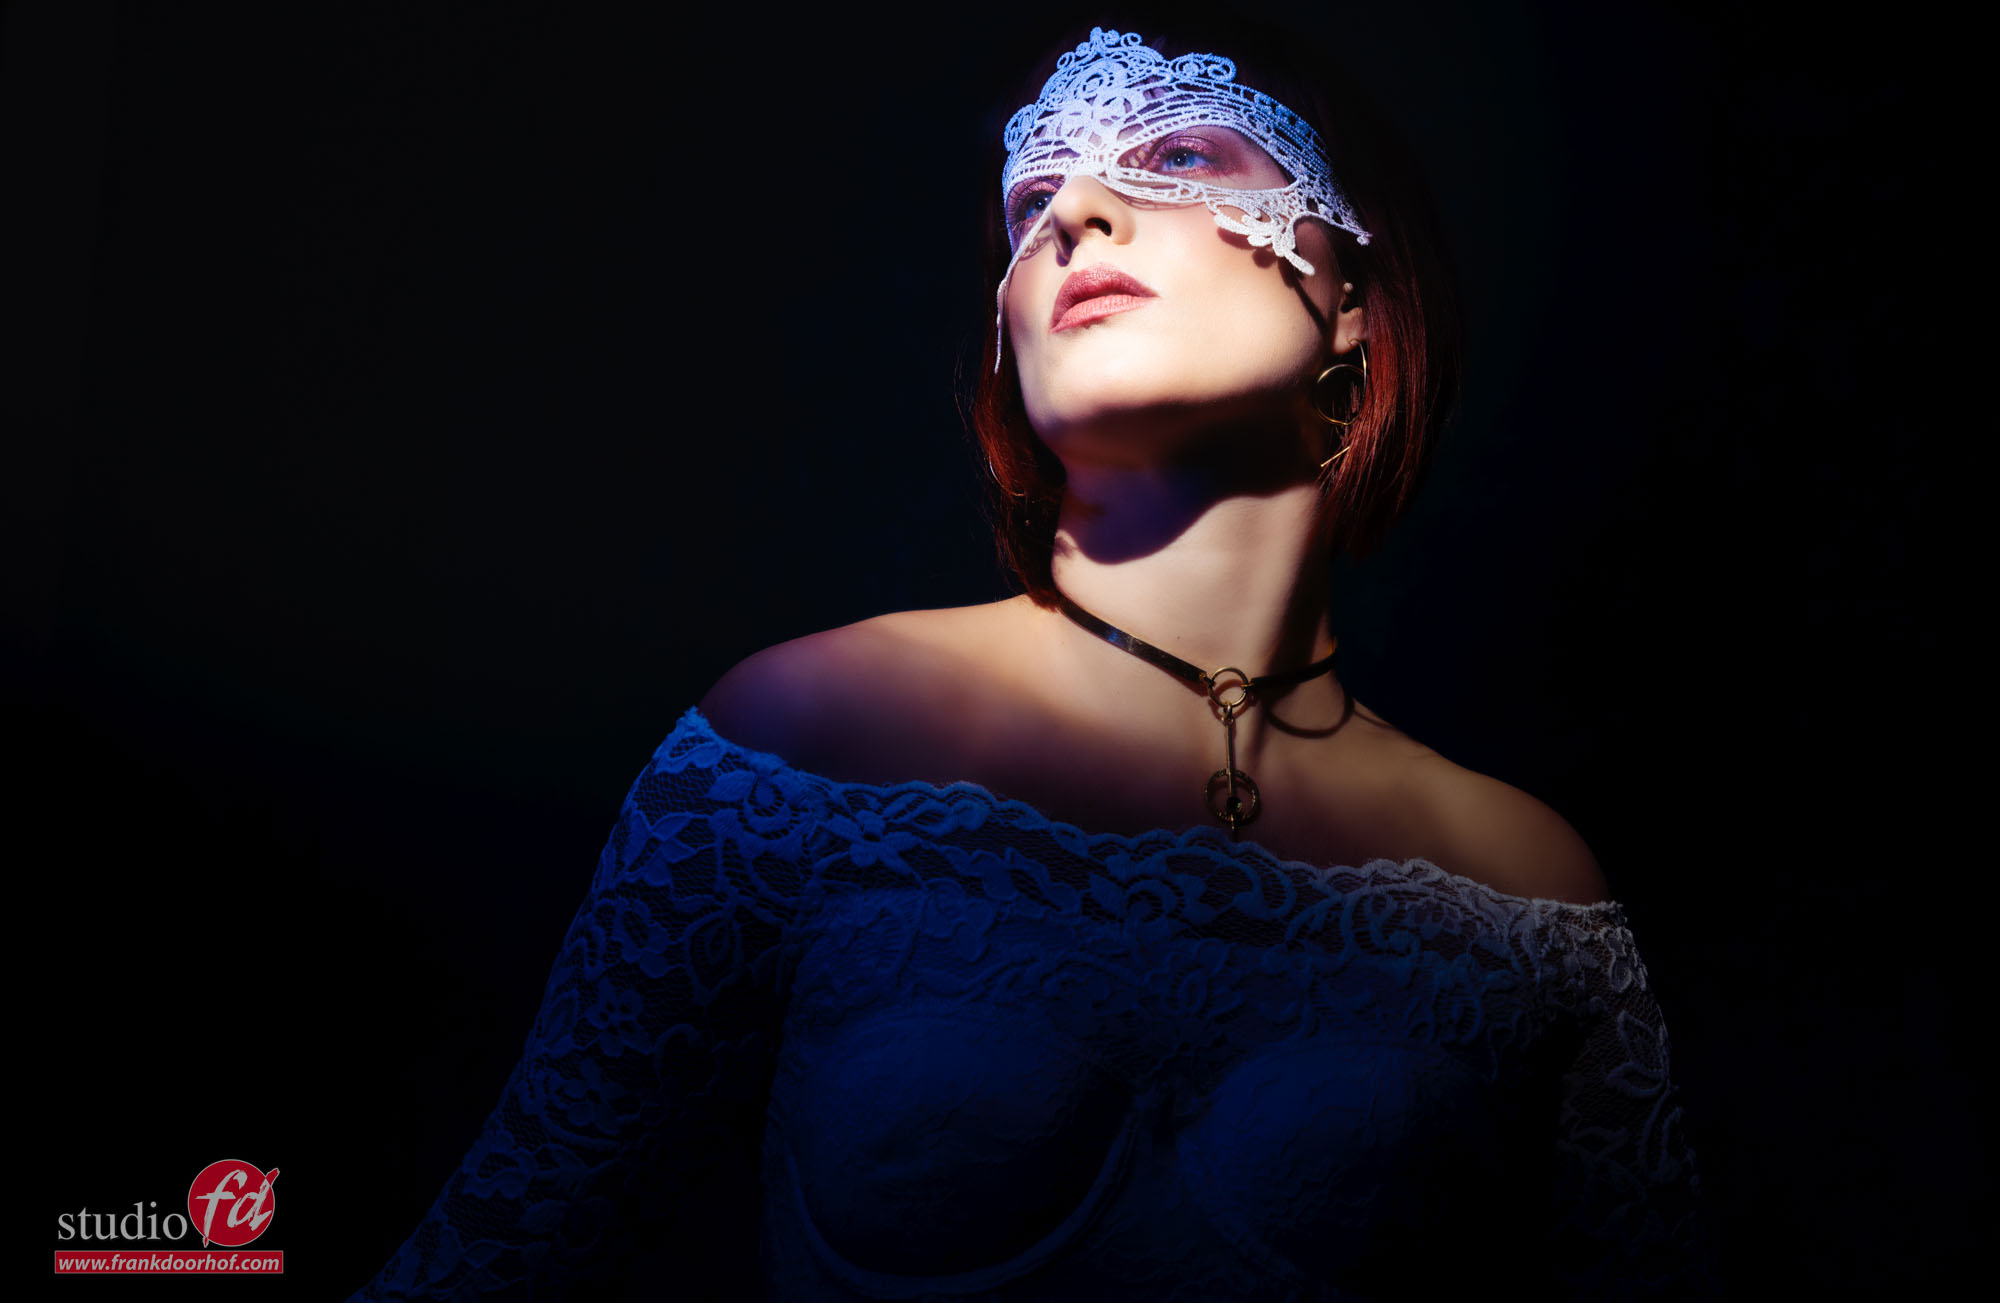
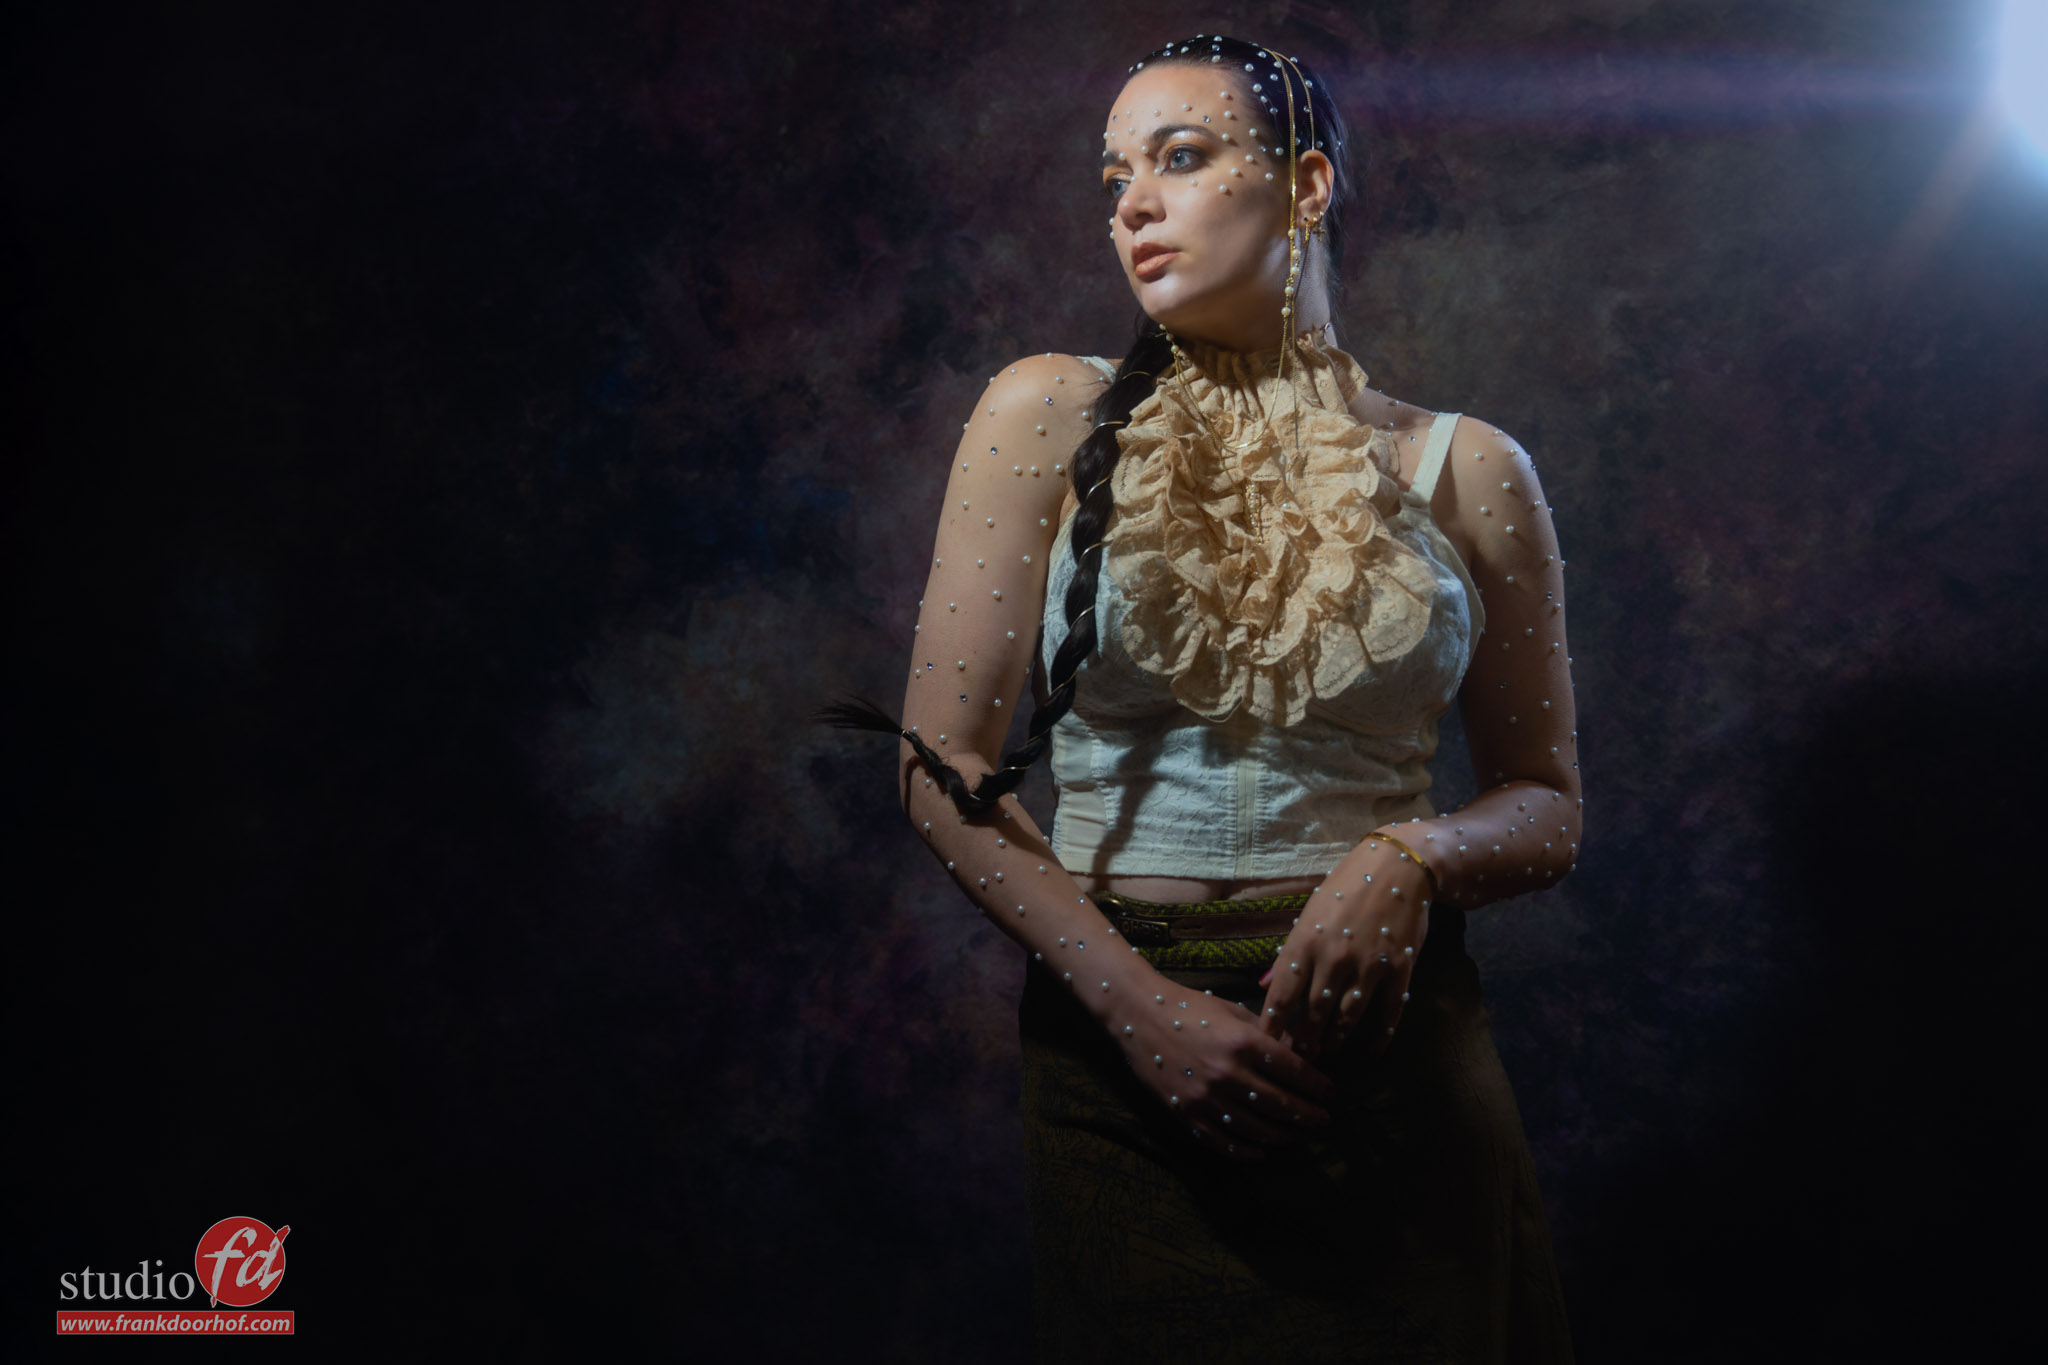
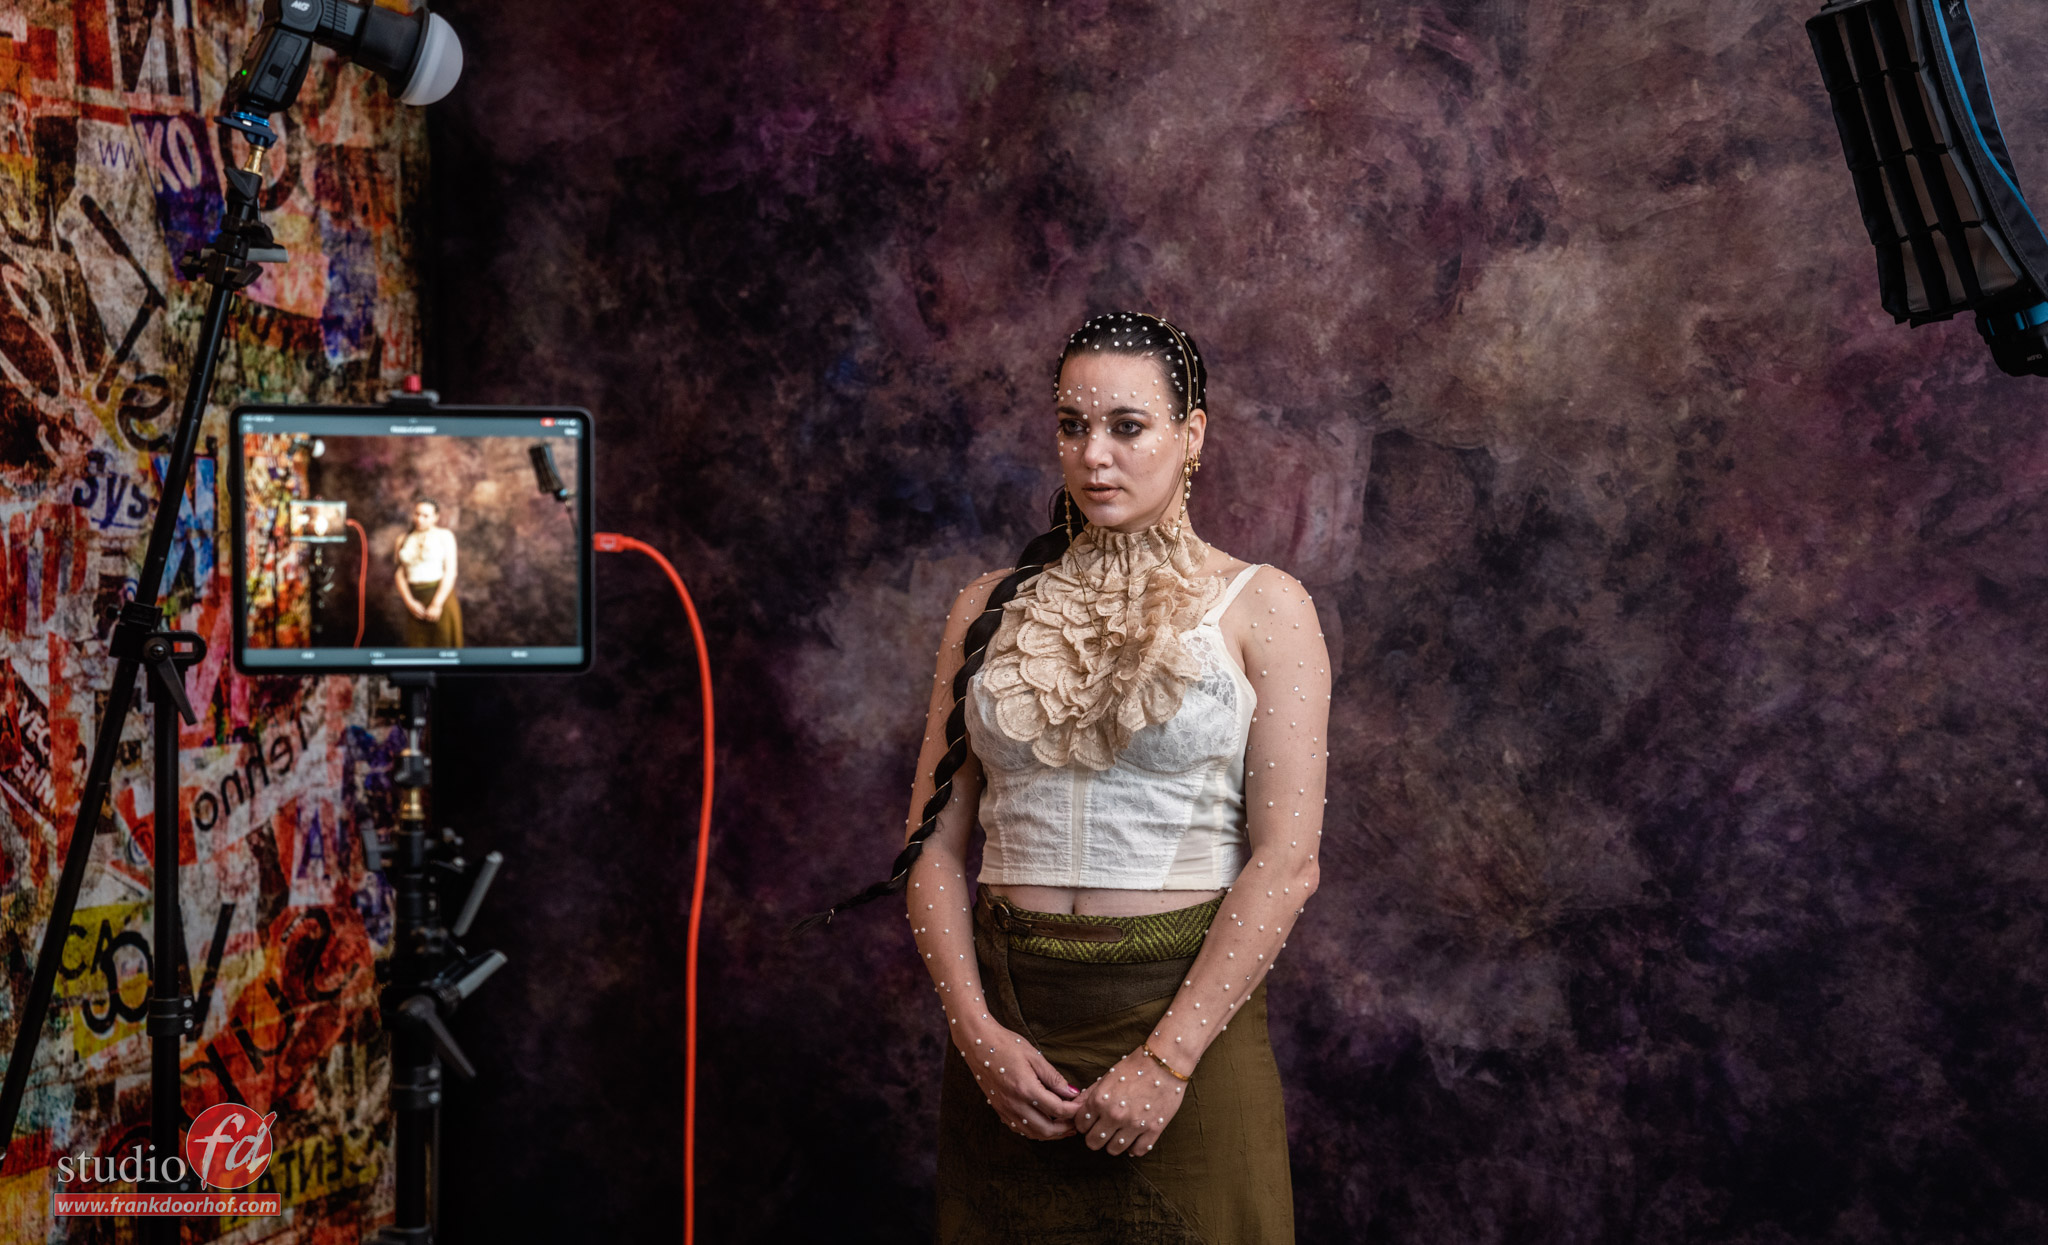
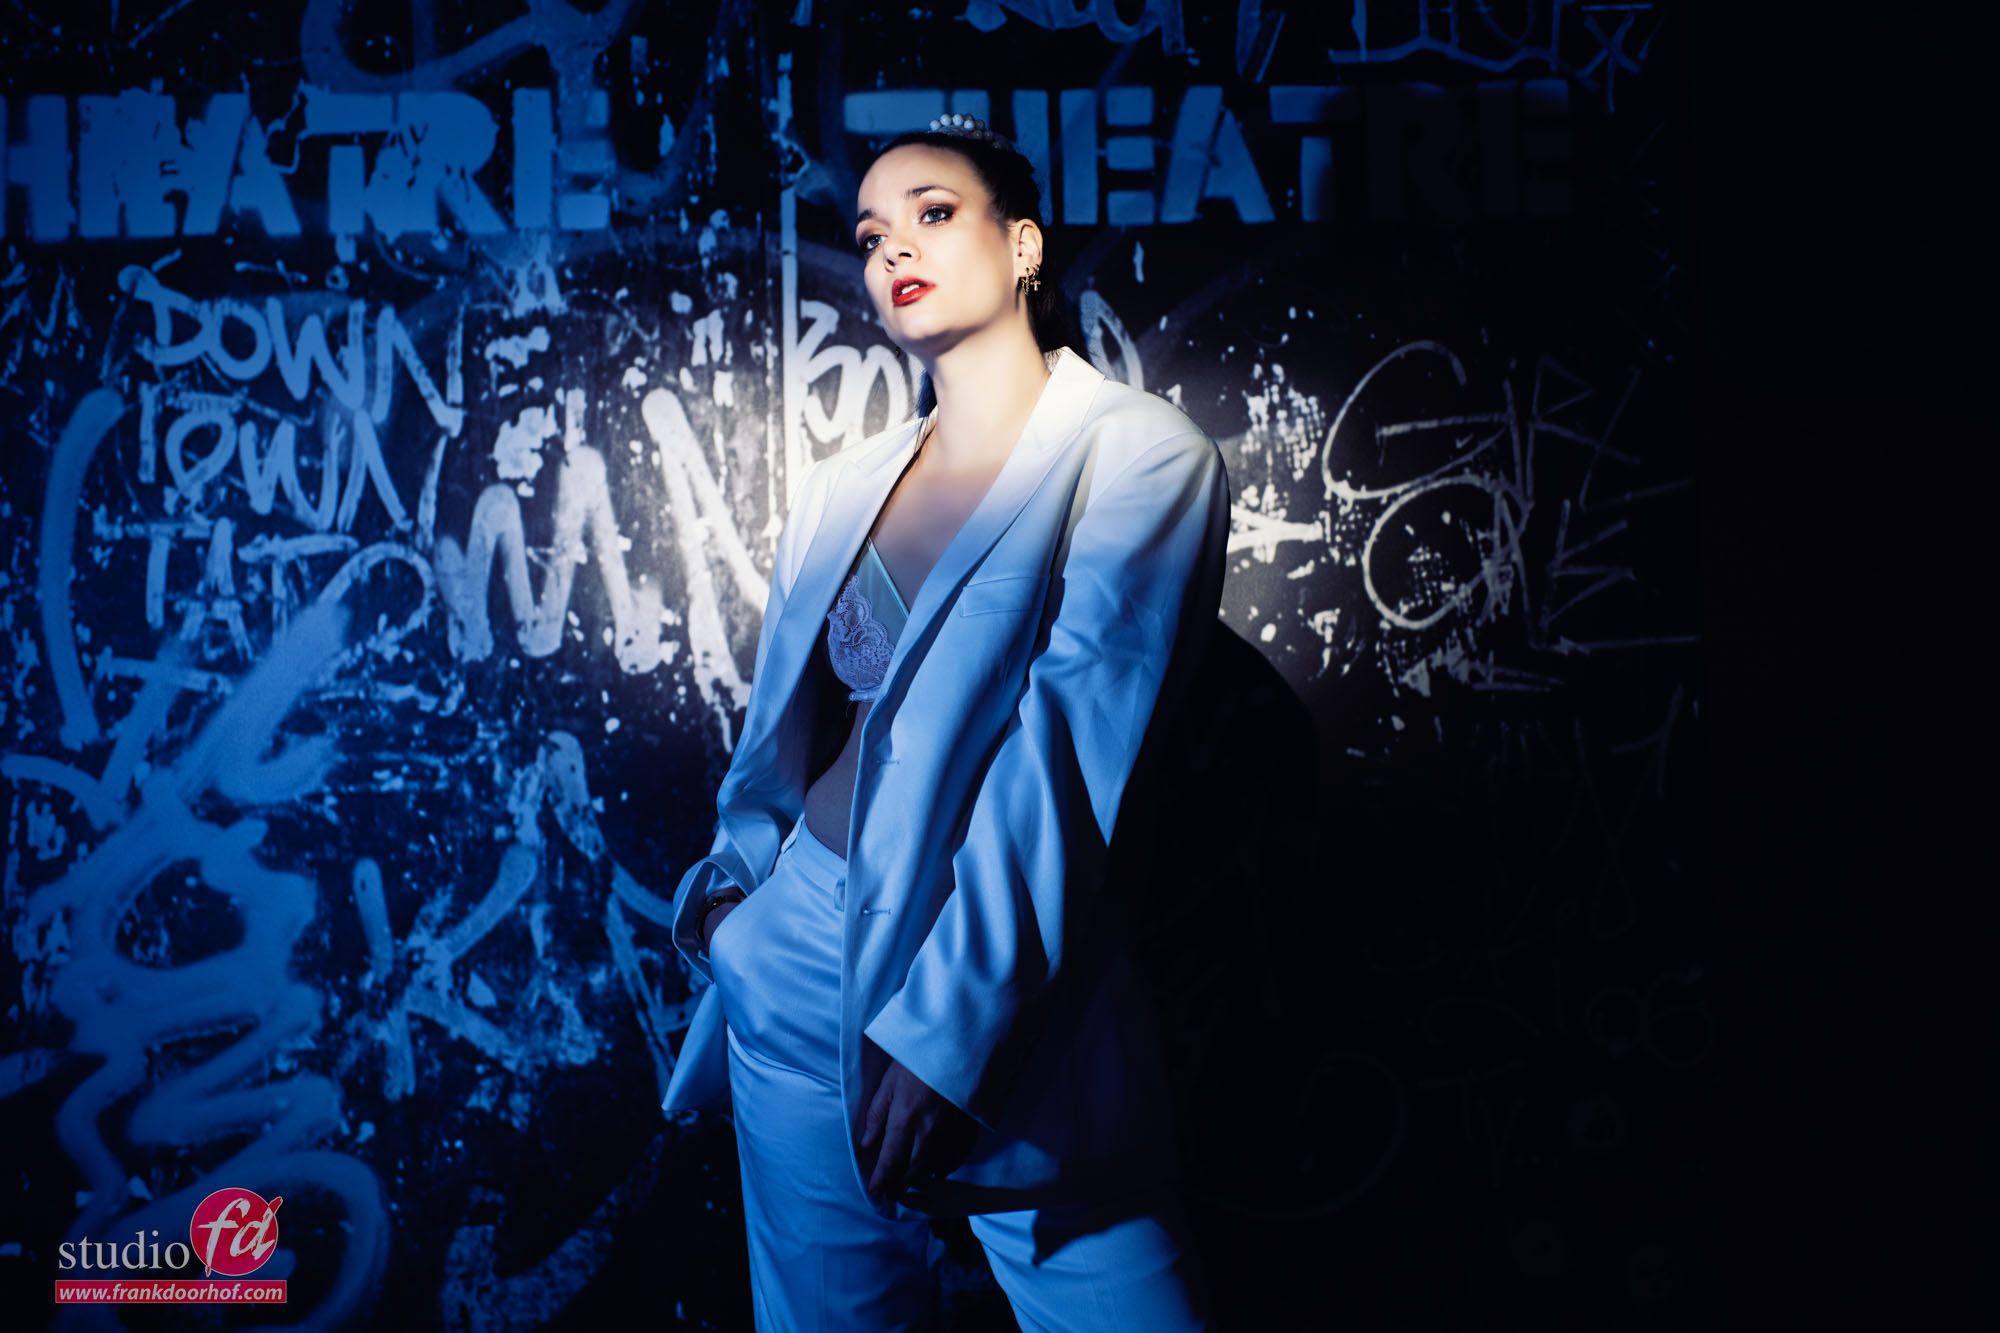
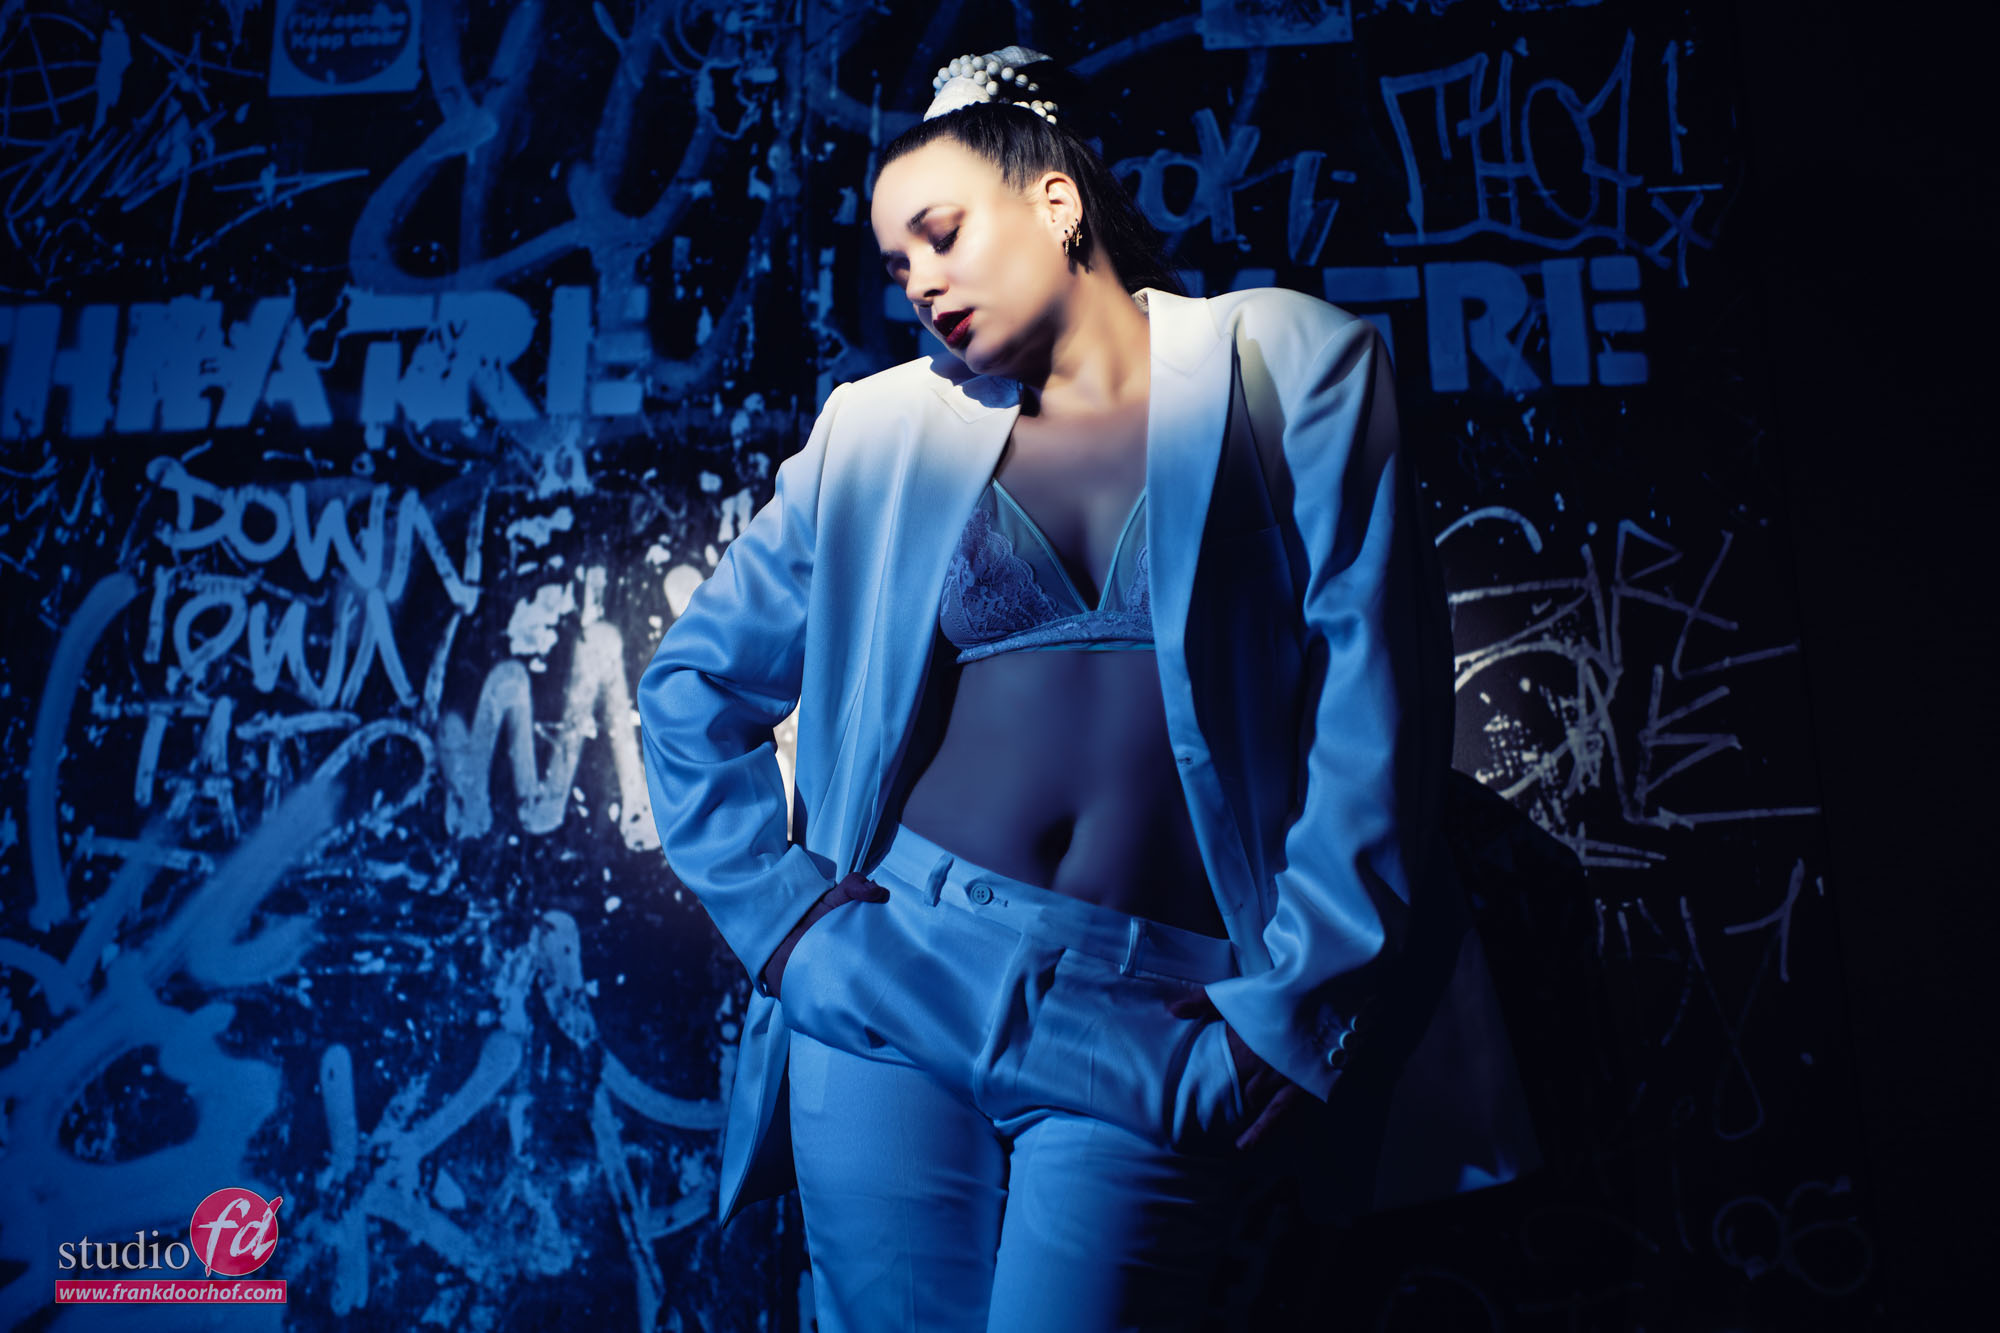
However for the next two images I decided to open up the shadows.
I’m using the omnidirectional dome from our Rogue magnetic system here with a blue gel. You just place it in the same line as your main light source and meter it a few stops below the main light.
I really love the effect.
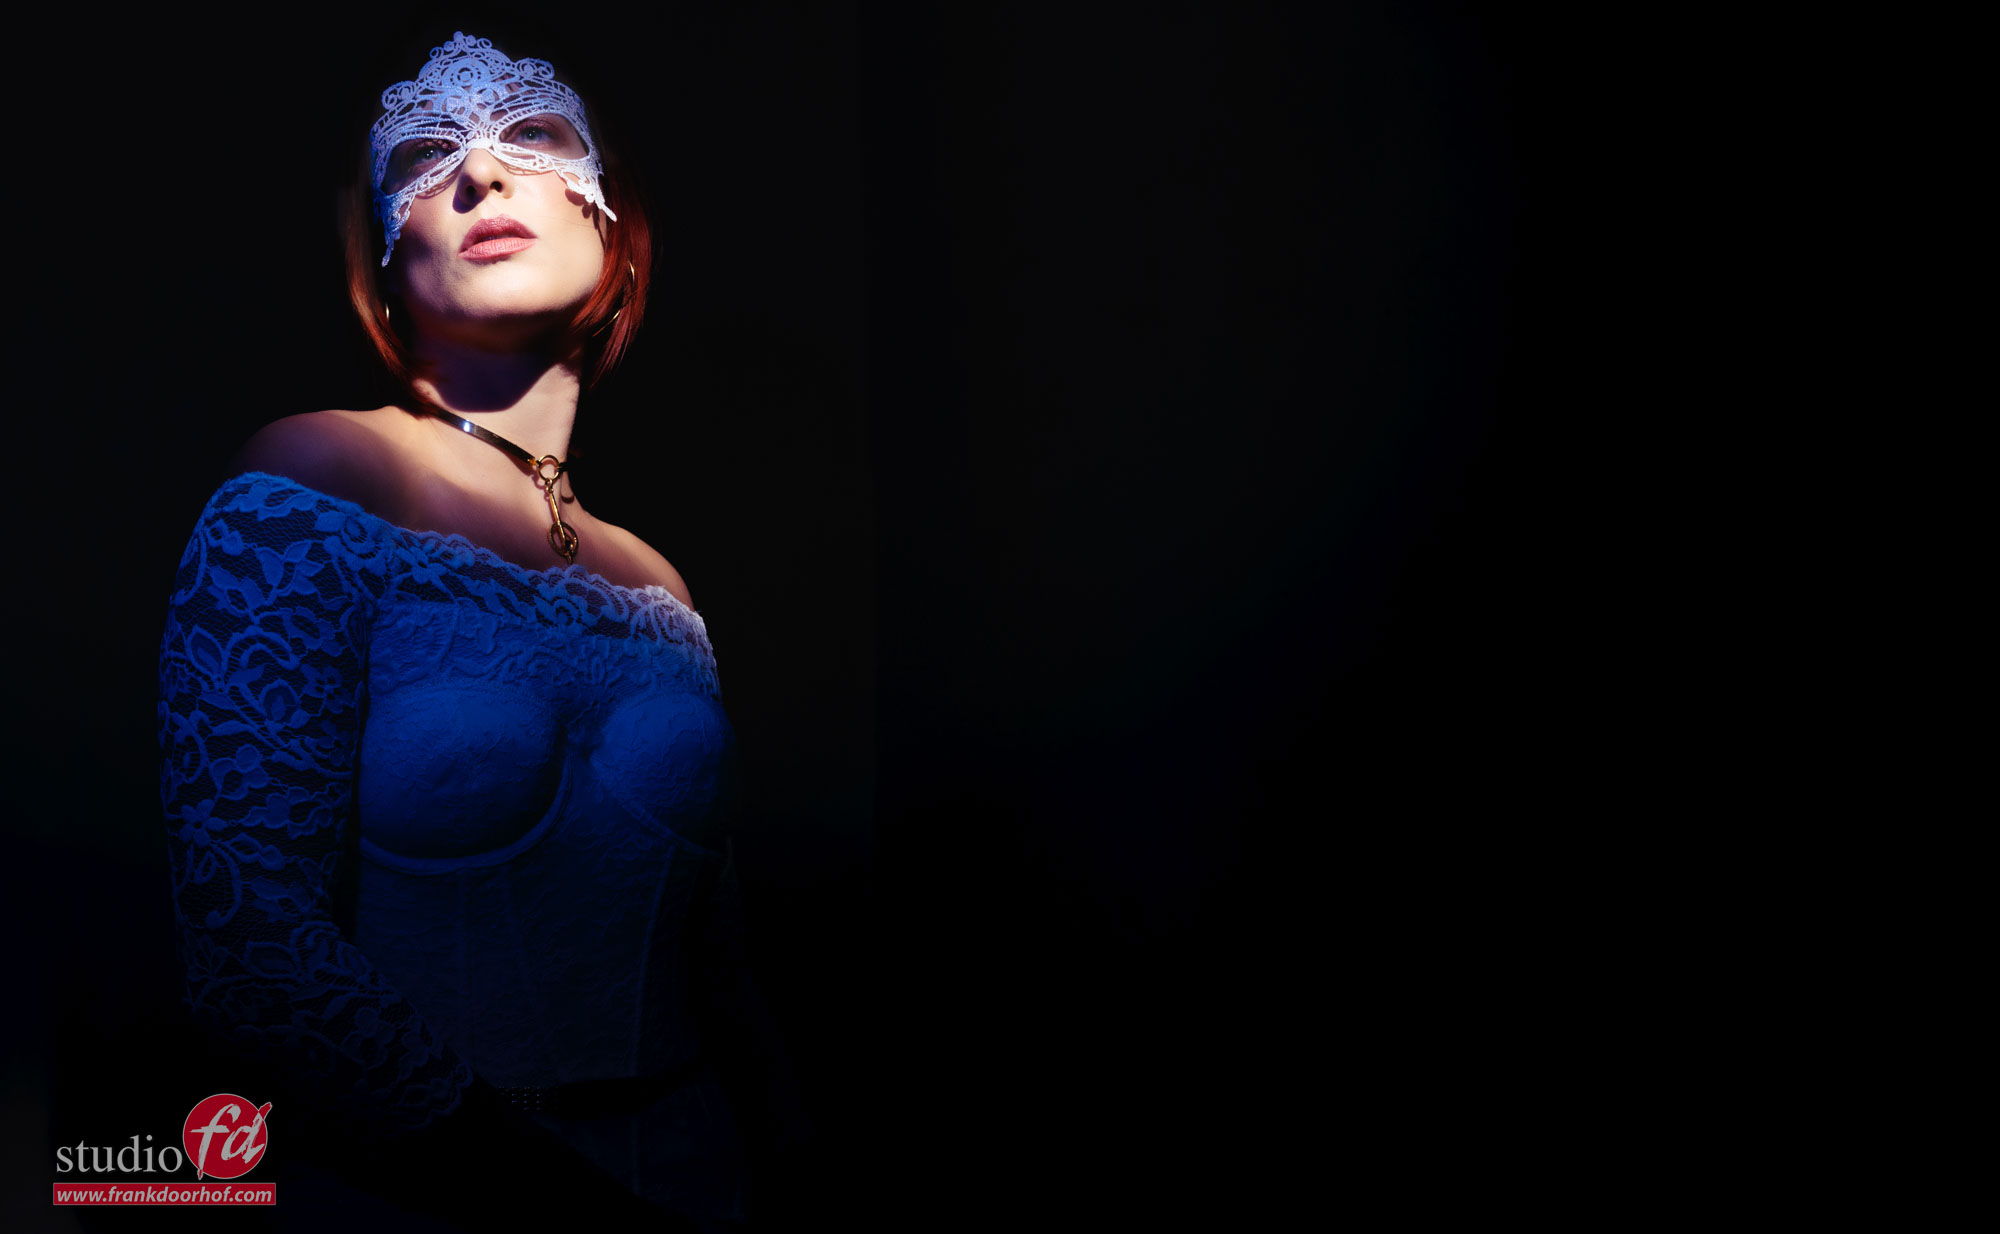
And with Rock and Roll lighting…. we need some black and white.
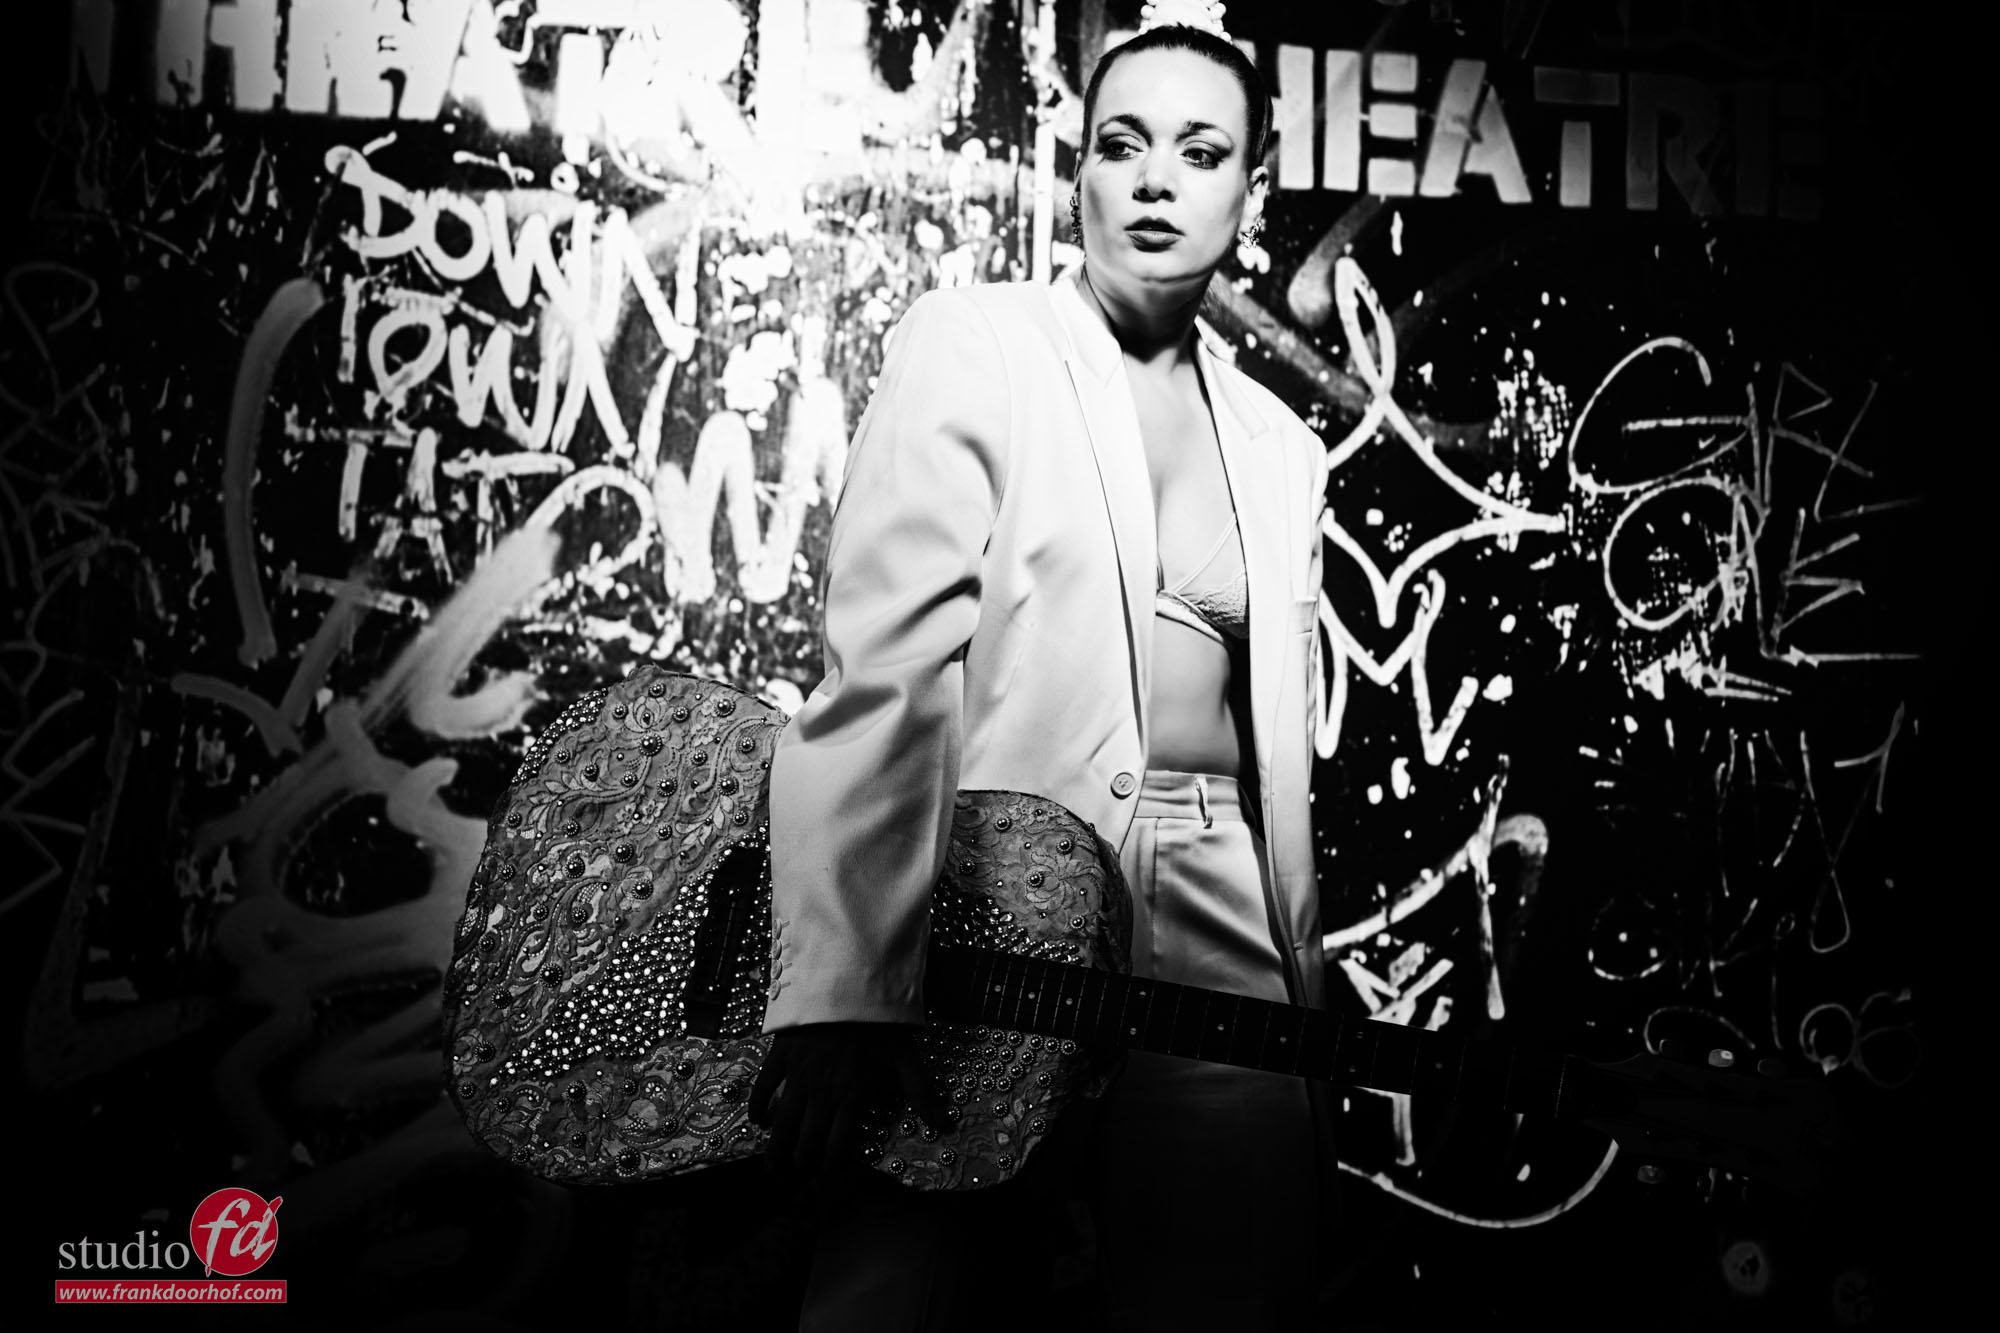
And a guitar…..
The Rogue products are available via www.frankdoorhof.com/shop or at your favourite camerastore selling Rogue.