Tag Archive for: lighting

Digital Classroom July 1

Today we finished the second broadcast of our digital classroom project.
In this project I try to bridge the cap between the videos and the normal workshops.
In the videos you watch and learn but in workshops you can have a great interaction with our team to ask whatever questions you want and I will incorporate that into the workshop and because we work with smaller groups during the workshops that is an even greater learning experience, but there was absolutely nothing in between so… we created “Digital classroom”.


In “Digital classroom” we stream live from our studio and I show different techniques on both lighting, working with the model and of course retouching (and much more). Now setting something like this up takes a lot of time and costs a lot of money so we are incredibly grateful to have the support of BenQ and Rogue as our main sponsors to make this possible, but also thanks to CameraNu.nl and LedGo we now have proper lighting on set (also not unimportant).


Because we use Google+ for the broadcast people can ask questions during the broadcast which (if possible) will be answered on the spot, another advantage is that as soon as the broadcast stops it’s available for those who missed it….. so here you go enjoy the “Digital classroom” from July 1st.
The next one will be on August 26.

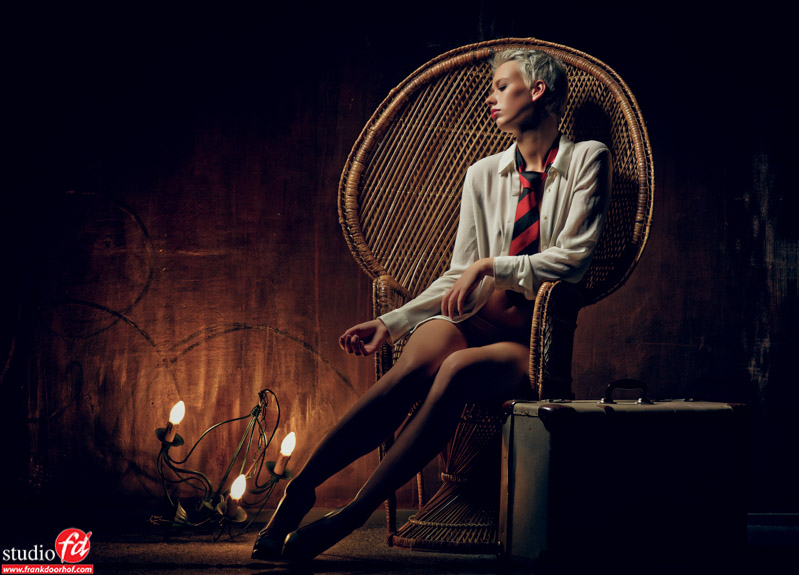
Mixing strobes with tungsten

There will be that moment where you have to mix two different light sources in a scene.
Now normally it’s common to gel the strobes to match the color temperature of the other light source, but sometimes it can be very interesting to keep the color temperature different.


In this shot (shot during a glamour workshop) I shot our model Lenaa on the chair and lit her with the 70cm deep octa and a custom grid from Honeycombgrids the tungsten lights on the back are in fact 100W bulbs. I made sure that the light sources didn’t really “overlap” but that the tungsten had free play on the background, this way the tungsten lights look really nice and warm and it gives a nice glow to the background. The suitcases gives the shot some extra dimension.


When shooting something like this, do make sure that you put the strobes on the LOWEST possible power setting, this way you can actually see the tungsten lights. If you meter everything on 1/125 you can still open up more to let in more of the tungsten bulbs (1/60 or even 1/30). Always remember that the aperture in these cases control the strobe and the shutter speed the tungsten lights.

Lenaa Juni 20 2014 38 1

Read more

Aimed light

TIP: Look at the old lighting styles


Now a days we have all this gear that makes our life easier, but does it…. sometimes I get the idea that it also confuses people and I mean REALLY confuses people.


Often I get mails asking me what the settings were for my camera if someone likes a shot, well….. sorry to burst that bubble but actually the settings are pretty irrelevant…. you choose the aperture for the depth of field you want to see and this is also highly depended on the lens you’re using and the camera you’re holding of course, and the shutter speed for the studio… well that really doesn’t matter as long as you cut the ambient light and stay below the Xsync, so most of the times it’s 1/125. 


What I mostly tell people during my workshops is that they should look for the light, don’t be overwhelmed with questions about gear, often I think people hide the fact that they are not able to recreate something to the fact that they don’t have the gear to do it. Trust me compared to what we have today, in the old days they had a lot less.


Take for example a technique I call “Aimed light”.
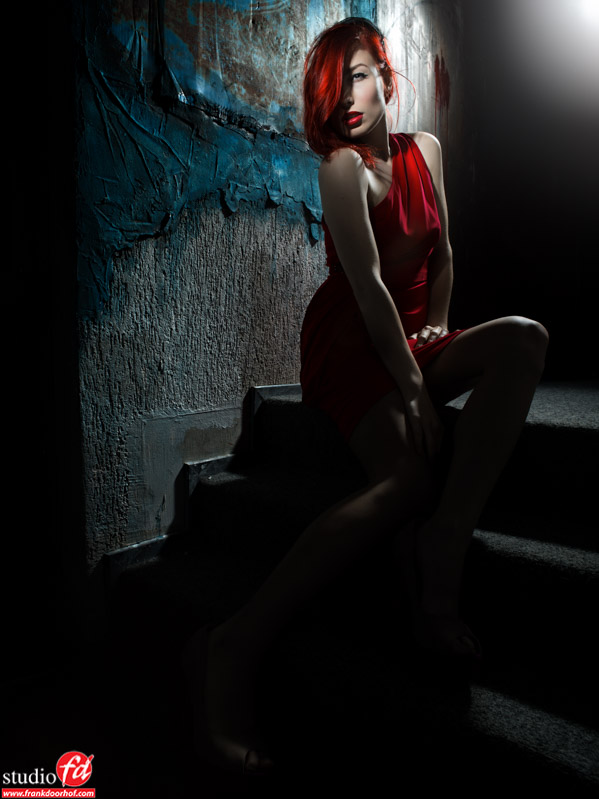
With this technique I create something pretty dark with backlighting and use a single light source aimed at the models face, someone has to keep following that face, because it’s a really tight light source, or the model has to stay in one place.


This way you can create something that always reminds me of a modern twist to the film noir lighting, and yeah I know it’s completely different but it is where I took my inspiration from.


If you look at this example shot you actually see a 2 light setup, one Elinchrom beauty dish with grid from the back and one Elinchrom Snoot from the front, that’s it. Nothing complicated, now add a cool model, a strong color and there you go….. no need to worry about gear, this would look the same with a Canon 10D, a Nikon D4s or a Sony A7r (this was shot with a Medium format camera btw :D)


So next time, don’t think that you can’t do something because you don’t have the gear, dissect the image and recreate it, lighting isn’t hard (as soon as you understand it) but creating a fitting mood and working with the model and styling that’s pretty important 😀


Have fun.

Marie Mei 30 2014 (66 of 119)-Edit

Aimed light

One of the most difficult things to do is really aiming your light.
In a lot of workshops you will see big soft boxes aimed at the model from a moderate distance, this is of course very understandable for the simple reason that in fact you really can’t go wrong…. however the resulting image is often “a bit flat” and not that interesting lighting wise.


A next step is using smaller light sources like striplights or for example a beauty dish with grid.
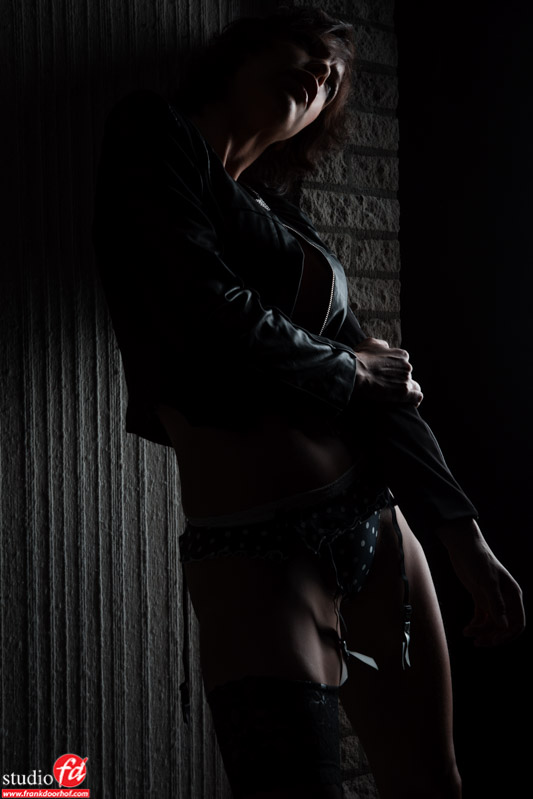
For example in this shot I used a small striplight.

Roosmarijn Mei 22 2014  (73 of 155)-Edit

It can get way more interesting however when we start lighting our model from the back and creating a very dark front. Now normally one would let the model look upward to catch some light, but often that doesn’t really result in the image you want, a model looking towards the camera always has a little bit more….. connection, especially with glamour.


In the next shot I used a beauty dish from the back and lit the models face with a very small light source, in this case a snoot with grid.

Read more