A new Frank Doorhof allround filter pack
Filters come in many shapes and sizes (literally).
Personally, I’m not really a filter fan, but since I started using the Black Diffusion filters from K&F concept I have literally fallen in love with those filters.
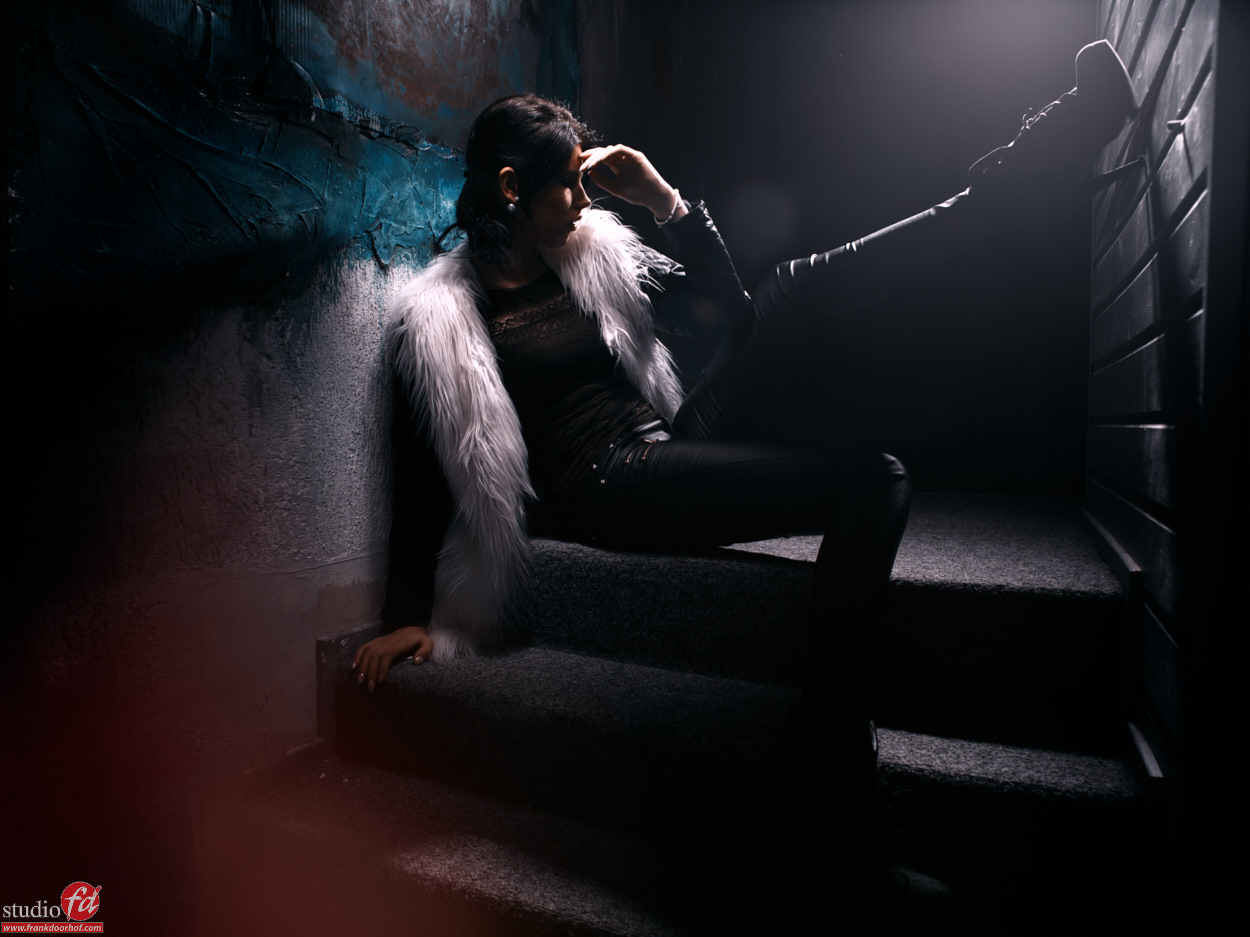
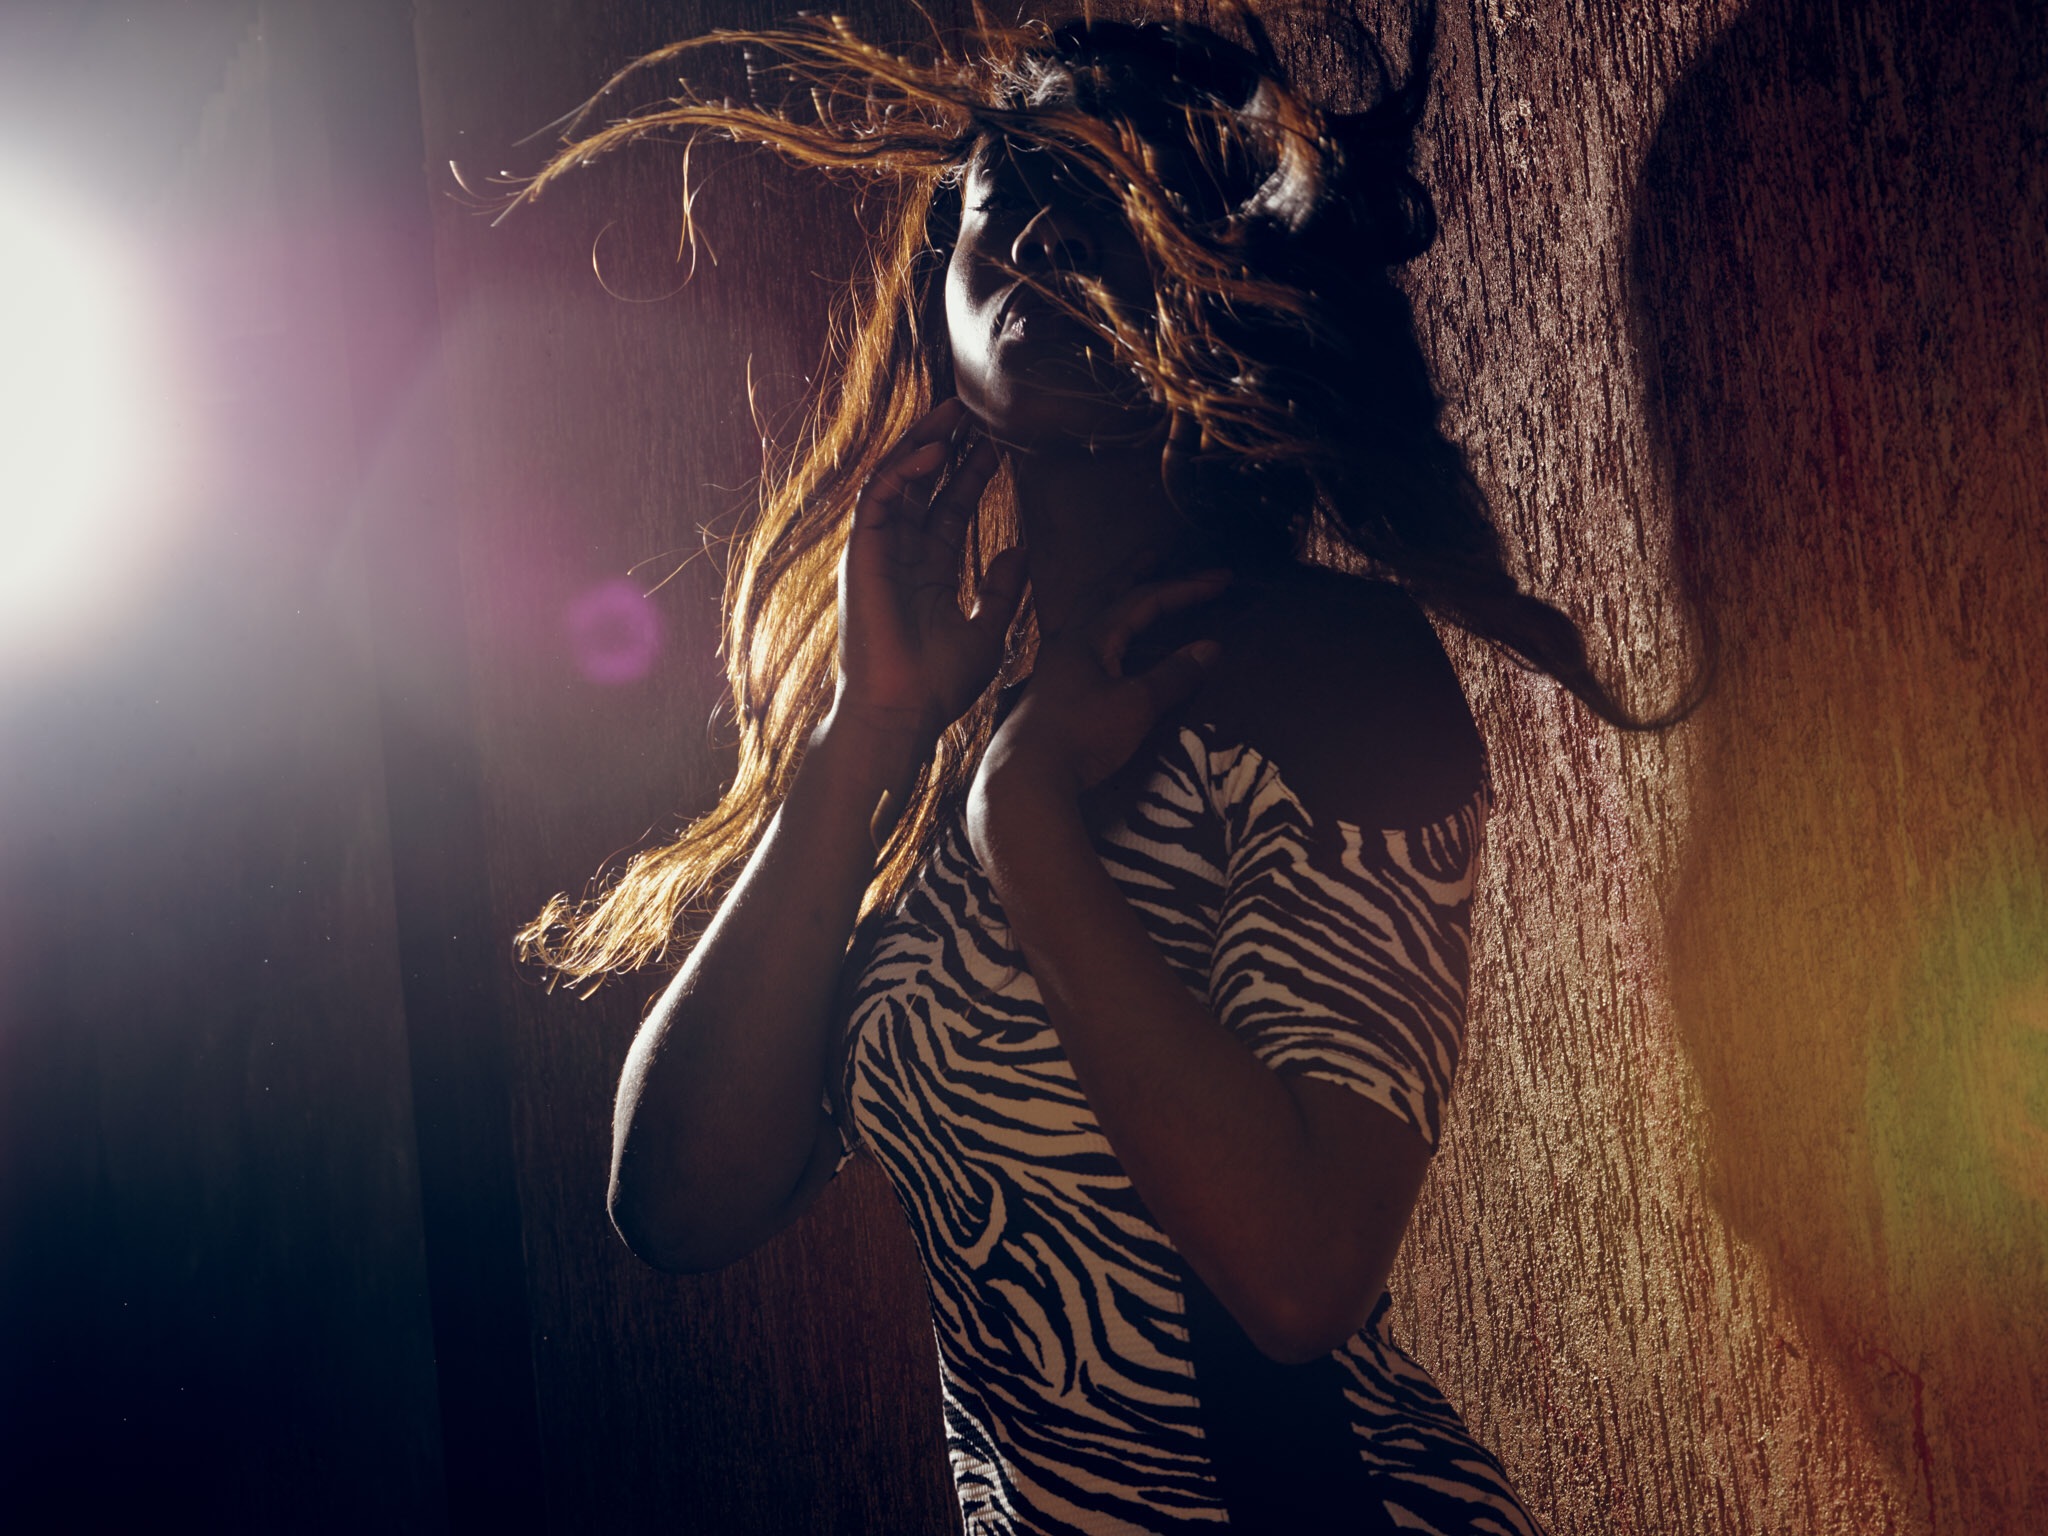
The Black Diffusion filters from K&F concept give a fantastic “glow” effect on highlights, but do not “ruin” the photo due to loss of sharpness, photos remain razor-sharp, but as soon as some backlight falls on the lens, you see the highlights really “glow” fantastic. “. but that’s not all, I mainly use the filters for the impact they have on lens flares.
Where normally a lens flare can be a bit “harsh”, the filters provide a fantastic smooth rendering of the flare.
The Black diffusion is available in different strengths, but I mainly use the 1/8 and 1/4.
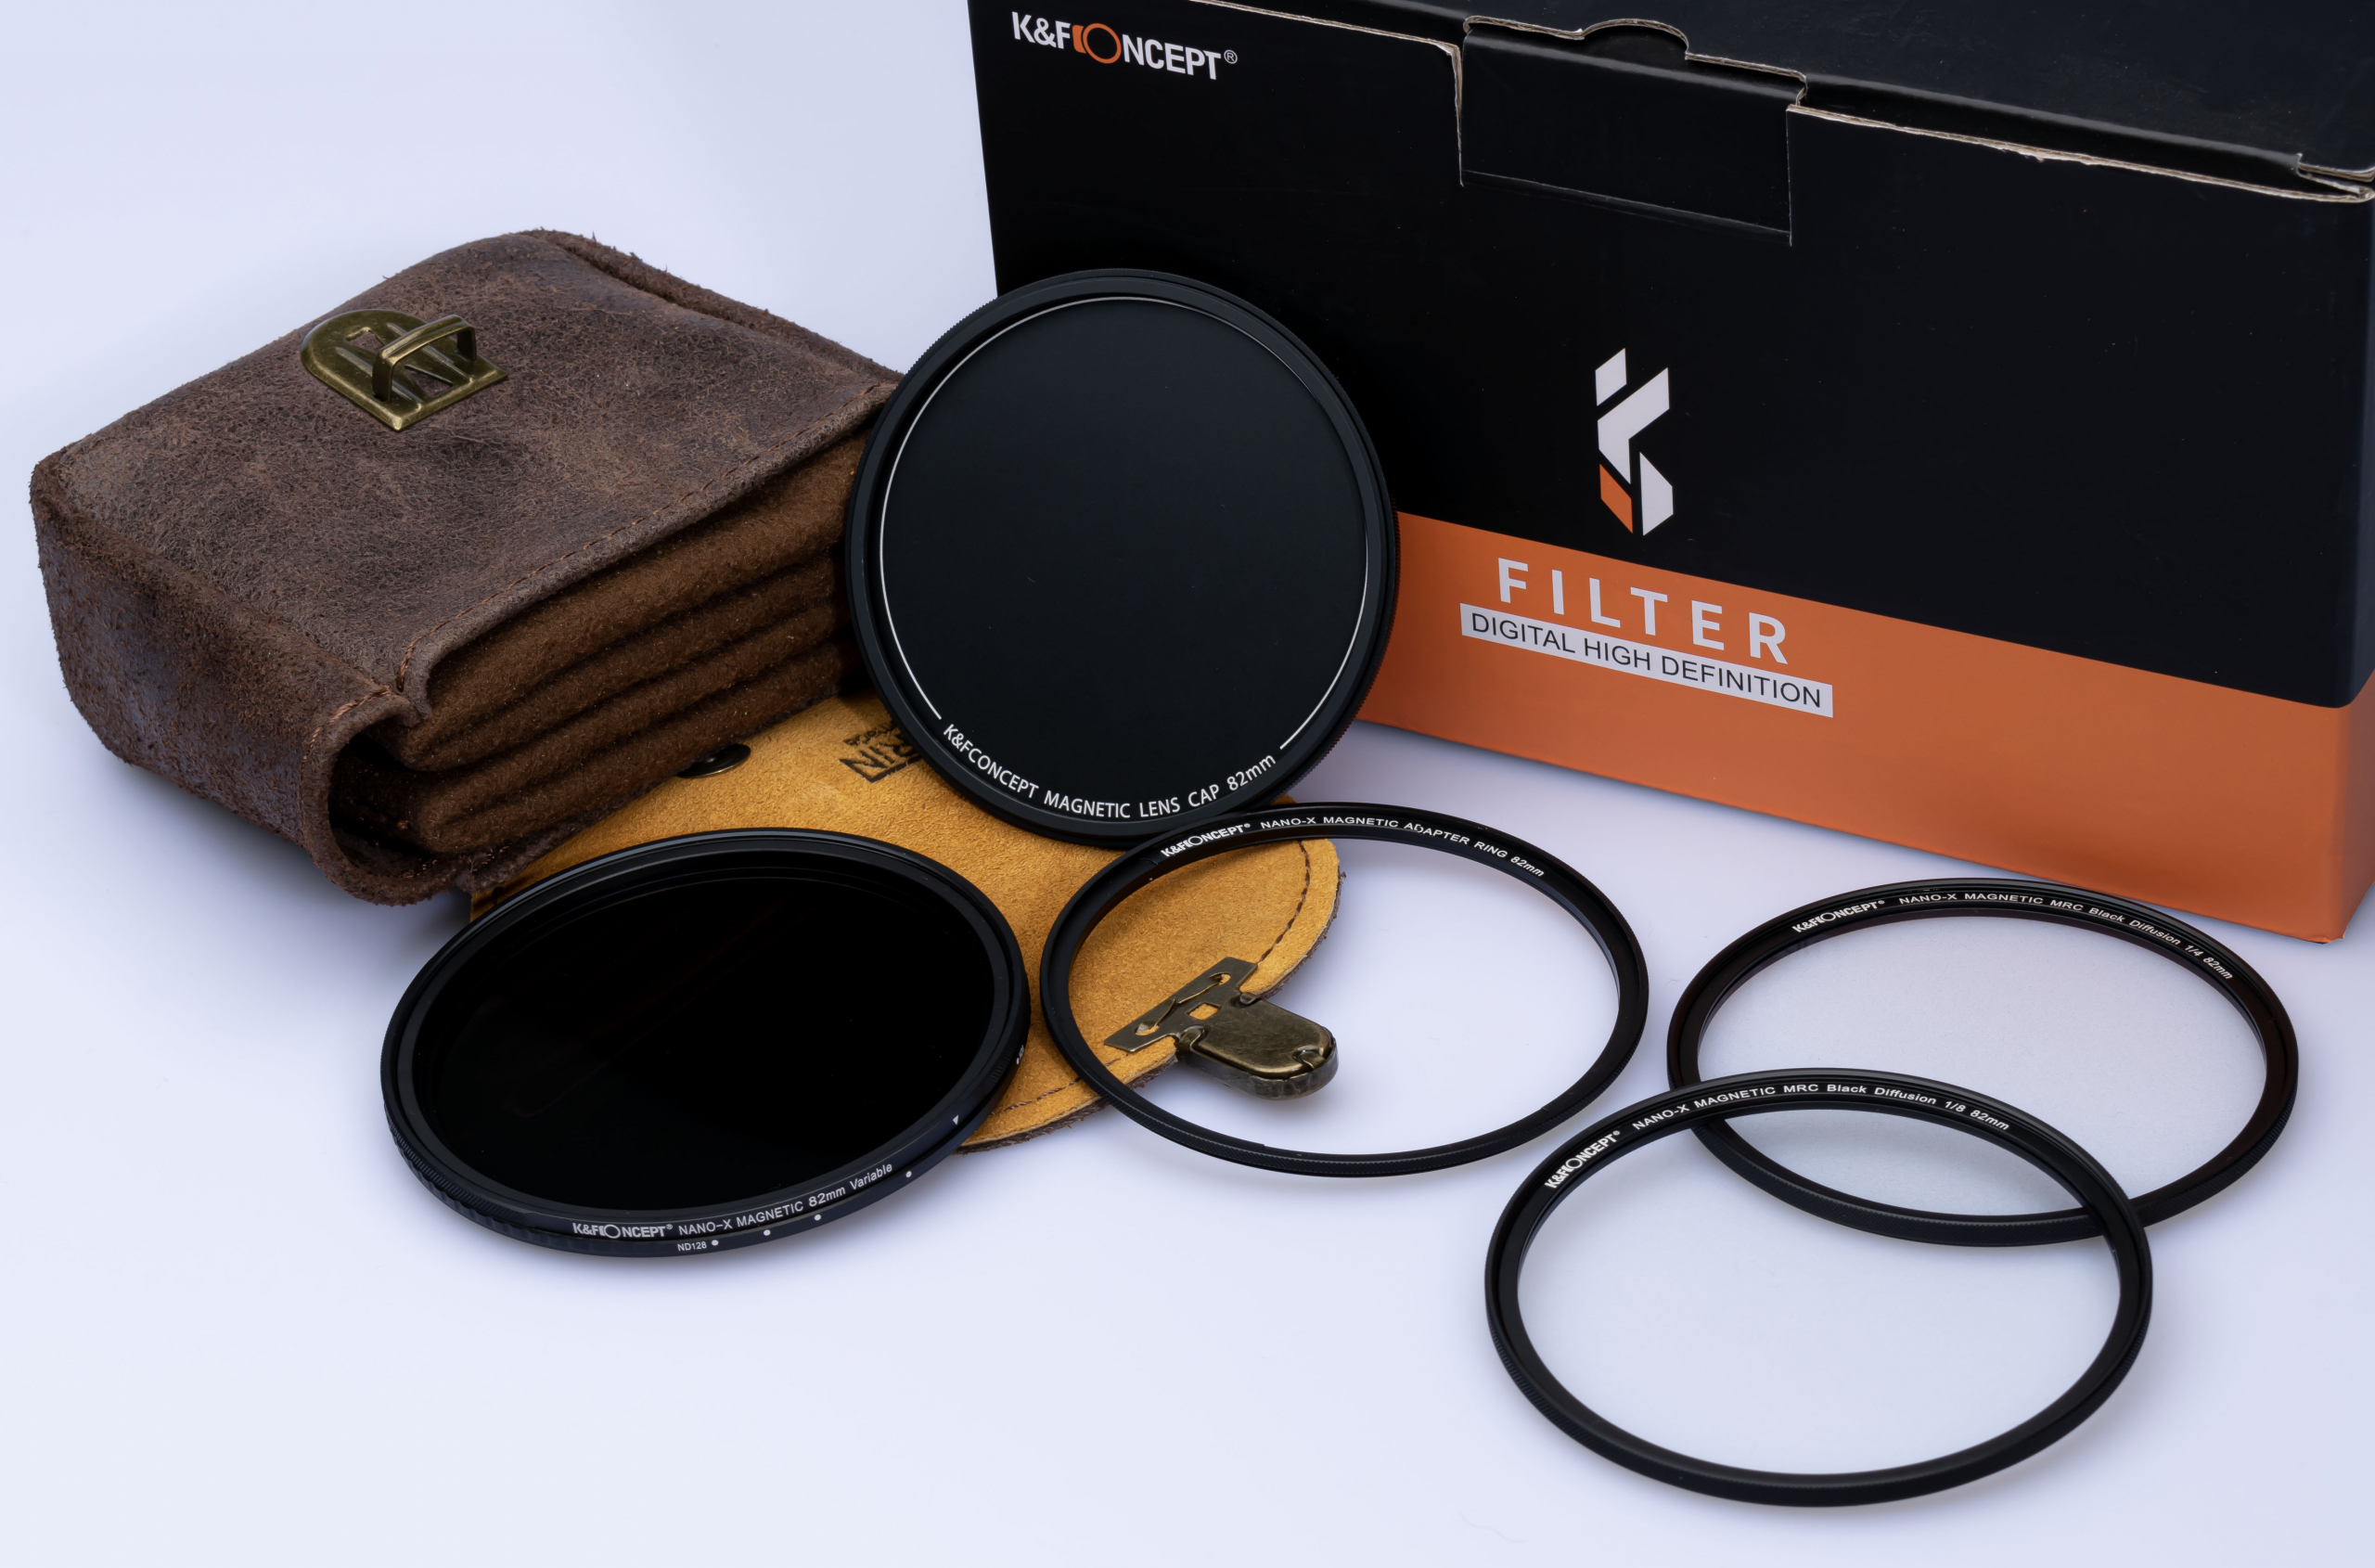
It will therefore come as no surprise that you will find these 2 in the package.
But there’s more…
You probably see them sometimes, those shots where the water is really super smooth, in case you’re wondering how they do that…. a really long shutter speed. Normally, however, this will not work because you would then get a totally overexposed photo, so you have to ensure that less light falls on the sensor. And for that we use so-called ND (Neutral Density) filters, which are available in different values (stops) which indicate how much light is lowered.
Now you may be wondering what I do with an ND filter?
Well… with outdoor flash we have a similar problem.
Many flashes that are a bit more powerful have a limitation on the shutter speed that you can use (often this is max 1/125-1/200, called the X-sync). If you shoot faster, you will be treated to a “nice” black bar (the shutter curtain). This often means that if you work with flash outside, you get photos with a depth of field from here to eternity, and that’s not always what you aim for of course.
By using an ND filter, we are able to block part of the light so less light falls on the sensor, this means we can now open the aperture, resulting in less depth of field. Awesome.
Now the question that we all want to ask “what strength should I buy?”
Well, that’s not so easy to answer.
Sometimes you want a little less and sometimes a little more…. luckily we have a solution for that too.
In addition to the 1/4 and 1/8 Black Diffusion filters, the Frank Doorhof package also includes a variable ND filter from 8-128, a very useful range for both model photography with flash on location and landscapes. The variable ND filter has clear indications for the stops and is also fully adjustable. More flexibility is almost impossible.
If you’re already getting excited…. just wait
One of the major drawbacks of filters is that they are sometimes impossible to get off your lens.
There only needs to be a small grain of sand on the ring or maybe you don’t pay attention when mounting the filter and it’s not aligned perfectly, drama, drama, drama 😀
Well…. we solved that too.
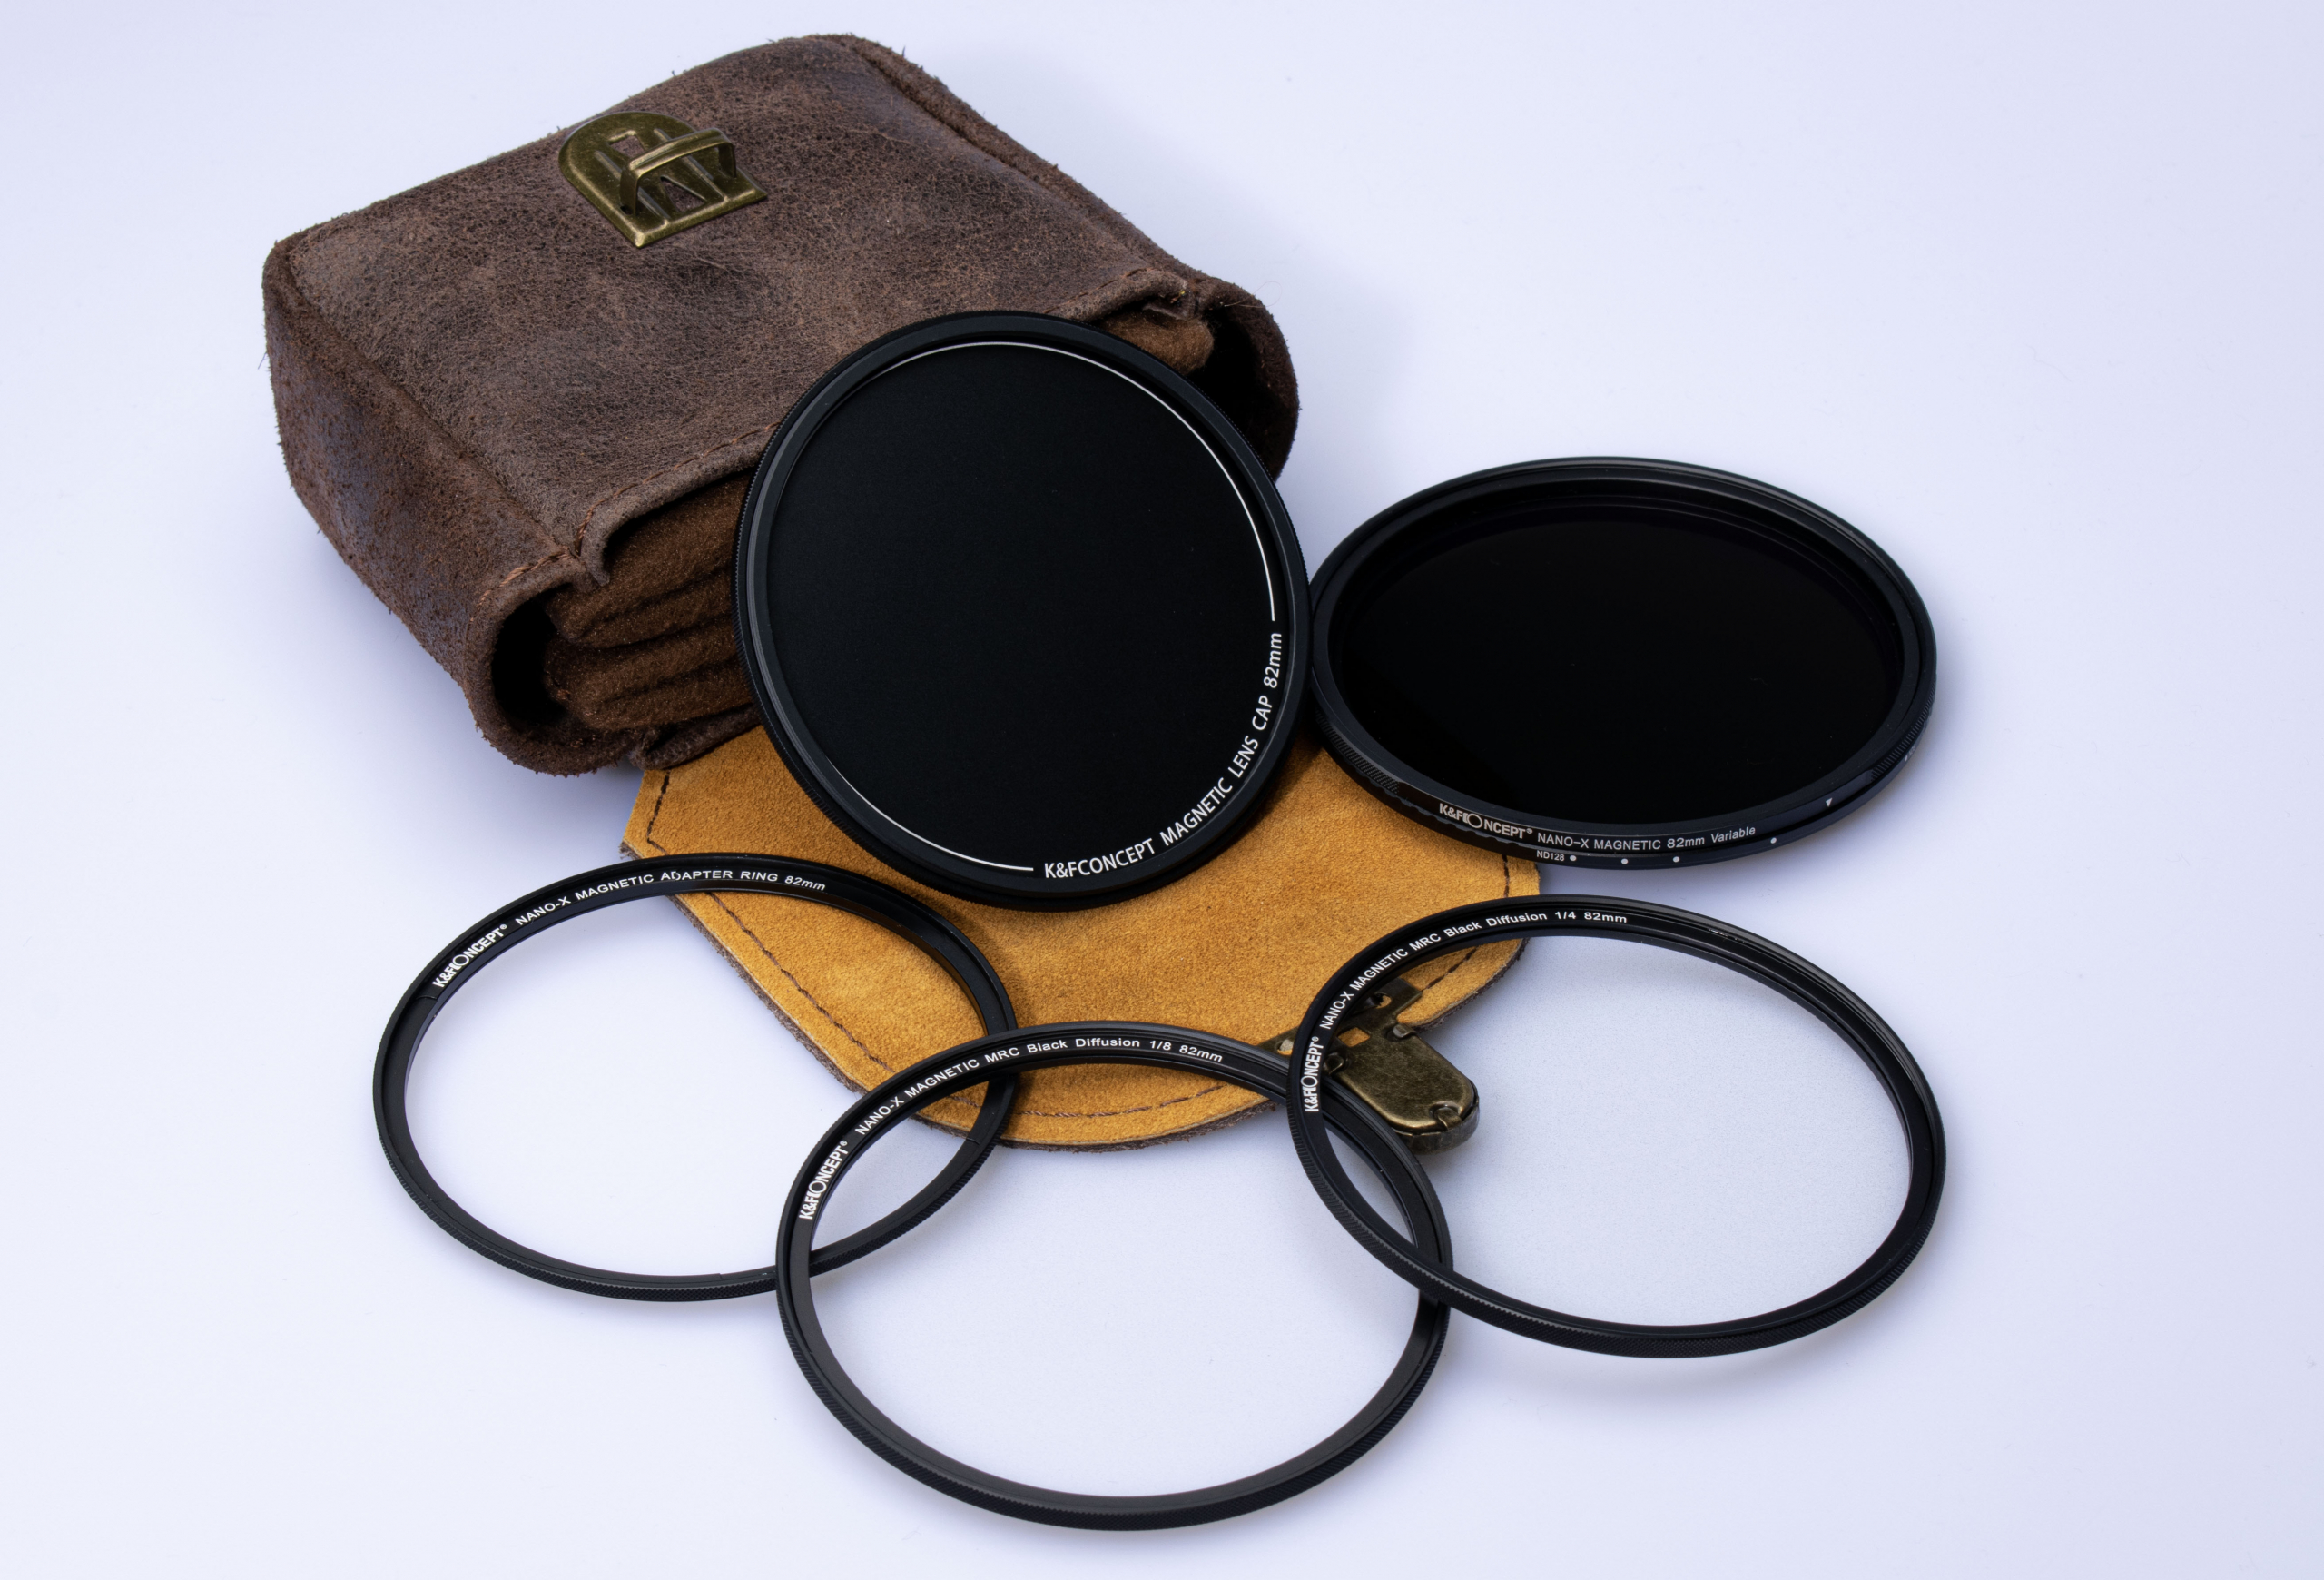
All filters are magnetic
This means that you only have to place the magnetic ring on your lens, my advise is to do this in a clean environment and also, just to be sure, clean everything with a blower so that there is nothing on the lens mount where the ring is placed. Once the ring is on, you can change the filters with lighting speed.
Happy yet?
Again this is not all, when we do something… we do it the right way.
Due to the design of the filters and the ring, you can also combine the filters.
For example, if you want more diffusion than 1/4, you just click the 1/8 on top of the 1/4 and you get a heavier effect.
Of course, the variable ND filter is also fully magnetic and has no protruding parts, so you can still use the lens hood if necessary.
Almost done
Ok, in terms of filters we are done now, but there is more.
Of course we can just give you the filters in a box, but that is not really convenient on location and doesn’t look cool/special, so we opted for a beautiful handmade leather pouch, and they are all unique (handmade). We have a few of them in the studio and they are indeed all slightly different, so you really buy something unique.
In this video I introduce the package to you and show you what it contains and what you can do with it.
The filterpack is now available via www.frankdoorhof.com/shop (for the Benelux) or in the stores that sell K&F Concept.