About technique and more.

A cool set with clickbackdrops

Building a set can be easy

Using a set in your photoshoot adds a lot.
When I started out with modelphotography I mostly shot on seamless (paper) and although it was a lot of fun working with different colors at one point you get a bit bored with it and I started with using custom walls with paint, structure or wallpaper.

A few years ago we came into contact with clickbackdrops and loved their huge selection of prints and the materials vinyl and especially pro-fabric (which mimics the old vintage canvas backgrounds without all the disadvantages)

Today in the blog some images I shot during a workshop with Felisa.
During this workshop I used the “boho drapes” background which can be used without anything extra and gives a real sense of shooting on an old fashioned set.
But it becomes much more interesting when you start to add some props.

In this case I added a chair for the model but also some branches with faint lights and a nice lamp.
For the workshop this is was a great setup to experiment with mixing light sources, finding interesting angles and of course also shoot some images without the strobes.

By using props in front of a scenic backdrop and taking into to account the way the shadows fall on your backdrop you can quickly create something that looks like it was shot on a cool vintage location.

During the workshops I always try to include several “challenges” into the sets and mixing light sources is always one that is often requested.
In essence the technique is not that hard, but you need to realise some important facts.

The continuous lights are of course a lot less bright than the strobes.
The strobes however are just a pulse, and after the pulse they don’t emit light anymore, so when you shoot images like this it can be cool to leave the modelling lights on, but if you need longer shutter speeds it’s important to disable the modelling lights, if you use the longer shutter speeds the strobe will freeze the model, but the modelling lights will start to register on the model at one point, so if you don’t want this make sure you only use the pulse of the strobe.

Let’s set the shot up

For a quick setup I’m using a lightmeter.
The Geekotos I’m using can go really low in their output, which is a huge benefit for these kind of setups where you mix faint light sources with strobes.
With the Geekotos it actually often means that I don’t have to use them on the lowest setting, which gives me more headroom to correct the balance without having too much noise in my images. If you use strobes that are more powerful or can’t go lower on their output it can help to choose a different light shaper, for example a striplight with grid will eat light while a metal reflector will boost your output. If you tried everything and just can’t go low enough think about adding a ND filter to your strobe (not the lens).

But let’s continue with my setup.
First I will meter the strobe on the lowest setting, when I know my aperture I will raise the ISO on the lightmeter till I hit that aperture (the light meter will calculate the aperture in real time when you change the ISO values).

Now it’s important to put the camera in the “exposure compensation” mode when using an EVF.
Look at the EVF and change the shutterspeed till you like the output of the lights.
Longer shutter speeds means more light from the continuous lighting, and as long as you don’t change the output of the strobes and ISO the shutterspeed will have to influence on your strobe output (as long as you take into account the Xsync of your strobes, max shutterspeed).

As you can see it workshops great when you mix continuous lighting with strobes.
I love to keep the color of the continuous lighting warmer than the mainlight, but if you want to correct the strobe to mimic the color temperature of the continuous  lighting you can use so called Color Correction gels.

Workshops

During the workshops we always try to shoot at least 3 different setups with different challenges, if you want to visit one of the workshops visit fotografie-workshops.nl
The workshops are in Dutch but if you let us know a few weeks in advance we can switch to English.
We are also now offering online 1:1 workshops live from our studio, where you can ask questions, see all the light setups via 4 cameras and see the whole retouch process.


How I approach a business shoot

Dentists “kruispunt”

Most of the work I post is from our workshops model photography or street/travel photography.
But we do a lot more of course, including business shoots.

Today I want to share some tips on how I approach our clients and why we score the shoots.

The first thing I always do is know my client.
When a client approaches us I always try to find out what kind of company they are, how do they work together, what is the team like and of course what do they want to have as an imago. One of the questions I try to avoid is “what do you look for?”

In most cases this is why you/we are hired, to create something where the client will recognise themselves in.

In our first conversation I often already have some ideas I bounce off to the client, and during that conversation you will find out that the client will open up a lot more and share much more information when you pay attention than you would ever get by just asking “what do you want?”. In this case it was immediately clear this is a very modern practice with people that love to work together and is a real team.

Before the “real shoot” I always try to visit the location to look around and see if we need extra lighting or other gear, and if somethings need to be moved or removed. This is a vital part of a successful business shoot because although your client might be comfortable in front of your camera, often the people working there have other opinions when a stranger just points a camera in their faces. So that first visit before the shoot is vital to get to know the people, joke around a bit and make yourself known, this will not only speed up the real shoot but also give you a huge headstart because now everyone knows what’s going to happen, and if you make it fun they will mirror this.

Standard, or not

This client was the kind  I love the most, they didn’t want to use any stock photography. Every shot had to be unique for their practice and the people that work there. But they also wanted unique images for their service/pages fitting the subject. So I started with shooting some close ups of the tools and rooms, and most shoots will probably stop there because that would be exactly what they needed. But if you really want your clients to come back you have to deliver much more. And in this case I knew they were very involved with patients that were afraid of the dentist.

“When we have a patient that is afraid, we always ask our receptionist to hold her/his hand, this really calms them down”

So I knew that one of the images for the page about fear, would have to show this.

But we also wanted some images that were a bit more tongue in cheek and different.
So for one image I decided to put away my fear and sit in the chair with a 12mm wide angle.

But we didn’t stop there.
They also work a lot with kids so we decided we needed some images that showed the dentist as a fun person and is nothing to be afraid off.
The actually used a puppet to show how to brush your teeth and of course this was the perfect prop. The only problem was that it’s a slightly older puppet and the teeth were all yellow, but although I’m not a dentist this was something I could easily fix in Photoshop.

By using the wide angle I got the effect I wanted.

And for the page prosthetics I could not resist to also make a funny looking shot.

Do remember that the images in this blog are the more funny, extreme ones.
For me during a business shoot I always try to shoot as much “stock like” images as possible from different angles and depth of field settings. You never know what works best in the design of a website, so also experiment with the angle and flow of your images. By giving your client different angles and directions in your images you never have to say to your client “sorry we did not shoot that”.

But besides these “stock” photos I always feel it’s important to capture the essence of the brand/company/client. And this is were you start to use the information you gathered about the company.

In this case I knew they were dynamic and modern and in for some fun. So this is why at the end of the session we did one more shot.
This one will probably not end up on the website but it can function as an awesome sociale media headshot 😀

During a business shoot I shoot a lot of images that are usable for websites and show tools and rooms, but to get the ones that really capture the essence of a business/client you have to know them. So always take your time and don’t do the shoot as a photographer but as a friend, it will hugely impact your business.

For business shoots and much more visit www.studiofd.nl

Adding something really special to a photoshoot with a gobo projector

I love my Westcott gobo projector

I love the old fashioned photography, think about photographers like George Hurrell or for example the world famous Harcourt studios.
In the 30’s and 40’s you often saw harsh light combined with hard shadows, this can be for example a plant, branches, chair, ladder or whatever you want to project on the background.

Quick tip.
If you want really hard shadows, make sure your lightsource is far away from the object that will cast the shadow, and the object is as close to the background as possible. The further you move the light away the harder the edge transfer (shadow)

But although those shadows are nice I love to go one step further, and this is where a gobo projector comes in.
As mentioned I’m using the Westcott Lindsay Adler version, but in essence they all work the same.
You mount the projector to your strobe and you can place different gobo’s (metal discs) between a lens (in my case a Canon mount lens) and the strobe, by focussing the lens you can create a sharper or softer pattern on your subject/set. It’s an awesome light modifier to create stunning images.

You can use the projector on your model to create very sharp areas of light or to light the whole set and use fill in lights for extra detail or mood.
During a recent workshop with Felisa I used the projector exactly for that.

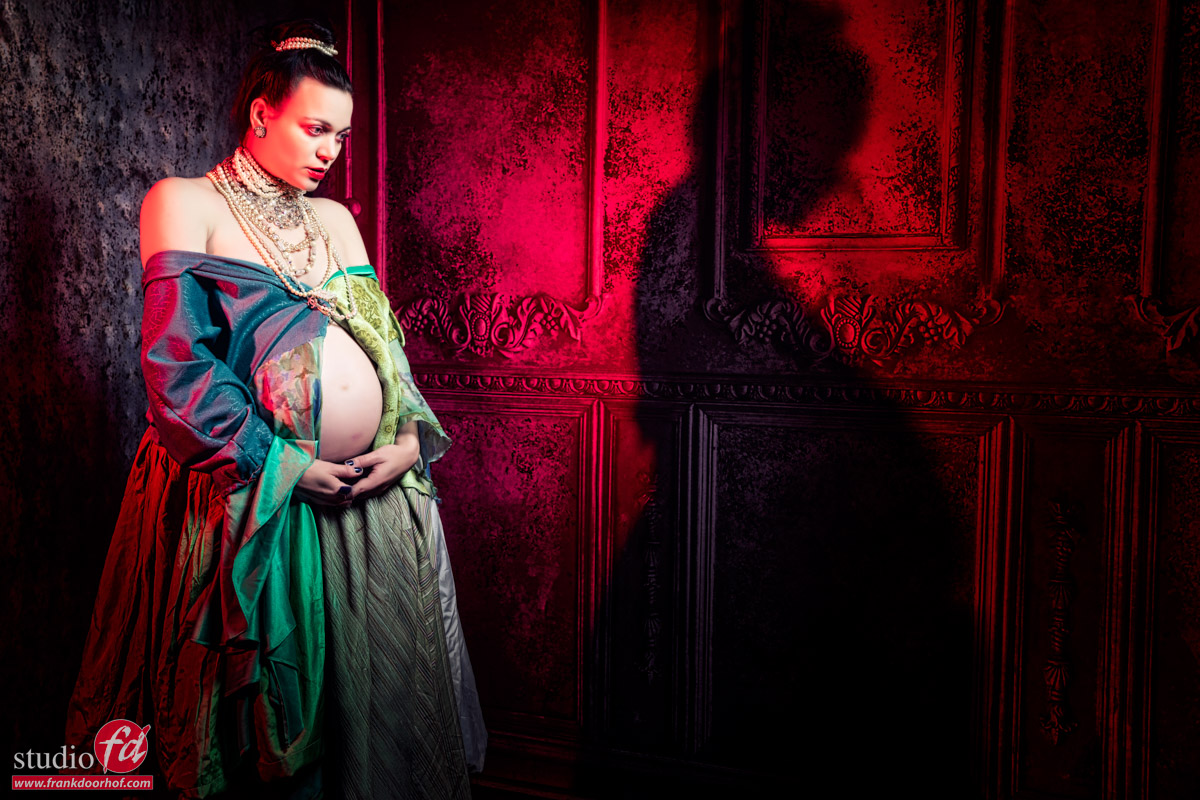
In these images I’m using the projector with a standard gobo with lines on our Geekoto GT400 aimed at Felissa, for the accent light I’m using one Geekoto GT250 with the Rogue Magnetic system and a blue gel. By adding a bit of smoke the blue nicely smeared out over the set.

We build a small set by using 2 of our Clickbackdrops backgrounds.
Of course the fur is fake.

A few tips for the Gobo projector

On the Westcott you can mount lenses with the Canon mount.
The lens that was delivered with my set was for me too long and made it impossible to throw the light over a complete set, it does work great for portraits.
So when you want to start using a gobo projector I would advise to get some extra lenses.
Now this is where you have to be careful.
The projector eats light, so make sure that when you get a lens you get the widest possible aperture you can afford, the nice thing is that you don’t need to get a super high quality lens, you could for example use old M42 lenses with a Canon convertor and make it possible to experiment with different lenses.

One of the things I love about the Westcott version is that you don’t need to use the gobos, but you can also use the blades to get some really striking patterns on your model.

And you can of course combine it with some colors for extra stunning effects.

Want to visit one of our workshops?
visit www.fotografie-workshops.nl for the new agenda.
The workshops are in Dutch, but if you let us know a few weeks in advance we can switch the to English.

MacBookPro M4 Pro Display performance nano texture

The new MacBookPro M4 Pro: It’s gorgeous

I was 100% happy with my MacbookPro M1 Pro. (see my review here) 
It was lighting fast and even when screencapturing Photoshop I didn’t see any hiccups.
But when Apple showed the new screens I was already looking for my laptop to order a new one.
The biggest frustration with the MacbookPro for me was the very annoying  glare on the screen, it could drive me nuts when travelling, if you need a mirror…..

The nice thing about Apple is that you often don’t have to wait too long and indeed today I got the new MacBookPro M4 Pro with Nano Texture  14″, 1 TB, and wanted to share the first experiences with it, mainly focussing on the screen.

And the screen is indeed absolutely gorgeous and kills the reflections better than expected. It’s something you have to see to believe case 😀
I also opted for the space black color and also here I can say I’m glad I did, I love the normal color of the MacBookPro but the space black is my new favourite.

Ok till now it’s been more like an unboxing, and as you know I’m not really the person for that kind of posts 😀
So let’s dive into the interesting stuff.

Shine a light on me

Let’s do a quick test

the MacBookPro M4 Pro

Left is the….really?
As you can see there is a huge difference. On the previous screen you can clearly see the reflection of our led lights, on the new screen there is nothing visible. And remember the reflection of the previous screen was even worse in some older generations. I’m really glad with this outcome because the screen was my main reason to upgrade.

Now when you see this we want to see something more extreme of course.
So we used the flashlight of the iPhone on full power.

On the previous screen you can clearly see the light and its a pretty large circle and you can see the light actually breaking down in RGB.

Now on the new screen it might seem that the circle is also large but thats probably not what you’re seeing.
This is an extreme example, shining a very bright flashlight right on the screen from 20cm distance.
The little circle in the middle is what you also see in the image above but a lot smaller and much less intens.
The “glow” around the circle is probably the Nano texture doing it’s anti light reflective work, when the lightsource is less extreme this would mean it totally takes out the reflections, as you can see in the first example.

In other words, wow.

Performance of the MacBookPro M4 Pro with Nano Texture

As creators we of course demand the absolute best from our screens.
Of course it’s always better to use a dedicated monitor. For example the BenQ monitors I use have a hardware calibration option and are tracking very close to the AdobeRGB colorspace. (and they have a great anti glare coating :D) but does that mean that you can’t use your laptop screen for editing ?

Well decide for yourself, I will post the validation of the screen in a moment.
It really depends on how color critical your work is, but in all honesty when I look at the results I would not hesitate to edit my work on the MacBookPro, as long as I’m able to check it on the BenQ before it goes to the client.

the MacBookPro M4 Pro

Calibration

The first thing I do when I get a new laptop is make a 1:1 copy from my old laptop (I love the way the Mac does this).
This mostly takes an hour or slightly longer, in that time I keep my screen on at my preference light output.
When my whole system is up and running, this often means the screen has been on for a few hours.
Now it’s a good time to do the first calibration (and repeat this after a few days).

Do make sure you use the proper analyser for the XRD screens.
We highly recommend the Calibrite HL series due to the high luminance output of the screens.
On the photo you still see an older analyser which was handy for the moment, calibration should be done with the HL series by preference.

With MacOs you do have to make sure that you check your display settings and disable the two settings you can see in this image, these settings can really mess up your calibrations.

the MacBookPro M4 Pro

After the calibration is done it’s possible to run a validation of your screen.
I’ve setup the screen to the brightness I normally use in a bright room, this is brighter than my BenQ which is in a controlled environment.
I highly recommend calibrating at the brightness you use the most. You can always go up or down 1 click.


As you can see the performance of the screen is actually pretty good 😀
I’ve been working on the MBP for a few hours now and coming from the M1 Pro I can say that especially plugins like Luminar Neo and BorisFX are running a lot faster. That doesn’t mean that the M1 Pro was slow. But the M4 Pro is clearly a lot faster.

Conclusion, should you buy the MacBookPro M4 Pro with Nano Texture screen?

There will be a lot of reviews about the speed of the new MacBooks, for me it was already clear I would get more speed than I would probably ever really need. However the screen is one of the most important things on a laptop for me. We travel a lot and having a screen that functions like a mirror is insanely annoying. To be honest the screen alone was worth the upgrade. But a good screen should also be able to show proper shadow detail, don’t clip the whites and have a proper performance for color “critical” work. So in this short review I focussed on the screen and wanted to share the validation of the new MacBookPro 14″ Nano structure screen.


If you are in the market for a great monitor, make sure to check out the BenQ series.
I’ve been using them for years and they always deliver a great price/performance.
For the European customers we have a few 10% discount coupons we are allowed to give away. (Email)

Check this link for more info about BenQ SW monitors


Check out my YouTube video about retouching on the iPad