Tips on styling
Styling is one of the most important parts in a successful photoshoot.
If you shoot a model in jeans and tanktop, you’d better be a lighting wizard because there is not much else going on…..
This is one of the quotes from my book “Mastering the modelshoot” (which recently got the label bestseller :D).
Now for some people the term styling already gives them a panic attack… styling is difficult, impossible to do yourself etc.
Well…. let’s be realistic, for a good styling project you will need a professional stylist, they really have “the eye” and know what goes together and will work in a photo, but don’t worry if you can’t afford one, there are some simple things you can do yourself.
1. Don’t overthink, but DO overthink
Sounds weird right?
Well it is.
What I mean is that sometimes people already think “I can never do it, so I won’t even start” and that’s the first overthink. The second one is much more important… when you start doing the styling for a shoot do it with care, make sure that everything goes together, match colors and match the styling to the model and the look of the set you’re gonna use, you really have to think about this over and over again, a styling idea can fall flat on it’s face by small mistakes.
2. It’s always personal
You can create the most amazing outfit and look, but always remember that as soon as you steer away from “standard” people will either like it or hate it, and the more extreme you go the more extreme the reactions will be, be prepared for some intense flaming online, especially from people who don’t do it themselves 🙂
3. Think about a theme/color
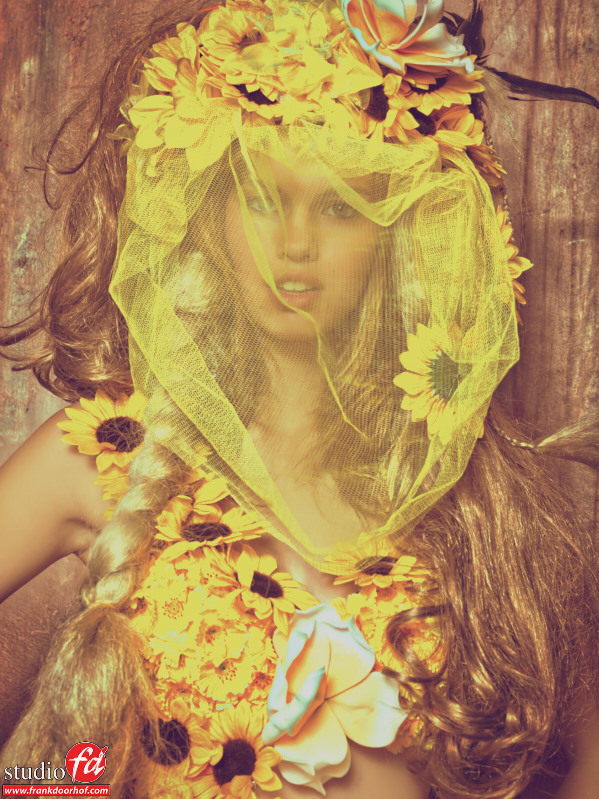
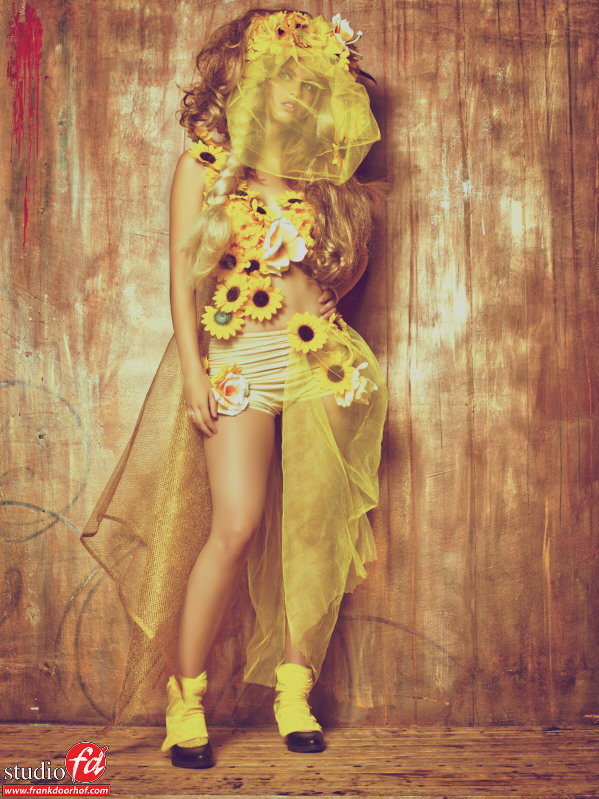
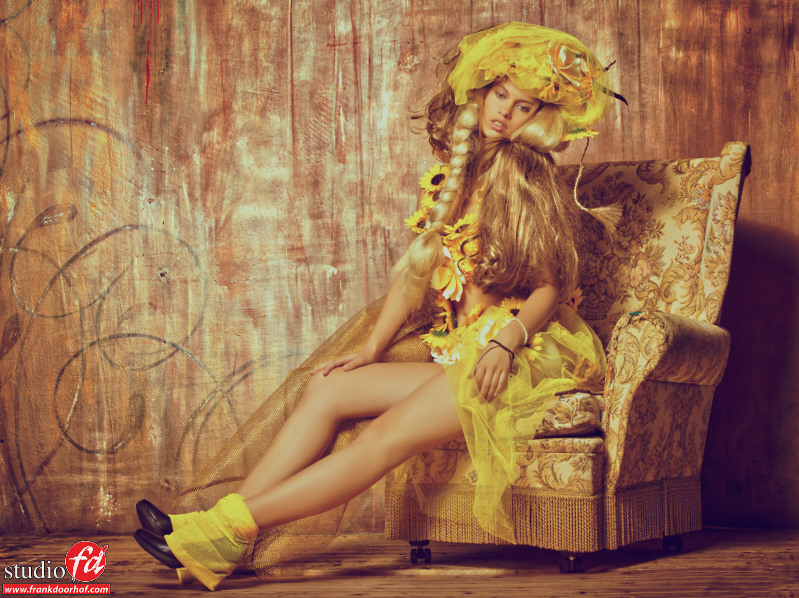
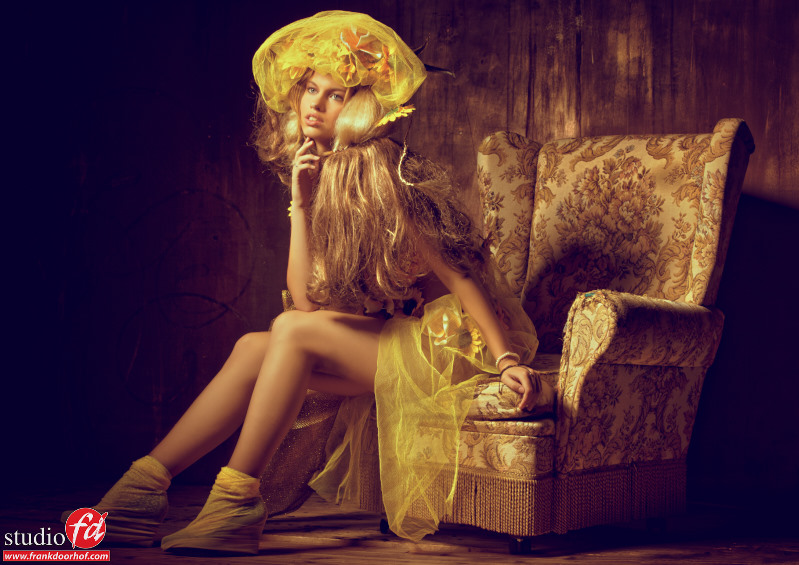
I often think about a color and a theme together, in other words I will work within a theme but the leading “line” will be a color. If we take for example the images in this blogpost the theme is flowers and the color is dominant yellow, I can’t take any credit for this styling by the way, this was done by our very own Nadine Stephan. But you do see the look in this case. Now if you are progressing in your work it’s very good to start mixing things up, or keep it in one color…. but when starting I think it’s important to keep it as “simple” as possible color wise. If everything is one color or based on one color it’s easier to create something that looks “good”.
4. Blend it in/or not
In the images you see above I clearly choose the background and floor to blend together with the color in the styling. This is a personal choice and might very well not be yours, contrasting colors can be incredibly powerful but… will sometimes also take away some of the “rest” in an image.
5. Throw everything together
Yep, that’s a way to do it, but don’t over do it.
When I started experimenting with styling (a long time ago) I literally just threw some stuff together that (for some) didn’t make any sense but for me looked cool, I did learn the hard way that what sometimes looks cool for you can indeed look incredibly stupid when you look back at it after a few months, but that said…. do experiment, there is no better way to improve yourself than to sometimes fall flat on your face and get up, people that walk within the boundaries and are afraid of the boundaries will never be able to break through and create something fresh and new.
In short, everything can go together, it’s not something that has to be wearable on the street (unless that’s the idea), so be creative and start experimenting.
6. All materials go
Again you don’t need to wear it on the streets, in fact we have created outfits that were held together with ducktape and clamps, trust me it looks awesome but if you let the model jump…. well they will be wearing something different (or nothing). I often call it the “soap opera effect”… what you don’t see doesn’t bother your mind, why the “soap opera effect” ? Well when you watch a soap opera all the decors look real, however when they close a door a bit too hard you can sometimes see the decor shake, as soon as you see this your mind is in another place and goes like “wait a minute this is fake” and the “magic” is gone. It’s like seeing Santa (uncle Ben) getting dressed and putting his beard on…. the magic will be gone forever.
And because it doesn’t has to be durable etc, all material are in fact ready to be used, you just have to choose the ones you love to shoot and that will have a great effect in a photo, for example I love see through material in front of the face, and material with shine/reflections or structure. Some would be impossible to even walk in, but for the shot…. it’s only a short while it has to stay on.
7. Lighting is important
Often I tell people that if the styling is right and awesome you can get away with less impressive light, and although that is true (for me at least) I still believe that you can make a great shot into an AWESOME shot if you also start thinking about the lighting, as you know lighting can create so much more in a scene than just the illumination of your model (subject). In this example I love the more direct lighting, but I also love the following shot from the same session, a totally different look.
I could write a full book on the subject of styling but for the blog I love to keep it simple, I hope these small pointers can help you to give you better images.
If you want more tips on shoots/styling/lighting etc. order my book “Mastering the modelshoot”, you’ll love it.
Many thanks to Nadine for the styling and Anna our model.

