About the light meter in a quick overview
On August 12th I joined Scott Kelby during his great “Light it, Shoot it, Retouch it” tour.
If you didn’t already see it, and it’s close to you, make sure you check it out… You’ll love it.
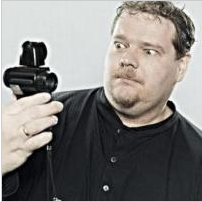 Anyway, during my piece of the seminar I choose to do the high contrast light setup using a deep octa and strip light, during the setup I of course also talked about the use of a light meter and explained some of the theory behind it, however after the seminar I got so many questions from people who never used a meter to people who had problems using one that I decided to dedicate a blog post to it, because really honest… using a meter is like the simplest thing you can do within photography.
Voodoo or not
You know there are two camps among photographers when it comes to the use of the light meter, I always call them Camp light meter and Camp no light meter (yeah I know it sounds cheesy), the funny thing is that when you talk online about the meter it’s often a case of black and white, in other words you love it or you hate it, there hardly is any middle ground. Now I have dedicated a lot of space to the use of light meters, and I’m afraid a lot of more space will be spend in the future because somehow the most ridiculous reasons to use or not use a meter are still being spread, let’s do a simple point by point system explaining the use of the meter and making some things clear.
It’s hard to use and it takes a lot of time
Sorry but people saying this should not call themselves Photographers. We all know how to use a camera that is WILDLY more complex than a light meter. In fact the light meter is just a very simple tool. And no it does not take a lot of time to use (it saves you a lot of time).
So where does this story come from ?
I really would not know, but I will tell you very simplistic how a meter can be used in for example model photography.
Step 1:
Aim the meter with the dome towards the light source (under the chin of the model, or close to her body depending on where you want the measurement to be accurate) and trigger the strobe.
Step 2:
Set the camera to the value the meter says.
Step 3:
There is no step 3….. now don’t tell me that was difficult 😀
Ahum Frank that’s REALLY it ?
Uhu, yes, sorry.
Now let’s look at some of the reasons why people find it hard to use a meter.
Option 1:
The don’t have a clue how their light works.
This is probably the biggest reason, if you set your light wrong and you meter on the face of the model while the hotspot is on her chest your image will look incorrect. However what people forget is that the exposure on the models face will be correct. Still often the meter is being blamed and people go back to the “when I can see it, I can correct it” method.
Solution 1:
Master your lights…. yeah I know sounds logical indeed but it’s the truth.
When you know how to set your lights and you know what happens when you change the lights metering it will be accurate. Let’s take for example a spot you aim at your model, with the meter you can set it 100% accurate without ever seeing the light. You use a so called “cross metering” (well actually I call it that). Meaning you first measure on the face of the model (aimed towards the light source) and let’s say that gives you a value of F8.0 you now know that if the chest meters F11 you’re wrong so you have to relocate your light, in other words, the face should be the highest value (UNLESS you want the “focus” on another part of the body of course). By metering in a cross (middle, left, right, up, down) you can actually visualize the circle of light, and also 100% accurately know where the light will loose too much power to render for example the dress.
WOW wait…. you know before shooting the light fall off ?
YES, but more later.
Option 2:
People don’t know how the meter is used.
Solution 2:
I could say RTFM but I won’t, because it’s really just very simple.
I advise people to set the meter on a measurement of 1/10th stop.
This means that the meter will meter the light and give you a value of a FULL F-stop and something.
The full F-stops are :
2.8 – 4 – 5.6 – 8 – 11 – 16 – 22 – 32
The numbers behind the full stop are 1/10th stops.
Meaning for example that a reading of F8.3 means you have to shoot on F8 and add one click on the camera (because the cameras today are set in 1/3rd f-stops). It’s really that easy. Most people however will know on which F stop they want to shoot and adjust the lights for that, so let’s say you have a reading of F8.3 and you want to shoot on F8 this would mean you have to lower the strobe 3/10th of an F stop (on Elinchrom this means going 3 clicks down). And yes that’s actually all there is to know, there is no more voodoo or things to understand, it’s REALLY that simple…..
We can go deeper and speed up our setups however
Understanding LIGHT, and I really mean LIGHT and not the meter is of course essential to our photography, let’s be frank with each other a Photographer paints with light so he/she should actually really understand what’s going on. To my surprise however a lot of the photographers out there don’t really have a clue about light, it’s like a painter that doesn’t know anything about his paint, canvas or brushes and mixes water paint with oil based paints.
A few lines above I said you could know the light fall off by using the meter.
This is not a voodoo quality of the meter however. We know that our cameras have a limited dynamic range, and we can test that. However first we have to know one thing about our basis, and that is :
18% gray
Most of our calculations are based on 18% gray. We also call this middle gray, or in Photoshop 128.128.128 (but that’s not important now). We also know that one stop of light is double the amount of light (or half). This would give is very quickly the following dynamic range…..
black is app 4.5 stops lower
1.1% gray is four stops lower
2.2% gray is three stops lower
4.5% gray is two stops lower
9% gray is one stop lower
18% gray is middle gray
36% gray is one stop higher
72% gray is two stops higher
white is app 2.3 stops higher
This very simple theory gives you enormous speed when setting up light and using a meter, and DO remember this is theory about light and in fact has NOTHING to do with the meter, the meter is just the tool to METER the theory.
Let’s say we set our spot (strobe) on our model and the face is properly lit at F8, we now have to make sure that to keep detail in the dress/clothing we cannot drop more than let’s say 4 stops on the light, would we drop more we would loose detail, you will have to take into account what kind of clothing she is wearing of course, a white dress will keep detail longer than a black dress. But there is even a way to meter that very accurately.
Incident vs Reflective
Not all meters have this option, but if you buy a meter REALLY get one that does have a 1-2 degree spot option, you will love it.
When we normally meter our model we use the dome pointed towards the light source, we call this incident metering, in short it measures the light falling on our subject and gives you the value on which to set the camera to render your subject accurate (when metered correctly of course, meaning as close to the subject as possible).
With the spot metering (reflective) we get a different value from our meter.
We now aim at the subject (most of the time a background) and the meter gives us the same kind of value, let’s say F8. However when we would set the camera for this value and we would shoot our background it would not be rendered correctly, but it would be rendered 18% gray. Now this is an incredibly powerful tool when you understand how to use this.
When you look at the schedule above you can see that if we would add 2.3 stops to 18% we would render something pure white, but when we decrease the power by 4.5 stops (or more) we will render that subject totally black…. you feel the powerrrrrrr ?
With this method you can set your backgrounds in seconds (yes you read that correctly literally seconds), you will NEVER EVER blow out details in the skin or hair from your models again when using white backgrounds, you will also never find that your background is not 100% black and you need to photoshop it black (which can make ugly marks and visible retouching)
So when a model meters F11 when using the dome (incident)
Your background should read F22.3 to render it white (although in all honestly I always add at least 1/3rd stop to make sure you don’t see wrinkles and light fall off), or below F2.0 .5 to render it 100% black. And yes it’s really that easy.
Now we also are at that point why some people find the use of a meter difficult and decide to do it by eye or using the back of the camera (which is a HUGE mistake), this all sounds very technical and for some people it’s too much to remember at once or to understand when reading it quickly, however one should realize that only the step 1 and 2 at the very top (remember those ?) are the use of the light meter in every day use…. everything that follows after that is understanding LIGHT and NOT the meter…. however when you understand light you can use the the meter to bring this into work.
Frank let’s be honest, isn’t it just easier to look at the screen ?
Trust me I’m always honest about these things and I say “NO” really in capitals.
First off all the back of the camera is useless, what you see is based on a JPEG thumbnail which use settings in the camera, your RAW however doesn’t, so the display never shows you how the final result will be.
But even when shooting tethered it’s not 100% accurate, especially laptop screens and most LCDs are very prone to the viewing angle, just for fun project a very dark image and move your head to the left and right and top and bottom, on most screens you will see a difference in the brightness of the blacks, seeing details that are not seen when looked at the screen from the proper angle. Also remember that although the fill slider is a very powerful tool, you are in fact also introducing artifacts like noise and sometimes even halo’s into your image, and that is never the idea of course.
However we could go on and on and on for ever, there are always people that will know a reason why not to use a meter, so I will say it very short and hopefully wake some people up…. why spend a minute too long in Photoshop on EVERY image and run the risk of loosing shots or detail while with a meter you can within seconds see what’s going on and know when to add or subtract light ? I really don’t see the argument 🙂 but that could be me. When you use a meter it will give you a number, dial the number in your camera and you’re spot on…… learn a bit more about light and you will learn how to quickly measure for absolute black and white and everything in between…. and yes I REALLY setup up a 100% lit white background in seconds without blowing detail, and I can do it with any background (as long as you give me enough power of course). But the real kicker…. I can also do it outside when I don’t have the aid of modeling lights etc.
Questions
Of course you are free to ask them here, but here are already a few I know will come:
I don’t have a spot/reflective meter how to do the white background ?
Very easy, you have to make sure it’s a white background.
Go to the background, aim towards the light source and if the model reads F8 make sure the background is on F8.3, in fact in a perfect world the background would need to be on F8 and it would be white (remember incident gives you the value to actually render the correct brightness), but in reality you need to add just a little bit more because there is no perfect background, there is always some light fall off, some wrinkles etc.
Also sometimes you DO have a reflective meter but you just don’t know it, read your manual and look for reflective, in some meters you can slide away the dome and use it as reflective.
My camera is that a reflective meter ?
Yes, you are understanding it I think.
Remember that when you shoot snow it always turns out too dark, or when you shoot a nice skyline it’s always too bright ?
That’s were a reflective meter goes “wrong” but now that you understand how light works you can adjust this very easy, for snow just add xx stops, and for the skyline just lower xx stops… how much ? well sorry I can’t tell you that, I always tell my students (and I use this myself) to guess how much of the area is white or black and if a lot is black or white go closer to the 2.5 over (white) and 4.5 lower (black), but if there are a lot of lights in the skyline or a blue sky above the snow go a bit lower/higher. And yes if you use a meter with spot you could meter this very accurate, and yes you can use your camera for this, although it’s a bit of a hassle.
Set the camera to spot metering and frame as much as possible of what should be black or white in the center and meter the light, now press the * (exposure lock) for snow add let’s say 2 stops and for the skyline let’s take away around 4 stops (which would mean going to manual because most cameras don’t go that low), now frame the shot and use the exposure compensation for 2 and -4 (manual) and shoot, it should be pretty good.
I’m always told to meter towards the camera
I know, but trust me… that’s wrong.
When you meter towards the camera you’re metering light that comes from the camera… and although some light setups work great that way, most don’t especially in todays fashion work. You can do the test very quickly yourself. Setup your light straight above the camera on let’s say 2 mtrs, now meter towards the camera and it should be perfect, however now start moving the light more and more to the sides (keep exactly the same distance), when you meter towards the camera the value will go down, however when you meter towards the light it will stay constant, and that’s correct because the inverse square law dictates that light at the same distance will stay the same in value, and also when you shoot your model you will see that metering towards the light source is the only right way.
I hope that with this “small” blog post I have explained some things about the proper use of a meter and triggered you to dive into it and maybe buy your first meter ? or start using the one you have.
Outside use of the meter
This can be tricky.
You always have to remember that the meter will meter both ambient and strobe.
Normally this is shown in a percentage, what you have to realize is that to make a proper exposure from what you have in mind you can’t always trust that percentage or even the reading the meter will give you. For example if there is a lot of light and the strobe is way underpowered the meter will not give you the correct reading (ambient light wins), so take note of that. Also remember that it’s very important which way you point the meter, if you meter straight into the sun the percentage will be different than when you have the sun in the back. So when you want to create let’s say a day to night image from different angles and you only concentrate on let’s say 90% strobes you will get widely different results when you meter in a setup that faces the sun or where you meter with the sun highlighting (accenting) your model. What you can do in these cases is use the spot metering function and meter the sky and take the same difference in stops as you did in the shot before.
When outside and metering ambient only also take note that in this case you DON’T have to always point towards the light source, in this case the sun. Let’s say we are highlighting a model with the sun hitting her from behind and we want a proper exposure on her face, some people will now point the meter towards the sun (metering the only light source) and make an exposure for that, this however will not give you what you want. In this case it’s better to point the meter towards the camera and meter the ambient light (day light is everywhere) and set the camera for that specific exposure. It might sound weird because in the studio and with strobes I tell you to NOT do that, however when you look at the way light behaves outside it’s actually very easy to understand.
Outside light is coming from everywhere and most of the time in exact the same values, so it makes perfect sense to meter towards the camera, however…. not always. When you are using for example reflectors from the side I would highly recommend to point towards the reflectors IF they give you more light than the available light, UNLESS you want to use the reflectors to be used as accent lights and they are supposed to be higher than the main light.
Yeah I know it sounds confusing, but in reality it really isn’t.
You always (and I mean always) have to focus on which side of the light you want to be accurate, if you want the face of the model to be correct straight on, meter (outside) towards the camera because the light is everywhere. If you are using a reflector to light the models face from the side and you want that side to be correct and the rest to be darker, metere towards the reflector. If you want the sun behind the model going through her hairs and concentrate on that meter towards the sun… if the model is blond or very light meter with a spot towards her hairs and make sure that you open up NOT MORE than 2.3 stops (above that the hairs will loose detail).
You can also use the spot meter for metering skies and shadows.
Meter the white fluffy clouds and make sure your shooting not more than 2.3 stops wider to keep detail in the whites, same goes for the shadow areas, meter the shadows and make sure you are not more than 4.5 closed to keep details in the shadows. If you experience a scene that has more dynamic range you will have to : accept this, add extra light via a reflector or strobe, or shoot HDR.
As you can see the meter can be confusing if you look at everything I told up here, however I also hope that you will see through this and realize this is ALL just light behaviors and has in reality nothing to do with the meter itself, the meter itself is and will always be a “dumb” device that just gives you values that YOU have to understand and incorporate, so don’t be scared off by all this text and think you need to understand this to use a meter, you need to understand this to solve lighting problems, and to solve those you do NEED a meter because that will give you the values you are looking for.




Thanks for the explanation Frank. I used the light meter for the first time last week and it was pretty simple. Your explanation has helped clear quite a number of doubts I had. Just have to keep practicing.
Hi Frank,
Fantastic post here – this combined with your tutorials on Kelby Training is the best information on using the light meter I have seen anywhere either in print, video or the web. Well done.
I have a question regarding metering for a white or black background when you have a grey background as you do in your studio, if you have a reflective meter but not a reflective spot meter.
For example, if I have a grey background and I want it to be completely white, and I have something like a Sekonic L-308S, how do I go about it using its reflective meter functionality.
On this meter, you can flip the dome out of the way to turn it into a reflective meter, but it is not a spot meter.
Do you just walk behind the model, stand closer towards the background, point the reflective meter at it to measure, and then add the required amount of stops to bring it to white?
I guess I am a bit confused about the true advantage of a spot meter instead of something like a 30 degree reflective meter. Does the spot meter just allow the convenience of metering from the shooting position? Can the same result be achieved if one walks closer towards the background? How close?
Thanks a lot for the information, and keep up the brilliant blog. I read every post 🙂
Thanks very much, I put a lot of time in the blog so it’s nice to see people really enjoy it 😀
Measuring with your meter can be done, but make sure that the whole sensor is covered with the background, so indeed stand closer.
Frank, great post and looking forward to picking up a light meter as I’m hopeful it will help me in my beginning stages of strobe lighting.
Not to promote another person on your blog but I watched Introduction to Studio lighting by Joey Quintero (http://www.youtube.com/watch?v=-ibFanS5GC4&feature=youtu.be) yesterday he also mentions a lot about light meter and has good visuals on demonstrating the use of the meter.
Needless to say your blog and Joey have me convinced I need a light meter.
In Joeys video he suggests the Sekonic 308s which is arounf $250 but I see you point out flaws with the meter software and the company, do you recommend another light meter for cheaper or similiar price.
Looking forward to doing accurate light ratios when using a two light setup such as setting model at F11 and white seamless at F16
Hi,
With the 308s you can’t use the software, it’s only for the 758.
I would advise a meter with a spot attachment, so the 358 or 558 and 758 those are the best in the range.
The spot is very handy for measuring reflective on backgrounds.
Thanks Frank. More for me to research as I do not know the difference between normal metering and spot metering.
The price between the 308s as opposed to even the 358 is big, in that I understand the 358 does not come with the spot attachment and will have to drop more$$ on the attachment.
being new to metering and just trying to understand your #1 and #2 steps listed in this blog post, it’s hard to know if having spot metering is so important to me and worth the extra cost.
thoughts? Again, your input through your blog and replying to my question is greatly appreciated!
Spot metering can be a very handy tool when determining if a scene has deep black with detail or blacks that are blocked (same for whites), it’s also very quick to determine the amount of stops you need to add/take away to/from a background to make it 100% white or 100% black.
Current, as I am learning, I use Nikon speed lights using an SU-800 as a commander. I am considering incorporating pocket wizard triggers and thinking ahead to studio strobes. The SU-800 allows adjustment in manual mode in full stop increments (1,1/2,1/4,1/8,1/16), and in iTTL mode in 1/3rd stop increments. You recommend to adjust in 10th stop increments va skyport which makes perfect sense to me. What what be a good interim set to use to control the speed lights with an eye toward studio strobes? I’d like to be able to control the output in the scene without lugging the camera as you do with the extra sky port. Is there a similar system with speed lights?
Actually also for small flash my meter is set to 1/10th increments, it’s just a very easy way to get there if you know what i mean.
Hey Frank, quicky comment on the ‘Measure towards camera’ issue. Yes, we are in agreement… but that said, the dome will meter correctly in a 120º arc around where the dome is facing. So any light in that field will meter correctly. Of course for repeatable results, it’s best to meter to the light 😉
Yes and no.
When you use the more “focused” light sources like grids etc. I found that the angle is greatly diminished to be accurate, that’s why I don’t tell people any degrees but just teach them to ALWAYS measure towards the light, because that’s always correct 😀
But you are right.
Great write up Frank. The only thing missing is a paragraph on using an incident meter outdoors with natural daylight. It requires a slightly different approach in my experience because you can’t just point the meter up in the general direction of the sun or even the sky, particularly when shooting in open shade.
adding it now
Interesting post. What about if you are shooting someone and your only light source is natural daylight via a window and they are parallel to the window/wall and facing the camera (so the light is falling mainly across one side of their face? Would you still meter towards the light in that case or in this instance towards the camera?
In that case I would measure towards the window because that is now the light source. Just like a big soft box.
Thanks Frank. I guess what confuses me is if you watch any of the recent videos on Sekonic’s website they always seem to say point the meter at the camera, but I’m going with your way going forward. Thanks for the reply.
Sometimes I’m really at a loss with Sekonic to be honest. I do promote the use of the meters and I do use a Sekonic but I have no connection what so ever with them, actually I mailed them a few times pointing out problems with their software and indeed also with some instructional videos and never got a response.
I think it’s wrong to confuse people this way as a company that sells the gear, there’s already so much confusion and let’s be honest when you simply test it, it’s 100% clear one should measure towards the light (as explained in this blog post).
But more serious is that their software is wrong, when you calibrate with their software the end result is for example not fitting for my workflow, and I know how to solve this but most people won’t, and I got a lot of mails from people using their software only to find out that the meter underexposes by 1/3rd stop.
But that solved itself because since Snow Leopard their software doesn’t run anymore…..
And to add insult to the injury, their calibrating chart is more than $100.00….. 🙁
Frank, thank you very much for posting this. It was great to see you on stage and talk about why it is important to use a light meter and NOT simply use you camera 😉
Since seeing you in action, I’ve ordered my light meter! It makes perfect sense to have one and why to USE IT!
Now, if I can only get your in-depth feedback to the use of The Colour Checker… Maybe another post on this 😉
Best
Craig
What do you want to know about it.
Great in-depth read. I received my first light meter about three weeks ago and used it on a shoot…and I asked myself, “why didn’t I get this before?” 🙂
cool
Hey, nice post as always! The towards light/towards camera discussion seems a bit confusing to many. could I say that with a single light source I measure towards the light and with more than one light source I measure towards the camera the catch “the average” of all light sources (still measuring towards each light with dome down to get the ratio between the lights).
Would that be a way you agree on?
depends on the location of the lights, what you are doing to measure that is not aiming towards the camera, but trying to capture the both lights equal, this works when they are within a certain area (field of view for the meter) but it’s not something that would work with for example two lights placed to the side of the model.
Thanks for the great post!!! I like your videos on the light meter in Kelby Training. I am thinking of getting one soon since I’m not really contented the way I’m using my Ranger in which I always have to guess the power level of the lights. It’s also hard to tell the quality of lighting by just looking at the camera screen specially under the bright daylight so I think a light meter can gelp me a lot.
Light meters rock for that kind of work.
I can always stun a customer when I predict what the outcome of the shot will be, and he/she looks at me like “yeah sure” and than they see the image appear and it’s exactly what I said 😀
Thanks to the light meter that works every time.
Hi Frank. Great post, as usual. When I’m working with off-camera TTL flashes/speedlights (Nikon) and shooting in Aperture Priority mode, how can I still use the light meter to help me nail down the right starting point and avoid wasting a lot of shots and time?
Switch to full manual mode.
With AV things keep changing and there is no light meter that will give you a good starting point with AV because the meter in the camera will change it every exposure.
Go to full manual and you will have constant quality.
Hi Frank,
Great stuff! I really enjoyed your involvement at the seminar in Amsterdam.
Thanks for the insight!
Regards from Brussels
Kamyar
Thanks Kamyar
LOVE the shot of you looking at the meter 🙂
Yeah that was fun 😀
Good post. Why waste time after the picture is done when you can correct it all right from the start? You are so right.
Couldn’t agree more with the whole post, spot on!
Just a quick note!
Here is an everyday situation. I am out with my model and I’d like to use natural light without any flash or reflector. So, the main light is Sun and it is falling on my model’s face. If I want to get correct exposure off my model’s face, I would hold the meter under my model’s chin in 45 degree toward the ground pointing the white dome toward Sun in incident mode. For instance, meter says, F8, 1/125th, ISO 100. I set the readings on my camera and shoot!
Now, I don’t understand why some photographers suggests we need to add like +1.5 stop if model’s got a light skin tone and -1.0 when she/her has got a dark skin when we are shooting outdoor with natural light! Do you believe so? Do we nee to do so if we are using spot metering rather than incident metering?
One of his posts, Jonathan Canlas mentioned he does not believe that one should open up exposure for light skin tones or reduce it for dark skin tones! We measure the amount of light falling on the subject so no matter what skin tones she/he may have!
What do you think Frank?
Thanks,
It’s like the white backgrounds, I’ve seen people measuring that incident and still adding 2.5 stops, while that’s for reflective. The knowledge about using the light meter the proper is way has been so bad for some time that people just imagine something that is originally meant different.
With the skin it COULD be correct if you’re using a reflective measurement, for example take a spot measurement in the camera and change the exposure compensation. HOWEVER when you’re using incident metering on a subject one should not add compensation, unless you want a special effect.
In other words, someone with pale skin should stay pale, someone with dark skin should stay dark.
Spot on! That’s exactly what I think. Thanks man,
Thanks Frank. Great info for those of us moving up or needing a refresher course.
Just stumbled on this great article. Some big shots here proclaim they never use a light-meter and just nail the shot. I think it is just bragging. I always use my light-meter so I know what the ratio’s are to get a white background on white seamless for instance (I always overexpose the background to do that).
Good explanation, I could not describe it any better.
It’s bragging or simply not knowing.
Maybe more the latter 😀
I think is the about the 4th time I’ve read something by you regarding the light meter…and I think I’ve finally gotten it, Yay! But certainly you didn’t cart one along to the zoo the other day,or did you? Or did you just set your camera to spot meter and use that?
Oh trust me, in the zoo or on the street ?
I just use AV mode and use EV when needed.
Ok, ik ben om !
This is a masterpiece. A “MUST READ”.
Hi Frank,
You write
BLACK is app 4.5 stops lower
1.1% gray is four stops lower
2.2% gray is three stops lower
4.5% gray is two stops lower
9% gray is one stop lower
18% GRAY is middle gray
36% gray is one stop higher
72% gray is two stops higher
WHITE is app 2.3 stops higher
Any difference in latitude (white, black) between your Aptus-II and 5DII?
Much thanks,Anders
Yes there is, I always try to mention that.
You should always test for your gear.
This is a THEORETICAL approach, for example for my Leaf I use 3 stops to get pure white, at 2.3 it is white only in the area I metered.
For the MKIII I need even more, still investigating that one.
The funny thing is that I started by using a Gossen Luna 6 Pro, many many years ago. I still have in my bag a Sekonic Studio DeluxeII L-398M with all of the Slide Plates. It’s old but it is still my go to piece of equipment when I have a model to work with. It never fails, though I know some day the little sensor will die…and I will just buy a new one (if I can afford it!) Everyone needs a light meter weather they know it or not, I have been using them for 40 years, through film and digital.
Dear Frank,
This blog on using a light meter has served its purpose in two ways: you have convinced me to consistently use my meter, (Sekonic L358), and you have helped me to better understand how a meter will allow me to comprehend the nature of light itself.
I am now also going to heed your advice about calibration.
Thank you very much, indeed, for sharing your knowledge.
Thanks, glad it helped you.
Hi Frank,
First of all, i admire your work and since i am new to photography i try to read and try out as much as possible what you post online.
I am convinced about the use of the light meter but coming across this youtube clip i have some doubts. I would appreciate it very much if you could comment on it…
http://m.youtube.com/watch?feature=related&v=pPzMMn_AFQ4
Thanks a lot in advanced
Don’t know what to say….
Some people also :
Don’t wear seat belts
Jump out of planes without a parachute
Bump their head against the wall because it feels so good when they stop
etc.
Using a lightmeter shouldn’t be an issue, it’s just the only way to work accurate and fast and repeat your results.
EVERYONE that says otherwise doesn’t understand the meter, in this video for example there are several things that just aren’t true about the meter and how it works.
HOWEVER, in the end it all boils down to getting the result, if you like to spend a longer time because you don’t want to use a meter but still get the shot… well it’s a choice.
Thanks Frank,
the choice is made and i ordered the meter ;).
——
Kom je trouwens nog een keer een workshop houden in Zurich? Daar zullen vast en zeker veel mensen geinteresseerd in zijn. Ik in ieder geval!
Groeten,
Zef
Als er genoeg deelnemers zijn dan is het altijd mogelijk.
Hi Frank,
great website, great tutorials. Opened my eyes in a lot of different ways.
But I still have a question (and I hope you read this old thread). At one point in your text above you say:
“So when a model meters F11 when using the dome (incident)
Your background should read F22.3 to render it white (although in all
honestly I always add at least 1/3rd stop to make sure you don’t see
wrinkles and light fall off), or below F2.0 .5 to render it 100% black.
And yes it’s really that easy.”
I just wanted to make sure that I understood it correctly:
1) you meter the model with the dome (incident) towards your main light source and you set THIS reading as a base exposure in your camera. So far so good.
2) THEN you meter the white or black background – depending on what your setup is.
-> the only thing that I don’t quite get is:
do you measure the white background with your spotmeter (and then you would get a 18% grey reading of your background) OR do you hold you dome close to the background and measure the light falling on the background ?
What I understand is that with a SPOT reading you would have to compensate the flashes for the white background to 2.3 stops higher than what you measured to get a pure white. And 4.5 stops lower for a black background to get a deep black ?!
And if you measured with the DOME directly at the background (paper) you could just set the flashes until you reach 2.3 stops above your mainlight.
Am I right or is my brain just making an error here ? It is spinning a little bit. 😉
Thanks in advance
MARK
Incident means : Meter and use that value to render correctly.
So if you would meter a white piece of paper you should NOT add more light (maybe 1/3rd stop to make sure), because it meters white right?
When you use a spot meter you will get a value for 18% gray and this is were you start using the calculations.