A pure white background and floor, plus accents on your model with just three umbrellas
A white background, floor, and accent on your model with just 3 umbrellas?
Seems impossible… it’s not
Shooting with a white background and floor is far from my favorite setup, but sometimes you have to 😀
When I started with photography the white background was hot. And used all the time (I was always more of a light grey fan). So of course I had to learn how to shoot it.
The first problem I ran into was getting the background completely white.
This is easily solved by moving the model forward and just blasting the background. But when cameras became better and the headroom larger it became more and more problematic due the the enormous amount of light reflecting back from the background. So how to get that pure white background?
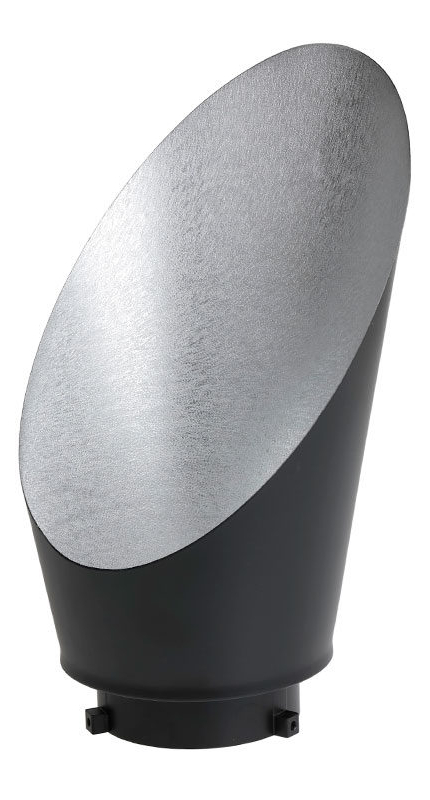
Special modifiers to get a white background
The first thing I tried was of course lighting the background with open reflectors, or softboxes. And although it worked ok it never was 100%.
So enter the special background reflectors.
The idea behind these is that they “focus” the light on the background and spread it out evenly.
By the way, it’s more easier if you have two of those.
And although it worked a lot better than a standard reflector it’s far from perfect.
The solution(s). How I made a white background and floor
Floor
So let’s not make the blog post too long and immediately jump to the solution.
Let’s start with the floor.
Without a doubt, this one was the most difficult to crack.
You can use extra strobes on the floor. But that also meant the light fall off on the model would look unnatural with loads of light on the feet.
You can use Photoshop of course. But that would mean the model just floats in the air, so you can start adding shadows again. Long story short this is not doable when you need to deliver 50 images to a client. You simply can’t edit every single image in detail unless you have a very large budget.
The solution is actually super simple and gives an awesome effect.
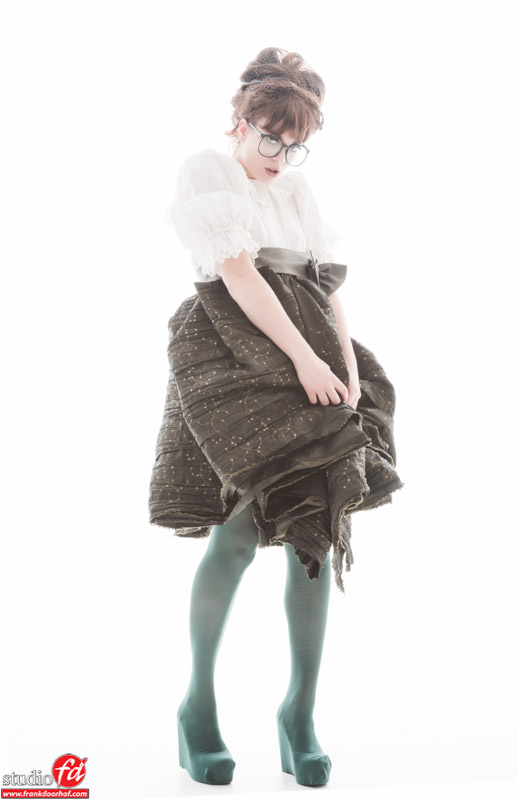
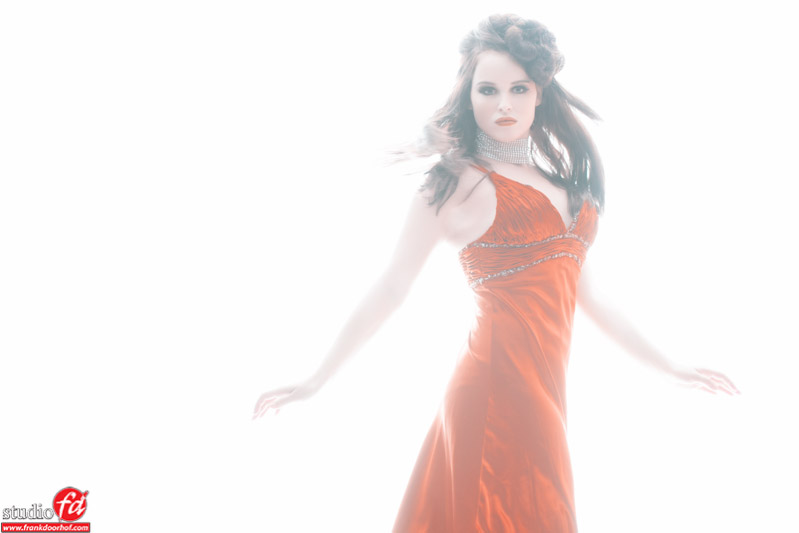
Just put some transparent plexiglass on the floor.
The plexiglass will reflect the light and give you an instant perfect white floor and as a bonus a great reflection.
The added bonus when using transparent plexiglass is that you can also use it on other color backgrounds and get some stunning reflection effects. But for today let’s keep it on white.
Now that we have the floor covered (pun intended) we have the background to light.
Background
For this, the solution is actually much simpler and cheaper than you might think.
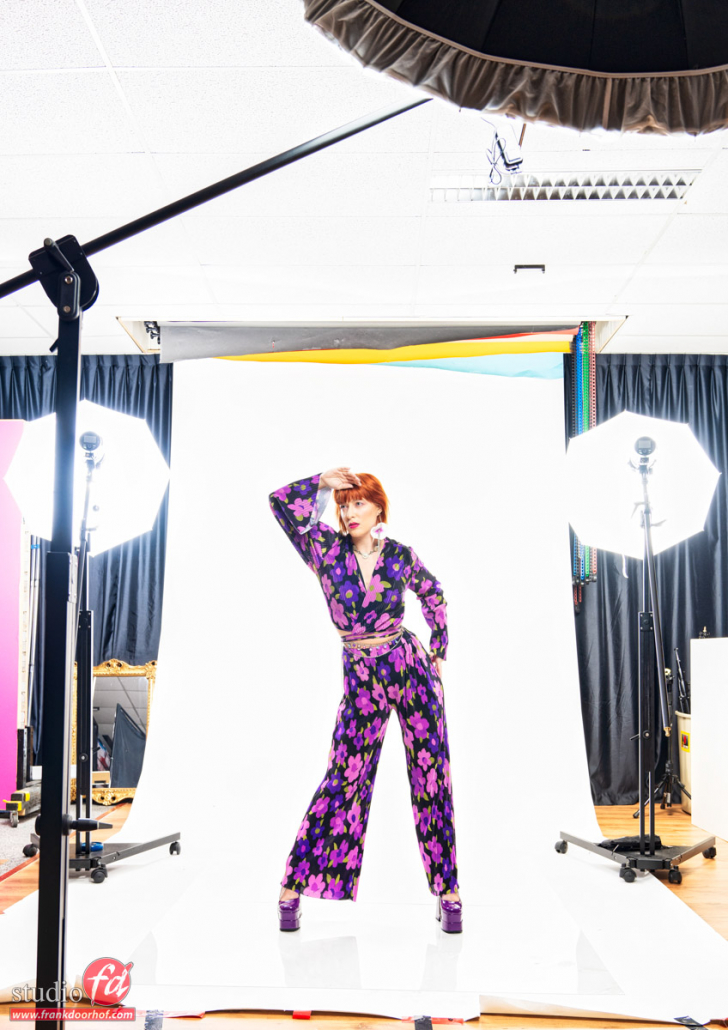
Here you can see the setup we used for the shots with Claudia from the previous blog post.
Umbrellas for a white background and floor
As you can see I’m using two white Rogue umbrellas, on our Geekoto GT400 strobes, at the back. And these are more important than you might think at first sight.
The placement of those two is vital for the end result and also gives you a lot of flexibility.
The first task for the umbrellas in the back is of course lighting the background and floor. So they are placed behind the model aimed at the background with the shoot-through part. However, a white umbrella also reflects so we have a light source that’s pretty unique. It lights both what’s in front but also what’s in the back, and that’s actually the whole secret or trick in this setup.
By choosing the right angle of the back umbrellas it’s possible to light both the background and also give a very accent light on the model.
In loads of setups, you can see 2 strobes on the background and 2 strobes as accent plus your mainlight which means you need 5 strobes for one setup.
By using umbrellas you can bring this back to just 3 strobes, and also the costs are considerably lower than using background reflectors and for example striplights as accents.
For example, we sell the Rogue fiberglass umbrellas in a nice travel kit edition with a black umbrella plus sleeve (here used as main light) and one white umbrella in a travel kit for € 116,00 the extra white umbrella retails for € 23,00
Now if you don’t like the accent lights you can always place two large flags between your model and the umbrellas and take away the accent lights.
And how about just 2 lights?
You might wonder, can we also do this (getting a white background and floor) with 2 strobes and 2 umbrellas?
That’s the nice thing about umbrellas.
The disadvantage is that the light spreads around very easily. But that’s also the advantage if you know how to control it 😀
Now when you use one umbrella on the back the accent light will of course just be on one side. But when you look at the end result it’s absolutely a setup that you can use.

Conclusion of white backgrounds
White backgrounds can always be tricky due to the amount of light that spreads everywhere.
But by using the right light modifiers and placing them correctly in the scene a lot can be done for a very low budget.
And let’s be honest. These images are straight out of the camera with just a little boost in contrast, as you can see the background is almost pure white and the only thing you have to take out are the seams of the plexiglass, which in most cases can be done in seconds.
So the next time you need a pure white background, why choose the expensive and difficult route?
Just use three or two umbrellas and some plexiglass and deliver images almost straight out of the camera.
check out the video about the Rogue Umbrella’s