Tag Archive for: video

Watch this before buying light shapers

Which lightshaper should I buy?

Probably one of the questions we hear every time someone visits our store or workshops.
So today in our digital classroom series a full 2 hour free tutorial discussion the Rogue Magnetic system and flash bender.
In my opinion this is one of the best kits to start out your studio or location setup, and if you already own strobes this is the perfect addition if you need a flexible and super creative solution to work fast and easy.

Of course I also share lighting tips and during the live shoot with our model Claudia you see the results coming in while I shoot them… so no hiding the bad ones 😀


The Photographing people conference

One of the most exciting events

If you’re into modelphotography, portraiture or any other event where you are confronted with photographing people, this is the conference for you.
KelbyOne is of course a name that guarantees the best instructors in the world and I’m excited to be part of their team.

For this conference I have a super creative class planned with motion and loads of special techniques.
And I’m 100% sure the other classes will keep you motivated and inspired for a very long time.
I can’t wait for the conference, and I hope to see you guys there (online).

Register via : The Photographing people conference
And you also support our work.

A room divider

A room divider is loads of fun

We all know that you can mount light shapers in front of your strobes to manipulate the light.
However, you can also use materials or objects placed between your subject and the light to create unique effects on the set or on your subject.

The key thing to remember is that the “sharpness” of the shadows is determined by the distance.
In this case, we use a room divider in our set to create some cool shadow effects on both our model and the background.

The key to a setup like this is, as mentioned, all in the distances. Begin by placing your light source as far away as possible and use a snoot with a grid or a reflector with a very tight and thick grid.

We want to ensure that the light is not spilling over but is focused on the room divider.

The “sharpness” of the shadows can be controlled by moving the room divider closer or further away from your subject. When you move the room divider closer to the light, the shadows will become softer and disappear a bit earlier on the background, moving the room divider closer to the model will result in sharper shadows that move further over the wall. As you can see, for this setup, I’m using the divider very close to the model.

Don’t stop me now….

“I’m having such a good time”…
This should always be your motto during a photoshoot.
Whenever you believe you’ve captured the perfect shot, don’t hesitate to experiment a bit further. In most cases, this can involve simply changing the angle or, as in the case of using a prop like our room divider, you can always find a different way to incorporate it into the composition. In this instance, the solution is to… well, let’s just say, choose a different angle.

See the whole class

Hopefully, you’re interested in learning how we shot, edited, and prepared this video. This is just one of the setups you’ll find in my brand-new class on KelbyOne. You can find the class here:

https://members.kelbyone.com/course/frank-doorhof-special-effects-simple-materials/

If you enjoyed this class, be sure to explore my other classes as well. Lighting setups are just one aspect of a photoshoot; it’s also about storytelling and creativity in lighting and color.

Just a torch some gels and cartboard

It can be easy

And it can be hard. It all depends on the gear you use.
How often did we hear that excuse when something didn’t work out?

A few years ago I did a workshop during Photoshop World where I started out with 3 strobes and “faked” that one by one the strobes failed and I eventually ended up with a torch that was on the stage, and finally asking people from the audience to use their phones to light my model.
The proof is in the pudding. In essence you can create great shots with almost everything, as long as it emits light is my motto.


In fact, sometimes limiting yourself pushes you to be more creative.
And what is more limiting than….. a standard torch.

A new KelbyOne class

I’ve been working with KelbyOne for quite some time now. In fact, I was their first European instructor, which naturally means that when they request a new video, I want to create something fresh and creative. This time, the class focuses on using household materials to capture stunning photographs.
You can find the class here

A torch

Besides using household items like rescue blankets and a room divider (among other things), I also challenged myself with lighting.
One set we decided to try would be to see what you can achieve with just a simple torch.
We all have one in our phones or a more powerful one.
For this set, I’m using a simple focusable torch.

If you’re using a torch for photography, make sure the batteries are fully charged and use a pretty powerful one in a dark room to avoid spill light.


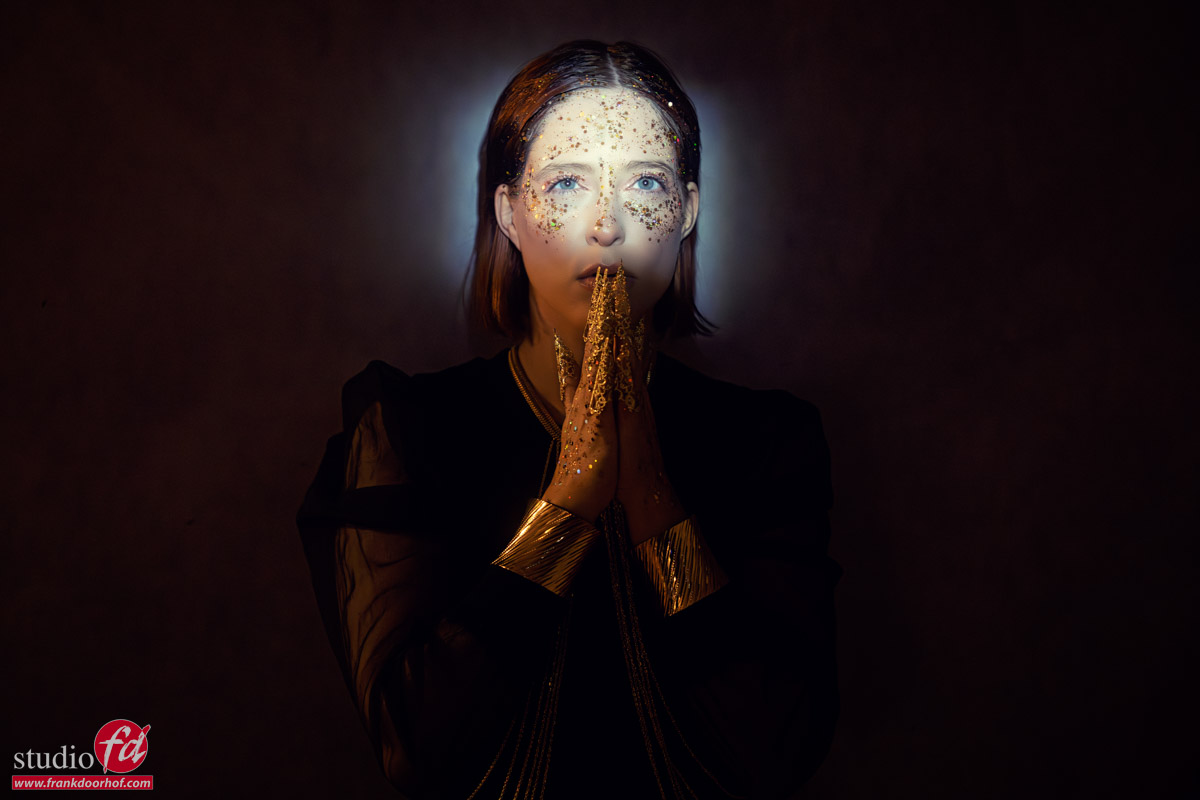
When we began with just the torch, the light was already ok, but I wanted to make it more focused.
However, when you can’t connect grids to a torch, you have to be creative.
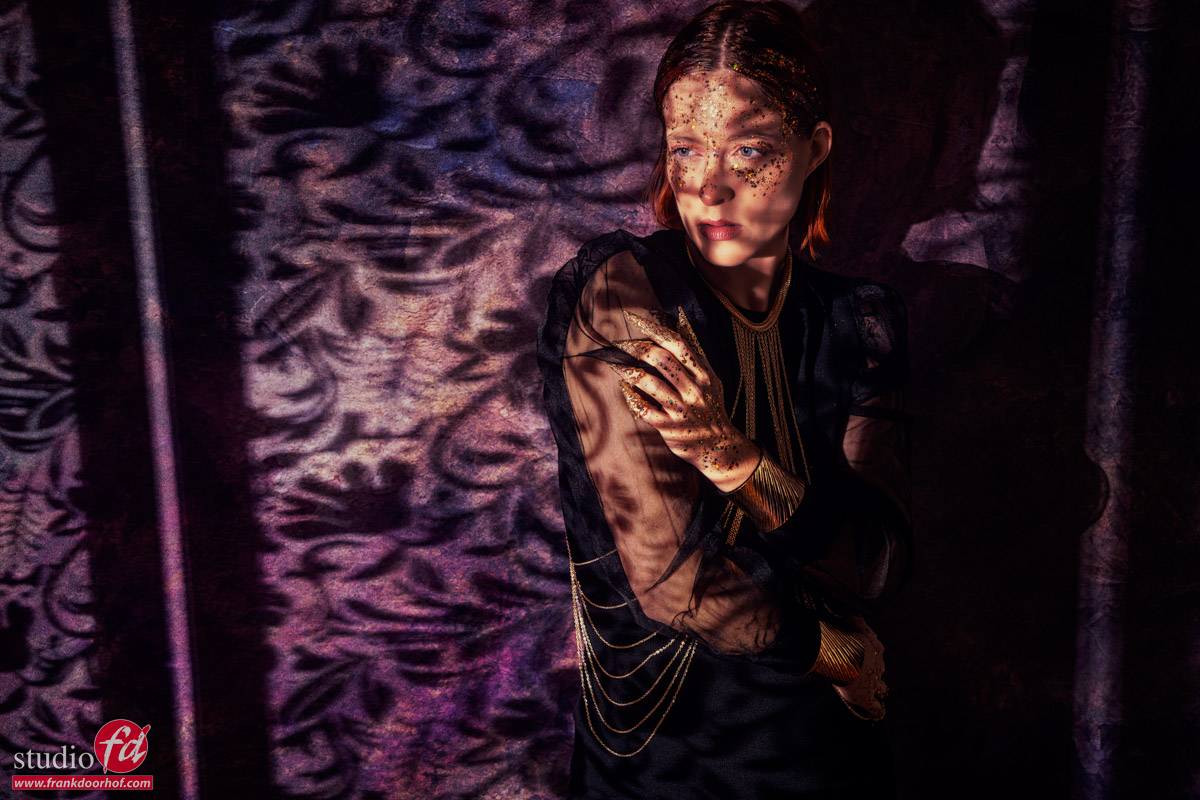
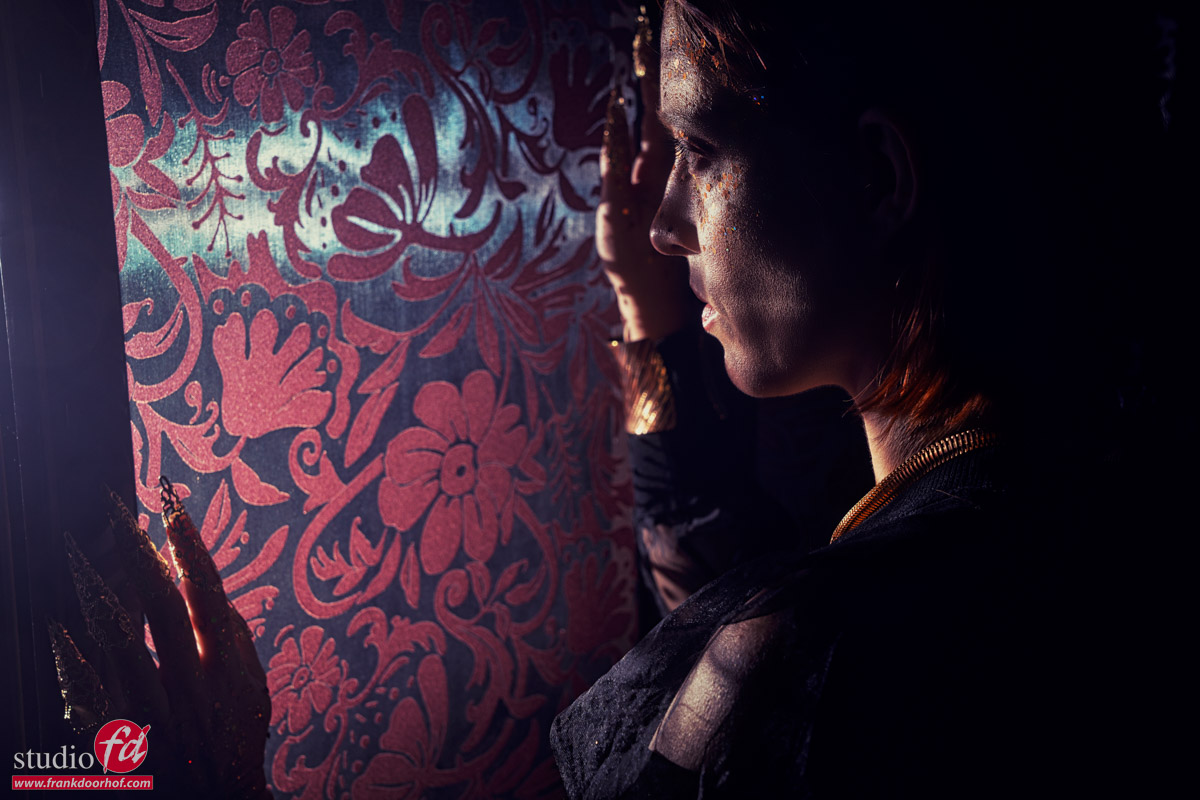
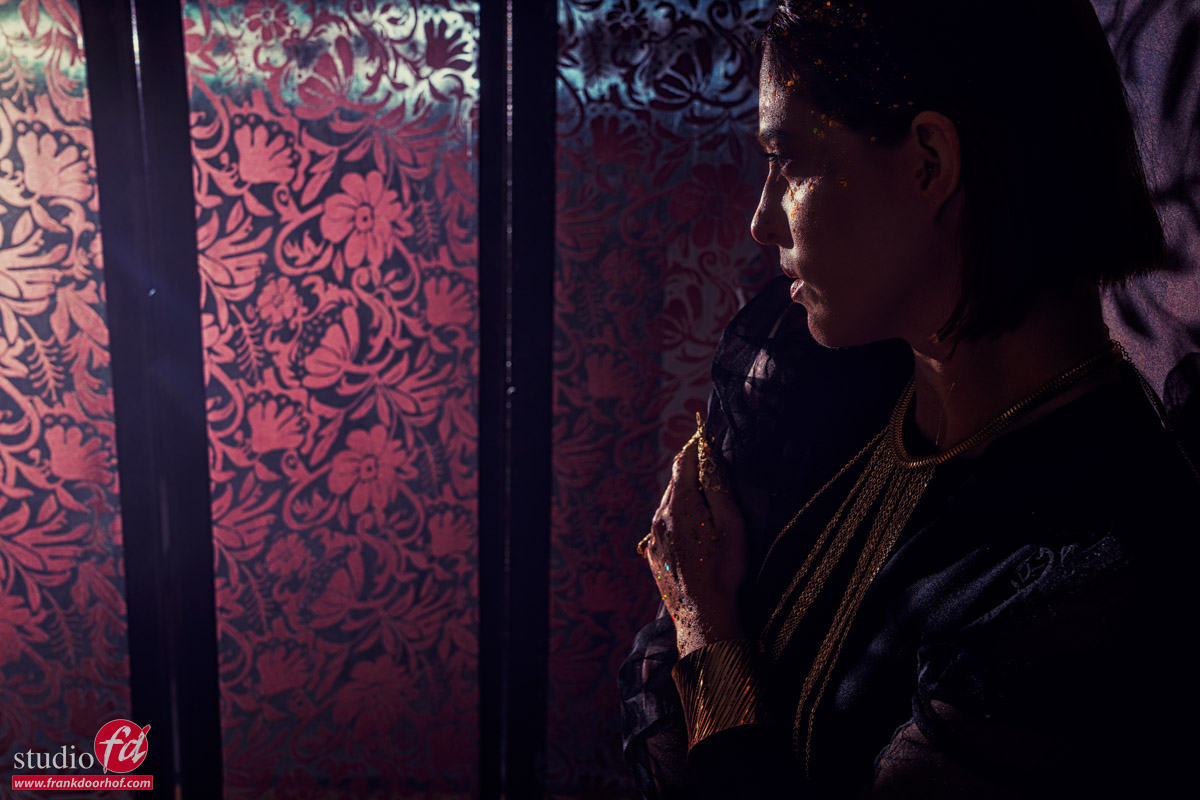
So, we used a piece of cardboard and cut out the pattern I wanted on our model.
We started with something like this (I did add some vignetting in Photoshop).


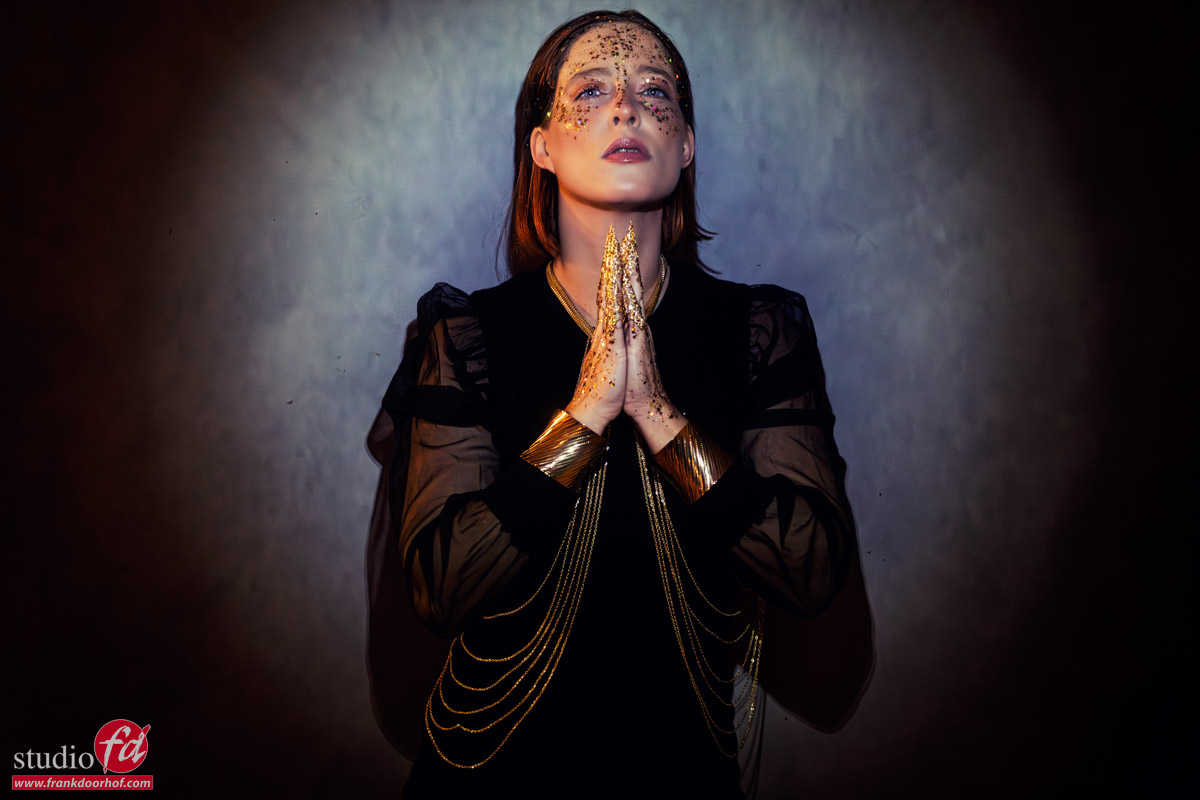
With the cardboard cutout we already get a lot more focus on our model.
I already love this look.
But we can always improve something, Right?
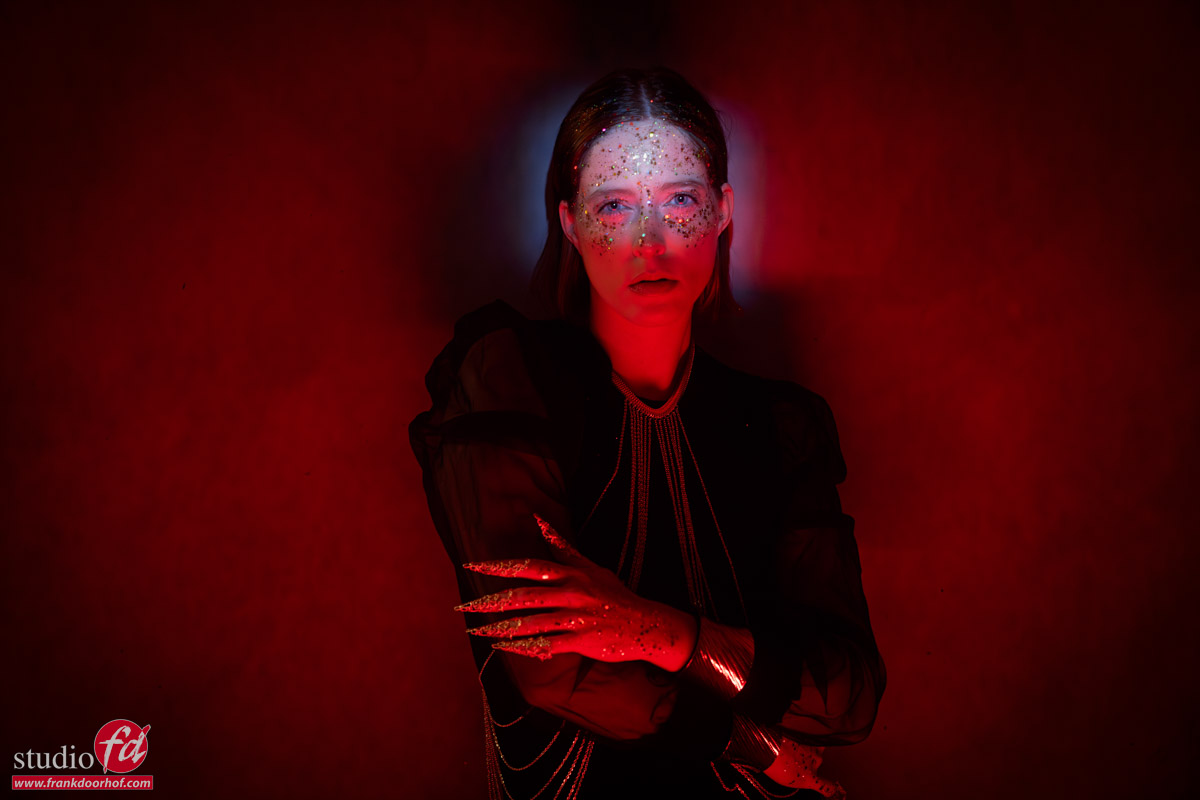
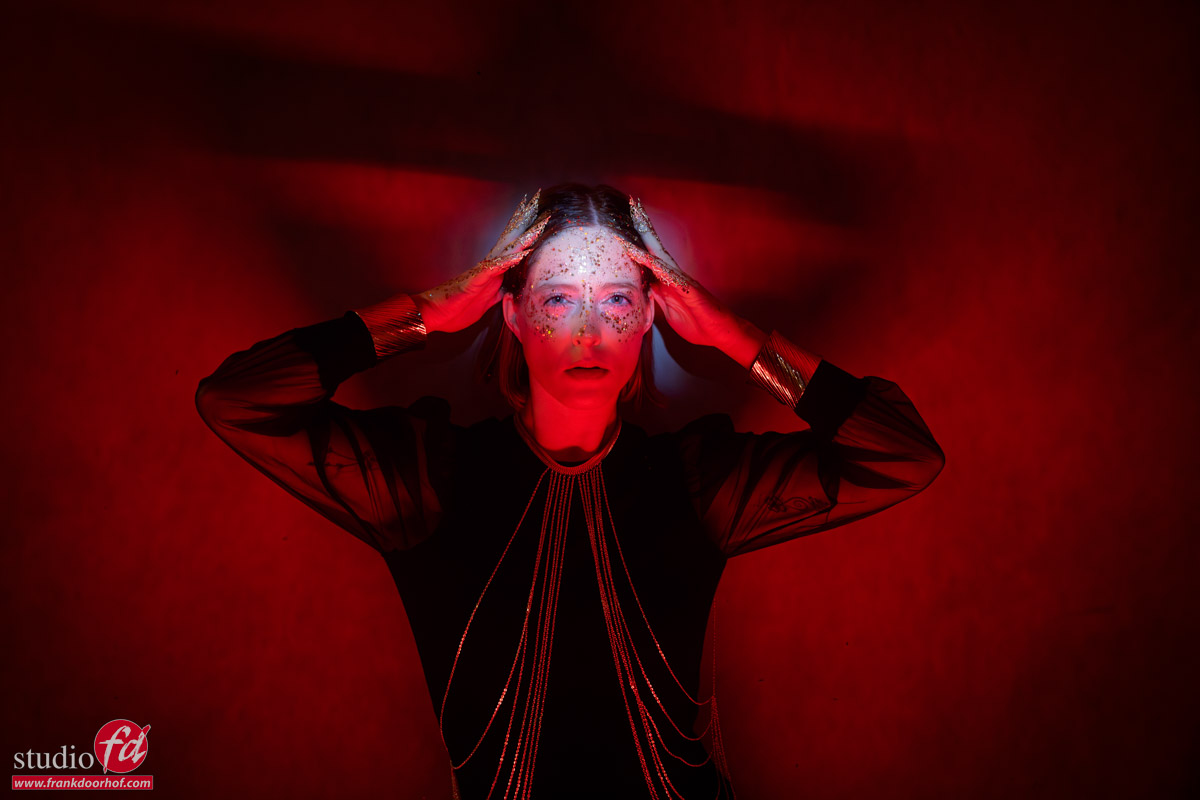
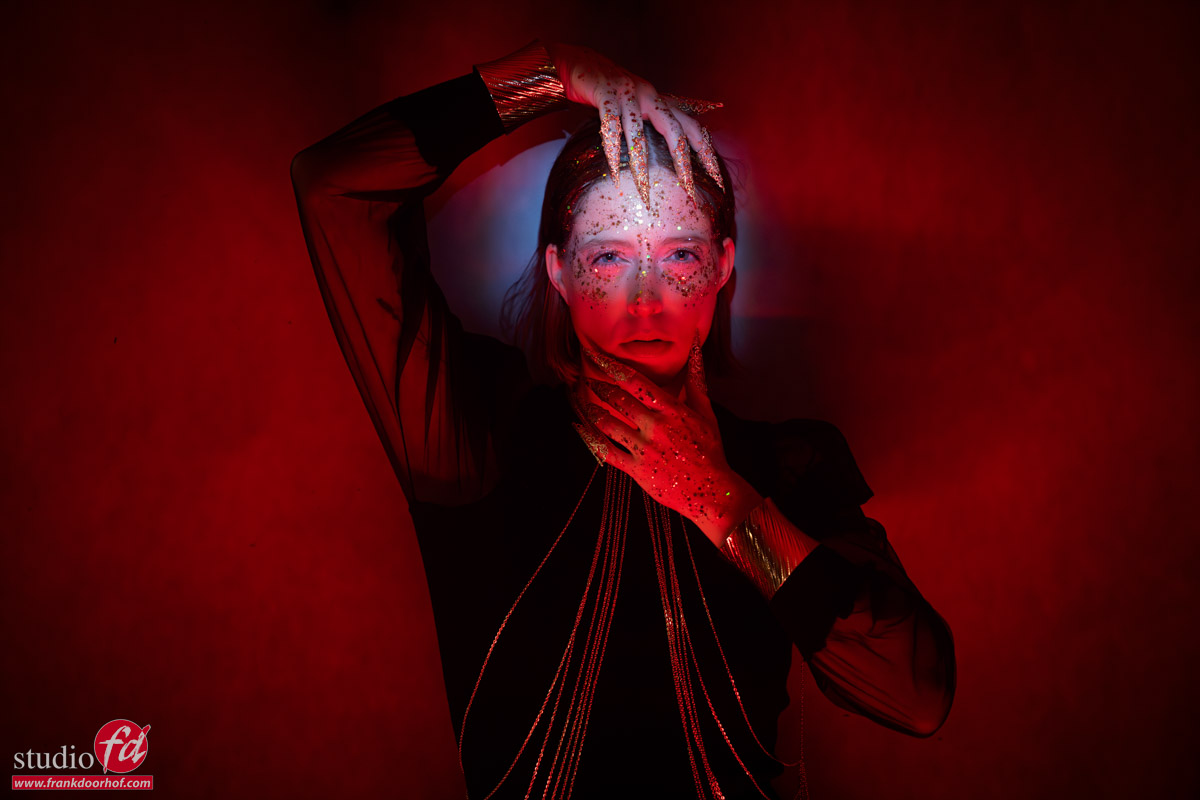
Add some color

Color evokes emotions, and I believe the color red would be an excellent choice for this shot.
As you can see, I’m still using the torch with the cardboard to illuminate the models’ faces, but I’m also employing a red-colored light source to enhance the shadows.
You can use a strobe with a red gel or, of course, a LED tube.

In my case, I primarily use Nanlite PavoTubes.
These lights can be remotely controlled and offer a wide range of colors and effects.

Now it was up to our model Claudia to create interesting shadows on the background with her poses, and of course she had to stay within the light.
Not an easy task, but she is a great model and I absolutely love these results.

See how we did it

We filmed the KelbyOne class with 3 different cameras to make sure you see the set from all angles, and of course you also see the images coming in during the shoot.
This is just one of the sets we did for the class, so if you want to be inspired and learn how to use simple materials and alternative light to create stunning images, make sure to check out my new KelbyOne class.