Tethering… what if all goes wrong…
We get a lot of questions about this so I thought it would be handy to do a small blogpost about it.
So you want to shoot tethered right?
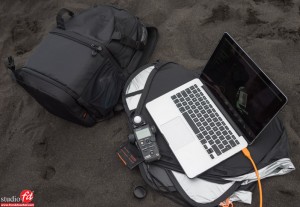
Well I don’t blame you, it’s the best thing ever, it’s fast, you can check your images, you can beam them to smart devices (or worldwide) etc. etc. the options are limitless at the moment and it keeps getting better. My personal favorite way to shoot tethered in the studio is by cable, and if you talk about tethering tools there is of course one brand that stands out… yep Tethertools 😀
But what if your brand new cable doesn’t work?
Most people buy an extension cable and a camera cable (and of course a jerkstopper, which is a must buy if you want to keep your port working), and in most cases it’s plug and play, and it should be that way, it’s not rocket science. But in some cases…. well it just doesn’t work, so here is a small list you can follow to find the problem.
1. Check your camera
Make sure your camera is on the right setting.
In most cameras you can set the USB protocol, some are called PC remote, some are called PC etc. but make sure it’s not on storage mode (if you don’t have that setting… it’s probably setup right).
2. Check your software
Believe it or not but if Lightroom 6 (cc) supports your camera, it doesn’t mean that Lightroom 4 also supports your camera.
Also, with for example Capture One, RAW support doesn’t mean Tethering support, so make sure you also check this.
You can check it very easily on the websites from the supplier of your software. We have best results for tethering with Capture One followed by Lightroom, both should work pretty flawless (although Lightroom sometimes looses connection, but a simple “stop tether” and “start tether” should solve that problem.
If your software is supporting your camera, make sure you are running the latest version of your software and OS.
3. Check your software 2
Some cameras will tether without any drivers from their manufacturer, but sometimes you need to install the drivers, just use the CD that was delivered with your camera and to make sure just install everything, and later start deleting stuff and see when tethering stops.
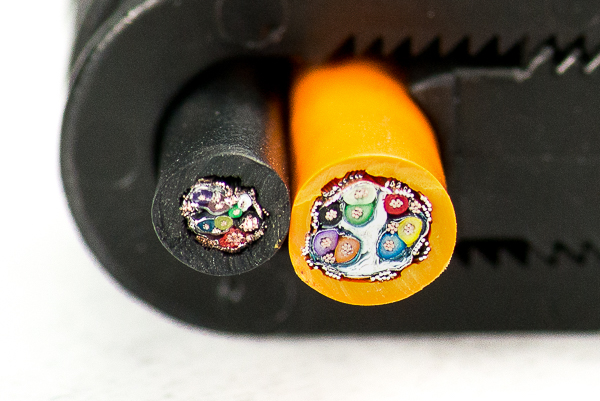
4. Check the cable
If it’s not the software the quickest test is to check the cable, just connect the supplied cable from the camera and see if that works, then start with the extension cable between the original cable and the PC/ Mac and see if that works, and then change the camera cable.
5. Switch USB ports
Believe it or not but not all USB ports are created equal, just switch the ports.
If you use a hub, make sure to first test a DIRECT connection to your PC/Mac.
6. Reset your PRAM/NVRAM or SCM on Mac.
On rare occasions the Macs can have a problem with USB (and other things), it’s rather easily solved, find online the term PRAM/NVRAM or SCM and reset and you’ll be set in seconds.
On most macs it’s as follows:
NVRAM (PRAM)
- Shut down your Mac.
- Locate the following keys on the keyboard: Command (⌘), Option, P, and R.
- Turn on your Mac.
- Press and hold the Command-Option-P-R keys immediately after you hear the startup sound.
- Hold these keys until the computer restarts and you hear the startup sound for a second time.
- Release the keys.
After resetting NVRAM, you may need to reconfigure settings for speaker volume, screen resolution, startup disk selection, and time zone information.
To reset the SMC:
- Shut down the computer.
- Plug in the MagSafe or USB-C power adapter to a power source and to your computer.
- On the built-in keyboard, press the (left side) Shift-Control-Option keys and the power button at the same time.
- Release all the keys and the power button at the same time.
- Press the power button to turn on the computer.
On MagSafe power adapters, the LED might change states or temporarily turn off when you reset the SMC.
To reset the SMC on Intel-based Mac Pro, iMac, and Mac mini computers, as well as Xserve:
- Shut down the computer.
- Unplug the power cord.
- Wait fifteen seconds.
- Attach the power cord.
- Wait five seconds, then press the power button to turn on the computer.
If nothing works…. it could very well be that you already damaged the port in your camera (it’s very easy to do).
You can check if you can put the camera on storage mode and if the camera can be seen by your computer, if that works at least the port works, now bring it to another computer and try the tethering there, as mentioned before it’s not rocket science and in 99.9% of the cases it should flawless and at once. If it doesn’t it’s often one of the above, if not… well it gets a lot more complicated because it could be something in your machine, but that’s way to diverse to discuss here. However in almost all cases it’s one of the above.
Now one more thing…
If you need reliable tethertools make sure to visit the site from Tethertools or the international site.
And if you are using USB3 and experience problems, or you simply want to cover more distance, check out their USB3 booster.

You must be logged in to post a comment.