You probably already read some things about it, but Elinchrom recently released their new Skyport and that introduces a whole new way of shooting images outside (and inside). In case you didn’t let’s quickly tell you “all about it”
Skyport
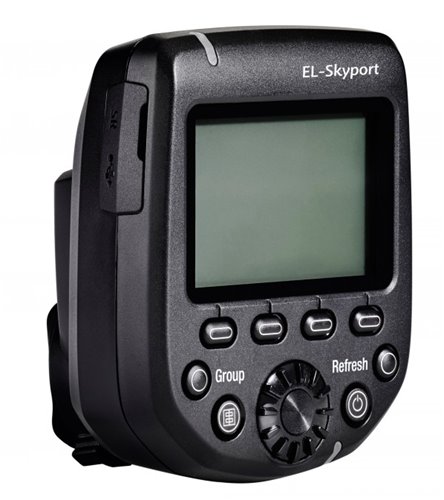
The skyport is the system for triggering Elinchrom strobes (and they also have an universal version of course), main advantage of the system is that you can also change the output of your strobes and turn on/off the modeling lights, use groups and channels etc. A pretty cool system in a remarkable small package. Well you can skip the small in the new incarnation of the skyport, you could say it’s matured now.

But as you can see it’s a good thing, because one of the first things you notice is the big LCD display, and that is awesome. You can now see which strobes are active, you can select the strobes and change settings, and of course you can still change the output of the strobes, switch between groups and much more.
In short the new system has the following new features.
1. Much stronger, so longer distances (something that was needed in my opinion)
2. ODS control, later more but very important for HS use
3. Focus assist beam (very handy in darker studios)
4. HS
5. USB for updates
6. Uses normal AA batteries (yeah)
But the biggest thing is of course: HS
What is this HS?
Well it’s actually quite easy to explain… it makes it possible to sync at higher shutter speeds.
Normally studio and location strobes (except small flash and some other brands) are limited to the so called X-sync which often means that you can shoot up to 1/125 or 1/160 without any problem but above that it’s hit and miss to let say 1/200 and after that you will start to see black bars (second shutter curtain).
Now when you’re used to this it’s not a real problem, but it does limit your creativity, you can’t fight the sun and shoot wide open, simply because the shutter speed would be way too high, you can of course use ND filters but then the camera has problems with focussing so perfect…. well far from.
The HS system from Elinchrom breaks this barrier and makes it possible (in certain configurations) to shoot all the way up to 1/8000 of a second. Which is pretty cool and something that was not possible yet on the Elinchrom system. They achieve this by very clever timing with the TL pre-flash and making sure everything is syncing as good as possible, and this way it “seems” like you have strobe power over the total range of shutter speed, and this is true but… there are some things you have to realize and that you probably don’t read in other reviews, so that’s why I wanted to give some attention to it.
What you need to know
In theory (and real life) the system works awesome, it doesn’t eat your battery (which a strobed system would do where the flash is repeated constantly, like speed lights) and the Quadra for example recycles very fast, just like you’re using it normally.
What happens is that the timing is so accurate that it seems the whole sensor is lit even with 1/8000 of second as shutter speed, but… this works only with SLOW strobes, for example the D-lite series (believe it or not) are perfect for this, but an ELC on the middle setting (clocking in at 1/5600 of a second) is not very good for this system (it actually cuts off at app 1/500 on a Canon 5Ds without fine tuning I have to add), but the BrX, D-Lite etc. all work surprisingly well, and this is very cool because this means you don’t need to buy new strobes. Then why did Elinchrom release new heads (the Quadra HS head for example), well that’s easy to explain, the HS head is a VERY slow head and this means it’s perfect to reach that 1/8000 of a second shutter speed without any problem. So in short, shorter duration strobe heads will not work that well, long duration heads will work perfectly.
The other thing you have to realize that (and it hurts to say this) you can forget about the light meter.
The reason for this is simple to explain but sometimes hard to understand (yeah it sounds funky I know).
To achieve the higher shutter speeds the camera cuts the strobe off earlier, with ODS you can tune this but, the effect is that the higher the shutter speed the LESS of the strobe duration is used.
If for example a strobe has F16 on 1/125 it’s not also F16 on 1/4000. In fact it could very well be F2.8 by that time. And no that’s not a bad thing, it’s simply how these systems work, and the same happens with speed lights, you loose light output the higher you set the shutter speed, ANY system on the market has this “problem”, but thanks to the digital polaroid on the back of the camera we can check.
We did some tests very quickly with the Elinchrom Quadra and the HS head in combination with a Canon 5Ds and it was easy to reach shutter speeds of 1/8000 f2.8 and get some stunning results that were not possible before during day time. It’s a bit getting used to for me to constantly check my digital polaroid, but within a few minutes it becomes second nature, and because the skyport is very easy to operate and give more and less light to the strobe it’s actually something you get used to very fast… and if you never used a meter before… you will probably don’t even notice this.
In practice
It’s incredibly handy to be able to control your DOF on location, but most of all to control the ambient with the shutter speed over a MUCH greater range than from 1/125 to the minimum you can hand held. You do (again) have to take notice that if you change the shutter speed to let in more ambient light you have to adjust the strobe, but already after one hour of use I found myself doing it almost automatically and nailing the exposure almost spot on every shot I took. And let’s be honest I rather be able to break the barrier of 1/125 and not being able to meter than to meter and be stuck on 1/125. For your creativity this is a HUGE step forward. Plus you can now do almost everything with just the Quadra, add a maxi light and you’re in lighting heaven so the say 😀
Canon and Nikon
At the moment the system only works on Canon and Nikon, Sony will follow soon (I hope very soon), you can of course use the new skyport already on Sony, Fuji, MF etc. but it will do actually everything EXCEPT the HS option.
One could say that Elinchrom is late in the game with their HS system, but I have to be honest the product I see now (and worked with) is superieur to what I’ve used before (note : I don’t really care for ETTL on these systems) and I rather wait a bit longer and have something that works like this than cut corners.
I’m very excited about the system and can’t wait for the Sony version.
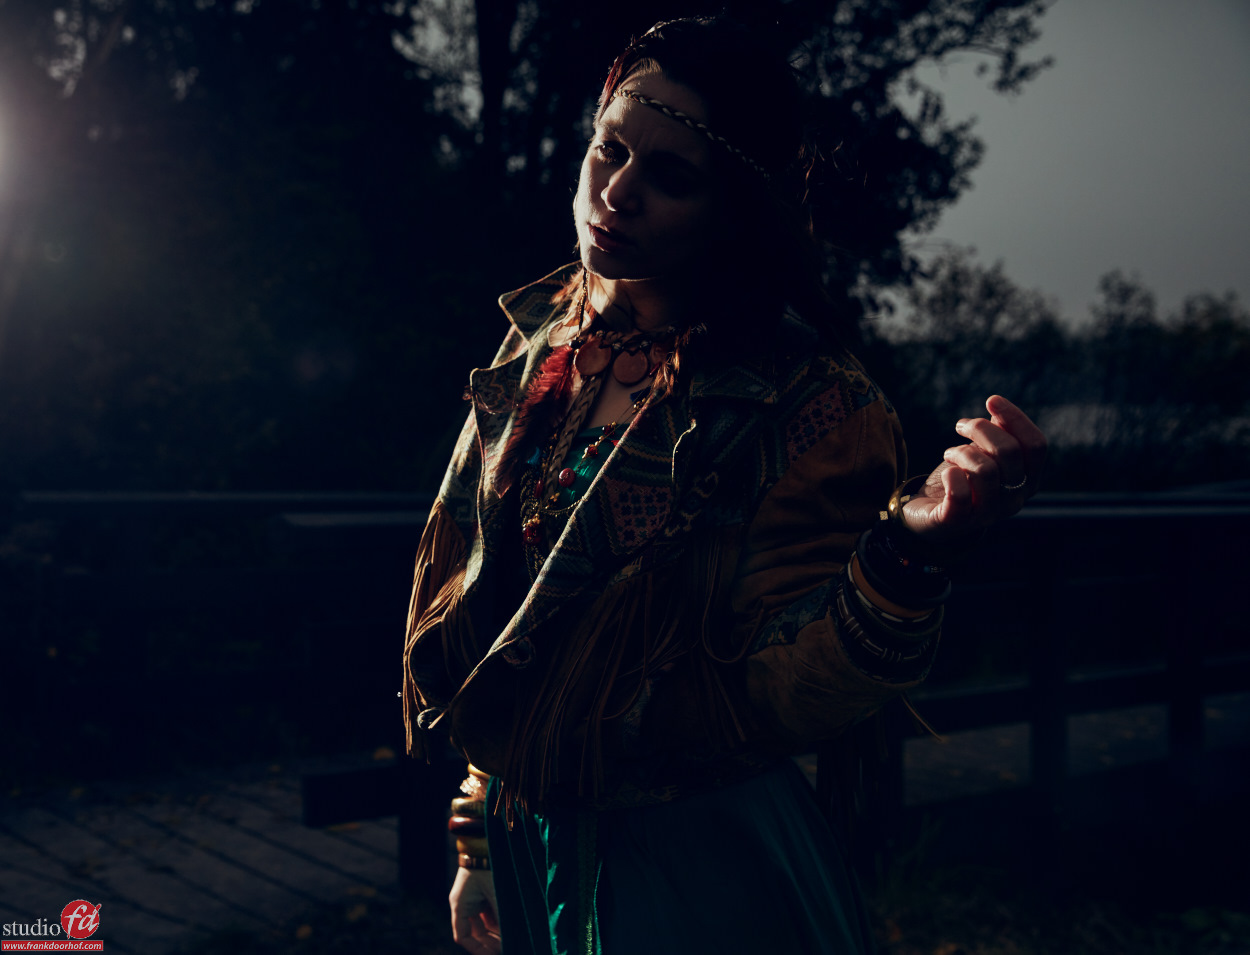
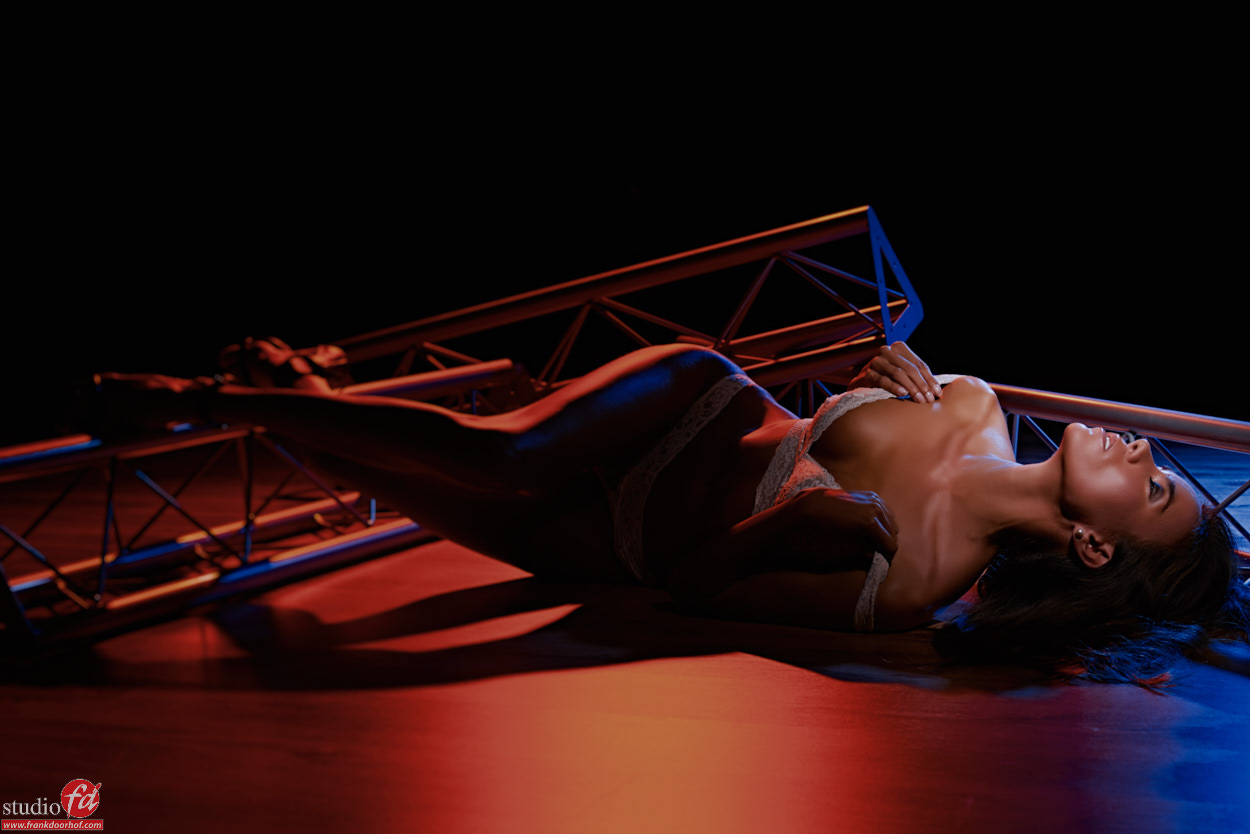
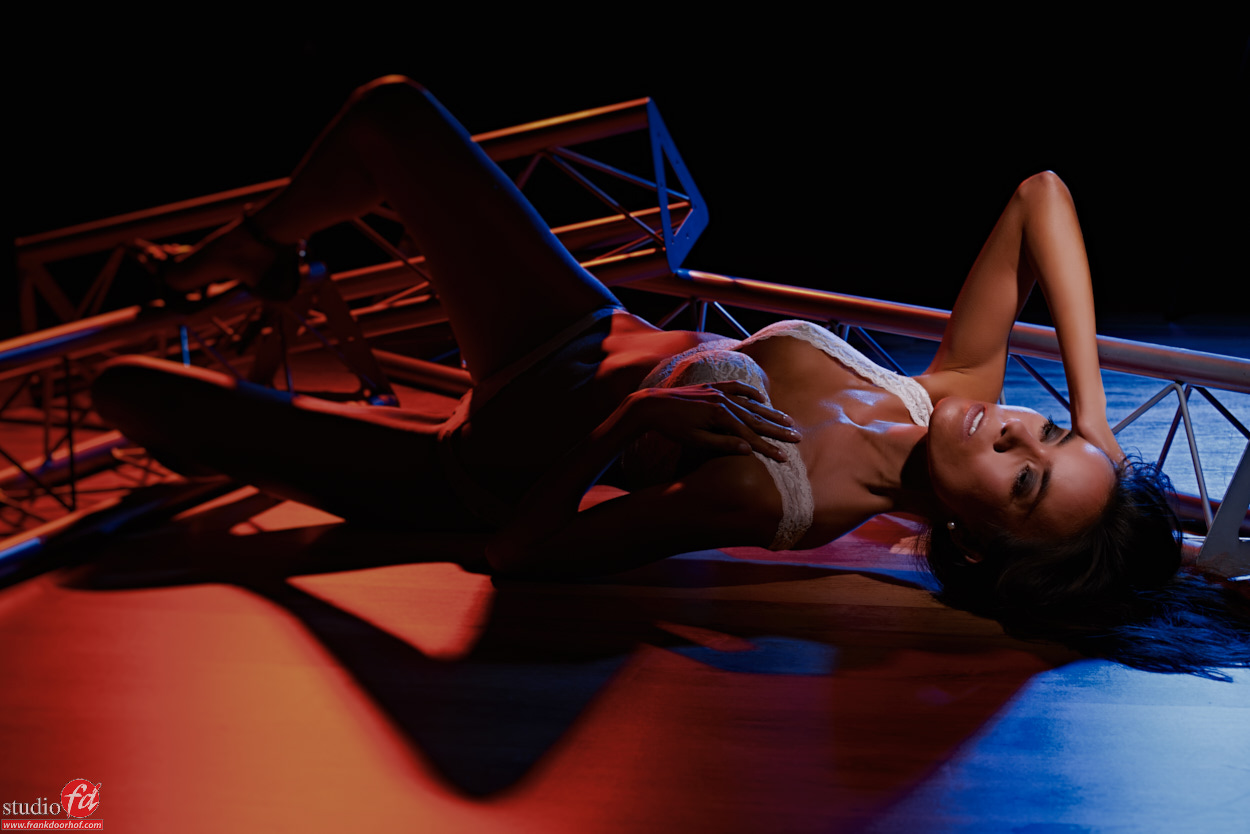
We filmed two small videos for the HS system, and today I share some images from the video with Nadine, videos will follow later.
Let’s start with just natural light, everything else is strobed.