Note 8 after a minute hands on review, Android from an Apple Fanboy’s perspective….
images from internet
It’s an exciting time for many of us… well I know it’s for me.
Finally after years of delivering great phones but sticking to a “standard” design, Apple is releasing the iPhone 8 and just a few days ago Samsung released the Note8. Now a few years ago I couldn’t really care less about what Samsung, LG, Google or whatever was doing… well let me say it differently, I loved seeing it but I was just curious, but things change.
If you have been following my social media stream you know that I switched from YEARS on MacOs to Windows in December last year for our studio PC, replacing a MacPro for a killer desktop PC (well it doesn’t really fit my desk but you know what I mean), after the “normal” problems when you switch OS-es it’s been a very smooth sail to be honest, the PC is blazzingly fast and cuts through 4K multicam video like it’s nothing, and rendering times….. well Adobe listen FIX this… FCPx is much faster with rendering, but luckily we also have Resolve which is also very fast, but for now I still edit on premiere…. well ok it’s not about this, but it’s important to know a little bit of background.
The reason I switched my desktop was due to the release of the new MBP, bare with me.
My laptop is what I use daily, most of my videos are edited and recorded on the laptop, it’s with me when I travel, one could say my laptop does 90% of the work, where the desktop does 10, so switching my desktop was a no risk endeaver. So I decided to try it with that. I liked it so much I actually a few months later switched from my MBP (the good “old” 15″ with cardreader, large battery and HDMI) to the Dell XPS15 and I all honesty I never looked back, I LOVE that laptop, it rocks.
Next up was the Apple Watch.
LOVED it, LOVED it, but I’m someone that does love to track my workouts and steps, sleep, food etc. and the Apple watch, in all honesty… well it just lacked A LOT, it did promise a lot, but we ended up with in my personal opinion a great watch for casual use, fun to track your steps (fill the circles) and very very good for social media and notifications. What Apple promised (loads of health options) didn’t come, so I didn’t even upgrade to the series 2, I didn’t even feel the urge (which as a gadget lover is really weird). Enter the Garmin Vivoactive HR, which I fell in love with within a few days…. yeah the display SUCKS compared to the Apple Watch, the notifactions are….”ok” but the dashboard for workouts, sleep and food are stunning, this is what a watch should do (if you use it like me), it even counts my strokes while rowing, it syncs up with my heartbelt, it syncs with my cadance meter, and it even is able to beam the heartrate to my bike computer (Garmin Edge 820). Awesome combination.
Next up…….
Well I never expected that I would switch phones.
Let me make one thing 100% clear, I’m not against Apple, heck I love the company, I think it’s one of the most innovative companies on tech out there (or was), I love the brand, I love the build quality, but most of all the intergration and ease of use and stability. Of course it changed a bit over time, I do have an iPhone that SOMETIMES crashes, my Apple watch sometimes stopped counting steps, my Apple TV’s remote control via the iPhone is less accurate than a few years ago, but overall I must say that I maybe have 1% problems and 99% smooth sailing. And with smooth I mean… everything is smooth (and this is important to remember for later).
Friends often showed me their androids and claimed that their CPUs were SO MUCH faster than my overpriced piece of junk iPhone… well when I scrolled through images, showed them 4K video and zoomed in images it always was smoother than their so much faster phones and tablets. So I’m more than happy with my iPhone, which indeed is a bit higher priced. But I’m more than willing to pay that premium. I also owned almost every iPad including the Pro, but maybe that’s actually where the dissapointment started, the iPad pro is awesome don’t get me wrong, the Apple pencil is pure magic. When you draw I can’t think of a better mobile device. But the promise of a professional photography and video editing solution on the go…. well as with much with Apple the last few years…. it just didn’t happen… is this Adobe’s fault? is it Apple’s fault? I don’t know and I don’t care. I bough a very expensive iPad PRO and I hoped and expected to be able to do more with it than consume media on a big tablet. In fact the iPad pro is so big that when I fly I sometimes regretted buying it because it simple was uncomfortable to use and I was afraid it would break in the bags in the chairs. No I’m not saying it’s a bad device, I was too fast with buying it, knowing what I know now… I would have stayed with the iPad air.
Ok so now to the case at hand.
Android…..
When the iPhone 8 rumours started I was very enthiousiastic. I work hours on my phone every single day, I take photos and video with it, do social media, even type blogposts on it (not these kinds but the shorter ones), I use it…… well for almost everything, my phone and I are BFF (just kidding but not really). So when a new one is released I love to upgrade, I just love trying new things and there is always something that triggers me (mostly the cameras). Over the years the road upwards with the iPhones has been a steady one, the prices have gone up considerably, but well…. I use it constantly so I’m willing to pay it.
When the price speculation of the iPhone 8 started with 1100.00 for the stepin and probably 1500.00 for the 128GB version (I try to get the 128) I had to swallow a big lump, remember dollar prices are often multiplied with 25% over here with iPhones. (taxes and some other things), that’s A LOT of money, but the alternative……. leaving the Apple Eco system….. no… and than it actually hit me (pretty hard), over the last 6 months the only things left were my airports (Apple stopped making them… WHY) and my AppleTV…. so what Eco system?
So I slowly started looking at alternatives for (dare I say it) my iPhone.
Now I actually did the same “trick” as with my PC’s.
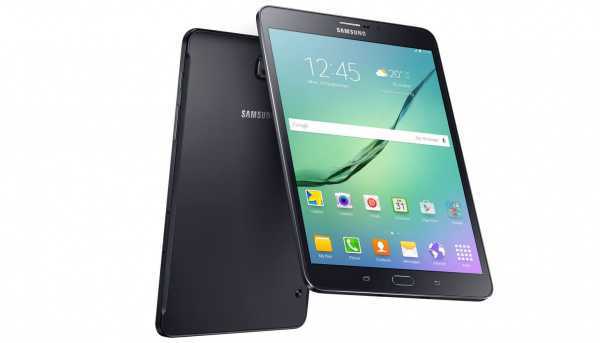
I ordered a Samsung Galaxy Tab S2 tablet, a 9.7″ android tablet (I have to say that it’s very light and nicely build, love the less smooth back), not the newest but because every manufactorer uses a different “look” for Android and my main attention was aimed at Samsung (at that time the 8+, the only thing I didn’t like was the single camera, I use the second one A LOT). When the Note 8 rumors started with dual cameras I knew it for sure…. this would be the battle… the Note 8 vs the iPhone 8, also seeing the Note 8 is released in shops just a few days after the announcement of the iPhone 8 makes this almost too much of a coincendence. Wait what Apple announces and than switch (or not).
So let’s take a look at my opinion at the moment on Android.
A few years ago I got an Android phone for a few weeks and absolutely hated it, I loved the idea of new tech but Android crashed on me, there were weird behaviours of the phone, cutting and pasting was a dissaster and…, well overall it just wasn’t nowhere near iOS. But things have changed.
The Samsung tablet runs Android 7 and my opinion is based on this vs the current iOS10.
Look and feel
In all honestly there is not much difference.
iOS over the years have become relatively cluttered with settings that aren’t that easy to find anymore than in the time of iPhone 3/4 but it’s more than doable. At first the Android was a bit overwhelming but after a few hours I have to be honest I found everything relatively fast. The look…. well let me put it this way, they looked VERY closely to iOS.
Handling
As an Apple user you get used to certain things. Things that “we” take for granted which you find out later are not that normal on other systems. Take for example the touchpad. According to most the Dell and Surface pro touchpads are the best PC touchpads… well that might be the case but compared to the MacBooks they are pretty standard. I still love it when I’m behind a mac and use the touchpad, on the other hand I’m now 100% used to the mouse again and with the new Logitec mouse I’m more than happy and very accurate.
What strikes me however is how confusing android can be.
For example swiping in a browser, how easy is that…. well not on chrome… you have to go to the top and use the backbutton… WHY… well because if you swipe from the side you actually open settings… well …. change that?
Also going back from an app brings you back out of the folder…
Ok let me explain
I love to have my apps in folders, but I have a folder Social media that contains all the social media apps which I open one by one to check and reply. On iOs hitting the home button brings me back to the active folder, pretty cool so I can go to the next app, home repeat. With Android I’m brough back to the complete page, so I have to open the folder again and click the next app. You can of course use the back button but that will go through all the steps I did…. a minor thing but pretty annoying.
The other thing is that VERY often I’m in an app and literaly stuck on a page, there is no way back or forward. Well not in the screen, use that backbutton again. Now this is actually something I’m now used to but on iOs you’re always swipe away from rescue.
What I do like A LOT is the close all option.
We often have many apps open and this can slow down a device (although some claim it can’t) and with iOS you have to swipe them all away one by one (or three by three if you get your fingers right), on Android there is a cool “close all” option.
What I also like A LOT are the small widgets you can place and resize on pages, I never thought I would them that much to be honest but now when I look at my iPhone I go like “mmmm it would be nice”. Which by the way also brings me to another point. The interface itself and the pages look a bit “cluttered” although that’s not the correct term probably, let me put it this way, iOS looks much cleaner and organized with the bottom meny much more clearer away from the screen than on Android, the bottom part is too much a part of the page for my taste…. but without a doubt also my personal thing 😀
What I do have to get used to are in fact the three buttons, home, open apps and return, often by accident I hit one of those buttons when I want to do something else. But in all fairness it’s getting better.
Apps
This is of course where it all boils down to.
I can say that for everything that I need I found an App.
Of course the app store from Apple is better filled and the quality is better (I already installed some real junk on my tablet which would have never cleared the Apple app store I’m afraid) but when you keep to the big names and 4-5 stars rated apps it’s pretty much the same.
The only app I’m missing is capture pilot but we can also use that via the webbrowser so no big deal.
Stability
This is a difference in all fairness.
My tablets Chrome browser was at one point absolutely unusable, it wouldn’t even open 90% of the time and when it did it crashed within seconds. I booted the tablet in safe mode and purged the cash and ever since it’s been rock solid, but it shouldn’t happen, on the other hand I also had some problems with apps on my iPad in the past and also had to reboot that with a hard boot, the hardboot in iOS is however less intimidating, you just reboot, with Android it feels like you’re rebooting a PC in safe mode… not a thing when you’re not afraid of tech but I can imagine some people would be totally put off by this, but again it only happened once (in all fairness I’ve owned the tablet for a week and it happened on day 1).
Also the Samsung seems to lag sometimes, play a game like candy crush (yeah sorry I like it) and you can see that some animations are smooth but not smooth… I know it sounds weird, it’s like they have to ramp up, it’s not that the tablet doesn’t have the CPU power because it handles more complicated animations easy but it’s always at the start of an animation that it just “stutters” a bit. Not something I every experienced on iOS.
Overall Android feels more fragile to me.
I know this is a very vague term, I have the same with Windows by the way. It’s absolutely not grounded in experience of crashes but somehow MacOs and iOS feel Rock Solid, like whatever happens it will recover, don’t worry where with Android and Windows I’m always afraid of “oh no… here we go” only that last part actually never happens. So take it for what it is… maybe I grow over it, I have with Windows, which I now trust almost as much as MacOs with what I do (no games, just Creative cloud, Resolve and some other programs).
Apps part II
And this is a biggy.
As a vlogger and content creator I’m always working on ideas and things I want to do and share.
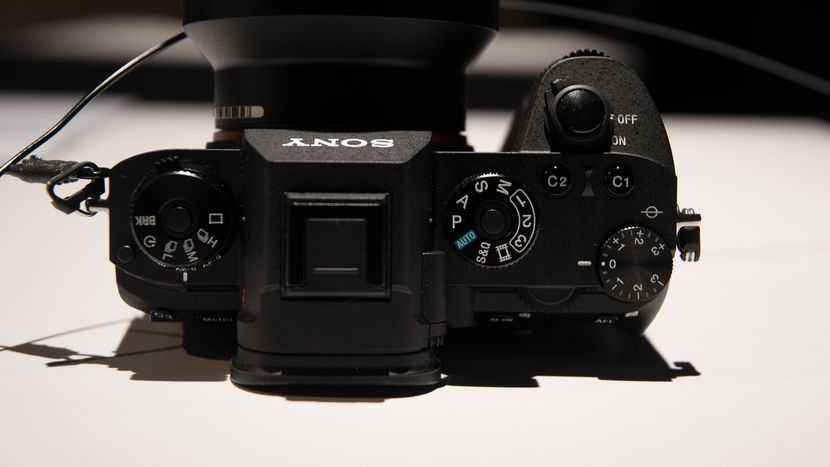
I shoot with Sony cameras and if I want to “beam” a picture from my camera to my phone or iPad that’s easy, but not as easy as it could be. Make connection to the wifi of the camera, start the software, copy files… sounds easy (and it is), in reality however since iOS10 I have to input a new password EVERY single time, trust me this becomes very frustrating at one point. On Android the story is different. Just click the two together and voila there is a connection… it’s beyond believe for me that Apple doesn’t allow this over their NFC system, it makes my life so much easier.
Another thing that struck me was our dreambox (sat receiver).
On iOS I have tried several apps and all could mimic a remote control but finally I ended up with one where I could select the bouquet, zap and see the EPG, pretty cool stuff. On Android I want something similar, the first few I tried were terrible but than I found one that blew me away, not only does the remote work, not only can I see the bouquets, but… I can also stream in full HD to my tablet and watch television. On iOS I had a similar solution but it never really worked flawlessly unless I used VLC player or a seperate app.
Access
I’m not an iTunes hater.
I’m not an iTunes lover.
I like the fact that we have one allround solution for music, podcasts etc. but I never liked the way that MacOs handles my filmroll for example, I always used preview to empty my filmroll or Lightroom. With Windows it already surprised me that I could just connect my iOS device and it would show up like a DCIM folder and I can copy all my images and video like from an external drive.
I also love to read digital comics and watch series when travelling.
On iOS you can very easily use iTunes to drag and drop files into the apps that you want to use… but it’s a bit of a work arround, an easy one but… well you know what I mean. On Adroid you can just drop it in a folder and let the app look for it. In fact VLC and my comic reader actually didn’t even need instructions they both found all my files spread over internal and external memory and showed it in the library…. pretty cool stuff.
Connectivity and memory
With Apple you pay through your nose for extra memory, this is really ridiculous, but you don’t have a choice.
I did use a USB stick with lighting on one side and USB on the other when travelling with movies, but you needed to play the movies with the accompanied app… to make a long story short I never used it a lot because the app sucked and crashed a lot on me, plus I needed to take my case off because the stick was too wide (aargh).
On my tablet (and most Android devices I believe) you can just add a micro secure digital card and extend the internal memory that way, I use a 64GB card and that’s plenty of room for what I do on the tablet (tablet also has 32). On my phone I would probably just add 128. The cool thing however is also that without the need for apps or drivers you can just use STANDARD USB sticks on a short mirco USB to USB cable (or USB-C of course with the newer tablets/phones) and the software will just see it as…. well external storage. Meaning there is no more limit to what you can bring with you, just buy some 64GB sticks and switch.
Image quality
As mentioned before I bought the Tab S2, the newer one is the S3 but because for me this was a test I didn’t want to fork out the money for the S3 which is on part with an iPad. What strikes me however is the screen quality. It’s incredibly bright and it shows a really nice almost 3D image quality with high contrast, deep blacks and incredibly sharp images withouth ringing (making it artificial sharp), color is not accurate, but so isn’t the iPad pro (let alone the new screen technology apple is using), but for consuming media it’s ok to have more “favorable” colors, as long as I don’t have to edit on it and it’s just my tablet…. why not.
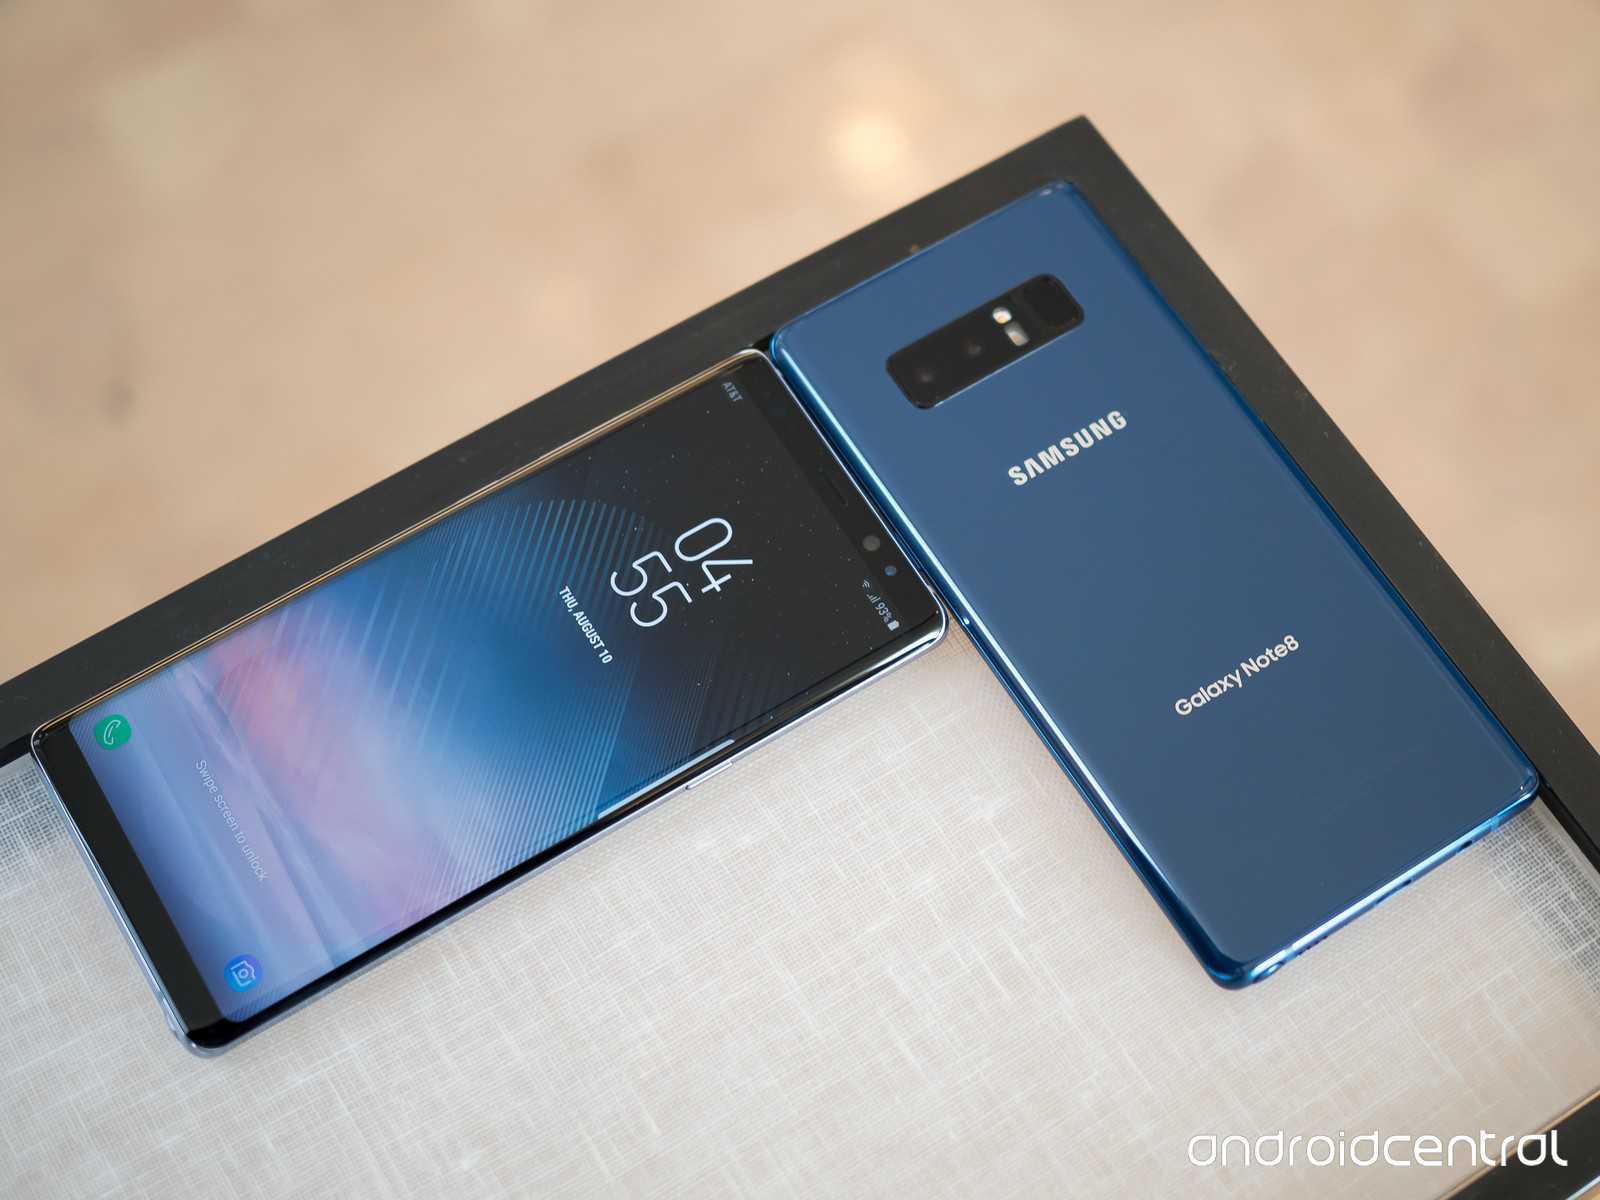
Note 8
This afternoon we visited a Media Market and to my surprise they had a sales version of the Note 8 on demo, no stock but a demo unit. this was my first experience with the Note 8, and what follows now is my HONEST opinion, don’t flame me, read it as MY opinion.
What strikes me is the sheer bloody brightness of the screen, this is one bright screen. I cannot imagine using that one on full power unless flying the drone in bright sunlight, and this was actually one of the things I had on my list of plusses for the Note 8 (very bright screen).
What also strikes me is the curved screen… I still don’t know if I’m a fan of the total lack of bezzles, where do you grab the phone without loosing some of the material that’s on the screen, how about protectors, how about….. well time will tell, but it does look gorgous.
Double camera.
I could play with it a little and I still think the interface from Apple is slightly better. I couldn’t find my way back for example to use the Tele or Wide setting after changing exposure, and as mentioned before I have this on several occasions with Android, it just isn’t logical, in the end I find my way back… but it could be easier. That said the preview focus effect is fricking awesome, also knowing you can do this later on really excites me, I love this effect and use it pretty much all the time (except when shooting RAW of course). Also the fact that you have the option to shoot the same scene on BOTH the tele and wide lens has great appeal to me, add to this that both cameras have image stabilisation and from what I could tell in the short time I had with the Note 8, the image stabilisation is INSANE…. and I mean INSANELY good.
Handling and the stylus
Unless you have been living under a rock you probably already read about the stylus, insane specs for just a pointing device, very nice specs for a drawing device. Will you draw on the screen? well I don’t know, maybe some doodles, but what I do like is the fact that you can use the stylus to write notes on the screen while the phone is OFF… yeah that is very handy. Taking the stylus out is pretty easy, but it’s an extra thing you have to do so unless you really want that stylus I think most of the time I’ll be just using my fingers. If you always find the need to doodle this will be one AWESOME device for you.
App connect
With the note 8 it’s now also possible to connect apps. Meaning you can for example run YouTube on top and surf the web underneath, a pretty cool trick but in all honesty I would rather use the floating youtube window for that, however mail and browser open can be pretty handy when you are making an quote for a client and you have to look stuff up and copy paste, this could be a tremendous time save.
Handling
The biggest screen on the market on a phone…. you would expect something HUGE.
But in all honestly it felt ok in my hands and I don’t have huge hands, it’s certainly not a phone you can operate with one hand but it’s MORE than doable and it doesn’t feel like much bigger than my iPhone 7 Plus. I do feel the Galaxy 8+ feels a bit more ergonomical due to the more rounded areas. Also the fingerprint scanner is a joke…. I’ve read about it but in real life it makes you wonder why the person who designed it on the Galaxy 8+ wasn’t fired before the Note 8 would be released… but it’s in the same ridiclous position. It’s something that you can get used to without a doubt… but was that really the only spot?
Quick conclusion
With a price point of just under 1000.00 the Note 8 is a VERY expensive phone.
You REALLY have to ask yourself do you NEED that second camera, do you NEED that stylus. Otherwise you can MUCH better get a Galaxy 8 plus, the screen is similar in size, it has a slightly larger battery and the ergonomics are slightly better. For me the deal breaker is actually that double camera so I would opt for the Note 8…. or the iPhone 8……
Of course some of you will say “why switch, what’s wrong with the 7Plus”
Well nothing really, except it frustates the heck out of me that I can’t get an external microphone to work anymore, which worked just fine on previous iPhones with headphone jacks and I really want that option back. And as mentioned before… I just love a new phone because I work on it so much.
At the moment the changes are 90% that I will go for the Note 8. Especially now that I’ve seen the phone and played with the camera a bit. Can Apple win me over… well yeah. Improve the camera over the Note 8 and I’m with Apple unless there is a price difference of 300.00 or more. And this is probably gonna be the thing. With the Note 8 I can keep adding memory if I need it for almost free. With iPhones I’m stuck. Also I love the look of the Note8 and Galaxy phones. Plus…… and maybe that’s also a big factor at the moment I feel like I’m losing my love for Apple. They keep raising prices and calling things pro that in my honest opinion are NOT pro. They introduced a touch bar that’s a joke, some people will love it but most people I talk to never use it anymore, but they changed FinalCutPro to be optimized for the touchbar, an option which at that time was only on ONE mbp and not on seperate keyboards. I more and more feel Apple is losing it’s way, and maybe the love is over…… or maybe the other side just makes devices that are a bit more thought out for functionality than design (although, again the note 8 and galaxy’s are gorgous).
We will have to wait till September 12th (I believe) but this will be keynote where I actually can’t be dissapointed anymore… my choice will probably be the Note 8, unless Apple blows me away…… and silently I hope they do……


You must be logged in to post a comment.