Let me start of by saying that I always believe that everyone is right…
Now what do I mean with this?
Everyone has a different workflow, everyone has different skills, everyone has different needs and that’s ok, so whatever I will say in this blogpost is actually aimed at me, and maybe at you…. But one thing…. please read the WHOLE blogpost before you start a discussion because I think it will make a lot of stuff clearer 😀
Why this blogpost?
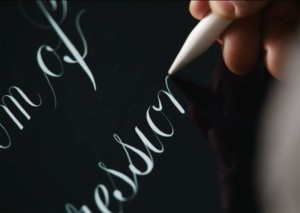
I recently got an iPad pro and Apple Pencil and have been over the moon with the possibilities (see my reviews online and on this blog), in fact the Apple Pencil awakened a long sleeping desire to draw in me, and I’ve been doing since the day I got the Pencil, it just feels very very natural. So I’ve been posting very positive about it. Also because I never intended to buy the iPad pro for the simple reason it didn’t run full MacOsX, but….. and this where it happens.
Full OS vs iOS
So why did I bought that expensive iPad pro and didn’t I buy a MacBookPro or 12″.
Well the 12″ doesn’t make sense for me, I need processing power, we edit 4K videos on the road, I retouch 42/60MP files etc. and although the 12″ is great for business men, for me it would be a paperweight (a very light one) and I would still prefer my MacBookPro 15″ retina.
But… I can’t draw on my MBP.
And this is the MAIN reason I bought the iPad pro, the incorporation of the stylus, excuse me Pencil. Of course it also helps that it’s smaller than a laptop (easier when traveling) and it’s bigger than an iPad so I can work on it better, and even with the attached Logitec Create keyboard it will still fit on my lap in an Airplane (barely). But most of all because all the apps are 100% touch based….
Surface pro and likes and iOS iPad Pro
So whatever you post about the iPad pro there will be a group of people claiming the iPad pro is just catching up because the Surface Pro has been doing it for YEARS…..and indeed they Surface pro (and others) have been in that form for years, indeed, so that’s true. If you look at it like this…. you have a pen and a tablet.
BUT…..
There is much much more, let’s look at some differences.
The first thing you have to realize that there is a huge difference between a tablet and a PC.
A tablet is/should be 100% touch, meaning bigger menus for your fingers (slightly smaller for a stylus), there should be more than enough apps to do whatever you want to do and…. most importantly the system should be very stable.
A desktop or laptop is a different beast.
You have a keyboard for typing and shortcuts, and you have a pointing device for example a mouse and/or trackpad. Most importantly this means you can have smaller menus, you can use keystrokes for quick and easy acces to much used commands and you can work in a efficient way.
Did you read that last one?
In a more efficient way, and that’s 100% true.
Let’s look at Photoshop for example.
Photoshop (real life) example
For Photoshop I use the following keyboard shortcuts a lot (read sometimes several times per second)
sampling, brush size up and down, Undo and redo, zoom in and out, drag, and switching color when working with masks and I know I only use a few compared to some others. But I would need 9 hardkeys or soft keys to do my work in the most simple way. On my Mac/PC or laptop no problem at all, the keyboard is always there.
Now I disconnect the keyboard like on the surface, I sit down on the coach and start to retouch…. after opening my image and looking at it the first problem occurs, I want to zoom in… well that’s possible via the Menu. But now I want to take away some blemishes…… uh…. well….. I can find my healing brush but….. how do I sample without a keyboard? ok let’s forget the sampling just run a filter because I’m running the full version, so that’s done, now I make a layer mask, hide all and I start to paint, every time however I need to switch colors I have to click on the colors, but that’s doable. However changing the brush size….. well that’s again very annoying because it has to be done in the menu. But we’re done with that… now let’s change something in the background with the clone tool…. oops that doesn’t work also because I have to sample something….. well let’s skip that too….
To be honest this doesn’t work for me.
If I need to skip things in my workflow I would rather not be able to retouch at all, it should be seamless. You could of course project the keys as a floating keyboard and use those with touch, but when I worked with the Surface I couldn’t find an app that made a few small buttons I could program as keystrokes.
Same goes with video editing, try to operate Adobe Premiere ONLY with a stylus… you can better wait till you’re home and do it at home.
So I’m running a full OS, I can work in Photoshop and Lightroom but… I can’t do the things I normally do unless I switch constantly between menus and taking for granted that some things never will work. One could argue that you can program the keys on the stylus for this but this is not something that worked very well for me, I lost a lot of control when I did this and found myself frustrated a lot, but maybe if I would have stuck with it for a few days longer I would be able to learn it, but even then I would have only had 2 extra keys.
Now let’s look at a 100% touch interface
A tablet runs with apps.
Now apps in the past were terrible, it was a game, an option to put two fingers on the screen and draw, play piano etc. and of course an app was never take seriously… but hey it’s 2015 and apps have grown, in fact you could say that when you look at the apps today some apps are even better than the full blown versions on the “real” OS. But the system will live or die by the amount of apps, and this is (in my opinion) where the Apple system blossoms, there are apps for everything and the apps are very very good overal.
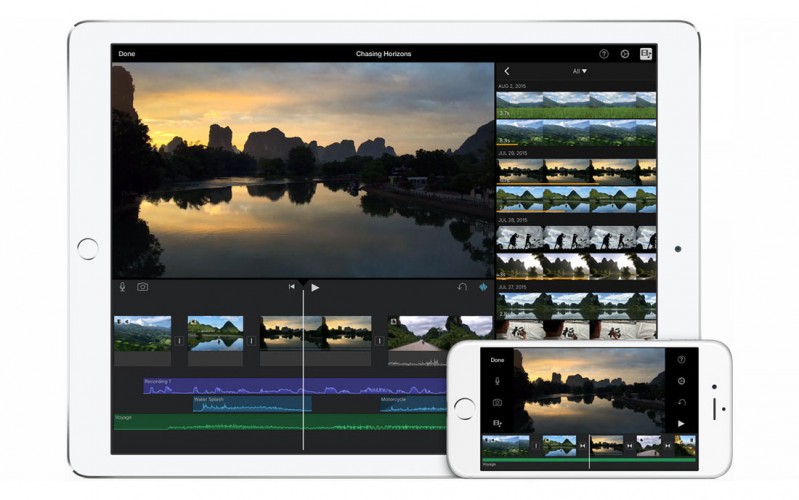
For example take a look at iMovie
When ever I tell people I use iMovie they look at me with a big question mark like I’m editing on a typewriter.
But let’s face it, iMovie on the iPad/iPhone has matured and delivers 99% of what most people need. You can edit 4K streams, use PIP, use titles, add music, manipulate music, change the look of clips, change fades etc. plus it reads a lot of video formats now a days. What do you need is the big question, if you need to edit Multicam you are right, iMovie is not the place, but if we are filming a BTS video we often use one camera and that we can edit for almost 100% in iMovie, the only reason I say almost is because sometimes we want a different kind of title, a different look etc. but that’s personal, if it would be just the video we could do it 100% in iMovie.
Now throw in Adobe Clip in the mix and you have different options including a cool one where you select the music, throw in the clips, sit back and it creates something cool all automatically on the music which of course you can later fine tune. I know of people that actually use this every time for BTS videos even when at home, they throw the clips in, let it do it’s magic and fine tune it in Premiere pro on their macs. It’s actually also something we are looking into, but Annewiek (and me) actually like a bit more control so we always edit manually. But hey it’s pretty cool.
Interaction and connectivity
In the past the iPad was the iPad, you needed iTunes to connect and what came out of the iPad was a finished product. But also that has changed A LOT.
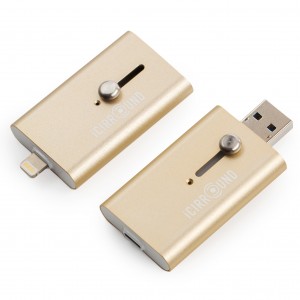
First of all using iTunes is also something I don’t like that much, but I hardly use iTunes anymore, only for my music and backups to be honest. The rest is all transferred via a USB3/Lighting stick which is available up to 128/256GB so that should keep you going. Work I create in Procreate is synced via my dropbox, videos and photos we use airdrop and movies I just copy to VLC player via the stick or via iTunes drop, so this is really something from the past… but there is more.
You can easily start a project in Adobe Clip or iMovie and continue that project in Premiere or iMovie/Final Cut ProX on the desktop, no problem at all. I can create a drawing in ProCreate and drop this as PSD to Photoshop to finish it off.
Limitations
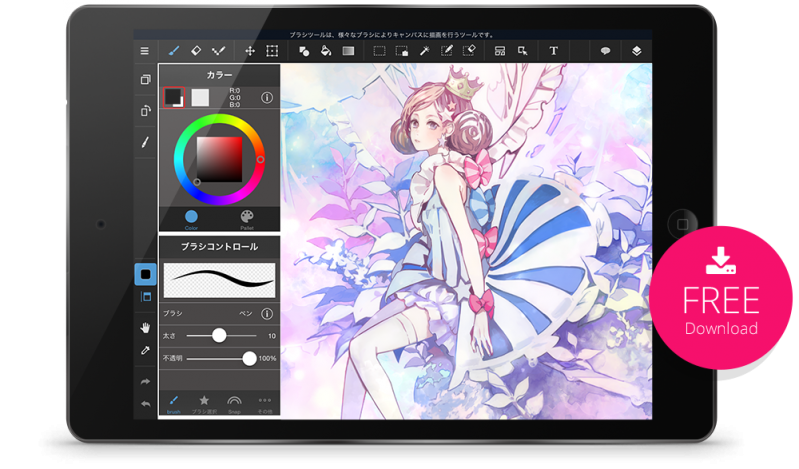
Because the interface is 100% touch and Apple doesn’t want to take any sacrifices they will not merge MacOSx and iOs together at the moment so somethings you can’t do. For the moment for example there is no full Photoshop touch that works with plugins the way you are used to on the desktop, but I think there will be solutions pretty soon. If you for example look at the interface of the FREE MediBang Paint you can see that it’s very well possible to create a very sophisticated program on iOS. I have to be honest that it’s a program I just installed 2 days ago (never heard of it before) and I’m now switching between MediBang and Procreate to see which one I like the most, but MediBang is pretty impressive and I can see something like this EASILY used for photo editing if they changed a few things around and add a few features. (by the way the interface is 100% english in my version)
A look into the future, that I THINK will be reality
Let me start of by saying that this is just my COMMON sense speaking, what I tell you now is not something that I know is coming, but it’s something that if it would NOT be coming it would REALLY surprise me.
Let me start by saying the following (and this might shock people), Photoshop doesn’t read RAW files.
No really it’s true. Photoshop works with a “finished” product, ACR (Adobe Camera RAW) converts your RAW files into for example TIFF 16 bits ProPhotoRGB files and this is what Photoshop uses. After this all the plugins are used, you can retouch etc. but in essence you are working on TIFFs/PSD etc.
So let’s see what the future COULD bring
I process all my files in Lightroom, Capture One or DxO on my desktop (in the hotel or wherever) into TIFF/PSD 16 bits files. Now I put them on my USB stick and we travel. During travel I now open first my TIFFs/PSDs into Photoshop fix (which can handle pretty big files) and I retouch my skin, other small things etc. Now I open up my other skin plugin (if needed) and I make the skin nice of course I use the delivered adjustment brush to paint the effect in where I want it. After this I run my mobile app for the special sharpening (on my dekstop this is Intensify pro from MacPhun) and I’m done with that (also with the adjustment brush ofcourse), now I open up the final software and I tint my image….. And…… well I’ve done the EXACT same workflow as I did on my desktop and I have the EXACT same file as I did on my desktop, but there is one huge difference…. ALL the apps I used are designed for touch, meaning they use easy to use interfaces, they support the Apple Pencil and they run VERY fast because everything is optimized for my tablet. Everything is now stored on my stick which I take out and plug into my desktop and copy everything on my harddrives and sync it within Lightroom and… well I’m done.
The whole discusion of “the iPad can’t read RAW” is pretty “lame” RAW files only need to read once and this is where you adjust what you need and you store it as TIFFs/PSDs after that you can edit in whatever you want. So also on the road.
Discuss because of….
I’m afraid a lot of the discussions about surface pro vs iPad is more a matter of “my brand is better than yours” than people that really think about the workflow differences and the options you get. Or they simply don’t want to be open for what’s really going on, and of course you could say I’m the same 😀
Is the iPad pro a game changer… well I think it is but not if you just look at it as a tablet with a stylus, that indeed has been on the market for years. It has just been released and you already see artist and real creatives (I consider my drawing skills to be absolute starter) taking the Pencil in their hands and being blown away and switching to the iPad pro because it gives them more control, although already they created art I can only dream off on iPhones with their fingers. The Apple pencil is I think the real game changer, and as you know the iPad pro was designed for that Pencil (the technique is not 100% in the pencil but also in the iPad).

You see apps like Astropad who not a lot of people heard of explode online now it really comes to life with the bigger screen and Apple Pencil on the iPad pro. You do have to realize however that Astropad is not a substitute of running Photoshop on an iPad pro… it’s in fact a 19.99 Cintiq alternative, for me for example the Cintiq was never a question, I would LOVE the companion but it was too expensive and the use I would get out of it was too little to justify the costs, and carrying another device on the plane or during travels.
In the coming months you will hopefully see more and more plug-in creators change their plug-ins for Mac/Pc into apps on the iPad and if someone is smart enough to create a “macro” app which will let you open a TIFF and run it in series through the Apps you need this would be a golden combination. So open in fix, save, open in skin, save, open in intensify, save, open in tint, save and now finally….. choose.
Most professionals have a really streamlined workflow, my Photoshop workflow for example is almost always the same, so for me it doesn’t make sense to go back to step 1, my retouches take on average 5-10 minutes total and are always in the same order, heck I even flatten my layers when I’m done. So being “stuck” with apps would actually be no problem at all for me.
Most of all however the game change element is in the fact that for the first time you have a REAL tablet (so one that is based on 100% touch) with a HUGE library of apps that now also supports a creative device (the Pencil) that can be qualified as top of the line, that combines this all together and opens totally new workflow options. The iPad never really FILLED the gap between being at home and traveling, it was always more “playing around with your files and great for iPhone shots”, now it really fills that gap WITHOUT claiming other wise, I never heard Adobe say you would never use your Photoshop anymore, they always talk about connecting everything together, working on one device and continuing on another. This is also what I didn’t like about Cooks announcement that it would replace the laptop, for business men I think it could, for creatives… well never.
When Microsoft lend me the Surface Pro I was amazed by the device, when they recently released the Surface book I was blown away, it looks drop dead amazing for what it’s on paper, but I also know that as soon as I disconnect it from the keyboard I’m stuck with a crippled Photoshop and the apps for Windows that are 100% touch don’t come close to the offers on the iOS system, and that’s understandable of course, it’s mainly windows with added touch so that’s not an attack, but why would you write an app if you have the full blown OS available.
I always claimed that if there was something better than what I’m using now I’m switching, this is also why the Surface pro replaced my MacBook for about 6 months (I actually sold my MPB) but in the end it just didn’t work out, I found myself using it more for watching movies and some photo selecting in Lightroom than running Photoshop, when I ran Photoshop I had a keyboard connected and then loved it, but as soon as they keyboard was gone… well I couldn’t work with it at the speed I wanted so I never used it. For photoselecting I can use Lr Mobile which works faster with touch than the full version to be honest on my Surface.
You always have to realize that there are many different markets.
For business men I think the SurfaceBook is the choice at the moment, it will beat the iPad pro senseless for the simple reason that it’s very well thought out, office runs on it and when you disconnect it you can draw a bit and watch movies (although battery time is limited) but without a keyboard Windows will stay crippled. For creative people, photographers, video editors, drawers, painters etc. I strongly believe the iPad pro is the first generation of a device that WILL change the way we work.
Are we there yet?
Well yes and no.
With Adobe Photoshop fix you have a great program for fixing things (hence the name)
With Snapseed I could do the sharpening I love and even the tinting (actually snapseed does A LOT) but they need to up the resolution to 50MP on the iPad pro which is the only limitation it has now in the workflow (and of course be able to open TIFFs), but I think that’s something that could be easily adjusted.
For me as a professional I still prefer my MacPro and my Magic touchpad, Wacom/Astropad (still testing which one will stay but I’m leaning to Astropad) and my 27″ dual monitor setup with aRGB color capabilities, but when traveling this doesn’t fit in my bag, so I have no problem at all by selecting my images in the hotel, converting them to TIFFs and putting them on a stick and retouching them all on the plane with the iPad pro without the need for keyboards, because the whole interface is touch based.
Conclusion
Sorry for the long rant but I wanted to write this blog post because it seem the last week I’ve been posting the same answers over and over and I’m limited to what time I have online so I thought let’s bundle all these answers into one blog post I can reference to.
Let me end by stating (again) that I love Microsoft, they are making great products and the people I worked with were absolutely awesome, I really really like their SurfaceBook. But for what I PERSONALLY do the iPad pro at the moment is filling my needs, but it’s far from perfect, it’s really a very good in between device for photographers and video editors meaning it cuts down a lot of edit time when you arrive back home.
Where is shines is drawing and painting and I absolutely love it, and as a traveling companion I couldn’t wish for a better device, the games are cool and gorgeous on the big screen, the movies playback amazing and it even plays 4K if needed.
Let’s dream a bit
Howe about if Apple would release a keyboard with build in harddrive, fast video etc. or in other words a MBP without display…. the only thing they would have on top of the keyboard would be the new connector…… and what if…… you would just click that iPad pro onto that connector and the iPad pro switches from being an iPad to just being a display……. I would be willing to pay the price of a MBP 15″ for that keyboard 😀
Like this:
Like Loading...



You must be logged in to post a comment.