Tag Archive for: new

New instructional video “A guide to Capture One 9 Pro”

We just released a brand new instructional video, and this is a LONG one.
With over 190 minutes of information it’s actually one of the longest we ever released, and the best thing… for a limited time only it’s priced at only 10.00 euros.


Often people forget the importance of the RAW developer and how much of a difference it can make on your final images, let alone what you can do in the RAW convertor as retouching. As soon as you open up Photoshop you are not working in the RAW convertor anymore so it’s vital to do as much as possible before that.

For years Capture One has been on the top of the list of best RAW convertors and not without a reason (of course), Capture One has many retouching and developing options that for some people will even make it possible to do the complete workflow within Capture One. 
 But that’s not all, in studio or location setups many photographers love to shoot tethered, and this is were Capture One in my opinion really shines as being rock solid and incredibly versatile.

When you first open up Capture One everything can look a bit…. frightening, especially when you are used to the industry standard Lightroom, but in all honestly the layout and options are actually very easy to learn if you get a little bit of help, and that’s where this video comes in.

In over 3 hours (190 minutes) I walk you through the way that I use Capture One.
You will find chapters on the tools, tethered shooting, retouching samples and workflow.
All videos are kept as short as possible and are very easy to understand.

Topics include :

BW modes, integration with Lightroom/Photoshop and plugins, exporting recipes, styles/looks, synchronizing, using local adjustments and layers, advanced color adjustments, advanced and simple skin retouching, masking possibilities, folder structures, overlays, watermarks, customizing the look and layout, HDR from one image, making images pop, using processing in batch, all the tools you need to know explained, auto masking tips, skin tone smoothing, tricks with the skin tone smoothing for skies, removing spots and dust, using healing for removing hair and blemishes, using capture pilot in a tethered workflow, RAW developing explained, lens correction, adding grain for a great look and evening out retouches, noise reduction, stacking effects in layers and styles, sorting and rating in the browser, creating your personal layout and much much more….

If you want to get the best out of Capture One in your workflow and setup a great integration with Lightroom this is without a doubt the best way to start. All videos are high resolution captures and the standard video is 4K so you can see all the settings and details the best way possible. The video is available now via www.frankdoorhof.com/videos

I’m 100% sure you are gonna love this one.


From old to new but in the end it’s all about YOU

People always ask “How did you start?”
I was brought up in a family of photographers and videographers, not professionals but just very enthusiastic people. So it was no surprise I also picked up cameras (both video and photography). But model photography came very late actually, I mostly shot birds, nature and sports.


Being a member of a photo club we had to do a workshop and for different reasons I choose model photography although I never had the idea to continue with this, but I did….. so how did my first images look and what can you see repeat.


Well as many of you at first I shot a lot of flat lighting, although I have to be honest I very quickly started experimenting with more focussed light (just love that look), because I had to learn how to properly coach my models I often used little tricks to keep me motivated, this often meant different backgrounds, plexiglas on the floor, smoke (yeah I started to use that very early on), cubes, accessories etc. it was a mess of things to keep images fresh. Let’s take a look at some of those early works, this is all in the first year (2004).

Eliese 1042004 64

This was actually my first model shoot ever. I even printed a book for myself from this session because I would never shoot something better….. Oh how wrong can you be. Just a simple setup with a small softbox and some material as background because I didn’t have a lot of other options yet and the studio was really small.


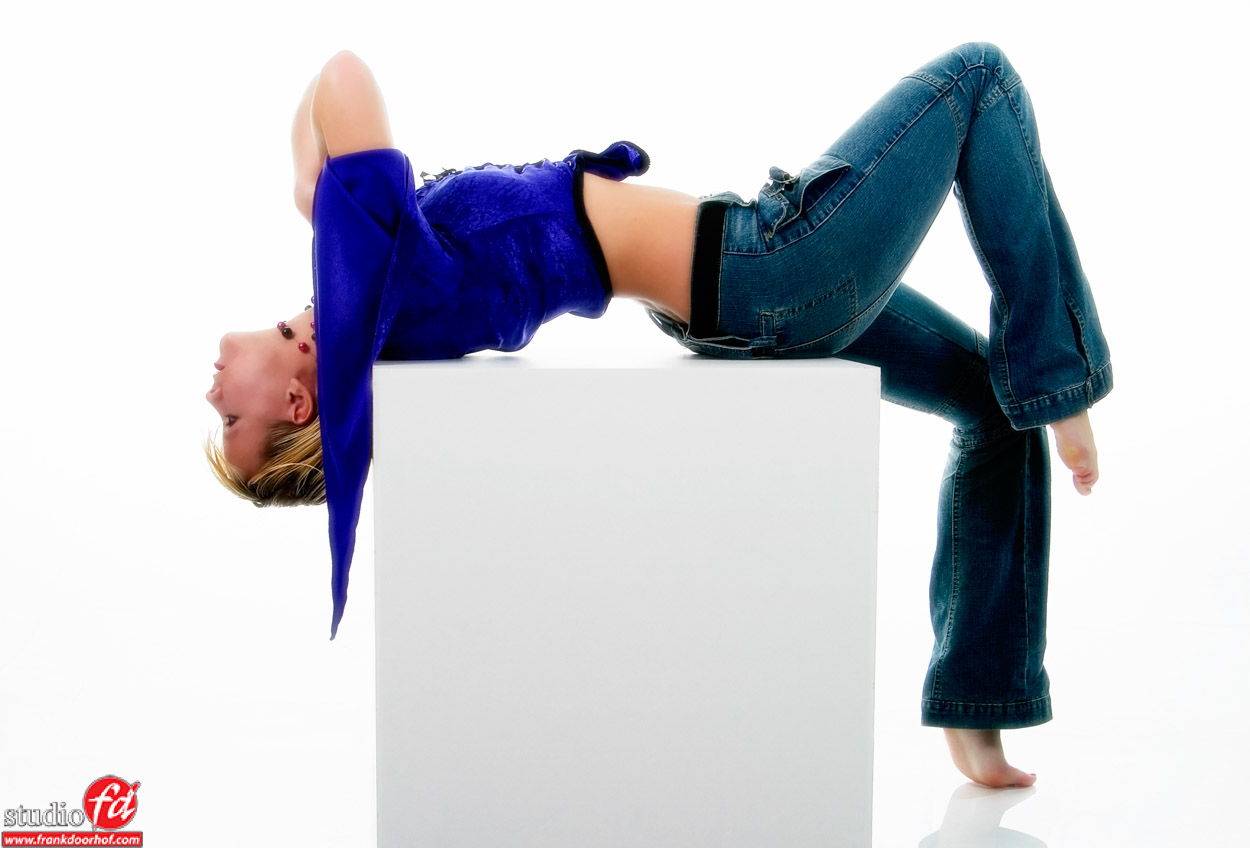
A few months later and a very good model, she knew how to pose and I tried some things with cubes (I think this is one of the first sessions I started using cubes) and as you can see some plexiglas on the floor for the reflection and to keep everything white. I just loved weird poses what can I say.


Jaimy 27112004 26

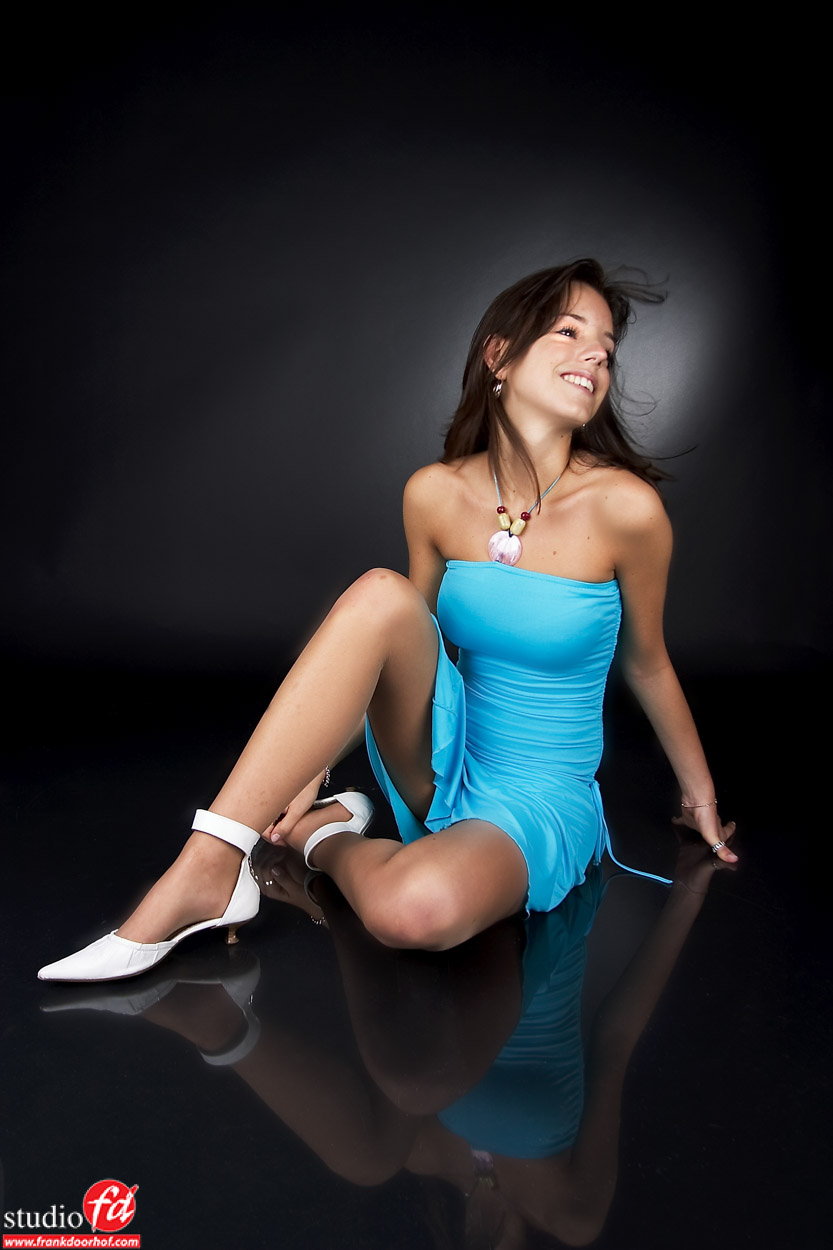
And of course I also loved black backgrounds and plexiglas and some motion.

Robyn 8 Juli 2004 212


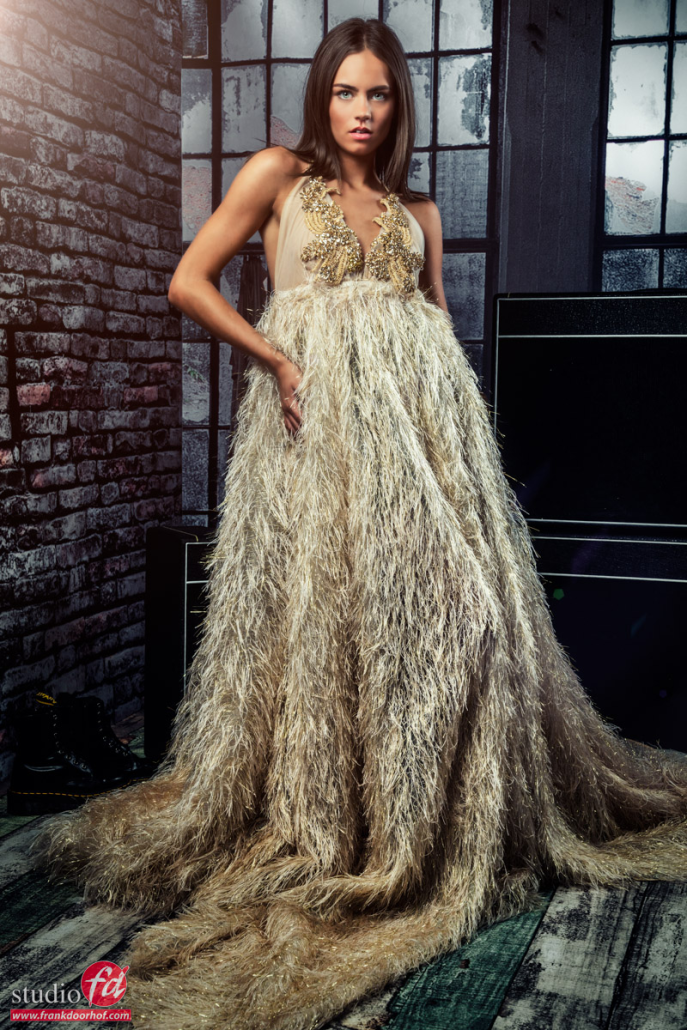
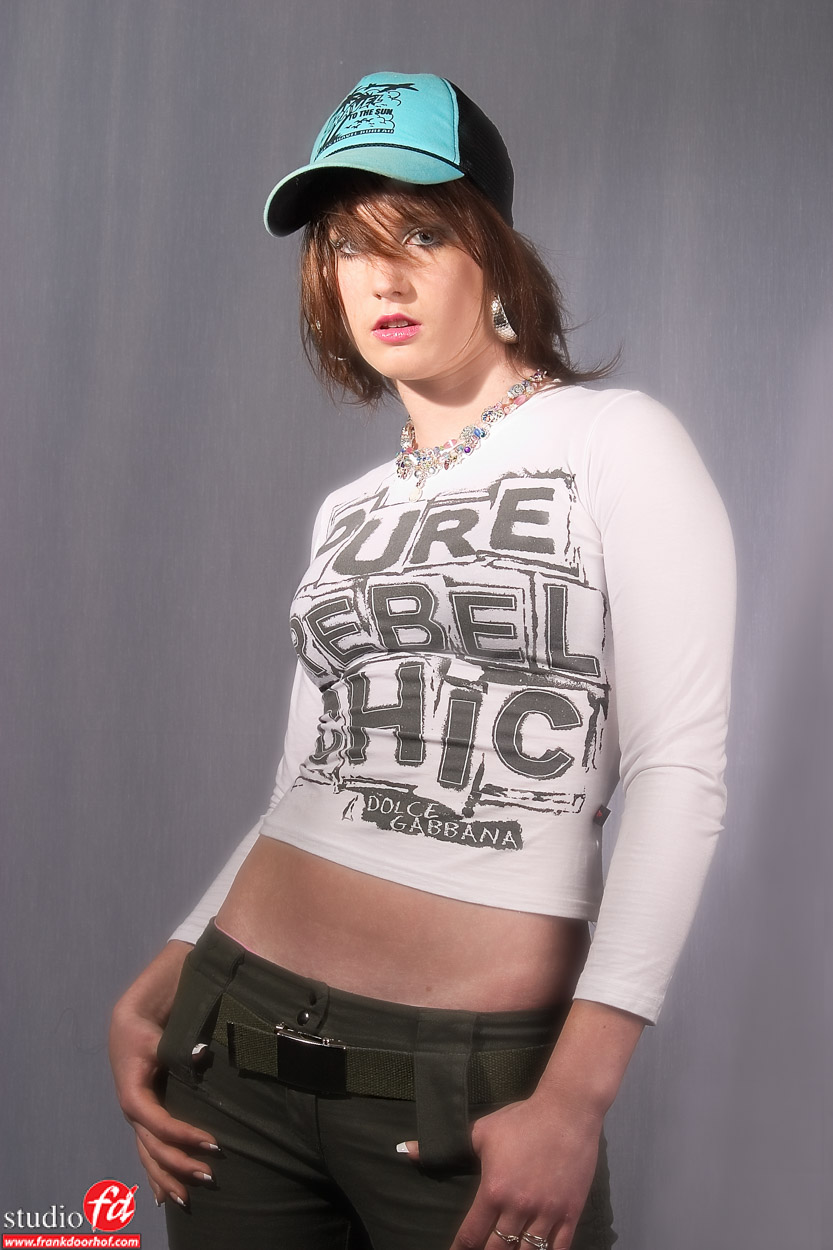
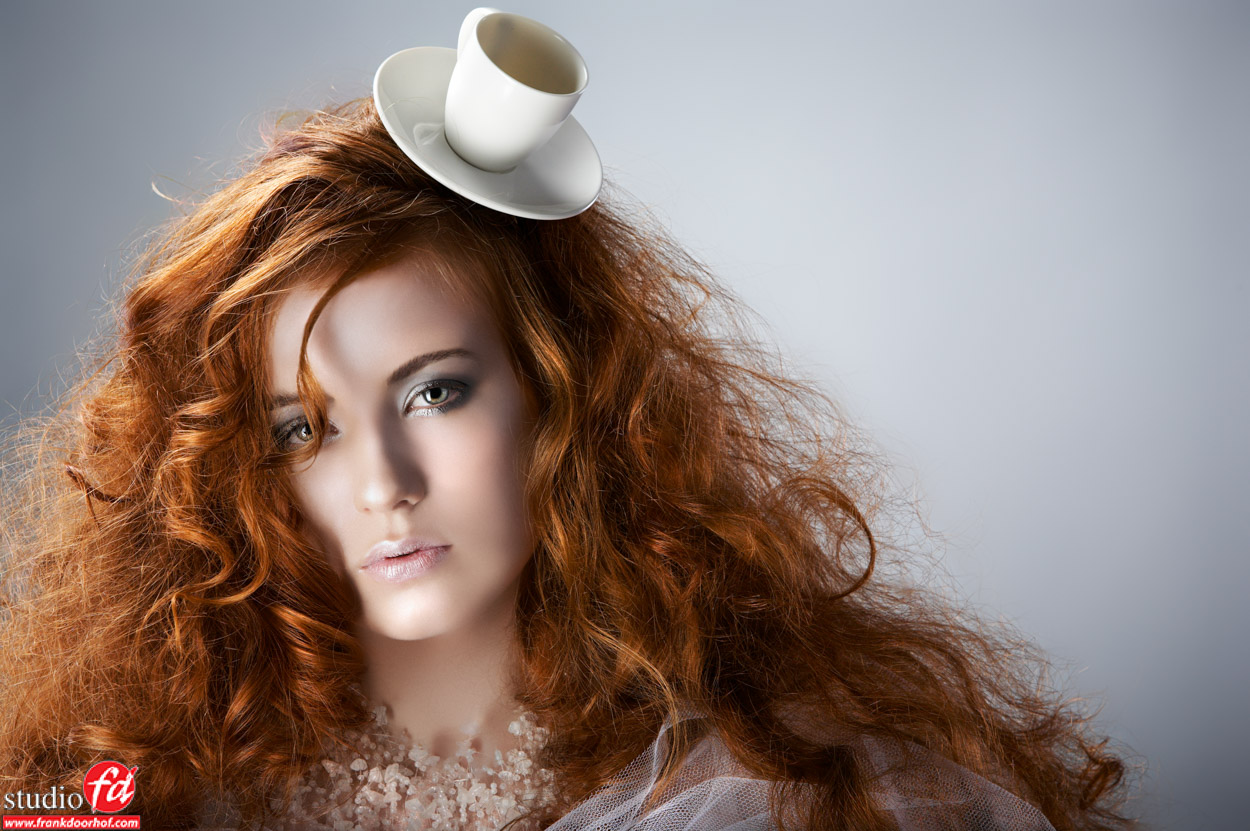
At one point I decided it was not all about weird poses, cubes, plexiglas and yet another color on the background and I started to experiment with styling. This image was one of the first attempts we made with styling, and crazy ideas. We are now in 2005.

Marie 28 Juli 2005 22a

Cheyenne 24 November 2006-14

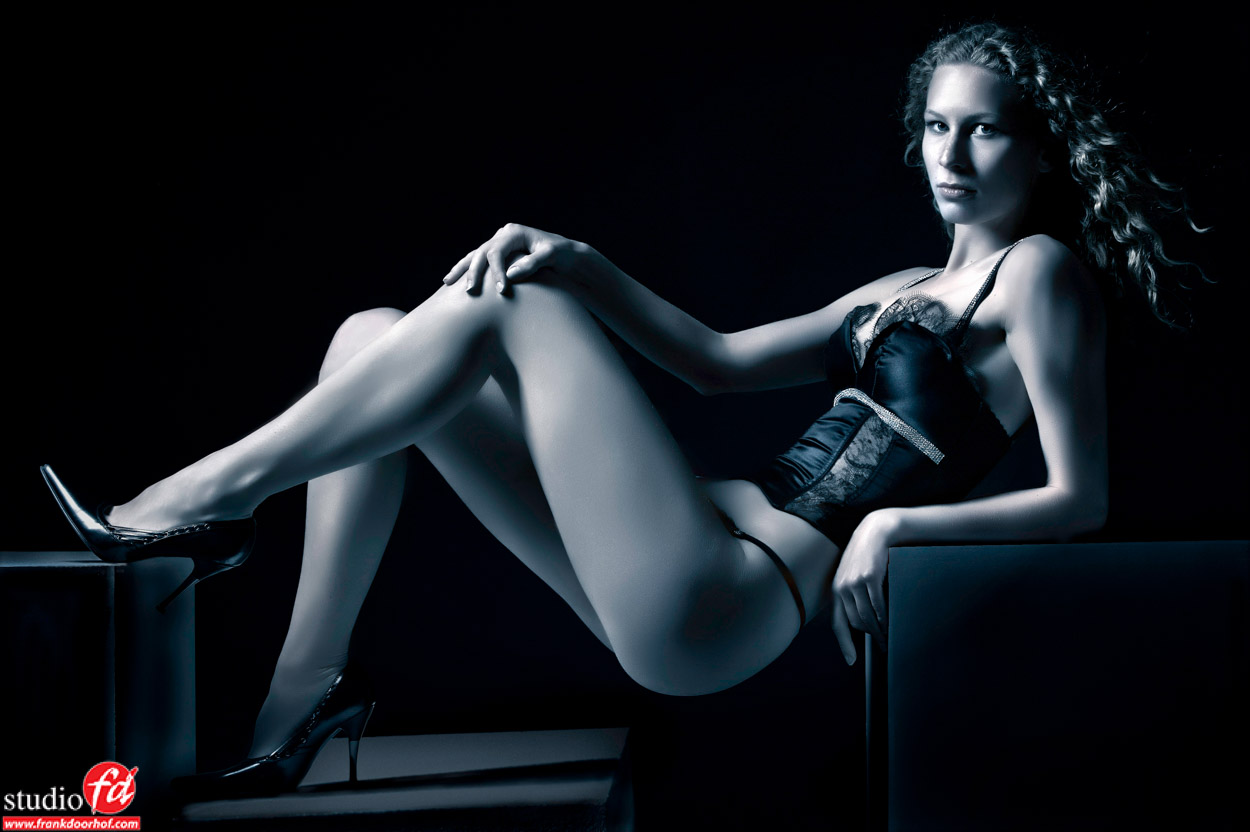
I always told myself that if I used something a while and I nailed a good shot with it (or a series) I would stop using it for a while, but at one point the cubes were bound for a comeback. And we did so in 2007 but as you can see at that point I also started to get a bit more heavy into complexer light setups, this was actually a 3-4 light setup and at point very tricky to setup and get it the way I wanted it to be.

Linda S studio 30 Mei 2007-11

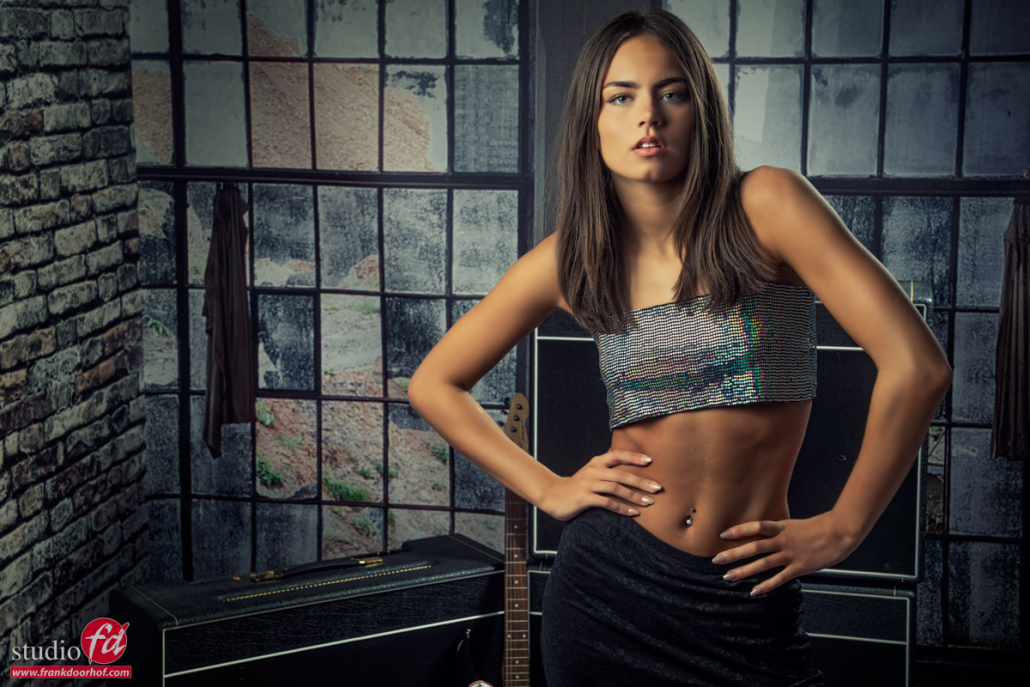
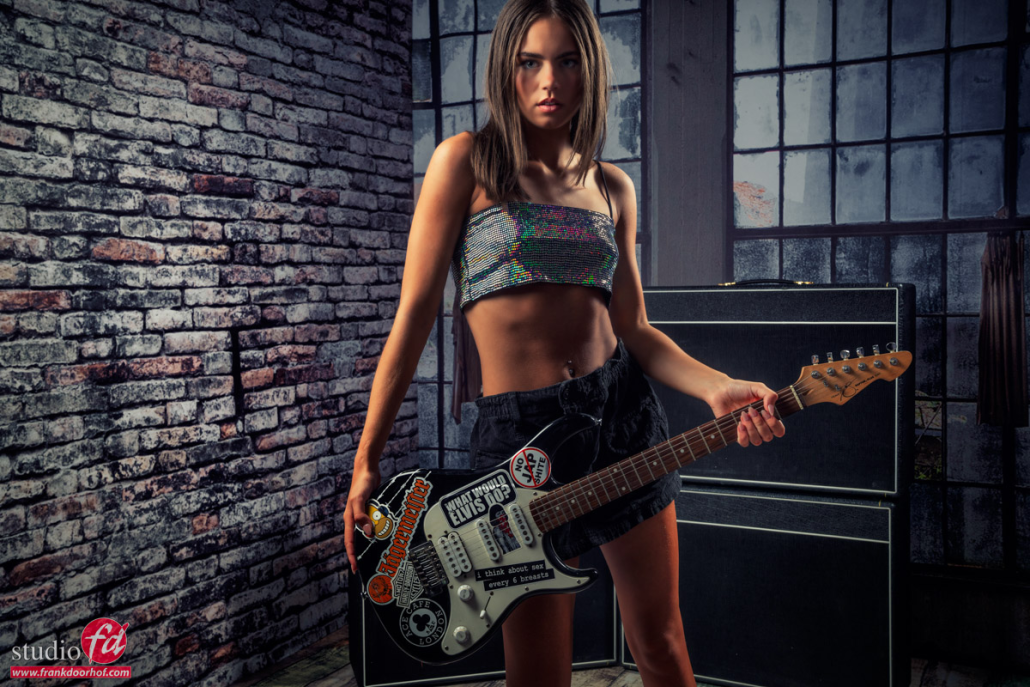
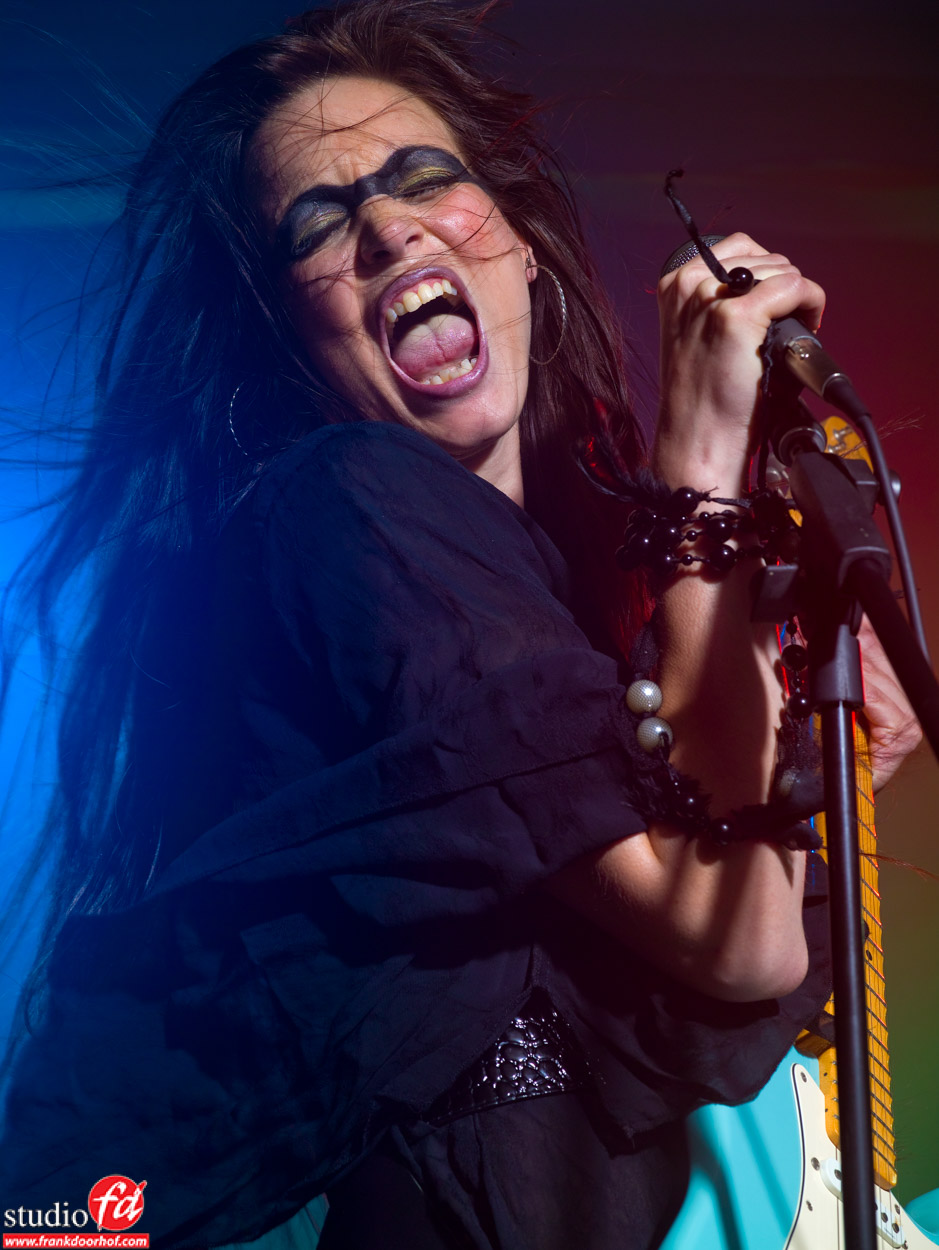
2007 also was the year I needed a model for a show at Professional imaging and Nadine responded, she loved my work and wanted to work with me. As compensation I always offered the models to be paid or to get a TFP shoot, Nadine opted for the last and wanted to impress me, she didn’t want a standard image, now it had to ROCK, so we decided to use the theme ROCKCHICK. I already used some smoke so that was handy and we came up with this shot.

Nadine 13 Juni 2007-57
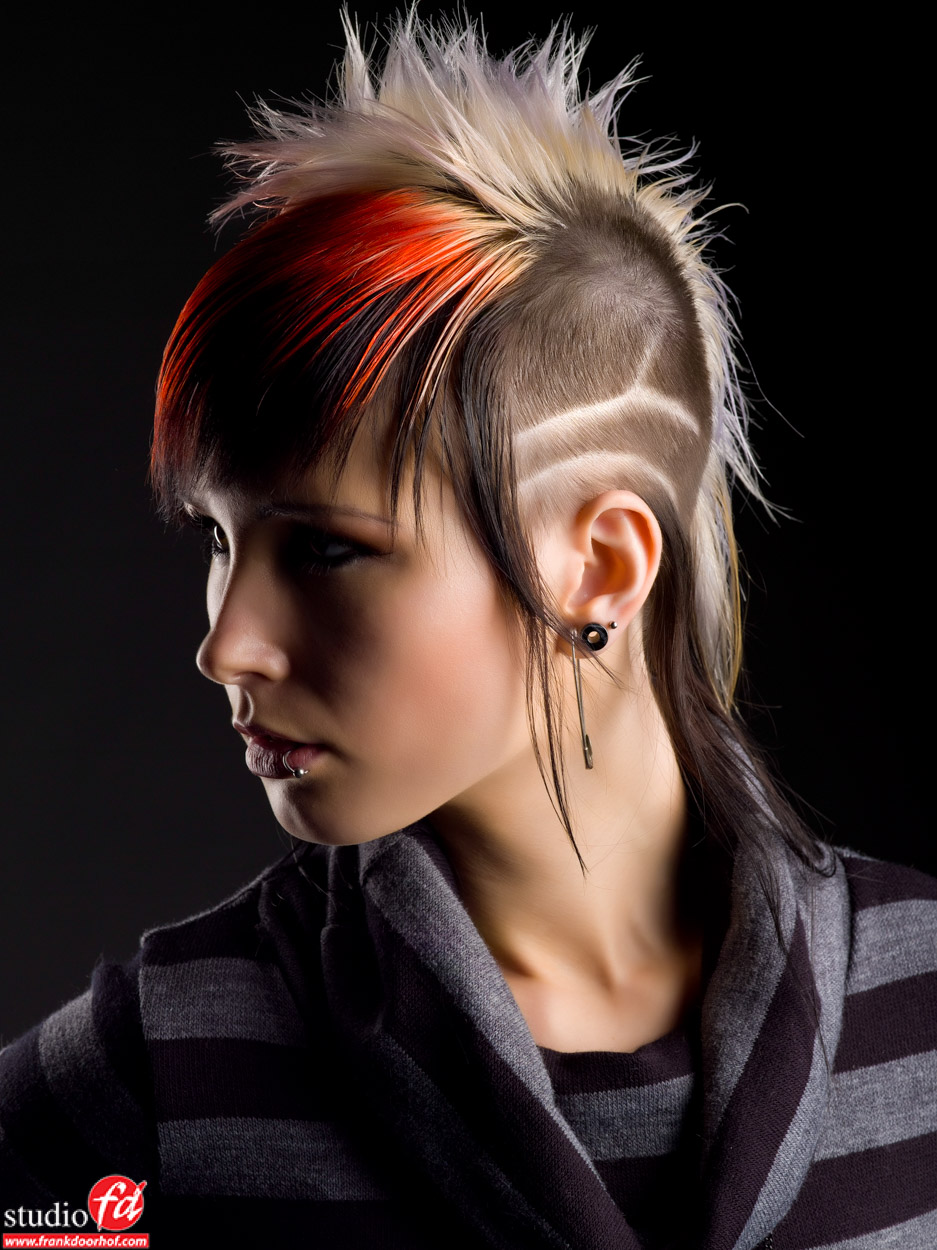
Not much later Corine decided it was time for a haircut a day before a workshop and got me all worried when she told me her choice was a bit edgy…. I don’t have to tell you I loved it.

Corine 9 November 2007 (6 of 15)
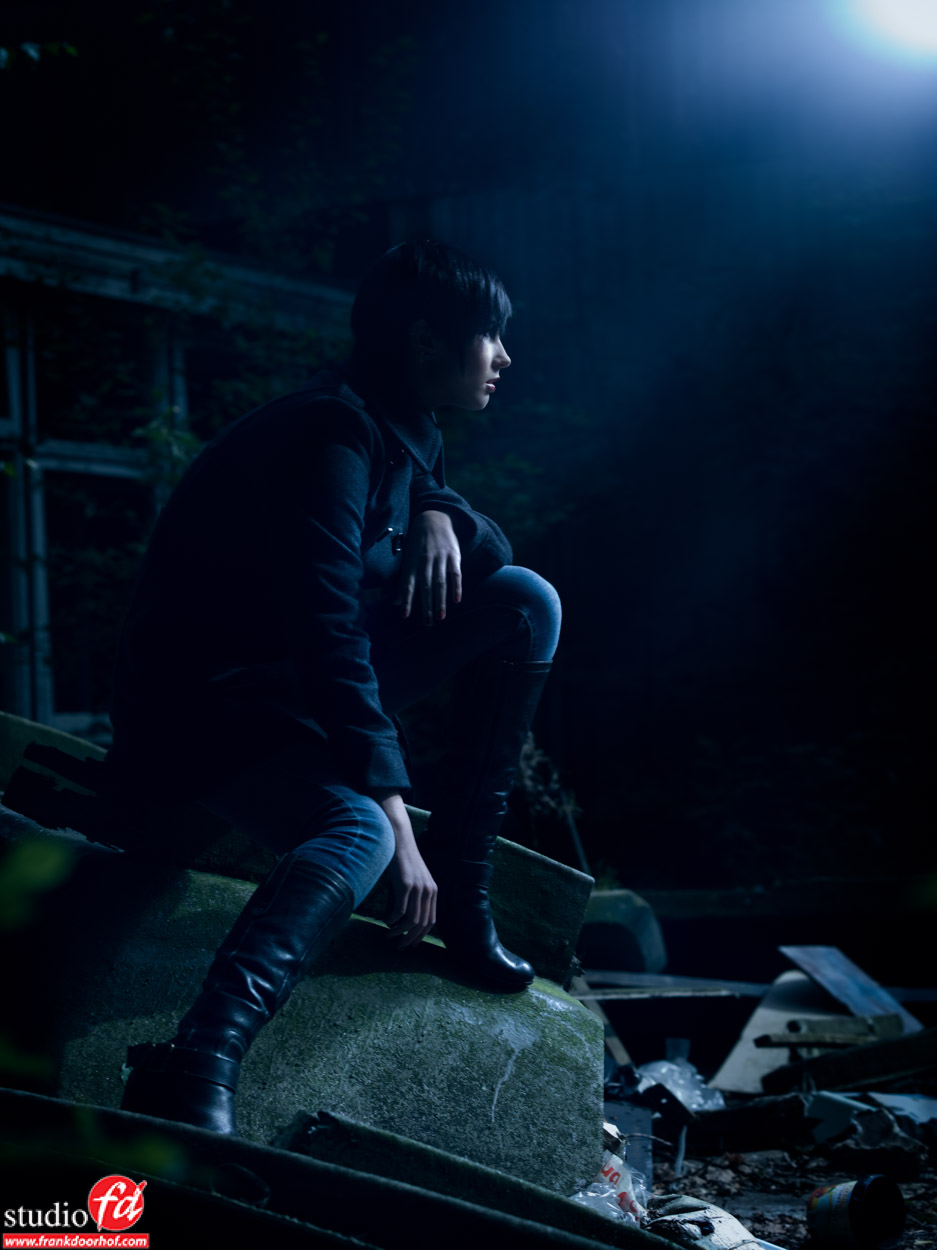
Now a few years later (2008 to be exact) I was venturing more and more outside the studio, for the simple reason my studio was limiting me at that point. And I started experimenting with backlighting and day to night, I think this is actually one of the first day to night shots I did with a model that visited our studio very often (Corine).

Corine 19 September 2008 (72 of 90)

The years after this everything went pretty fast.
Nadine and some other models visited the studio a lot and we worked on some free work and the whole group grew, the workshops started to become more and more successful and Nadine once joked that “every shoot I come it will be more extreme” because I loved to play around with styling and extreme things I of course encouraged this to tell her after every shoot “We’re almost there, it was just not perfect” an inside joke that we still play for the simple reason that we promised each other that as soon as we took the perfect shot we would stop.


For modern work visit my portfolio at www.frankdoorhof.smugmug.com and you can see that some elements return and some elements are now much more different but overall I think you can recognize a lot of things.


Now how did technique help me?
Of course it’s all cameras and gear right?
Well actually for me it’s not.
When I look back I think me discovering David Lachapelle and seeing the over the top styling and story telling really changed the way I looked at photography, from that point on it was never about the model and the beautiful clothes (although important), it was about story telling, the styling (the more outrageous the better), the expression and so much more.


Of course technique did have a major impact on the quality.
Strobes like Elinchrom are very precise and stable so I loved it when I made the switch from my first set Jinbei’s to Elinchrom, I also loved the new modifiers I got to play with. On a tradeshow I shot a few images with a Hasselblad (even made a picture of me holding it because this would be a one time deal), when looking at the images back home…. well I was sold and ended up with a Mamiya/Leaf combination. This helped me with dynamic range and higher resolution images for the artists I shot at that time (they needed really big posters and the 6-8Mps were just a bit on the short side sometimes). But it also helped me with a different format, when I started shooting MF I slowly changed from shooting dominate portrait mode to almost dominant landscape mode. Also my love for movies probably helped with this, it just gives a totally different look to the images and gives the model more room.


So technique helped.. but I always strongly believe (till today) that it’s your mind that creates the images, not the gear, the gear is just a hammer or nail to hang the painting/photo. That’s also why questions like “What lens did you use”, “What aperture did you shoot on” are all actually quite irrelevant. If I tell you…. you still aren’t getting that X-factor ingredient.


The last few years the photography market has gotten very interesting, Sony is taking over like a storm with backlit sensors, insane dynamic range, great features and options to use every lens ever made, and that all helps to get better image quality and makes it easier when traveling (smaller camera). But there is more of course, every day you see new products that make my heart beat faster, think about the recent release of the iPad pro with Apple Pencil that will open up so many possibilities for creatives all around the world, I think the scenery will change, Adobe hopefully will pick this up even more and start creating more and more apps for that.But also think about cameras that are totally flat and have several lenses so you can just shoot and the camera uses different lenses to focus on different lengths (like Light and their new camera technology), this makes it possible to later change the DOF in software… all really cool and handy…. but…… it will not change one thing…. give the best gear to the worst photographer and he will make bad images, give the worst gear to a good photographer and he will create art. An iPad pro with an Apple pencil doesn’t make you an artist, people with notebooks and pen can draw better images while on the phone than I do when I concentrate on my iPad pro 😀 but that doesn’t matter….


Technology helps us to enhance our workflow, create better images, give us option to discover parts of our art we never used before, but the real artist… will always be inside YOU.


Now let’s end with a challenge, write a blog post about your progress and your opinion on how technology helped you and send me the link, the best blogs will be featured on my blog.


Elinchrom HS system first tests

You probably already read some things about it, but Elinchrom recently released their new Skyport and that introduces a whole new way of shooting images outside (and inside). In case you didn’t let’s quickly tell you “all about it”


Skyport
The skyport is the system for triggering Elinchrom strobes (and they also have an universal version of course), main advantage of the system is that you can also change the output of your strobes and turn on/off the modeling lights, use groups and channels etc. A pretty cool system in a remarkable small package. Well you can skip the small in the new incarnation of the skyport, you could say it’s matured now.
ELI19366

But as you can see it’s a good thing, because one of the first things you notice is the big LCD display, and that is awesome. You can now see which strobes are active, you can select the strobes and change settings, and of course you can still change the output of the strobes, switch between groups and much more.


In short the new system has the following new features.
1. Much stronger, so longer distances (something that was needed in my opinion)
2. ODS control, later more but very important for HS use
3. Focus assist beam (very handy in darker studios)
4. HS
5. USB for updates
6. Uses normal AA batteries (yeah)


But the biggest thing is of course: HS


What is this HS?
Well it’s actually quite easy to explain… it makes it possible to sync at higher shutter speeds.
Normally studio and location strobes (except small flash and some other brands) are limited to the so called X-sync which often means that you can shoot up to 1/125 or 1/160 without any problem but above that it’s hit and miss to let say 1/200 and after that you will start to see black bars (second shutter curtain).


Now when you’re used to this it’s not a real problem, but it does limit your creativity, you can’t fight the sun and shoot wide open, simply because the shutter speed would be way too high, you can of course use ND filters but then the camera has problems with focussing so perfect…. well far from.


The HS system from Elinchrom breaks this barrier and makes it possible (in certain configurations) to shoot all the way up to 1/8000 of a second. Which is pretty cool and something that was not possible yet on the Elinchrom system. They achieve this by very clever timing with the TL pre-flash and making sure everything is syncing as good as possible, and this way it “seems” like you have strobe power over the total range of shutter speed, and this is true but… there are some things you have to realize and that you probably don’t read in other reviews, so that’s why I wanted to give some attention to it.


What you need to know
In theory (and real life) the system works awesome, it doesn’t eat your battery (which a strobed system would do where the flash is repeated constantly, like speed lights) and the Quadra for example recycles very fast, just like you’re using it normally.


What happens is that the timing is so accurate that it seems the whole sensor is lit even with 1/8000 of second as shutter speed, but… this works only with SLOW strobes, for example the D-lite series (believe it or not) are perfect for this, but an ELC on the middle setting (clocking in at 1/5600 of a second) is not very good for this system (it actually cuts off at app 1/500 on a Canon 5Ds without fine tuning I have to add), but the BrX, D-Lite etc. all work surprisingly well, and this is very cool because this means you don’t need to buy new strobes. Then why did Elinchrom release new heads (the Quadra HS head for example), well that’s easy to explain, the HS head is a VERY slow head and this means it’s perfect to reach that 1/8000 of a second shutter speed without any problem. So in short, shorter duration strobe heads will not work that well, long duration heads will work perfectly.
The other thing you have to realize that (and it hurts to say this) you can forget about the light meter.
The reason for this is simple to explain but sometimes hard to understand (yeah it sounds funky I know).
To achieve the higher shutter speeds the camera cuts the strobe off earlier, with ODS you can tune this but, the effect is that the higher the shutter speed the LESS of the strobe duration is used.


If for example a strobe has F16 on 1/125 it’s not also F16 on 1/4000. In fact it could very well be F2.8 by that time. And no that’s not a bad thing, it’s simply how these systems work, and the same happens with speed lights, you loose light output the higher you set the shutter speed, ANY system on the market has this “problem”, but thanks to the digital polaroid on the back of the camera we can check.


We did some tests very quickly with the Elinchrom Quadra and the HS head in combination with a Canon 5Ds and it was easy to reach shutter speeds of 1/8000 f2.8 and get some stunning results that were not possible before during day time. It’s a bit getting used to for me to constantly check my digital polaroid, but within a few minutes it becomes second nature, and because the skyport is very easy to operate and give more and less light to the strobe it’s actually something you get used to very fast… and if you never  used a meter before… you will probably don’t even notice this.


In practice
It’s incredibly handy to be able to control your DOF on location, but most of all to control the ambient with the shutter speed over a MUCH greater range than from 1/125 to the minimum you can hand held. You do (again) have to take notice that if you change the shutter speed to let in more ambient light you have to adjust the strobe, but already after one hour of use I found myself doing it almost automatically and nailing the exposure almost spot on every shot I took. And let’s be honest I rather be able to break the barrier of 1/125 and not being able to meter than to meter and be stuck on 1/125. For your creativity this is a HUGE step forward. Plus you can now do almost everything with just the Quadra, add a maxi light and you’re in lighting heaven so the say 😀


Canon and Nikon
At the moment the system only works on Canon and Nikon, Sony will follow soon (I hope very soon), you can of course use the new skyport already on Sony, Fuji, MF etc. but it will do actually everything EXCEPT the HS option.

One could say that Elinchrom is late in the game with their HS system, but I have to be honest the product I see now (and worked with) is superieur to what I’ve used before (note : I don’t really care for ETTL on these systems) and I rather wait a bit longer and have something that works like this than cut corners.


I’m very excited about the system and can’t wait for the Sony version.

We filmed two small videos for the HS system, and today I share some images from the video with Nadine, videos will follow later.


Let’s start with just natural light, everything else is strobed.

Nadine (2 of 79) October 28 2015
Nadine (15 of 79) October 28 2015

Nadine (68 of 79) October 28 2015

Nadine (62 of 79) October 28 2015

Nadine (52 of 79) October 28 2015

Nadine (46 of 79) October 28 2015


Nadine (40 of 79) October 28 2015

Nadine (28 of 79) October 28 2015

Nadine (28 of 79) October 28 2015 1

Nadine (20 of 79) October 28 2015


New instructional video MTM 2 On location

New Mastering the model shoot instructional video : OUT NOW !!!!

Today sees the release of the second video in the “Mastering the model shoot” series, Video 2 : On location.
Working on location is one of the most challenging things a photographer can face, but also one of the most exciting and of course it can give you great portfolio results, but there can also go so much wrong.

In more than 100 minutes you travel with me, Nadine, Lenaa and of course Annewiek through the UK and Scotland and you see me shooting in different amazing locations and with each locations I share the tips, techniques and the gear to go from ok to WOW.

Topics include :

GEAR
Working with small flash/speedlights, natural light, the Elinchrom Quadra. Old lenses on modern cameras.

TECHNIQUE
Metering the scene and calculating for stunning results on the fly, dragging the shutter, cheating to get out of the 1/125 rule without HSS, modifiers, working with wide angles or longer lenses and why.

COMPOSITION
What to look for in a scene, finding the right angles, changing positions for the perfect light, concessions you sometimes have to do and how to work around them

RETOUCHING
A complete run through of two images of the shoot from start to finish with loads of techniques and tips (I didn’t take the easy ones)

MODELS
Working with the model, coaching, poses, styling, story telling

And MUCH much more….

The video is now available on https://frankdoorhof.com/web/shop-videos-etc/direct-video-downloads/ and is priced at 35.00 euro.

We also created a new section with classic videos where you can download the first series of instructional videos for a very attractive price.


Only a few of the images shot during this trip.Nadine 113 - July 13 2015

nadine 10 - July 14 2015

Lenaa 40 - July 13 2015

Lenaa 25 - July 13 2015

UK (79 of 134) July 08 2015

UK (20 of 160) July 08 2015

Nadine Juli 9 2015 0091

Nadine 65 - July 13 2015

nadine 93 - July 14 2015

UK (72 of 134) July 08 2015 1

UK (138 of 160) July 08 2015 1