Tag Archive for: location

The most amazing deal of the year

It’s time for the 5DayDeal again

If you want to get the most amazing deal for your photography, I think the 5daydeal is exactly that.
Every year they deliver the goods and also this year the deal is jam-packed with awesome tutorials, e-books, filters, presets and software.

We made a special page for the 5 day deal.
If you use our link you also support our work.

This year you will also find 2 of my new tutorials in the deal.
Did you know… Lightroom
And
A full length lighting tutorial for portraiture and fashion.

Add those two together and you already have the value of the total package 😀
So head on over to the page and order your 5daydeal today and start learning for.. well at least another year (yep it’s that jam-packed).

A step by step workshop with Nadine and using Geekoto strobes outside

Workshop outside with Geekoto strobes

What do you teach?

Probably one of the first questions people ask when they want to know more about my workshops.
And let’s immediately take the bull by the horns. It sometimes seems everyone is teaching workshops and the quality is often not what people expect. A guided photo shoot is NOT a workshop. I’ll teach you lighting with Geekoto strobes (but any brand will do). Continue reading more about using Geekoto strobes in a workshop outside.

For me, there are a few things important during the workshop.

  1. A small group
    I love to work with groups varying from 3-12 attendees. This way I can give a 1:1 experience to all the attendees and we all have enough time to shoot portfolio material.
  2. Theory
    Knowing how the light works is essential and will immensely help you understand what happens during a shoot. How to place the lighting quickly and solve problems. In essence, lighting isn’t that hard (no really), it’s the creativity and getting the right shot that’s an everlasting journey of learning.
  3. Creativity
    The theory is essential, but after that, it’s all about creativity, how to style a set, how to find the right angles, how to coach the model, etc., etc. this is in essence what makes or breaks the shot
  4. How to work with the model
    You can’t take a perfect shot (if that’s even possible) if the model doesn’t feel at ease, so during the workshop, there is always attention to coaching the model and also how to prepare for the shoots.
  5. Workflow
    Understanding your gear and software takes away so much stress and means you can focus 100% on the session and your subject.
  6. Q&A
    Believe it or not, I hardly prepare my workshops, but I’ve taught a lot of them over the years, and at the moment I start all the workshops with a Q&A. In this part, the attendees can ask whatever they want. I will answer the questions immediately for the theory part and create a set (or make it part of the set) during the workshop. Do you have a problem with a white background? Then we create one set with a white background. This way attendees always get what they want and expect.

Themes of our workshops

All the workshops do have a theme.
For example, Cosplay, Classical Masters, Glamour, Gels, etc. but the content will be different every single time due to the Q&A which keeps it fresh and challenging for me but also for the attendees that visit several workshops a year.

One of the themes a lot of photographers struggle with is using strobes on location effectively.
So let’s take a look at the workshop “On location in Emmeloord” with Nadine.

All shots were done during the workshop outside with Geekoto strobes

During the workshop, we worked with the Geekoto GT200 and a large metal reflector for most shots.
These reflectors add some extra light output to the strobe which helps a lot outside when it is really bright.
On the second Geekoto GT200 I used the Rogue magnetic system for some added color or a grid with the reflector for color.

The Geekoto strobes support ETTL and HSS but for the workshops, I have to limit the strobes to full manual mode.
The reason for this is that all cameras operate via a different radio system. This means that if you use a camera that is not supported you cannot shoot which of course is not the idea of a workshop. So we are using so-called “dumb” triggers that work on all cameras. The only limitation is that I have to shoot at a max shutter speed of 1/125 which means we shoot with rather small apertures. When I shoot commercially or for myself I’m using HSS for a much shallower depth of field. As you can see in some images.

Outside with Geekoto Strobes, set 1

After the Q&A it was time to go outside.
The idea of this workshop is that the attendees have to find interesting locations around our studio. In other words, you don’t have to travel far to find awesome locations. And always remember, seeing it through the lens and with strobes it’s a totally different scene.
The first set was right next to our studio.
Our neighbors use a closed fence. The clothing Nadine was wearing worked flawlessly with the fence.
I started using the reflector straight on the model but to create a more interesting look I added a blue gel from the side.
By experimenting with angles and the balance between the strobes you can quickly change looks on location. Even without the client noticing.

outside with Geekoto Strobes. with on the left a blue magnetic gel

Outside with Geekoto strobes, set 2

For the second set, we found a few large onion boxes that were stacked up and Nadine had the perfect outfit for this.
I started out with just the reflector on Nadine. But soon we switched this over for a Rogue grid as the main light on Nadine’s face and the reflector with a blue gel top opened up the shadows with a blue tint for a totally different look. And of course, as you can see you can change the output of the blue strobe to create totally different looks without losing the focus on the face of your subject.

outside with the geekoto strobes

Outside, set 3

You probably will notice it with these shots but….
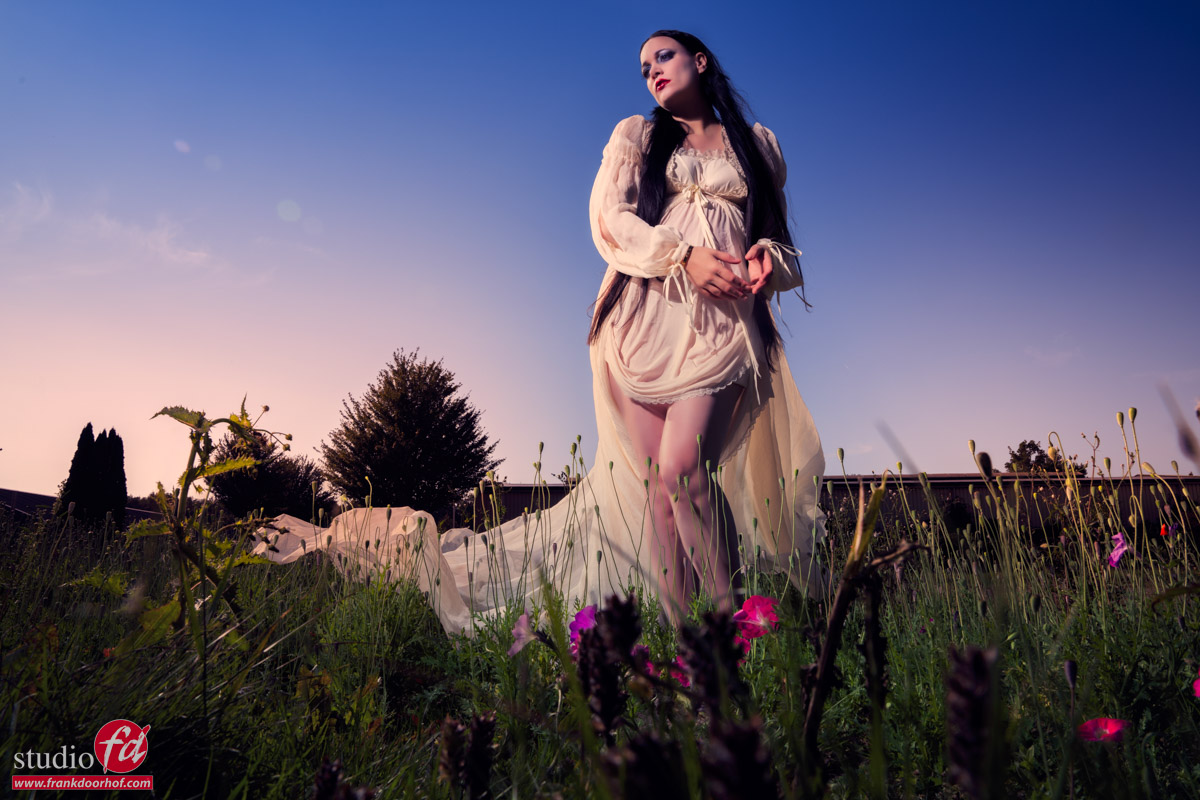
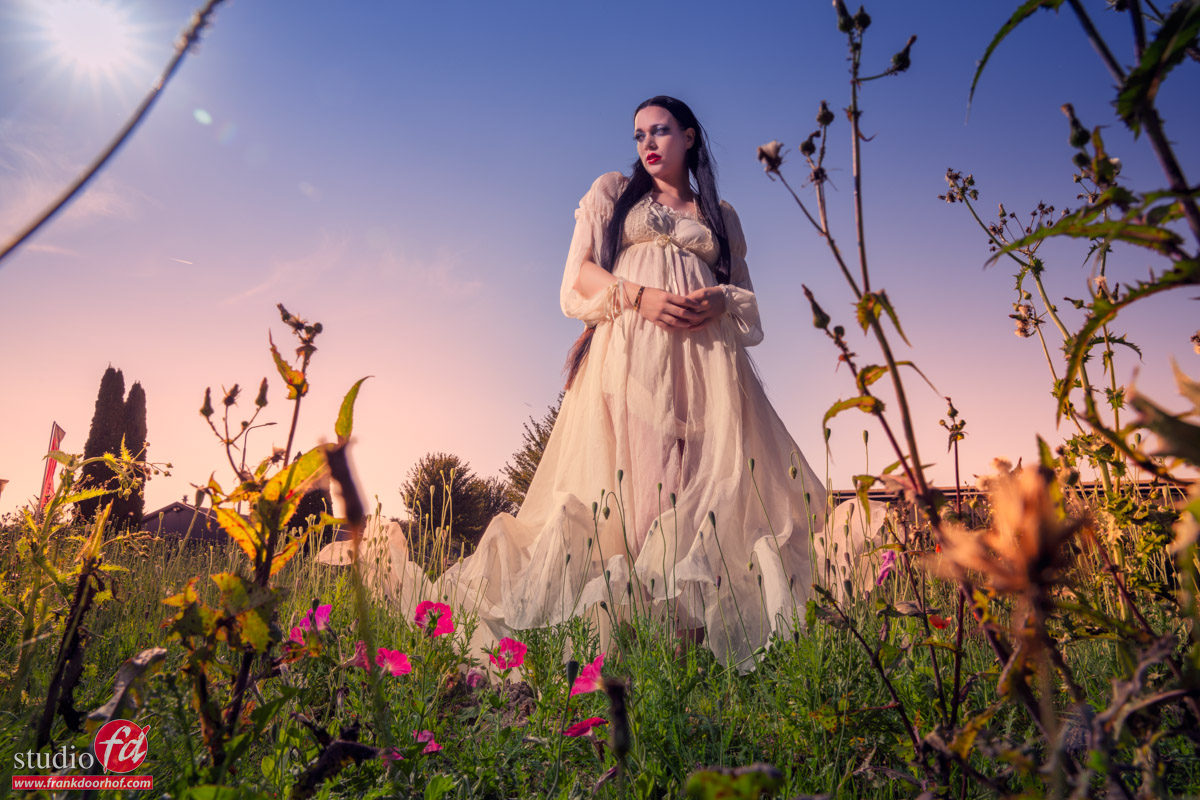
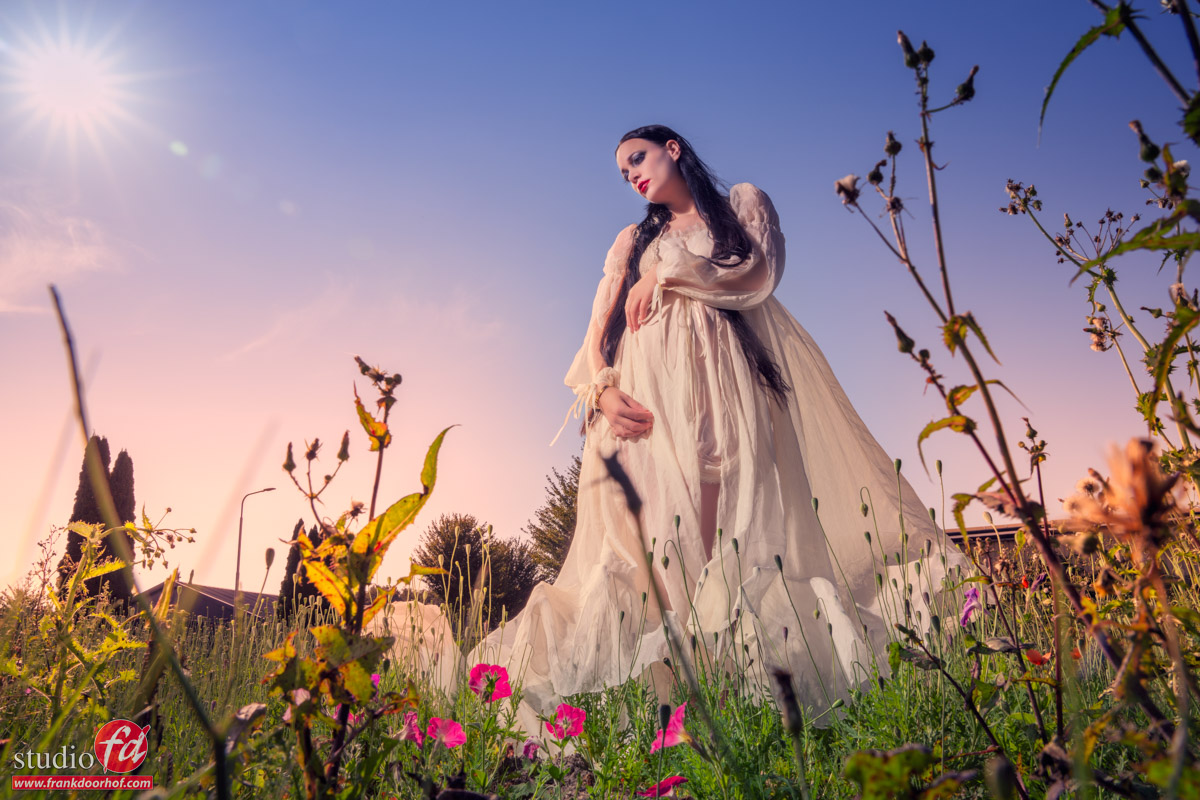
Nadine is pregnant. So for the next set I wanted to shoot her pregnancy shots. Well some of them at least, because I think we will do some more at a later stage.

For this set I wanted something a bit more bright and airy.
In front of our studio there was an old building. Great for photography (one of my signature series backgrounds is actually from that wall) but they recently demolished it. And now there is a large field right in front of the studio… not a disaster 😀

I used the Geekoto GT200 with the large reflector for a harsher quality of light.
This is the set I also shot on HSS as you can see 😀
The part of this shoot was to not only find the location but also find the right angles. And how you can change the look of a scene and shot by changing your perspective, using material in front of the lens and of course maybe angling the camera slightly or…. Well let’s take a look at the different options I chose from this set.

Oustide with Geekoto strobes, creating a lens flare with a second strobe Workshop outside with Geekoto Strobes, shooting from a very low angle Workshop outside with Geekoto Strobes, photographing from a higher angle

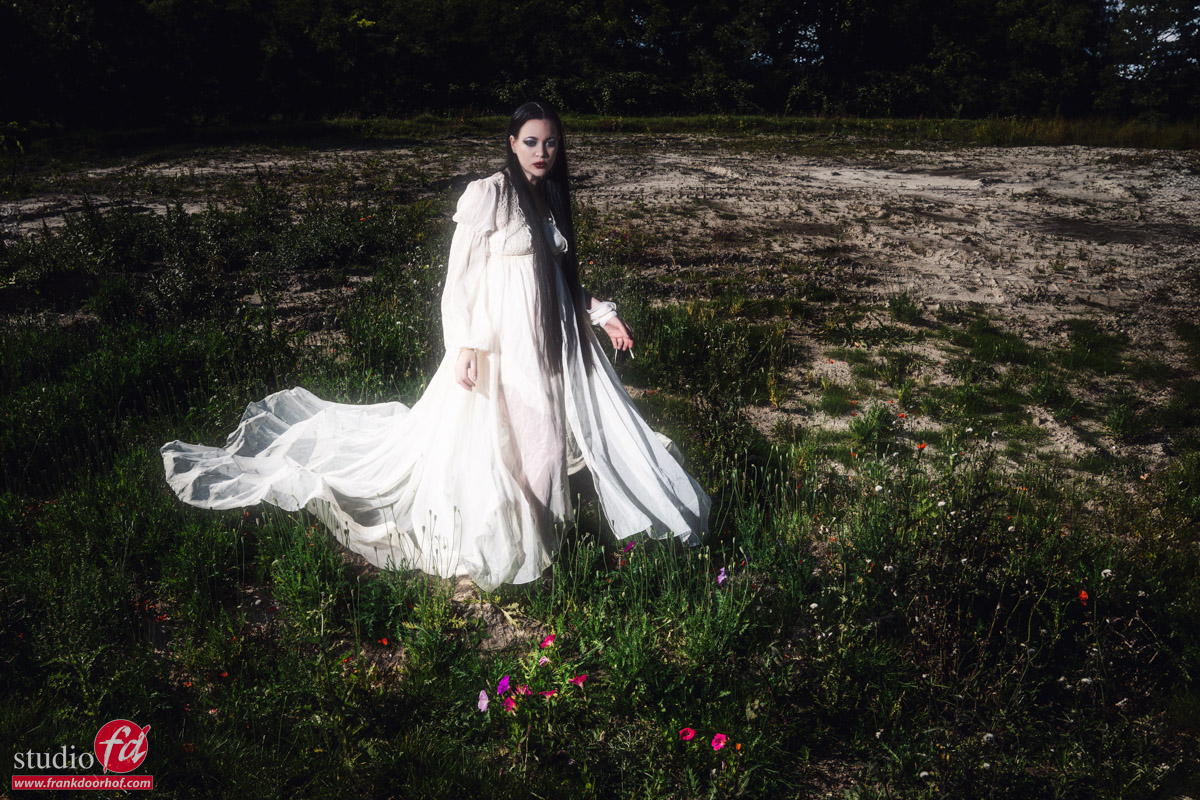
Outisde, set 4

This location was at the edge of Set 3. and the last one in the workshop outside with Geekoto Strobes
I used the Geekoto GT200 as main light and the reflector with a blue gel in the back.
Choosing a lower angle gave me a cool triangle in the back which I feel gives the image a nice flow.
And of course a more close up shot is part of the setup. This was the time we changed batteries on Geekoto Strobes.

Workshop outside with Geekoto Strobes and making day to night images

Also want to visit a workshop?

Today I showed you the results and different sets we did during the workshop outside with Geekoto strobes “on location in Emmeloord” with Nadine.
During the workshops I always try to use 3-4 different setups explaining different techniques and of course it’s a great way to get a good addition to your portfolio.

If you think “that’s for me”
Than visit photography-workshops.eu for the Dutch workshops.
But if you are not living in the Netherlands or don’t speak Dutch we also have other options.
If you let is know 2 weeks in advance I can teach the workshop you want to visit in English.
Or if you can’t travel to our studio we also now offer the option to get a full 1:1 experience with 5 different camera angles, lightroom/Photoshop view and a talkback channel, you also get all the raw files and retouched results from the workshop. Visit our online workshops page for more info.

How to read a light meter

How to read a light meter?

A light meter is a tool to meter your light. Some photographers think it is something from the old days. Others don’t “need” one. And some people never use it. I am a big advocate for using the light meter. In this article, I explain why and how you read a light meter.

Lightmeters are cool

Let’s start right away with a bold statement 😀
I know for a lot of people light meters are not the first thing they think about when starting with photography. But that’s wrong. I might say it’s one of the most important parts of your kit.

Why is the light meter so important?

First of all, we have to realize that we only see 3 colors as human beings.
We call those colors the primary colors, Red, Green, and Blue.
We also have secondary colors, Cyan, Magenta, and Yellow.
All colors are connected via the blackbody curve (white points for color temperature) and determine the colorspace.

Now how do they determine the colourspace you might ask?
Good question actually.
All colors within the colorspace have 3 coordinates, x y, and Y.
Hue, Saturation, and Luminance.
When we want accurate colors in our photos I think it’s clear we need to make sure the colors are captured as accurately as possible when shooting them.

We have 2 tools for this that work together.
The first one is the color checker (I’ll write a different post about that in the coming days) and the light meter.
The color checker is used to calibrate the colors in your RAW converter, but to get the colors (x,y) right we also need to get the Y correct and that’s where the light meter comes in.

It’s super easy actually

Sometimes, I feel a little bit like the light meter helpdesk with all the questions about the use of light meters. And most problems occur by not understanding the meter, so let’s dive in.

First of all, let’s make it clear…. it’s really super easy.

Let’s first take a look at the display.

how to read a light meter? I use this light meter

On the display, you see the shutter speed: 1/125
The ISO: 400
And the F-stop: F8.0 (4)

And that’s where it often goes wrong.
A lot of people will now set up the camera for F8 on ISO400 1/125 and… well the images are overexposed.. so how is that possible when using a light meter? Right?

Well because there is one extra number that is really important, and that’s the little 4.


It’s in the details

When we look at our camera you will probably know that you can change your F-stops in 1/3rd stops.
On most strobes, you can have 2 options, also in 1/3rd or even on 1/10th stops.
But don’t confuse the two. The settings on your strobes have nothing to do with what you see on the meter. It’s just the power output, and there are also settings like 2.8, 4.0, or 5.6 that are pure because… well those numbers are there.

So how do we proceed?

When your meter reads F8.0 (4) this means the meter reads F8 and 4/10th.
If you have strobes that can be adjusted in 1/10ths you can just lower it by 4 clicks and you’re probably reading F8.0 after that (if you have good strobes).

If your strobes can be adjusted in 1/3rd stops we have to improvise a little bit. Go down one click on the strobes and the meter should now read F8.0 (1) now its a matter of just moving the light a few inches further away and it will read F8.0

Now I have to be honest, for 1/10th I don’t really move my lights, but if you really need to be very accurate it does work great.

how to read the light meter. example of the settings Let’s try it out!

Here we see F5.6 (7)

We have a few options:
1. We can go down 7 clicks on a strobe with 1/10ths adjustments and get F5.6
2. We can go up 3 clicks on a strobe with 1/10ths adjustments and get F8.0

1. We can go down 2 clicks on a strobe that works in 1/3rd adjustments and move the light slightly for F5.6
2. We can go up one click on the strobe and end up at F8.0

1. Set the camera up for F8.0 and lower your aperture one click for F7.1
2. Set the camera up for F8.0 and raise your ISO 1 click (also the ISO is set in 1/3rd on most cameras)

The nice thing is that if you know how to read the light meter you can very quickly change settings.
Do you have problems with calculating settings like ISO, shutter speed, and the connection between the Aperture?
Don’t worry, if you use a meter you can just change one setting and you will the other settings change.

In other words, if you misjudged the lighting and you get a reading of 1/125,  ISO400,  F8.0 and you need a faster shutter speed, you can just change the shutter speed, ISO, and Aperture until you see the settings that will work. You don’t even have to do a new reading.

Are light meters only for strobes?

So is a light meter only handy when using strobes?
No absolutely not.
A light meter, just like your camera can be used in different configurations.
You can use it to determine your aperture or shutter speed and of course, play with your ISO.
It’s like the perfect pocketknife for all situations 😀

Ok, I’m sold, which light meter should I buy?

It’s no secret I love the Sekonic brand, but in essence, you can also get a different brand, just make sure you get the right one.
First make sure it’s a flash-compatible meter, so most very old meters will not work.

Also, make sure to determine if you need an incident meter or want both (reflective and incident).

Incident vs reflective

When we look at the difference between the two it’s easiest to compare the reflective meter to how your camera works. It will give you the value for 18/12% grey. These meters often have extra attachments (spot meters) or have the spot meter build in. Personally, I would highly recommend getting a meter like the Sekonic 758 or 858 with a very tight spot meter build-in. You can also buy attachments for some other meters but I don’t want to mess around with attachments that can be lost, so the 758/858 would be my choice.
But do you need it?

That’s a good question.
The main thing where we use light meters for is the incident meter.
This means you hold the meter in front of the area you want correctly lit and the meter gives you the correct value.

Now you might say… why would I ever use a reflective meter if it only gives me 18% grey?
GREAT question.
We use reflective often to make white backgrounds 100% white and not 98 or 110%. This prevents spill and shows all the details in clothing and hair which you would lose if you overexpose the background “too much”. Or we make sure that certain areas are 100% black. But you can also calculate light falloff.

Now I have to be honest.
Mostly I used the reflective meter outside to calculate the output of my strobes to create day-to-night images, fill light, and everything in between. But with modern cameras, there is a really cool trick for this.

Is the EVF a replacement for the light meter?

Yes you read it correctly the EVF can replace the “reflective” meter, but only in certain circumstances.
For example, if you are on location and want to create a cool day-to-night effect.
Just set the EVF up for emulation mode and fix the shutter speed where you want it, start to play with aperture and ISO, and just watch in the viewfinder, let’s say you love the look at F8, 1/125, and ISO100. Now, The only thing you have to do is set up your strobe for F8.0 for which you still need an incident meter (to do it fast and right).

How to read a light meter conclusion

Reading the light meter is super easy when you understand the extra numbers and how they interact with your camera and strobe.
The benefits are immense, you can work a lot faster, visualize and set up location shoots within seconds, and wow your customer by nailing the shot right away (something you see less and less).

When you look at eBay you can probably find a lot of meters but if you want to buy new (something I do advise with precision instruments) I would check out the Sekonic range like the :

Sekonic 858 (my meter)
or the Sekonic 758
but the Sekonic 358 is alright too
These are examples of the meters I owned over the years but they also have some really good alternatives like the :
508, 308x, 478 etc.

Check out Sekonic.com for more information on the different types.
Buy via our links to support our work.


Read this blog on a white background with only 3 umbrellas, I couldn’t have done it without the light meter

This article is about colors and sets


How to make wow images with sets and colors

Sets really add something

Often when I mention sets people think about big-budget solutions, but the opposite can be true, and mostly is in my work. In this article, I combine sets and colors to create WOW images.
It’s almost a sport to create cool-looking sets without breaking the bank.
So we also look for cool stuff on fleamarkets, attics, etc. you would be surprised what kind of “junk” you can buy for next to nothing that works great in a photoshoot.

And sometimes you use what’s there.
In this case, a customer brought in a huge projector for me to calibrate and it was packaged in a flight case. So…. yes indeed why not use it in a photoshoot?

Today a small tutorial on how to spice up a small set with a touch of color.

Model: Claudia
Want to visit one of my workshops?
Check www.fotografie-workshops.nl

Do you live abroad and is travel out of the question?
We have you covered there, book a full-day 1:1 online workshop in English or Dutch.
Just mail me for more info

Below the video, the results of how I made WOW images with sets and colors

Model : Claudia

How to make WOW images with sets and colors How to make WOW images with sets and colors


Read this blog for more sets with Claudia and colors