Who didn’t struggle with this one…
I know I did, and during the workshops I’ve heard the question over and over “how do you get those really cool sharp shadow lines on your model?”
Somehow I always immediately think about the old detective movies, where someone was looking through Venetian blinds and you can see the shadows on the face. So when I started with modelphotography I of course got some Venetian blinds to create the best images you have ever seen… only to fail miserably.
A softbox definitely was not the way too go, I knew that.
So my first experiment was with an open reflector and grid aimed at the venetian blinds and te results were…. well pretty disappointing.
Of course I wanted to know what I did wrong and found out that all the “power” was in just one simple move.
Literally move your light.
When you want really harsh shadows, think about the sun, it’s far away and gives you huge shadows, add clouds in the sky and the shadows are softer. This is why we often refer to clouds as “the big softbox in the sky”.
The harsh light I got but the problem was that the shadows were hardly seen on the model, unless she was really close to the Venetian blinds and the light against the wall, which in that period meant 2-3 mtrs. All the images I saw in books with diagrams gave me that setup, but the results were nothing like it.
The trick is distance, which at time was my problem.
When you move your light further away from the Venetian blinds the shadows will become harsher, but also reach further, meaning the model doesn’t have to stand against the Venetian blinds, but can actually move in the set, as long as you have space.
The problem is of course focussing your light.
Meaning you need to make sure that the light doesn’t spill over your whole set, but only where you want it.
Luckily for that we have several light shapers.
If you use reflectors you can add grids which makes sure the light beam becomes much more focussed, and depending on the depth of the grid you can make the light beam smaller or wider.
of course you can also use a snoot, I personally love the Rogue snoot on a GT200, which makes it possible to not only project a round lightshape (with the included diffusion panel) but also a vertical light pattern, if you leave the difussion panel out (the GT200 is a rectangular strobe vs the GT250 which is round), and you can adjust the beam of light by collapsing the snoot in 4 different settings.
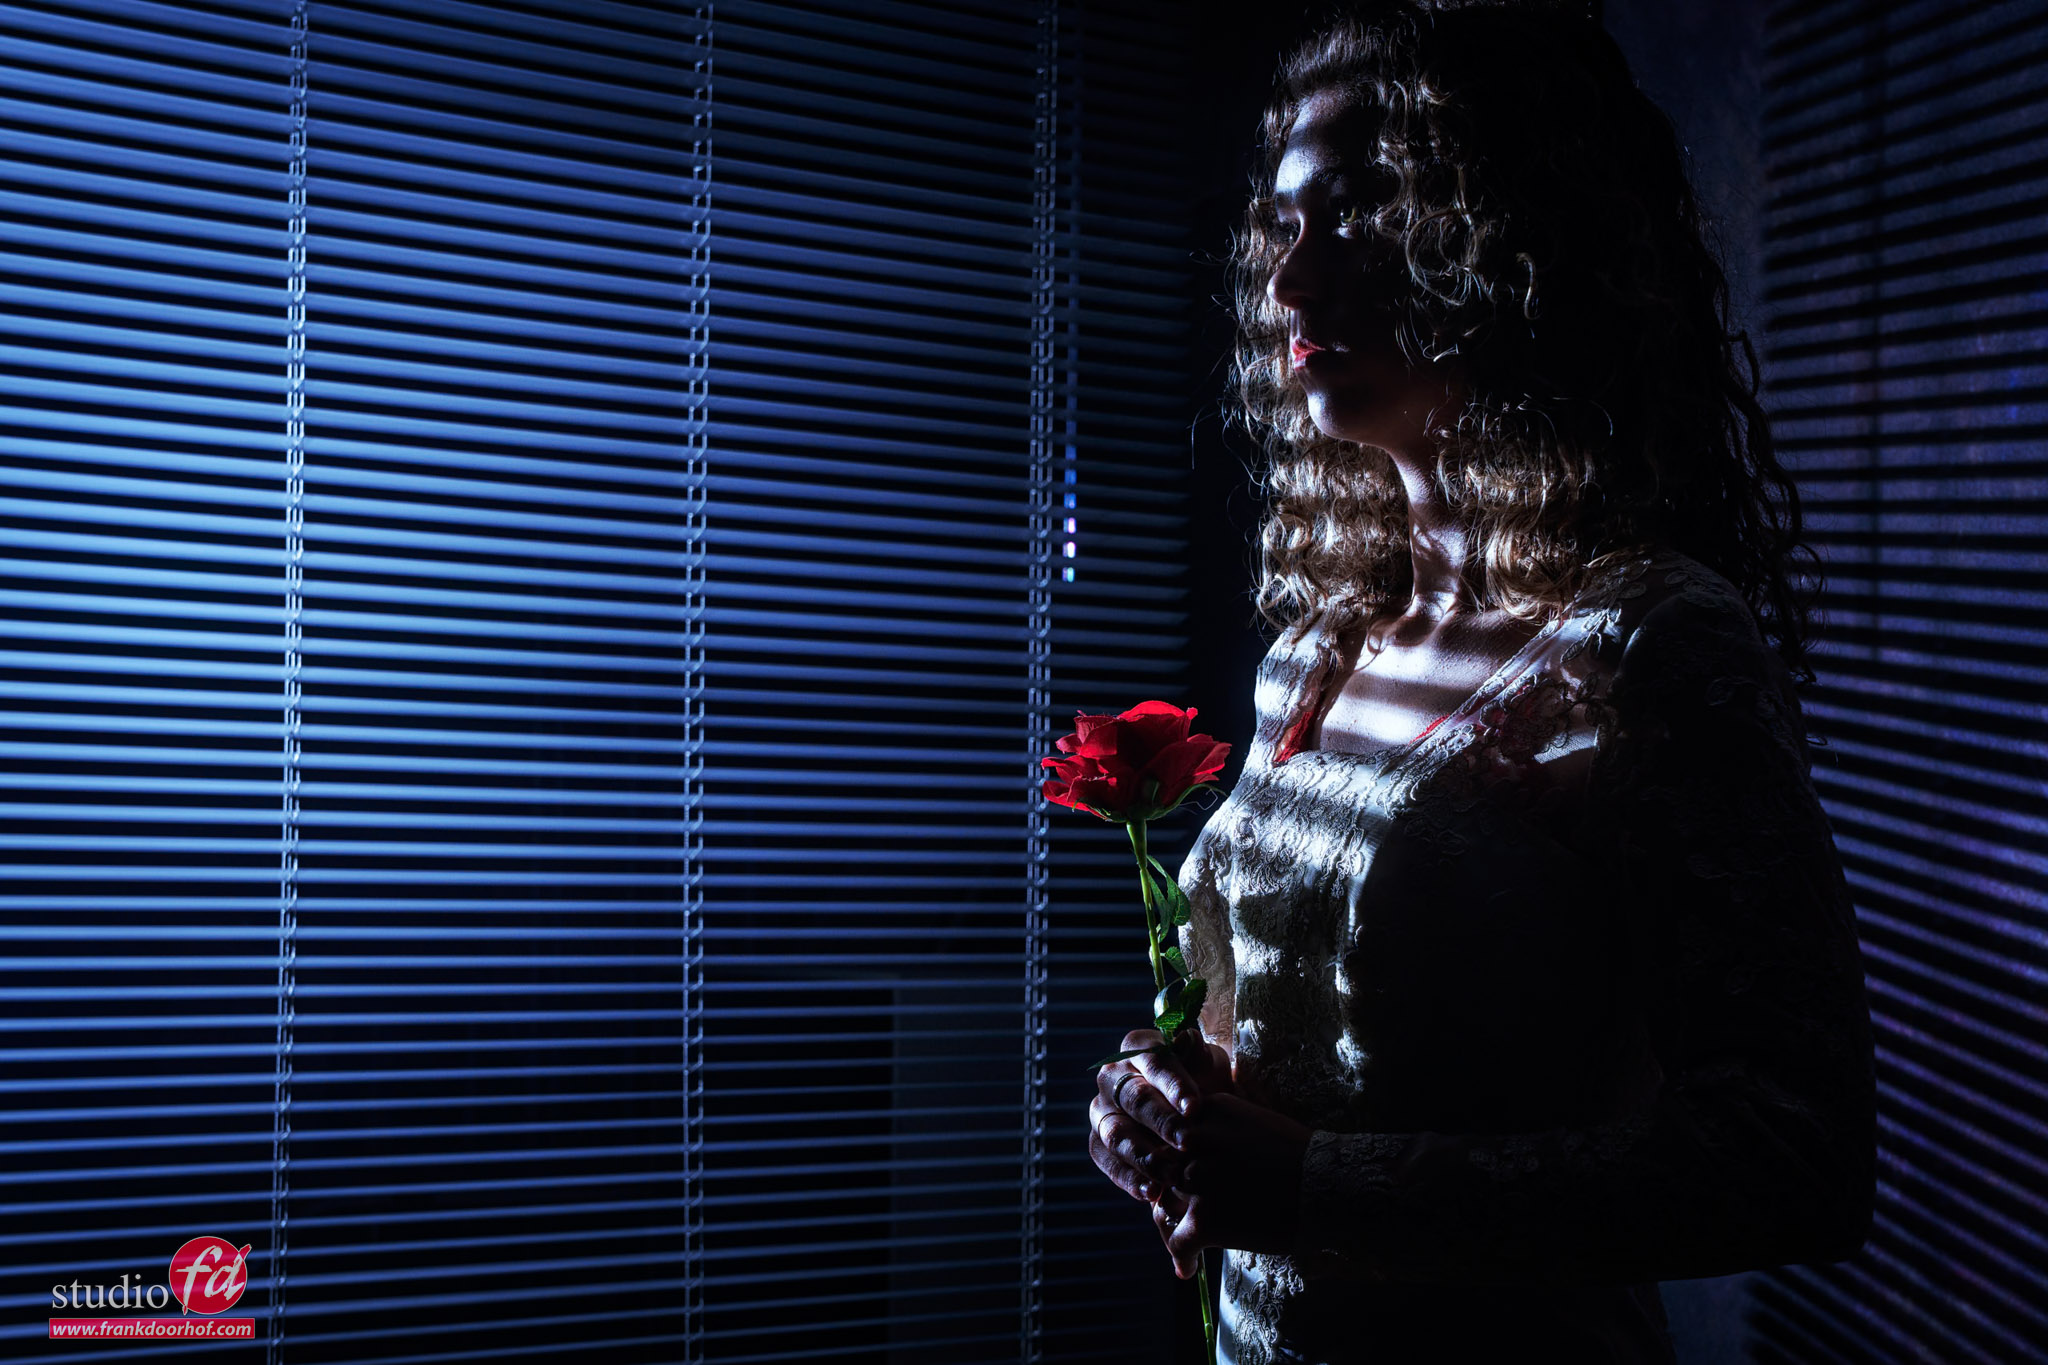
Let’s take a look at a result with the model close to the blinds.
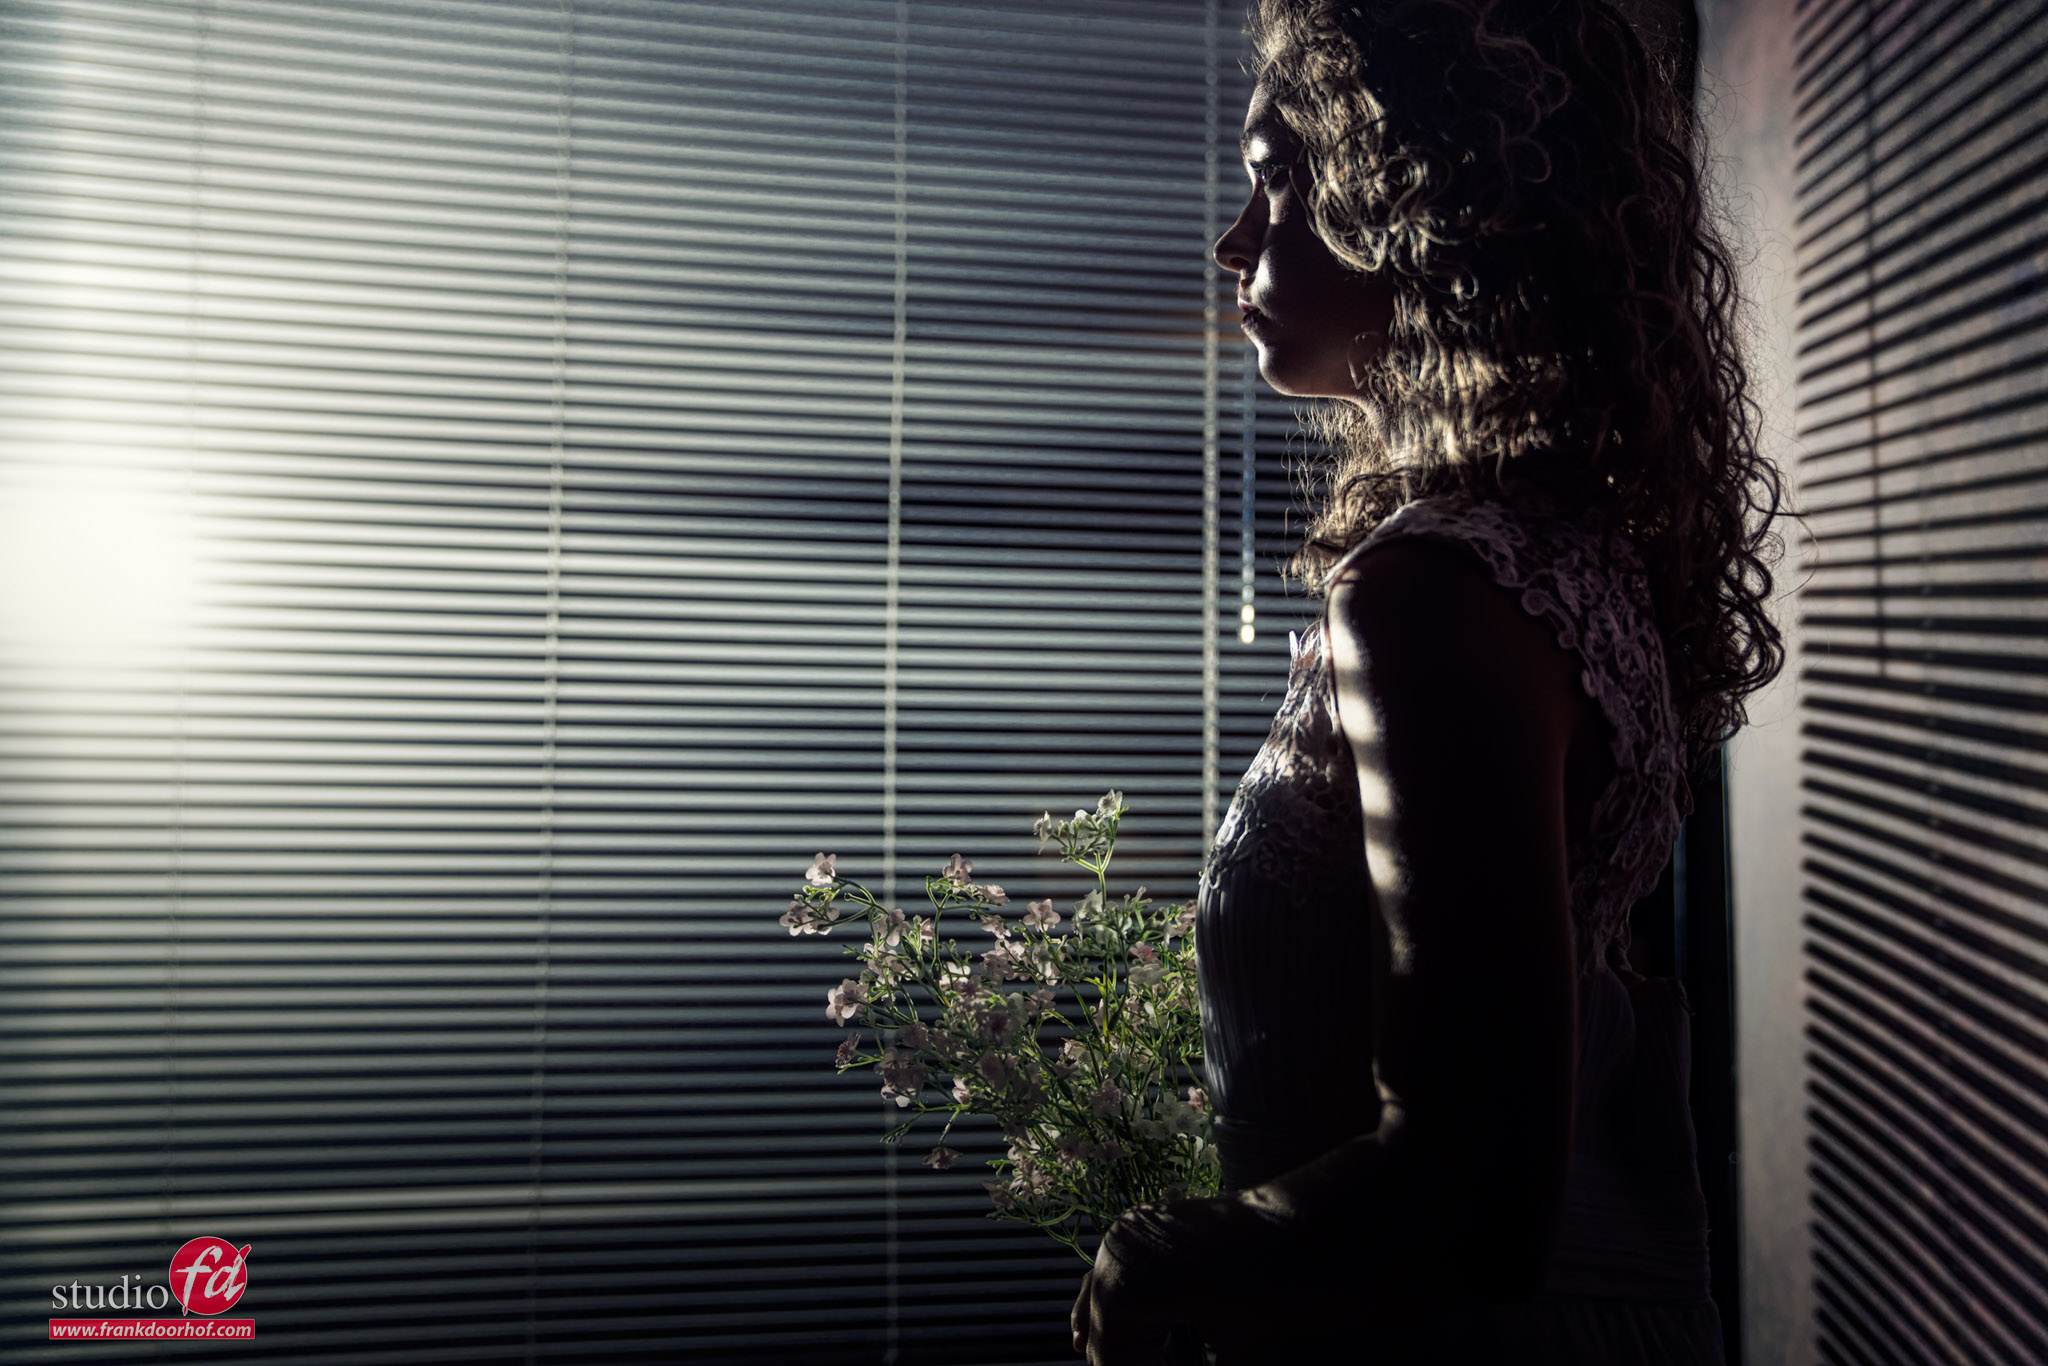
As you can see that with enough distance you can also see the lines on the background.
Which means we can also use them in a set, and if you like the shadows to be less harsh…. just move the light closer to the blinds. You have 100% control.

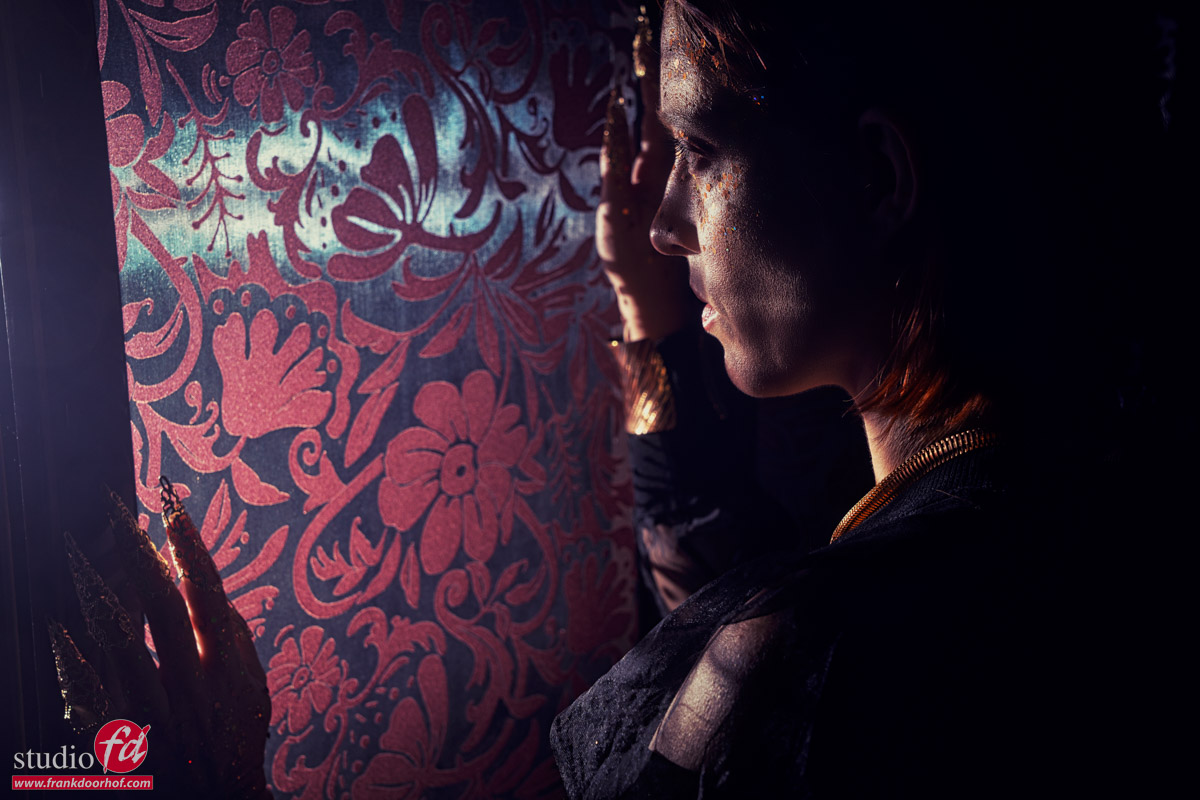
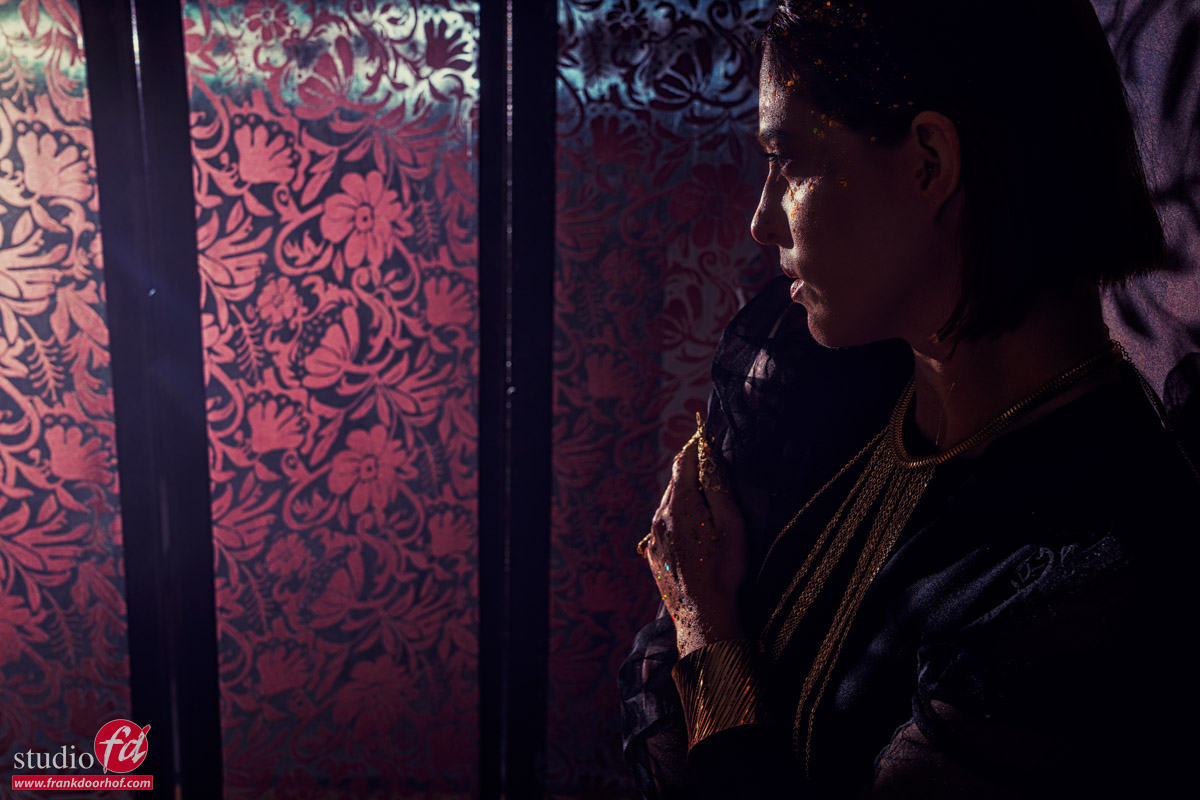
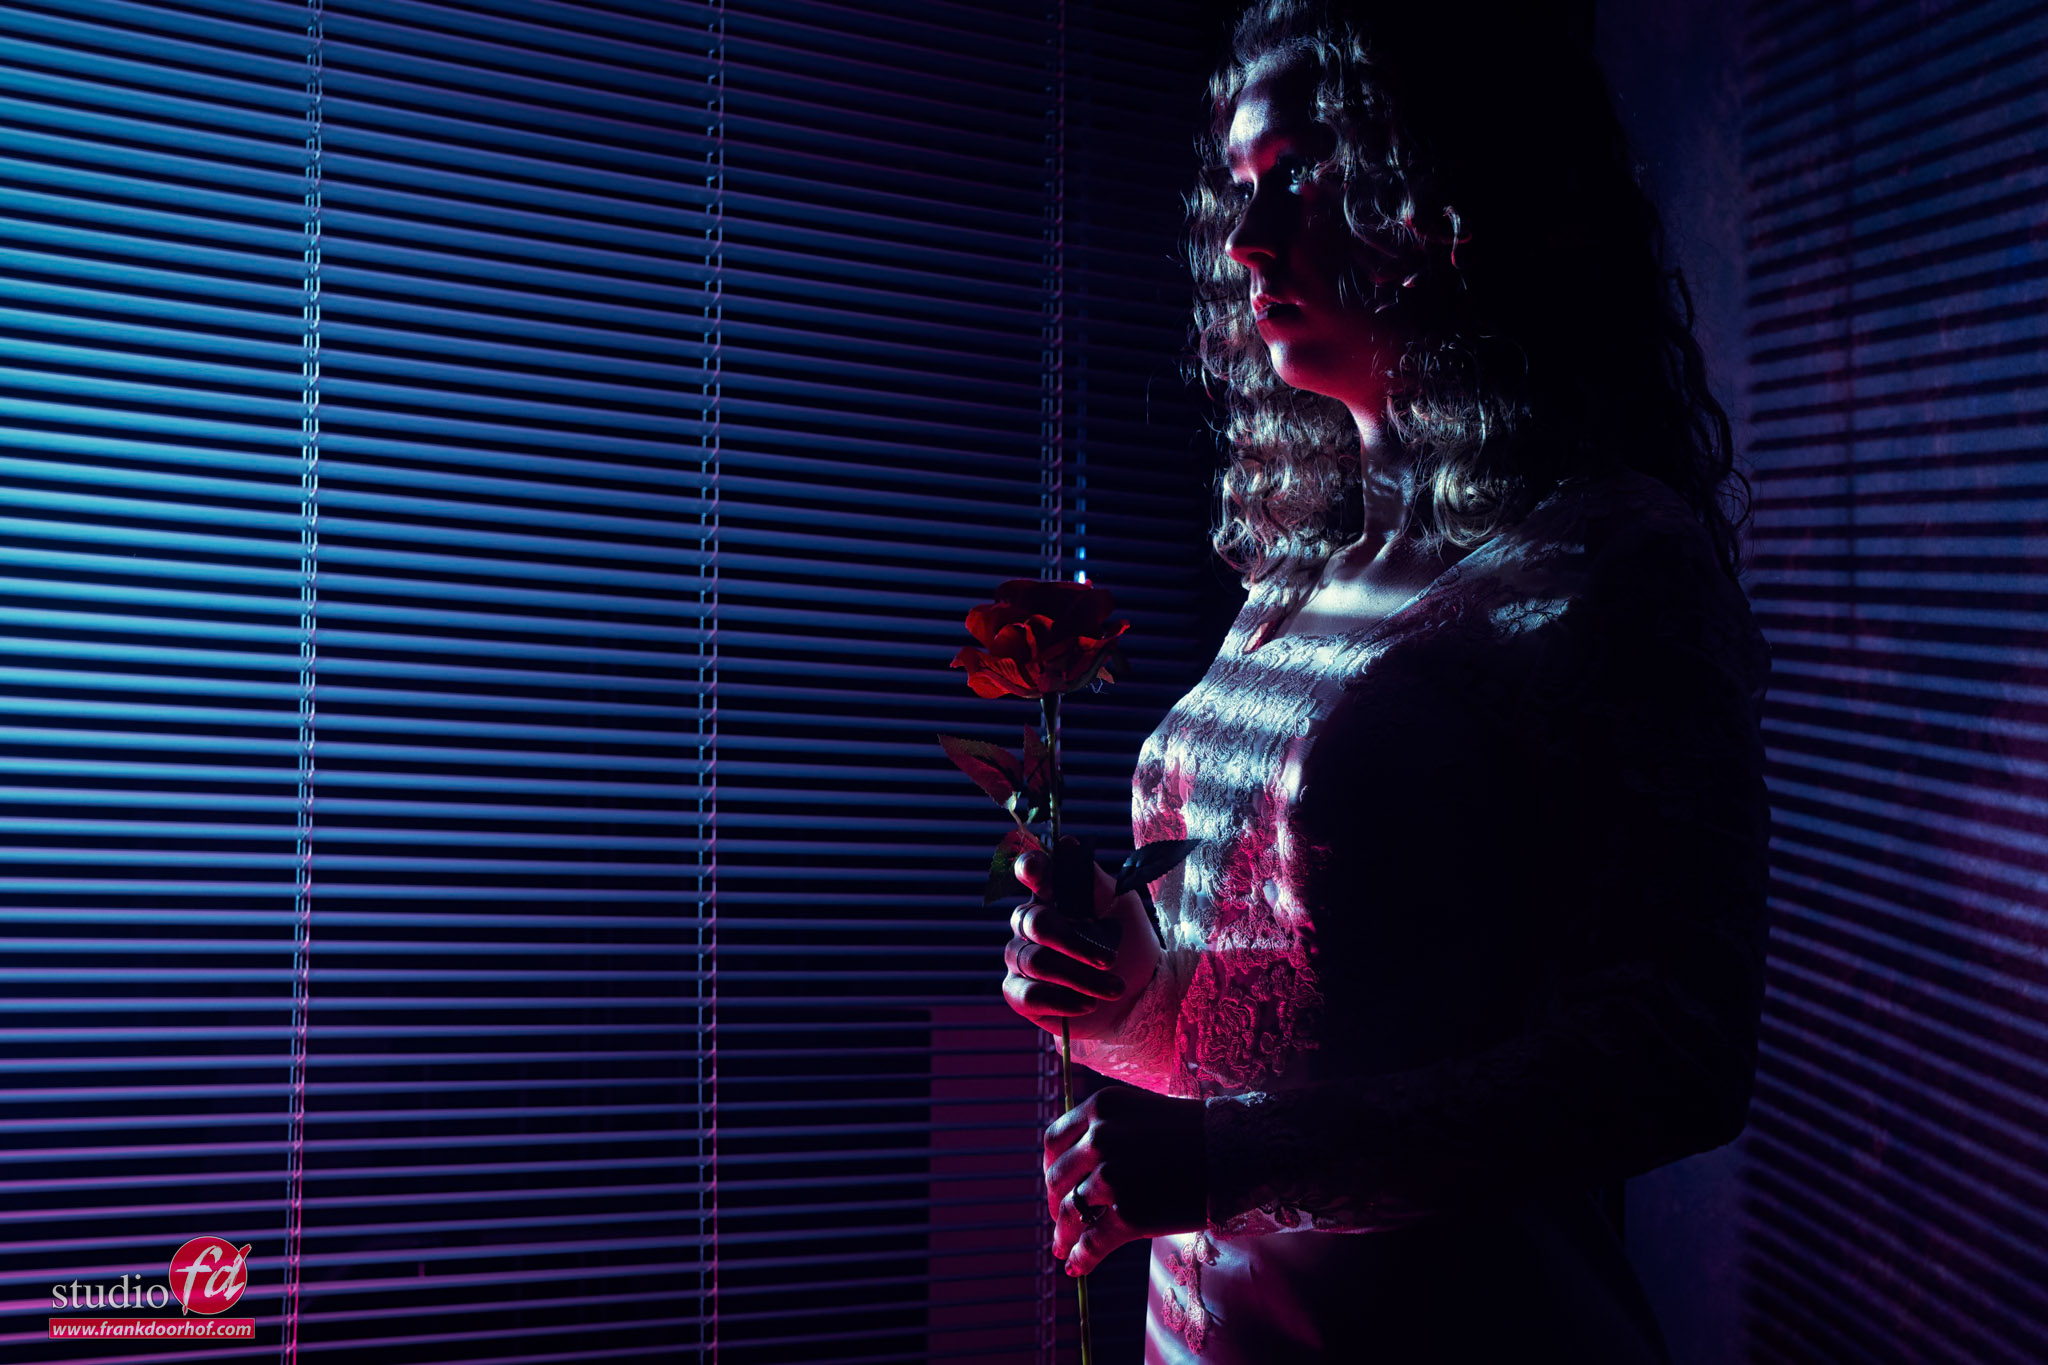
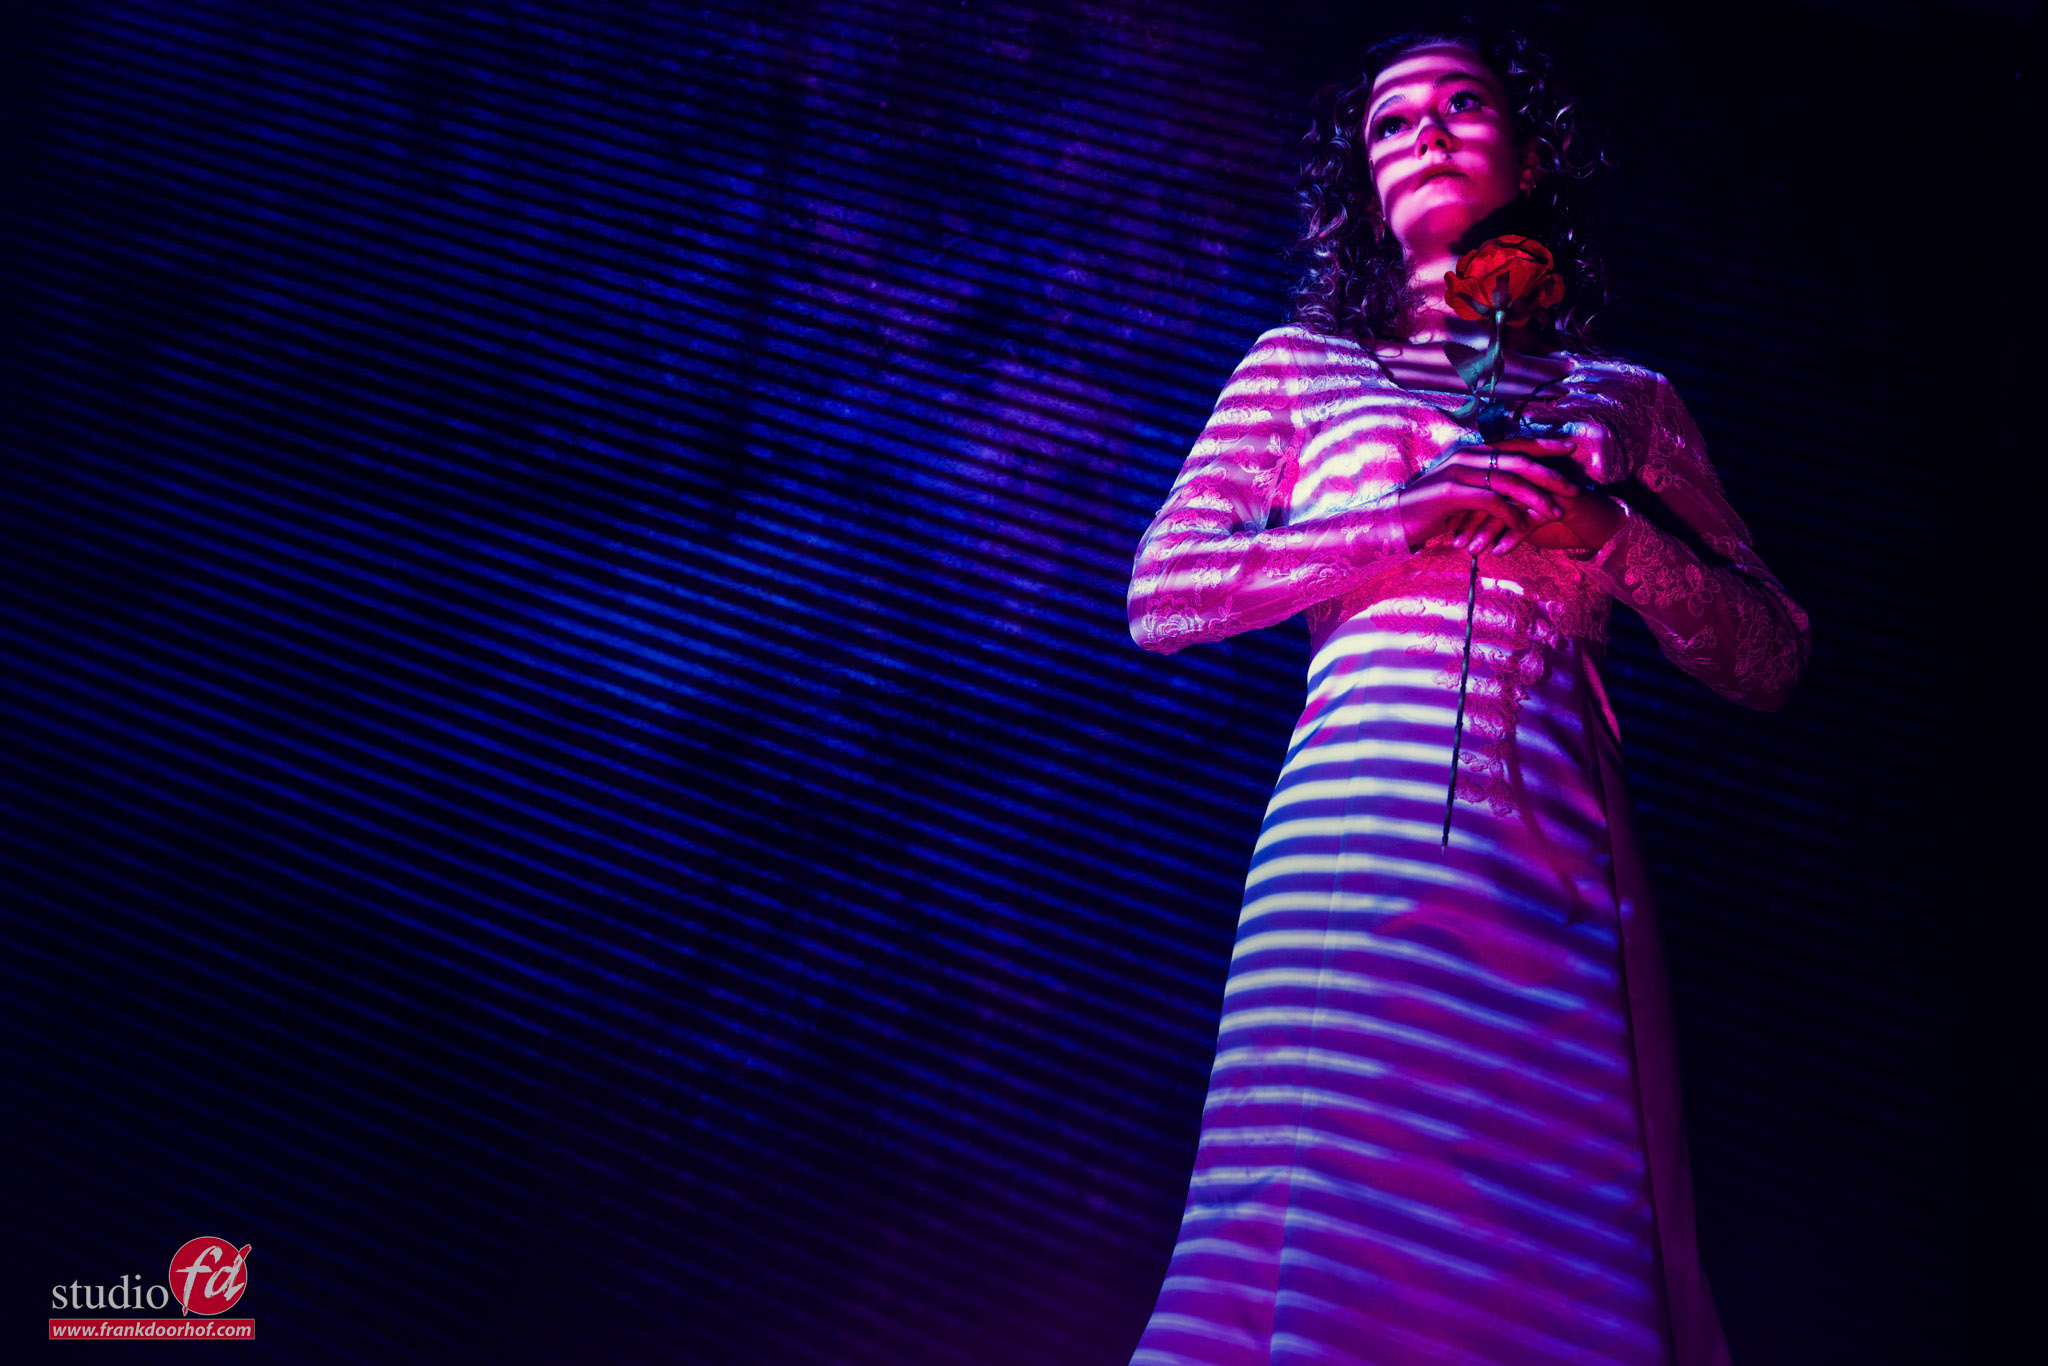
And if you like it more moody and dark, just change the angle and exposure.
And maybe add a slight blue color, which always helps with getting a more moody dark feel.
And finally, you can of course always add a small fill in light.
In this case I’m using a Geekoto GT200 with the Rogue Magnetic dome and a red gel to give a nice fill in light that both hits the model but also leaves a nice gradient on the Venetian blinds.
Because I need the strobe to be low on the floor I’m using a platypod to hold the strobe.
The platypod system is a great solution to replace tripods and place strobes in ‘impossible” (super) “creative” locations.
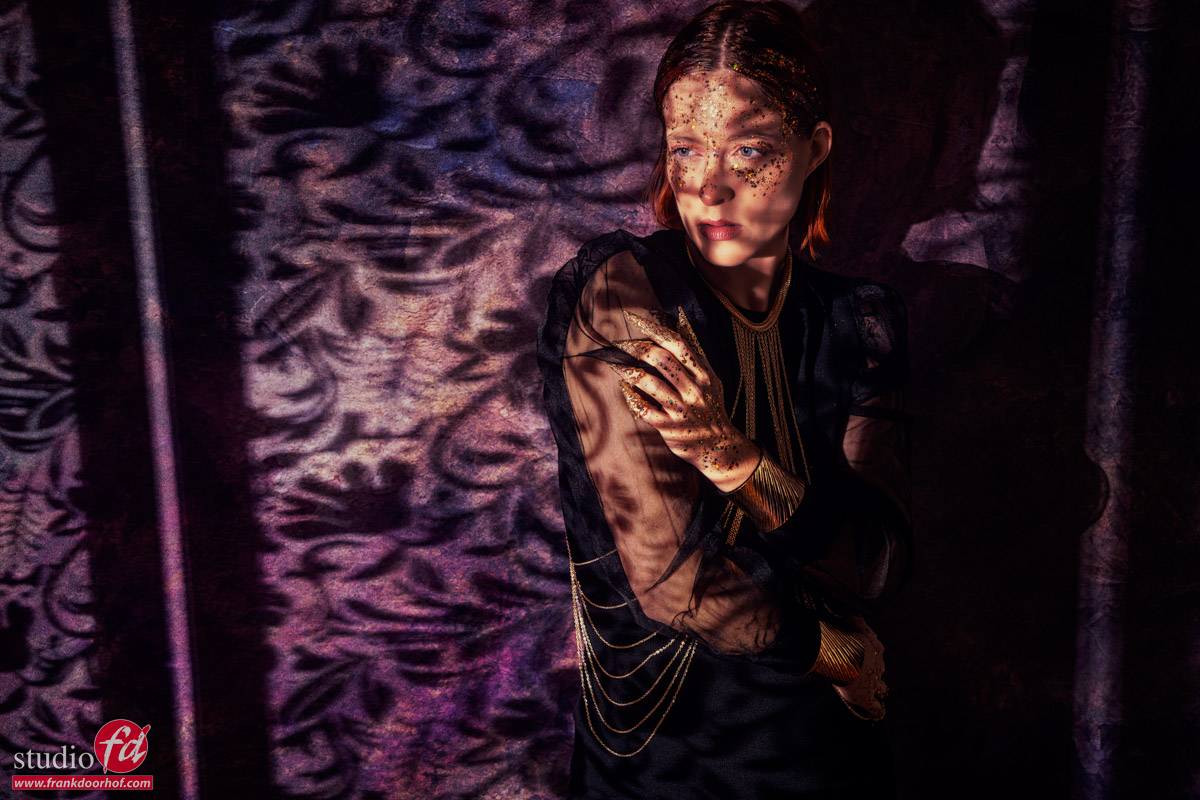
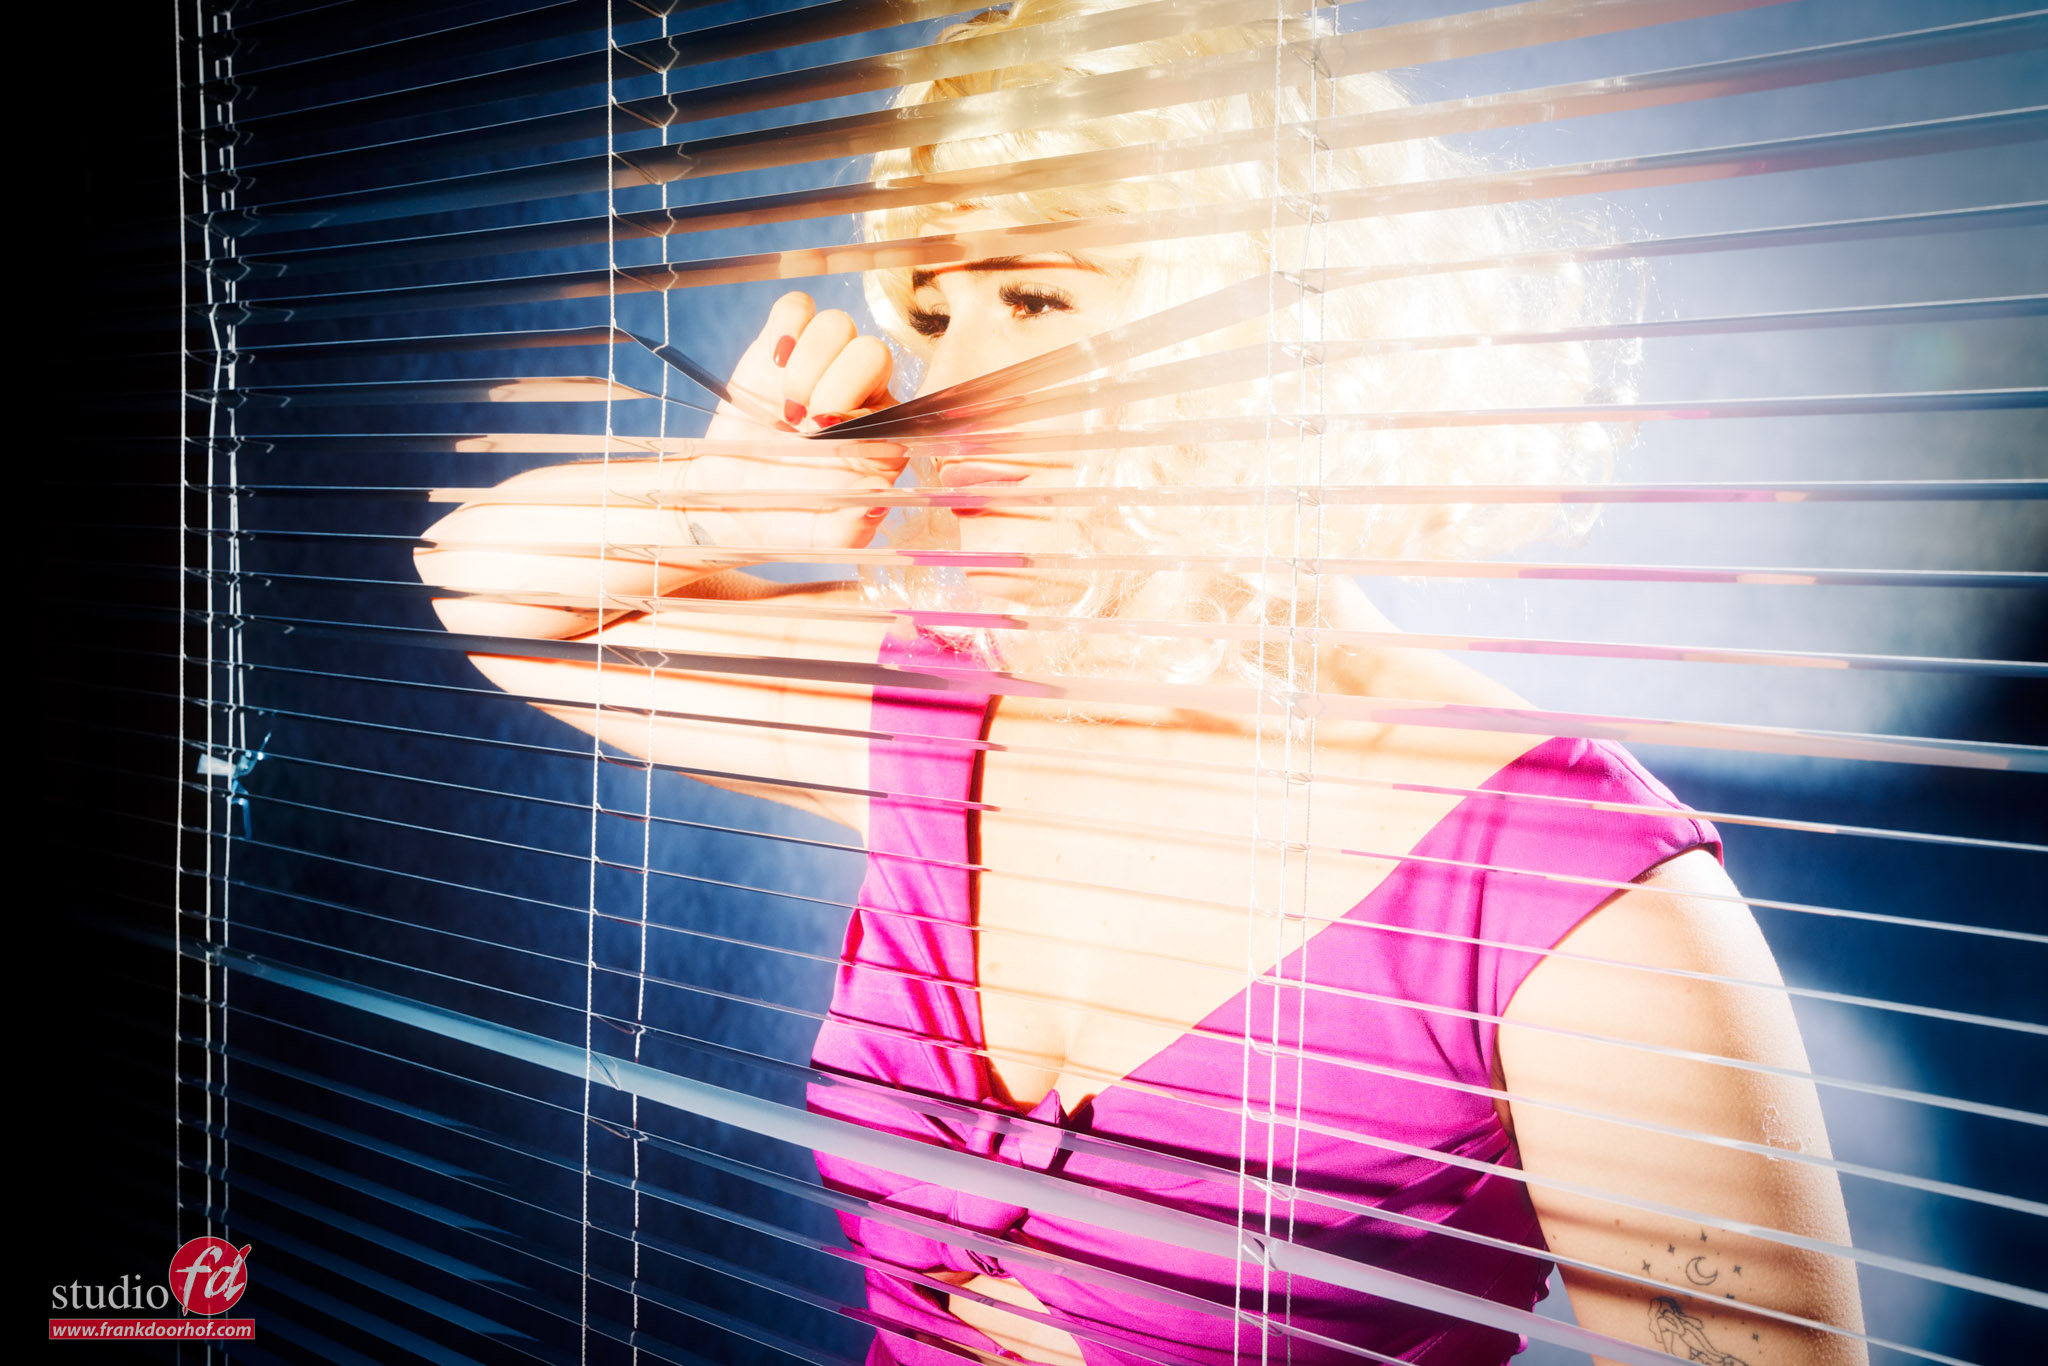
And of course you can also shoot the Venetian blinds from the other side and use the reflections to create a totally different look.
This is one of the things I always try to show in the workshops, moving around is one of the most powerful lighting tricks you can use and it can give you a lot more final results from the same setup.
Alternatives
Of course there are other ways to get shadows like this, and even more creative ones.
Venetian blinds are pretty cheap, but if you want to go all out with shadow effects I highly recommend the Lindsay Adler optical snoot from Westcott. It’s a gobo projector that is able to project patterns on your subject, and thanks to the lens you can focus the sharpness of the shadows, It’s one of my absolute favorite light shapers for creative light use.
Want to visit one of the workshops?
visit fotografie-workshops.nl for the agenda and more info.
Not speaking Dutch? No problem.
Let us know a few weeks in advance and we will switch the workshop to English.
And if The Netherlands is too far away, we have a full setup for (1:1) online workshops, with different camera angles, and of course screen sharing so you can see all the images coming in, and follow the retouch process. Plus you get all the RAW files I shoot during the day.
If you have any questions, feel free to reach out.