Reviews on gear and software

A clean sensor is a happy sensor

Loads of people ask me about my opinion about cleaning their sensor. Often people let specialized shops do it for sometimes a lot of money and don’t realize that the moment they zoom (with some lenses) or change lenses they have new dust building up. Let me start by saying that cleaning a sensor is easy as can be. You’re actually not cleaning the sensor itself but the toplayer. Which is actually pretty strong. There is one thing you, however, have to be careful for.

Some sensors (like the Sony) have onboard image stabilization, this means the sensor is “kinda” floating, so when you apply pressure to the sensor you will actually see it move, now that’s not good of course, to solve this just go into the menu and activate “sensor cleaning” this way the sensor will do it’s “magic” and it will lock itself unless you turn the camera off and on again, this is the moment when you can easily just clean your sensor.

Solutions

The in-camera one
To be honest, most cameras nowadays have sensor cleaning but to be clear, I never really had the idea it worked, yeah it sometimes did clean up a little bit but in essence, it’s the less effective way from what I’m going to discuss here.
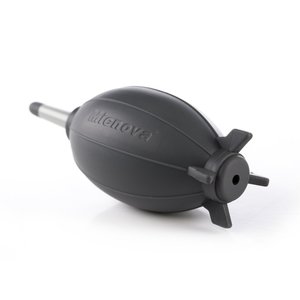
Rocket blower
This is probably the most famous one, and for good reason, often all that is needed to get rid of that dust bulb is a good gust of clean wind. In all honesty, this really is a must buy, if you don’t own any of these well…. get out and get one. And don’t EVER blow into your chamber with your mouth, although cleaning a Medium Format sensor can be done by breathing on it and wiping it clean with a pecpad, this is something that should not and never been done inside a camera.
Get your rocket blower here


Arctic Butterfly
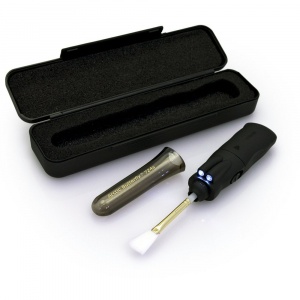
If I have to choose one device to use for cleaning, this is it. That’s also the reason I opened the article with an image of the arctic butterfly. I’ve been using them for quite some time now and the “new” versions with led lights are absolutely awesome. Operation is very simple, just activate the butterfly and let it run for a few seconds, stop and clean the sensor, it’s a very effective way of cleaning and takes out a lot more than the rocket blower. The main problem with dust is that not all dust is equal, some dust particles are just “resting” on the sensor and can be blown off, but some are a bit more sticky, and that’s where the butterfly comes to the rescue.

They are delivered in a sturdy case so you can take them with you on travels without worrying about damaging it. And trust me I’ve been in loads of situations where a rocket blower just didn’t do it’s work and being in the middle of nowhere without the option to clean your sensor at a camera store is amazingly annoying and takes a lot of time in Photoshop to clean up those beautiful shots, so if you only can take one device with you make sure it’s this one.
Get your butterfly here

Sensor swipes and Eclipse
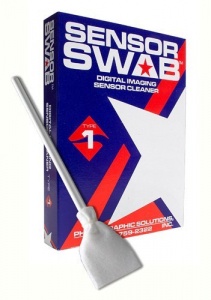
If all else fails this is it. The wet method. In essence, there will always be dust that whatever you throw at it it will stay there, it’s like it’s glued to the sensor, now before you take out the paint remover (which you should not even thing about) you should invest in a bottle of eclipse and sensor swipes. I have to be honest, for me, wet cleaning is like a last resort, but it never let me down. I’ve cleaned sensors from students of mine that were so dirty that even on f8 you already saw the dust blobs appearing and after a good wet clean they were “perfect” again.

Get the sensor swipes here
And get the Eclipse here
Conclusion
There is one very important thing you have to keep in mind before you lose your sanity. There will ALWAYS be a little bit of dust on your sensor when shooting at f16 or f22, don’t worry about it, it will be gone in seconds in Photoshop/Lightroom etc. I actually never saw a 100% clean sensor in my life, there are some things you can do to prevent it from building up or getting really bad.

  1. Make sure you always switch lenses up side down and fast.
    don’t let the camera lay on it’s back with the lens mount wide open, change caps first and then the lens. No take the lens off with the camera facing down and immediately put the new lens on
  2. Don’t switch lenses in a windy or dusty environment
    Sounds obvious but you don’t want to know how many people I see changing lenses on the beach or even worse in the dunes.
  3. Don’t push the dust to the sides
    I see this a lot when people start out cleaning their sensors, they will move the dust to the sides of the sensor and don’t take notice, this dust will build up and before you know it it will be very hard to clean and you see a collection of dust particles in your corners or side.
  4. Make sure the dust is gone but don’t over do it
    A good cleaning should be pretty fast, don’t keep rubbing the sensor one good swipe from left to right and maybe one to check but that’s it. Check first and continue later


Of course there are more ways to clean a sensor including some I never even tried because somehow they feel a bit sketchy for me, like putting magic tape on your sensor and pulling it off (yeah I really read that somewhere) now let’s make one thing clear, yeah magic tape is supposed to not leave any trails but really seriously would you risk your sensor to that? I won’t. There are also some dustpickers out there with which you can select one dust particle and take it out via a sort of plunger effect, I never tried it because in all honesty with the 3 solutions above I never run into problems.

So what should you always bring?
One would say the rocket blower and although I use it a lot in the studio my choice is, however, the Arctic butterfly. It’s right in the middle of effectiveness between the rocket blower and the wet method and this means that when travelling within seconds I can clean my sensor more than enough to get clean shots for the rest of the trip when I’m home I can always do it “perfectly” with the wet method. And trust me nothing is more frustrating than being on a trip and shooting some stunning scenery and coming back in the hotel/RV and finding out your sky is littered with dust and you didn’t bring anything and there are no camera stores close by enough. Try driving an almost 10mtr RV into a city centre to get some cleaning stuff or lose some time on your trip to find a camera store that sells cleaning gear. So always bring at least one device that really does the trick and for me, the best allrounder is the Arctic Butterfly.


Any experiences from you guys?
Post them below


Support our work by using the links in the article, even if you need something else :-), just follow one of the links and continue your shopping.

Must haves for video

Often you see videos online where you go like “really is it supposed to look like this?”
and don’t get me wrong I’m not talking about tinting that is not your taste or under and overexposed shots, these are all relatively easily fixed with settings, I’m talking about judder, stuttering video etc.

Now before we talk about this I have to make something clear.

How does video work?
Often when I teach a video workshop people know that there is a certain amount of frames per second, but what it means in combination with for example shutterspeeds if often unknown, so lets take a look at how it works and the problems we all encounter (even if you didn’t notice it yet).

Frames per second
Frames per second is literally what it says, the amount of frames that is recorded every second.
For cinema this is often 24 frames per second, although finally this is going to change to 48 and higher, which will give a much…. ok wait a minute with that one.

For PAL we always used 25 or 50 frames per second
And for NTSC we always used 30 or 60 frames per second

Now these last two are used for video, and the first one is for cinema.
The reason for the video frame rates is coupled to the power net, being 50hz in Europe and 60hz in the USA.

Now this is where a lot of the confusion starts.
People often take for a fact that because you are shooting on 25 frames per second this would yield the proper results, and that’s where it goes wrong.

Smooth vs staggato
Although framerate is incredibly important there is one factor that’s even more important.
When we look at 2 different movies we can see this effect happening.

Take for example a western, long panning shots over the desert or through a western town, the camera moves really slowly from left to right and all is rendered nice and relaxed on the screen, what a pleasant and relaxing experience……..mmmmmmmmmm everything blends together.

Now let’s take a lo0k at “saving private Ryan” and especially the D-Day scene.
Bullets are flying through all speakers, the sand is bursting in the air, people are being butchered and you almost feel sick in your stomach and you really feel like you’re there, you remembered the stories that in an accident everything seems to go in slowmotion and although there is no slowmotion used it seems like every grain of sand and every face is rendered almost in stop motion and is RAZOR SHARP.

Well both movies you are seeing in 24fps so how is it possible that both are so different?
Well that boys and girls/ladies and gentlemen is the shutterspeed.

When you record something in 24fps it only means there are 24 unique moments in time captured per second, it doesn’t tell you what happens with the rest. And that’s where shutterspeeds come in.

When you record something on 24fps with a shutterspeed of 1/24 you can see a beautiful pan, silky smooth and amazingly calming. The only “problem” is that signs on buildings are not razor sharp, they are a bit blurred, but quickly you blame that to the panning motion (and that’s right… for now.. this will change when we go to higher frame rates like 48 and up).

Now when we record the same scene at let’s say 1/500 you will see a totally different image, although everything seems slightly sharper there will be a very annoying hickup in the image, it would seem that pans are not smooth but they stutter. And well…. that’s exactly what happens.

Remember we are shooting 1 second of video/film with 24 frames.
If we shoot these slices of time on 1/24 it will literally show you everything.
If we shoot the same scene in 1/500 it will only show you a very little part of that second each frame, meaning the image will stutter, but it will be sharper.

Drones and video
Now when we use normal video we often don’t really see this problem, especially with vlogs or static images this effect is hardly visible. However when we switch to the slow moving drone images now it will jump out immediately, the drone you just bought sucks and not a little, it’s terrible. Well that’s normal, don’t bring the drone back to the store nothings wrong.

The problem with drones and action cams, smartphones or cams like the DJI Osmo Pocket is that they often work with so called fixed apertures, and because we all need light the apertures are often ridiculously wide, for photography this is a really nice thing, first of all the images are rendered with a nice Depth Of Field which (according to some) mimics the DSLR (yeah no) and as you can already see by my remarks I don’t agree, but what I do agree upon is that it’s much much better than in the past where almost every smartphone image was sharp from front to back, now a days you really can see some Depth of Field (and I don’t mean the fake portrait/aperture effect).

However we are still stuck with that fixed aperture.
So what controls the exposure?
Exactly ISO and shutterspeed
And until it’s possible to shoot on ISO1-100.000 we will have a huge problem with drones and sunlight.

Due to the sunlight the shutterspeed on a drone (and the other cameras I mentioned before) will almost always be high, and I mean above 1/500. This means that especially with a drone where you want that movement to be silky smooth you will seem some stutters. And again this is not a fault, it’s simply how video works, higher shutterspeed vs same frames per second and you end up with stutters. So how do we solve this.

Filters
Because we can’t change the aperture on most consumer drones, action cams and smartphones (or the osmo pocket) we need to do it manually. And here we introduce the ND filter. The ND filter is a Neutral Density filter, which means it takes away light in a neutral way, meaning it doesn’t color the image but it only takes away light, now in all honesty this is not always true, so beware when you buy filters that are too cheap (read don’t). Now because we take away light the shutterspeed drops and hence we get smoother video. But is that all?

Not really.
One could say “just add the highest density filter and be done with it”
Well that would be a disaster.
First of all you have to realize that if we take away light the shutterspeed will drop, which means that if you take photos you have more chance of movement in the shots, but it also means that things like autofocus will be a LOT slower in most cases and in some cases even unreliable, so make sure you are careful which filters you place. Also when you add a filter that’s too dense you will actually make the ISO jump up and higher ISO combined with smaller sensors spell….. disaster with noise.

This is one of the reasons I’m a big fan of the packs you see at the start of the blogpost.
In this case from the company Freewell (you can find them here)

You can of course buy just one ND filter, but the problem is that this won’t work in every situation, and often it’s cheaper to just buy a pack where you have several options, and this is the cool thing about the packs we just got in, for both the Mavic 2 Pro and Osmo Pocket they have you covered for almost every situation you can encounter, including some glare reducing filters.

There is one thing you have to take note off.
When I fly the drone I often like to take photos and video at the same time, over the years I’ve learned that this might not be the best way to work. When you use video it’s best to place the filters and film what you want/need, after that land the drone and take the filter off and take your images. Now I don’t say you have to, but I mostly take them off for photography, although that doesn’t count for the filters that also reduce glare/polarizing filters which I often leave on.

Anyway, long story short.
When you fly a drone or shoot video on fixed aperture systems you really (and I mean REALLY) need some filters. I’m going to test these the coming weeks but they already look really nice so I recommend you to check them out.

Solving the P30 Pro color problems

Let me start out by saying that I’m horrified by the fact that no-one saw this in reviews. It goes without saying that I always have my doubts with reviewers that review smartphones for photography. I strongly have the opinion that those reviewers hardly take any time to shoot serious stuff with the cameras, maybe it’s because of time constraints or it’s simply because they don’t know about DNG.

Long story short (because I could really rant about this), it’s the reviewers we trust, they often get cameras or other devices before the general public and let’s be honest we often determine our spending on their advice. In the past reviews with the P20 Pro I already had my doubts because according to most reviews the images were not more than ok, and only slightly above for example Samsung and Apple….. from the start I suspected them to use the P20Pro on JPG and 10MP because when I shot the P20Pro I was over the moon with the DNG/RAW files on 40MP, but the 10MP JPGs…… mawh not that much, over processed and not color accurate, actually exactly what the reviewers said. Now when you bring a phone like the P20Pro and now the P30Pro on the market aimed so strongly at photographers I really and I mean REALLY can’t figure out why they don’t give the cameras to real photographers that do real work with it. As soon as the P30Pro was announced I was ready, ready to be amazed, come on this is Huawei a brand 2 years ago I would not think about buying but ever since the P20Pro I’ve been a Huawei fanboy, and no I’m NOT affiliated with them, I paid full retail for my phone and they didn’t even a funky color so I ended up with black.

My p30Pro arrived and I couldn’t wait to test it out, to my horror this was not what I expected, images were horrendous. Not in sharpness or noise, not on JPG those rock, and even the video is A LOT better, but my beloved DNG/RAW files on 40MP with all due respect I have no other name for it than…. not accurate at all, not by a mile. At that point also my frustration started to build, all those reviews, all those people that have millions of views and claim to be professionals in their trade…. is it my device? is it me? so i started asking around online, now not a lot of people owned the P30Pro but the once that did to my surprise ALL confirmed that reds were indeed funky, and trust me it’s not just the reds.

Ok so what’s going on?

In essence it’s not that hard to figure out.
The P30Pro is using a new sensor, let’s keep it simple.
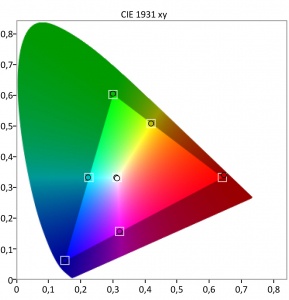
A normal sensor captures RGB (often in a Bayer pattern), but this new sensor captures RYYB, meaning not Red, Green and Blue but Red, Yellow, Yellow, Blue. In essence this means more light capture but it also brings a problem. In a balanced colorspace we work with a blackbody curve on which our white point sits (often revered as D65, or 65K or 6500) When you draw a line through these points you end up with a balanced system where Red connects with Cyan, Blue connects with Yellow and Green connects with Magenta. let’s visualize this, this is a REC709 colorspace rendered in 2D. Just ignore the dots, it’s a report from one of my ISF calibrations.

As you can see, the primaries colors are RGB and the secondary colors are CMY.
Normally a colorspace is 3 dimensional. This means that every color has a fixed coordinate, for red REC 709 for example this is

RGB color space parameters[2]
Color space White point Primaries
xW yW xR yR xG yG xB yB
ITU-R BT.709 0.3127 0.3290 0.64 0.33 0.30 0.60 0.15 0.06

And this goes for everything. So Adobe RGB, ProPhoto RGB, REC709, BT2020, P3 etc. all colorspaces that have fixed coordinates for the colors, this way we always know where the colors should be. Now we can manipulate these colors actually pretty simple. Because it’s a 3 Dimensional colorspace we use the so called HSL settings to get the colors in their position. (Hue, Saturation, Luminance) Now this is not the complete story, because there is also something called Gamma but let’s keep it “simple” for now.

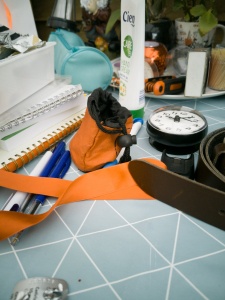
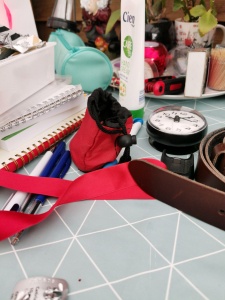
Ok so the first images I took with the P30 Pro looked like this.
First the RAW file without any adjustments and after that the JPG and although the JPG is slightly over saturated it’s actually pretty accurate, that thing is really really red.

Ok so you don’t have to be a genius to see that this is not right, and again I really can’t understand why no “professional”  reviewer did not see this.
In essence what’s probably going wrong is that by creating green out of the yellow they shift red towards orange (which is what you see) however when you look closely you see that also blues and cyans are affected, which is to be expected seeing a colorspace is a “balance” thing, if the balance is not 100% ALL colors shift.

Now this got me thinking.
Some people said it must be a problem with the sensor, but that doesn’t make any sense at all. Think about it, the RAW file is captured, and from there the JPG is created, not the other way around, so why would the RAW file be wrong and the JPG correct. The weird thing however is that both in the native app on the P30Pro as in Lightroom CC as in Capture One the P30Pro files just are wrong.

At first of course you panic and you think the worst.
But let’s be honest, what is the first thing I learn you guys when you visit my channel/workshops etc.?
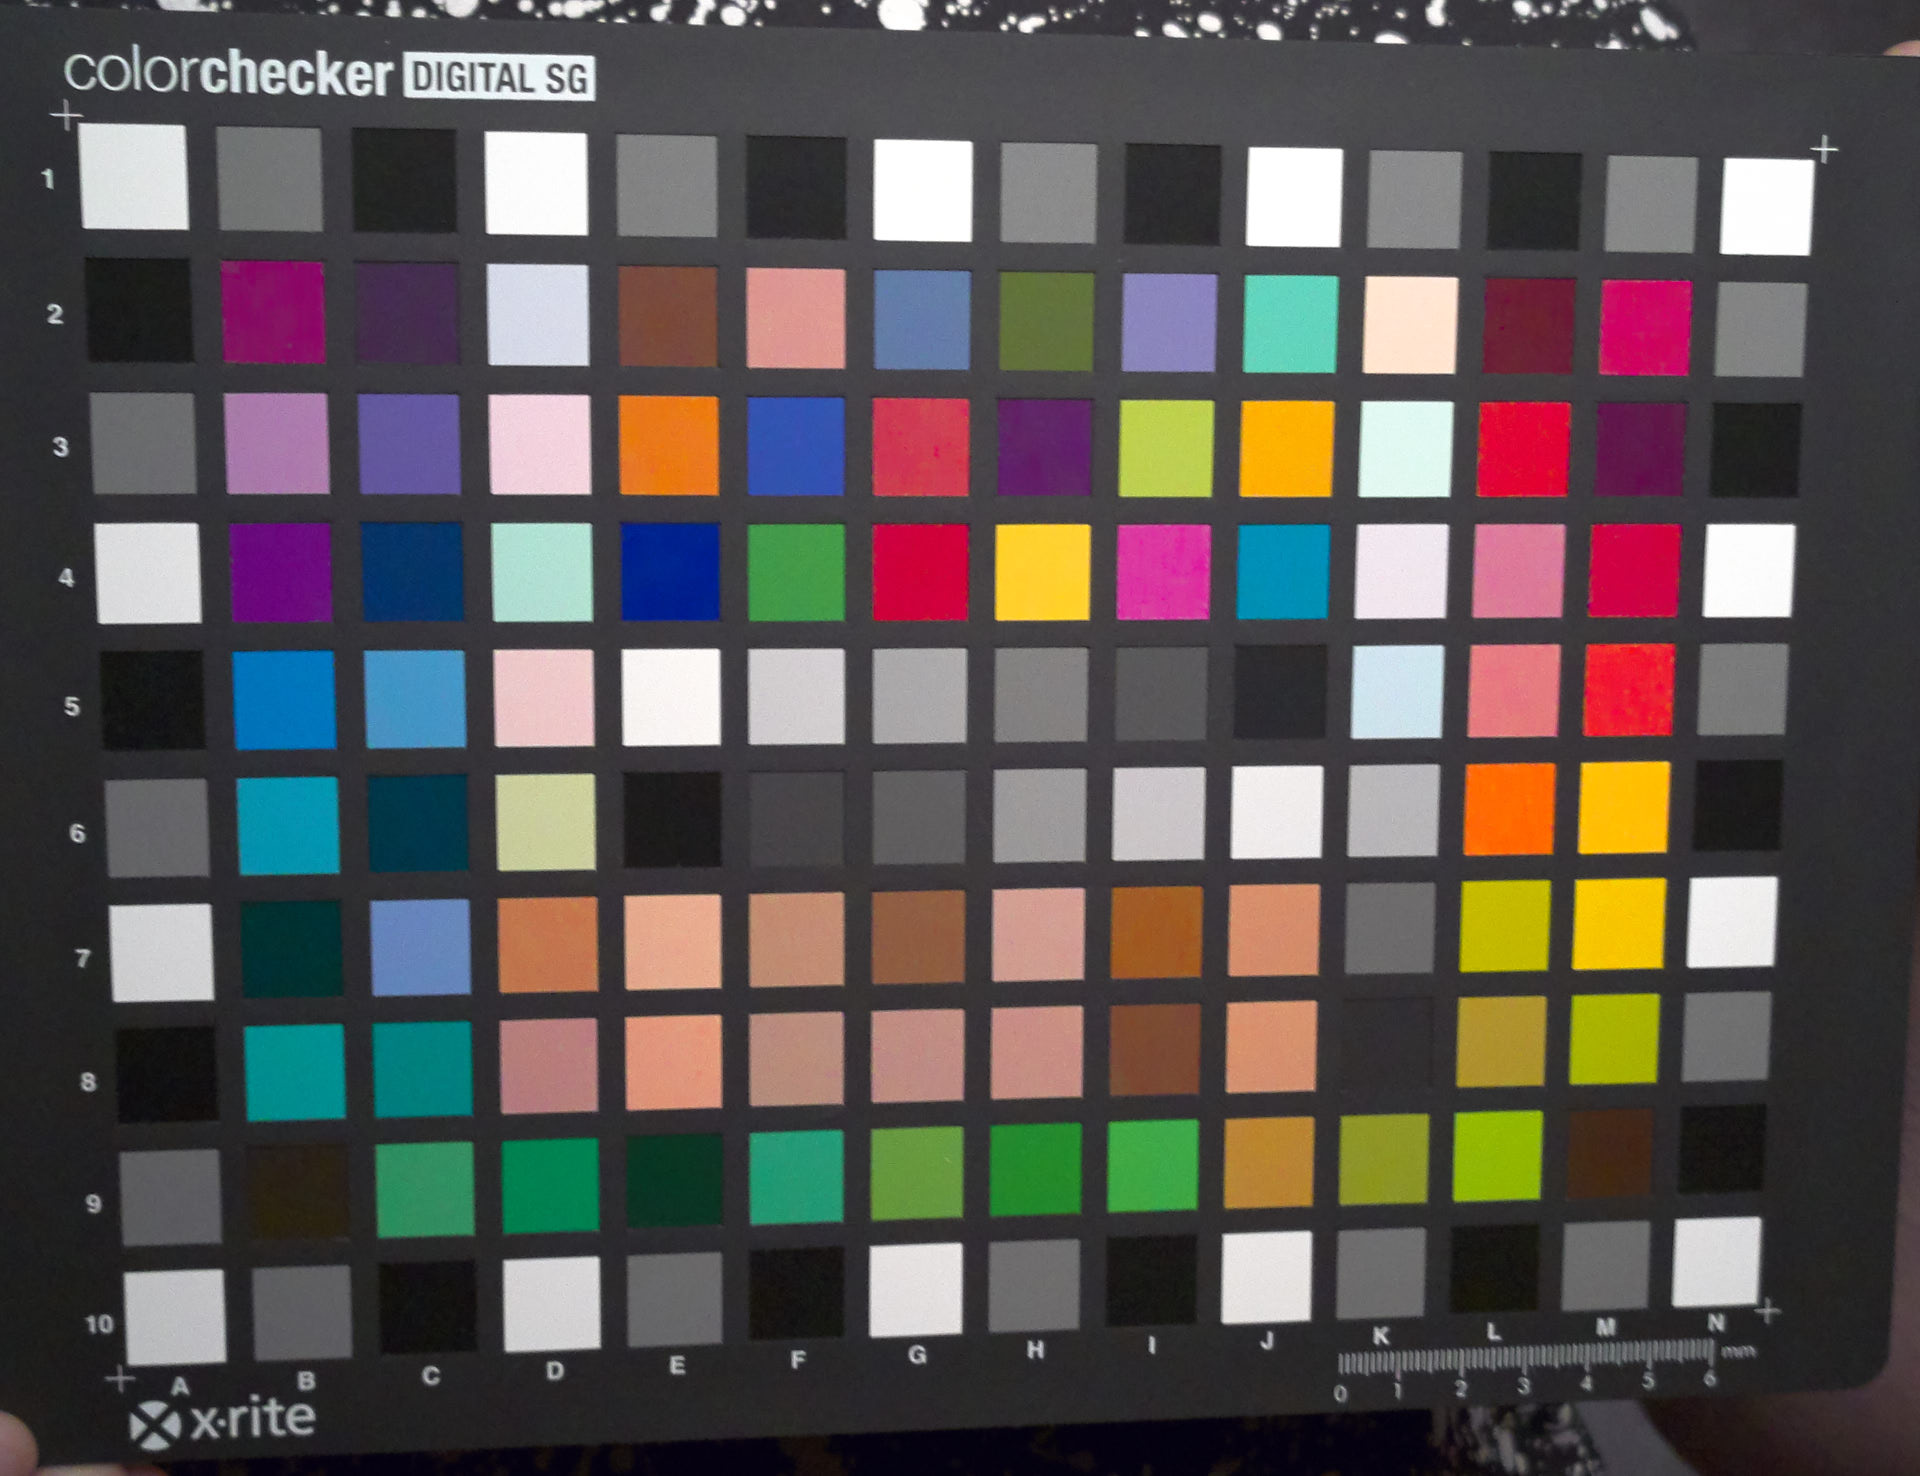
right always calibrate your screen and use the colorcheckers. So I decided to do the same thing but now with my P30Pro.

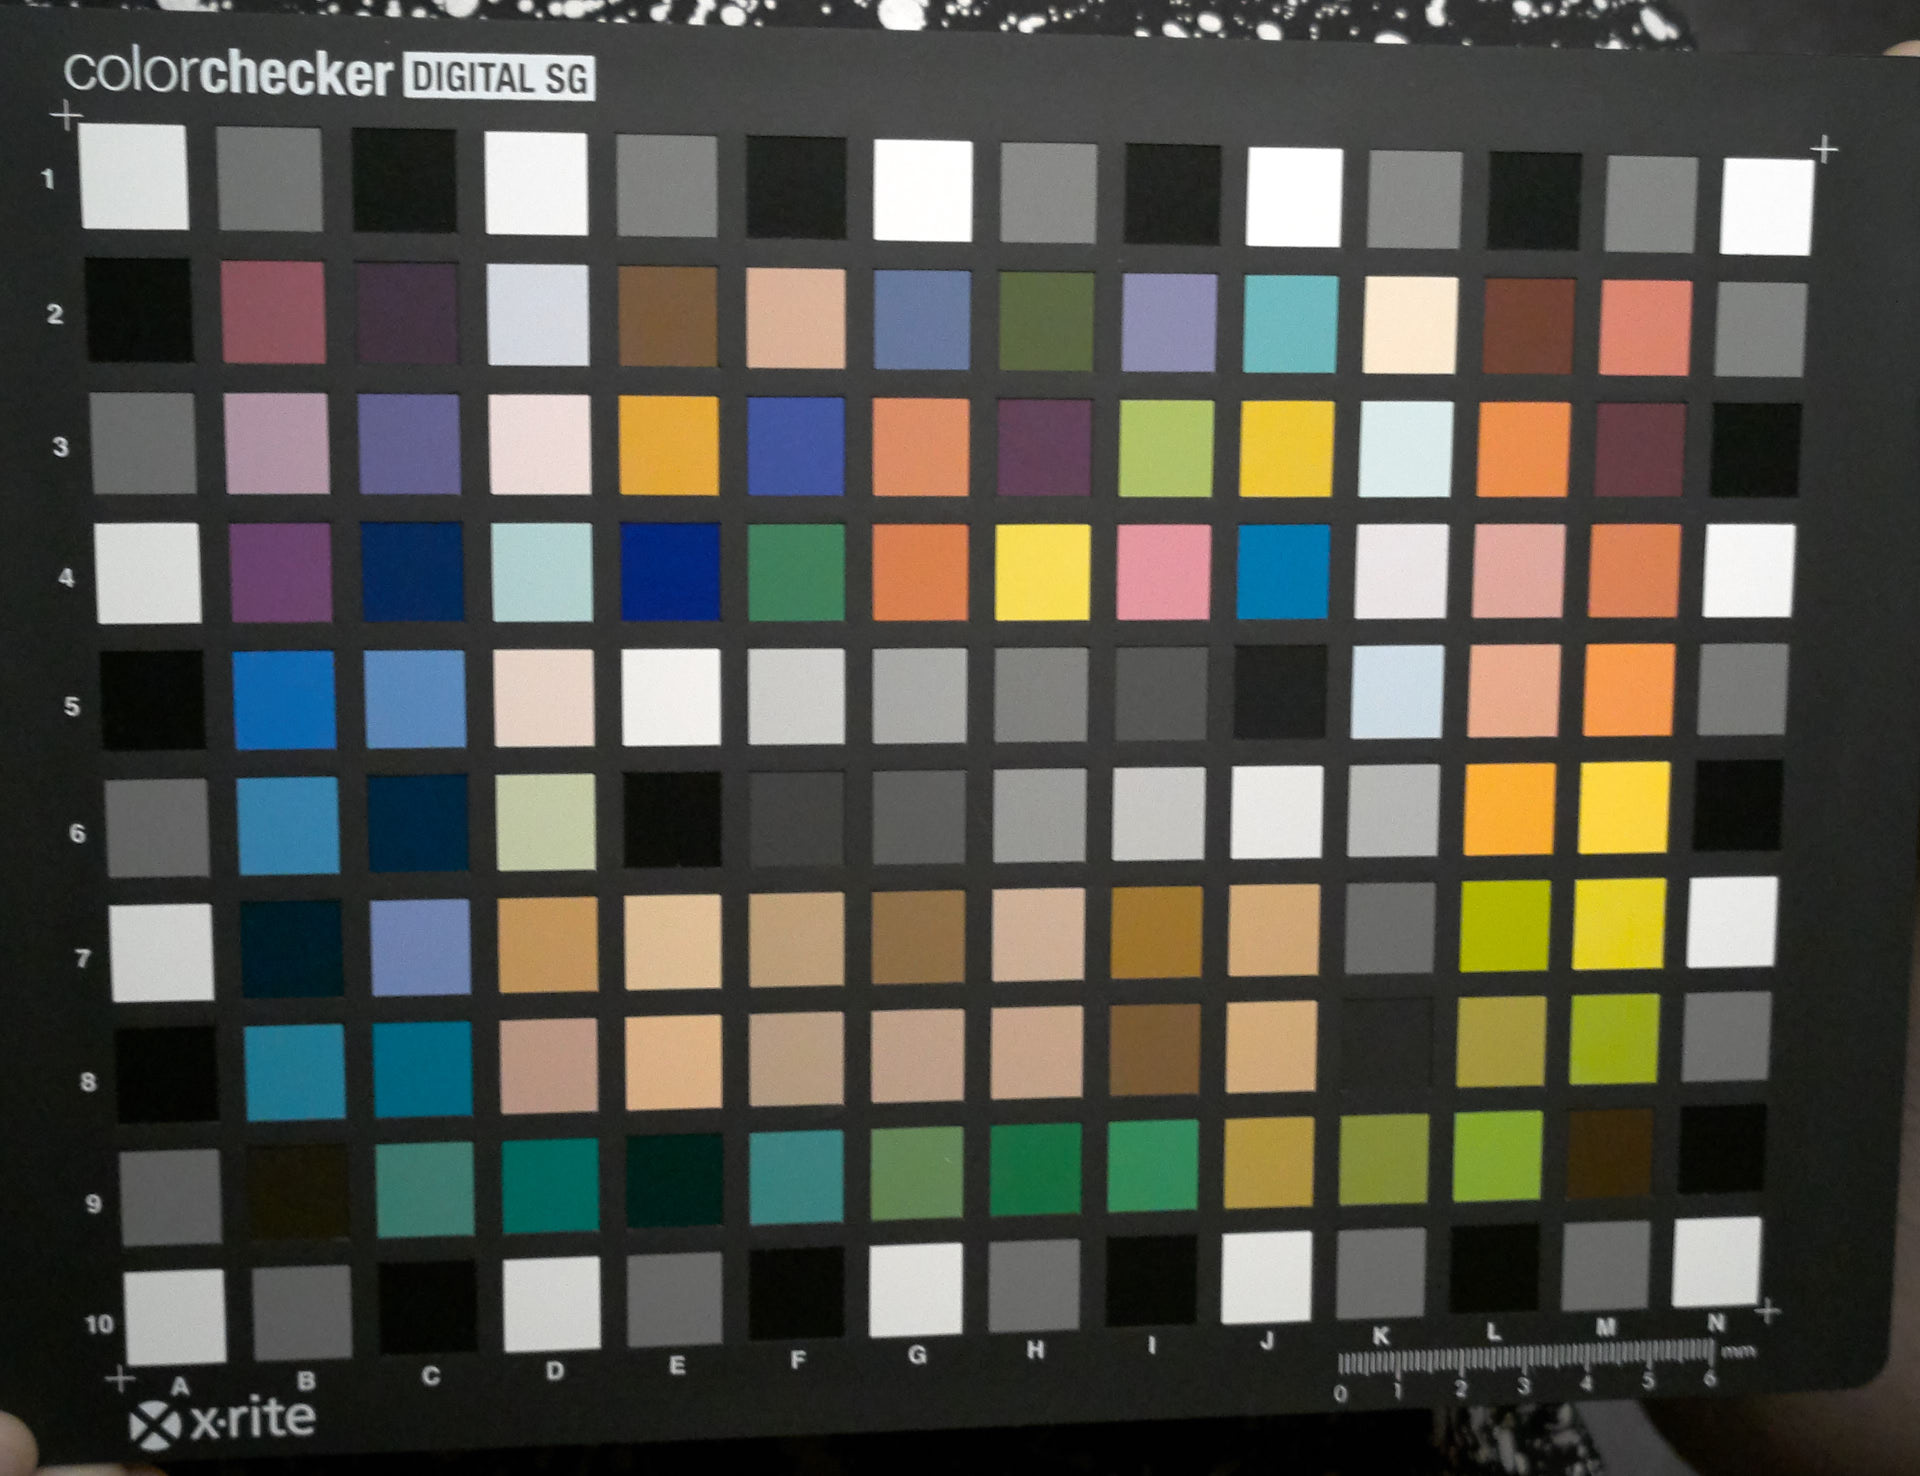
This is shot with the Xrite colorchecker SG
This is a really nice colorchecker with plenty of patches so you can create nice smooth correction files.

Now this is a HUGE mess, reds, skintones, blues… well let’s be fair almost every color is totally wrong, and not for a small amount.
Luckily Xrite delivers some really nice software to create custom profiles. And it’s not hard, just export from Lightroom, or Capture One and the software does it’s magic. And indeed… voila.
same Raw file

And there we go, now this is something I recognize.
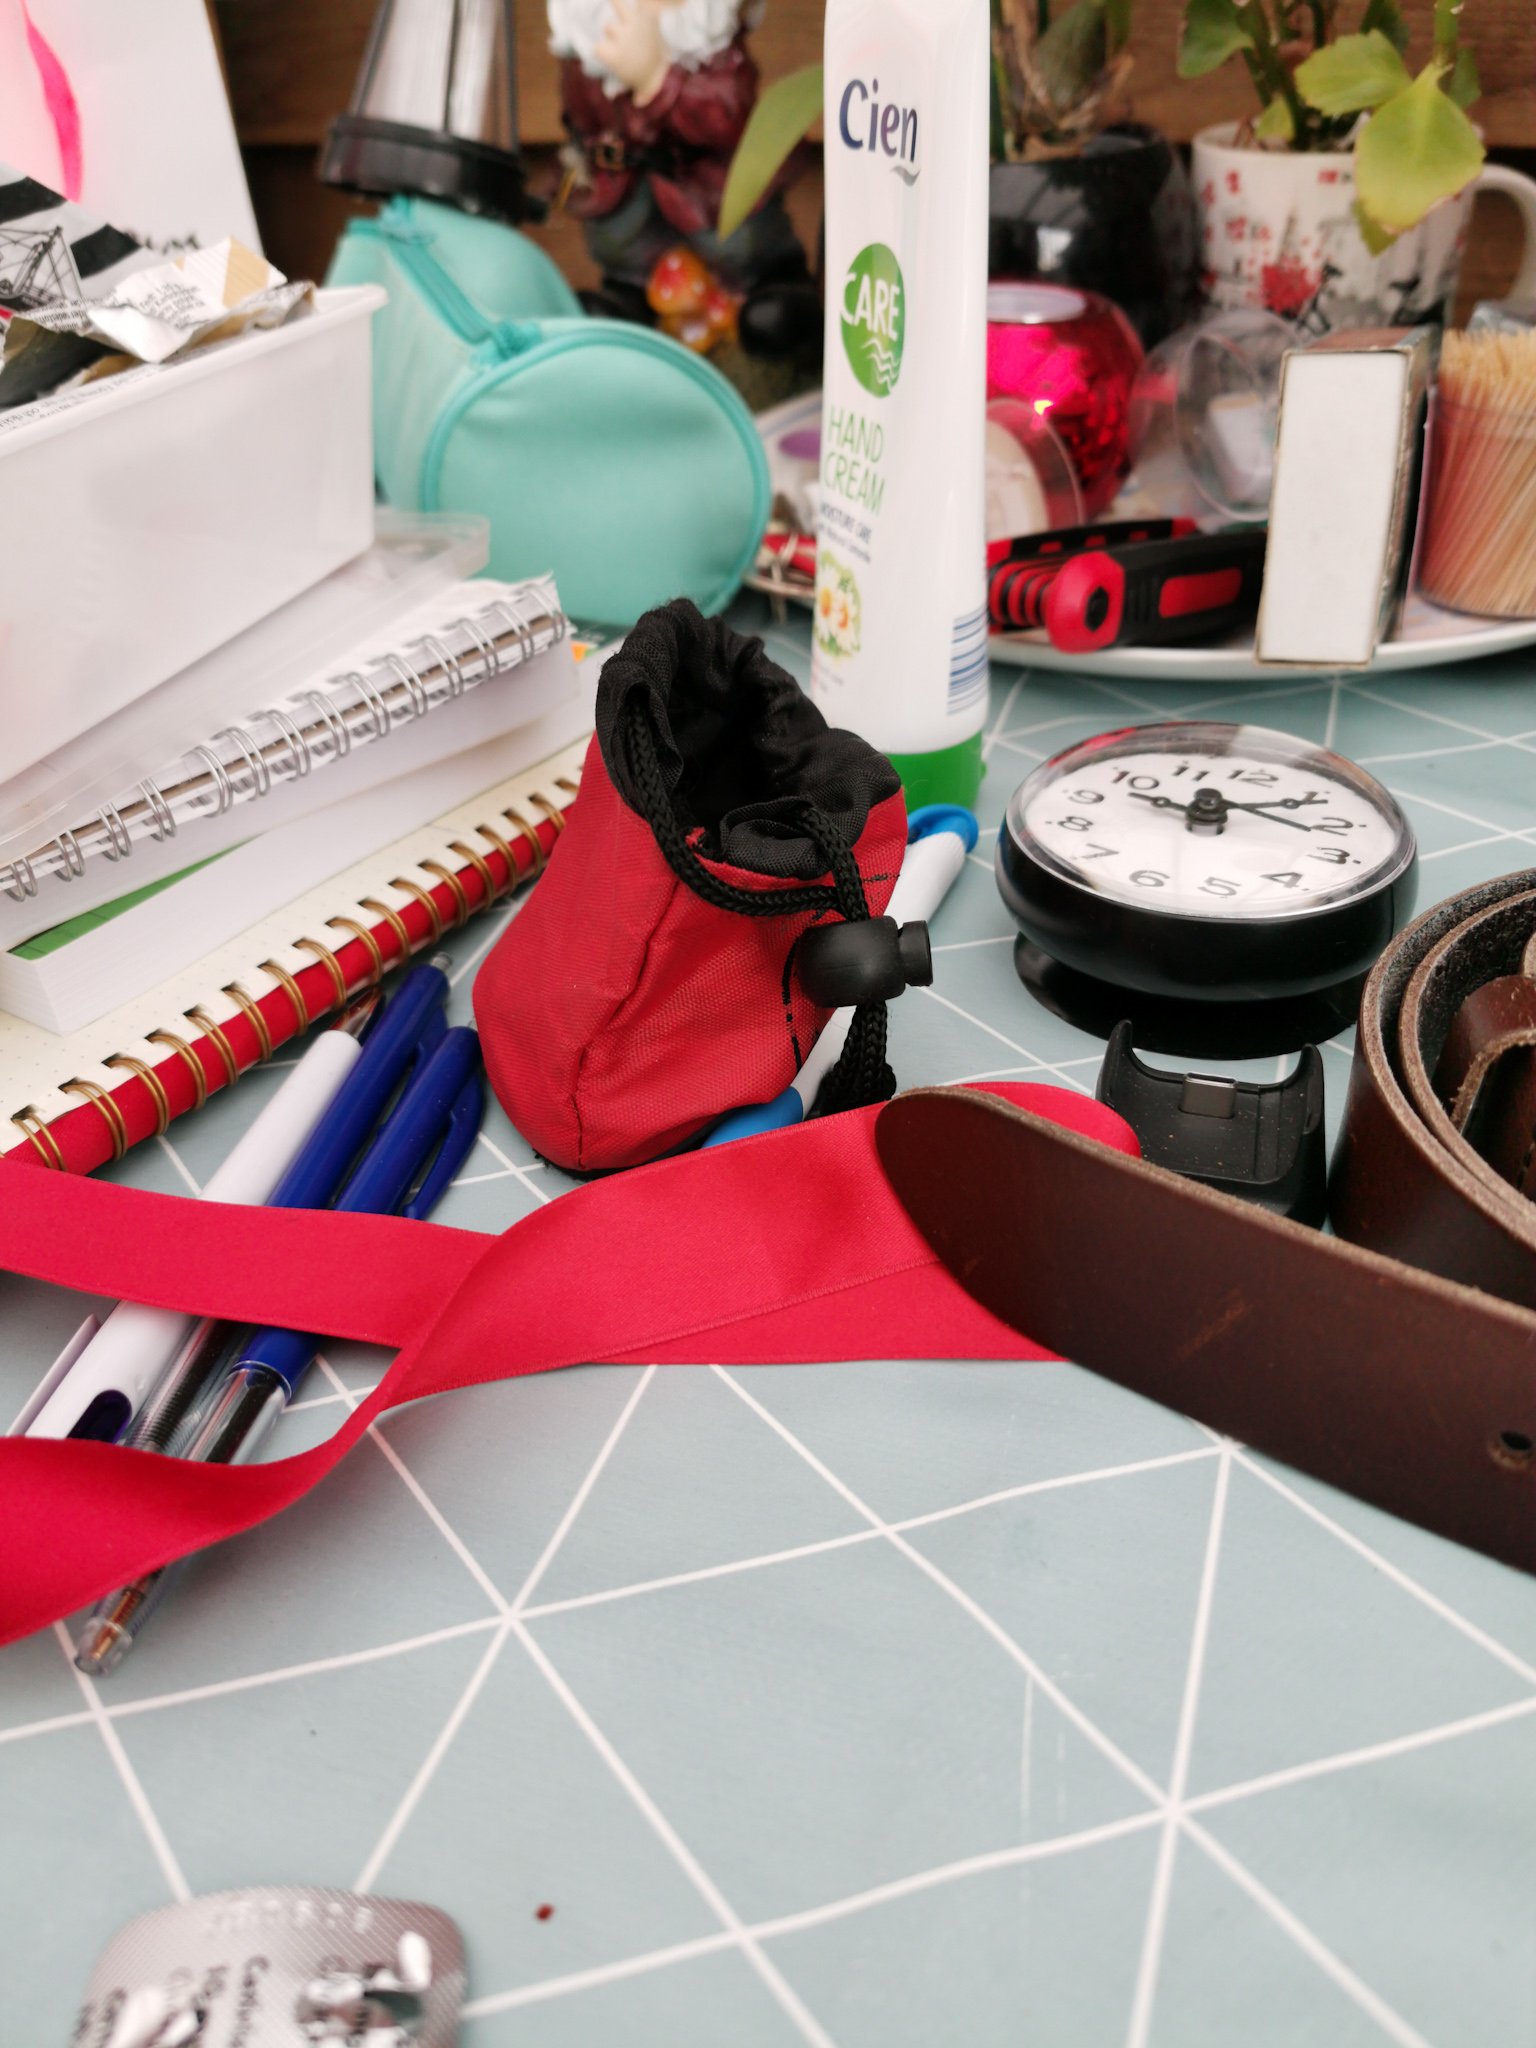
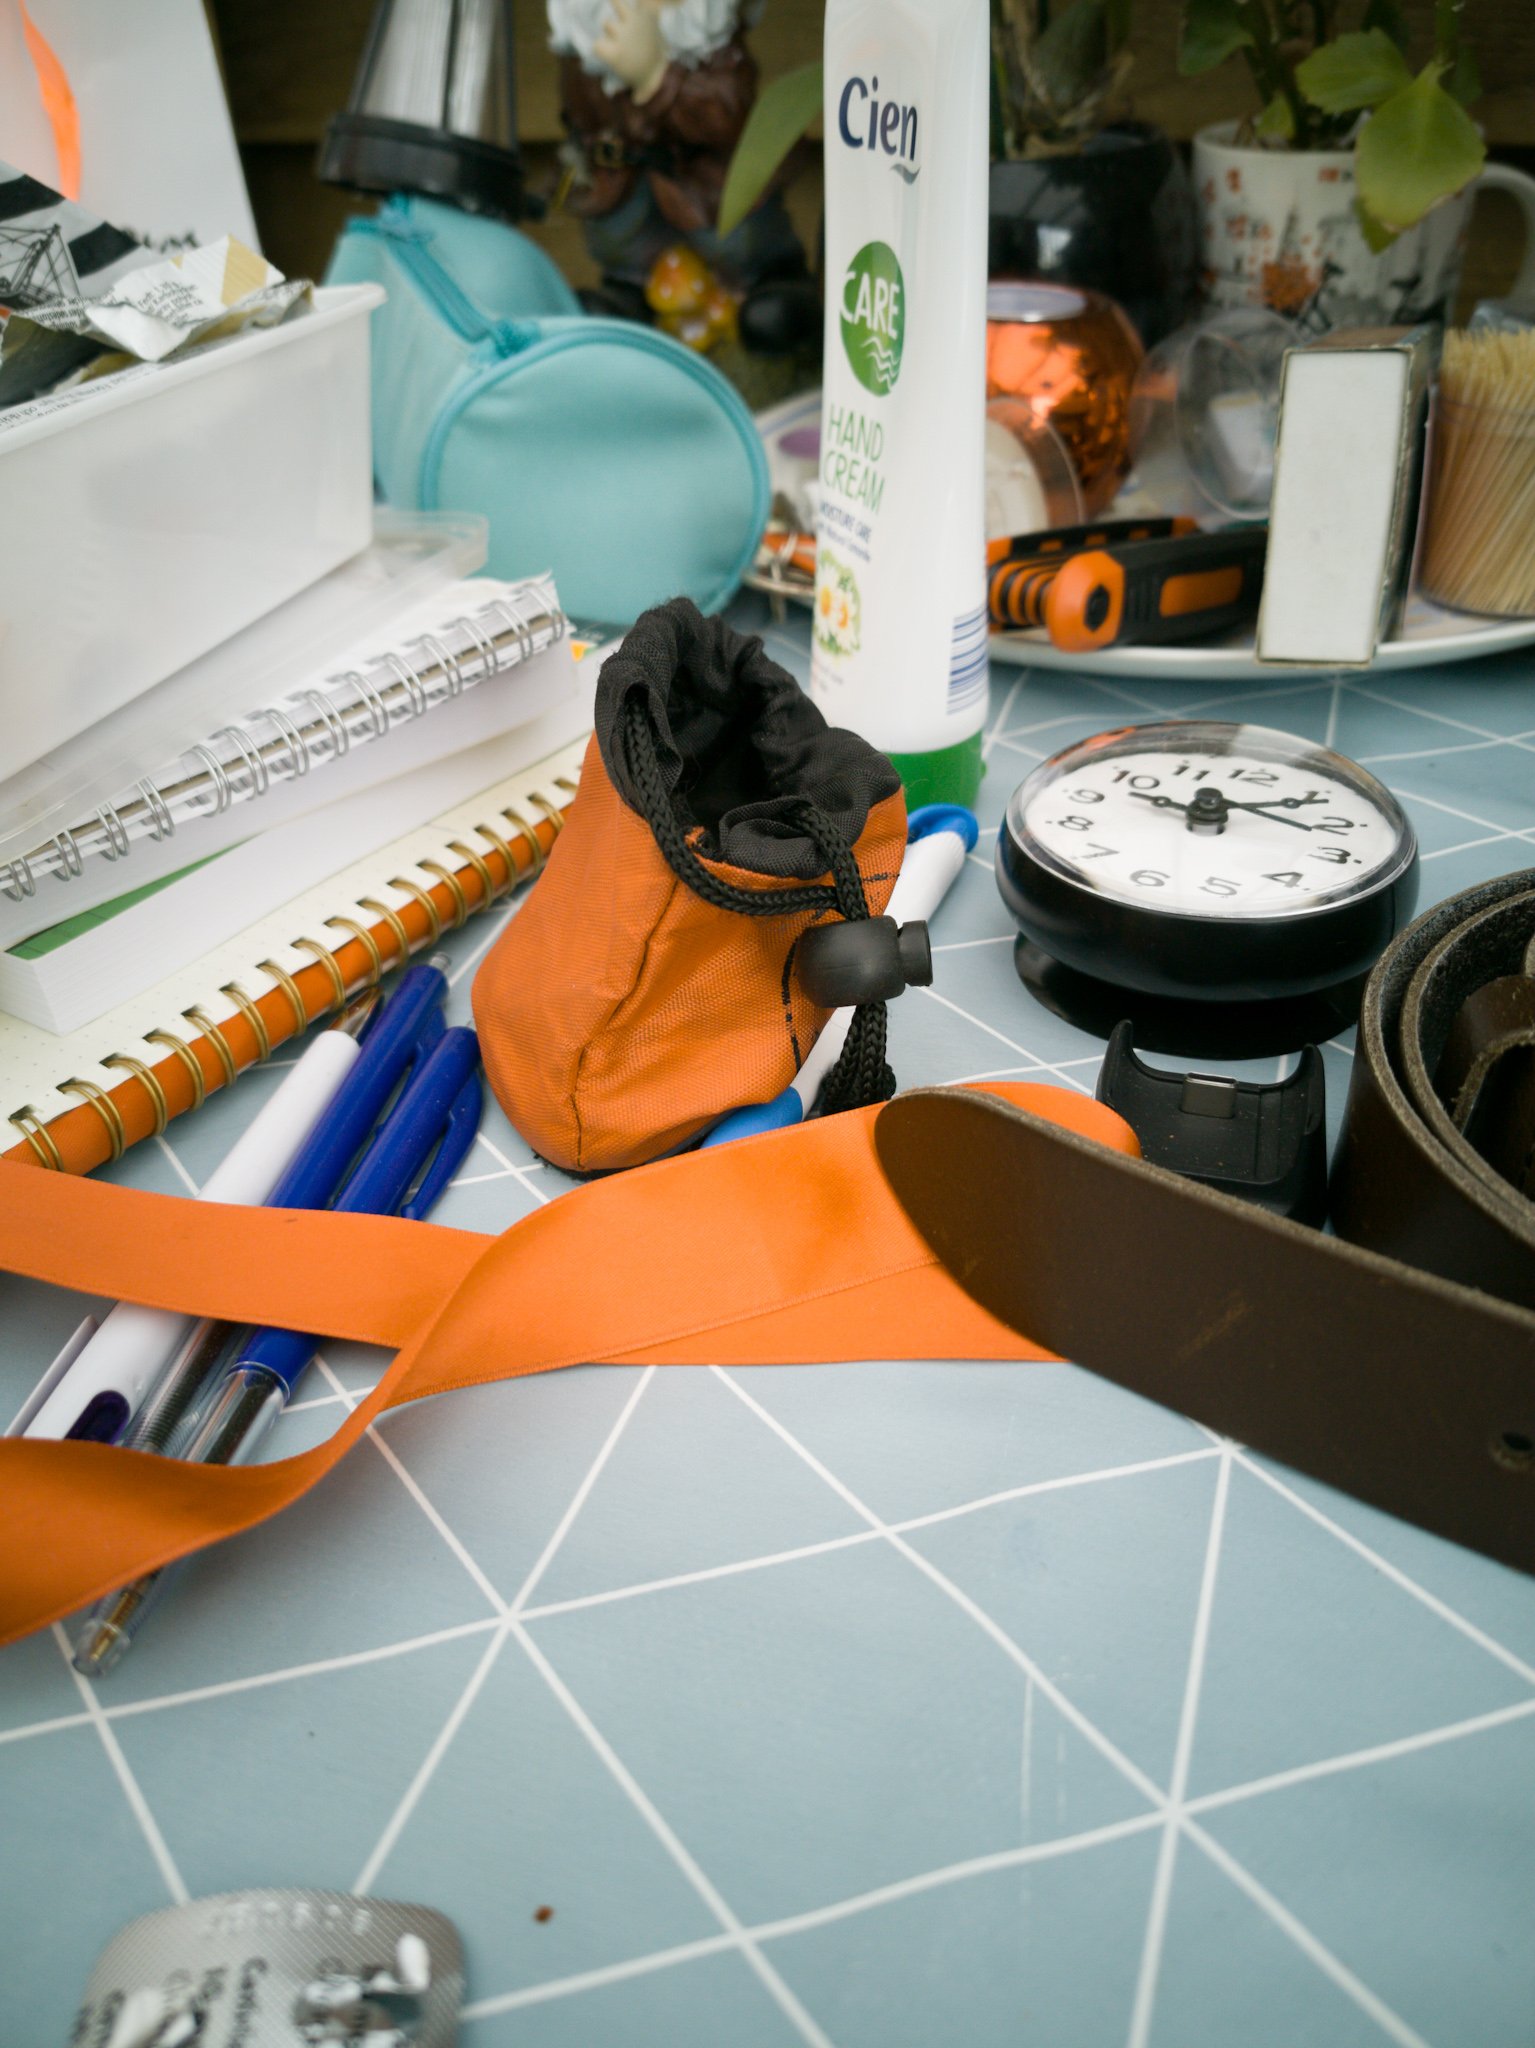
So what do we do?
Well until Huawei somehow fixes their RAW/DNG files (and that shouldn’t be hard seeing it’s only a wrong profiling) you will have to use a separate profile for your DNGs. And again its really easy to build and in all honesty if you’re serious about photography you probably already own a colorchecker.

So is this it?
no I wish, there still is a huge problem for P30Pro owners. Although the files are not lost and you can easily correct them you do have to realize that this is a problem that is very serious, all the apps on your phone that are able to work with RAW files like for example Snapseed, Lightroom CC etc. will all suffer from problems when you open the files directly, meaning editing the RAWs on your phone is NOT possible (if you want accurate colors), so Huawei really has to change this in software and create a proper ICC profile for their DNG files. Luckily this is solvable with software, it’s simply put creating a correct correction file and it’s done. So let’s hope that this maybe helps a bit.

Now what do I think of the phone?
It’s awesome. Love the new screen and look, it’s blazingly fast, it’s even able to decode 1080P .ts streams on the fly to cast to chromecast without any hickups, video looks really nice and smooth in 4K and stunning stabilization in 1080. Fingerprint sensor just works and the camera…. oh man really don’t start about the cameras.

Having a wide angle, standard and 5-10x zoom is just plain awesome.
I would love to have the wide and standard on 40MP but let’s be honest 20MP wide and 40MP is pretty cool too. Oh and the selfie camera is also great (finally)

Just fix the colors on your main MAJOR selling point sensor.
Oh and next time…. maybe first send a device to people that know how to shoot RAW 🙂 (hint hint)

As always feel free to leave comments below. I’ll post some images soon which I took with the camera, but trust me…. run to the store and get one.

P30 pro huge camera problem

After the huge quality jump from any other smartphone I ever used with the p20 pro I was more than excited to get my new p30 pro

because I mainly upgrade for the camera I ofcourse immediately tested out the camera and to my surprise the result is incredibly disappointing to a point where I think this is a bug

Here you see the jpg in 40mp

Although pretty over saturated it’s pretty accurate, the red is very bright in real life

And here is the same scene from the raw???

The weird thing is that with super wide I don’t see this problem.

Anyone else experiencing this?

Btw I’m not panicking yet seeing the jpg is fine I think there is a raw issue inside the firmware. Maybe due to the new rgy sensor instead of the usual rgb.

So let’s hope they fix this because now it’s totally unusable.

Did some more tests

It seems to only happen on the 40mp raw setting. Any other setting seems to be ok. Also the wide-angle sensor seems ok. I don’t know if they use the new RYB sensor only for the full frame but that could explain it.

Overall I still think it can be solved with a firmware fix seeing the jpg is derived from the raw and the jpg is fine.

What I do find very curious is that I can’t find any review online taking about this. On the other hand it seems they only tested jpg. Which I never understood. The power of these cameras is in the raw

So could someone test this please in raw 40mp mode?