Backgrounds and more….. on the cheap
 Well we all have the problem of budgets, some have wider budgets, some have narrower budgets, but in the end we all can’t spend more than we earn, although some try but they often end with nothing :D….. so this time a tip that will not cost you an arm and a leg but will greatly increase your income and probably your fun in the studio….
All shots are done against a background and the studio is no exception of course, in the studio however these are often are canvas backgrounds or seamless paper. This will give you a certain look, and often it’s great of course, however do a shoot on location and you are often much more interested by the structures and feel of the surrounding scene, well why not make that in your studio ?
The easiest way to do this is to use wall paper. Most studios have large walls that are not being used, or maybe to store gear or props, but they are often painted in a standard color and well they just exist in your working space, well while they are there why not make them interesting ?
Especially for photographers that don’t have a larger studio this is an incredibly handy tip. With seamless and canvas we often place our model in front of the background, often a few meters (feet) and the more the better, however when your studio is not that big you will run into space problems very soon, also because you are forced to use wider lenses the field of view is limited and the model doesn’t fit on the paper, or you will see the sides of the background or your strobes.
So what is the solution ? indeed wall paper.
When shooting on location one of the things I often use are the walls that are available at the location, so at a point in time we just decided to make those walls in our studio, for a good usable “wall” we need app 2-2.5 mtrs in width and app 2.30 mtrs in height. But in practice you can use any size, for example some of the “wall scenes” in our studio are just 1.50 mtrs in width, by choosing the position of the model correctly you can use actually almost everything you need. The fun thing is that wall paper doesn’t cost anything, and it’s easy to apply of course. But you can also go a little but further…..
In our studio we have a few movable walls with wallpaper on both sides, so we can switch them around, but we also have some walls with just paint work, ranging for just brown tints with other colors and patterns mixed in, to more funky metal works. However the thing I missed was structures so when we remodelled the studio to use the topfloor as relax room we had a large area left were the makeup room was. On this wall I decided to make some new scenes (backgrounds), the first one is a typographic inspired grunge background with some large letters and symbols that are visible when lit from the front but are much more striking when lit from an angle.
From there the background goes into a structured white background that can be used as a pure white background, but can also be used with little light on it and work with shadows.
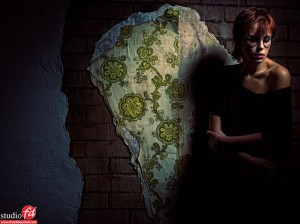
From the white area we go into a very grungy area with wore down plaster, very dirty bricks and some vintage wallpaper that’s almost falling of the wall, our painters also gave that wall some depth with adding structure and height differences, the wallpaper also gives a lot of structure of course. This part of the wall is the most exciting for me because by using angles lights there is a lot of mood in that setup.
 In the future we will of course build upon the backgrounds and see if we can add some props and more interesting angles to maximize the new backgrounds. Using the special paints like on these walls are of course more expensive than simple wallpaper but both methods give you a lot of new options in your studio and will probably trigger your fantasy, and again, because you are posing the models close to the background you are maximizing the room you have in your studio.
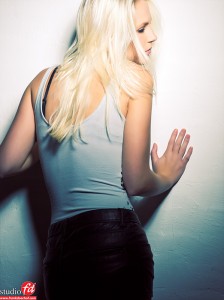
The shots you have seen in this post were shot today and yesterday during the workshop Studio Technique I with Sheena and Studio Technique II with Christianne.
And let’s show one more with a conventional canvas.
 If you have any questions, remarks or whatever feel free to press the comment button…… and feel free to share via twitter or facebook.


Hi Frank,
I’m working a lot with curtain material as backgrounds. These come in similar patterns to wallpaper, but can be rolled up for storage. I have a bunch of spare curtain bars bought very cheaply that allow me to both store and hang the material. Also rolling helps prevent and smooths creasing.
You got some tips/websites where you could find some nice background wallpapers..?? 🙂
Wallpapers can be bought in every DIY store and of course online. I don’t mean photographic wallpapers 😀
Hoi Frank, De workshop was erg leerzaam!
Zou je mij kunnen vertellen waar ik meer informatie kan vinden over de ”Workshop” in Mei volgend jaar waar je me over vertelde?
Grtz Bart
Hi,
Dat is een weekend waarin we een boot hebben afgehuurd waarmee we het ijselmeer opgaan voor 2 volle dagen.
Het is niet echt een workshop.
Meer een gezellig weekend met enorm veel fotografie, besprekingen van portfolio, gemaakt werk etc.
Dus wel zeer leerzaam maar niet als 100% workshop, zal het wel op uitdraaien maar goed.