Tag Archive for: tight spaces

A challenging location for a great shot

But we did it

Sometimes demos and workshops are at great locations with loads of room.
And sometimes (most of the times) it’s in a less than ideal situation.
This is why I love to challenge myself and the models during the workshops on location and in the studio.

Roel during the Camerado event

Recently we have a new very nice event in the Netherlands called Camerado.
It’s a small trade show with loads of workshops in different locations.
Some are hands on and some are lectures, but they all are very interesting topics.
I’ve been teaching at the last two episodes and this time we thought it would be nice to also do a small 45 minute location workshop.

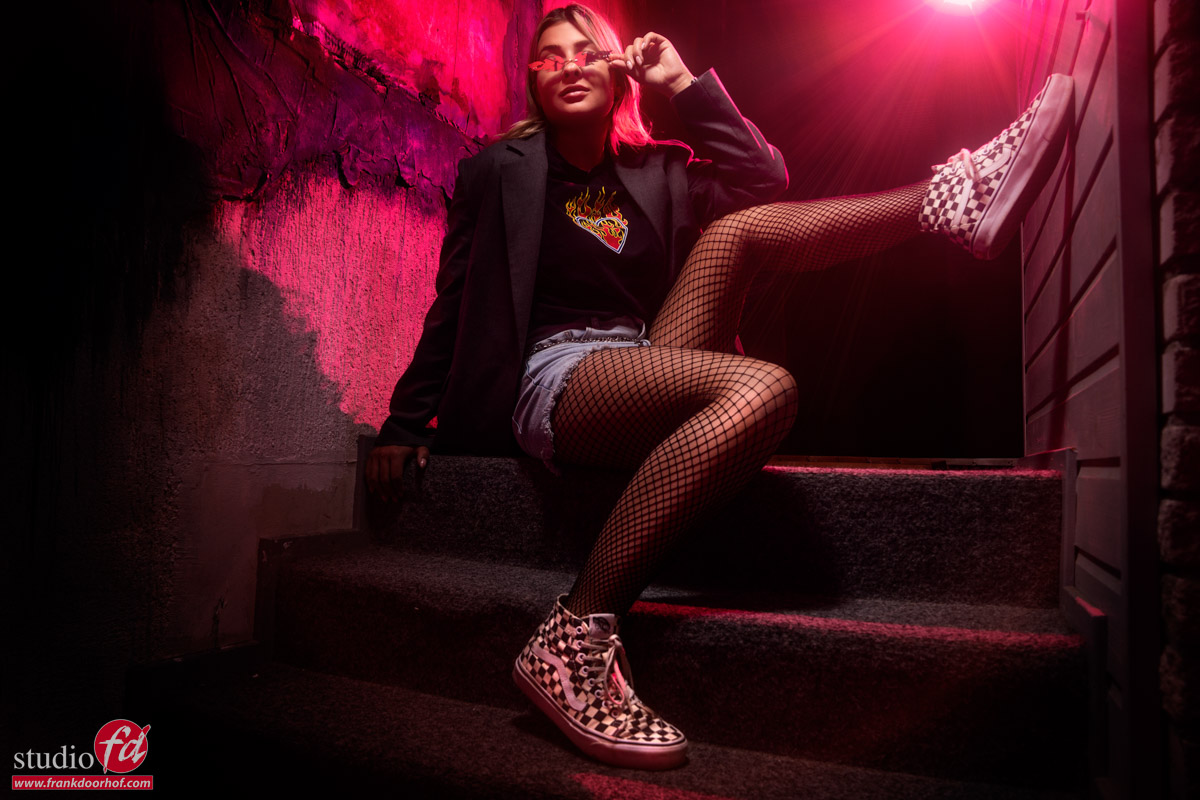
As you could have seen in the previous blogposts I love to work in tight spaces, so for this shoot we decided to use the staircase in the fort Noxx (yeah really :D) and place our model Roel in 2 different locations for totally different looks.

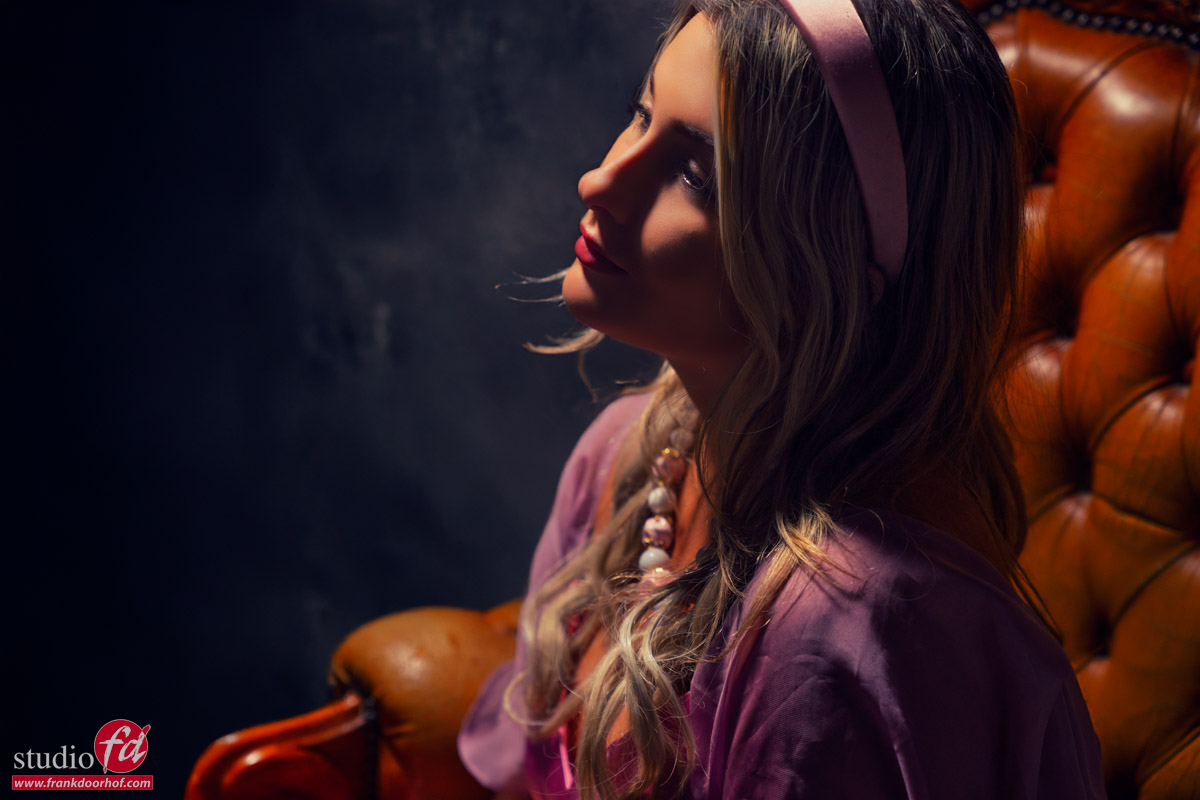
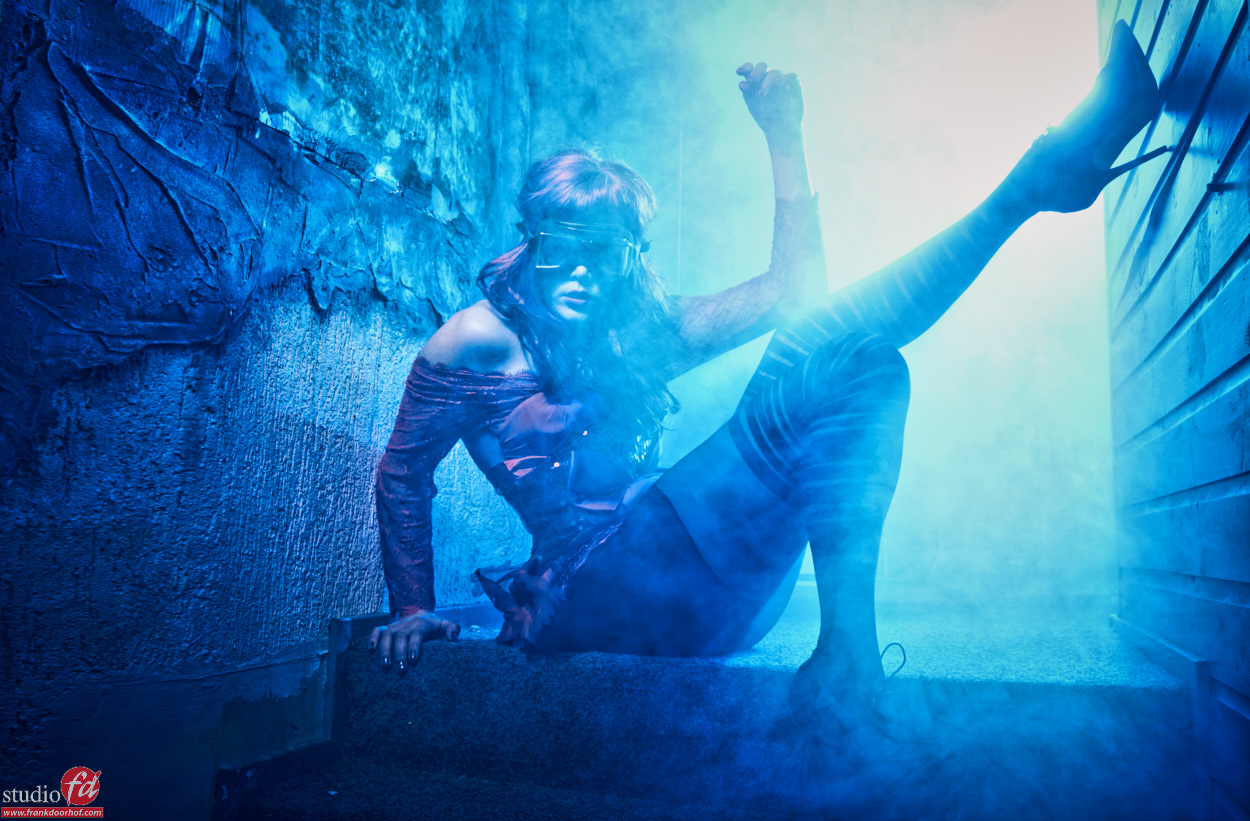
The first look is the “I know it will be usable” shot.
For this shot I’m using a Geekoto GT200 with the Rogue Magnetic system and the omnidirectional dome attachment. This will give me a very nice “semi-soft” quality of light. I’m using almost straight on the model. To make sure the surround area (where people were sitting) falls into the shadow area I’ve placed the light relatively close to the model. If you want to light more of the scene, move the light away, want more focussed light move it closer.

The result is a rather boring, but usable shot.

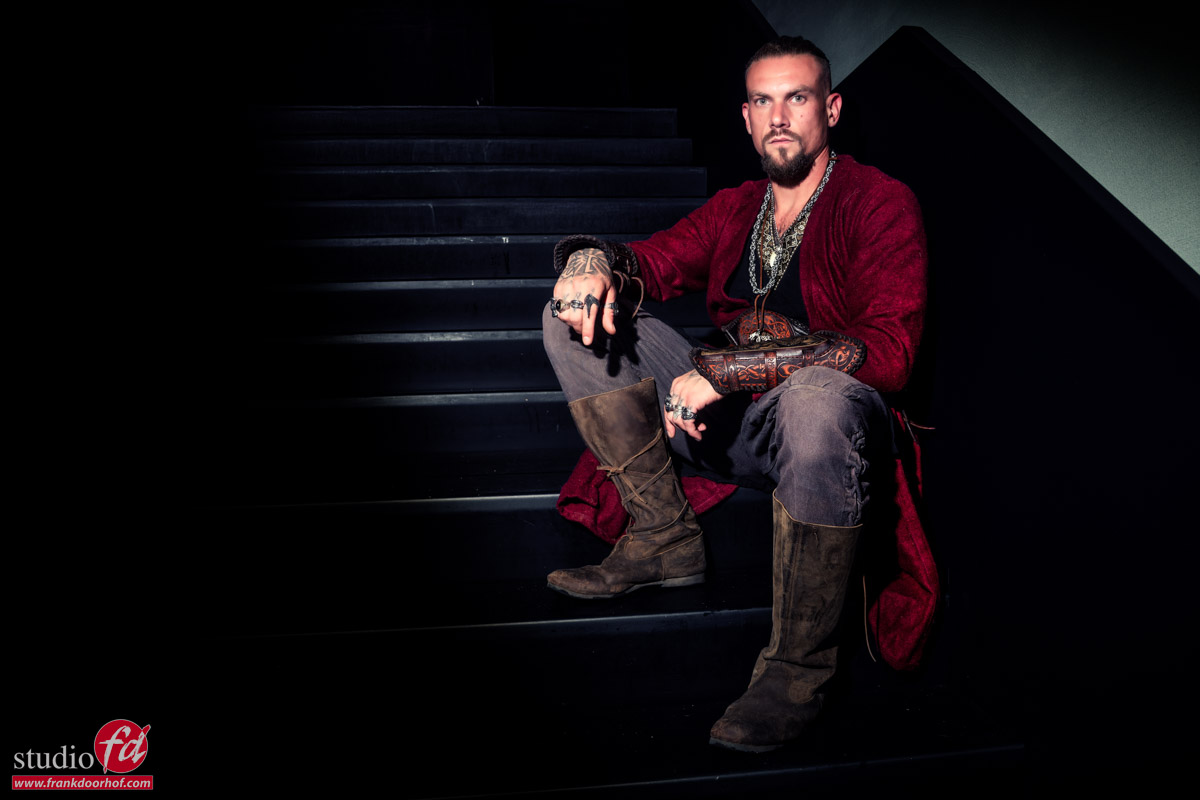
I did enhance the shadows in Photoshop and removed some feet and bodies 😀
But making sure it’s as good as possible in camera saves you a lot of work.

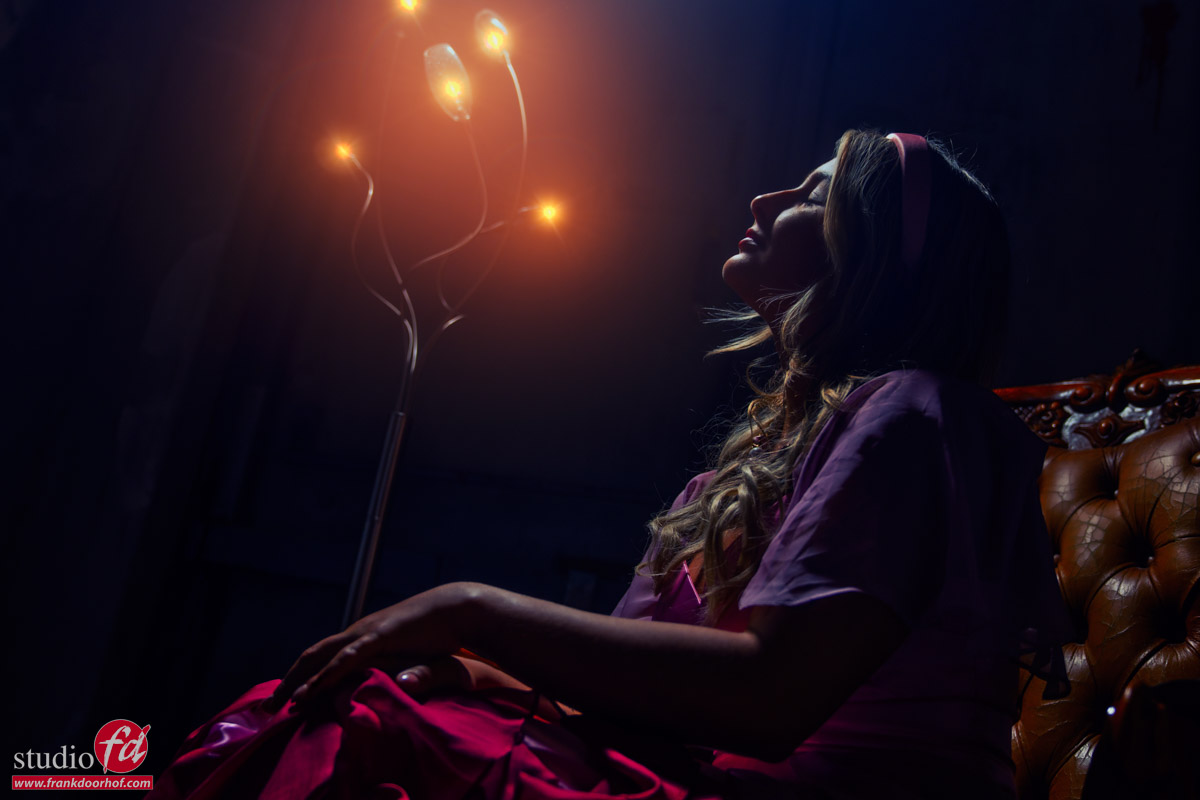
After getting the safe shot (always make sure you get that one).
It was time to experiment a bit more.
Using modeling lights on location is often not perfect or not even possible when there is too much ambient light and especially when you’re under time pressure it’s essential that you can judge your images when you shoot them.


I’ve been using the app Cascable for a while now on my iPad and can highly recommend checking it out.
Using the iPad makes tethering on location a lot easier and the battery runs all day without any problems.
Also with the new version the workflow between Lightroom and Cascable is super easy to setup, and it even works with Apple Photos.
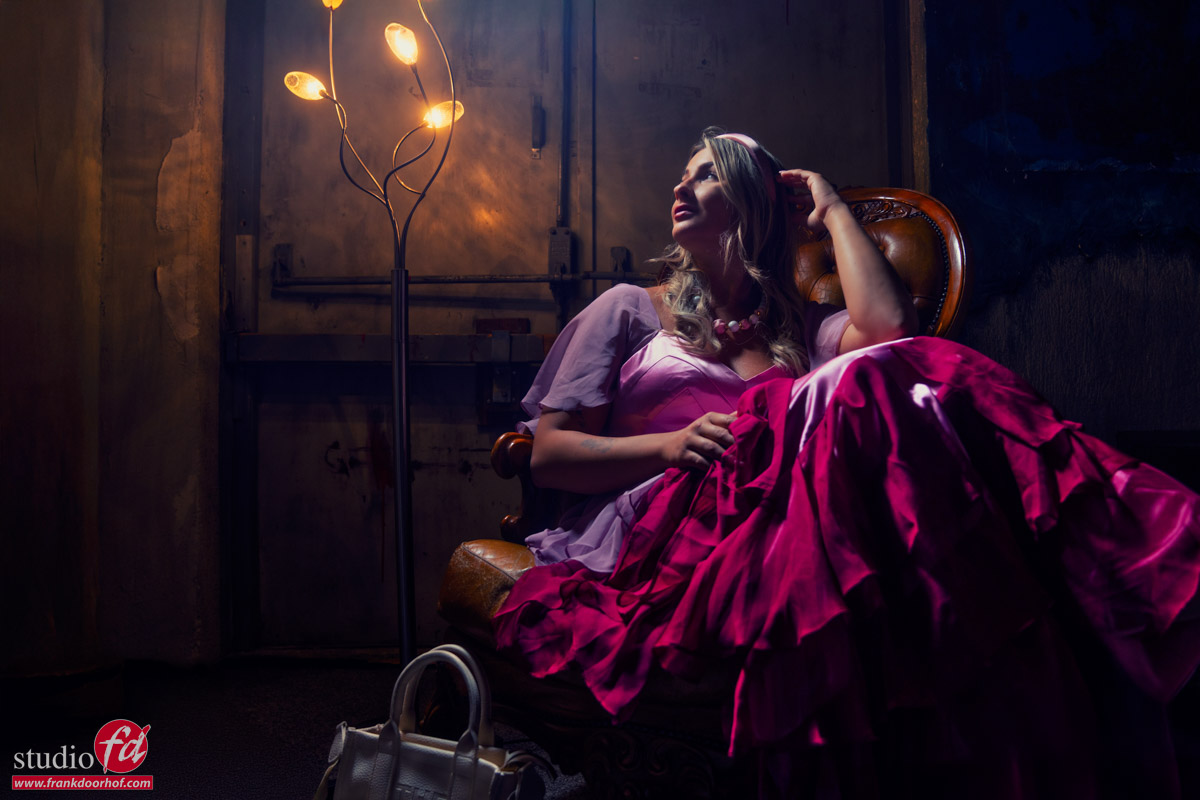
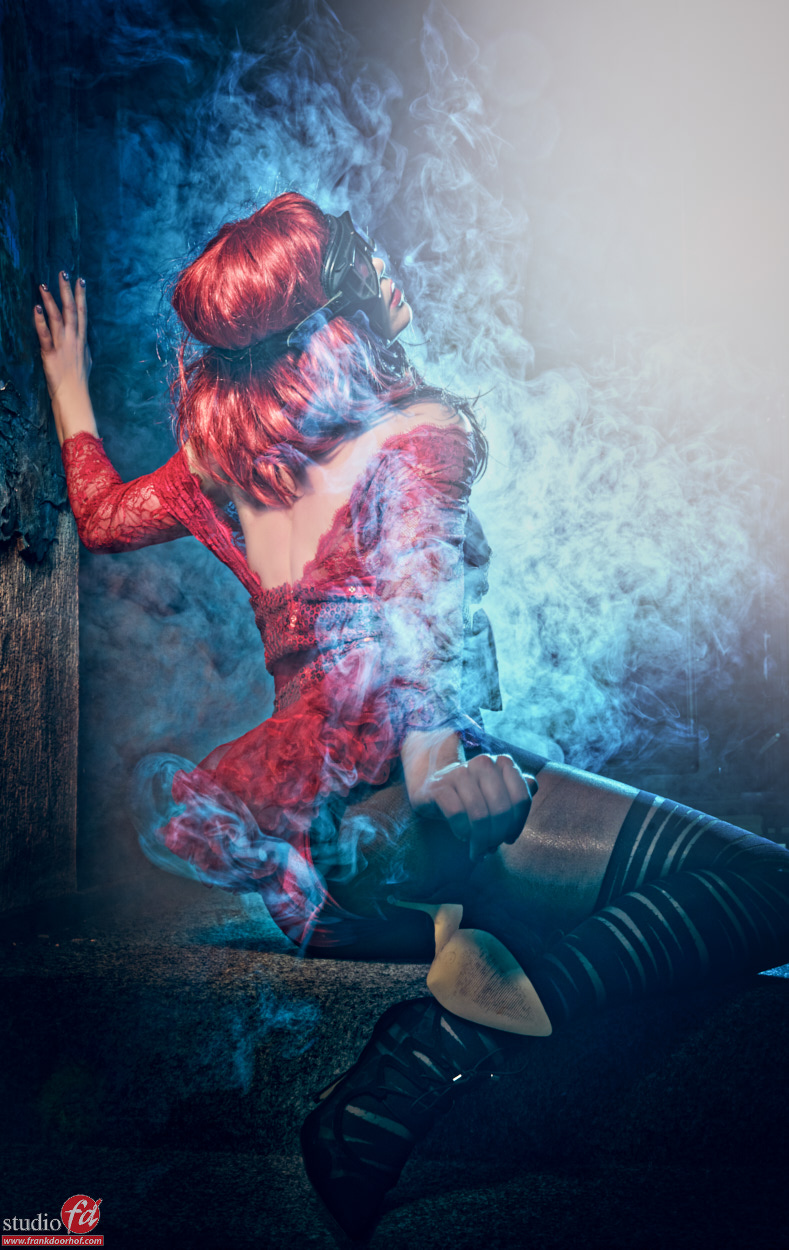
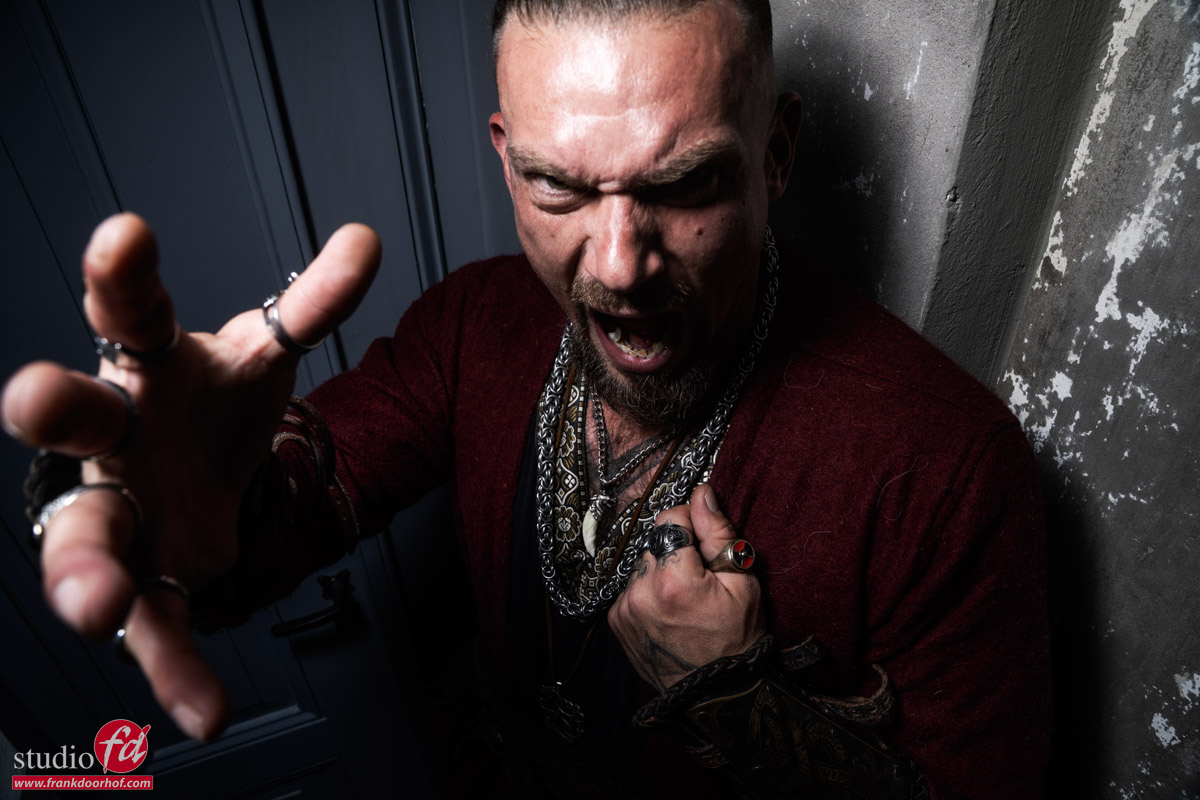
 

More contrast

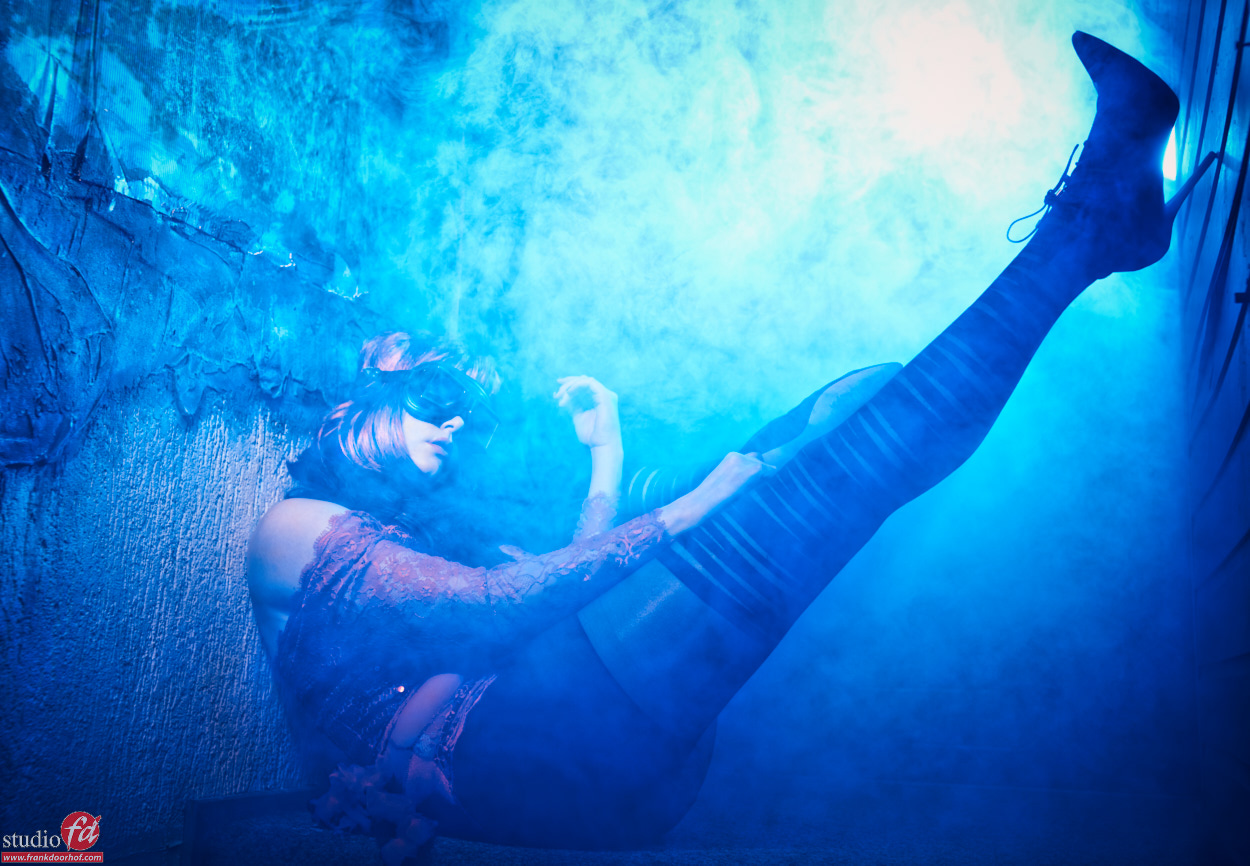
For the next setup we moved down the stairs and placed Roel in the corner near a old door.
For the lighting I’m using the Geekoto GT200 with the Frank Doorhof Flashbender in strip light configuration.

Again I’m starting pretty safe. With a more direct light setup

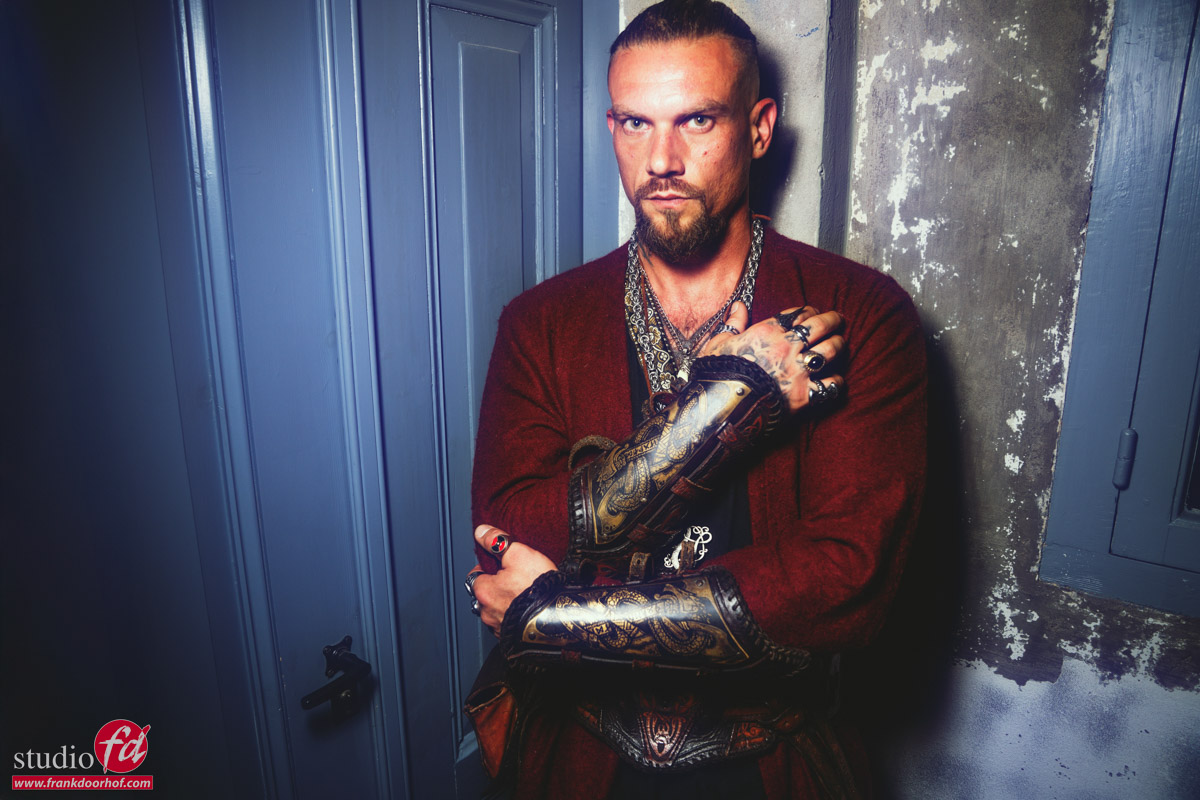
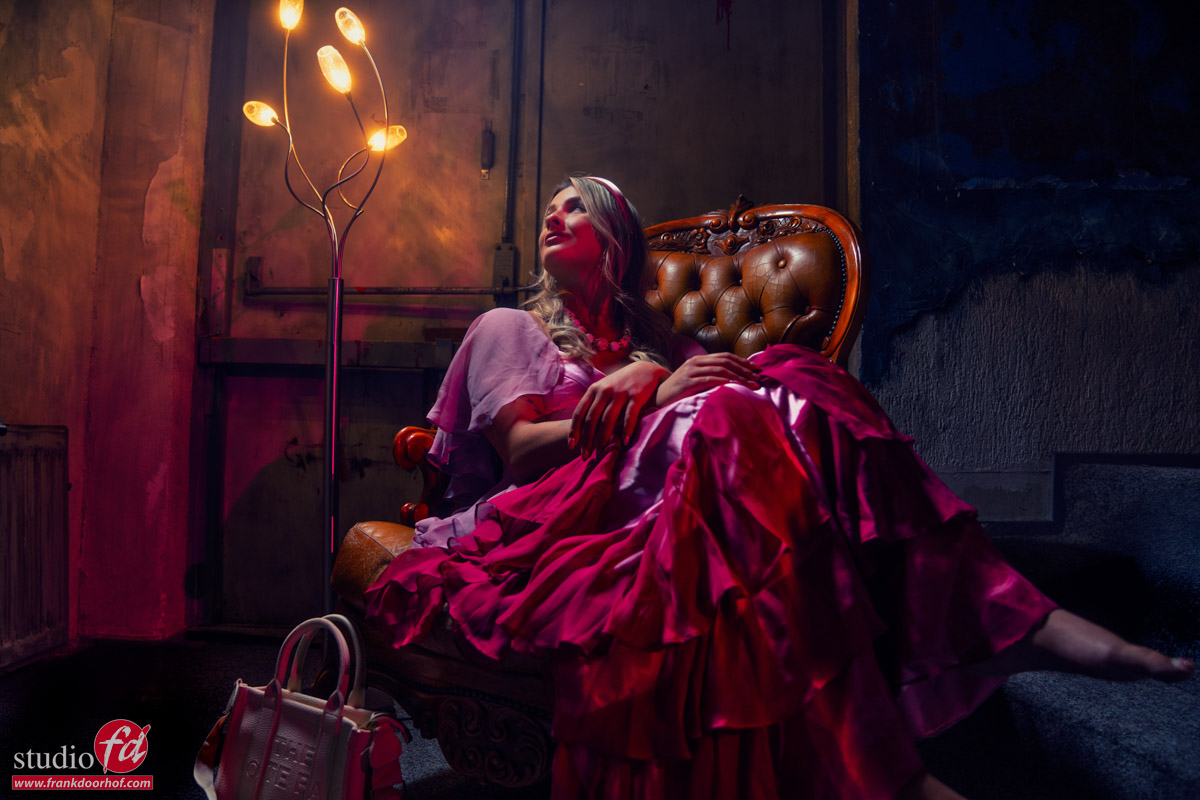
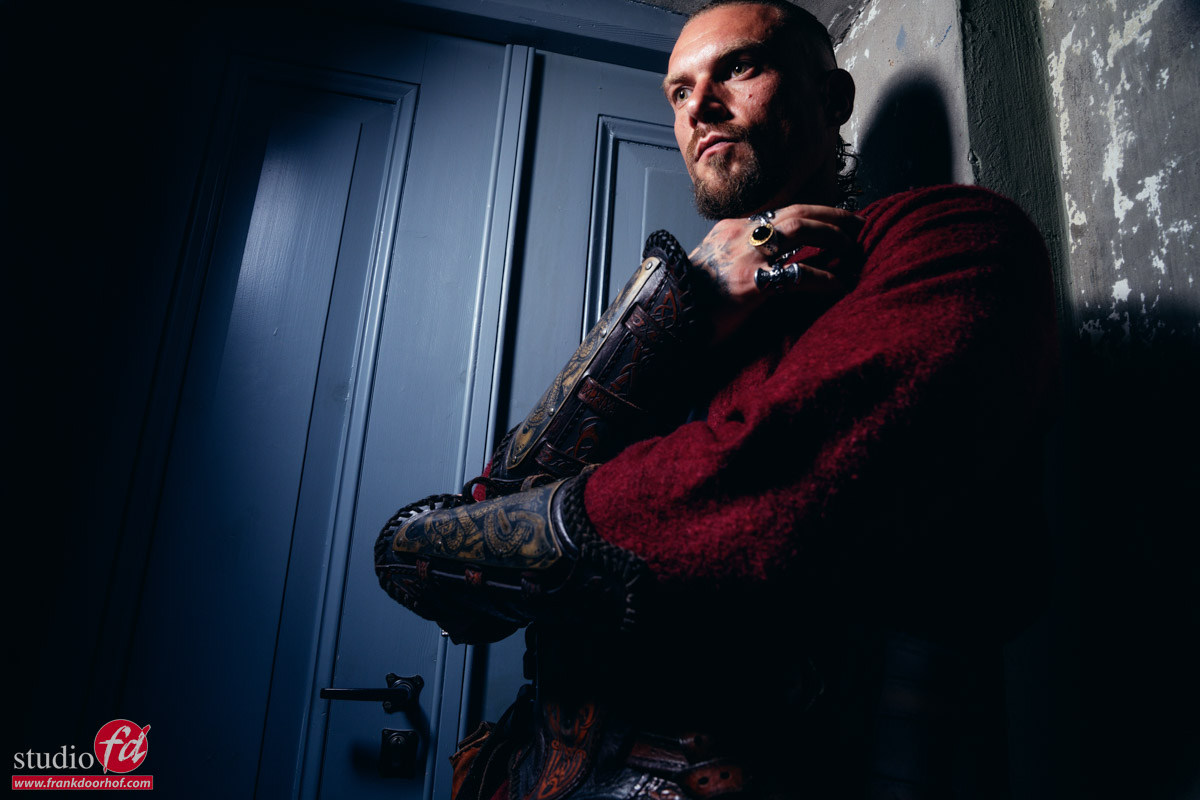
But now we really want more contrast, so the flashbender is moved more to the side and higher.
Due to the angle it’s very important Roel is looking slightly up to make sure the eyes are not too dark, one dark or close to dark is ok for this setup but there should not be a face with two black holes of course.
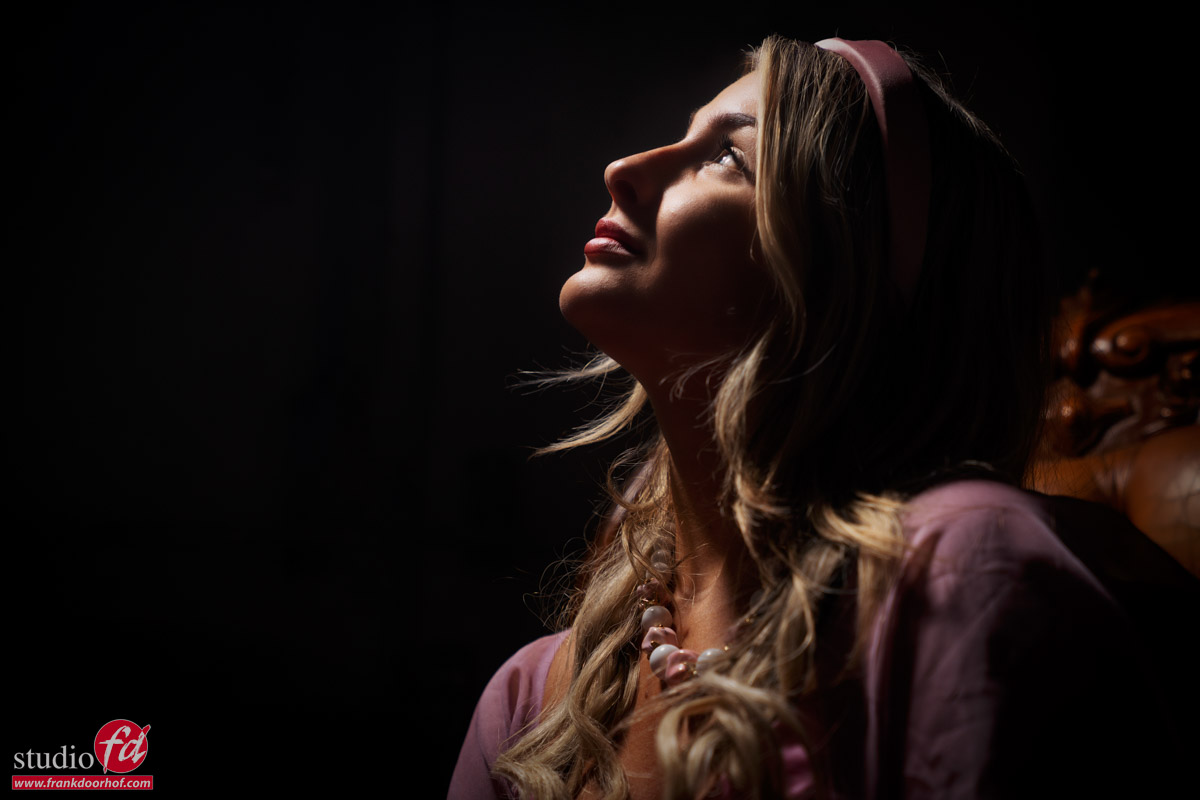
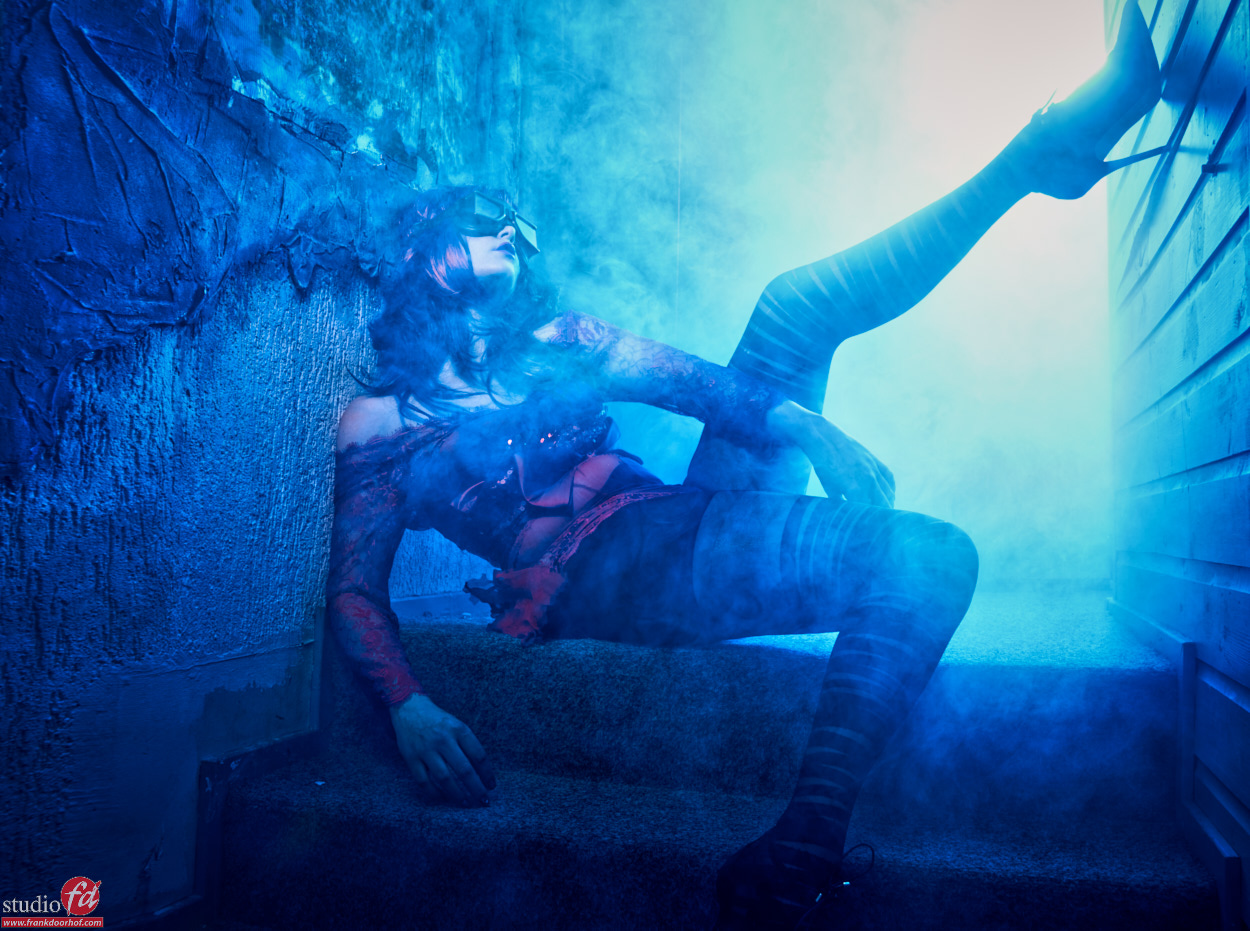
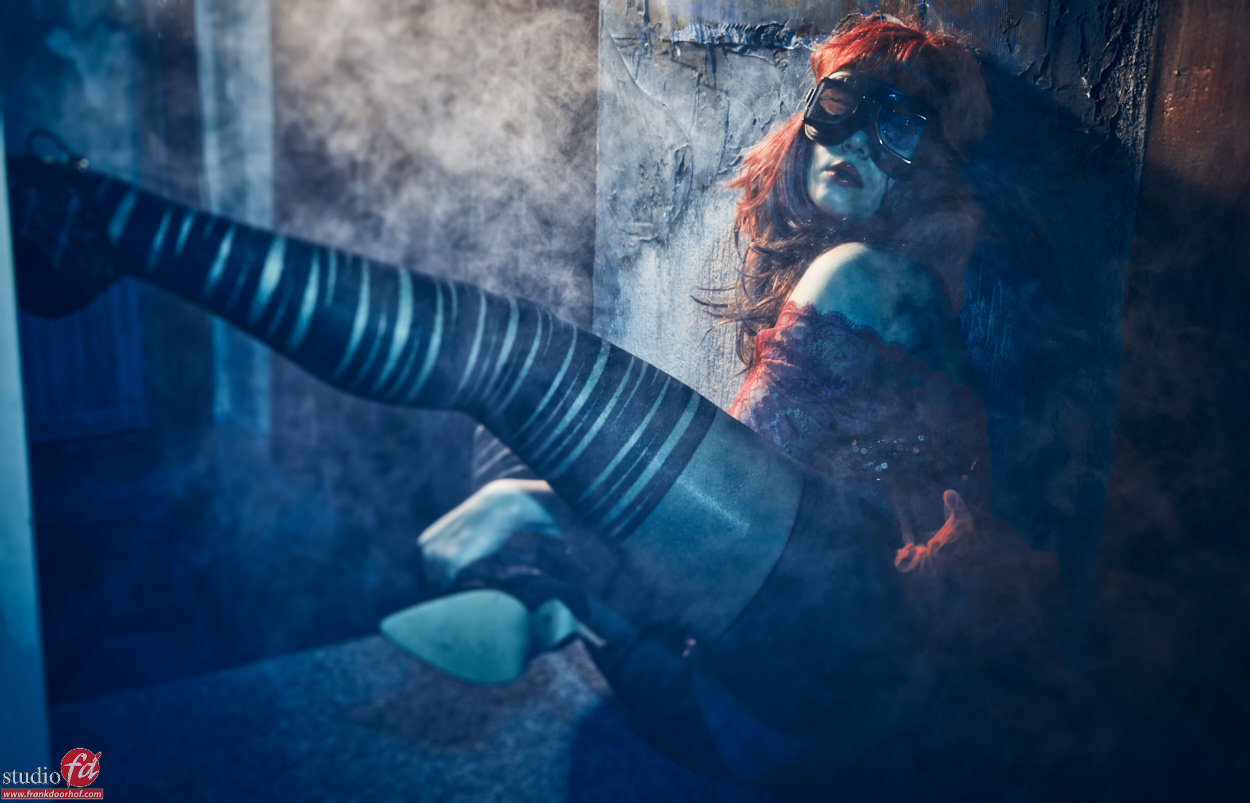
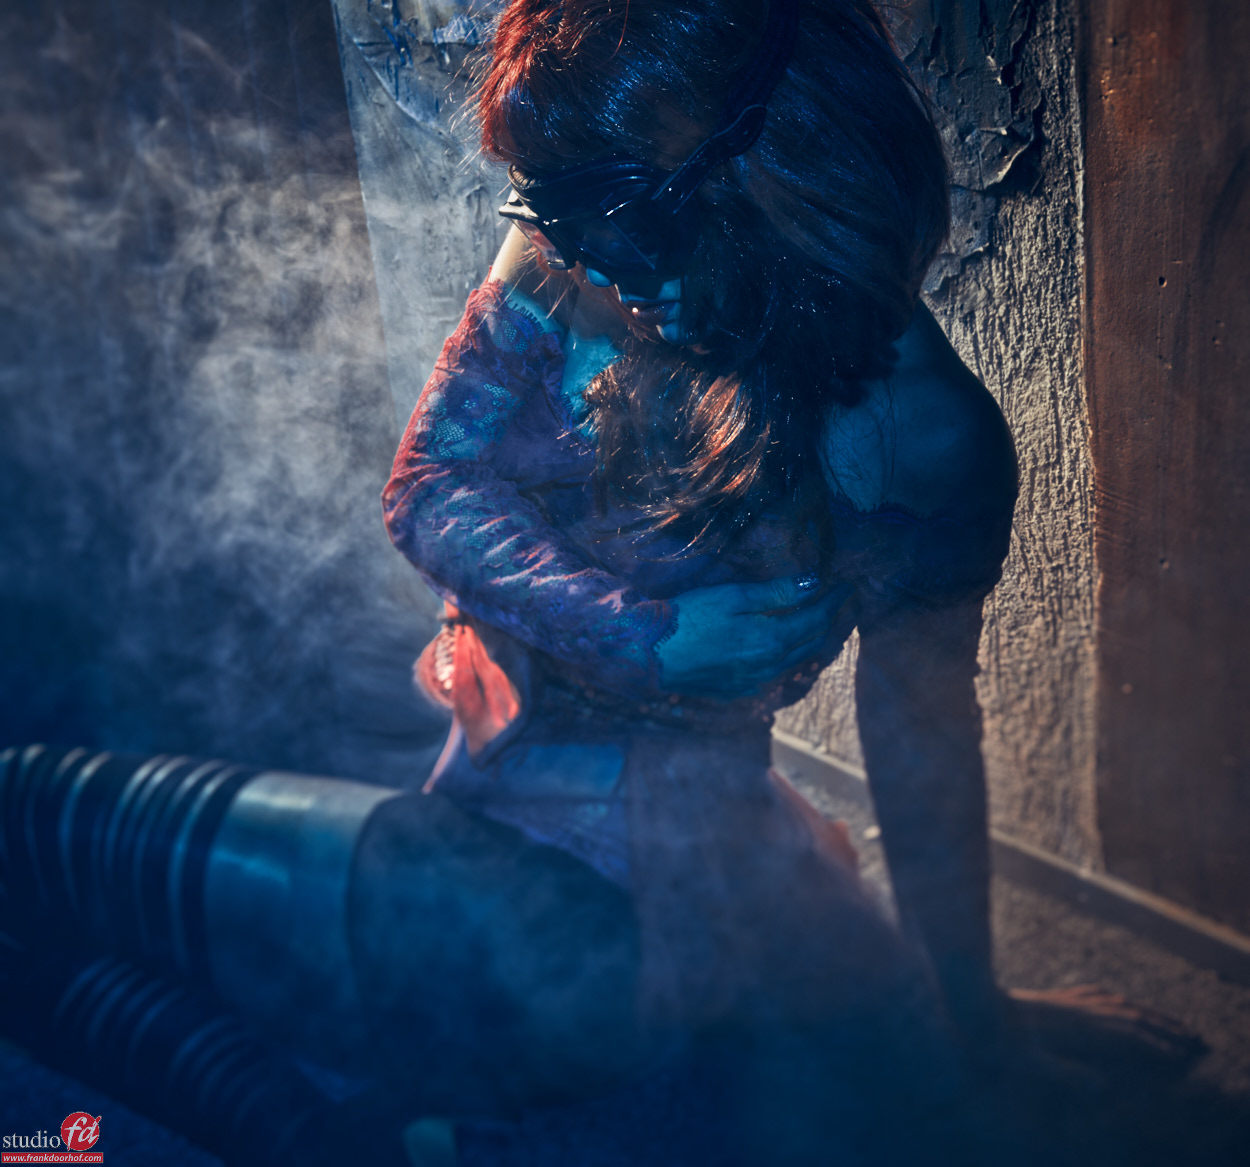
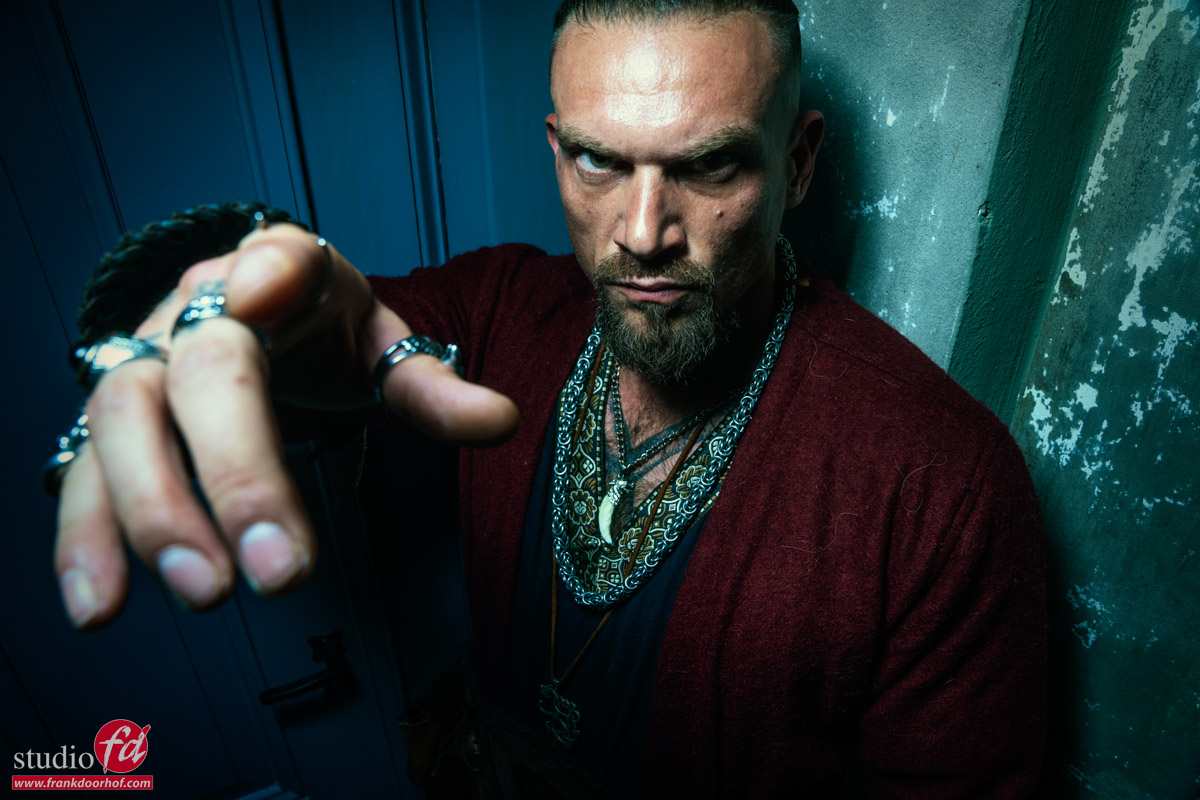
Playtime

We got the shots.
By the way that’s the advantage of shooting tethered, especially when your working under a time limit, you can check focus super fast on a larger display and of course right from the RAW file, this speeds up your workflow and prevents disappointments after the shoot.

So now it’s time for some fun shots. I always like to end a session with some fun sh0ts.

Conclusion

The whole photoshoot with Roel was perhaps 5 minutes (probably less) when you take away the explaining to the group.
Especially when you have limited time it’s vital to know your lighting, but also to make sure you have the shots. You can try to stun your client with the most awesome lighting setup ever, but if you fail you end up with nothing including no client/reputation.

So always start safe, and then start adding contrast or get more creative.
It also takes away a lot of the stress for yourself to know you already nailed at least “the”shot, and every next one will be better. Also use setups you know that work, of course freaking with light and lens flares etc. is awesome but when the clock ticks you sometimes are better of doing your “trick” that’s why they hired you, and when you have more time…. that’s when you can show them why they hired you 😀

One final tip, which can prevent some awkward moments.
Do make sure that you don’t place the monitor towards your model. When you don’t have a lot of time you don’t want to lose time because someone is looking at the screen instead of the lens.

If you also want to start shooting tethered a great way is to use Cascable on an iPad or Desktop, or use the software delivered with your camera, or a third party (there are many options). The only other thing you need is a proper tethering cable. To start out you can use a standard 1-2mtrs USB-c cable but when you want to start using it more frequently I highly recommend a proper tethering cable. This is no sales pitch but a tether cable is designed differently from a standard USB cable, it’s designed to handle wear and tear and not damage your camera or computer when something goes wrong.

I’ve been using IQwire myself for years and we also sell them via our webshop
On the webshop you can find all the gear I use.

So the next time you have a limited time.
Start simple and build it up, you’ll see it works a lot faster and you also project more confidence towards your model which also makes the session much easier.

Learning with Frank

Want to visit one of our workshops and learn a lot more about lighting, sets, styling and a lot more ?
Visit fotografie-workshops.nl for more info on the Dutch workshops.
If you don’t speak Dutch, don’t worry, let’s us know a few weeks in advance and we switch the workshop to English.
Don’t want to travel, also no problem, you can also book an online 1:1 workshop.
We got you covered with our Learning with Frank program.


Tight spaces big shots

Results from the shoot

In the previous blogpost we talked about the digital classroom episode about working in tight spaces.
Today it’s time to share the results.

Some background information:
The images were all shot during the live broadcast.
During the live broadcast I already shared some tips about retouching on the iPad and Adobe Lightroom.
For my workflow I mostly edit on the desktop and use Adobe Lightroom as my main hub, from here I export to Photoshop to do the more heavy lifting. Although Lightroom is getting better every release there are still a lot of actions that just work faster in Photoshop.

For my retouching workflow I mostly use a combination of Luminar Neo and BorisFX.
BorisFX you can use for a lot of special effects, and although I love using those for the Cosplay shoots I mostly use BorisFX for their awesome film emulations. For me the final tint of an image will determine the mood and the Filmlab tab from BorisFX has some real gems.

On frankdoorhof.com/discounts I have some nice discount codes for our visitors 😀

During the broadcast I shot 4 different looks in 2 different locations.

Set 1

Set 1 was shot on the staircase to the podium in our studio.
It’s not only tight for the model but also for the photographer, there is not a lot of space, so using wide angles is a must, and really adds to the mood.
I chose this image as my favorite, I’m using the red gel here as a more stronger fill in light.


In the Digital classroom Episode you can see me building up the lighting from flat to more contrast.

Set 2

For the second set we build a small set with a chair and continuous lighting.
In the video I show you how to mix the strobes with the lightbulbs and how you can add some red gels for a very cool special effect.
So let’s take a look at the results.

As you can see the red really adds something extra to the shot.
You can always try to do this in Photoshop, but in my honest opinion doing it in camera makes your life a lot easier, plus all the shadows, light fall off etc. are perfect (because they are real :D)

But as always, you always have to try different angles, so at the end of the session I also did just that.

Normally I like the lower angled shots more, but in this case I’m not so sure which one I like most.
The shot from above has something really nice going on, so in this case I’m just glad I always try them both.

One of the advantages of the lower angle is that you can also include the lights.

I faked it….

Yes, there is no hiding this one (and I had no intention of doing it of course).
As you can see in the video I had the idea of shooting this image with the lights on, but somehow the lights did not come back on (they worked again as soon as the cameras stopped)

As mentioned before I’m using BorisFX for the filmlooks in my images, but it also has some awesome lighting effects, and that’s what you’re seeing here.
I did not try to make it look natural but to give it a bit more of a surreal look.
So even when your lighting stops working, still leave it in the frame, you can always get something creative out of it.

Help us out

I hope you enjoyed this episode of digital classroom and the results.
It would really help us out when you like the videos, subscribe to the channel and tell other people about our channel so we can grow our audience and upload more material.


Tight spaces and the challenges

Tight spaces are very common

But somehow if possible we often try to avoid them.
Difficult to place strobes, distance to your model is short, not a lot of room to pose etc.

But think about it.
A large space is also not easy.
With really large spaces you have to think about lighting that is equal over the complete set.
Think about composition for leading lines and vertical/horizontal distortions etc.

For me tight spaces started as a challenge.
I did not yet have a large studio and when I started to teach at events the areas I had to shoot on where often not much larger than 2×3 mtrs.
Placing a model in front of a backdrop is impossible, so I started using walls, backdrops that could function as a wall and lighting from extreme angles, and somehow it just worked great.

Using the distortion of the wide angle lens to really guide your viewer towards the subject, using the tight space to make your model pose against a wall (or two), maybe make your model look huge by using a very low angle etc. I think we can conclude that tight spaces are awesome 😀 but always with a challenge.

The gear

In todays blog it’s time for a free full length tutorial in our digital classroom series.
So let’s talk a bit about the gear. This episode is jam packed with information plus you see me working with a brand new model Lisa.\

As you probably know in the past I’ve been using Elinchrom and Hensel strobes.
I still absolutely love the brands but working with the Geekoto’s did open a lot of extra creative options for me.
Due to the much smaller size I can place them in almost any location without worrying about power cables (they run on batteries), also the light stands can be much lighter due to the smaller size.

In this episode of digital classroom I’m using a GT200 with the Frank Doorhof Rogue Flashbender in striplight configuration.
You mostly see me using it as a strip but we actually designed the flashbender to function as a strip with grid but also as bounce card, snoot, small softbox and effect light. It’s my absolute favorite and most flexible modifier. Plus it always fits in my bag.

For the red accent light I’m using the Rogue Magnetic system on a second GT200 with a red gel.

Also for tight spaces check out our brand new Geekoto collapse light stands 😀

The video

Without further ado.
Let’s show you guys the video.
I give you several solutions for working in tight spaces, explain colors, share tips about posing your model in a tight space, light techniques explained when we start to combine continuous lighting and strobes in a small set. And a lot more. This is probably one of the best digital classrooms about tight spaces out there 😀


Small spaces are limiting? … nah

One of the most heard excuses is “my space is too small for a good shot”.
Well you might not be able to shoot a model in front of a white seamless, or fit in a whole family, or make a model jump (although that could be funny… for the photographer, not the model,….. nah don’t do it), but in essence EVERY location has potential as long as you use it to the max.


In this case we used a small staircase that is located at the back end of our studio and leads up to the “stage”. Our building is actually and old “church” and this was where the preacher was standing, it’s a tight space but for me it’s always fun to shoot there.


As you can see in the following shots I used some smoke to give the scene a bit more of an edge, but I also used my lighting to the max by moving around my model. Now always remember that smoke acts as both a diffuser and reflector so the more smoke you get… well let me put it this way, it’s always different. Also remember that as soon as the smoke gets in between the model and the front light source “all bets are off” smoke will start to act as a reflector and it will be one big white out.


We used one Elinchrom beauty dish with grid from the front and one gridded (and later open) reflector from the back with a blue gel.
Styling and model : Nadine

Nadine Januari 2 2016 0811

Nadine Januari 2 2016 0846

Nadine Januari 2 2016 0848

Nadine Januari 2 2016 0851

For the next one I left in a bit more red.

Nadine Januari 2 2016 0817

But you don’t always have to use the same pose of course…..
Why not shoot one from the back for example.

Nadine Januari 2 2016 0867

And while you’re at it. Why not move around your model and get a completely different look?

Nadine Januari 2 2016 0894

Nadine Januari 2 2016 0900

As you can see with the same light setup and the same very tight space you can create something really cool… just think outside the box… or in these kind of cases probably inside the box 😀


Good luck.