Tag Archive for: review

Rogue magnetic flash system review

There are always those products where you think “that’s not made by photographers”. You probably know what I mean, it looks fantastic (on paper) but to use it in real life is of course something completely different.

Let’s face it, this isn’t the first magnetic system, but it’s probably the last one you need.

But let me first make something clear. This is a very flexible set. And although I use it in the studio for this review and the enclosed live stream, it’s the perfect tool for weddings, events etc because it’s not only flexible but also a very fast system….. But I’m getting ahead of myself.

Rogue
If the name Rogue sounds familiar to you… that’s very well possible, Rogue released the flashbender on the market years ago, and together with Rogue we have put together the Frank Doorhof signature Flashbender which I actually used almost exclusively on my speedlights, until now ……

The Flashbender is great, let’s be clear about that, and I still use the Flashbender on my speedlights, but not exclusively anymore….

Rogue Magnetic flash system
As mentioned, there are more magnetic systems, but Rogue has listened very carefully to the complaints and wishes of the photographers using them and adapted their system exactly to what a photographer needs. So, let’s take a look at the system.

First, you should know that this system is designed for the wildly popular “round” flashes such as Goddox, Westcott and the Profoto A series for example. Special adaptors are available for both Profoto and standard rectangular speedlights. I use the standard speedlight adapter for my Nissin speedlights, the adaptor is available in “standard” and “small”, for most speedlights “standard” will work perfectly. In the case of the Nissin speedlights I did remove the zoom head (it also works with the zoom head on the flash but without the zoom head everything is a lot firmer) Note… not every speedlight has a separate zoom head.

I am going to review the complete set in this review, but you can also buy parts separately of course.

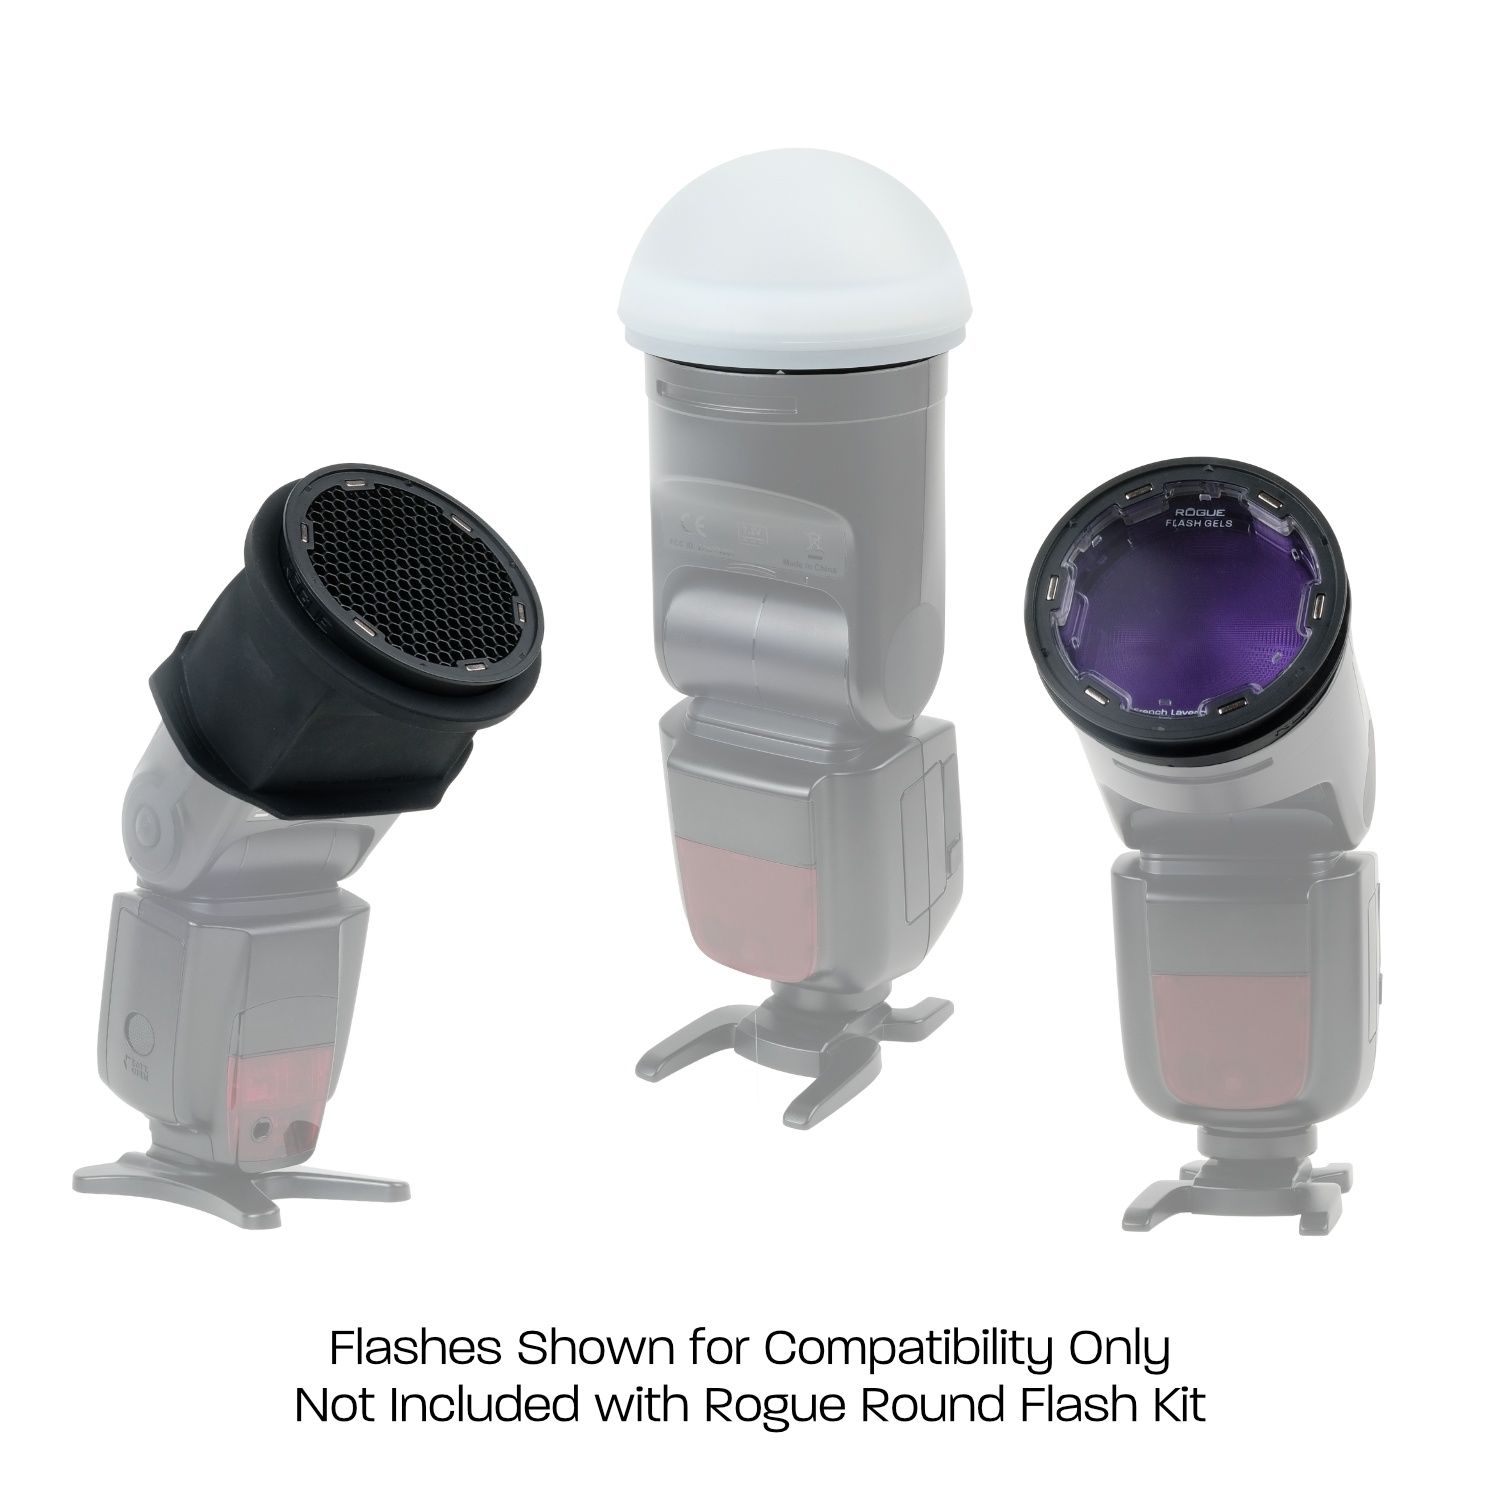
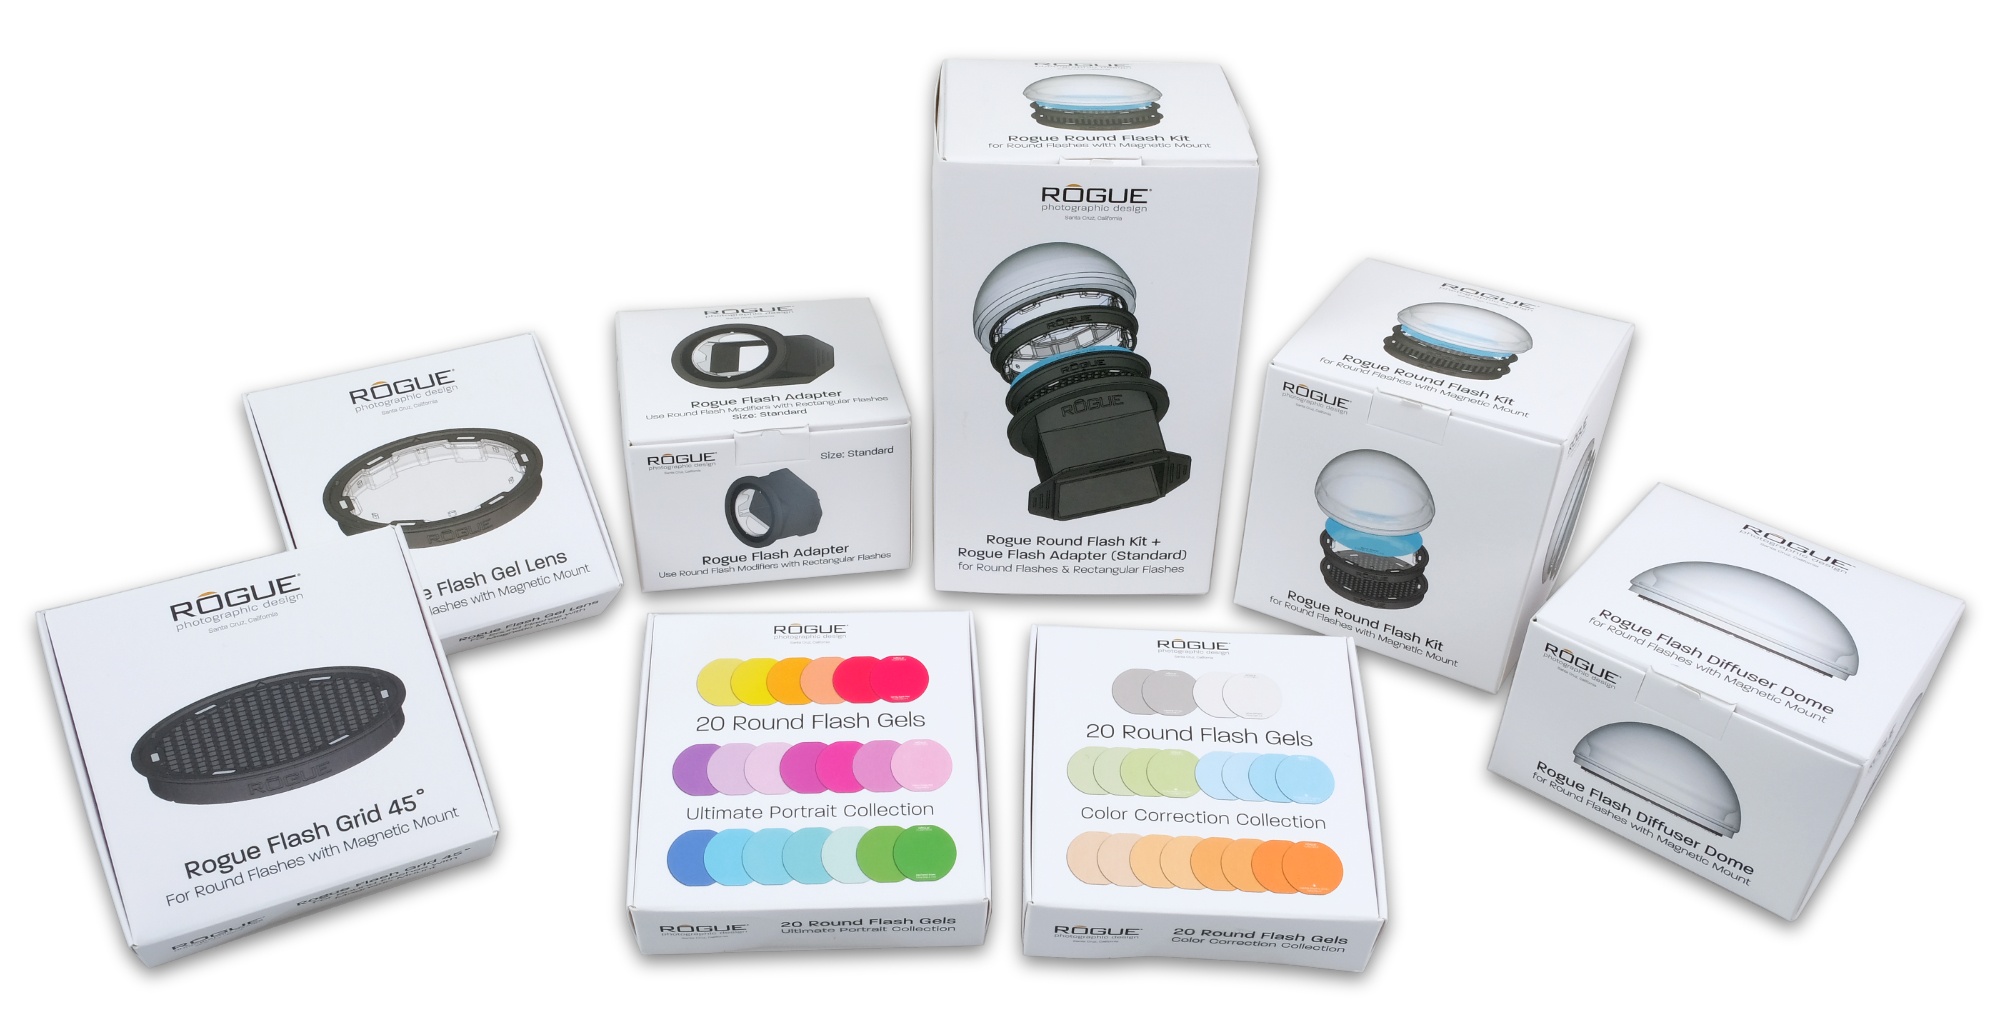
You can see the kit in 3 parts.
First we have the Dome.

The Dome
Let’s get straight to the point.
Of course, we are not going to get super soft light from a small light source, everyone who promises such a thing is not aware of how light works. A small light source will always give a harder light than a large softbox.

But still, the Dome does something very beautiful.
Due to the entire structure of the Dome, the light becomes omnidirectional instead of focused and this makes a HUGE difference. I’m not going to say that you get the effect of a large soft box, but this is very close to what you can expect from a medium/small soft box. This is actually a very smart way to turn a small light source into something that comes very close to really soft light, and that in such a small Dome, I’m impressed.

The “disadvantage” is that the light goes almost everywhere, but this will not be a problem for most people, on the contrary it helps enormously with lighting up the entire scene or a large part of the model, I use the dome also as fill in for color gels and it literally does a perfect job for that.

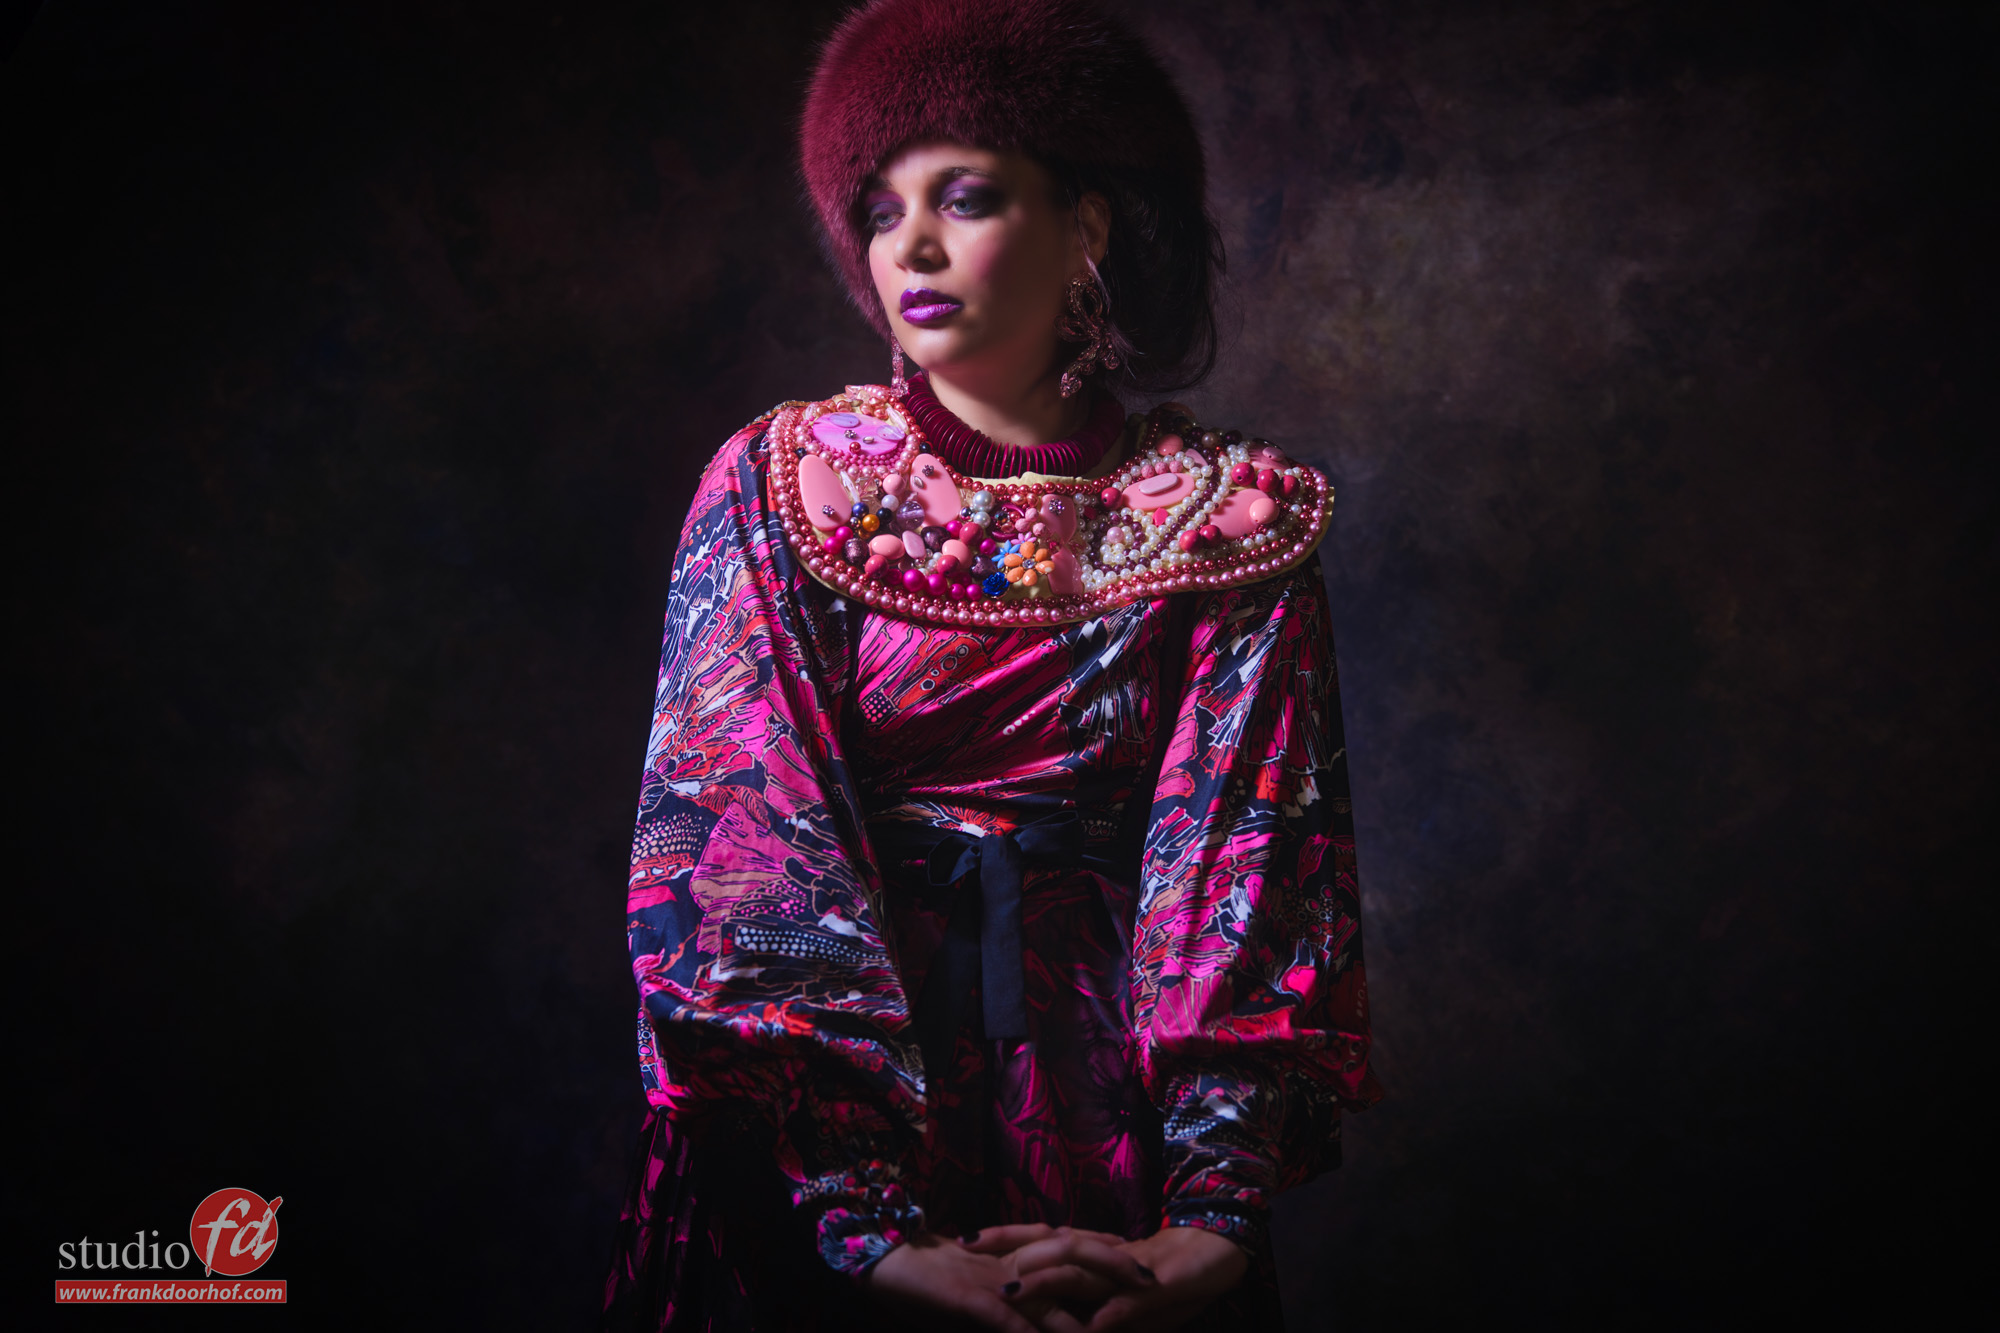
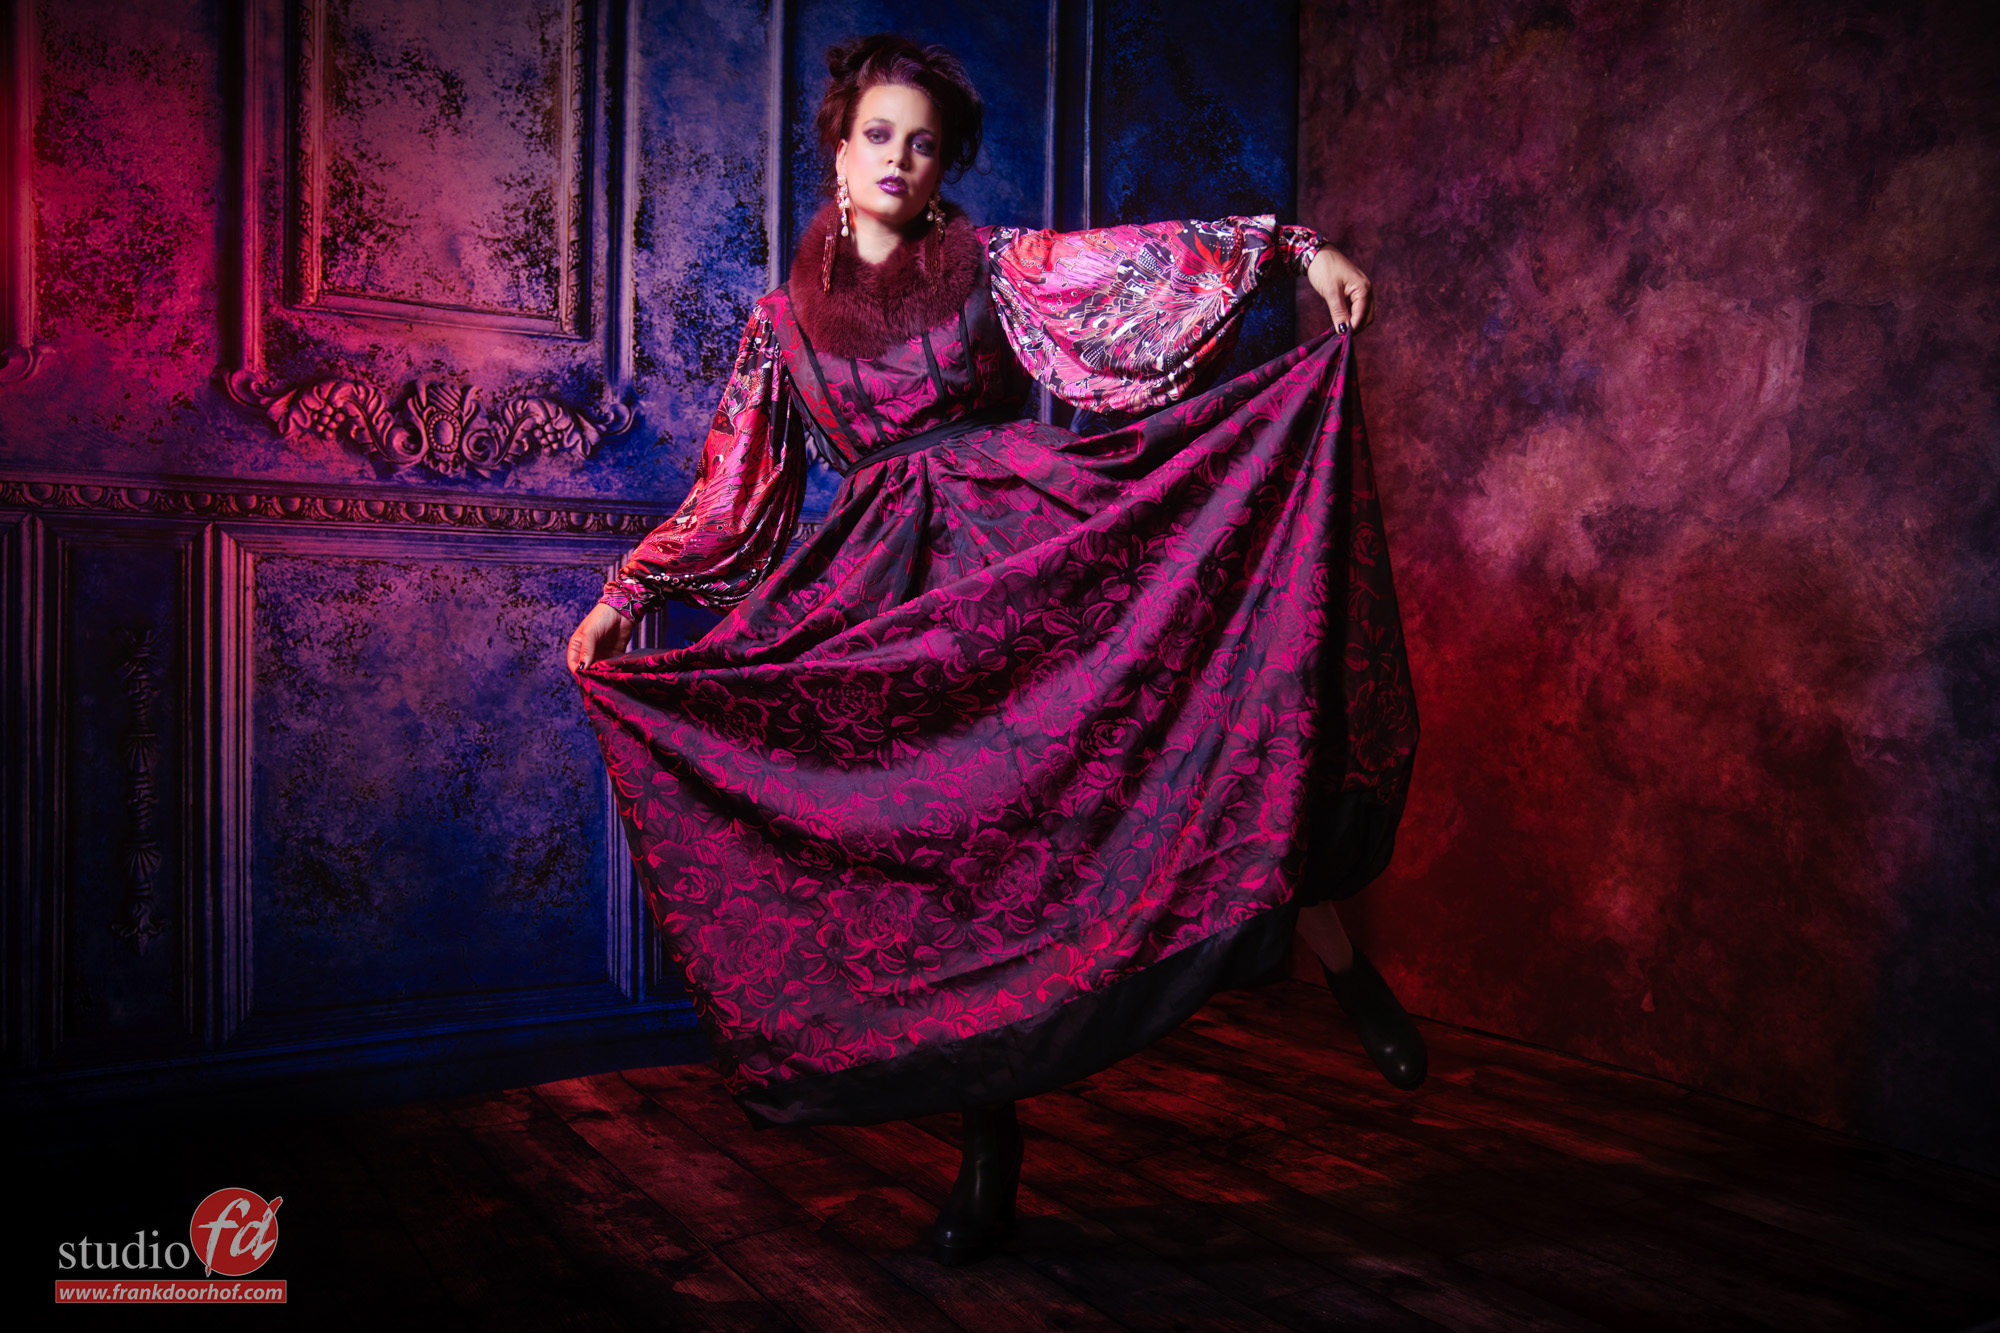
During the livestream of Digital Classroom, I used the system for the first time, the reason was actually very simple, I wanted to give people an impression of how easy the system is to use, even if you have never worked with it before. I could already predict the light, but I had the Dome, well it could go both ways, especially since using something like a dome is not really my thing. But as you can see in the stream I became more enthusiastic with each photo.

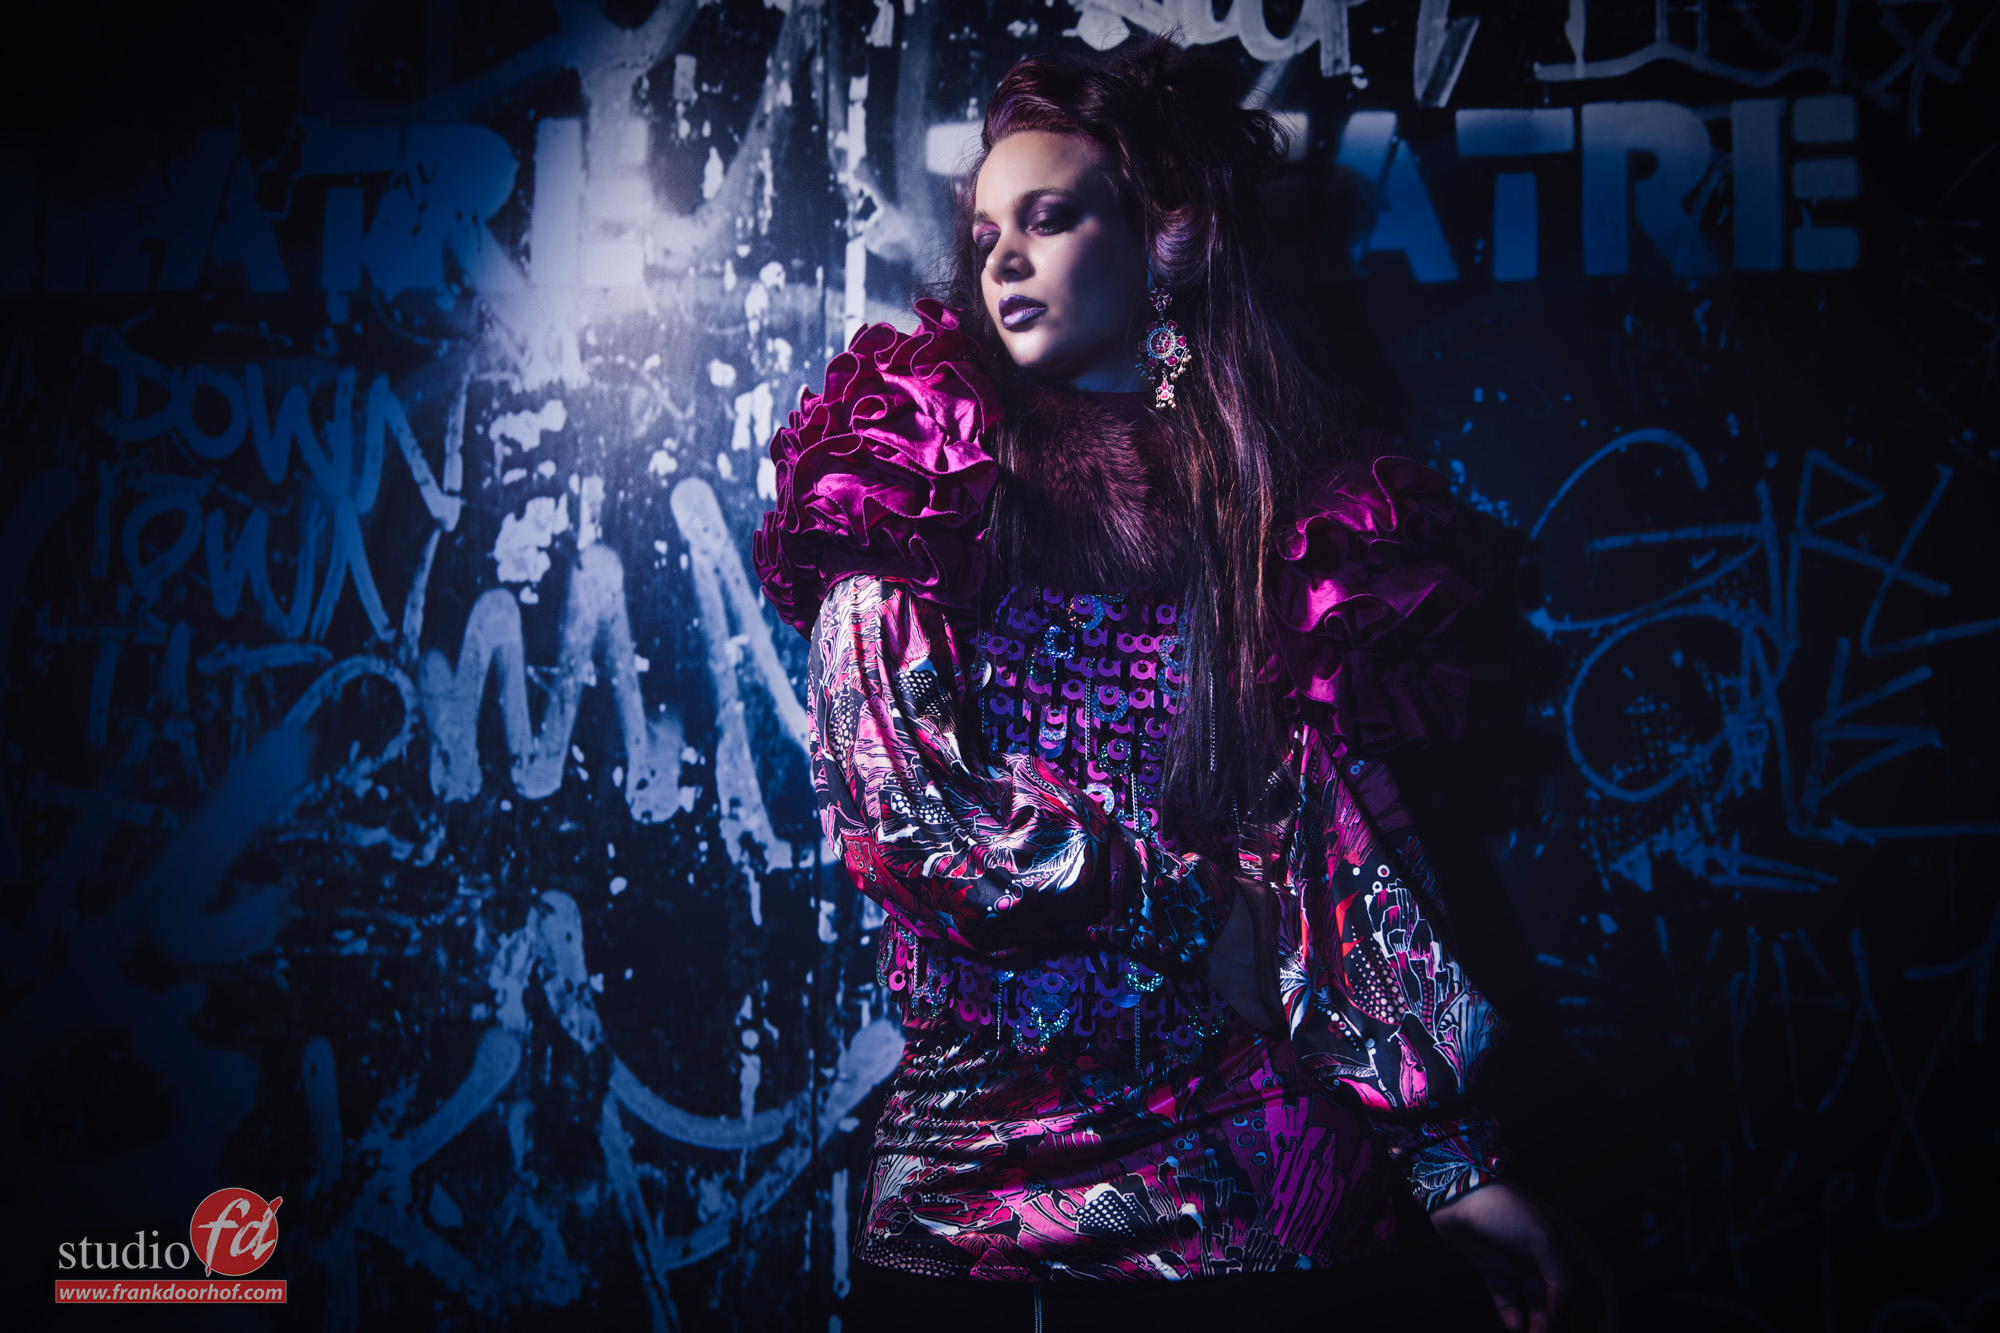
Using the dome and gel for fill in with color is absolutely awesome with this system

The Dome is perfect for a beauty portrait, as you can see in the examples.
But where the Dome really comes into its own is as a fill in with or without colorgels. During the livestream you will see me doing this as well. And the beauty of the Dome here is without a doubt that you can illuminate the entire scene with standard or colored light without too much effort. This gives a lot of flexibility in terms of highlighting a model / set but also a lot of creativity by using the gels. If you still use shadows in your RAW convertor, start using fill in flash, trust me you’ll thank me very soon.
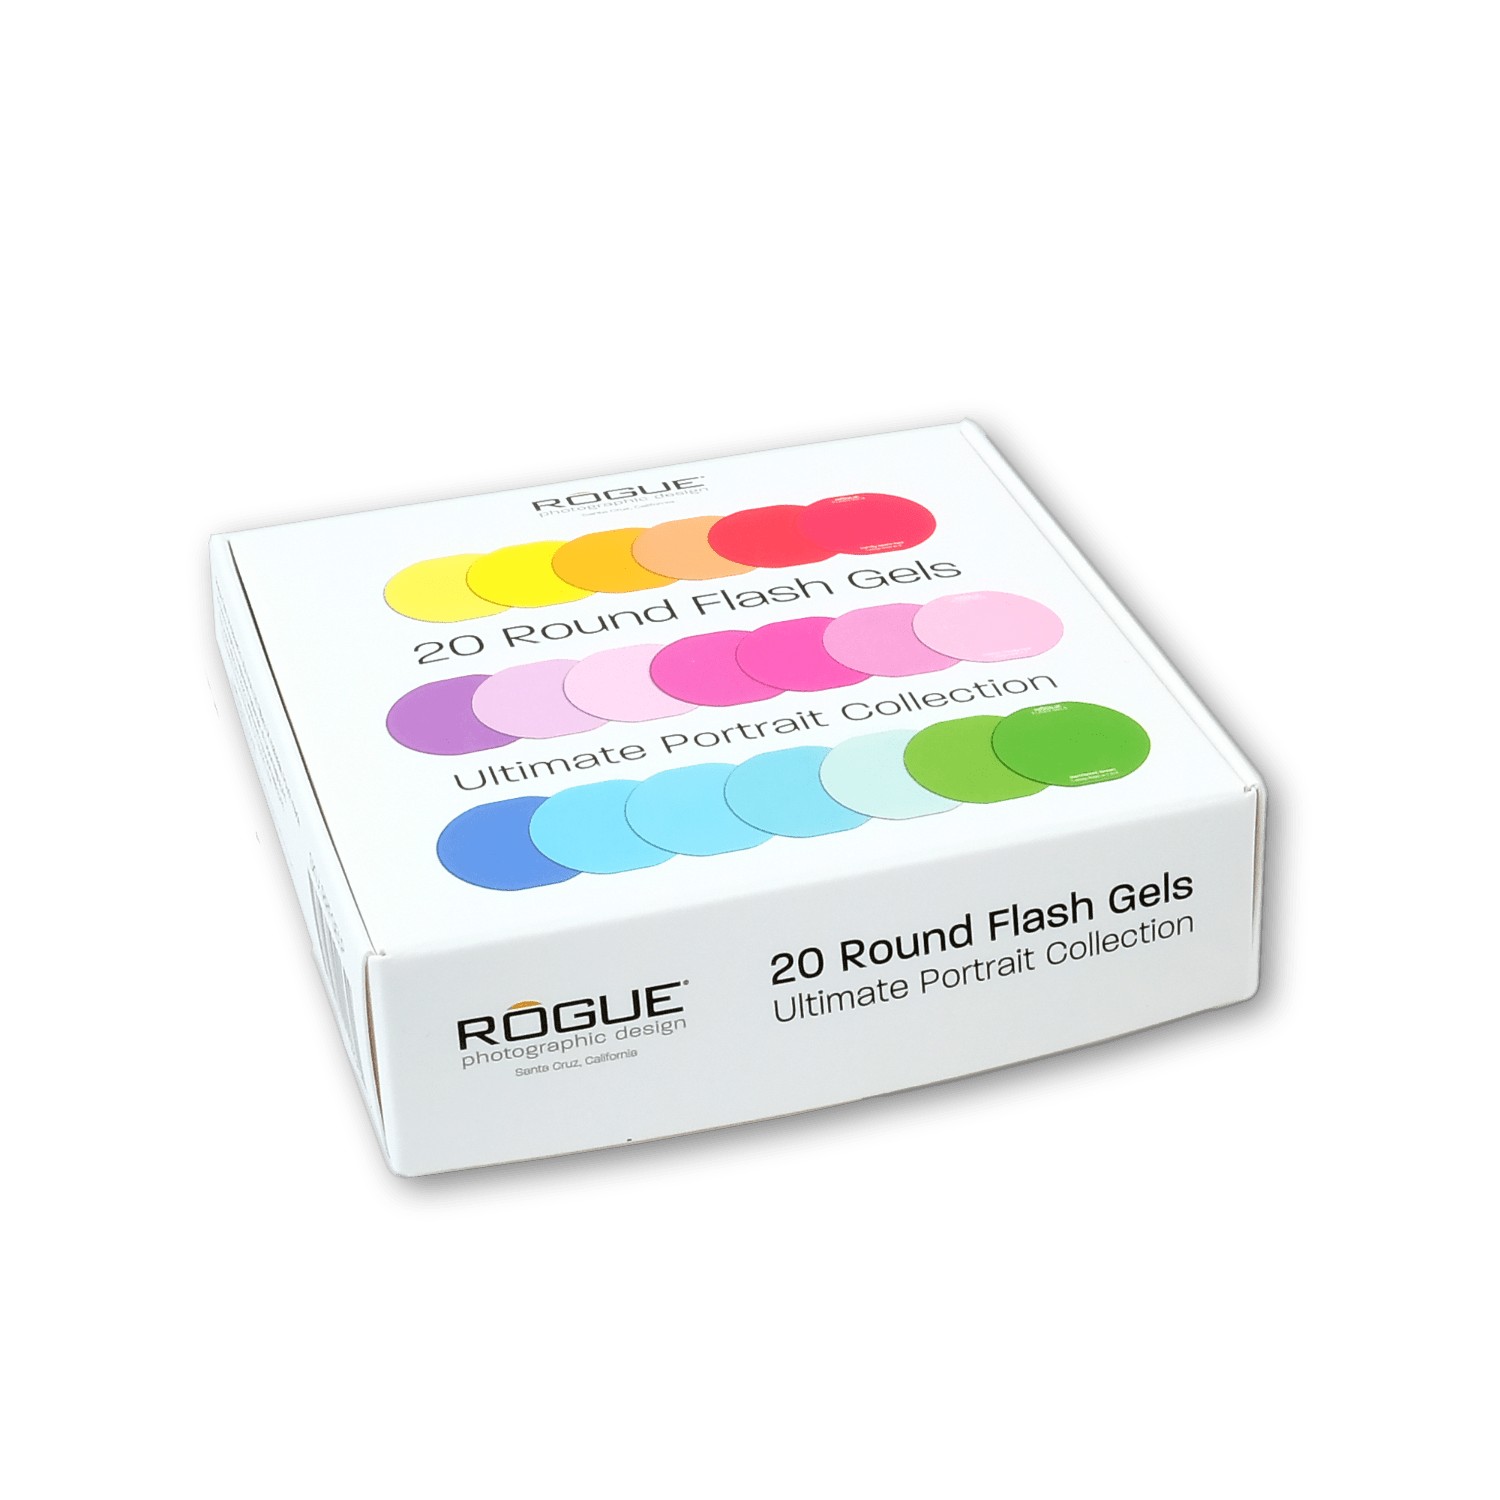
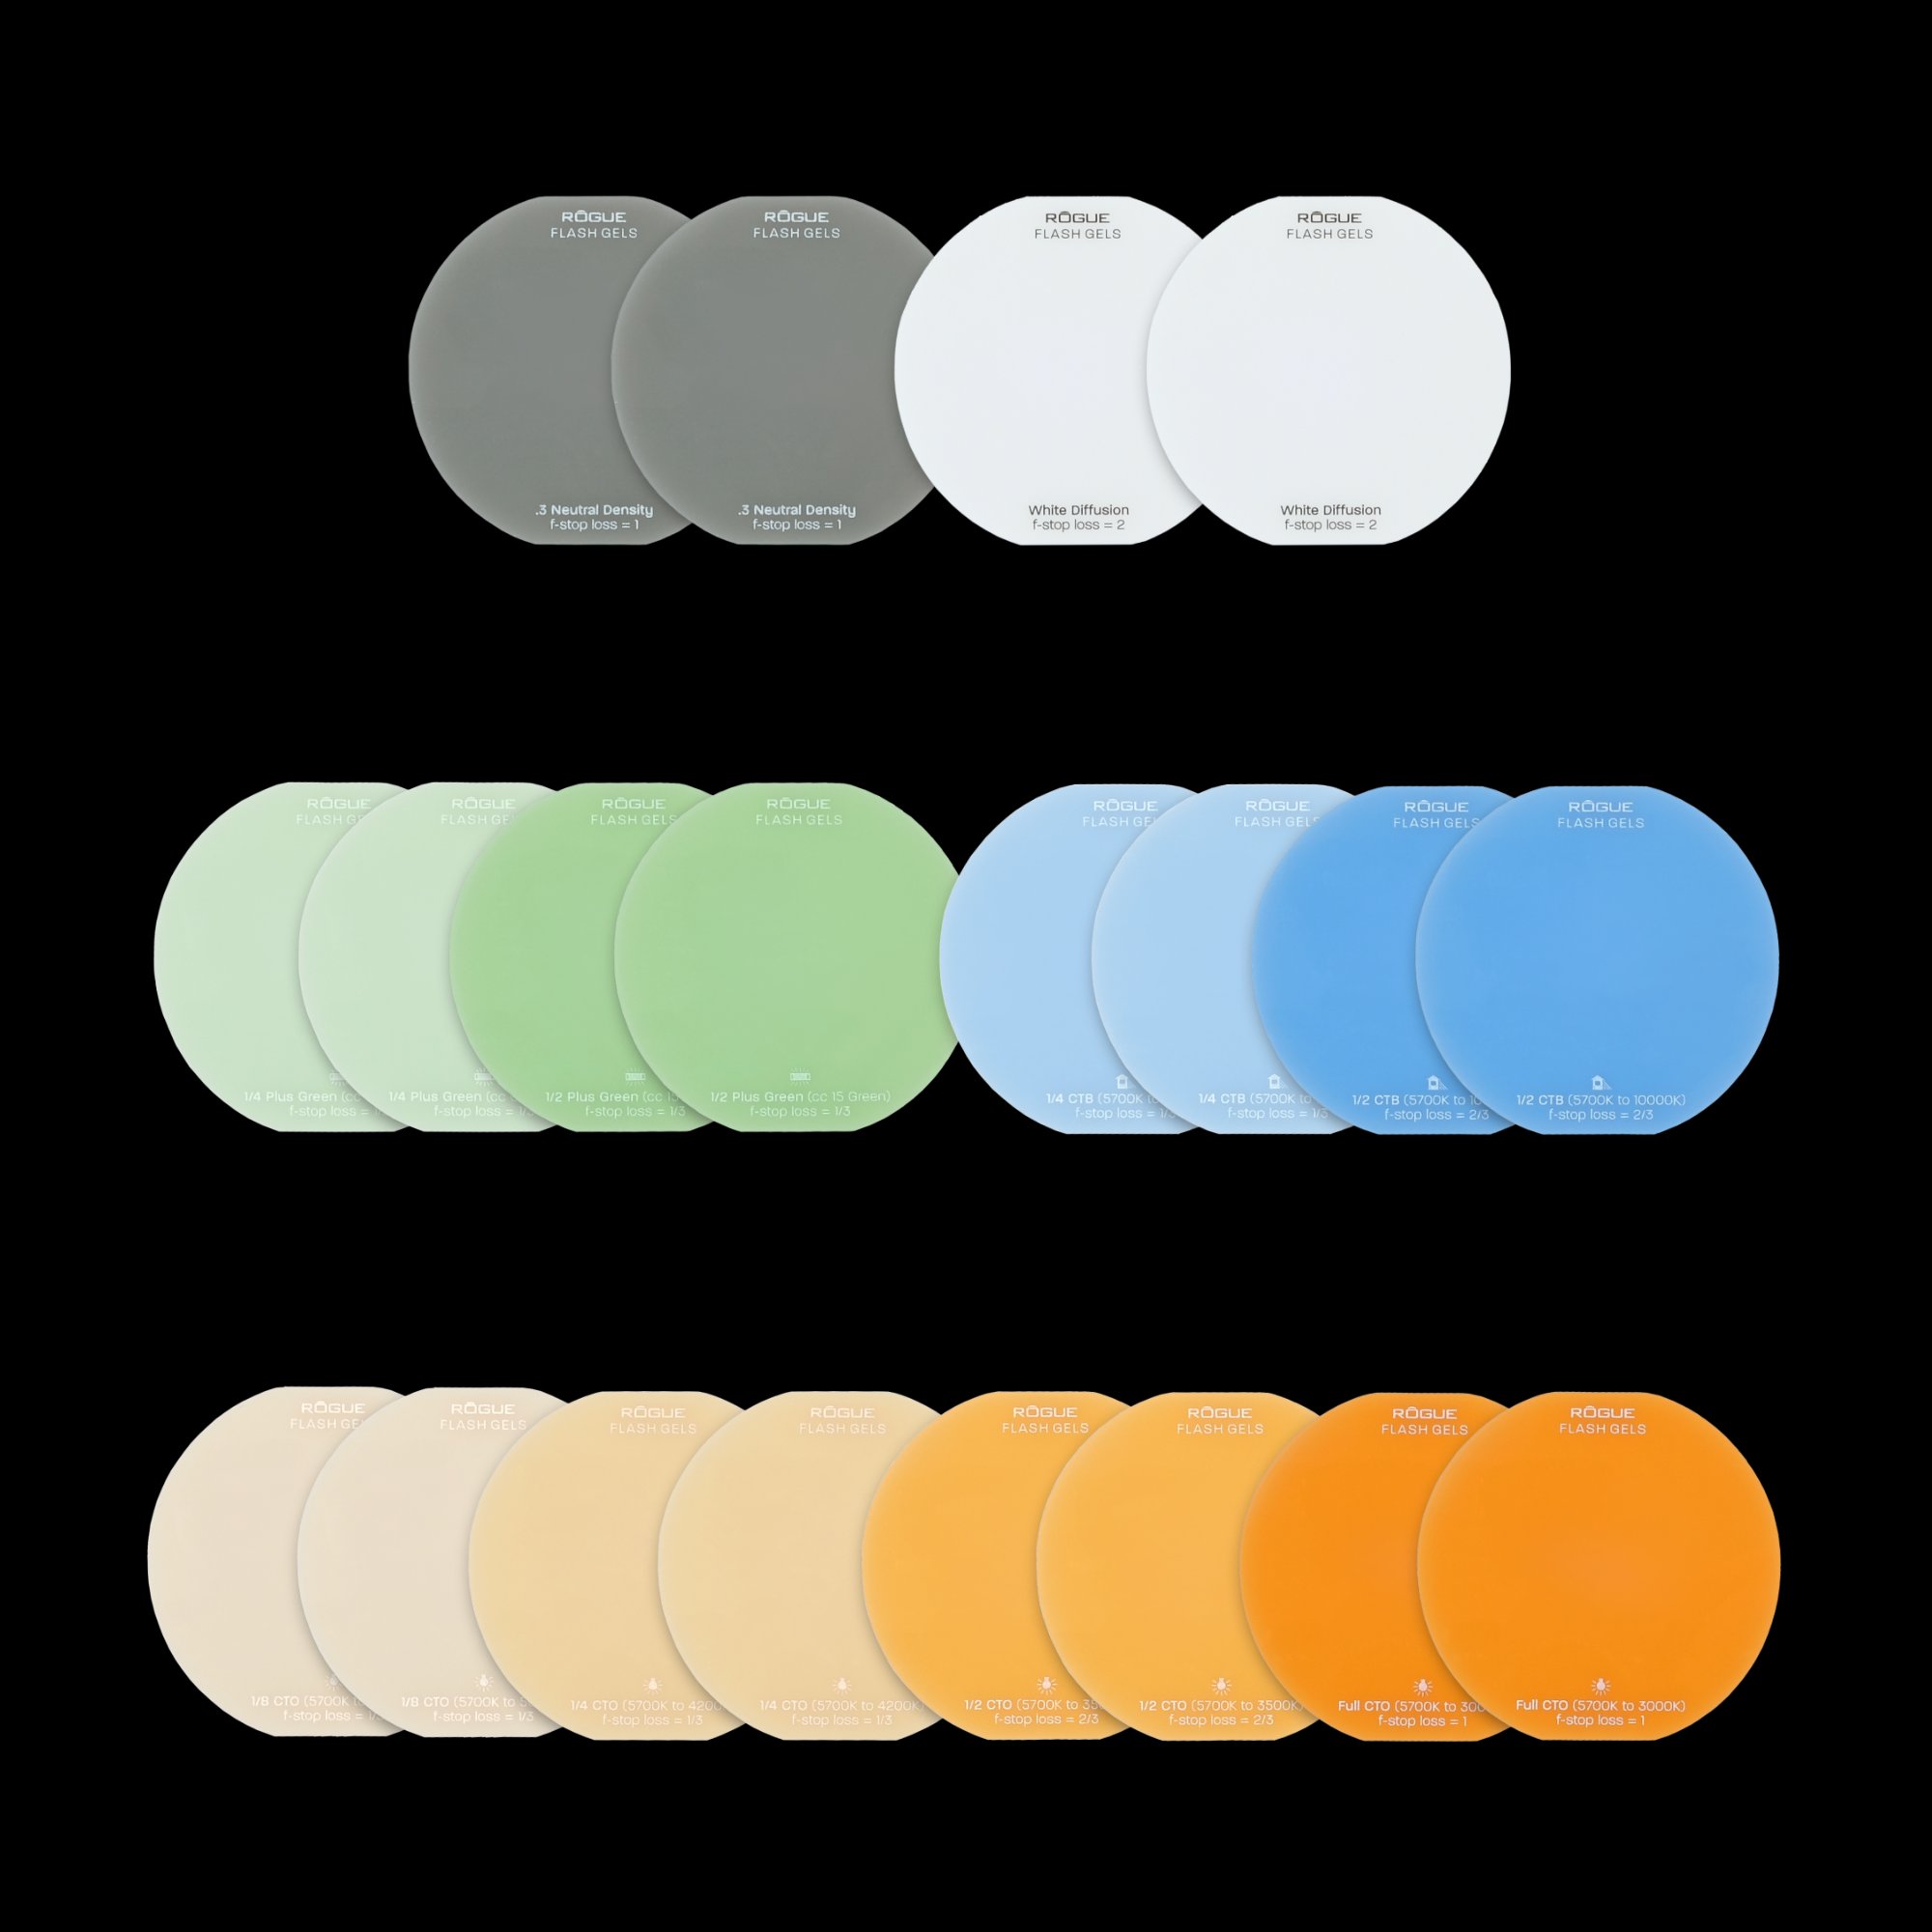
Gels
And then we of course arrive at the gels.
Under the dome I usually mount the gels.
Changing gels is super simple, you remove the ring with the dome and place the new gel and… well you click the Dome back and done.

The gels themselves are from the well-known brand Lee and are super strong and specially coated so that they do not tear (easily). This is a problem with many color gels, but the Rogue kit feels nice and strong and if you buy the special gel package you get a huge selection of cool named colors, if your favorite color or shade of that color is not among them it would surprise me.

Besides the colorgels there is also an extensive color correction set available. These are a must have for every photographer that needs to balance the strobes with other light sources.
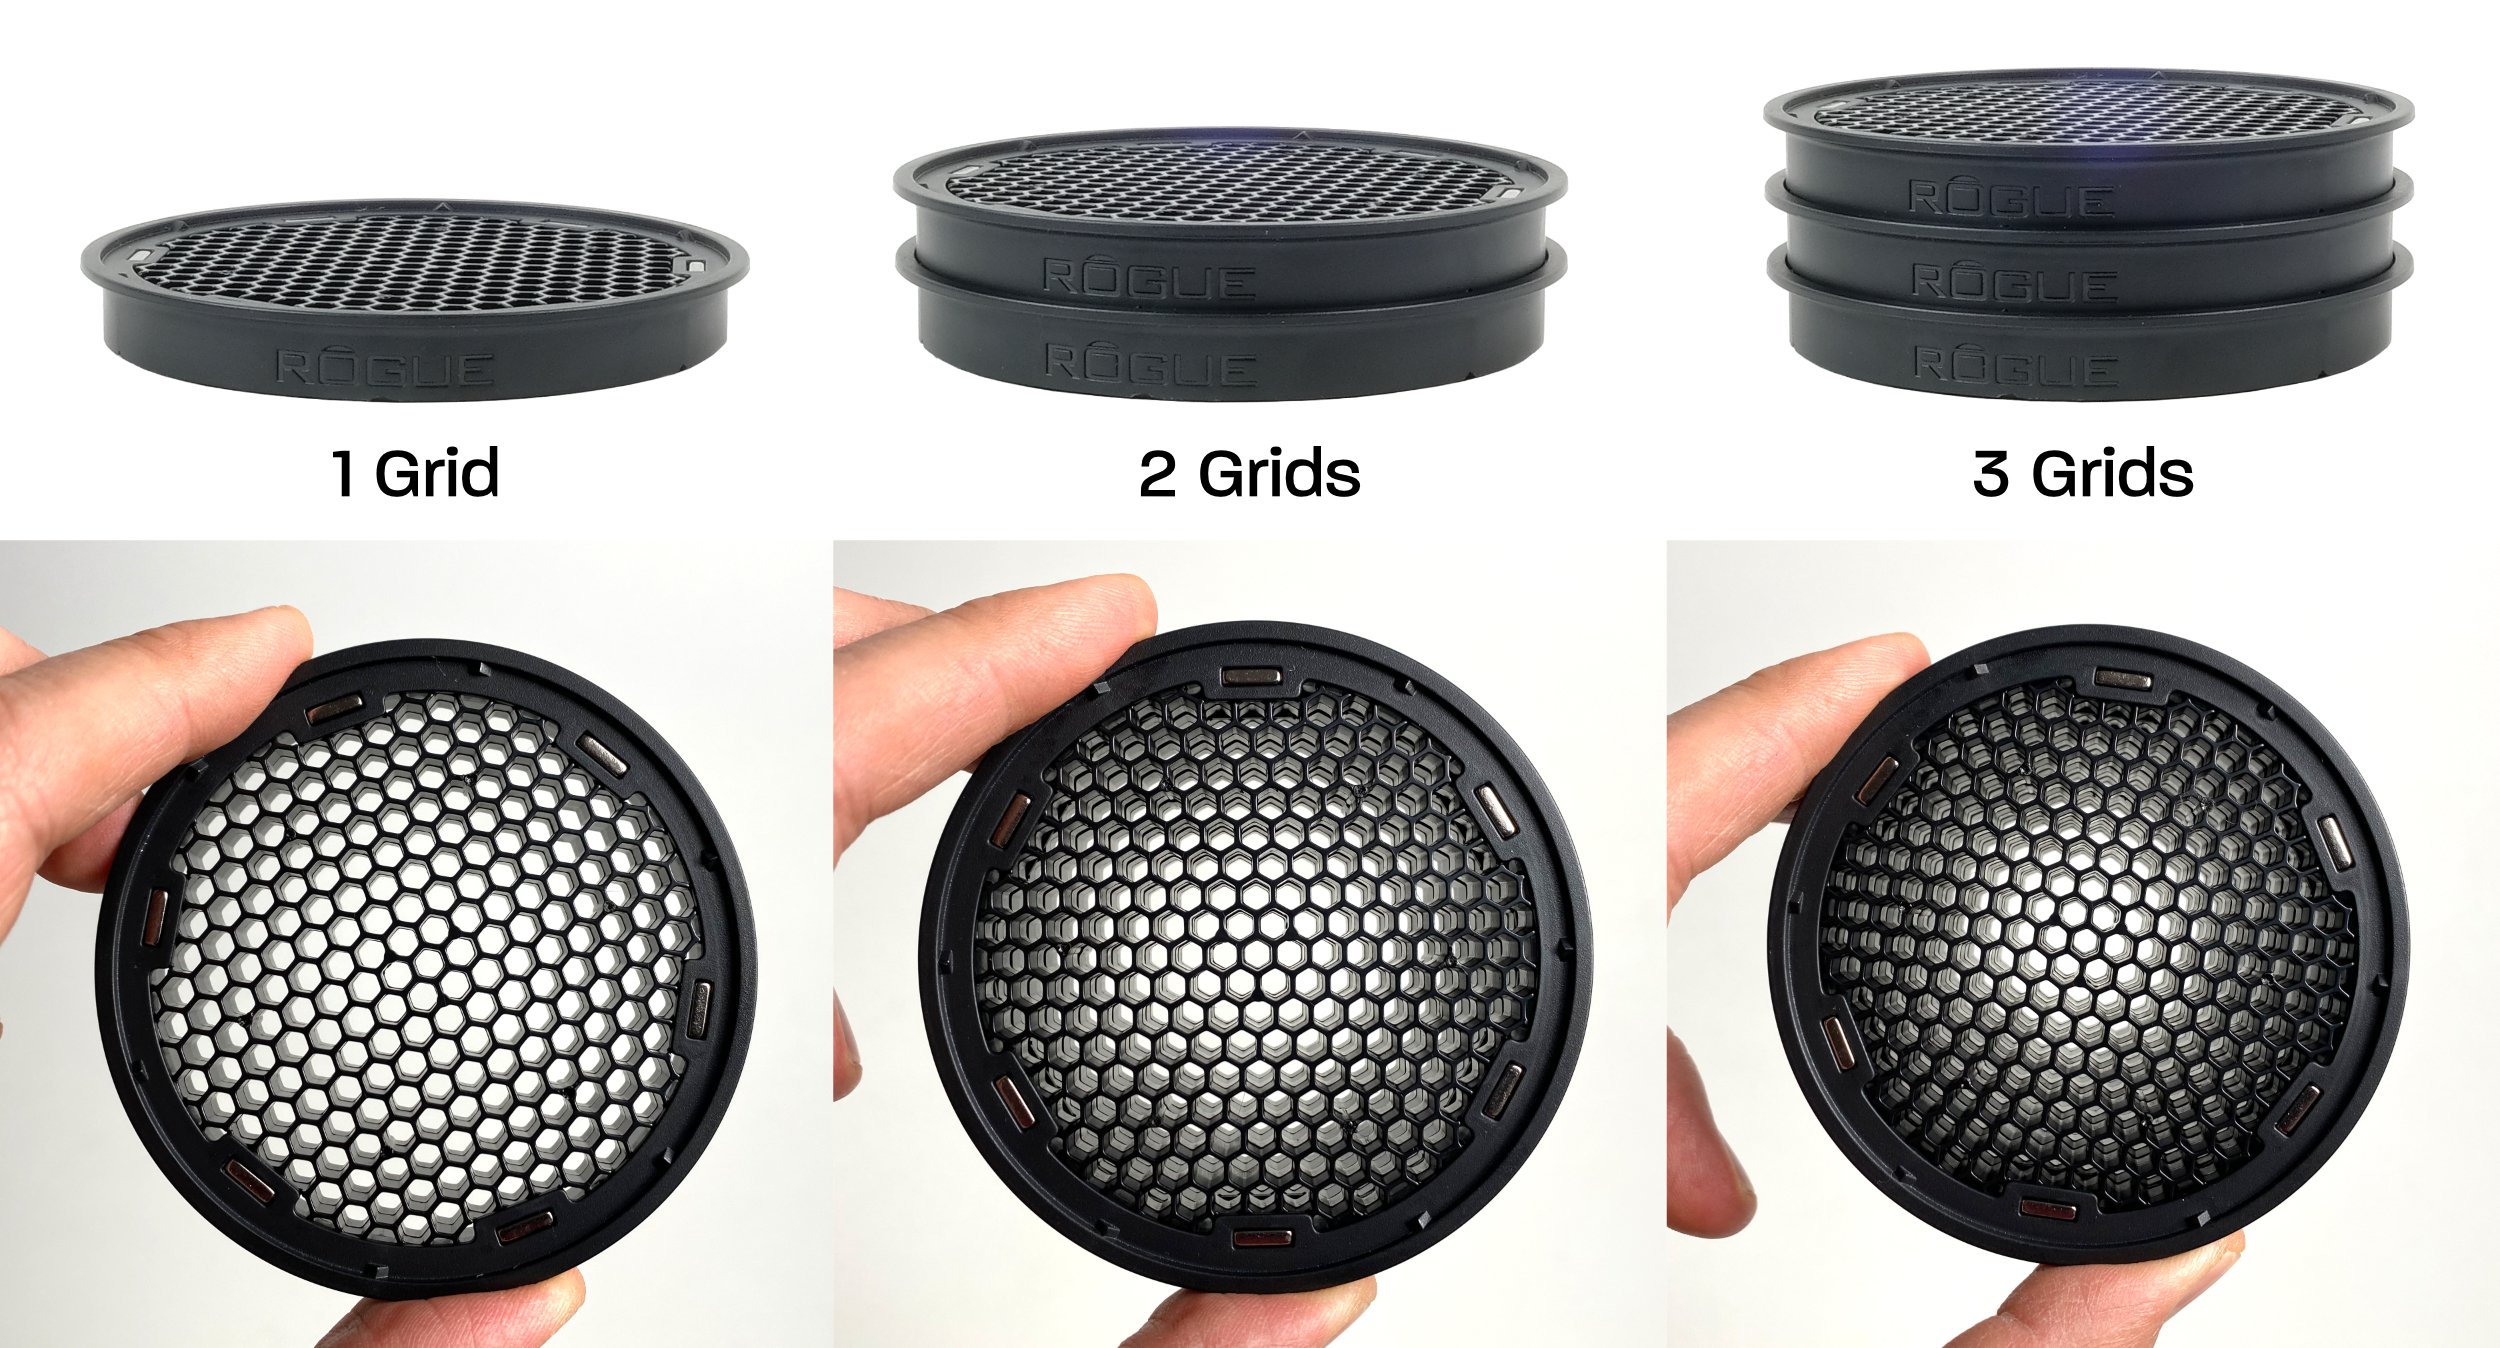
Grid(s)
A good flexible system also needs a grid, and as expected… the grid is of course also present in the kit. If you (like me) use a lot of focused light and want to have a bit more flexibility in terms of grids, you can of course just stack a few grids on top of each other for a super focused light source.
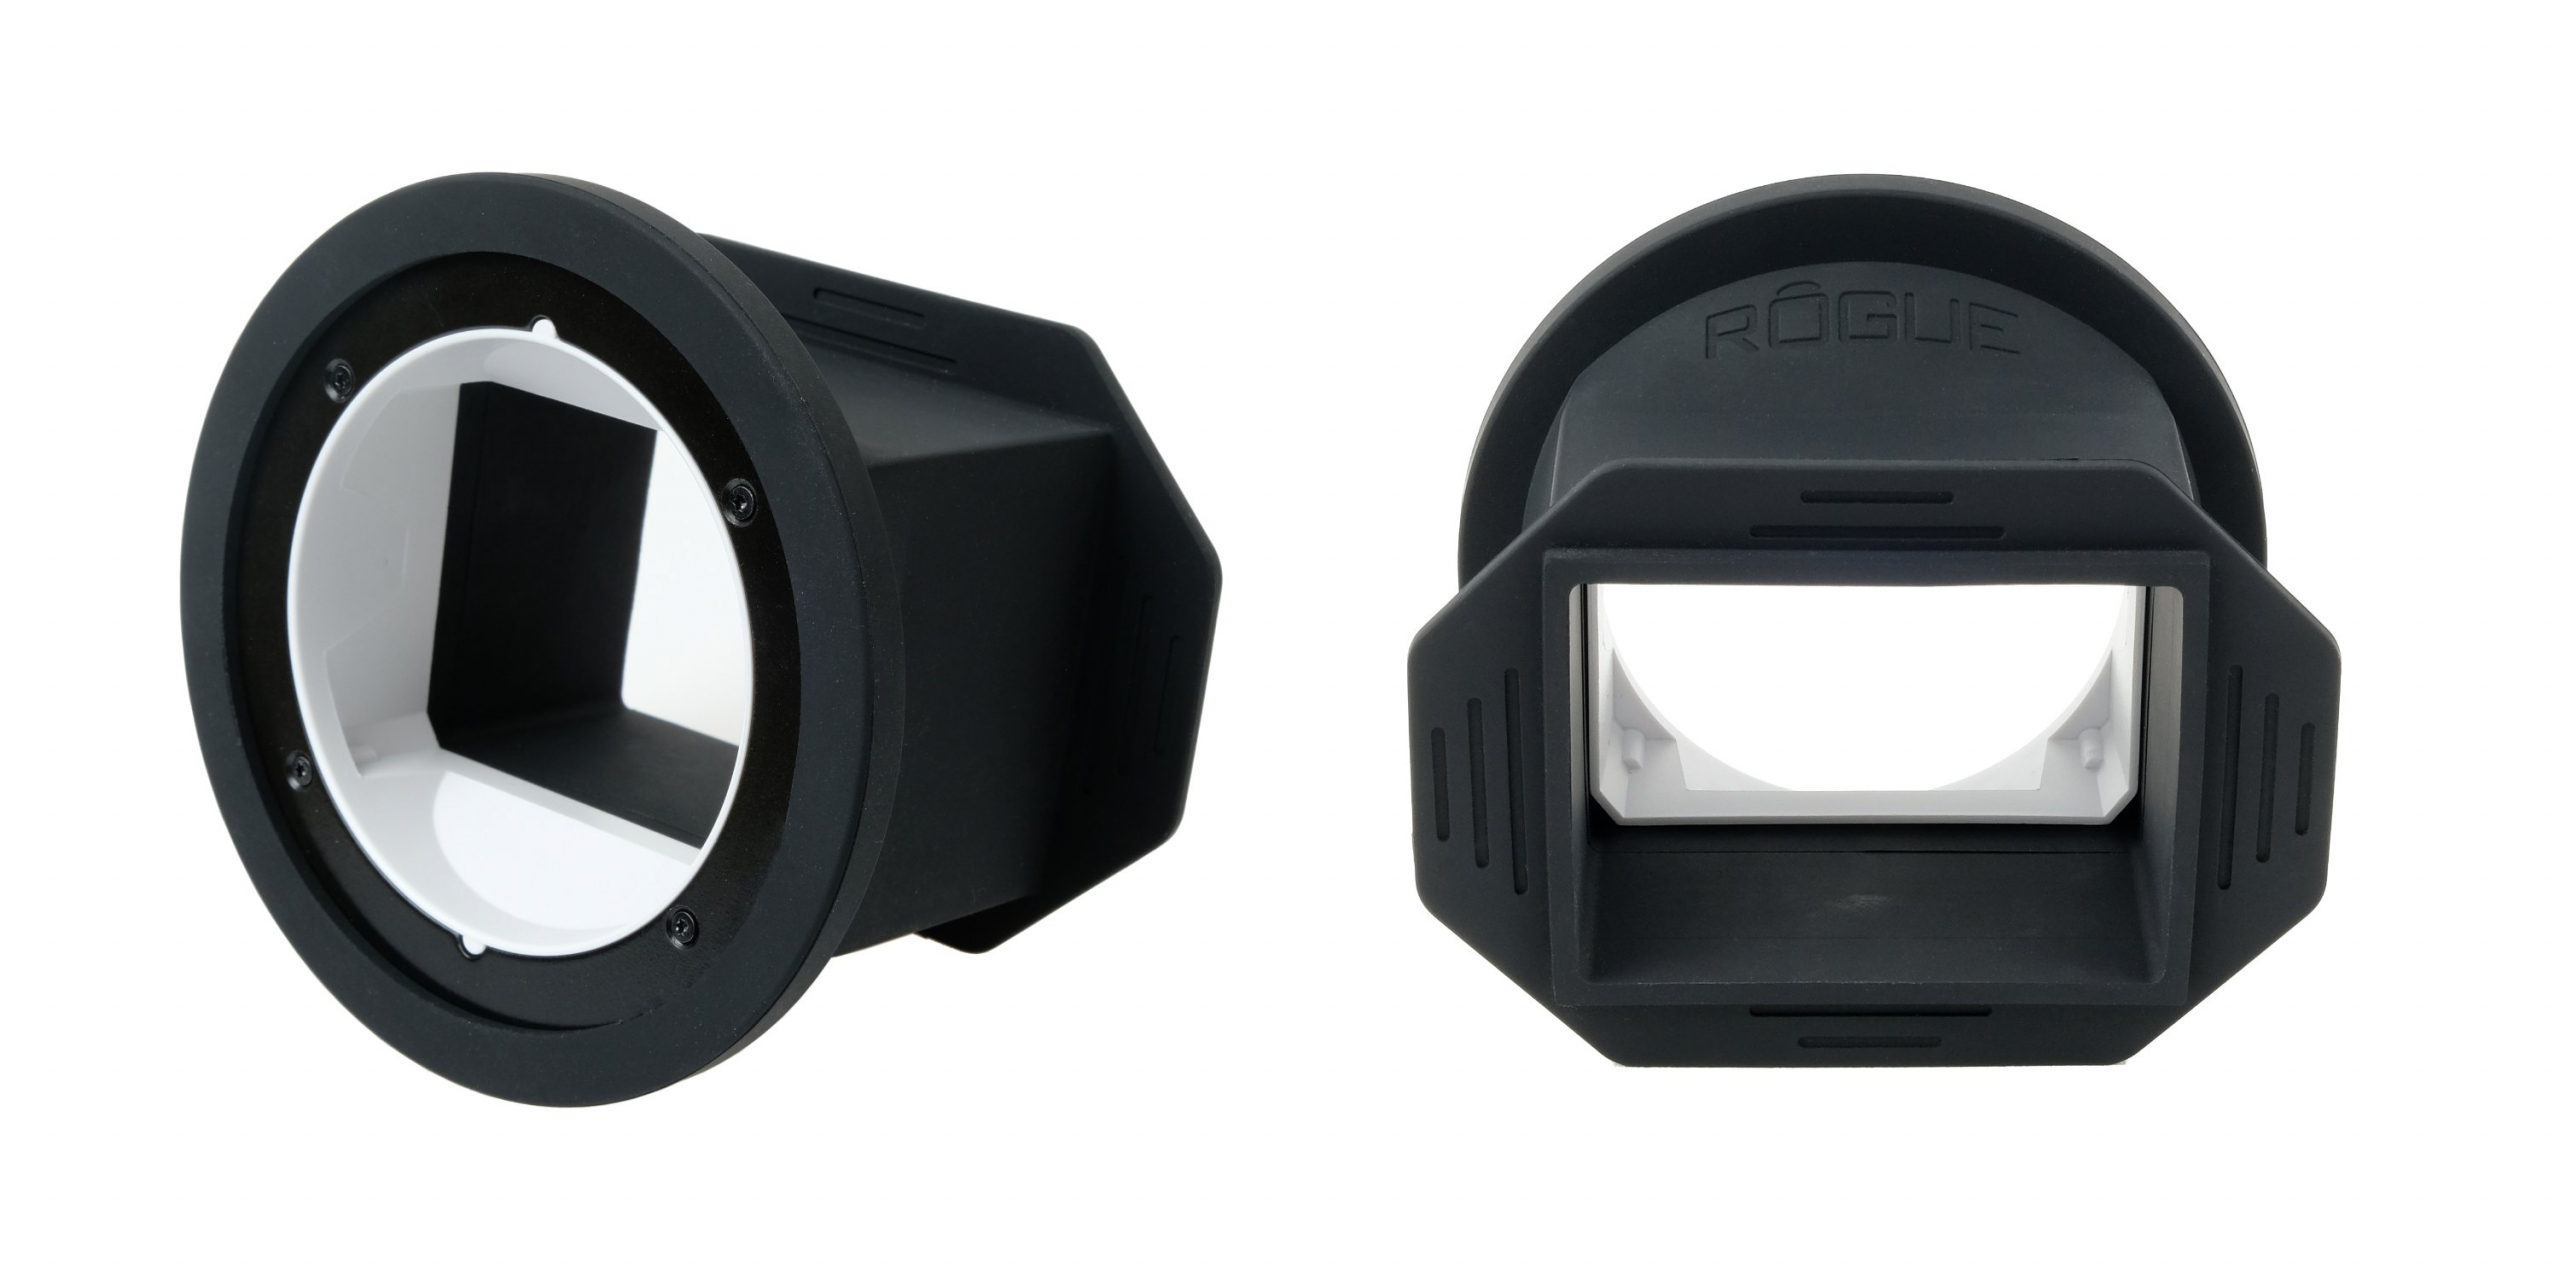
Speedlight adaptor

As mentioned before I’m using the system on standard speedlights, and that’s where the adaptor comes into play. The adapter is made of a flexible material and slides easily over the speedlight when you stretch it. When fitted, it is “fixed” but is also easy to remove by stretching it slightly again.

With the new magnetic system Rogue puts a product on the market that solves many problems which photographers encounter in real life. Sometimes it’s little things like the way you click the rings together, they click together very easily but try to remove them in a straight movement, and you really have to pull it off, but once you understand the trick you literally click them loose with ease, just push it up on one side and it’s easy to remove the ring, place a new gel or accessory and back to shooting in seconds.

Personally, I find it important that the system really locks, I do not want parts to come off during a photo shoot, but I also don’t want to be messing around with changing color gels because I can barely get my system loose. This is literally the best of 2 worlds, it is both locked very tightly but can also be easily removed by the proper move, very cleverly done.

What will make many people very happy is the way the magnets are fixed inside the rings. This system is designed in such a way that the magnets remain stuck in the rings, so no magnets that fall out and have to be found again, they are fixed in there to stay.

Conclusion
Rogue has a super flexible system that will perfectly match any photographer who likes to work with speedlights or round flashes but does not want to limit him/herself to 1 style. With the magnetic system, a lot is possible switching from flat (beauty) light with the dome to very high contrast with the grid(s) and of course every combination and order, you can even take the dome off the ring.

If you also the color gels you will quickly understand why I became more and more enthusiastic during the livestream, this is really a system I am 100% psyched about. Personally, I use 3 speedlights on location with 2 magnetic systems and a flashbender with strip light and one color gel kit.

If I’m honest, I wouldn’t know what else you’d need.
And the best thing?
The whole system is affordable and doesn’t take up a lot of space in your back, in fact you can probably fit it in your pocket during the shoot.

The magnetic system is for sale via our webshop or in the better camera shop
For international sales please check www.rogueflash.com
See the live stream where I introduce the system for the very first time here.

See the introduction video here.
Join the Home of Rogue Facebook group for loads of information and inspiration.

Transcend 4TB, what to look for in an external Harddrive

As many of you probably know, Annewiek and I ran a Computer shop for over 20 years and one of the main issues that always caused huge problems is data loss. And in essence it’s not that hard to prevent. That being said, everyone (including me of course) have suffered data loss over the years, the thing is to keep it at an absolute minimum and most of all the easiest way possible. But later more about that.

In this blogpost I’m going to take a look at the Transcend 4TB external harddrive (StoreJet 25M3C), and let’s be honest… a review about a harddrive doesn’t sound interesting right? what is there to say? well actually quite a lot, and that’s why I decided to combine the review with some tips you may or might not have thought about when buying a drive.

First off all let’s see what’s important when buying an external drive.

Reliable
It goes without saying that this is absolutely vital when buying any kind datastorage.
When buying lose drives for a NAS/DAS we always advise to buy the drives from different suppliers/stores, or at least ask the seller to give you varying serial numbers. When we sold drives for this purpose we would automatically give the customers drives from different batches. The reason is simple, although harddrives have improved a lot over the years there is always a chance of defects. In our experience when something goes wrong, it often happened that we got more drives back from that one batch. So although this could be 100% bad luck we always advise to spread out your drives when buying drives to backup data in one device.

Do remember that when one drive fails in a NAS/DAS it’s not a real problem, but when 2 fail you are into trouble (depending on the RAID setup of course).

For external drives you don’t really have any control about what’s inside the housing so I would always advise to buy from a reputable company. As a consumer we have no idea what sellers/manufacturers can do with hardware/software manipulations, there are several examples about USB sticks and external drives where the 512GB versions only can store 128GB safely. So don’t try to save money the wrong way, you are better off getting a 2TB from a company that you trust instead of a 4TB at the same price from “Photographers top gear” (fake brand (I hope)).

Transcend goes without saying is a brand that fits in the “we can trust” category.

Housing
Don’t be fooled.
A housing is not…. just a housing, there is a lot going on.
Just think about it.
Of course we have the harddrive (generating loads of heat), but also the interface, seeing there are no USBc harddrives. So besides just enclosing the interface and harddrive there is also the problem of heat dispersion, but also (with spinner drives) some damping is needed because an external drive is of course very easily moved, or someone moves/hits the table and although a drive also has it’s dampers the housing should really be designed to take some hits. And finally it also has to be small, sturdy and feel good.

Let’s be honest we don’t want drives that look they went to war after a month, but we also don’t want to drag around a brick. And finally… something that’s slippery is never a good idea, but you also don’t want it to be a dust magnet (we all know the material that feels great but looks like some worn-out rubber after a few weeks)

I think the Storejet will please even the most critical people.
The material feels very nicely, it’s firm but still a bit flexible, I really like that for a harddrive, it often means the material is pretty scratch resistant, but it also keeps the drive stay nicely in its place on the table and you can wipe dust off easily without it sticking to the housing. I do have to add that in about a month I will update this part if something chances in the test period.

Ease of use
As you can see in the images there is a button on the case, so why is it there?
When you buy the StoreJet you get some really nice software, it’s already on the drive so the first time you connect it you can install the software (make a backup) and format the drive after that to the preferred format.

There are two apps
The first one is RecoveRx and is aimed at recovering Photos you might have deleted by accident or from corrupt drives. But don’t be fooled by the label Photos you see at the splash screen, this is a full data recovery package including photos, videos, documents etc. I always really appreciate it if recovery software is delivered for free with a drive or card, it can happen very easily by a failing battery or a full card while using video that something goes wrong with your files and in my experience this kind of software is always very successful in recovering data.

Transcend Elite is aimed at backups.
And this is also where the button comes into play.
One of the things that we always experienced with customers in the computer store was that they often knew they had to make backups but….. there was always an excuse, but it always boiled down to the fact that there were too many things they had to do for a backup to start (and even when we automated it for them…. well when you have ever worked in IT you know what I mean).

Now this is where the button is used for.
In the software you can create a task, and when the button is pressed it will start that backup task automatically, you can create several ones and assign them to the button in the software, it works really easily and it makes it possible to create the tasks for someone that is able to switch the tasks but not to create them. This makes the backup process incredibly easy, oh and if you don’t want to press a button… there is also a scheduler available, so they got you covered.

Connections
At the moment I think it’s easy.
We need a USBc type connection.
But also here there is a difference between external drives.
When buying a drive always look at the quality of the connectors used, also the enclosed cable also tells you a bit about the kind of quality you buy.

The Storejets USBc connector looks very solid, the enclosed cable is a bit short but is from a thick and sturdy quality.

The reason I mention this is the fact that most external drives are connected and disconnected several times per day during a shoot or when traveling, and every time you put some stress on the port. A well designed port will take this abuse without any problems but (trust me) there are also ports that literally already start to bent after a week and before you know it the USBc cable (which is a pretty solid connection) starts to wiggle and the problems with data corruption and disconnects start. So please always check the quality of the ports.

Space
In all honesty this will vary a lot per person.
When we travel I use the external drive as a backup for my laptop but also for movies/comics/magazines which I can copy to my iPad to watch/read. So the 4TB means I can take everything with me I would ever need during the trip and still don’t have to worry about running out of space. If you just use it as a backup 2TB should be more than enough for most people.

DataProtection
Part of the data protection you can do yourself by making backups and buying external drives like this one from a reputable source. And with a reputable source I mean the store you buy the product, there are several examples online where people think they buy new products but end up with refurbished drives or even worse the housing from the brand they ordered but inside a much cheaper interface and memory sticks instead of a SSD, so please beware of where you buy.

When you buy the StoreJet you already get recovery software, an automated backup workflow, a one touch backup button so you already know they take data protection serious and this is also translated into the housing itself, according to Transcend we could drop the drive from up to 2 meters and nothing would happen to the drive or data…. I uhh….. just take their word for it.

Ok we are almost there, I hope so far you enjoyed the review and the tips. But we have one thing left of course, how fast is the StoreJet.

Now I have to be honest.
For me the speed isn’t the most important thing, if you really want speed get an SSD version (and of course also pay SSD prices) but I also don’t want to wait forever of course. In use the StoreJet feels fast enough for an external spinner drive, both large and smaller files copy without any problems on or around max speed.

But the test is always better 🙂

Conclusion
I’ve given several tips about what to look for when you want to buy an external drive, and the StoreJet actually fits those topics very well so in my honest opinion I think Transcend has an awesome external drive solution for anyone that needs a reliable external drive with loads of storage where you don’t have to stress out when it drops on the floor.

I do want to add one more tip
During longer trips there is a moment where my laptop is full.
This would mean that my external drive is the only backup, this is why we always travel with 2 external drives, one 4TB and one 2TB

The 2TB is just for photos and videos we shoot, the 4TB also contains other data that we took from home. This is a pretty secure solution especially when combined with for example Lightroom CC and an Adobe subscription. But make sure that you don’t store the drives and laptop in the same bag (yes it happens).


The transcend StoreJet was send in for review, the review is however my honest opinion.

Samsung s22 ultra video

One of the things that I found very interesting during the Samsung presentation about video at low light. And indeed their video looked awesome but lets be honest that was professionally lit 😉

For me it’s important that in real life situations i end up with usable video for behind the scenes videos. Those videos don’t have to be the best quality ever but it must be possible to see what’s going on.

Now one could say “why not use a Sony a7riv or a7s and a fast lens?” And you are absolutely right. Those cameras will blow the Samsung away in every situation but when we film material for the vlog we love to work with something really small and lightweight and preferably with a good microphone so I can quickly turn it on, press record and done…

For me the vlog should be a bit more raw and “real life” than tutorials (for which we do use the Sony cameras)

At the moment we’ve been using an osmo pocket which is…ok. Image quality is acceptable during the studio (low light) scenes and great outside, also the audio is ok. But I dont like the fact it’s fragile so we always have to carry it around in a case and take it out when using. Or leave it around your neck. And also the monitor on the back is ok for aiming but it’s not really accurate.

If it would be possible to replace the osmo pocket with a phone that would be great. So I decided to test the Samsung ultra out during the workshop smoke and gels with our model Felisa.

I have to be honest this was a worst case scenario. Using smoke mostly messes up the focus and using saturated gels are always killing video quality. Plus we didn’t use any extra lighting so all the lights you see are the modelling lights and because we mixed strobes with leds they were on the lower settings. This is also why the red leds are totally blowing out the video 😉

If you look at the video inside the studio it isn’t pretty but I have to say that on the HDR setting there was a lot more detail in both shadows and highlights outside and a slight advantage inside. For YT I changed the output to REC709 4k which did limit the dynamic range slightly (only visible outside)

What surprised me about the Samsung was the image stabilisation. On the screen it already looked good but in the video it really became clear that we are getting to a point that this becomes a real alternative to a gimble.

The slight vertical movement can easily be removed in your video editing software. But what you see in the video is all without any adjustments. What I did correct was the awful red color which looked more magenta than red. Luckily this only happened in the darker scenes and outside the reds were a lot better as you can see in the video. Although the overall look is not 100% accurate and oversaturated but it’s all correctable.

Also the audio is interesting. In pro mode you can select omni, front, back for the phone itself. But also external mics and even a mix option. Now that’s impressive.

The audio quality itself is ok. Good enough for a quick vlog type video but I think it’s too thin for anything longer or music. I’ll be testing using the Galaxy buds pro with the next vlog to see how that works but in essence audio should be absolutely no problem with all these options. (and you can always use an external recorder)

Conclusion

I see video in two categories for us. The tutorials we film in the studio under proper lighting and with different angles etc.

But also the vlog style videos where it would be best to work with as little gear as possible. You have to drag it around all day. Take chargers with you etc. This quickly takes away the fun and spontaneous effect.

With the ultra 22 samsung delivers a phone with a great camera system for social media but also with the video I think they hit a home run. Yes the video is far from perfect in low light BUT you can see what’s going on and the image stabilisation is awesome making videos easier to watch 😉

I think we are going to sell the osmo pocket soon 😉

You can watch the vlog here : https://youtu.be/ONVRELH3qbU

Samsung Galaxy S22 Ultra first camera test

It’s not secret that companies promise you the world when they want you to buy their products.
I remember one for the first smartphones I bought and the response from the seller was “you’ll never need another camera anymore, yes it’s that good, I don’t use my DSLR anymore”

Now this was many years ago when the quality of the photos always made me wonder if it was night all the time or if there was some weird snow or rain falling in the shots, in other words, muddy shots with loads and loads and repeat loads of noise.

Ok, when you shoot under perfect conditions there…. no I’m not even going to try they just plain sucked.
And in all fairness not a lot has changed, look at the presentations from Apple, Samsung etc. and they all promise you the perfect camera experience and better performance than before (yeah it would be weird if they said, it’s worse than last year)

I love gadgets and smartphones so most of the times I will upgrade almost every year when the latest and greatest is released and in all honesty I’m mostly highly disappointed. Up until I got my first Huawei phone… wow now that was a difference, it was far from perfect but for the first time I owned a phone that I would label as a hobbyist camera. In other words if I walk around without a real camera I’m more than happy with the smartphone images. But the UI and operation of the camera was… well it’s a smartphone you probably know what I mean right? It just doesn’t feel like a camera.

This changed when I got my Sony Xperia 1 II
Now when we talk about a real camera experience I must say Sony hit the nail on the head and hammered it all the way in. Yes it’s that good. If you ever used one of their amazing Alpha cameras it immediately feels familiar. They do use two apps but when you use the Pro version there is really hardly anyway to go back to the original camera. Also the dedicated shutter button is absolutely genius and works like a charm, the camera is super snappy and switching between the three lenses is fast and easy, even with gloves. The whole experience is a big 10+, The output is also very good in RAW, especially under ok lighting, as soon as it gets to dark the Sony really dives down in quality, and this is something I did miss dearly on the Sony, the Nightmode I got so used to on the Huawei series. But as a photographer I’m honestly more interested in RAW output without any tinkering than a nightmode… but still….

Well if you saw the Samsung presentation one might get the impression that they finally solved all the problems, this is the camera that can also make calls…..Because I did need a new smartphone I decided to take the jump and ordered the Samsung Galaxy S22Ultra 256GB. So lets make clear that I paid full price for my phone and I’m not at all associated with Samsung in anyway.

I’m totally going to skip the Android part, the only thing I can say is that I’m always pretty easy in switching OS and get used to things very easily, but some things I do want to point out.

Most people are active on social media and this is also where a lot of our images end up (when is the last time you printed your images?) so the sharing menu for me is incredibly important that it’s fully customisable and easy/fast to use. This is something that a lot of phones can improve and Samsung did do it right here by making it possible to have a lot of destinations in custom order meaning I can just follow the same order every time I post something I can’t express how important that is.

So up to the cameras
Specs are impressive for a smartphone with a 108MB (binned) main sensor, a 12MP Ultra Wide and 2 10MP tele lenses (3x and 10x).
When looking at the main camera app almost everything is there that you would want (and again fully customisable) we have standard modes for video and photography, a pro mode for both, panoramic mode in wide and ultra wide (nice), nightmode and some more cool things including a ONE SHOT.. (which takes one shot in all the modes you select, now that’s cool).

The standard camera app supports RAW (which is a surprise and awesome) and saves both RAW and JPG files (like most), only on the mainsensor you can opt for the binned output of 12MP or the full 108MP output.

If have to be honest the files coming out of the main camera app are pretty decent and have a lot of play room.
Samsung also has an Expert RAW app which you have to download separately (why not just include it), this app is pure aimed at the pro (they say) and has some real magic going on behind the scenes, 16bits RAW files are already impressive but they also work some internal magic with combining several shots to get some really sharp images that will rival pro cameras.

So is this all true?
Let me start that on the screen of the Phone the images just made my jaw drop on the floor and bounce back a few times. I’m not easily impressed but wow this is something else. But after loading them into Lightroom and looking at them on my 12.9″ iPad Pro there are already some issues, but still they look more than decent, I would even say impressive).

Where it all just gets a lot worse is when you open the images on a desktop.
Where the Sony RAW files exhibit plenty of detail and enough dynamic range to do some proper editing the Samsung files in expert RAW do have the same or slightly better dynamic range (especially from the main sensor) but it does cost you dearly.

When zooming in on a proper calibrated BenQ monitor it’s clear that Samsung needs to go back to the drawing board and do some fine tweaking for people like me.

I’m not saying the images are bad, oh far from.
But they suffer from an insane amount of sharpening that should NEVER EVER happen in a RAW file, in Lightroom I have to lower the sharpness all the way to zero to get some of the ringing out of the shots but it’s never totally gone. Now I have to be honest I did not held back in my test images, which you can see at the bottom of the review. Loads of small cables from the boats and of course a high contrast backlit sky. So in most normal situations this will be a non issue or not noticeable but hey we are doing a proper review not a consumer point and shoot review 😀

Where it gets worse is in the combination of images. Somehow you can see that the AI messes up considerably by adding the images together, again I chose some pretty difficult things to shoot, but not that difficult. Some areas of the images are very nice and detailed but a bordering detail can be very painterly or not even sharp, it’s a weird combination of sharp areas and painterly blotches.

Today I intentionally only used the 108MP sensor in the normal camera app and the other images were all shot in Expert RAW, I’ll repeat the test very soon by using only the main camera app in RAW to see if that “stacked” problem is less obvious there.

JPG vs RAW
Where I do have to give a lot of credit to Samsung is the quality of the JPGs.
As you can imagine I’ve seen a lot of different cameras and smartphones but man when looking at the pure JPGs coming from the Samsung one REALLY starts to wonder if shooting RAW is actually worth it. In the gallery I did add some images that are both JPG and RAW, where I have to be honest I do like my RAW processing more because I feel the Samsung is overdoing it a bit/a lot BUT that being said for most users I think they will prefer the JPGs, and on social media I honestly feel the JPGs do a tremendous job and I would not advise using RAW for that kind of usage. Of course if you want a bit more… RAW is the only way I think.

But let’s just for fun already compare two shots.

After my text it’s easy to spot the JPG (second one) but you can also see something else when you take the original files.
Samsung does a lot more than just play with shadows and highlights. I tried to get the exact same look in Lightroom and I just couldn’t without using some kind of masking so for a smartphone this is I think very impressive. The question is do you like it…..?

For who is this phone/camera?
And is it like the Sony a camera that can do other things, or is the Samsung a Phone that can take images?
Well it most definitely doesn’t come close to the UI and dedicated shutter button of the Sony, you can start the camera/expert RAW by double clicking the power button and use the volume buttons as shutter but this is very unnatural, the volume buttons are on the left top side of the phone and ALL cameras (as far as I know) have their shutter buttons on the right side. Meaning I’m always covering my screen when taking a shot, or I have to force myself to use my left hand, which for me feels incredibly unnatural.

That being said, I think the output is very impressive.
During day time the Sony wins hands down when using RAW and 12MP. The files are much cleaner and can be pushed more than enough. The Samsung however wins hands down with special modes like nightmode (which I love), one shot, more range with tele etc.

So… when walking around and shooting images for social media the Ultra 22 might actually be a total overkill camera, the quality is insanely good and it’s almost a shame to post the images on social media only, but that’s where the problem also arises, they are so nice on the smaller screens that you are almost disappointed when you look at them on the big screen, loads of painterly effects, way to much sharpening etc.

Conclusion for now
One could say this is more a review about the Expert RAW app which I absolutely love. Giving all the freedom to the photographer for shutter speed, ISO, focus (with peaking :D) etc. is essential if you want me to take product serious, but RAW for me is RAW meaning a total readout of the sensor without ANY interference that could be labeled as preference. Working with the Ultra S22 leaves me literally split in the middle.

For social media I think this is without a doubt the phone to beat, it crushes everything I saw so far in options, 10x tele might seem useless but the quality is so good it actually does make sense, HOWEVER I’ve seen several reviews that zoom in from the main app, this is not using the tele lens as I understand it (also explaining the very bad quality they show) you really have to switch between lenses, and than the tele lenses are very very good for a smartphone.

For professional use, I would love for Samsung to change some things in the expert RAW app, PLEASE turn down that bloody sharpening and noise reduction, it’s insane we can do that ourselves in Lightroom so if you label something expert don’t treat the users like dummies, we know what to do 😀 I think if Samsung would dial down on those settings you’ll get a lot more noise in the images but I’m 100% sure that Lightroom can do it a lot better than what I see now.

Still I have to be fair towards Samsung, this is one bloody good camera and maybe it’s totally unfair of me comparing it to a real SLR but hey if you claim it, you better make it so and although this is a really really good smartphone camera it’s nowhere near the quality you could get out of a $700 SLR. But putting that into perspective it’s now finally getting to the point where someone (like me) can say “it’s good enough”.

I would however love it when Samsung somehow made it possible to switch between the standard camera app and the expert raw possible within the apps itself. I find myself constantly switching and that means I can use one app without starting my phone and if I want to use a feature from the other one I have to close everything and open up the phone. It would be a huge deal if that wasn’t necessary and there would be a switch (like switching between selfie and front) that would just switch between the apps.

I do have to add one more thing.
In the Ultra22 Samsung did something that I think is really smart, they replaced the Note series. One can argue that the phone is too bulky or squared off and I agree, but a smaller phone doesn’t give me the options I need to edit the images easily, and my case will make it more rounded and easier to hold, so it’s a large phone…. we know. The thing I however feel would really draw creators in is the inclusion of the S-pen, now talk about something insanely handy and professional.

I could do a whole review on how to use the S-pen to take photos from a distance, or make it follow you with the camera, but most of the times I use it to retouch images on the screen, using the healing/clone tool in Lightroom with your fingers is terrible, on the iPad Pro it’s awesome with the Apple Pencil but the Samsung S22 ultra with the S-pen strikes it perfectly with the balance between the pen (not too small) and the screen size, retouching on the iPad Pro 12.9 is still a lot easier but for on the road the Samsung with S-pen will do just fine and will really be a part of the package that photographers/creators will fall in love with.

Here you can find some images in the gallery.
I also enclosed the original files for you guys to play with, it’s a hefty 500MB download so make sure you sit tight.
Download the file here.

I’ll do a follow up if necessary with the stock camera app and nightmode.
If there is anything you want me to test just ask.

Weird lines…

I do want to add one more remark. When starting the phone and using the fingerprint sensor I see some weird colored bars on the screen. Also it seems the proximity sensor doesn’t work as it should with taking screenshots. Let’s hope this will be solved by a firmware upgrade.