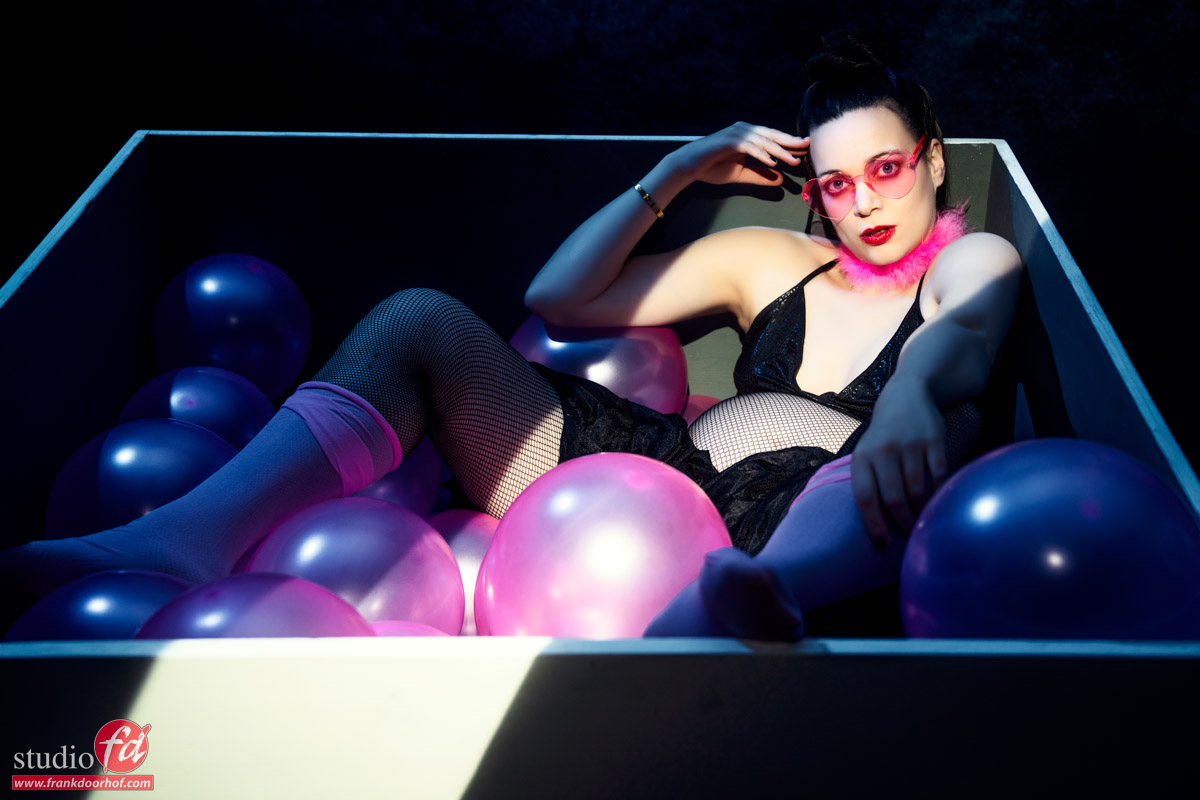
When your model is pregnant it’s time for some extra shots
Every pregnancy is unique, and when we shoot a pregnancy I always try to find something fitting for the model. And the Lindsay Adler Projector or Westcott Optical Spot by Lindsay Adler is the perfect Gobo projector for this.
I think we all know Nadine, and with Nadine, it’s impossible just to shoot some images of her belly. So during a recent workshop, we decided to shoot different setups all aimed at a part of Nadine’s character and of course my input 😀
It was a load of fun, Nadine got several totally different pregnancy shots, and well… we got some cool behind the scenes videos.
Today the video about this shot.
In the video I explain the lighting setup and the idea behind the shots.
I always appreciate a like and subscribe to our YouTube channel, it really helps us out.
https://frankdoorhof.com/web/wp-content/uploads/2025/01/Nadine-89-November-23-2024-Edit.jpg8001200Frank Doorhofhttps://frankdoorhof.com/web/wp-content/uploads/2015/03/studioFD_Logo-1FV.pngFrank Doorhof2025-01-16 17:00:212025-01-24 15:43:01Using a gobo projector in a pregnancy shoot video
If you have been following my work over the last few decades (time flies), you probably know I’m the kind of photographer who strongly believes you have to get the image right in camera. So when you’re on a set and you are able to change things, you do it on set and don’t rely on Photoshop for the simple reason that shadows and patterns all interact. When you can take the shot as perfectly as possible on location, this also means it will look best. In this blog post, I’ll reply to some comments I received about my Topaz Photo AI testimonial.
So no Photoshop?
Does this mean I don’t use Photoshop, heck no, of course not.
I’ve been using Photoshop for ages and love every bit of it. There are always things you can’t fix on location or need to do in Photoshop.
When I shoot film (sometimes love to) I choose the film for the look I want. There is a distinct difference between Velvia, Portra, Reala, etc. When I shoot RAW there is no “look”. It’s the RAW information, in fact, it’s not even the right color rendition. If you want that you have to shoot a color checker and create a profile. And please remember this…..
So what is this blog post about?
Madness, pure Madness
Over the years you haven’t seen me promote many brands. I try to only promote products I really use and love. I always have a saying “Some products are designed by people behind a desk for the photography industry and some products are designed by photographers for photographers”. So when I promote a product I don’t only use it but I also try to be 100% honest about not. And that also means that when a company asks me if they can use a video I made about their product for advertising I have no problems with that. But the videos or articles are always 100% my personal opinion.
This also means that when I see someone responding to an ad using my images or videos I try to help and reply. But sometimes it’s getting really weird. And because I hate to repeat myself 1000x I thought it would be fun and frustrating (if you are one of those) blog post about some of the weirdest conversations I had about the Topaz Photo AI testimonial.
What is it?
Ok, Topaz Photo AI is a plugin/standalone from TopazLabs.
I’ve been using their software for ages and it’s always working great. Although not the cheapest option on the market they do perform often faster and better than the competition. One of their apps is PhotoAi. It’s a great app that takes out noise and has an awesome sharpening engine that is great for making detail pop. But also if you slightly miss focus you can adjust it. Don’t expect miracles but it does work great.
Now because the title contains AI it seems to bring out some really weird characters. So let’s take a look at my review (Topaz Photo AI Testimonial), and then the funny/weird and even aggressive responses.
See my Topaz Photo AI testimonial
As you can see in the video, although the software works like a charm there is nothing magic about it.
I don’t replace faces, I don’t take stuff out. But I do take noise out of the images, and as you can see it makes jewelry and small details really pop.
Now let’s first say that “YES” you can do this all in Lightroom or Photoshop, absolutely true.
I’ve been an Adobe evangelist for years and love what they are doing with Lightroom. The new noise reduction was released after Topaz PhotoAI (when I did my first review) and is without a doubt 50/50 with Topaz at the moment. It’s really getting awesome. Sometimes Lightroom wins, sometimes Topaz Sharpening. However, (and upscaling) is still best in Topaz Photo AI. I’m actually using Topaz as a part of my Lightroom/Photoshop workflow they work great together.
In fact, when you open up a RAW file in Lightroom it already automatically does some noise reduction and sharpening. For fun try disabling this and look in horror at your images.
The needed extra info
So how do I use Topaz Photo AI normally?
PART 1:
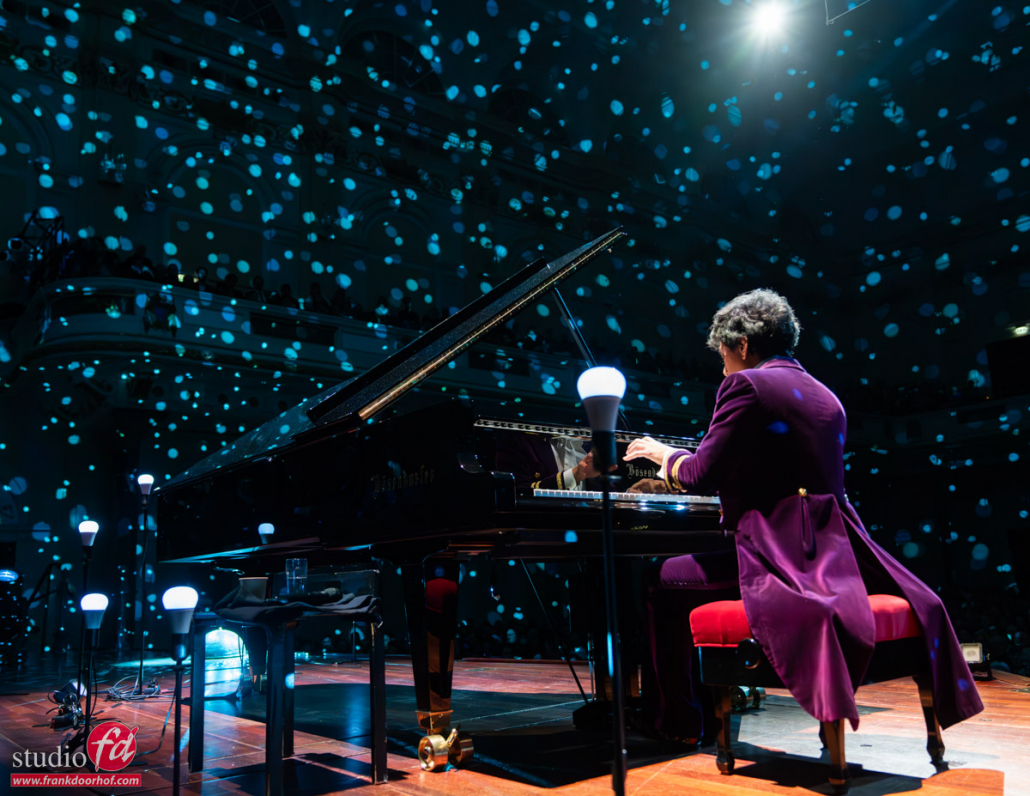
When I shoot classical live concerts, the artist often has certain wishes.
I have to freeze the artist (1/125-1/500 at least), but it’s also appreciated when the venue and audience are slightly visible. So shooting at f2.8 is only possible when I shoot from the stage with a wider angle. As soon as I start using my close-ups I have to start shooting at f4 – f5.6 for those images. Of course, I also shoot wide open but for the pillars/billboards. They often chose images that have a bit more DOF.
PART 2:
This means I’m pushing my camera to the limits with ISO often hitting 32-104K. And this means that even the best cameras will exhibit noise. For the internet or a newspaper, you can get away with this but for fine art prints or pillars/billboards, you can’t. So noise reduction is necessary. There is no technique you can use that will lower the noise.
PART 3:
Also using focus assist is not allowed due to the artist not being distracted.
This also means that with the very dimly lit stages or with backlighting I have to accept that my focus sometimes is slightly off. In the past I would shoot in motor drive shooting 3 images and just hope that one would be 100% in focus. With Topaz Photo AI we now have a very good sharpness engine that cannot bring back images that are out of focus, but when you are just slightly off it is possible to adjust the sharpness so it looks a lot better and can be used for publications.
PART 4:
When shooting fashion or products clients love pin-sharp images. When shooting with strobes it’s almost impossible to get images that are blurred. The flash freezes motion. And let’s be honest if you can’t focus your camera on a model or product in a studio you have a problem with your gear. But even when the images are 100% sharp there are some things that can really help when you sharpen an image.
PART 4A:
Most lenses and bodies will work fine. But if you do a lens test you will very quickly find out that all lenses will slightly back or front focus. This doesn’t mean you will always see out-of-focus images But it does mean your camera and lens don’t work the best way they can. Some lenses/cameras can correct this with software or in the camera but it’s never 100% perfect. This means that running a very slight sharpening over an image will always look like it jumps into focus. With RAW files you need it when you use a Bayer filter (they always include some unsharpness in your images).
PART 4B:
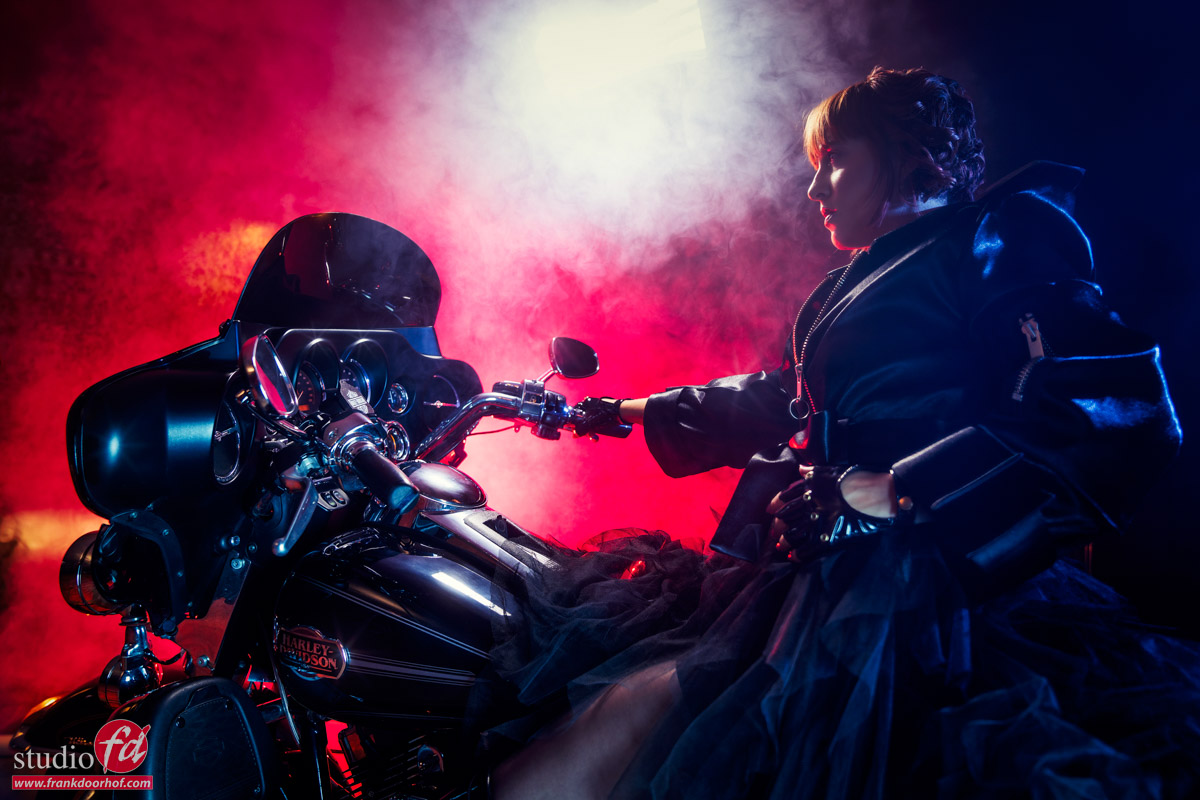
Clients love pin-sharp images. But even when everything is perfect in focus it will help a lot when you add some extra “pop” to jewelry, stitches in clothing, etc, or like the shiny details in a motorbike.
Fasten your seatbelts….
To protect the privacy of people and also to keep it shorter I’ve condensed the posts into one shorter blurb.
I post them pretty censored in some cases. This is also why my responses are a bit harsher than you’re used from me 😁
Here are the first of responses to my Topaz Photo AI Testimonial:
“You should first learn to take proper images and control your lighting” “Real photographers take photos, don’t fake them” “Another amateur thinking they know how to shoot”
Tip:
Always look at someone’s work before being a jerk.
But also realize that not everyone works under the same conditions. When I shoot for schools or businesses and only do headshots I would really not know why you would ever need Topaz Photo AI. When you do weddings, wildlife, events, etc. I think Topaz will save you a lot of time and also save images that would normally be lost. This has nothing to do with not being a great photographer. But simply with the fact that gear is not perfect and some moments are once and never come back.
With replies like this, you actually show you’re an amateur. Because you don’t realize how insanely tough some conditions can be. And that when you want to use Topaz PhotoAI you still need a great shot. And a great shot means you as the photographer had to be there; to take the shot at the right time, with the right lighting, the right composition, etc. If your camera fails at that moment how does that make you a bad photographer?
“I can teach you a few things about using tripods and strobes”
“get better gear, or learn how to set up your camera, nobody needs a higher ISO than 800”
Yeah, sometimes you just don’t know how to respond, especially when they are really polarising.
First of all, I will be kicked out of the venue when I bring strobes. I often shoot the complete concert as the only photographer allowed (normally you are only allowed the last chords). So using strobes is 100% out of the question. Same with a tripod. Yeah, I can bring one but I don’t have anywhere to put it. When I move around I will hit people with it. Plus I can perfectly hold my camera still at 1/125 or 1/500. When I would shoot at a lower shutter speed I can’t freeze my subject.. so yeah doesn’t work.
Better gear is always fun, aren’t we all boys 😀
But it won’t help when you already use some of the best cameras and lenses. And as mentioned before, it’s often not possible to shoot wide open. Images used for large prints are often (for me at least) with a deeper DOF, so that means noise even in the best cameras. And ISO800 is even for street photographers a barrier they break more than stay below probably.
“You don’t realize you are taking away the works of thousands who would normally do this?” “You are destroying the internet with that stupid AI junk” “You are taking up way too much energy with that AI”
Tip 2:
Always check what the software does before going into berserker mode.
If you need thousands of people to take noise out of images and sharpen them I really feel for you. Emptying the card and importing files must feel like university. Without kidding, noise reduction and sharpening are built into every RAW developer and are never done by external parties unless you outsource literally all editing. In which case I wonder if you are really a photographer. Seeing that in the retouching process, there is a lot of your personal vision of the shot and for me, as a photographer/creator it’s a vital part of my images,
Same for the other two responses.
Lightroom does indeed need an internet connection for its AI functions but Topaz can work 100% offline for noise and sharpening. And it even works on my laptop without being plugged in. So again, check what the software does before going into full-blown attack mode.
“It takes foreeeeever on my PC, it’s junk” “It looks totally artificial when it colors an image don’t buy” “This has been in xxxx for years and much better, lol don’t buy”
In the first one, it really depends on how you read it…….
Probably the PC is junk because even on my M1 Pro MBP it ran without a problem and on the M4Pro I recently got it actually is very fast.
Fun are people that don’t realize a 10-year windows PC laptop is really not up to the tasks of the new software. But downward doubtful are people that claim Topaz Photo AI does some stuff really bad that…. is not even in the software 😀
I’ve seen a lot of those varying from that the coloring functions are ok. But mostly junk (there is no coloring option) to people that claim that the fact it doesn’t work offline is the reason they don’t use it anymore and bought XXX which is much better…. You see what they are doing right :D? Topaz Photo AI works offline without any problem, but they probably like you to buy something else. Also funny to see the same name pop up in different places around the same time.
Also, this has been in XXX for years and is a funny one.
XXX is a free software package we probably all know and most certainly does not do the same thing. Yes they have an option called sharpen and noise but… well never mind, you can also retouch an image on your iPhone or eat soup through a straw.
And because I’m Dutch I do understand the following ones about Topaz Photo AI, I really do.
“It’s way too expensive” “They keep updating the software and you have to pay for it”
Well, Topaz is not cheap, yes I agree.
But you have to figure out for yourself if it’s worth your investment.
For a hobby photographer maybe not. But a professional wedding, sports, wildlife, or event photographer will get so much out of software like this. Images are clean and razor sharp and the workflow is very much streamlined in the latest versions with stacking and presets.
And yes, luckily they keep updating software, there are a lot of new techniques and I would rather see a company update their software than stop.
About pricing, it’s very simple. Everything nowadays seems to be going to subscriptions. And I just like many of you I don’t like it and prefer a one-time buy. But with Topaz I think they made a nice mix. You buy the software and when there is a major update (once every 1-2 years) you pay an upgrade fee. Or you keep using the older version. I really don’t see anything Topaz is doing wrong here. This is the way I prefer it, it’s unrealistic to expect lifelong free updates unless you’re Apple.
Let’s end in a fun way
If your videos are used in ads it always means you get a lot of replies. Some people would think “I would not respond” and I get that. However, I believe that if you connect your name to a product and also your reputation the least you can do is respond. And luckily there are also a lot of nice responses, and even a lot of these that ended up using the software in the end 😀 Also another reason to write about my Topaz Photo AI testimonial.
I think adding the title “AI” to Topaz Photo is maybe a mistake.
AI has a very strong response in the creative world, and I agree with a lot of them.
I feel a photo shoot be taken on set as perfectly as possible. If you use generative fill in Photoshop, Boris FX, etc. for me is the creative process to enhance my original photo. And when you mention this there is no problem for me. However, just typing in “Viking running away from burning village” and using that as a base is no art for me. It’s stolen material that you did not create and should be banned or labeled.
However, apps that are just noise reduction, sharpening, etc. that have been used for ages and always got rave reviews are now adding the letters AI, and people start seeing only “Skynet” and “doom”. On one side it’s funny, on the other hand seeing how aggressive some reactions are it’s also worrying. This why I decided to just write everything I normally answer in a funny meant blogpost.
Also, try to see it from another angle.
I know how to control my lighting, can take some proper images, and understand the technique.
This also means I know the limits of my gear and that always limits my creativity. Using software that can take out noise and sharpen images pushes me to shoot in situations I would normally not even try. This is one of the very positive effects of continuously improving software. It can be a bad thing, but there are at least as many applications where it actually helps to be more creative and save time.
So the next time you feel the need to attack someone first check their site, check the software, and then ask yourself… does my response really add something?
In the end I also recorded a small video in which I show how I use Topaz Photo AI in my own workflow so you can see it in action and also see the difference, always remember that YouTube compresses the video and photos so in real life it always looks better.
https://frankdoorhof.com/web/wp-content/uploads/2024/10/Claudia-221-September-26-2024-copy.jpg8001200Frank Doorhofhttps://frankdoorhof.com/web/wp-content/uploads/2015/03/studioFD_Logo-1FV.pngFrank Doorhof2024-12-06 10:50:362024-12-09 12:29:06Are you really that “shallow” ?
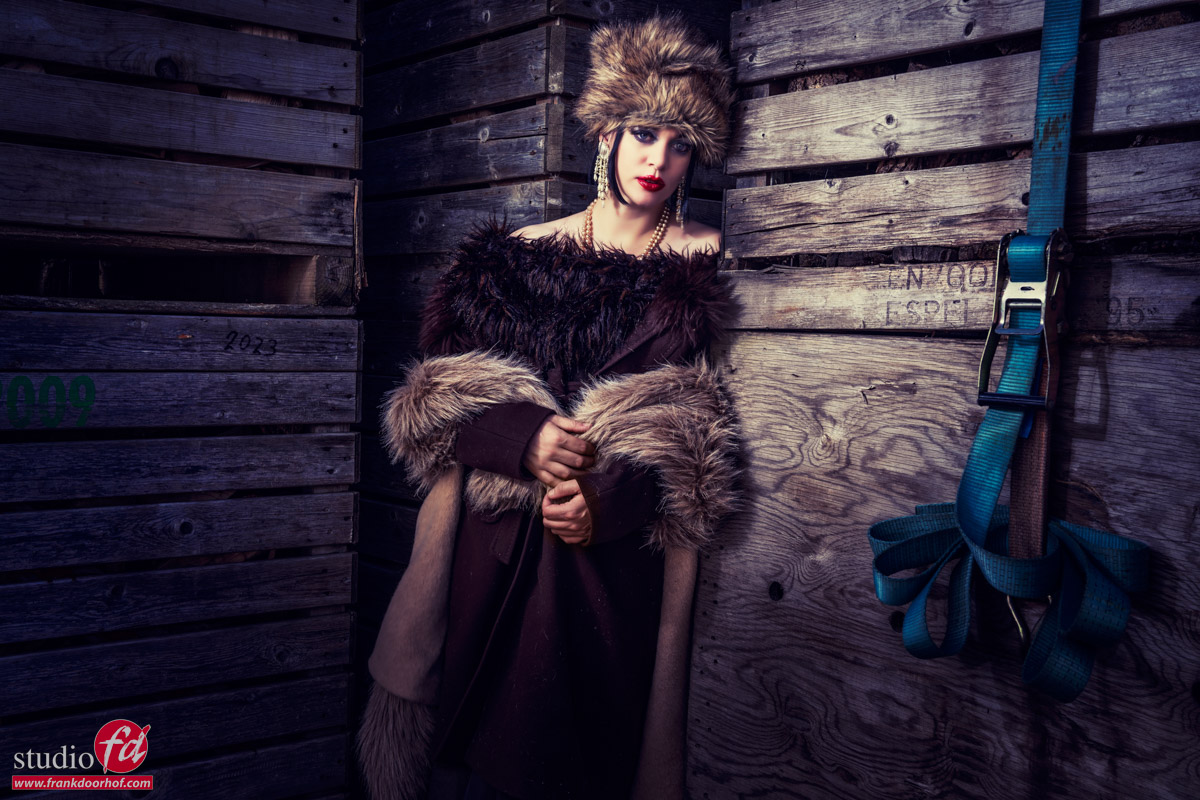
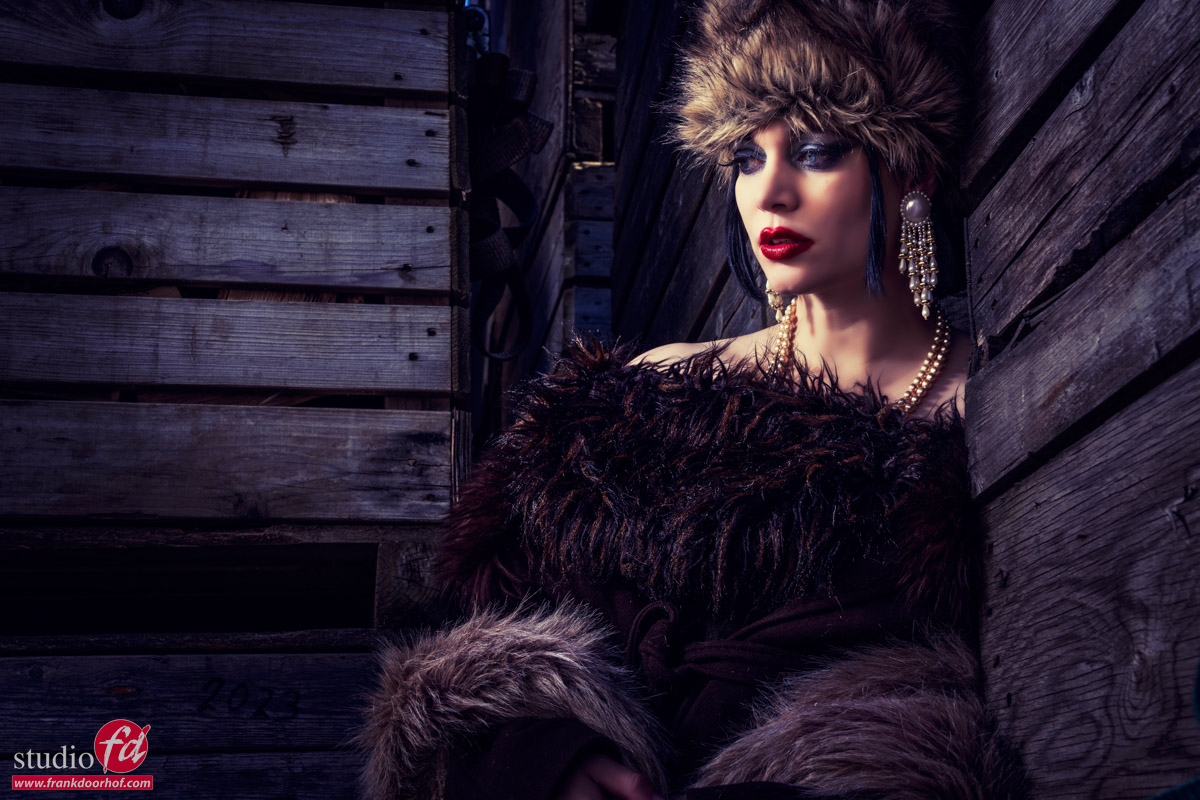
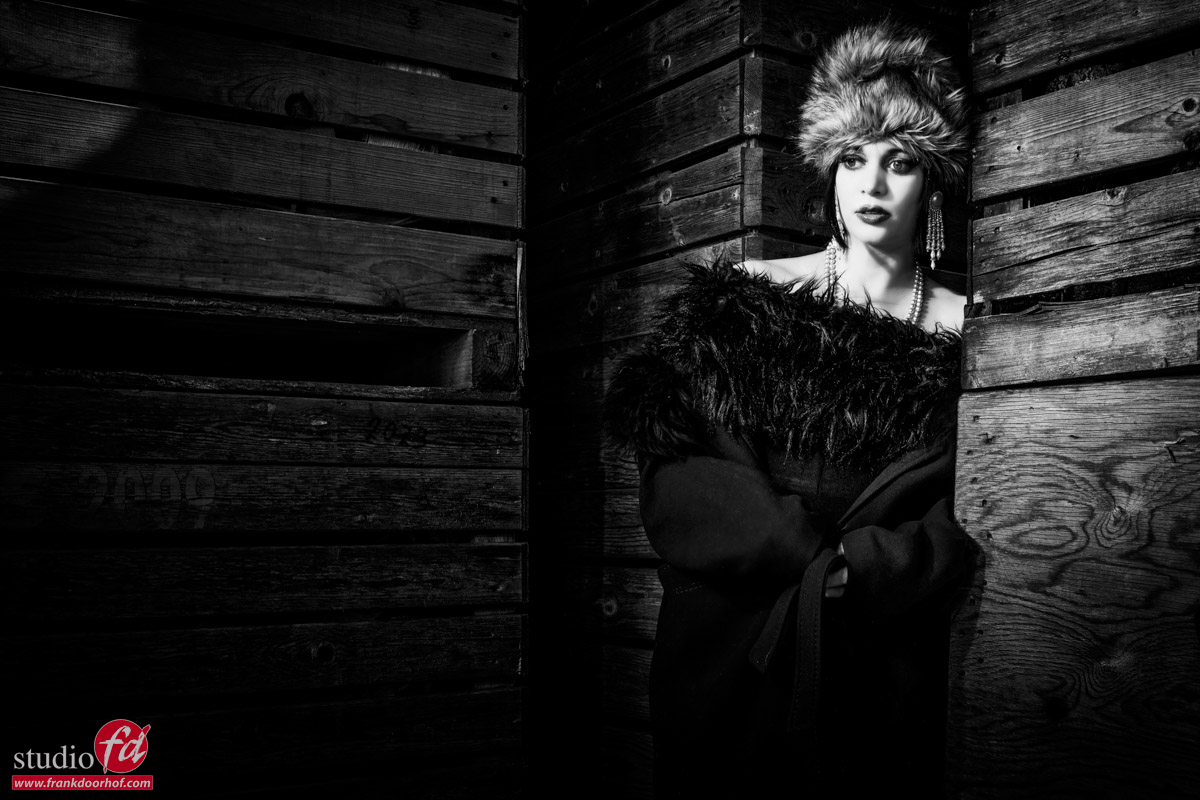
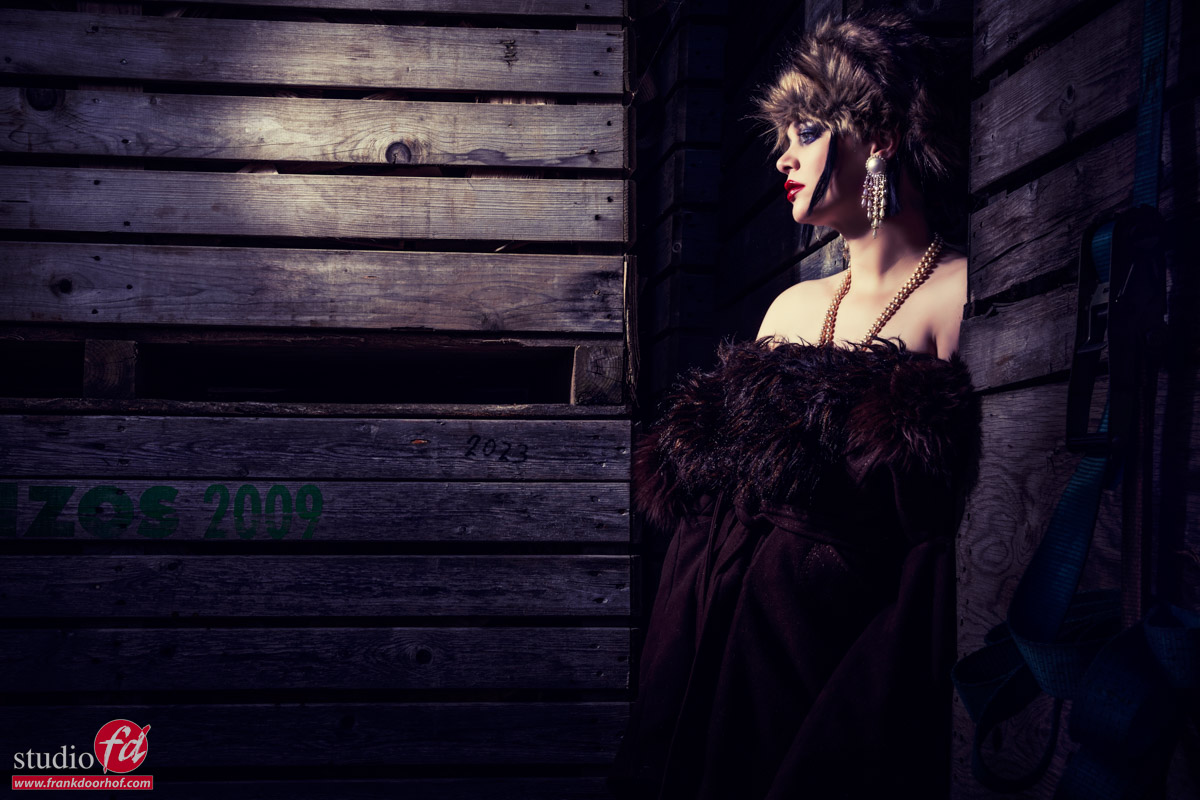
During the workshop “on location in Emmeloord” we scout for locations that look not so interesting but the challenge is to create some cool images anyway. This is a great training exercise because let’s be honest in most cases working on location is not as superb as often hoped for, but we are still expected to deliver awesome images.
For me there are a few different things I use to make a location look more interesting.
The first is of course the location itself, I try to find angles or other details (small or large) that I can use, or that I don’t want in the shot.
In this location we loved the onion crates, they blocked off the sunlight for a large part, which is always handy when working in the bright sun. The less direct sunlight on the model the better in this case.
After I have something in my mind for the general location I’m going to use in the set it’s of course time for the lighting.
In this case I’m using the Geekoto strobes aimed at our model Nadine from the side to create a nice light patten on the crates. Although this was nice we wanted something more, so I added a blue gel to the set. But as you can see in the video and images we started with a more flat lighting setup.
Of course we can talk about, but often a video is much better, so here we go 😀
And also lets take a look at the images separately
Also want to visit a workshop?
Today I showed you the results from one of the sets we did during the workshop outside with Geekoto strobes “on location in Emmeloord” with Nadine.
During the workshops I always try to use 3-4 different setups explaining different techniques and of course it’s a great way to get a good addition to your portfolio.
If you think “that’s for me”
Than visit photography-workshops.eu for the Dutch workshops.
But if you are not living in the Netherlands or don’t speak Dutch we also have other options.
If you let is know 2 weeks in advance I can teach the workshop you want to visit in English.
Or if you can’t travel to our studio we also now offer the option to get a full 1:1 experience with 5 different camera angles, lightroom/Photoshop view and a talkback channel, you also get all the raw files and retouched results from the workshop. Visit our online workshops page for more info.
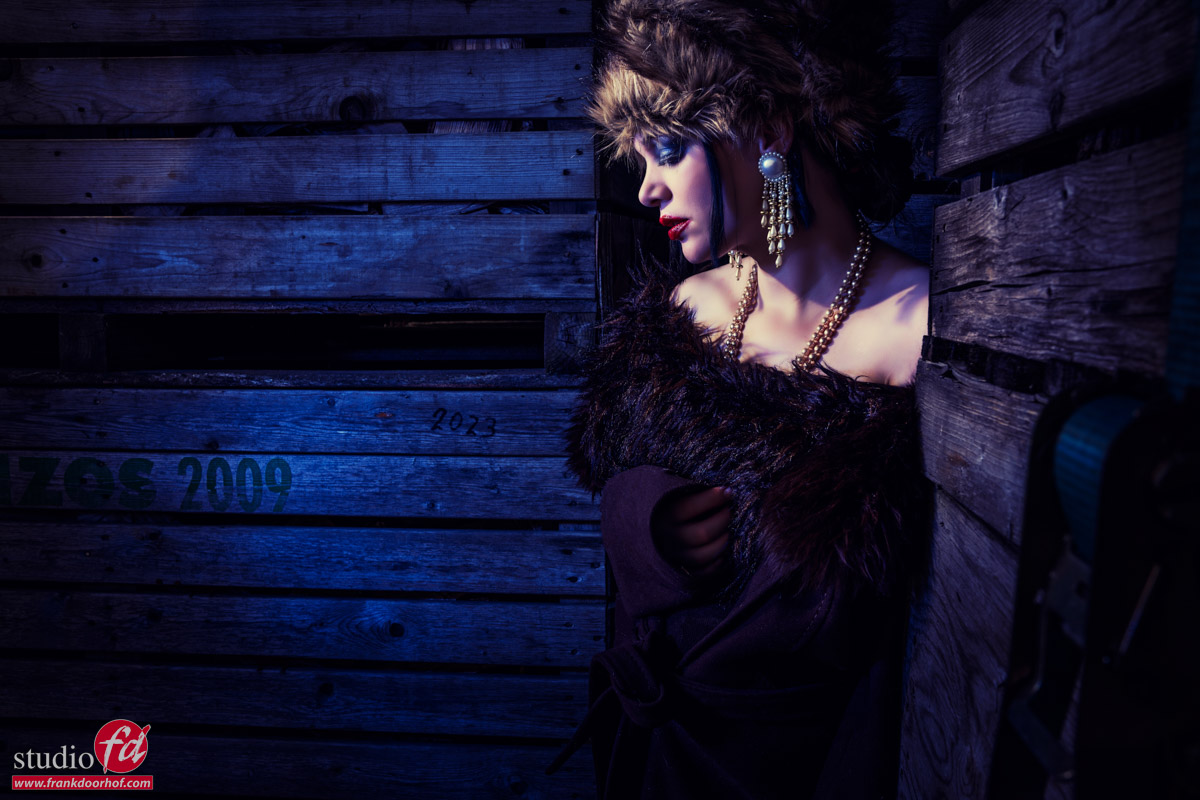
https://frankdoorhof.com/web/wp-content/uploads/2024/09/Nadine-20-September-21-2024-copy.jpg8001200Frank Doorhofhttps://frankdoorhof.com/web/wp-content/uploads/2015/03/studioFD_Logo-1FV.pngFrank Doorhof2024-11-18 18:00:582024-11-06 17:16:58Working on location with strobes and making something boring interesting
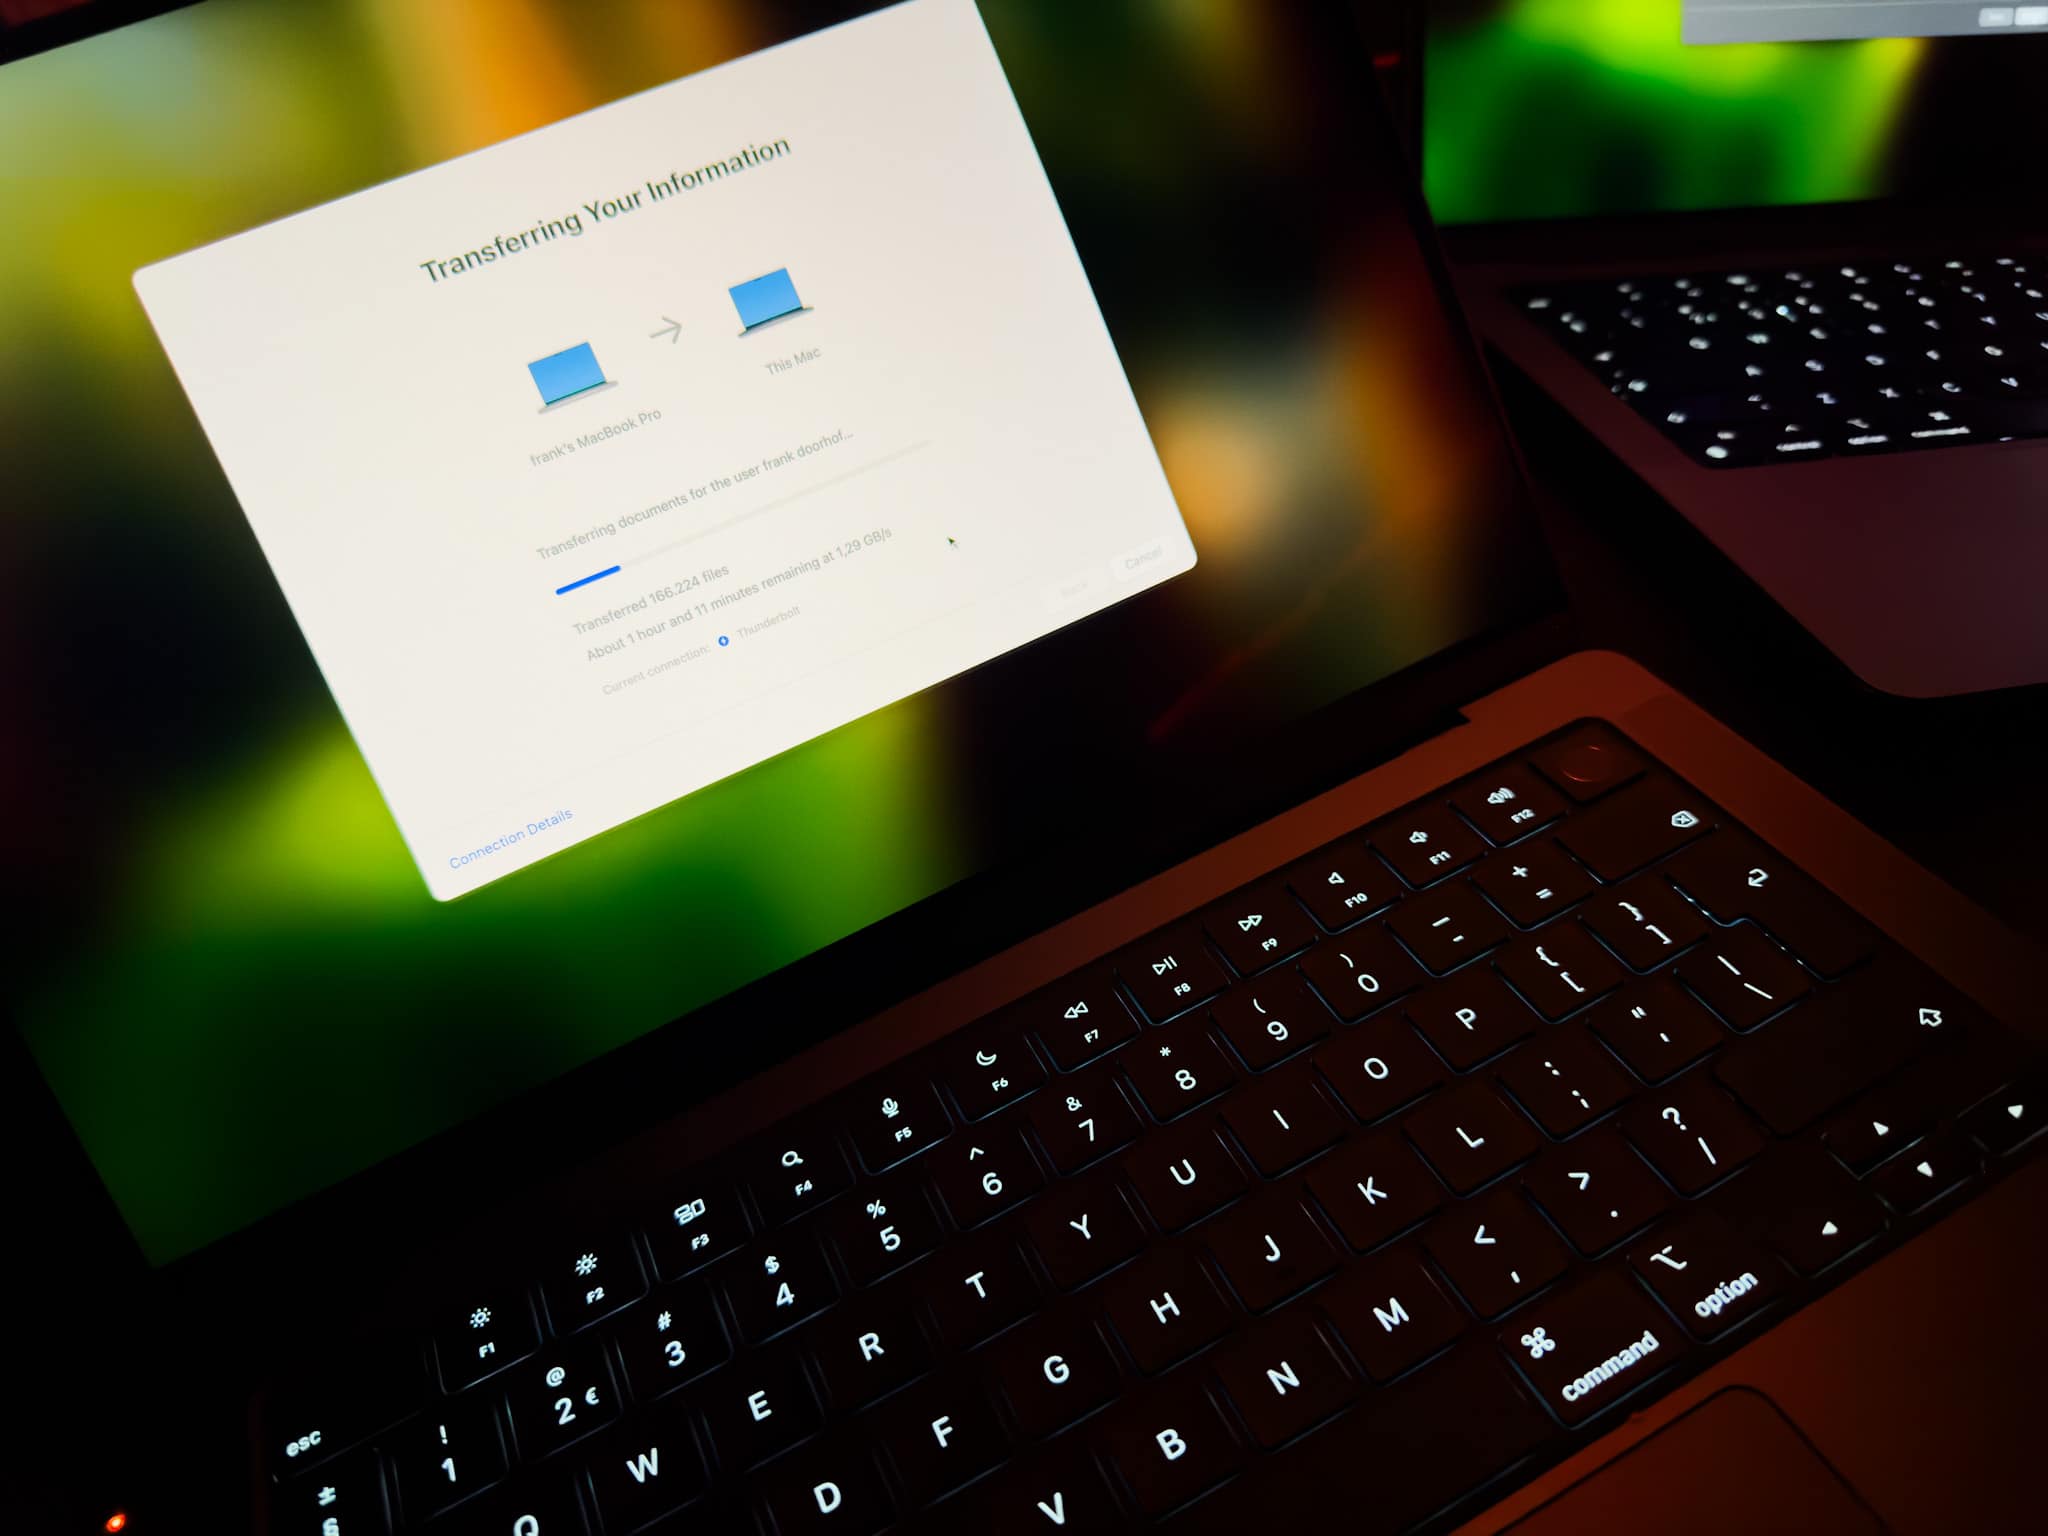
I was 100% happy with my MacbookPro M1 Pro. (see my review here)
It was lighting fast and even when screencapturing Photoshop I didn’t see any hiccups.
But when Apple showed the new screens I was already looking for my laptop to order a new one.
The biggest frustration with the MacbookPro for me was the very annoying glare on the screen, it could drive me nuts when travelling, if you need a mirror…..
The nice thing about Apple is that you often don’t have to wait too long and indeed today I got the new MacBookPro M4 Pro with Nano Texture 14″, 1 TB, and wanted to share the first experiences with it, mainly focussing on the screen.
And the screen is indeed absolutely gorgeous and kills the reflections better than expected. It’s something you have to see to believe case 😀
I also opted for the space black color and also here I can say I’m glad I did, I love the normal color of the MacBookPro but the space black is my new favourite.
Ok till now it’s been more like an unboxing, and as you know I’m not really the person for that kind of posts 😀
So let’s dive into the interesting stuff.
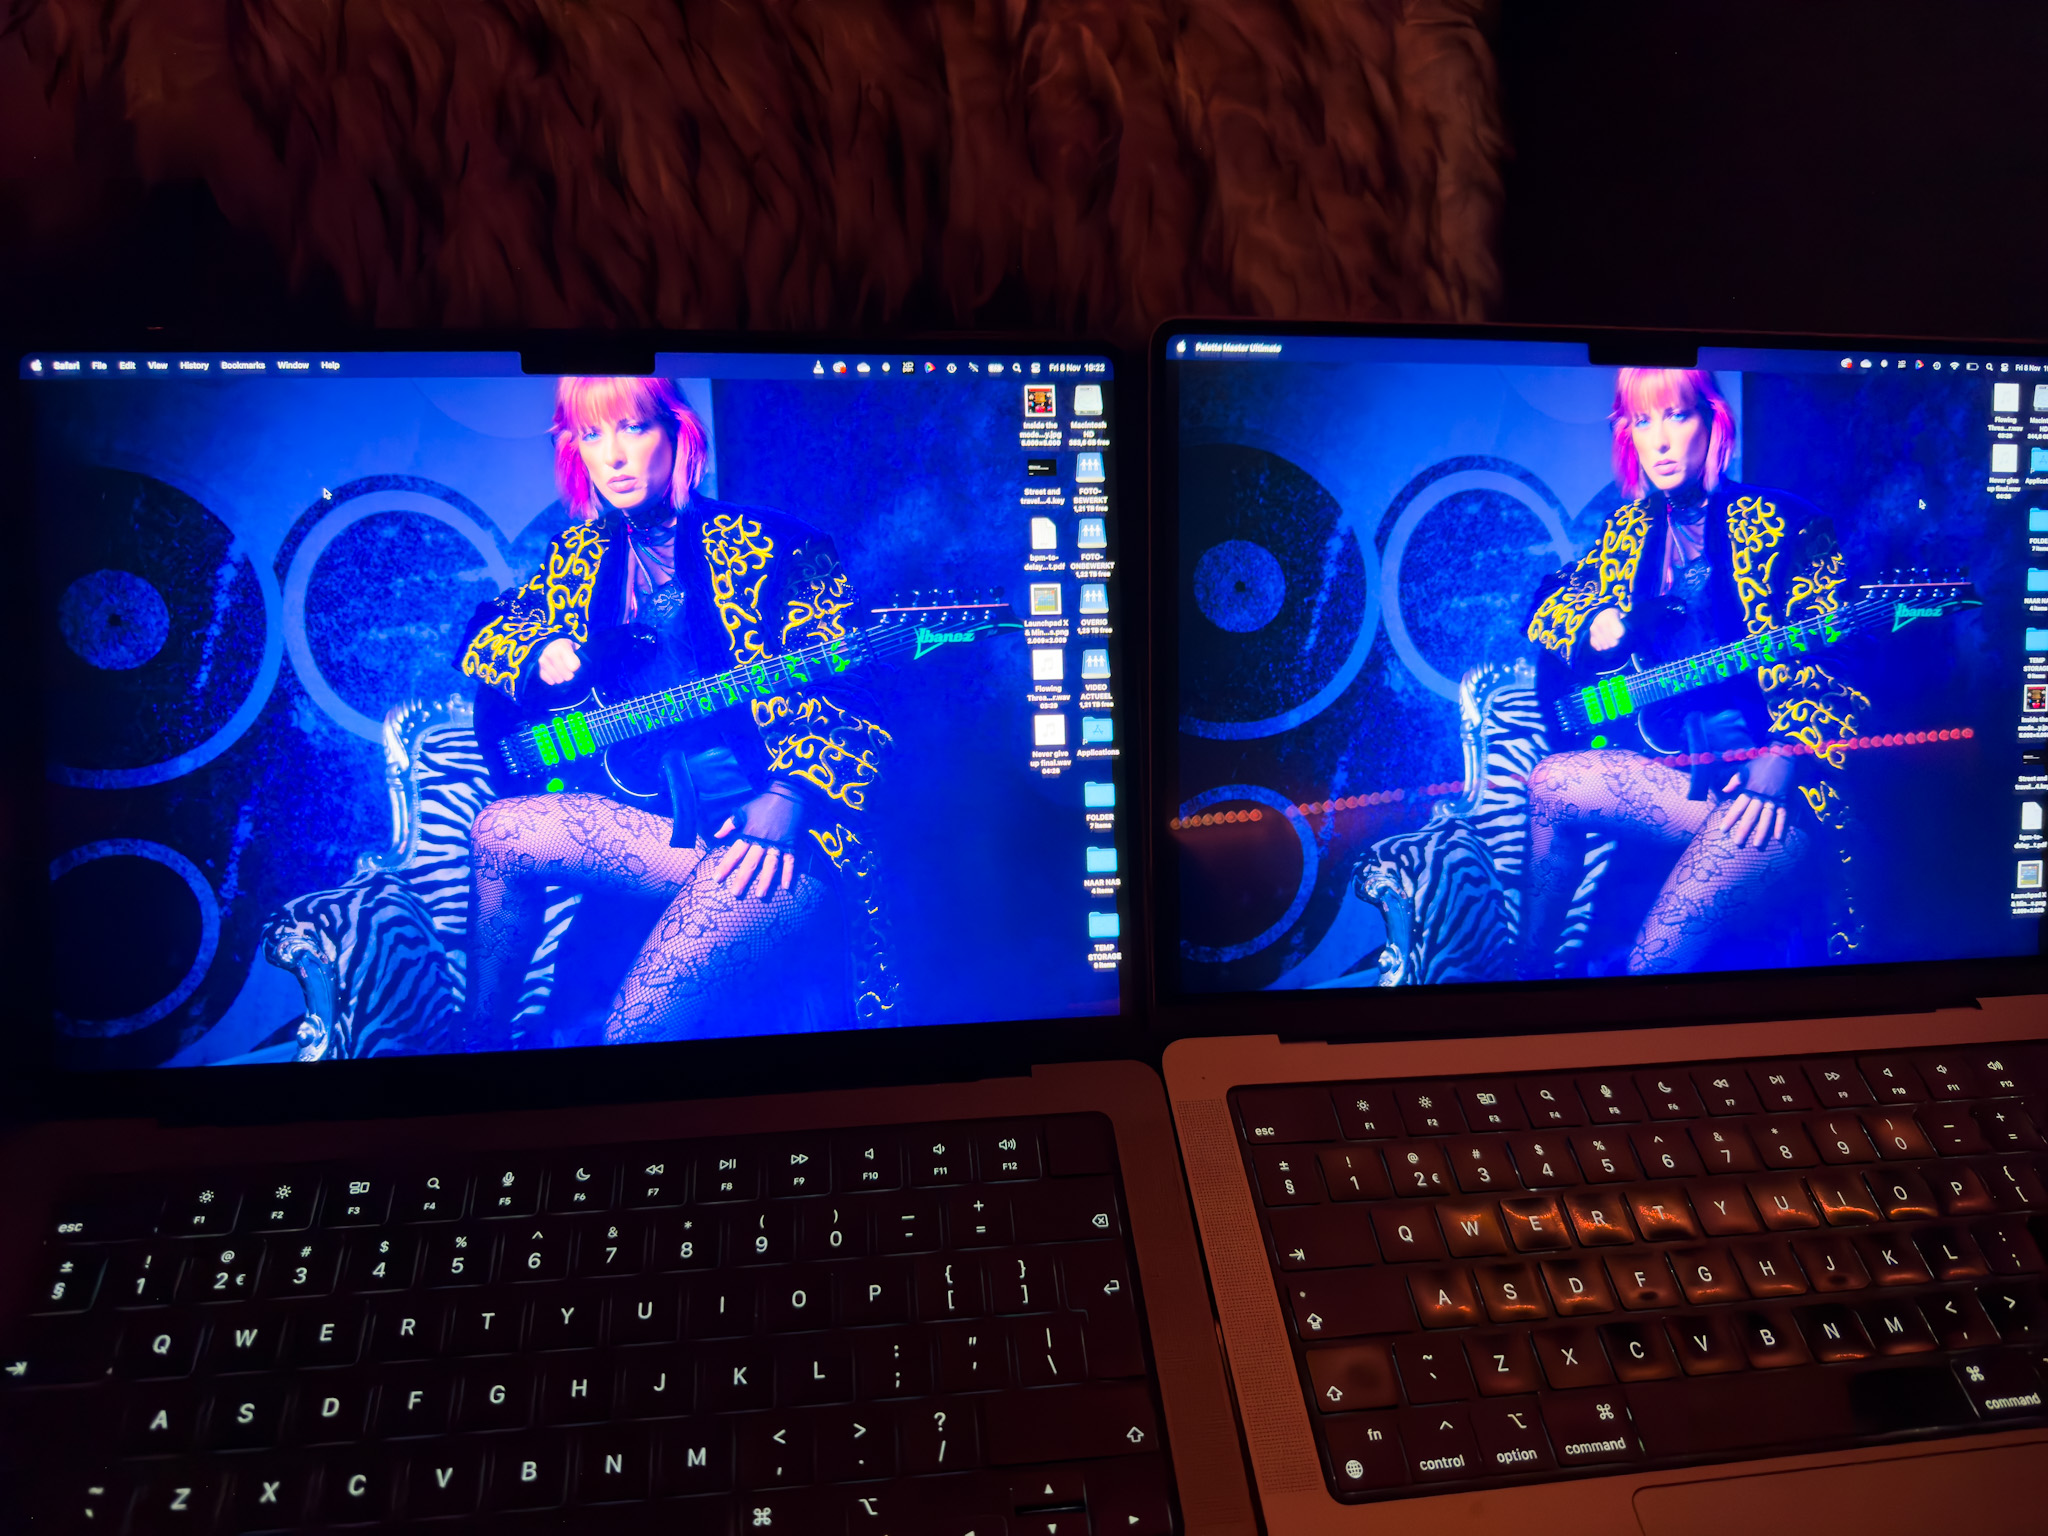
Shine a light on me
Let’s do a quick test
Left is the….really?
As you can see there is a huge difference. On the previous screen you can clearly see the reflection of our led lights, on the new screen there is nothing visible. And remember the reflection of the previous screen was even worse in some older generations. I’m really glad with this outcome because the screen was my main reason to upgrade.
Now when you see this we want to see something more extreme of course.
So we used the flashlight of the iPhone on full power.
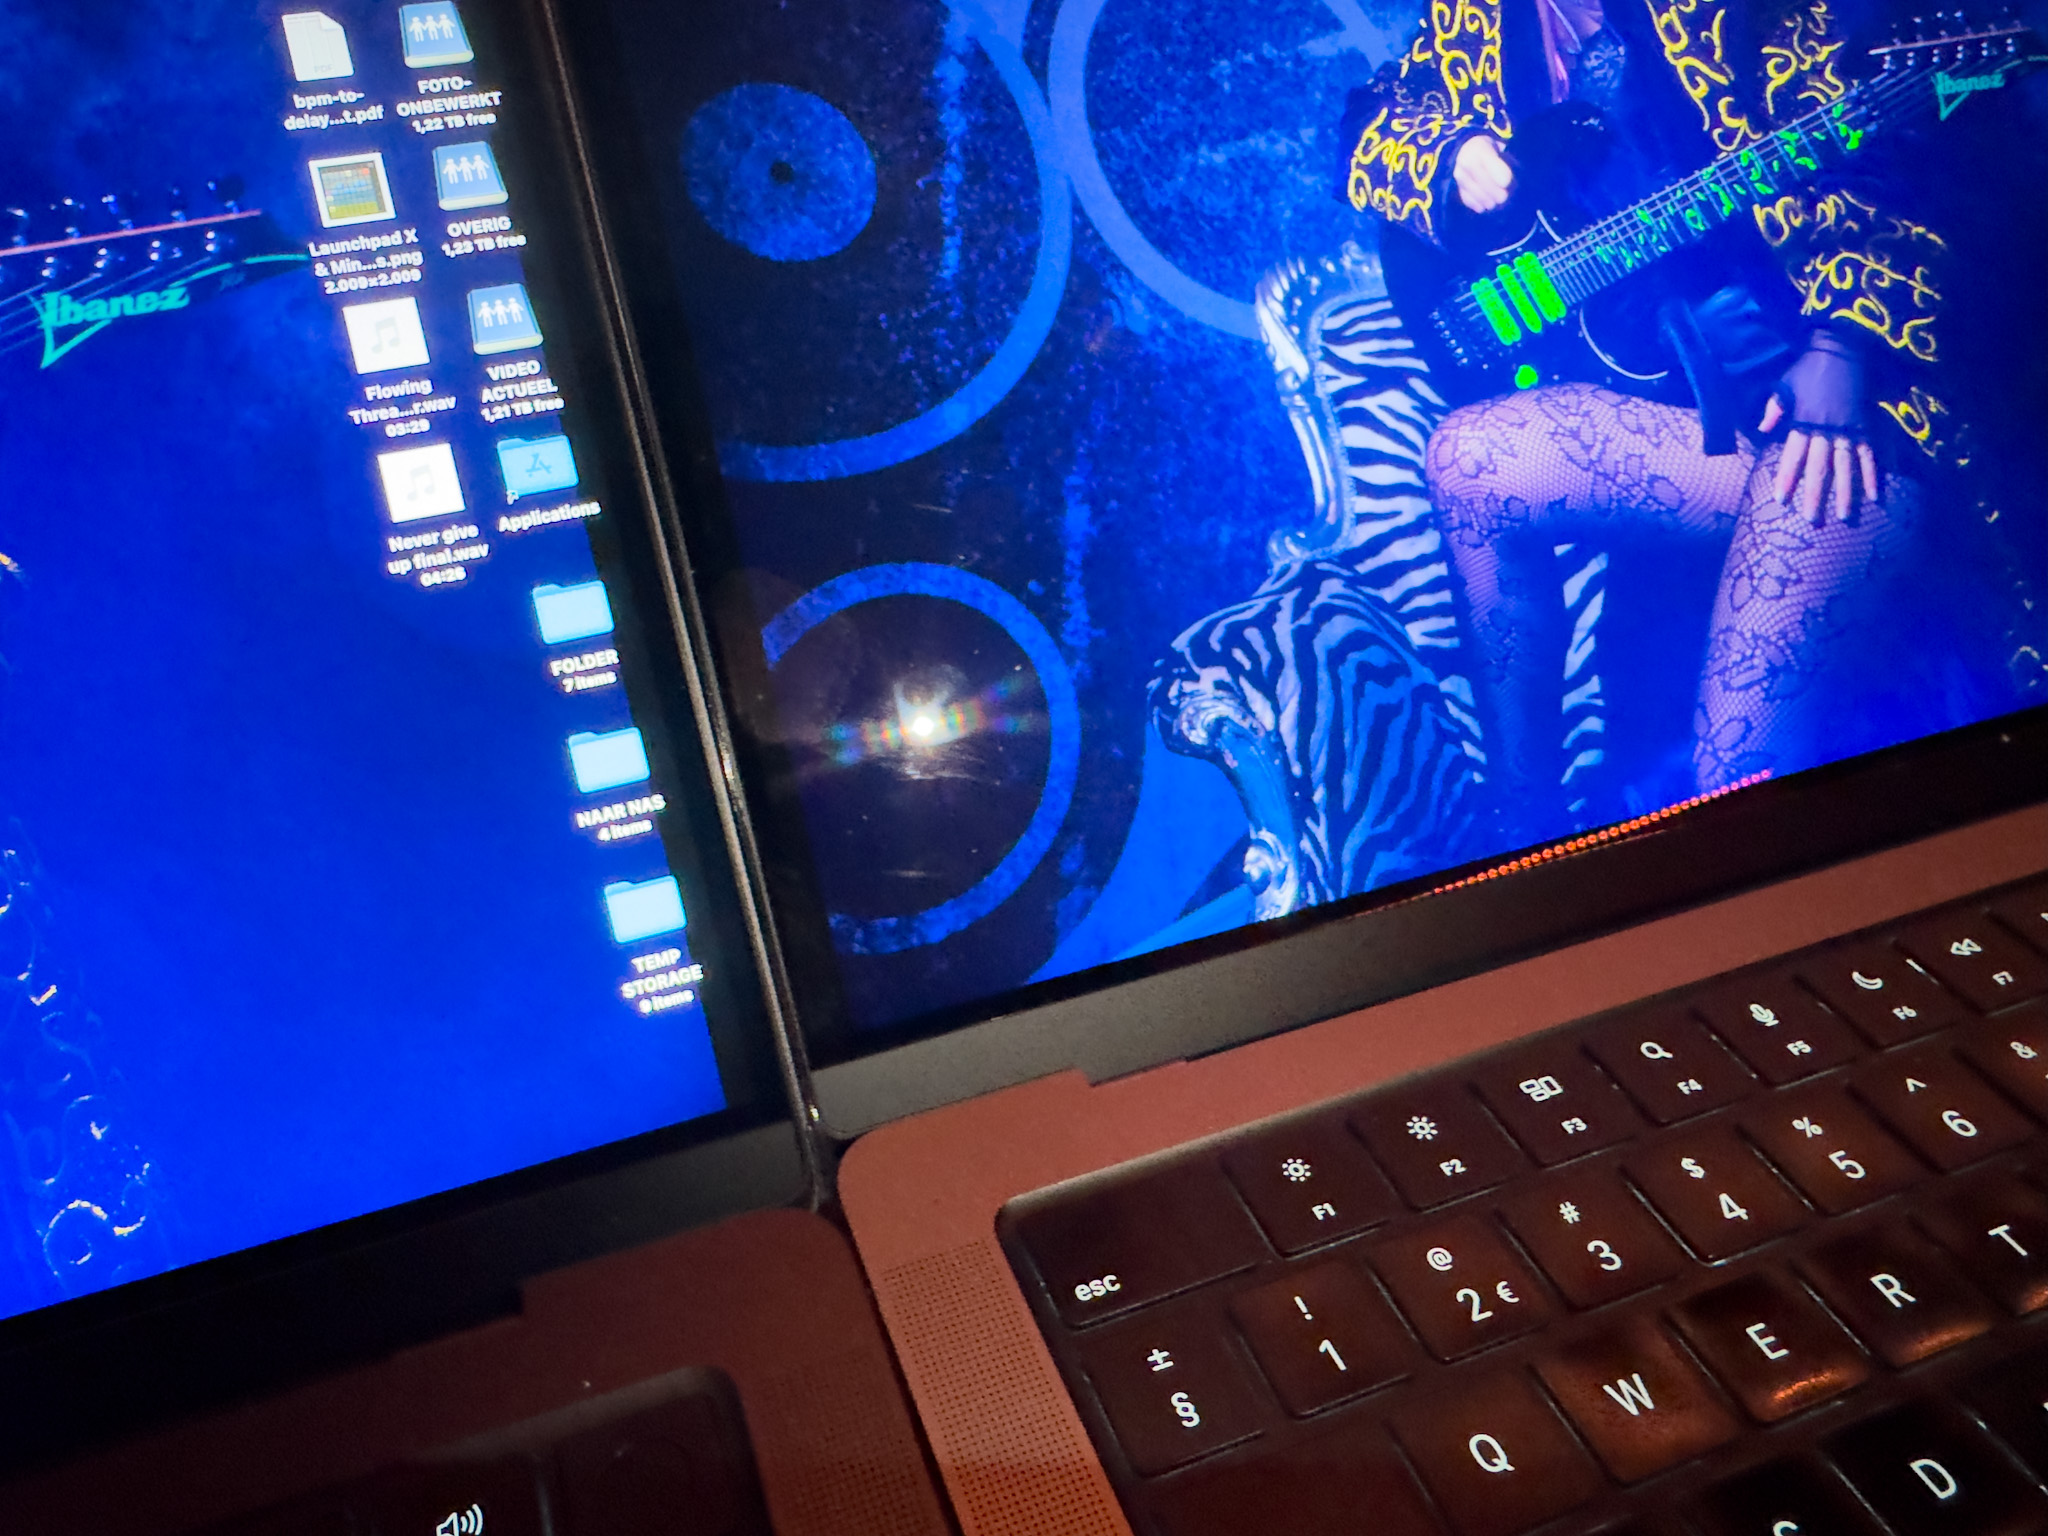
On the previous screen you can clearly see the light and its a pretty large circle and you can see the light actually breaking down in RGB.
Now on the new screen it might seem that the circle is also large but thats probably not what you’re seeing.
This is an extreme example, shining a very bright flashlight right on the screen from 20cm distance.
The little circle in the middle is what you also see in the image above but a lot smaller and much less intens.
The “glow” around the circle is probably the Nano texture doing it’s anti light reflective work, when the lightsource is less extreme this would mean it totally takes out the reflections, as you can see in the first example.
In other words, wow.
Performance of the MacBookPro M4 Pro with Nano Texture
As creators we of course demand the absolute best from our screens.
Of course it’s always better to use a dedicated monitor. For example the BenQ monitors I use have a hardware calibration option and are tracking very close to the AdobeRGB colorspace. (and they have a great anti glare coating :D) but does that mean that you can’t use your laptop screen for editing ?
Well decide for yourself, I will post the validation of the screen in a moment.
It really depends on how color critical your work is, but in all honesty when I look at the results I would not hesitate to edit my work on the MacBookPro, as long as I’m able to check it on the BenQ before it goes to the client.
Calibration
The first thing I do when I get a new laptop is make a 1:1 copy from my old laptop (I love the way the Mac does this).
This mostly takes an hour or slightly longer, in that time I keep my screen on at my preference light output.
When my whole system is up and running, this often means the screen has been on for a few hours.
Now it’s a good time to do the first calibration (and repeat this after a few days).
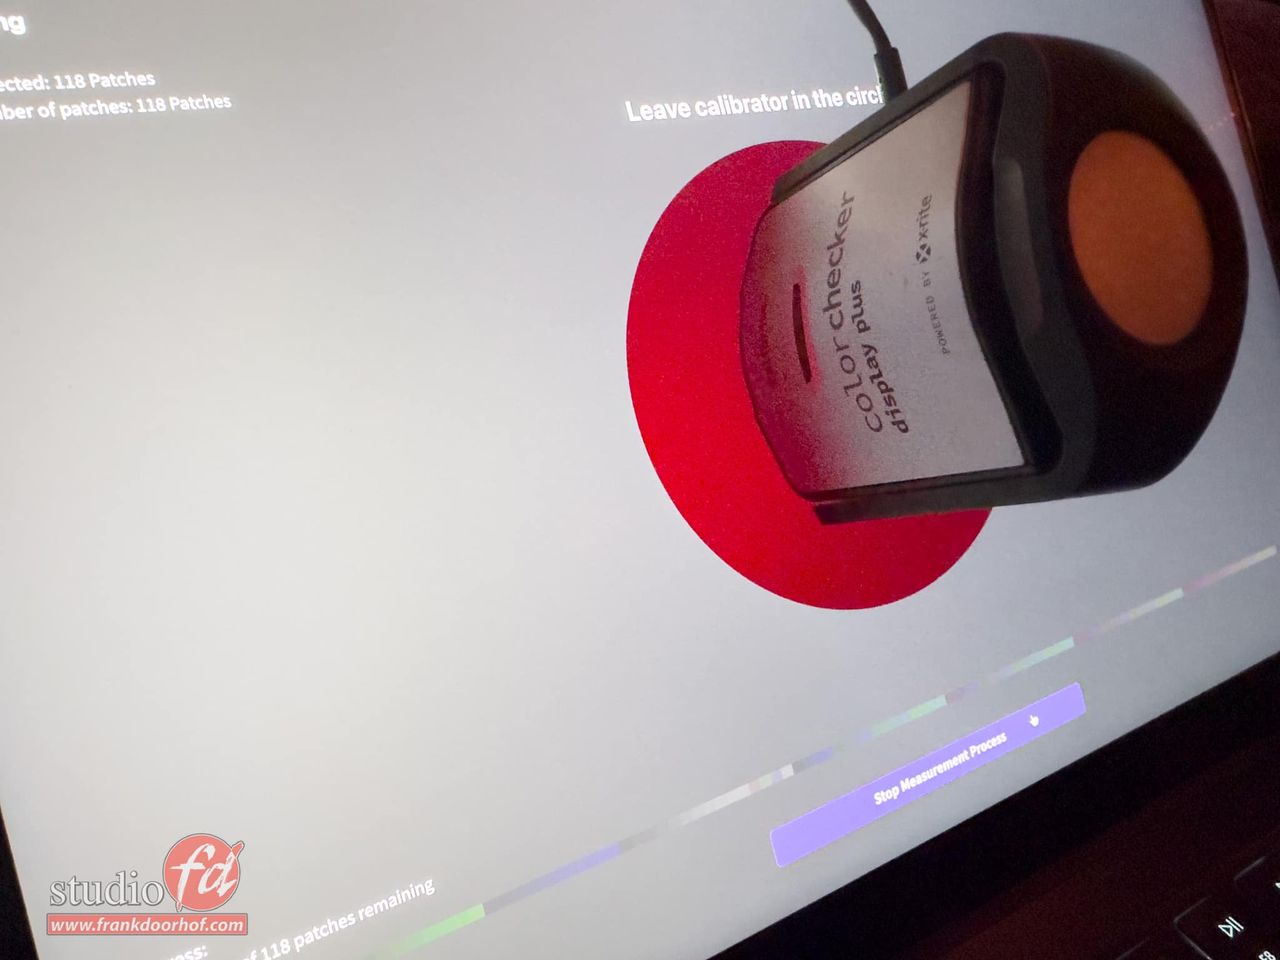
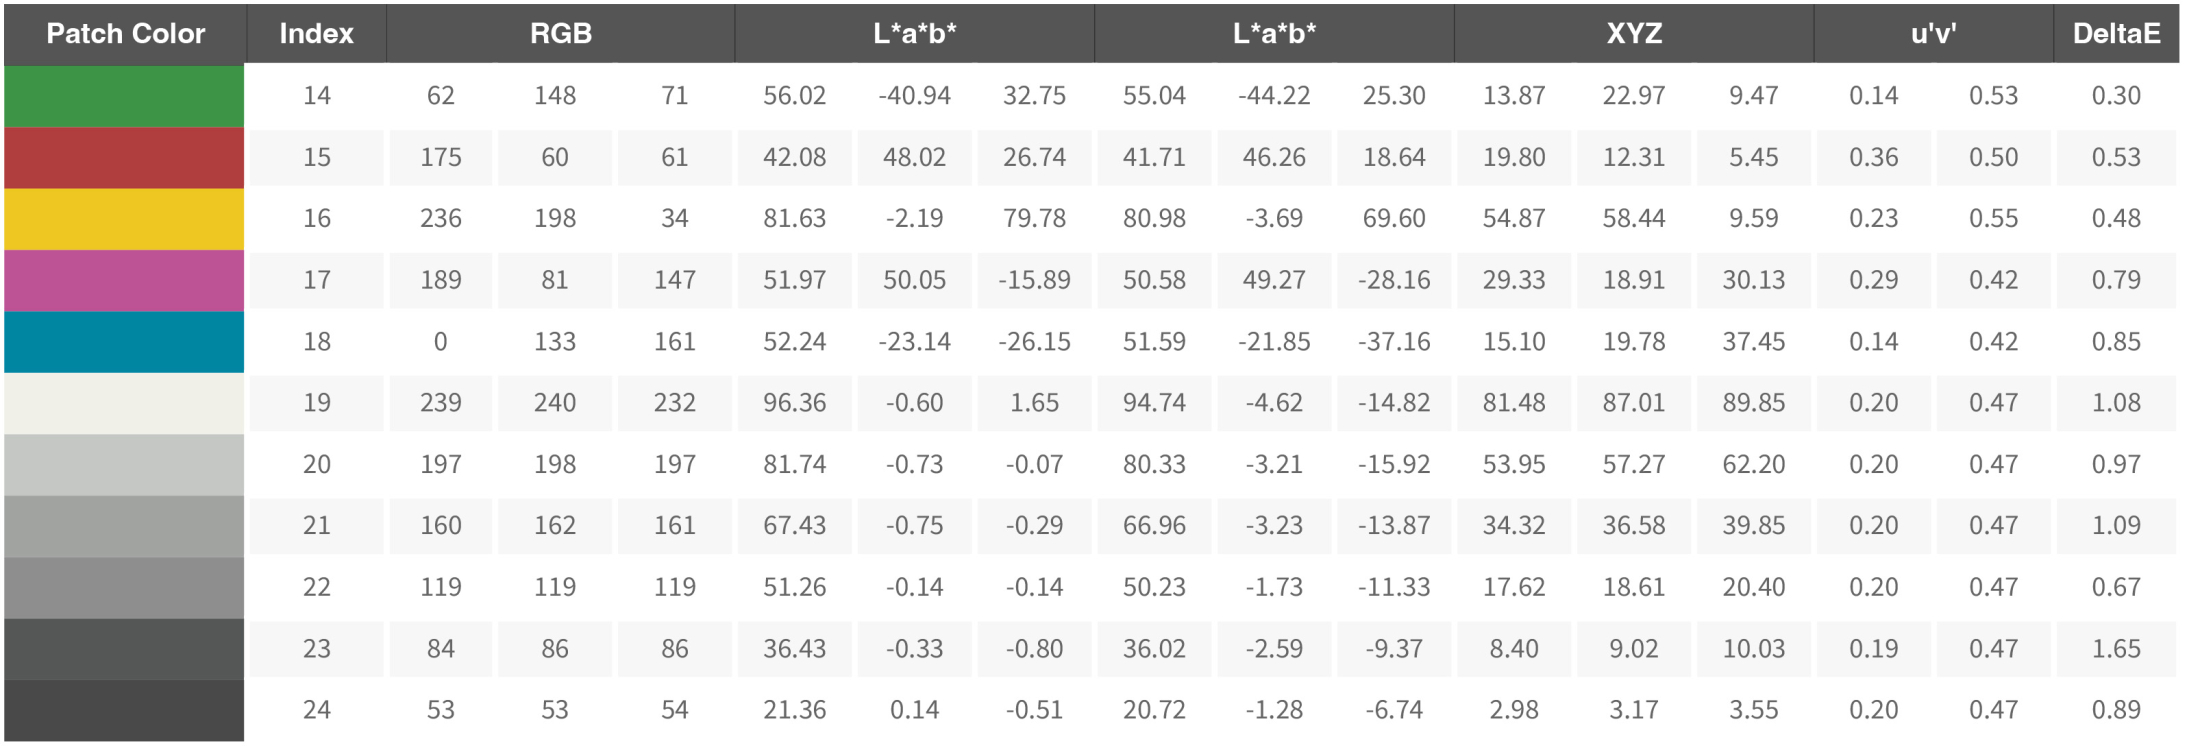
Do make sure you use the proper analyser for the XRD screens.
We highly recommend the Calibrite HL series due to the high luminance output of the screens.
On the photo you still see an older analyser which was handy for the moment, calibration should be done with the HL series by preference.
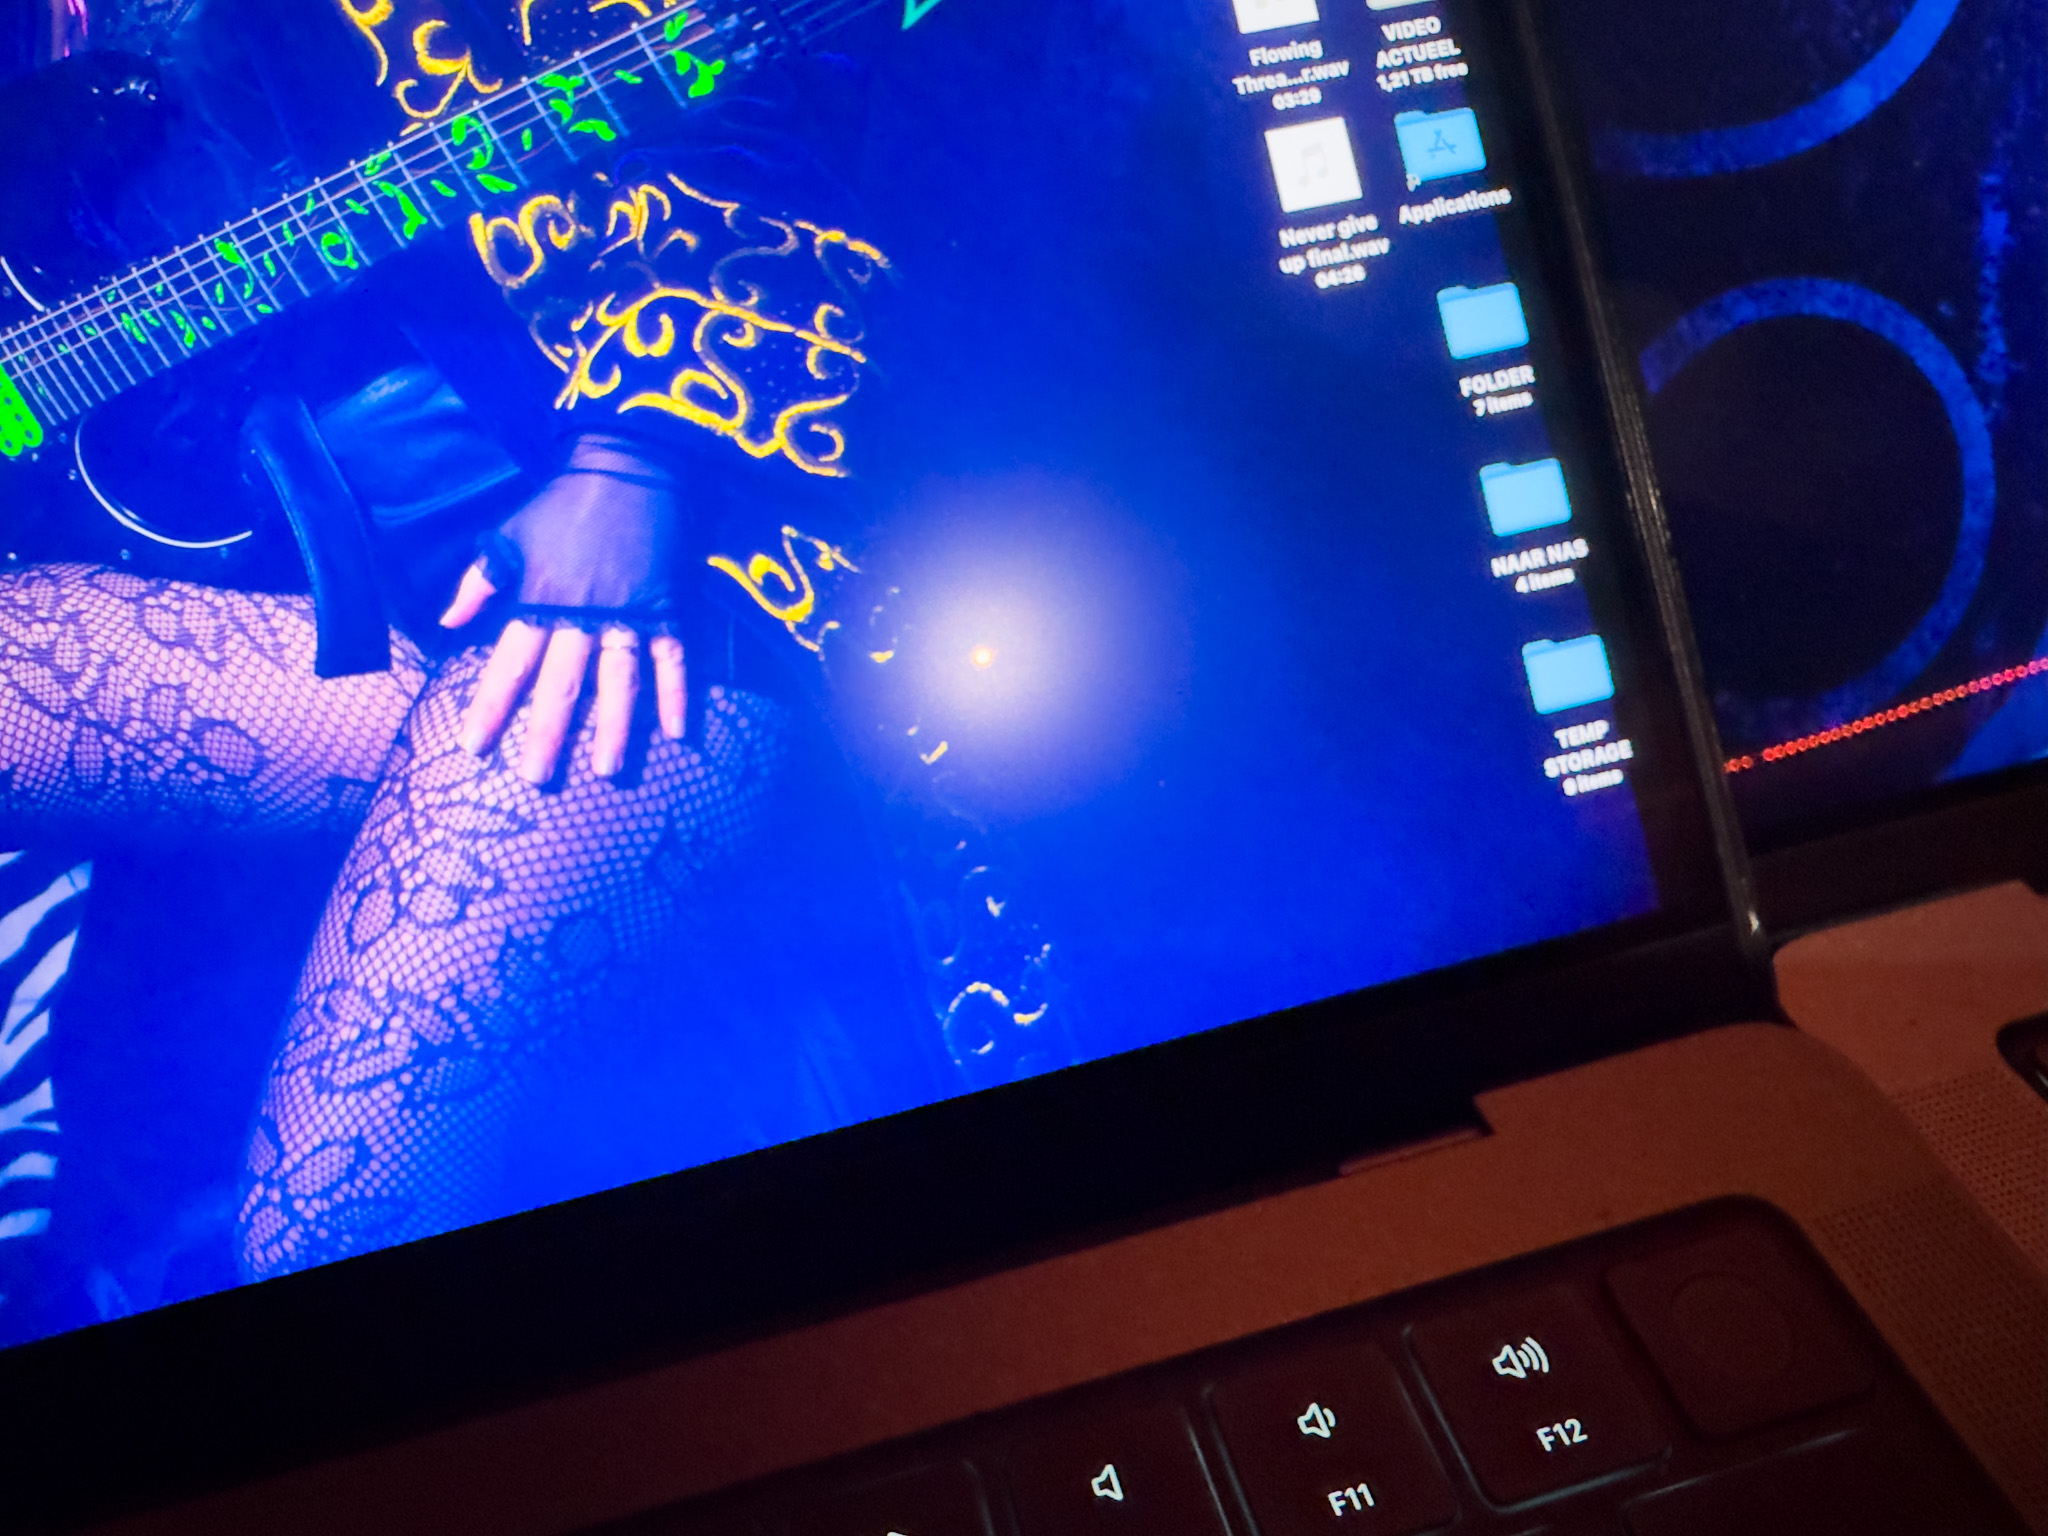
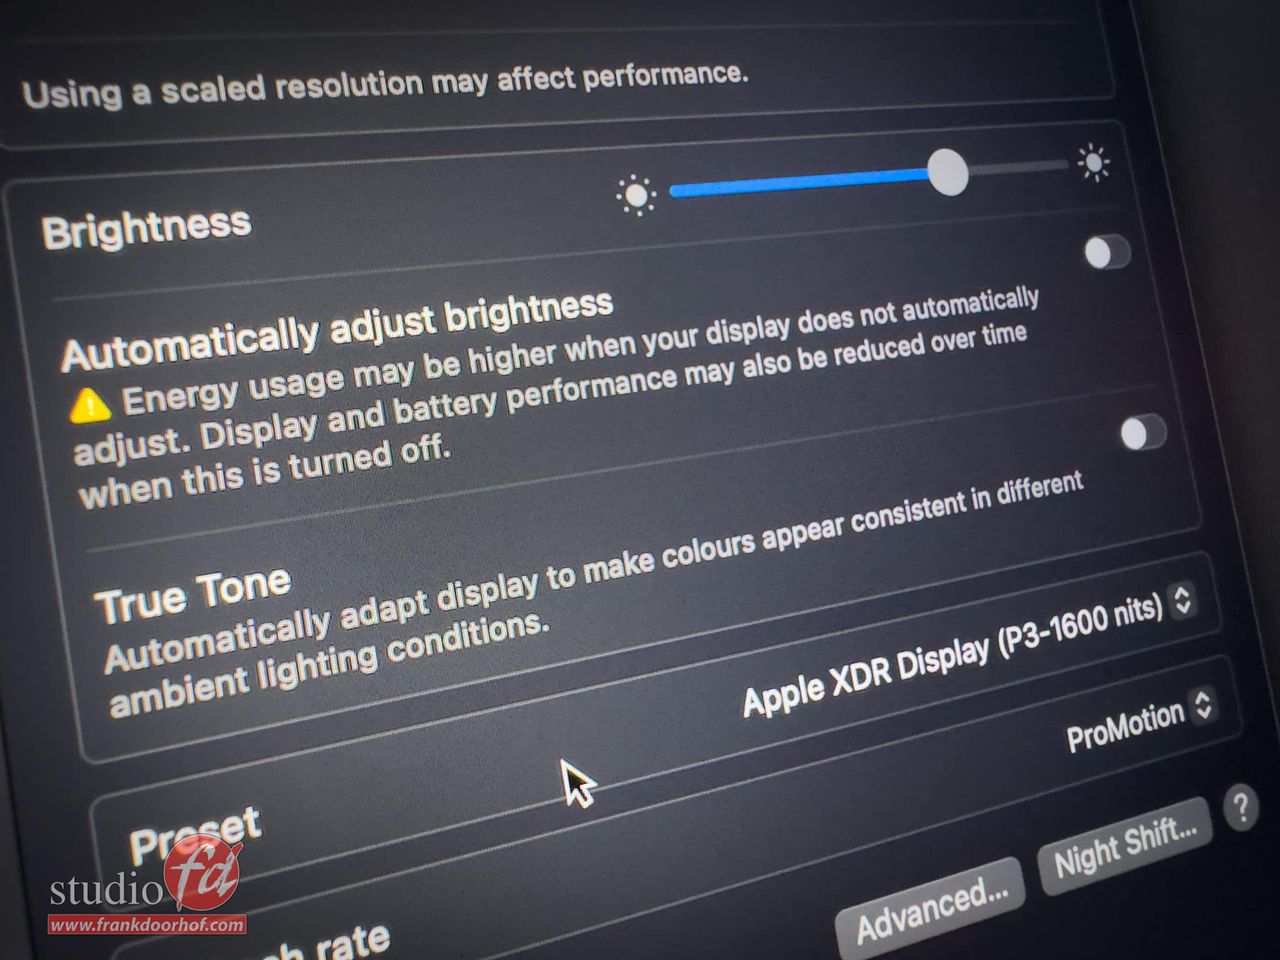
With MacOs you do have to make sure that you check your display settings and disable the two settings you can see in this image, these settings can really mess up your calibrations.
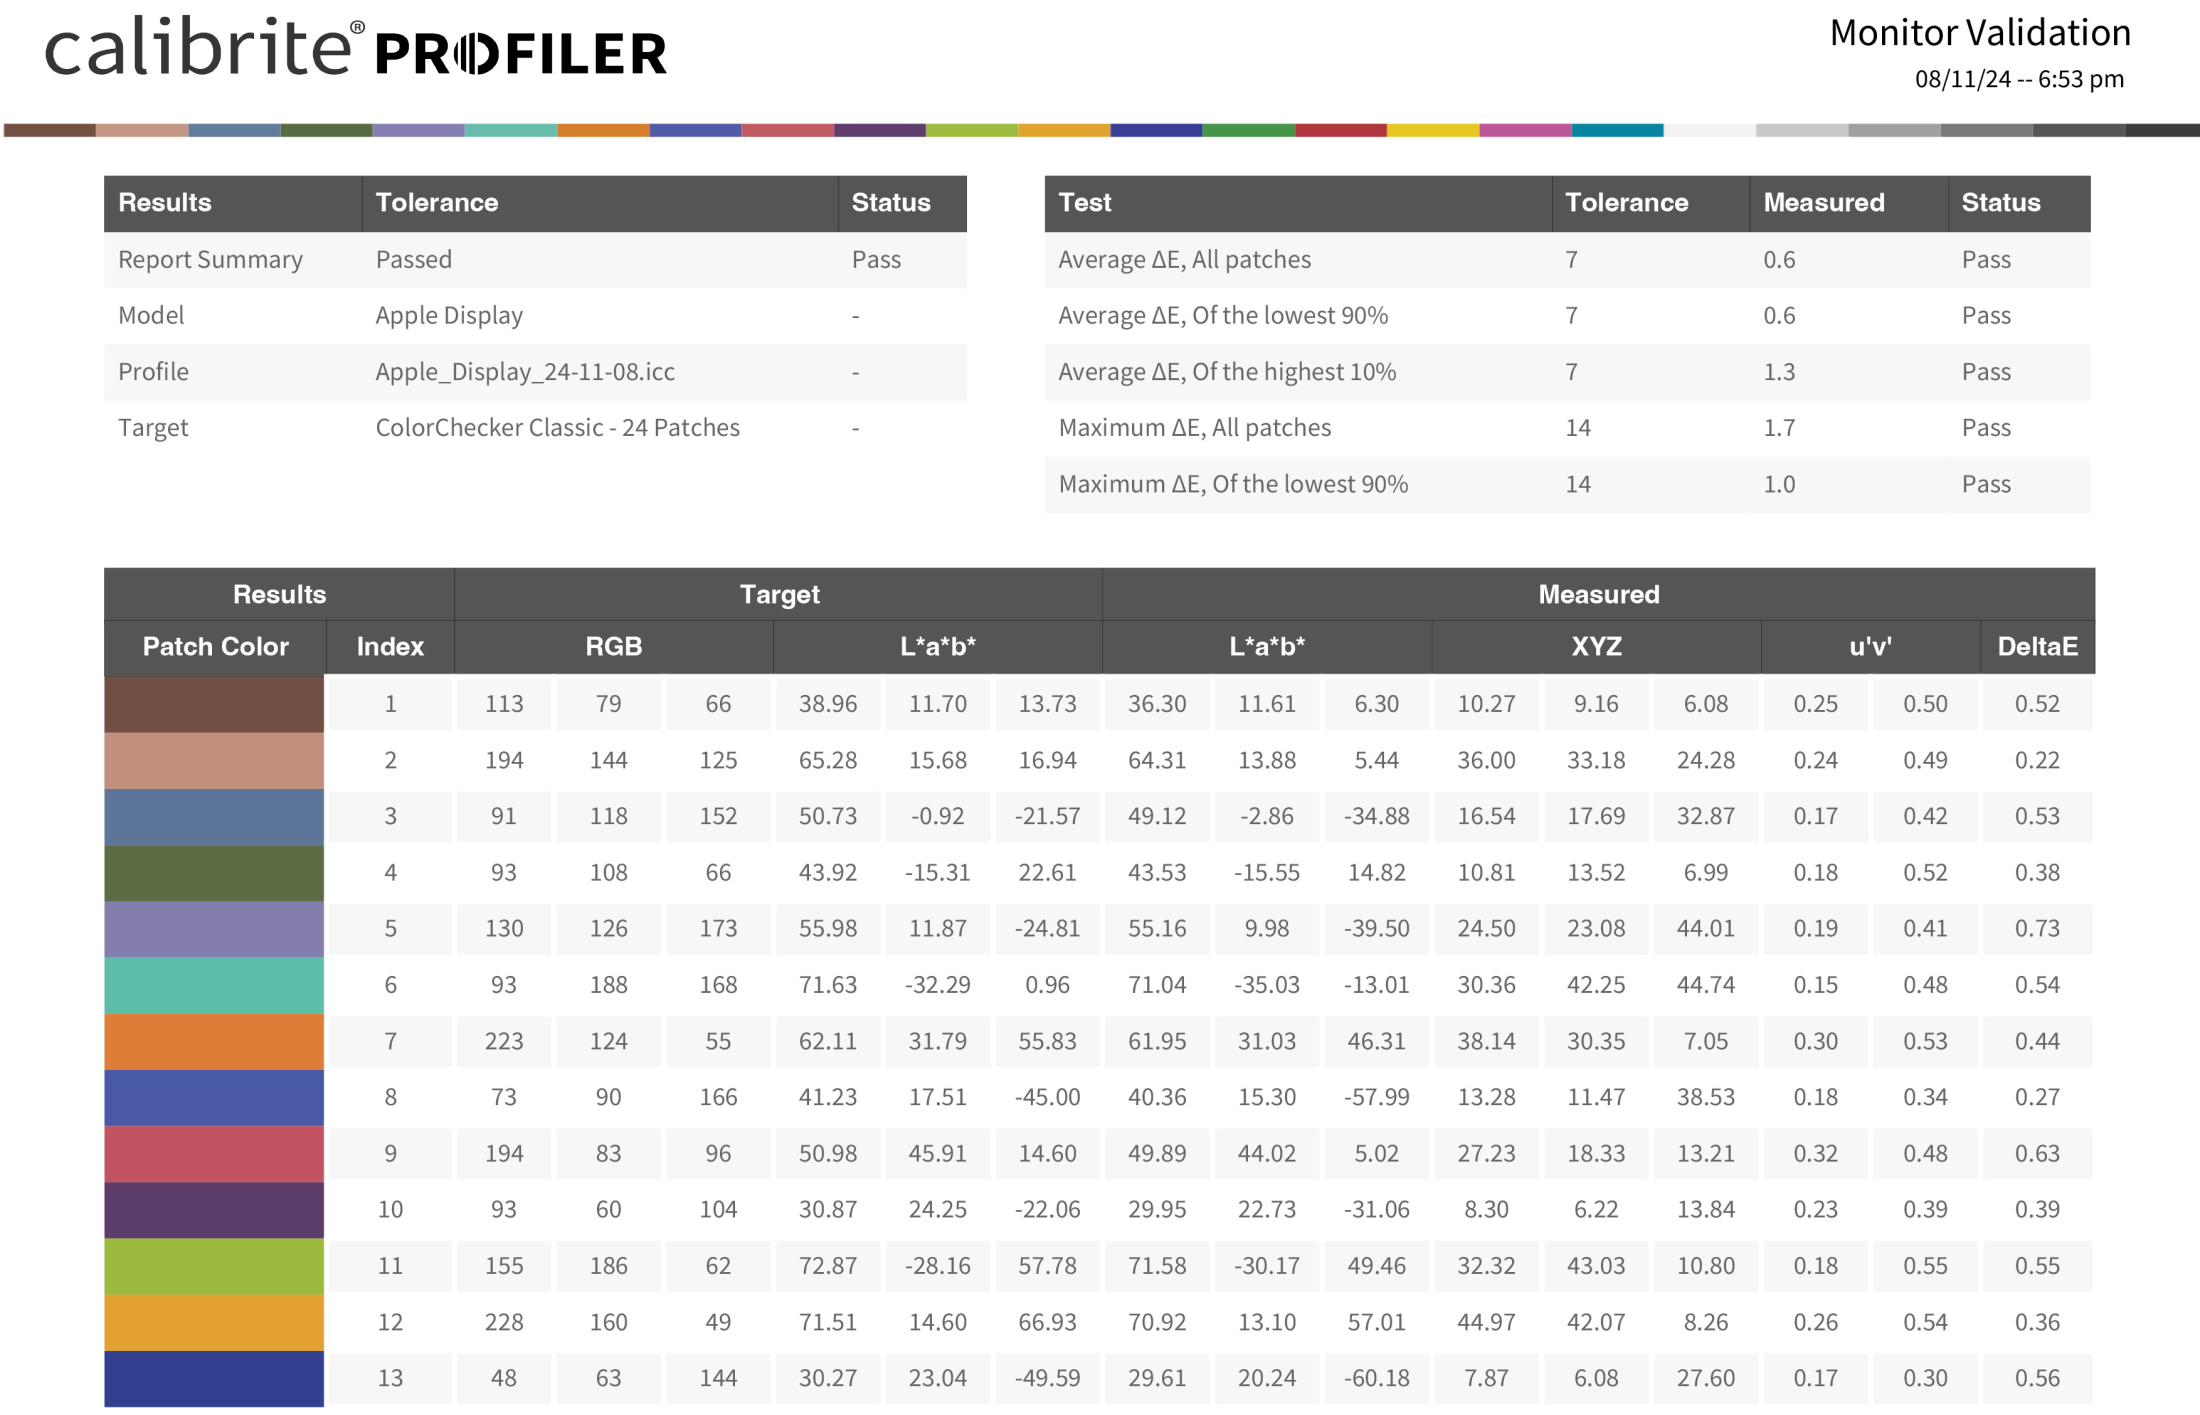
After the calibration is done it’s possible to run a validation of your screen.
I’ve setup the screen to the brightness I normally use in a bright room, this is brighter than my BenQ which is in a controlled environment.
I highly recommend calibrating at the brightness you use the most. You can always go up or down 1 click.
As you can see the performance of the screen is actually pretty good 😀
I’ve been working on the MBP for a few hours now and coming from the M1 Pro I can say that especially plugins like Luminar Neo and BorisFX are running a lot faster. That doesn’t mean that the M1 Pro was slow. But the M4 Pro is clearly a lot faster.
Conclusion, should you buy the MacBookPro M4 Pro with Nano Texture screen?
There will be a lot of reviews about the speed of the new MacBooks, for me it was already clear I would get more speed than I would probably ever really need. However the screen is one of the most important things on a laptop for me. We travel a lot and having a screen that functions like a mirror is insanely annoying. To be honest the screen alone was worth the upgrade. But a good screen should also be able to show proper shadow detail, don’t clip the whites and have a proper performance for color “critical” work. So in this short review I focussed on the screen and wanted to share the validation of the new MacBookPro 14″ Nano structure screen.
If you are in the market for a great monitor, make sure to check out the BenQ series.
I’ve been using them for years and they always deliver a great price/performance.
For the European customers we have a few 10% discount coupons we are allowed to give away. (Email)

You must be logged in to post a comment.