Tag Archive for: projector

Using a projector for awesome and unique effects

An unexpected awesome light source

You probably have use one during work, or maybe you have a great Home Theater system, projectors are used in many different situations.
They are awesome for gaming, presentations and of course movies.

But did you ever think about using it as a light source?
The main different between a monitor/tv and a projector is that the projector projects light onto a screen and that creates the image, where a monitor/tv is a flat screen. So what if we replace the screen for our model.

Now you can project whatever you want on your model

But what about taking it one step further
Open up Photoshop and go to full screen mode (F)
Now let the model sit in one location and start painting on the model with your brush.
If you need more space zoom out on the projector (or move the projector further away).
You can chose to keep the images sharp but you can also defocus the projector of course.

Using a projector is awesome for effects you can never achieve any other way.
You do have to take into account that most projectors are not very bright, so expect to shoot on higher ISO’s.
When using the projector chose the vibrant, or presentation mode, this often outputs a lot more light, but you sacrifice a lot in color accuracy which in this case…. is no problem at all.

Model : Janaika
This was shot during a workshop.
Do you also want to visit a workshop visit www.fotografie-workshops.nl

Using a gobo projector with different colors

Its fun

To experiment with different solutions to get cool looks.
As you probably know I’m a big fan of focussed light sources, and the gobo projector is of course an awesome light shaper that does this and so much more.
The Gobo projector I’m using is the Westcott Lindsay Adler version.


Standard it’s delivered with a 135mm lens but I’m mostly using a 50mm 1.8 lens on it to get the light spread out more over a larger area.

With this Gobo projector you can choose to just use the blades to create shapes and really focus the light with one small beam on your model, or you can use the gobos themselves, small metal plates with patterns that you place between the lens and your lightsource. The cool thing about a gobo projector is that with the lens you can focus the patterns on y0ur subject or background.

Adding some colors

Normally you use the gobos as they are, but during the workshops I love to experiment so for this setup I’m using two gels I put on the gobo.
As you can see it still needs some work, but the effect is very cool
You do have to take into account that this will REALLY eat your light, a gobo projector is not very bright, but when adding gels into the game means that in this case I’m shooting at slightly higher ISO’s than I would normally use with strobes. Luckily the Geekoto strobes I’m using can also be turned down to a really low output, meaning they mix perfectly with the projector.

Model : Felisa

Adding some smoke made the image complete for me.
But also always walk around your model and try different positions, it has happend countless times during workshops, events and commercial jobs, me and the client think one angle or position is best, and I always try to include some different positions at the end of the session, and in some cases I actually prefer the alternatives. So always make sure you shoot from as many different positions and angles as time and space allows.


Adding something really special to a photoshoot with a gobo projector

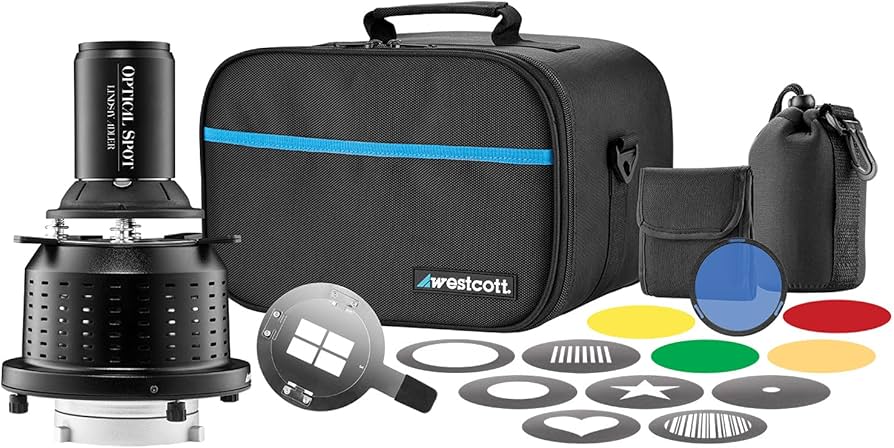
I love my Westcott gobo projector

I love the old fashioned photography, think about photographers like George Hurrell or for example the world famous Harcourt studios.
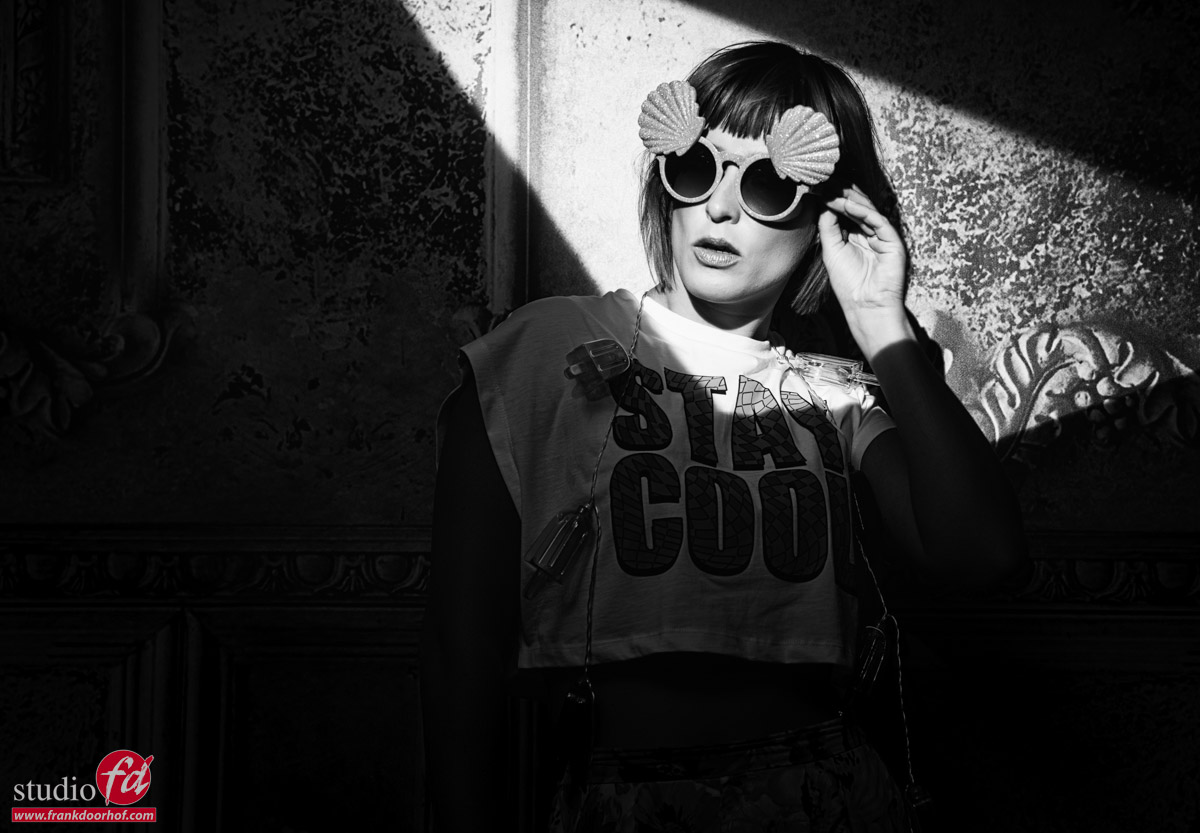
In the 30’s and 40’s you often saw harsh light combined with hard shadows, this can be for example a plant, branches, chair, ladder or whatever you want to project on the background.

Quick tip.
If you want really hard shadows, make sure your lightsource is far away from the object that will cast the shadow, and the object is as close to the background as possible. The further you move the light away the harder the edge transfer (shadow)

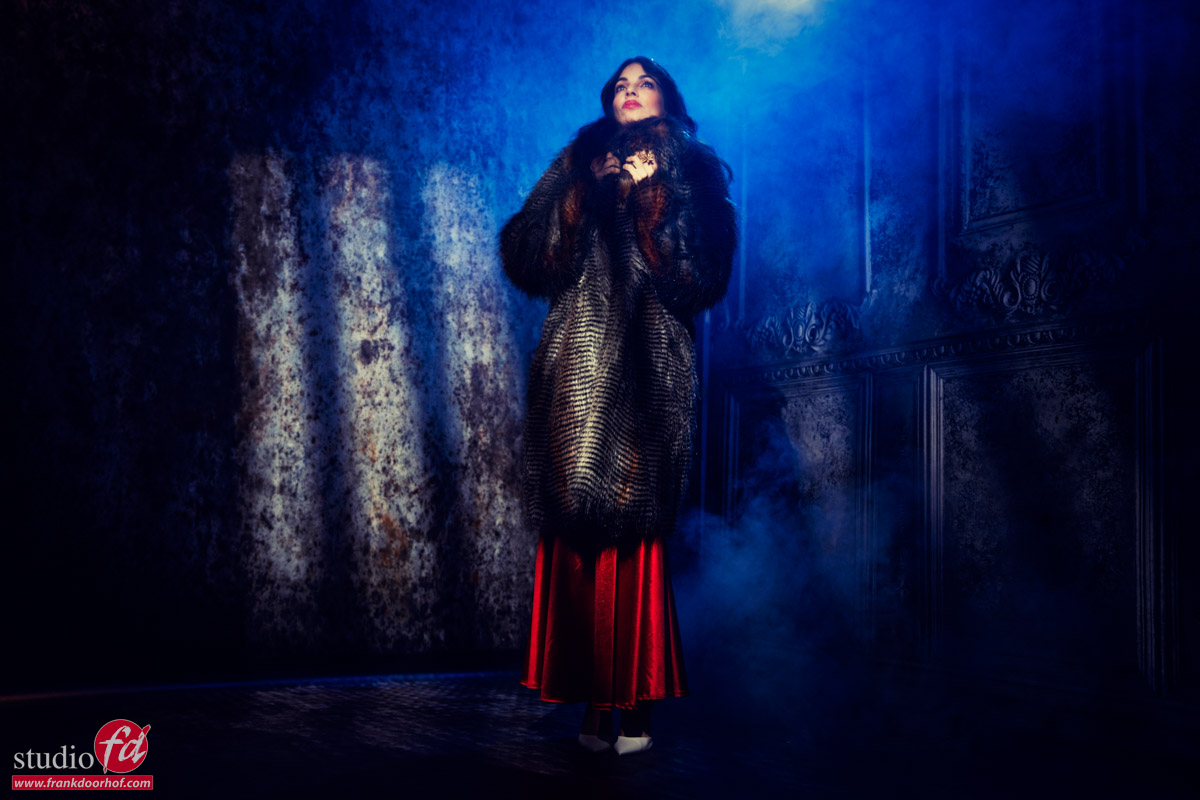
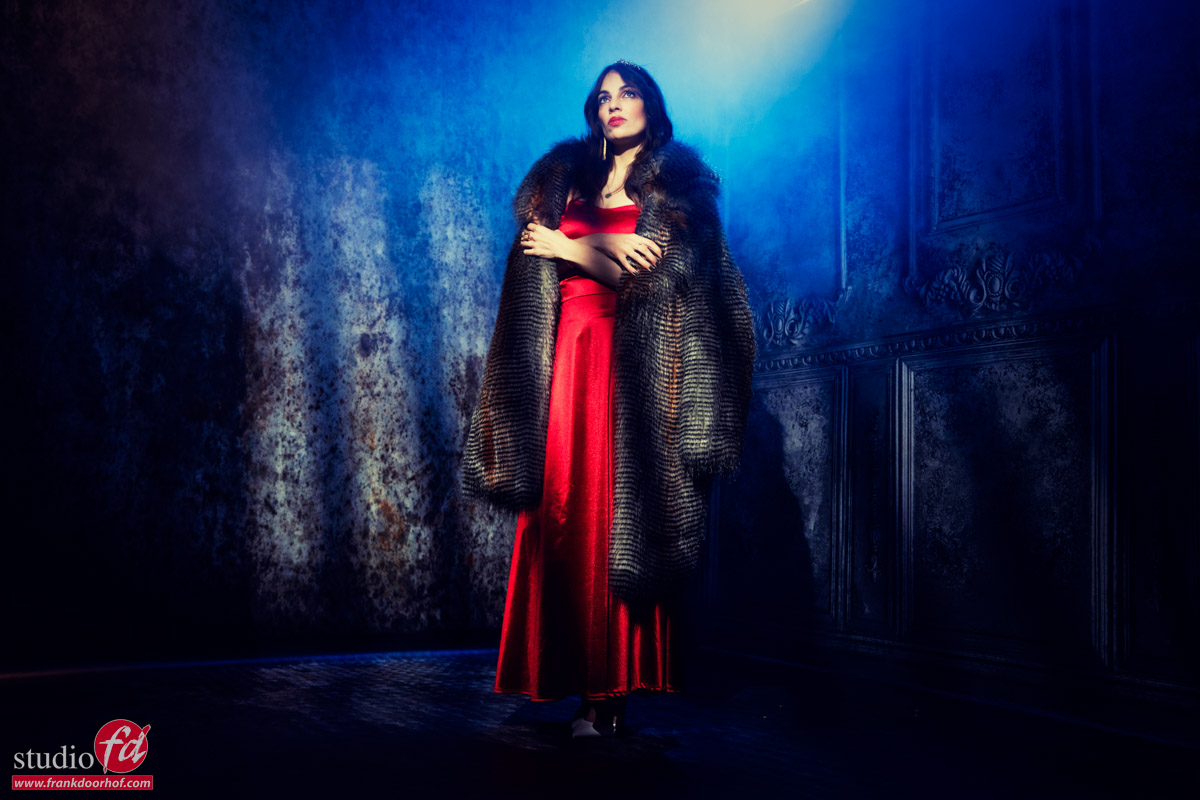
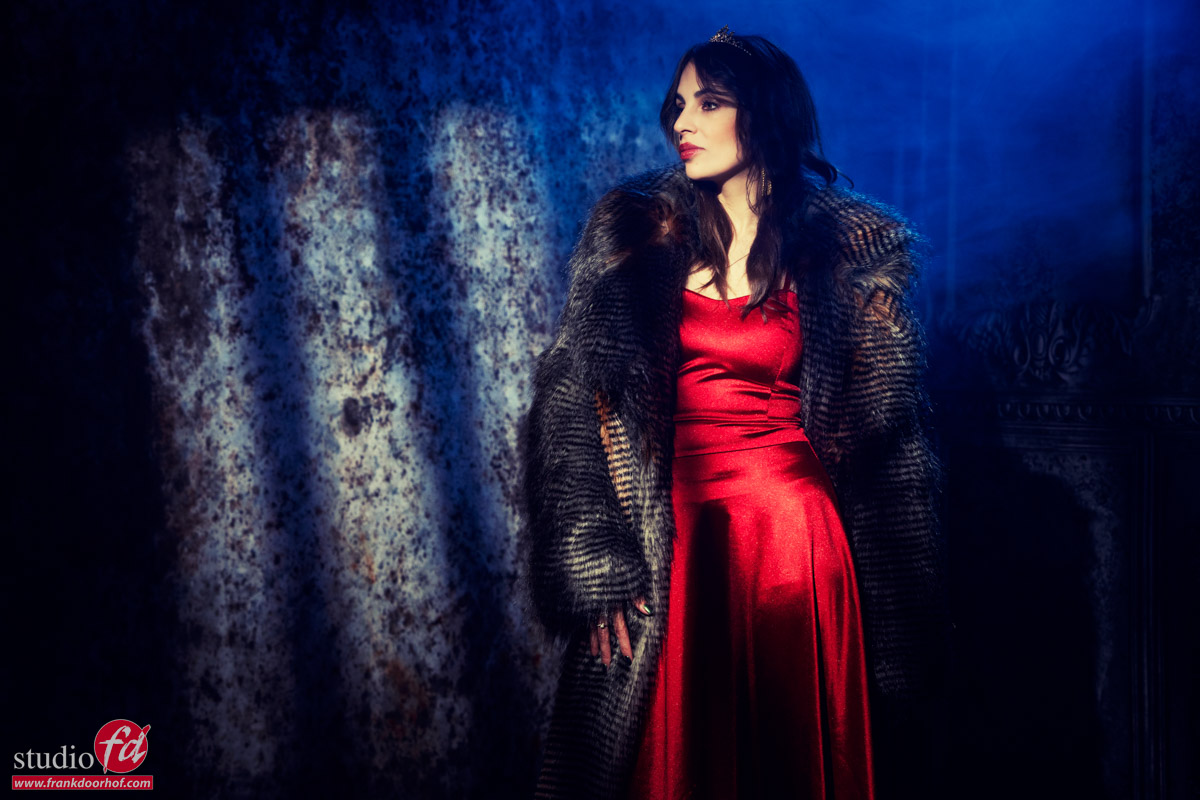
But although those shadows are nice I love to go one step further, and this is where a gobo projector comes in.
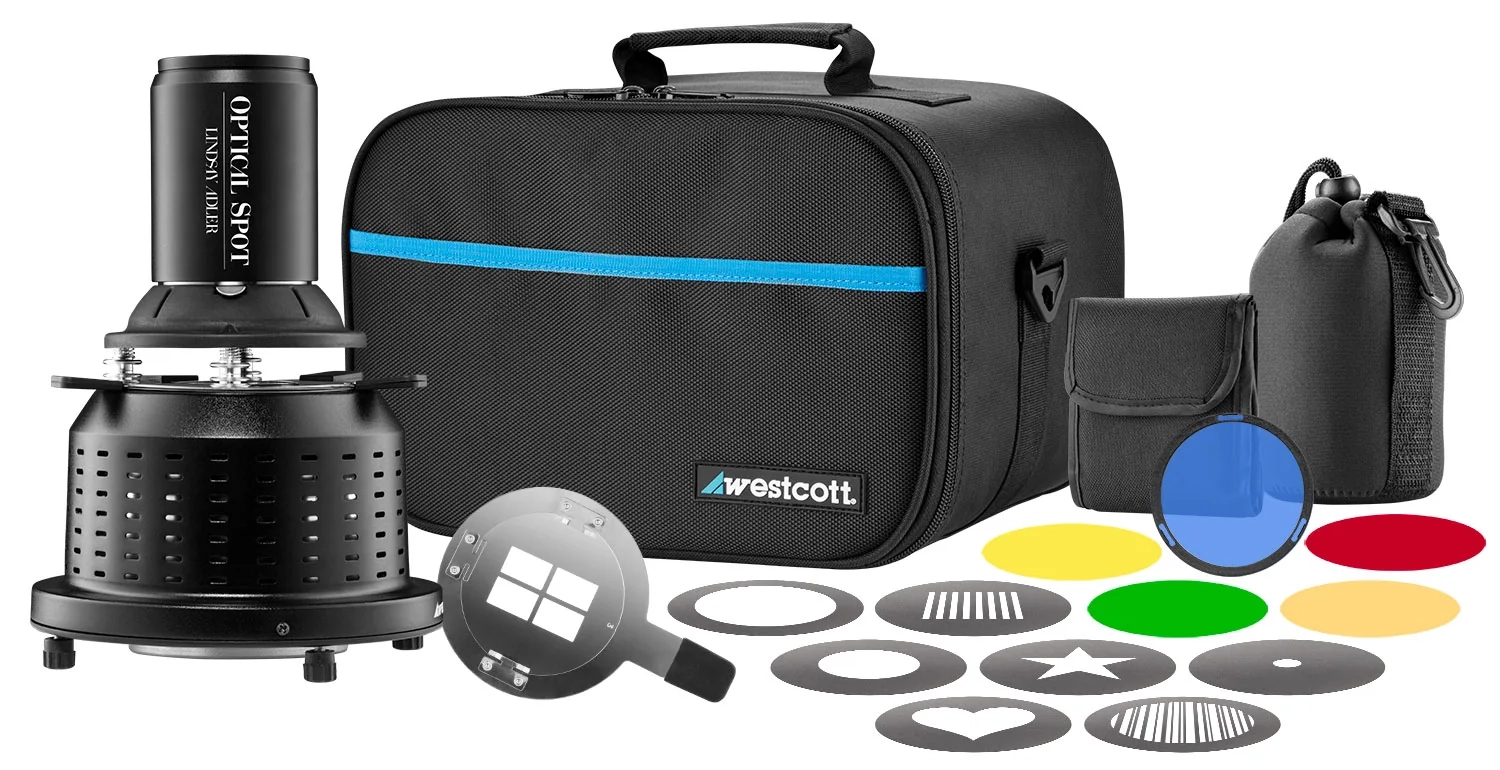
As mentioned I’m using the Westcott Lindsay Adler version, but in essence they all work the same.
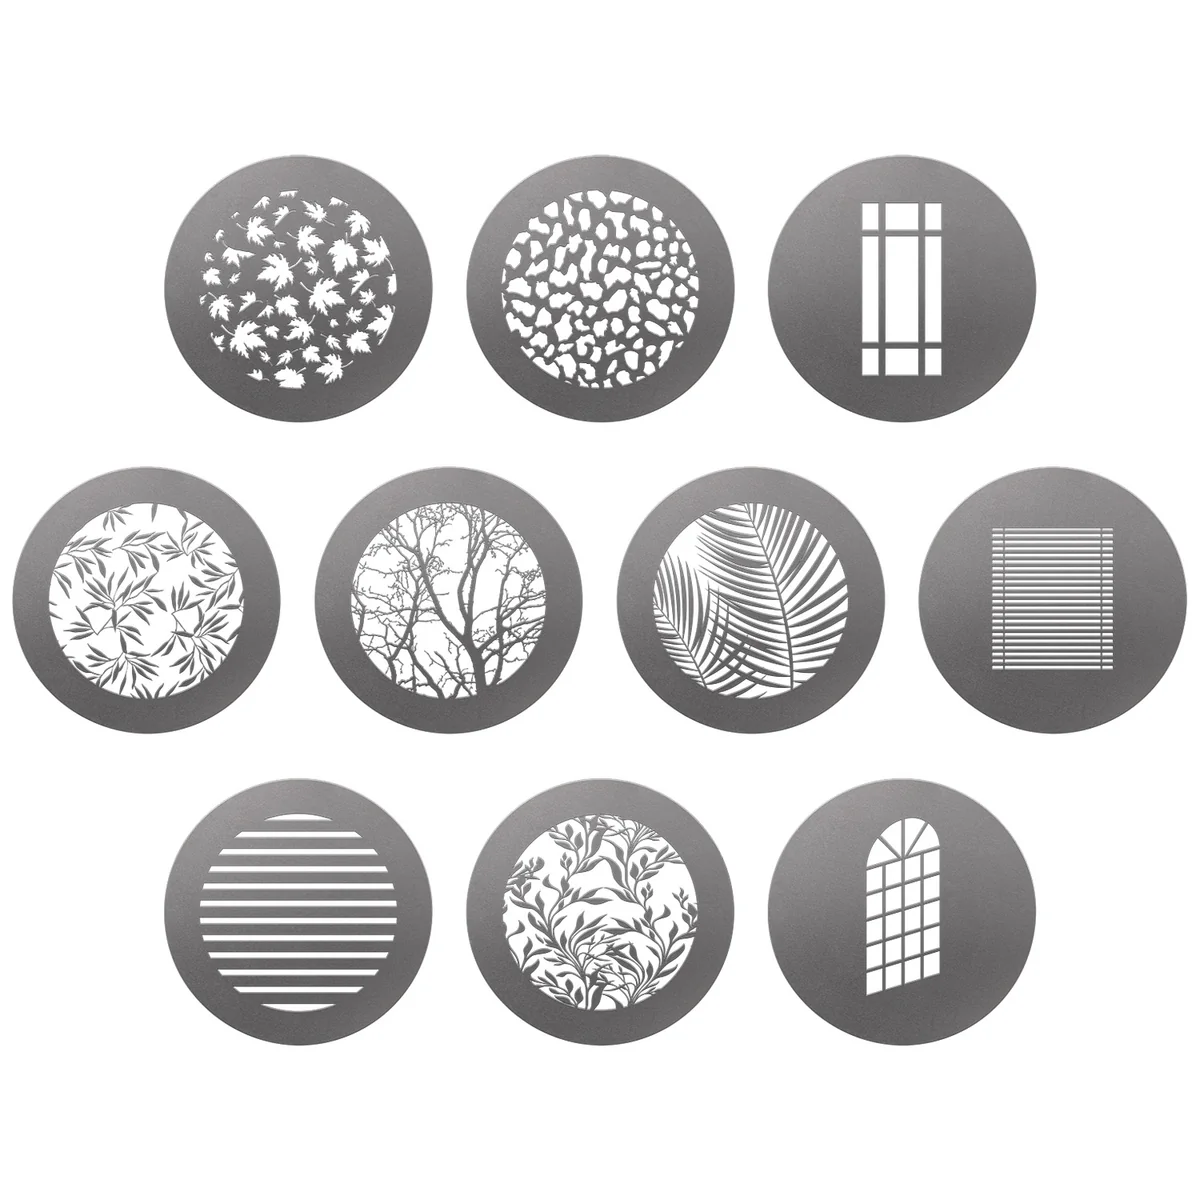
You mount the projector to your strobe and you can place different gobo’s (metal discs) between a lens (in my case a Canon mount lens) and the strobe, by focussing the lens you can create a sharper or softer pattern on your subject/set. It’s an awesome light modifier to create stunning images.

You can use the projector on your model to create very sharp areas of light or to light the whole set and use fill in lights for extra detail or mood.
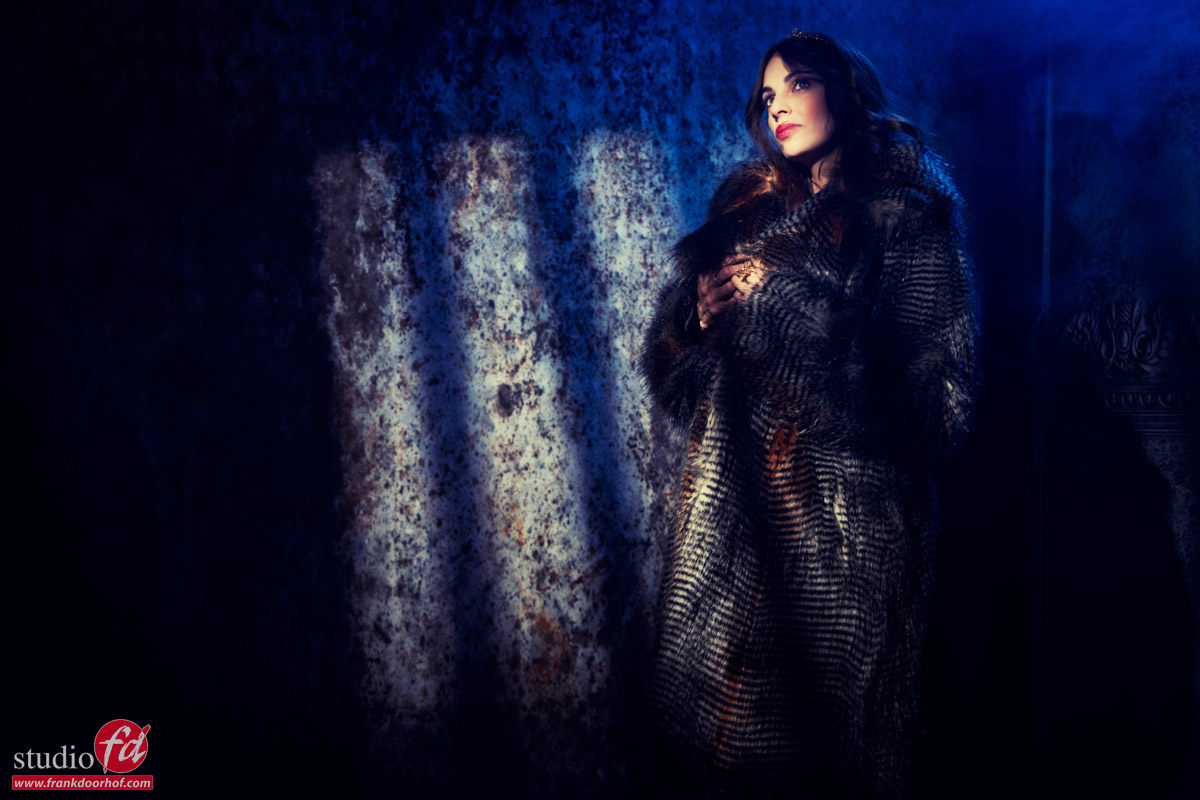
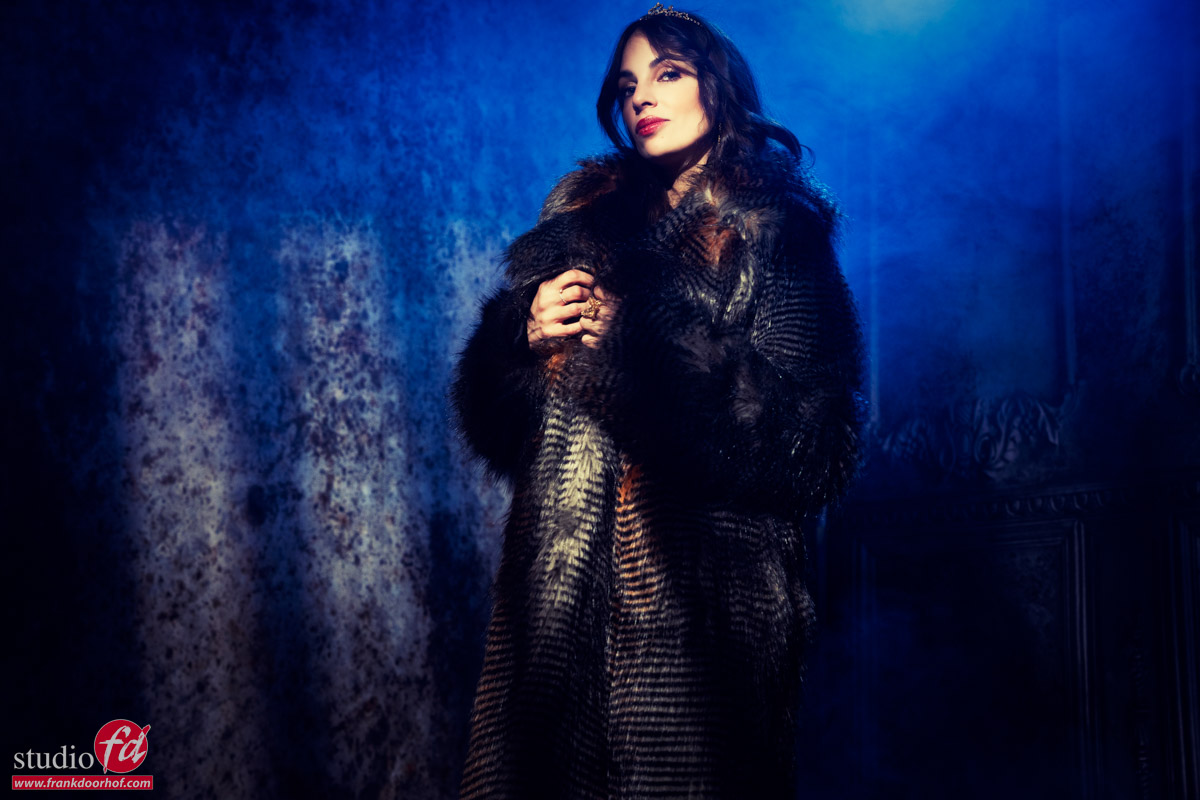
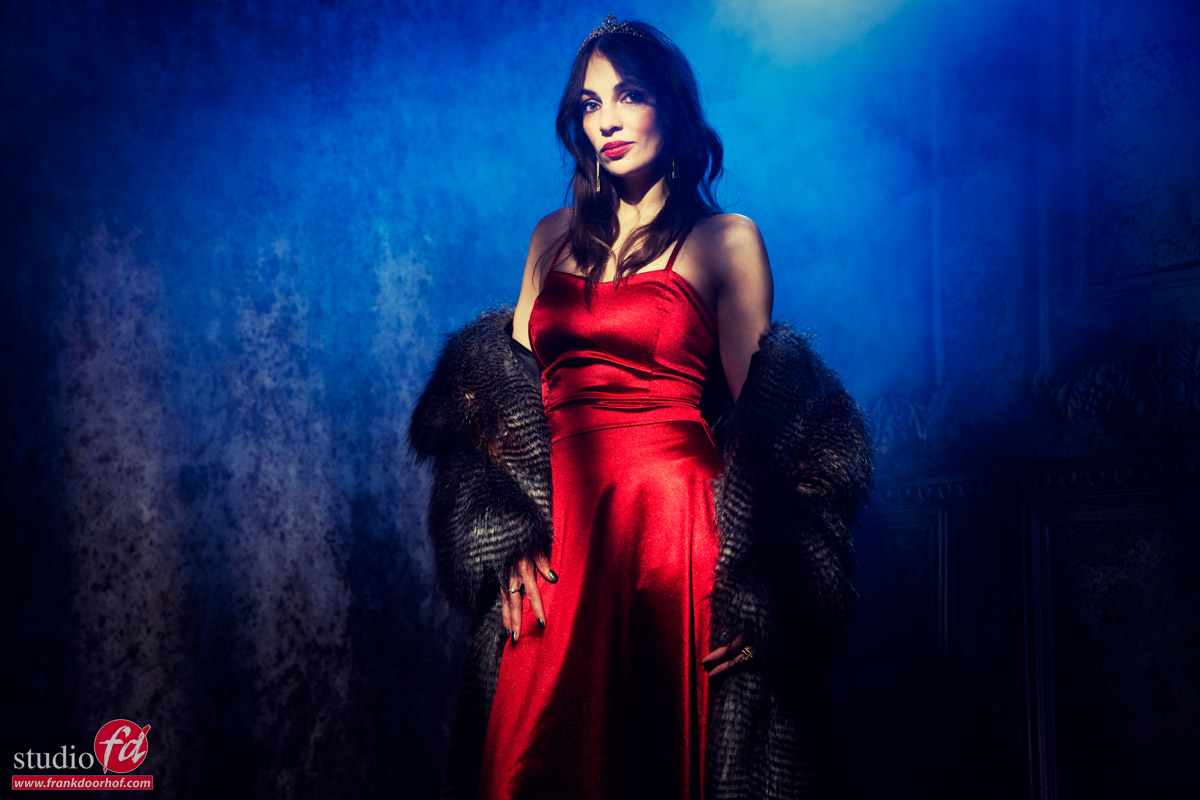
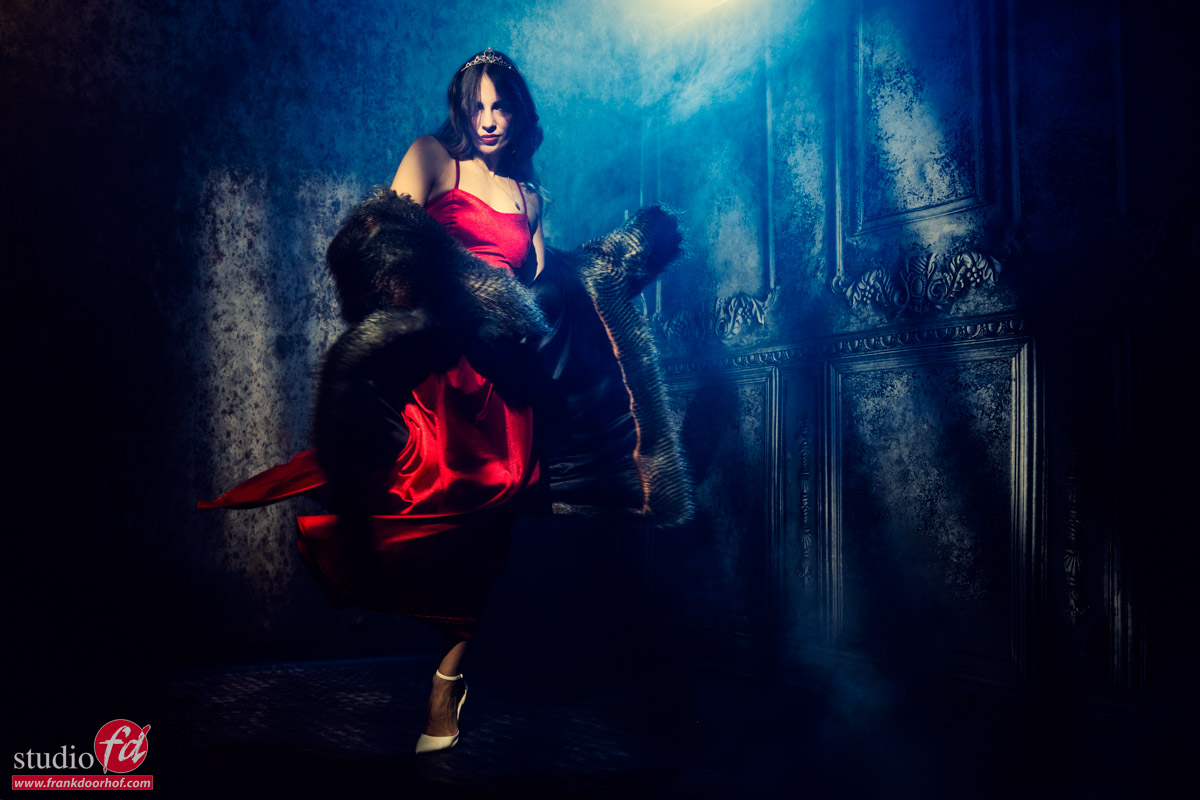
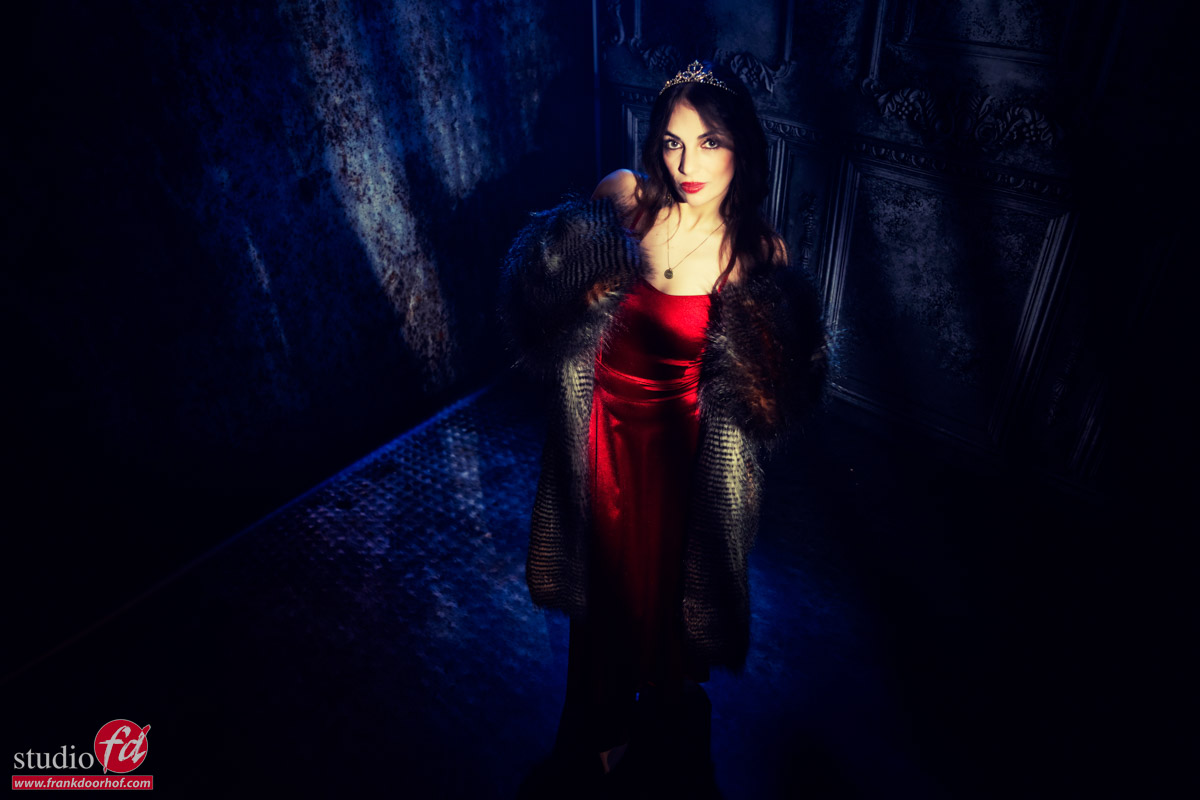
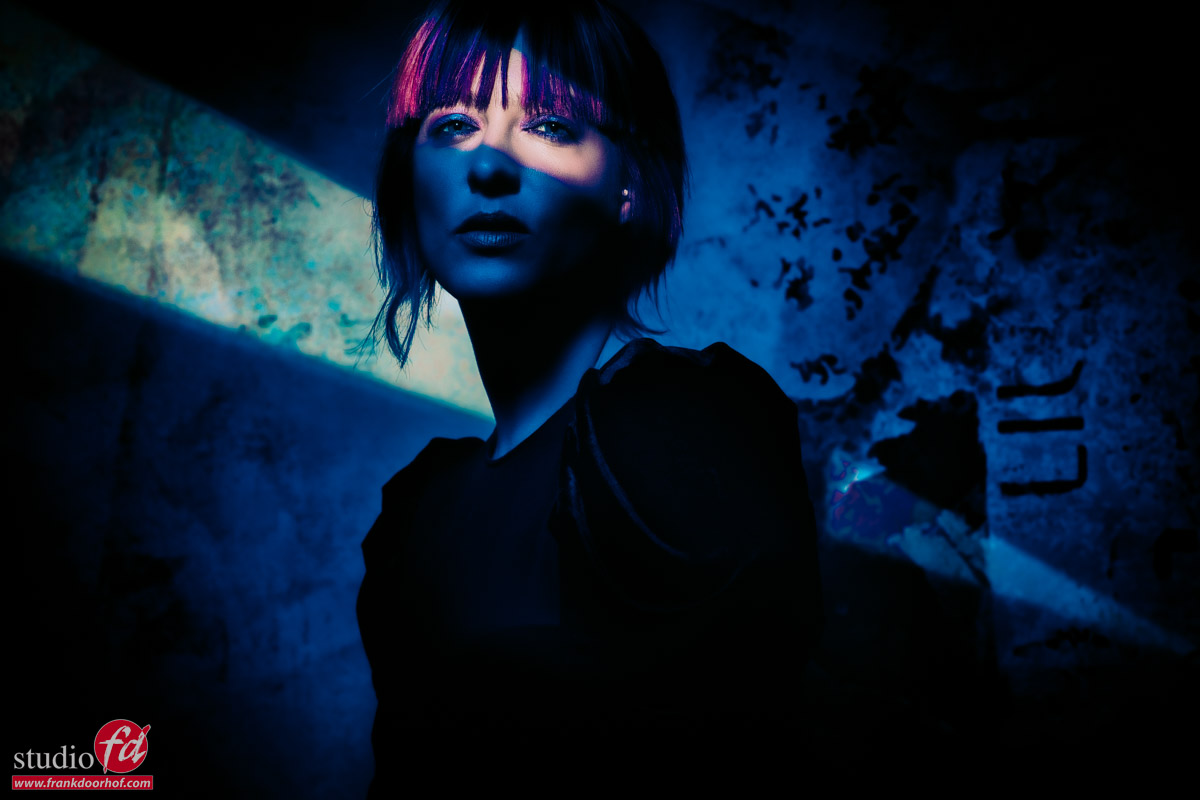
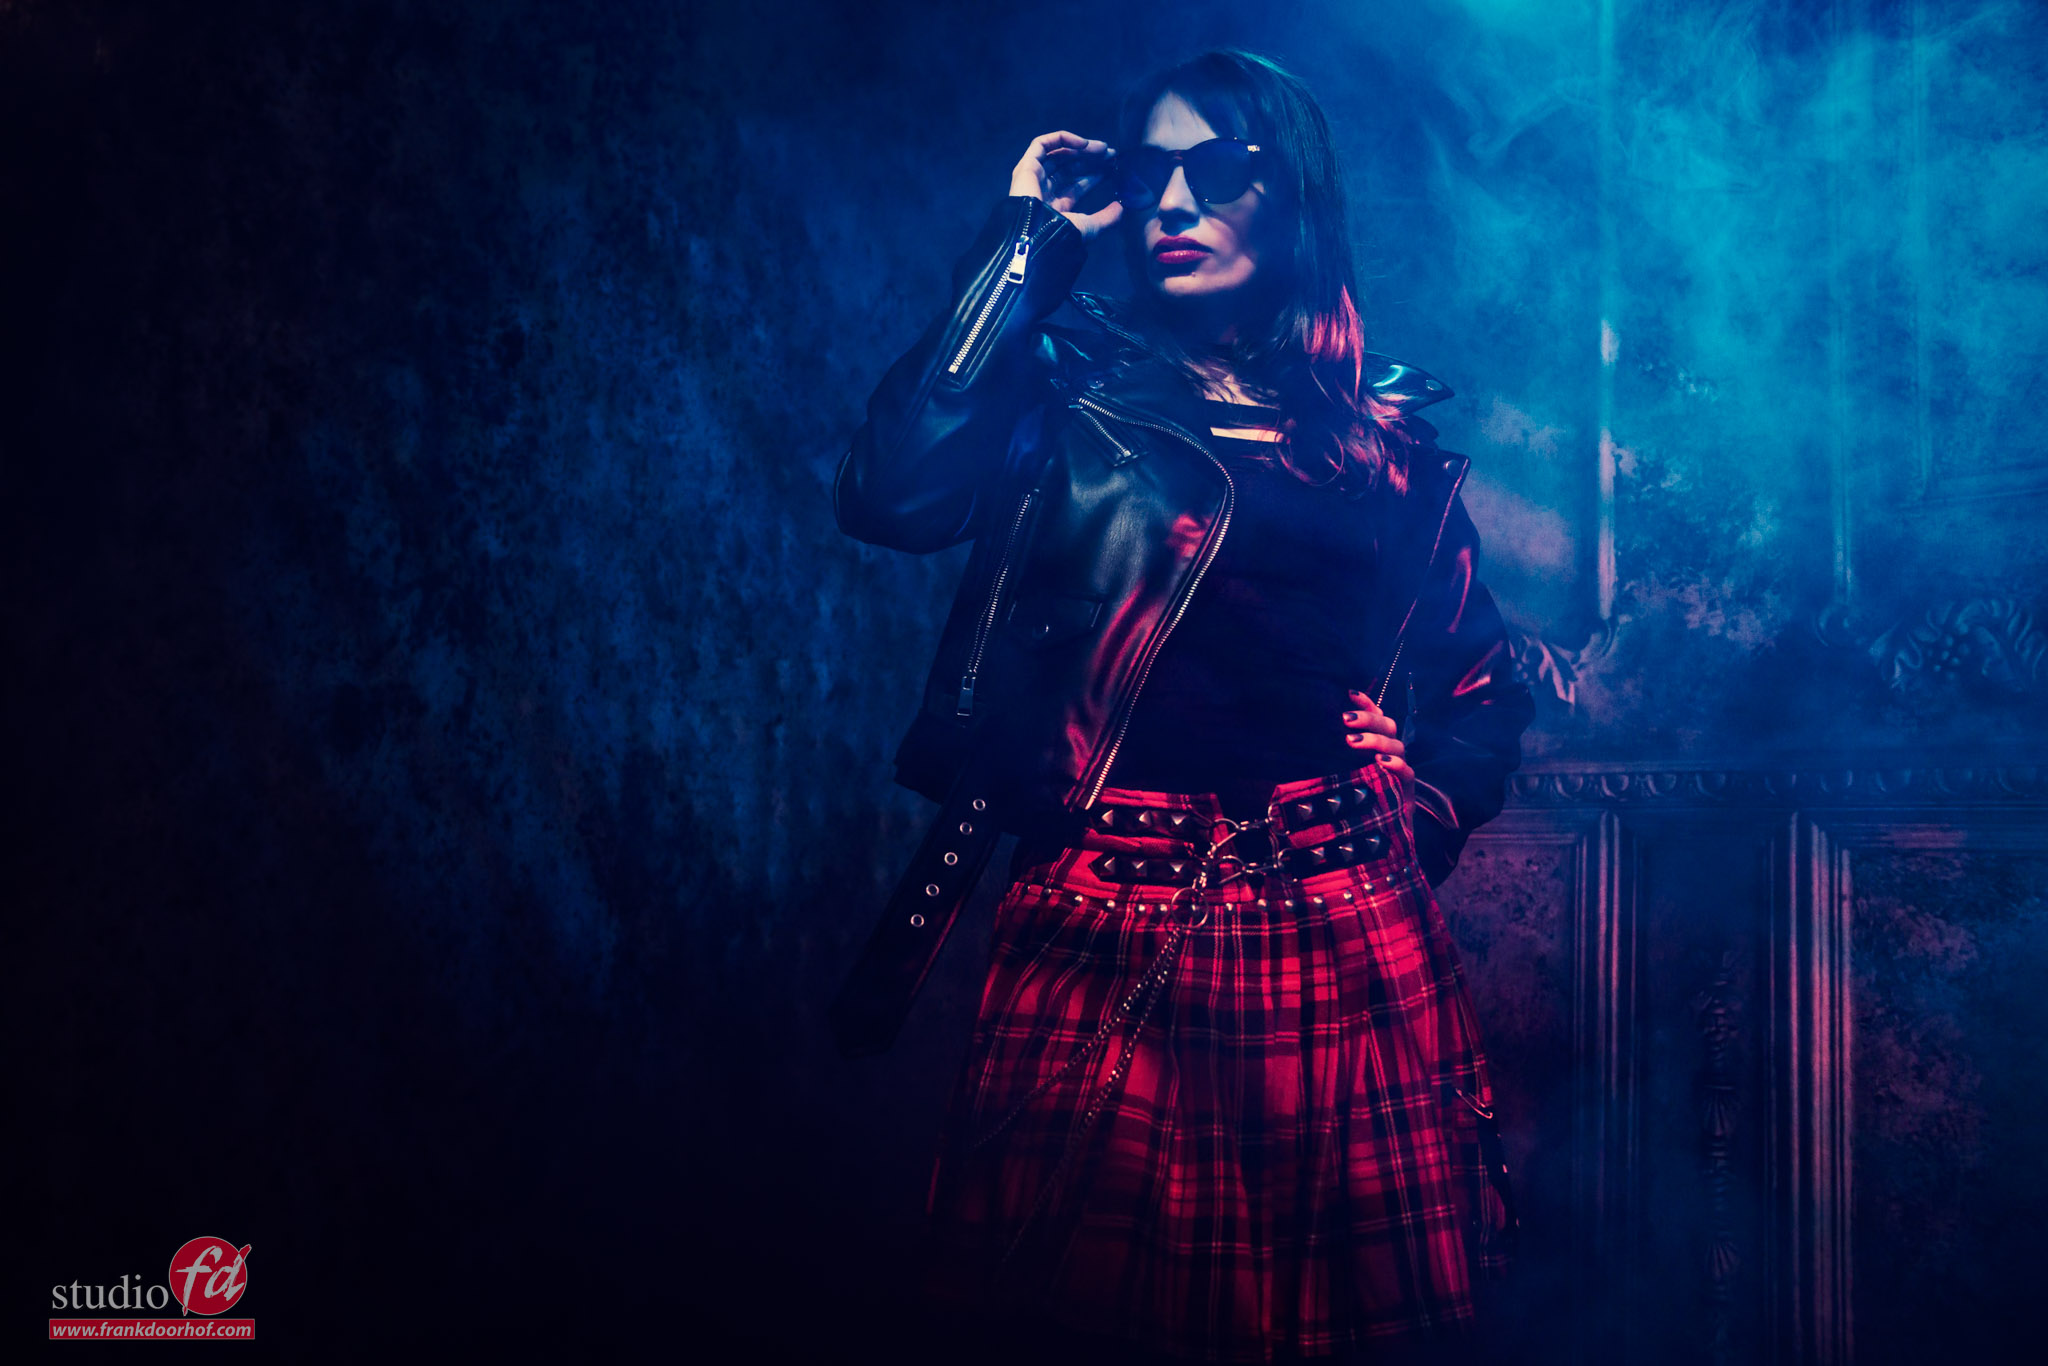
During a recent workshop with Felisa I used the projector exactly for that.

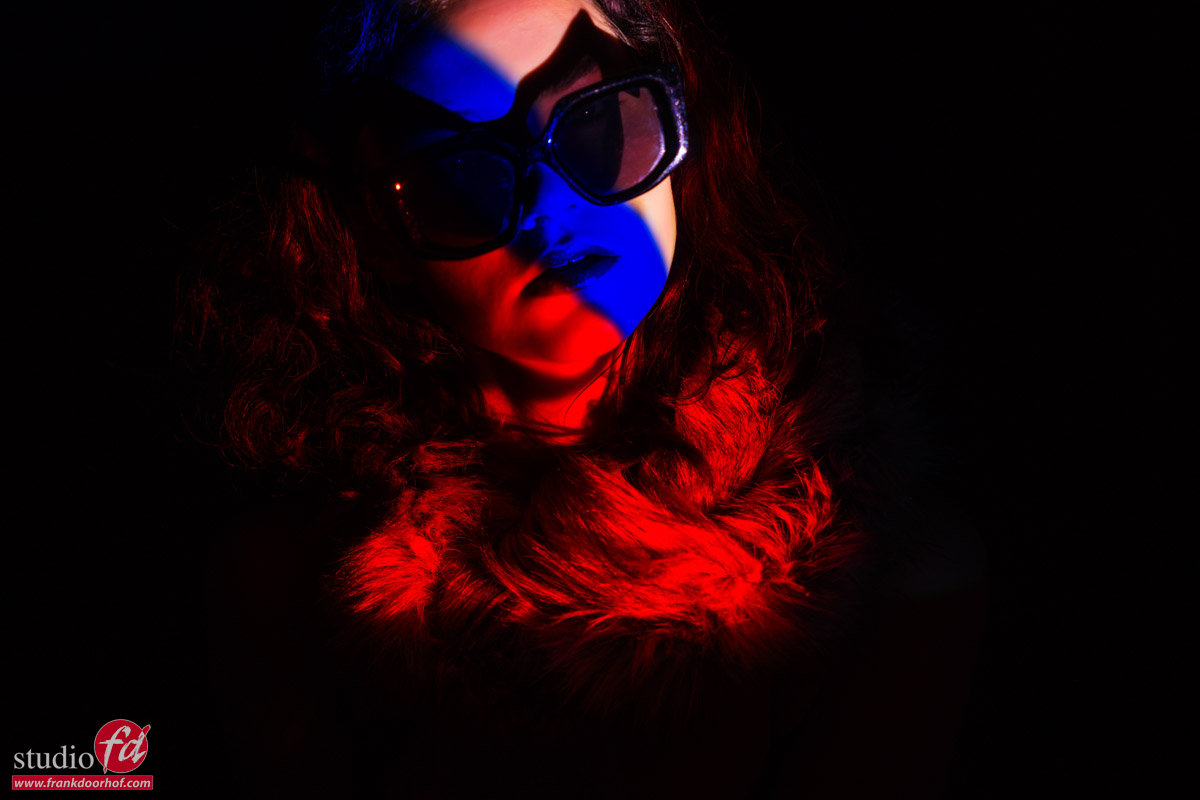
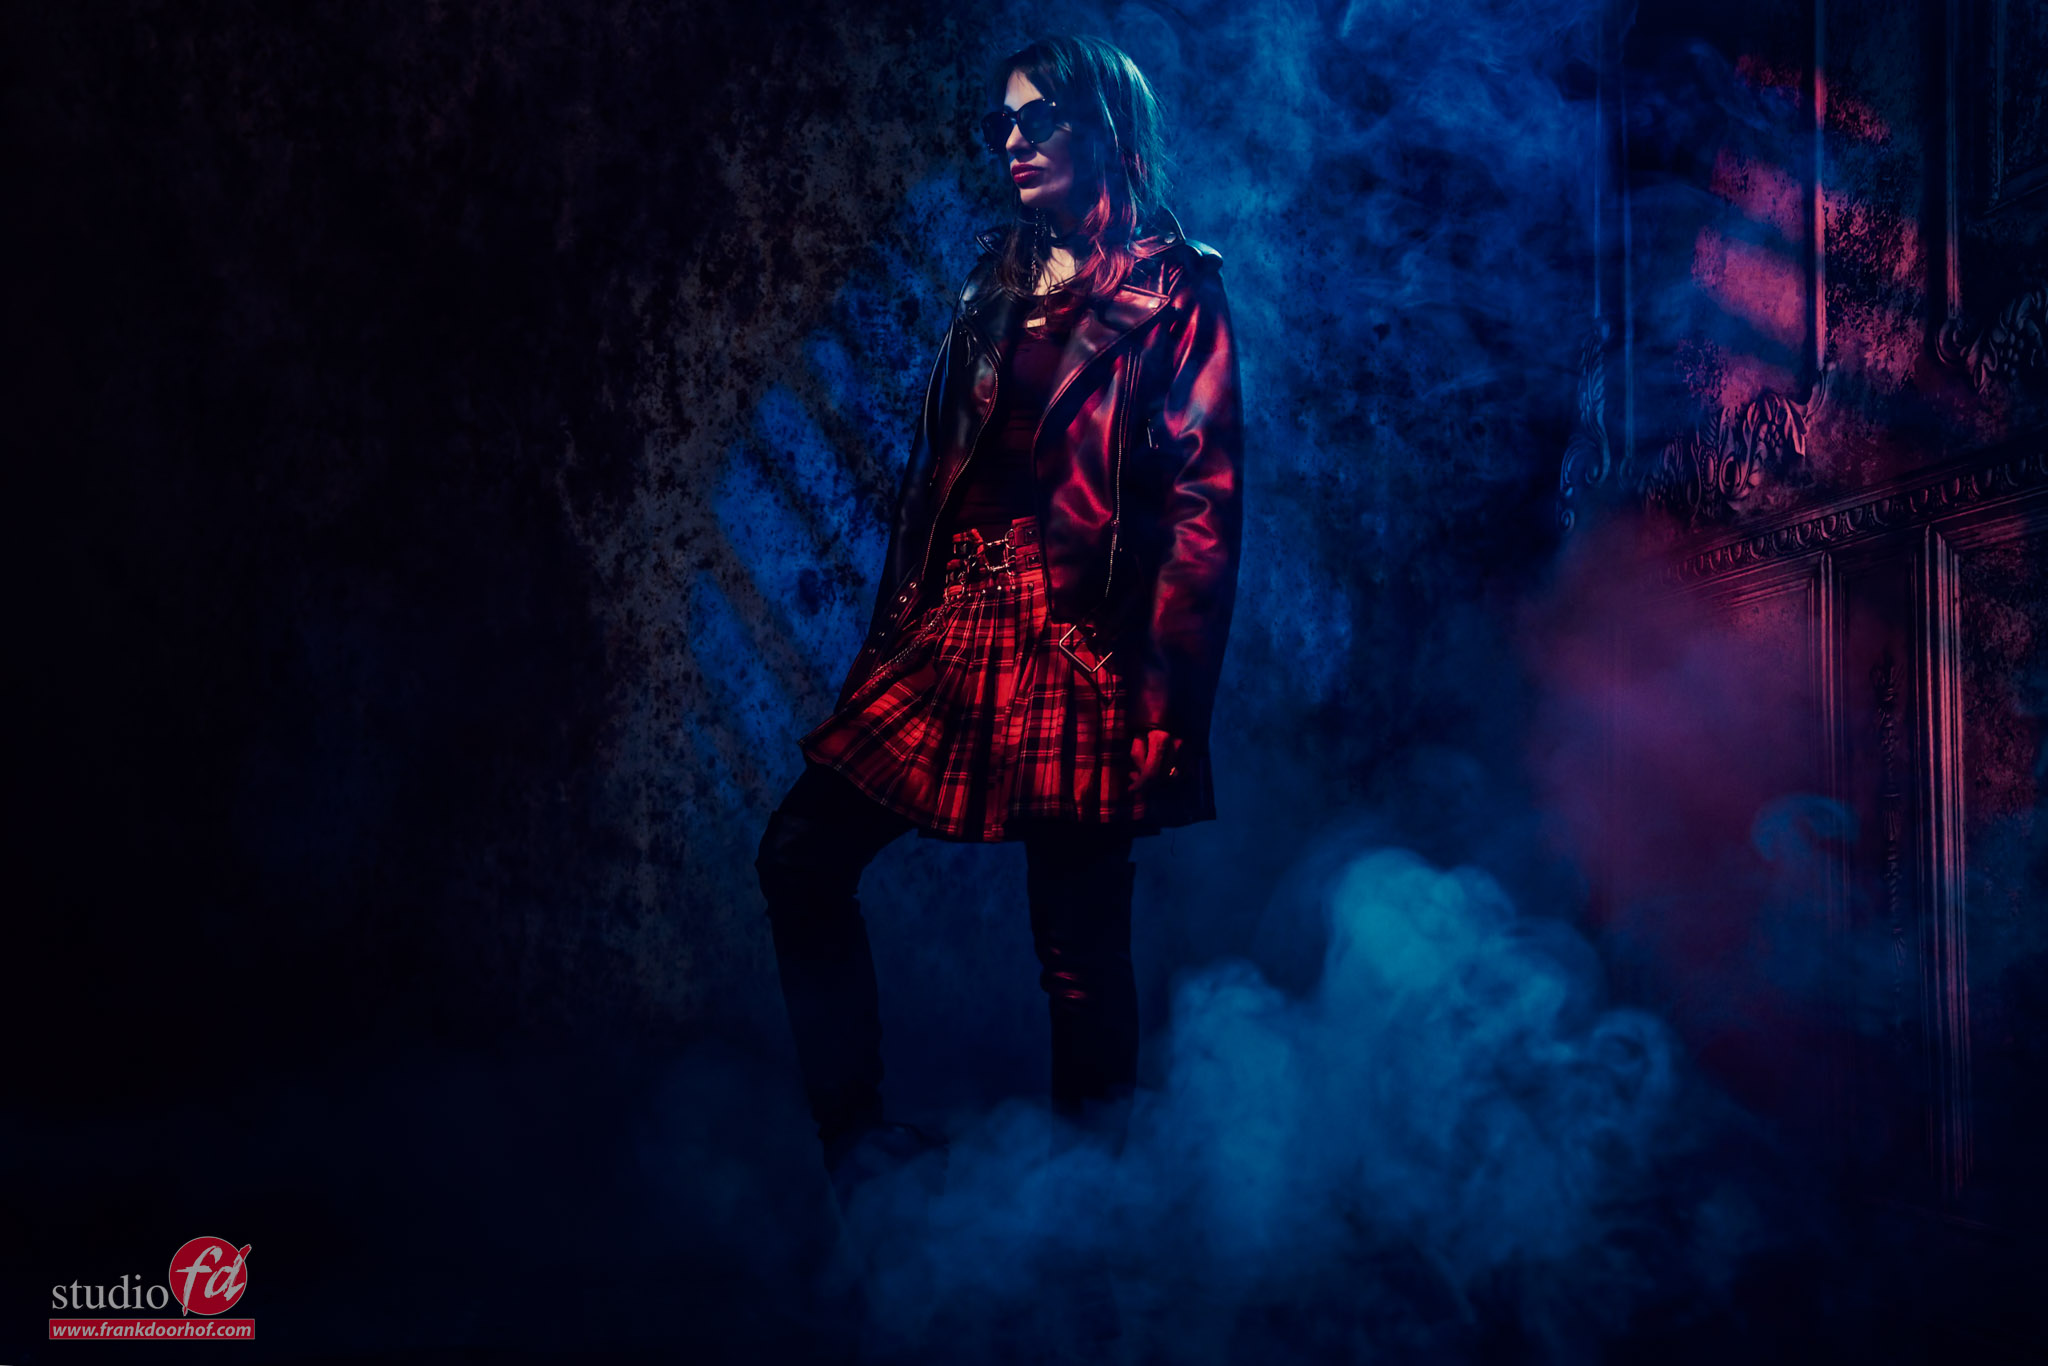
In these images I’m using the projector with a standard gobo with lines on our Geekoto GT400 aimed at Felissa, for the accent light I’m using one Geekoto GT250 with the Rogue Magnetic system and a blue gel. By adding a bit of smoke the blue nicely smeared out over the set.

We build a small set by using 2 of our Clickbackdrops backgrounds.
Of course the fur is fake.

A few tips for the Gobo projector

On the Westcott you can mount lenses with the Canon mount.
The lens that was delivered with my set was for me too long and made it impossible to throw the light over a complete set, it does work great for portraits.
So when you want to start using a gobo projector I would advise to get some extra lenses.
Now this is where you have to be careful.
The projector eats light, so make sure that when you get a lens you get the widest possible aperture you can afford, the nice thing is that you don’t need to get a super high quality lens, you could for example use old M42 lenses with a Canon convertor and make it possible to experiment with different lenses.

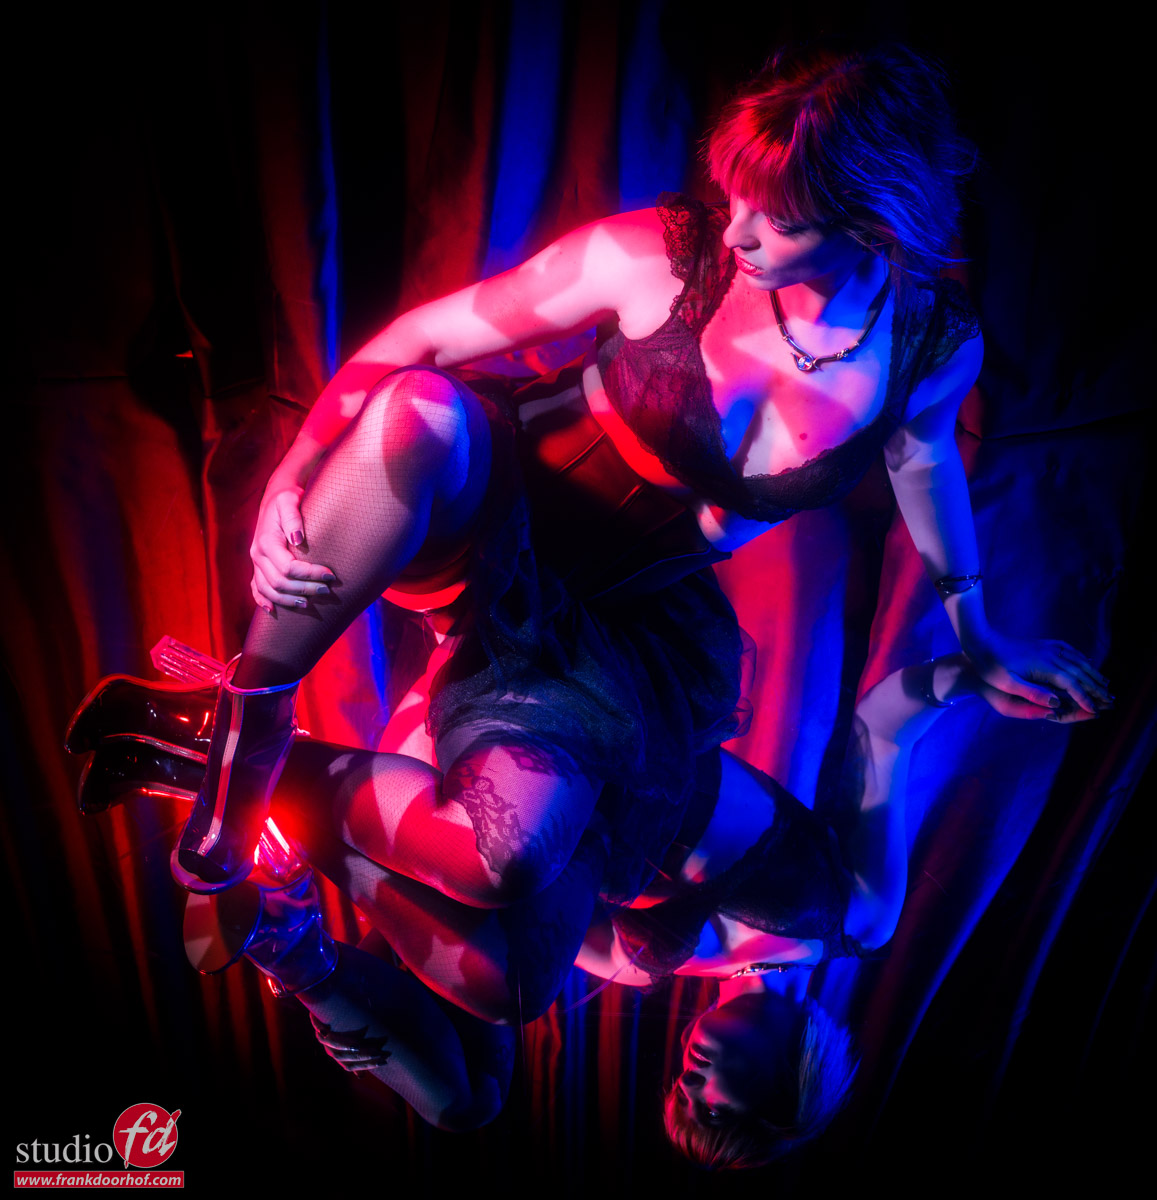
One of the things I love about the Westcott version is that you don’t need to use the gobos, but you can also use the blades to get some really striking patterns on your model.

And you can of course combine it with some colors for extra stunning effects.

Want to visit one of our workshops?
visit www.fotografie-workshops.nl for the new agenda.
The workshops are in Dutch, but if you let us know a few weeks in advance we can switch the to English.