Tag Archive for: landscape

Let your images breath

The devil is in the details

One of the stories I often tell during workshops is one where I almost disappointed my model/stylist Nadine.
She had this awesome outfit and great boots to complement the outfit.
I took some great shots, but whatever I tried everything we shot with the boots in the frame was …. terrible.
This is the moment I just realized, sometimes you just can’t get it all in the way you want. We are now many years later and I’m pretty sure we could pull it off now, and recently I got my change to test it.

When Nadine is our model during the workshops/events it’s always a surprise what she thinks off.
Her styling is always stunning and complete, and even when we don’t shoot full body her opinion (and I agree) is that to get into character you need the full outfit, PLUS you never know.

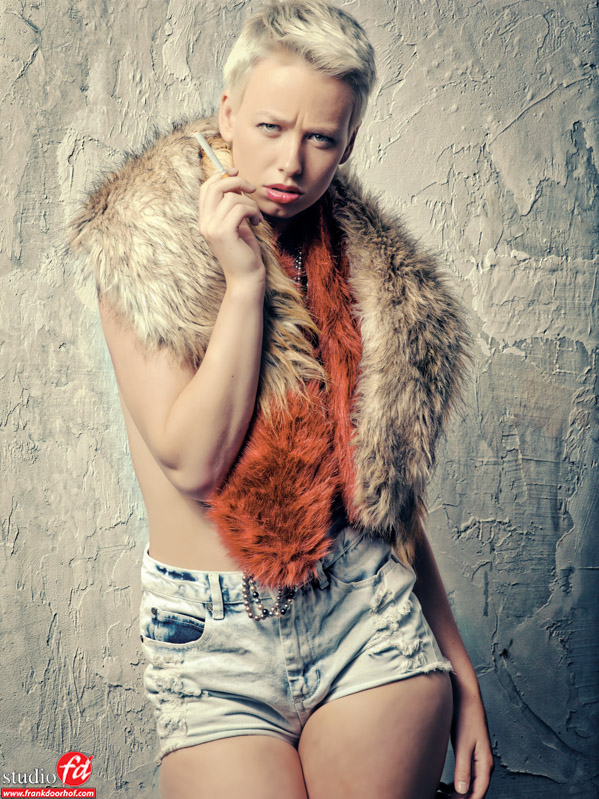
When Nadine came on the set with this outfit I immediately knew I wanted the shoes in the shot.
Now we could just shot it full body, which I did 😀
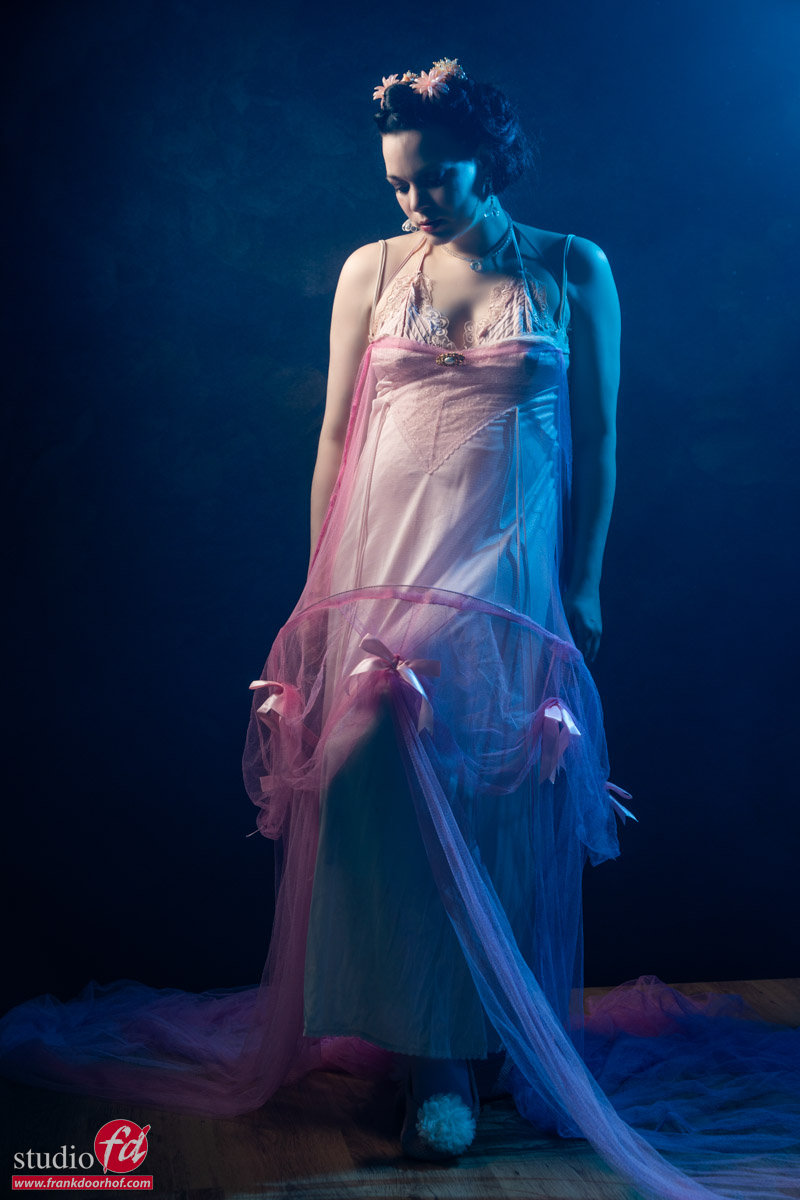
It doesn’t breath

I know it is a maybe a weird title but for me a shot like this doesn’t work.
Yes it looks nice, love the outfit and the pose, also no problems with the lighting (well done Frank :D), but…. it doesn’t breath.

There is something in photography called “negative space” I would love to rename this to “positive space” simply put because it’s a vital part of the shot to make it “breath”.
Now I could just turn the camera from portrait mode to landscape mode and place Nadine somewhere on the Rule of 3rds and be done with it, but than the “negative space” doesn’t really add something, so we have to convert it to “positive space”.

From a recent photoshoot we still had some balloons left, so we added those on the floor to create some depth (I added a few in Photoshop).
And because we LOVE to see shapes I asked Nadine to lift her leg at 3 and extend the foot.
The reason we do this on 3 is because I always want to “see” the motion in the final shot. If you ask a model to KEEP a pose it will almost always look less natural than if you count down/up and let the model take the pose live.

As you can see this looks a lot better and more pleasing.

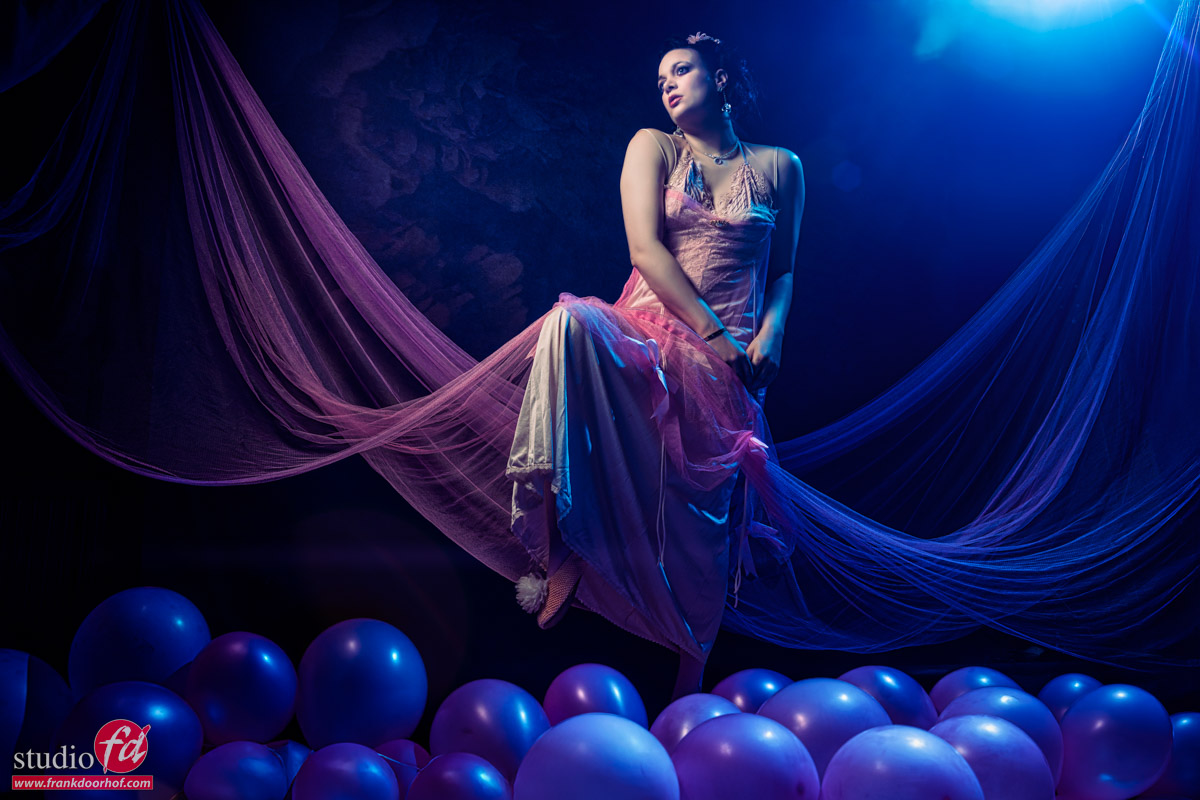
I now also have much more space for a proper vignette and some lens flares, plus we can now also see the beautiful parts of the dress we held up.

As you can see, switching from portrait mode to landscape mode on your camera can make a huge difference. I can highly recommend trying it out.

The workshops

During the workshops we talk about a lot more than just lighting setups.
We start the workshops with Q&A in which the attendees can ask any questions, some will be answered right away, but most will be incorporated into the workshop.
But besides lighting we also talk about composition, workflow, creativity, gear, retouching, working with models and a lot more.

Also want to visit one of the Dutch workshops, or events?
Check fotografie-workshops.nl for the agenda.
And don’t worry if you don’t speak Dutch, we can switch the workshops to English, or you can book a 1:1 workshop in our studio, or even online from your comfortable chair.


Some nature shots

What a lot of people maybe don’t know is that when I started with photography one of my biggest passions was animals and especially birds. But in todays world I also try some landscapes….. it’s a weird experience not shooting people for so long but it’s also a time to rethink everything, count your blessings and if possible just enjoy that you’re still able to do certain things.

But most of all, keep pushing yourself towards new things, or just keep learning/practicing.
Normally I would not post results like this, but in this time I think it’s worth it.
Enjoy.

New instructional video “A guide to Capture One 9 Pro”

We just released a brand new instructional video, and this is a LONG one.
With over 190 minutes of information it’s actually one of the longest we ever released, and the best thing… for a limited time only it’s priced at only 10.00 euros.


Often people forget the importance of the RAW developer and how much of a difference it can make on your final images, let alone what you can do in the RAW convertor as retouching. As soon as you open up Photoshop you are not working in the RAW convertor anymore so it’s vital to do as much as possible before that.

For years Capture One has been on the top of the list of best RAW convertors and not without a reason (of course), Capture One has many retouching and developing options that for some people will even make it possible to do the complete workflow within Capture One. 
 But that’s not all, in studio or location setups many photographers love to shoot tethered, and this is were Capture One in my opinion really shines as being rock solid and incredibly versatile.

When you first open up Capture One everything can look a bit…. frightening, especially when you are used to the industry standard Lightroom, but in all honestly the layout and options are actually very easy to learn if you get a little bit of help, and that’s where this video comes in.

In over 3 hours (190 minutes) I walk you through the way that I use Capture One.
You will find chapters on the tools, tethered shooting, retouching samples and workflow.
All videos are kept as short as possible and are very easy to understand.

Topics include :

BW modes, integration with Lightroom/Photoshop and plugins, exporting recipes, styles/looks, synchronizing, using local adjustments and layers, advanced color adjustments, advanced and simple skin retouching, masking possibilities, folder structures, overlays, watermarks, customizing the look and layout, HDR from one image, making images pop, using processing in batch, all the tools you need to know explained, auto masking tips, skin tone smoothing, tricks with the skin tone smoothing for skies, removing spots and dust, using healing for removing hair and blemishes, using capture pilot in a tethered workflow, RAW developing explained, lens correction, adding grain for a great look and evening out retouches, noise reduction, stacking effects in layers and styles, sorting and rating in the browser, creating your personal layout and much much more….

If you want to get the best out of Capture One in your workflow and setup a great integration with Lightroom this is without a doubt the best way to start. All videos are high resolution captures and the standard video is 4K so you can see all the settings and details the best way possible. The video is available now via www.frankdoorhof.com/videos

I’m 100% sure you are gonna love this one.


Working with portrait or landscape mode

Composition is one of the things that is always very important in a shoot, but what is the perfect composition?
Well to be honest… there is no perfect composition.
Of course there are those “rules” like the rule of thirds but let’s be honest they just give you a “this will work” general rule of tumb, but it’s often not the most interesting shot possible. In my opinion it’s incredibly important to play with the way you shoot.


Take for example these two shots.
One is shot in the so called portrait mode.
It draws all the attention to the model and to be honest it looks pretty nice.

Lenaa Juni 20 2014 64 1

However as soon as you change to landscape mode for me the whole image gets way more interesting.

Read more