Frank Doorhof
  • Blog (articles)
  • Rent our studio space
  • MAIN SHOP
    • MAIN SHOP
      • Orders
      • Account details
      • Downloads
      • Addresses
      • Lost password
      • Cart
      • Checkout
      • Terms webshop
      • Return policy
      • Privacy Policy
      • Privacy Statement in3. Dutch customers only. When you want to pay in 3 parts
  • IQwire Tether Cables
  • Rogue Modifiers
  • Geekoto Flash and Modifiers
  • Platypod
  • Click Backdrops
  • PORTFOLIO
  • Learning with Frank
    • Dutch workshop agenda
    • Workshops
    • A Year With Frank
    • Online 1:1 workshops
    • 1:1 workshops in English
    • Portfolio review by Frank Doorhof
    • Patreon
  • Support our work
  • Merchandise
  • Digital Classroom LIVE
  • Our YouTube channel
  • Biography Frank Doorhof
  • Services
  • Discounts etc
  • I need help
  • Menu Menu
  • Shopping Cart Shopping Cart
    0Shopping Cart
  • Link to Facebook
  • Link to X
  • Link to Youtube
  • Link to WhatsApp

Tag Archive for: editing

Speed up your workflow with Reblum

24-04-2026/in blog, Reviews/by Frank Doorhof

Skin retouching has always been “a thing.”

This blog is about Skin retouching with Reblum. Ever since I started with model photography, one of the hottest topics has been skin retouching.
Let’s first talk about why you should do it and how Reblum comes into the picture.
Because we didn’t need it with film… right?

Well, not really.
First of all, when people only used film in most beauty shots. Filters were used to make the skin glow, and thus make it look just like in the movies, nice and soft.
And also remember that with film, the surface never was 100% straight. Focus was never 100% accurate, and the film itself didn’t have that insane 100% artificial build that film had.
With digital, we have insane quality in lenses. 60MP sensors that now focus on the sensor itself, so our images are razor sharp without any possible pitting for our models.

In other words, you won’t just see all the skin details; no, you will literally see stuff you don’t even see yourself in the mirror; the camera is ruthless.

But luckily, we don’t have to shoot with soft focus filters (you still can, of course).
In fact, I’m always shooting with a K&F Black diffusion filter. Which is awesome for backlighting and does give a very slight glow to skin; it’s hardly visible, and I mostly use it for smoother and larger lens flares.

Photoshop for skin retouching

I don’t remember the first versions of Photoshop (I did start with Lightroom 1.0), but Photoshop did change the world for Photography.
When I started with skin retouching, it was pure hell. It took hours when you wanted pro-quality. And it was just boring and repetitive work that you would rather not do.
If you ever hear someone say, “dodge and burn the skin,” it means literally going over every pore and taking them out with highlights and shadows to make sure you keep the original structure.

Later on, we all started to develop smarter ways to do skin retouching.
Photoshop got more filters, and in essence, it was possible to get an ok skin retouch that was good enough for the internet.
One of the disadvantages of the automated skin retouching plugins was that they didn’t really do a good job. It was often more like a Barbie doll than a human. And getting that detail back was often solved by adding a noise layer. When you look at some magazines from the 90s-2000s, you know what I mean.

I actually created a simple action in Photoshop to bring detail back in the skin, but it’s not the real detail.
So, is there a perfect solution?

The perfect solution

Like with almost everything (except, of course, my wife), there is no perfection in life.
And that also goes for skin retouching.
Over the years, I’ve tried several solutions, and some I really liked, but most were slow, changed my whole model (even before AI), or just didn’t work on high-resolution images.

Nowadays, I mostly use Luminar NEO, which does a great job in most cases, and you can even stack effects.
If you are looking for an all-around solution for looks, slight retouch work, portrait work, and a lot more, Luminar NEO is one I can highly recommend.
However, it has one huge drawback for me. I love using presets and that is the Achilles heel; even on my M4 Pro MBP, it takes a while to load all my presets.
But don’t let that hold you back, it’s still one of the best all-round solutions.

Enter Reblum for skin retouching

I love the expression “keep it simple, stupid.”
Or the Steve Jobs approach, “one button is already one too many.” Well, ok, he didn’t say it like that, but you know what I mean.

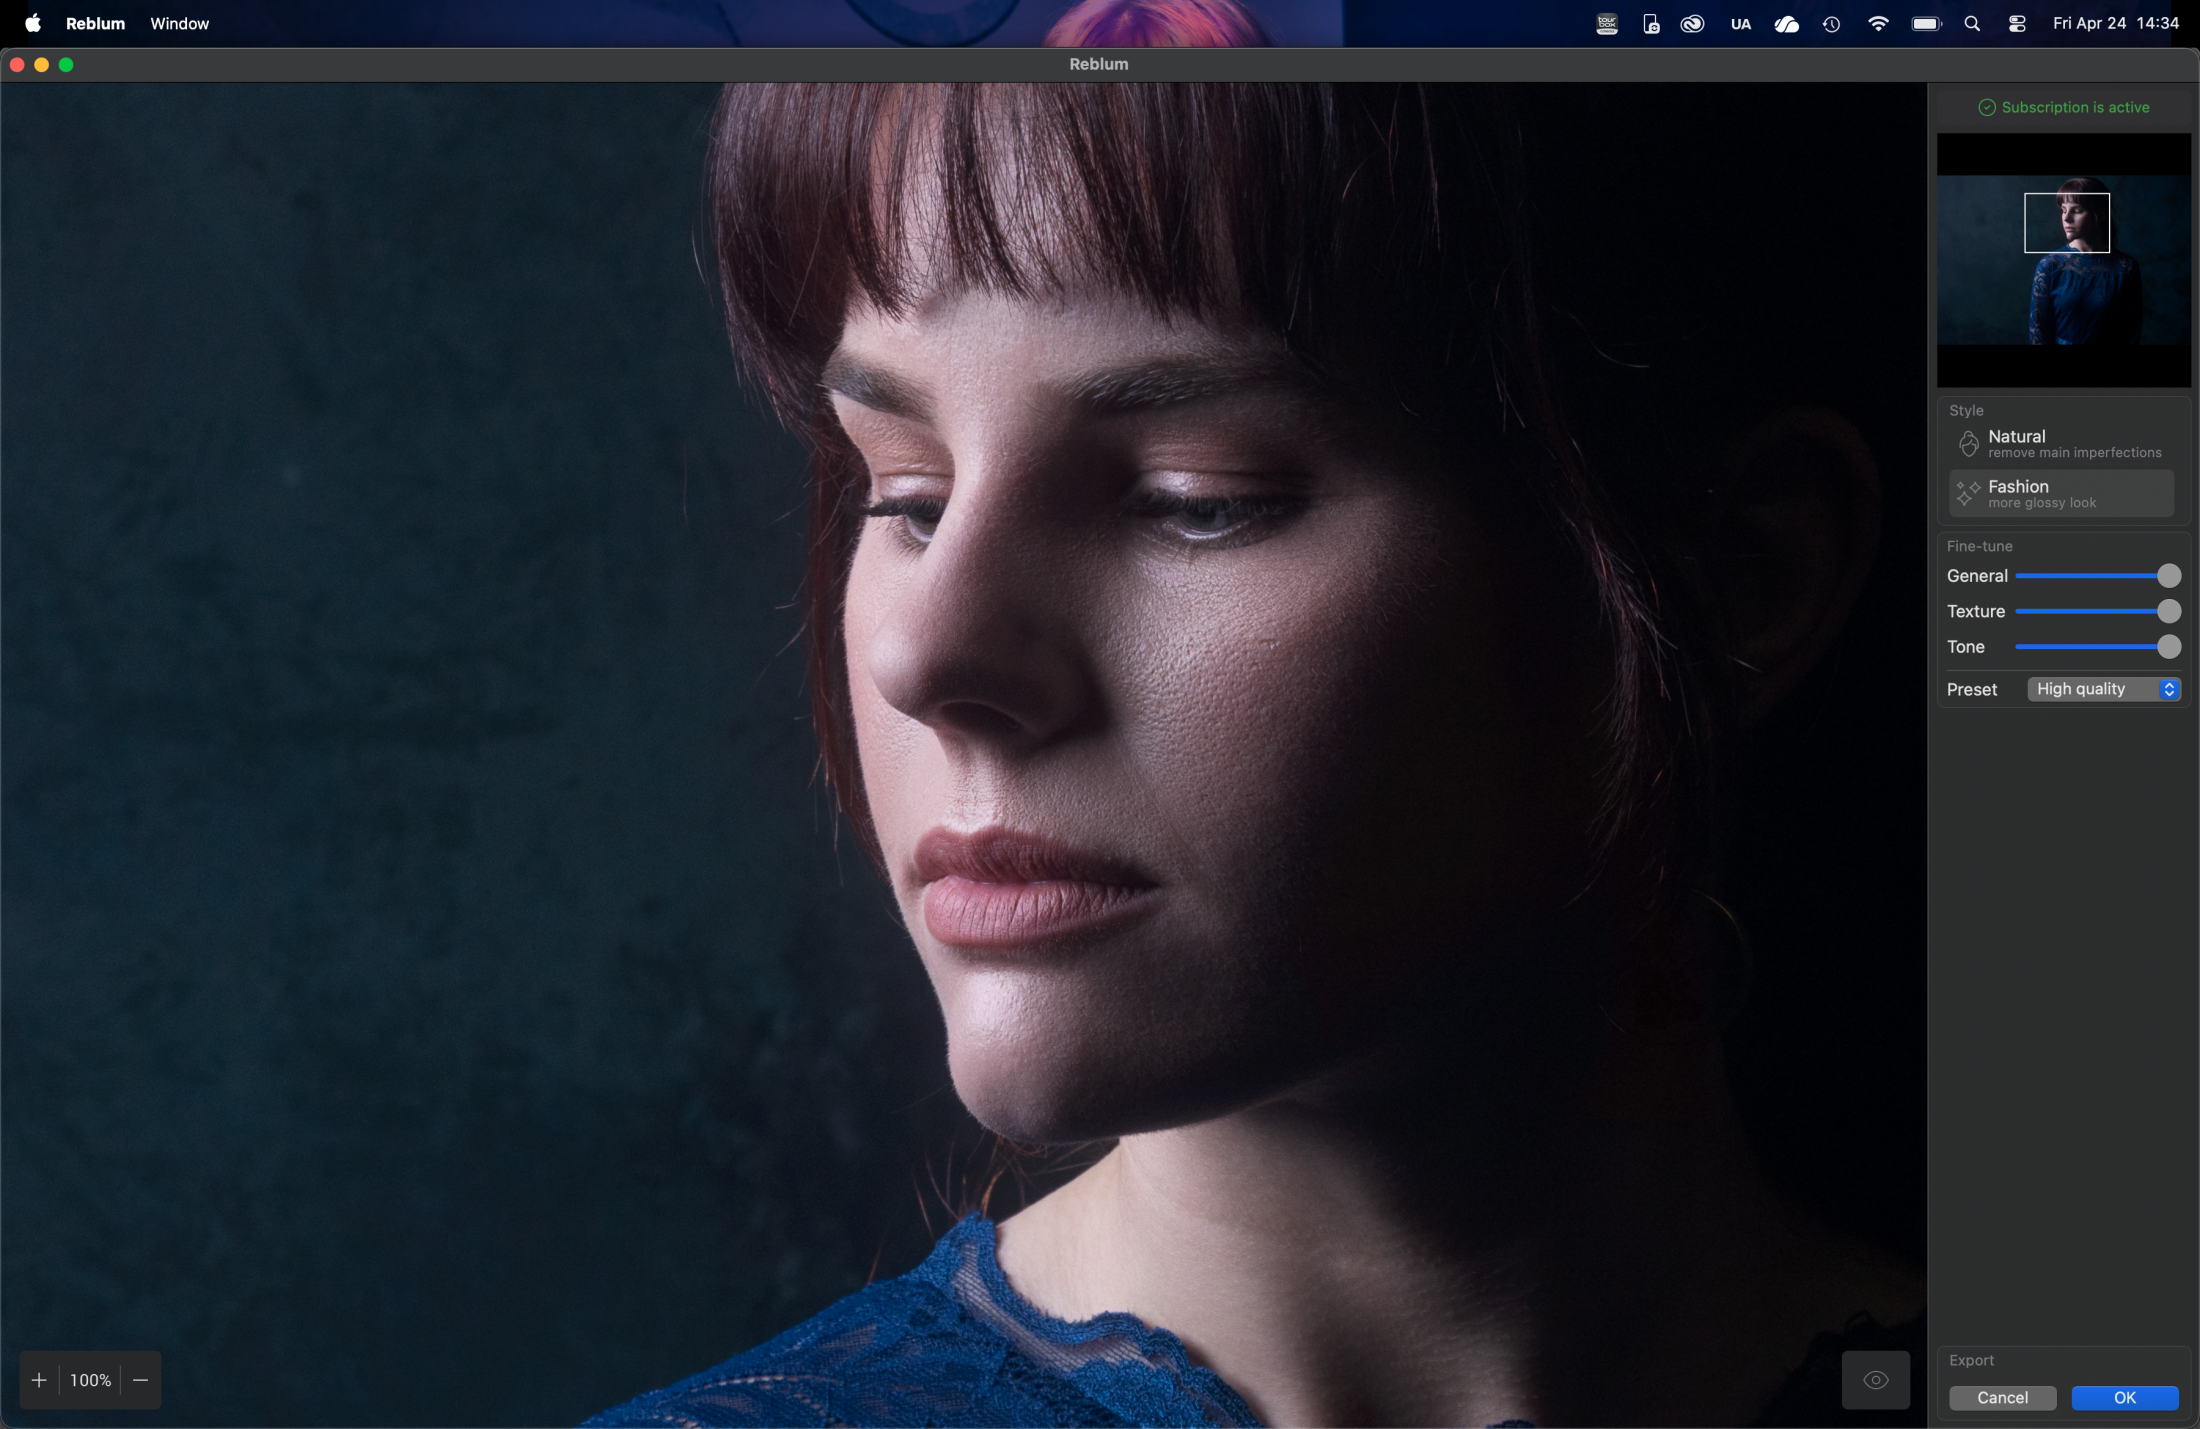
The first time you look at the interface of Reblum, you might be a bit disappointed.

Reblum for skin retouching Yes, that’s it.
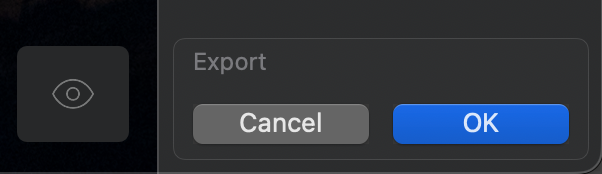
Well, not really, there is also an eye on the bottom for the before and after.
And export.

So we have two options and three sliders. Is that really all you need?
My first response was no.
But let’s be honest, what more do you actually need…..
If you run it in Photoshop, you can use Photoshop for masking if necessary, but in all honesty, everything I ran through it was fine and didn’t need any masking.

How you can use Reblum, and where it shines

There are many solutions for skin retouching. But what I really like about Reblum, and the reason you are reading this review, is the speed and integration into any workflow.
Reblum works under Lightroom, Photoshop, and Capture One.
For me, it’s key to work on 1 image, finish the image, and open the next one. I hardly work with batches, but even for me, Reblum speeds up my workflow a lot.
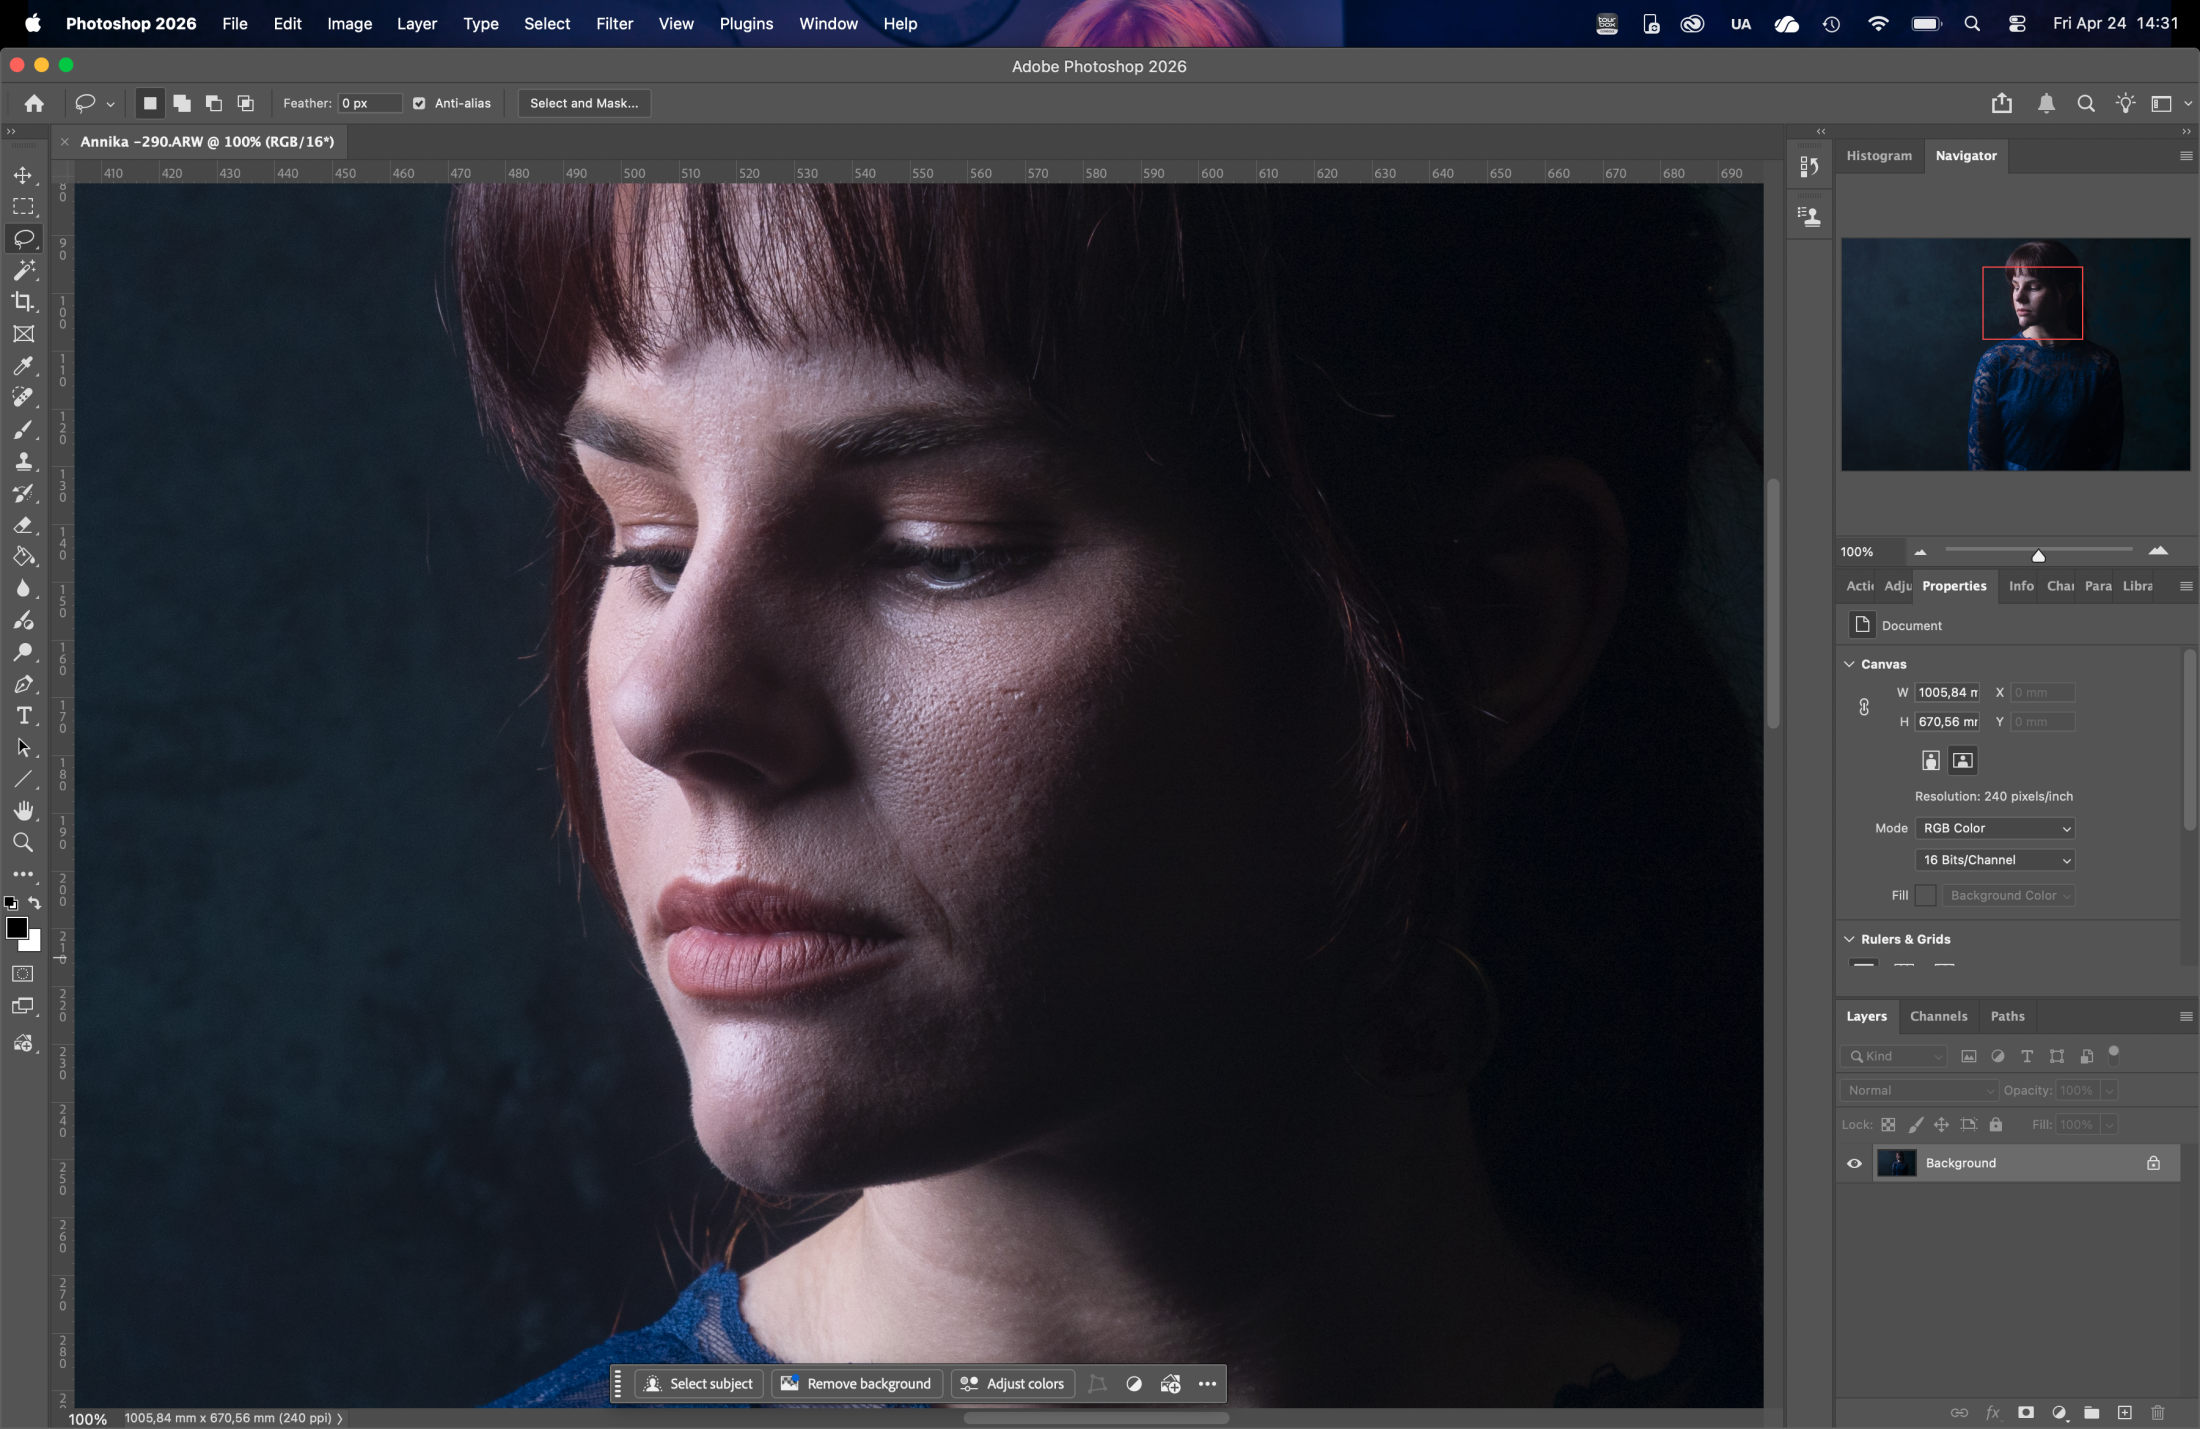
Reblum can be run straight from the top in Photoshop (recently used filters). And it will just run the filter on your present image, and after that, you can start the rest of your retouch process.

And it’s fast, and I mean really fast!
On my M4 Pro MBP you don’t really it working on 60MP files, its just there almost instantly.
It means my workflow has been considerably shortened, which is always a good thing 🙂

Reblum skin retouching, examples

So let’s take a look at 2 examples.<br class=”yoast-text-mark” />>Of course, I can redirect you to their website, but you never know if a company cherry picks photos (I’m 100 sure everyone does). And of course, there is nothing wrong with that, but I think real-life examples are always done best with your own images. And Reblum gives you a 7-day trial version so you can, of course, test it out for yourself.

The first image is a standard high contrast portrait. I like to keep some pores on the cheeks, which keeps the model looking real.
But I don’t like it to be “rough” due to shadows and color differences.
With most skin retouching software, it’s great on flat light and a model looking straight into the camera. But it becomes a lot harder when a model is at an angle, and you are using high contrast lighting.
So… that’s what I tried.

reblum skin retouching

If you are looking for Barbie skin, you are in the wrong place, as you can see.
But for me, this is the “perfect” retouch. Loads of detail in the skin, but it looks so much “fresher” and natural. On the original image, you really see the relentlessness of the camera and the harsh lighting (not something you always want your model to see).
The retouched image keeps all the contrast in the skin, but it smoothens out the things you don’t want in the skin.
For me, this is the preferred way of retouching. I sometimes call it “retouching around the pores”.

But how about a shot that we did with our model Nadine?
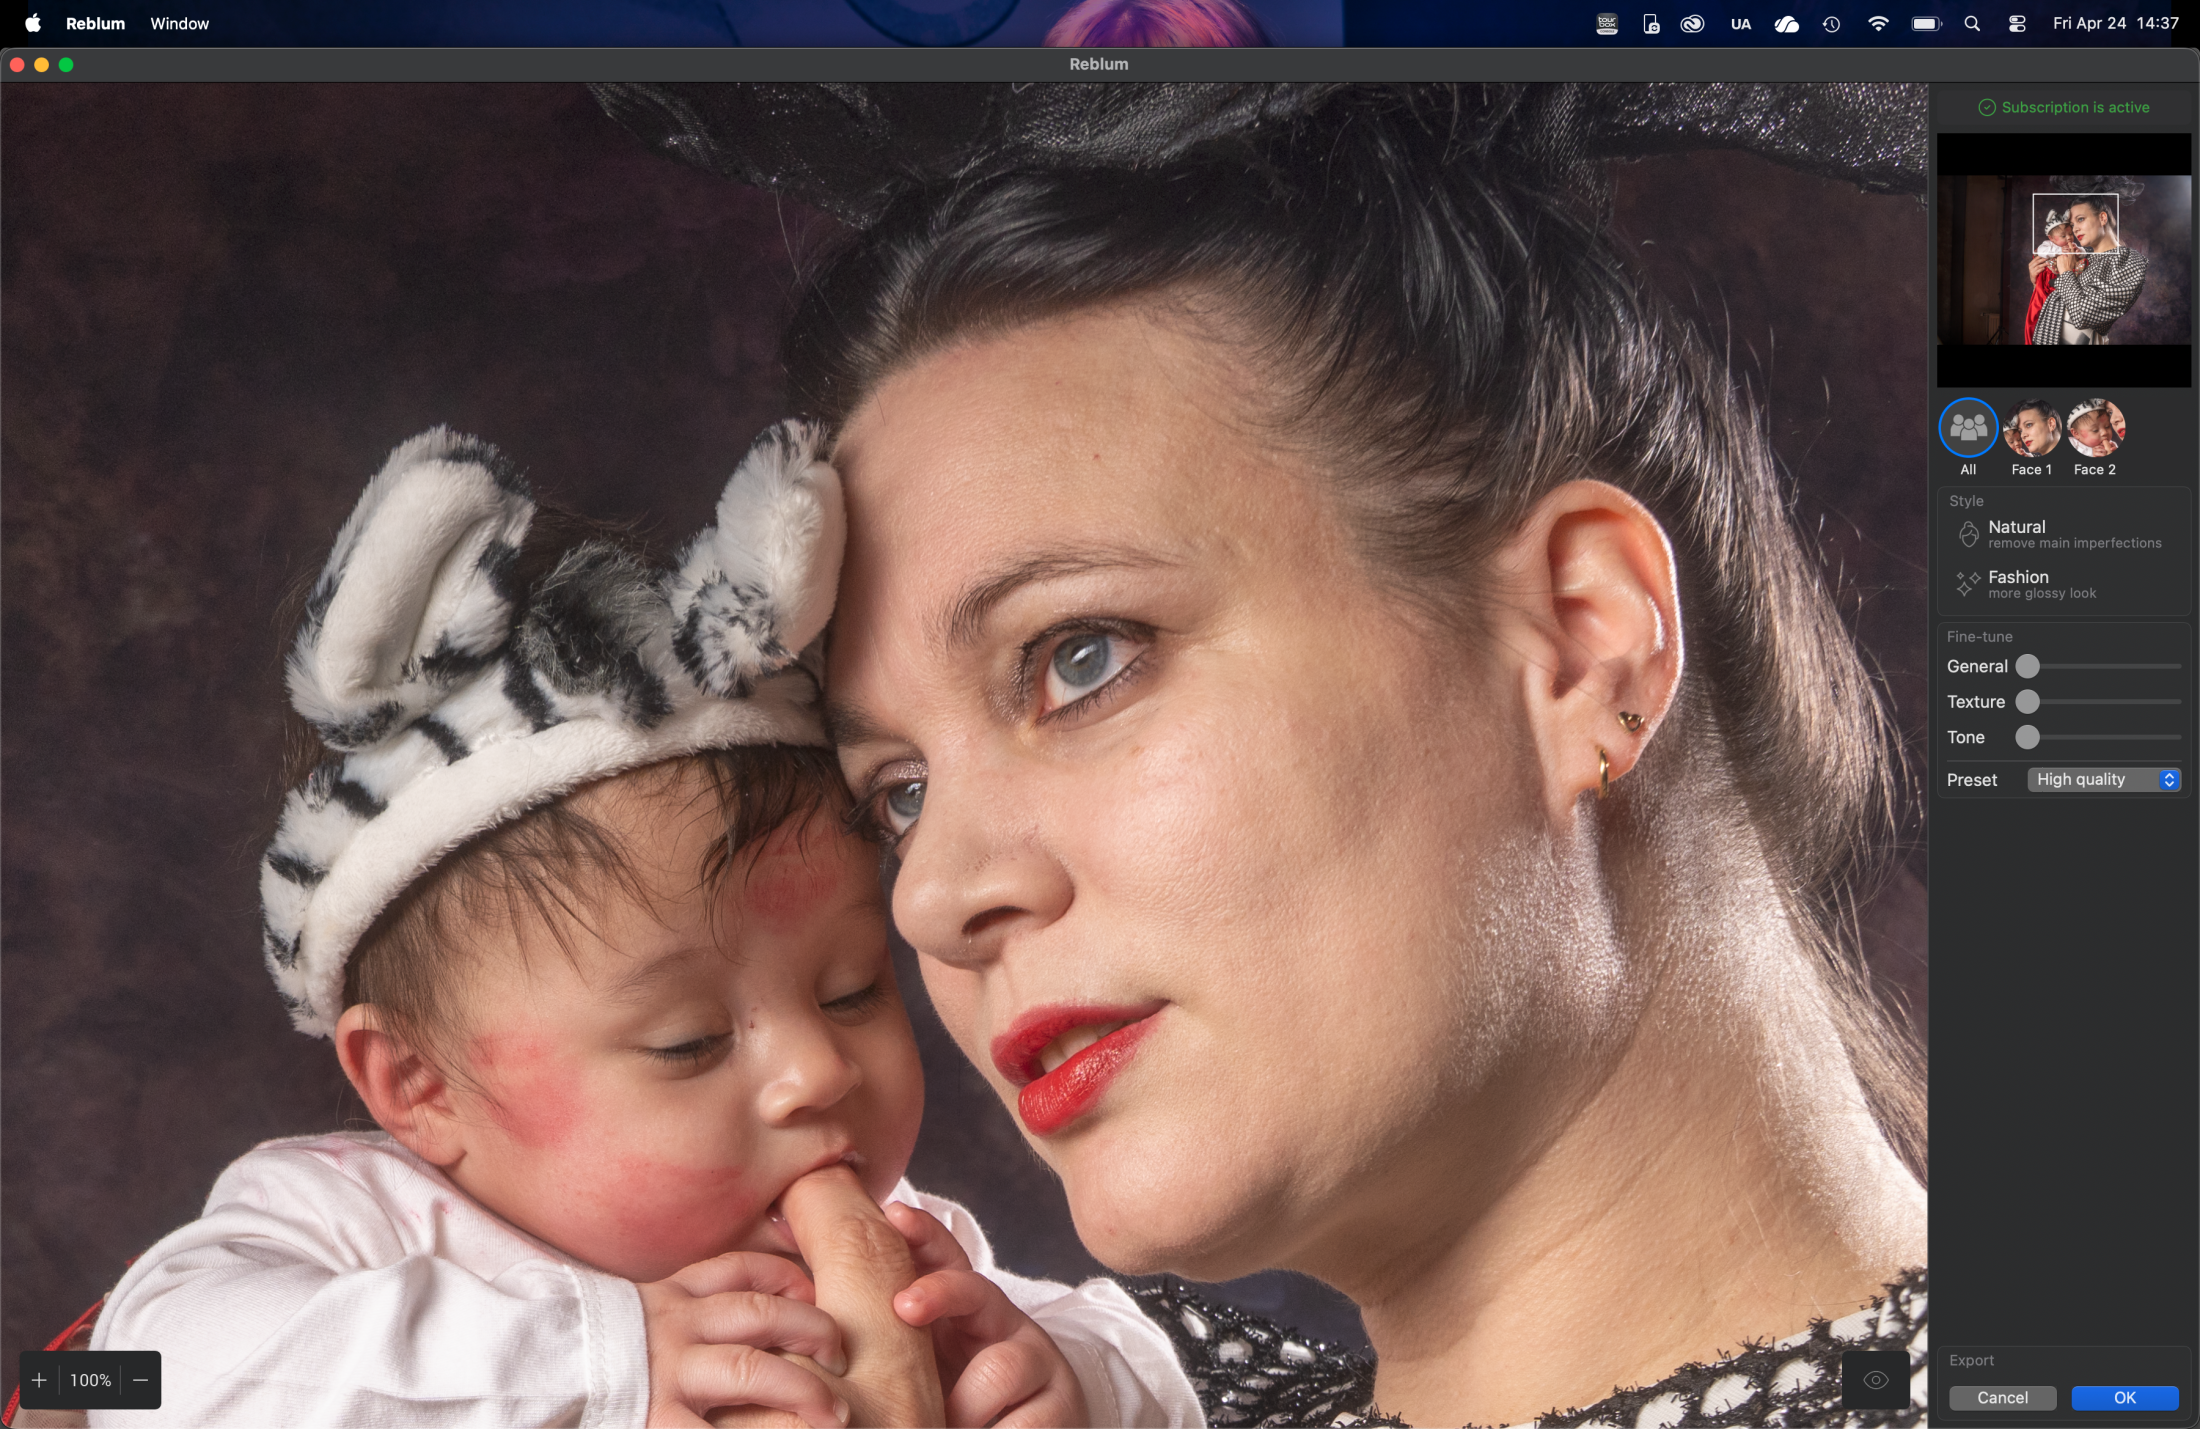
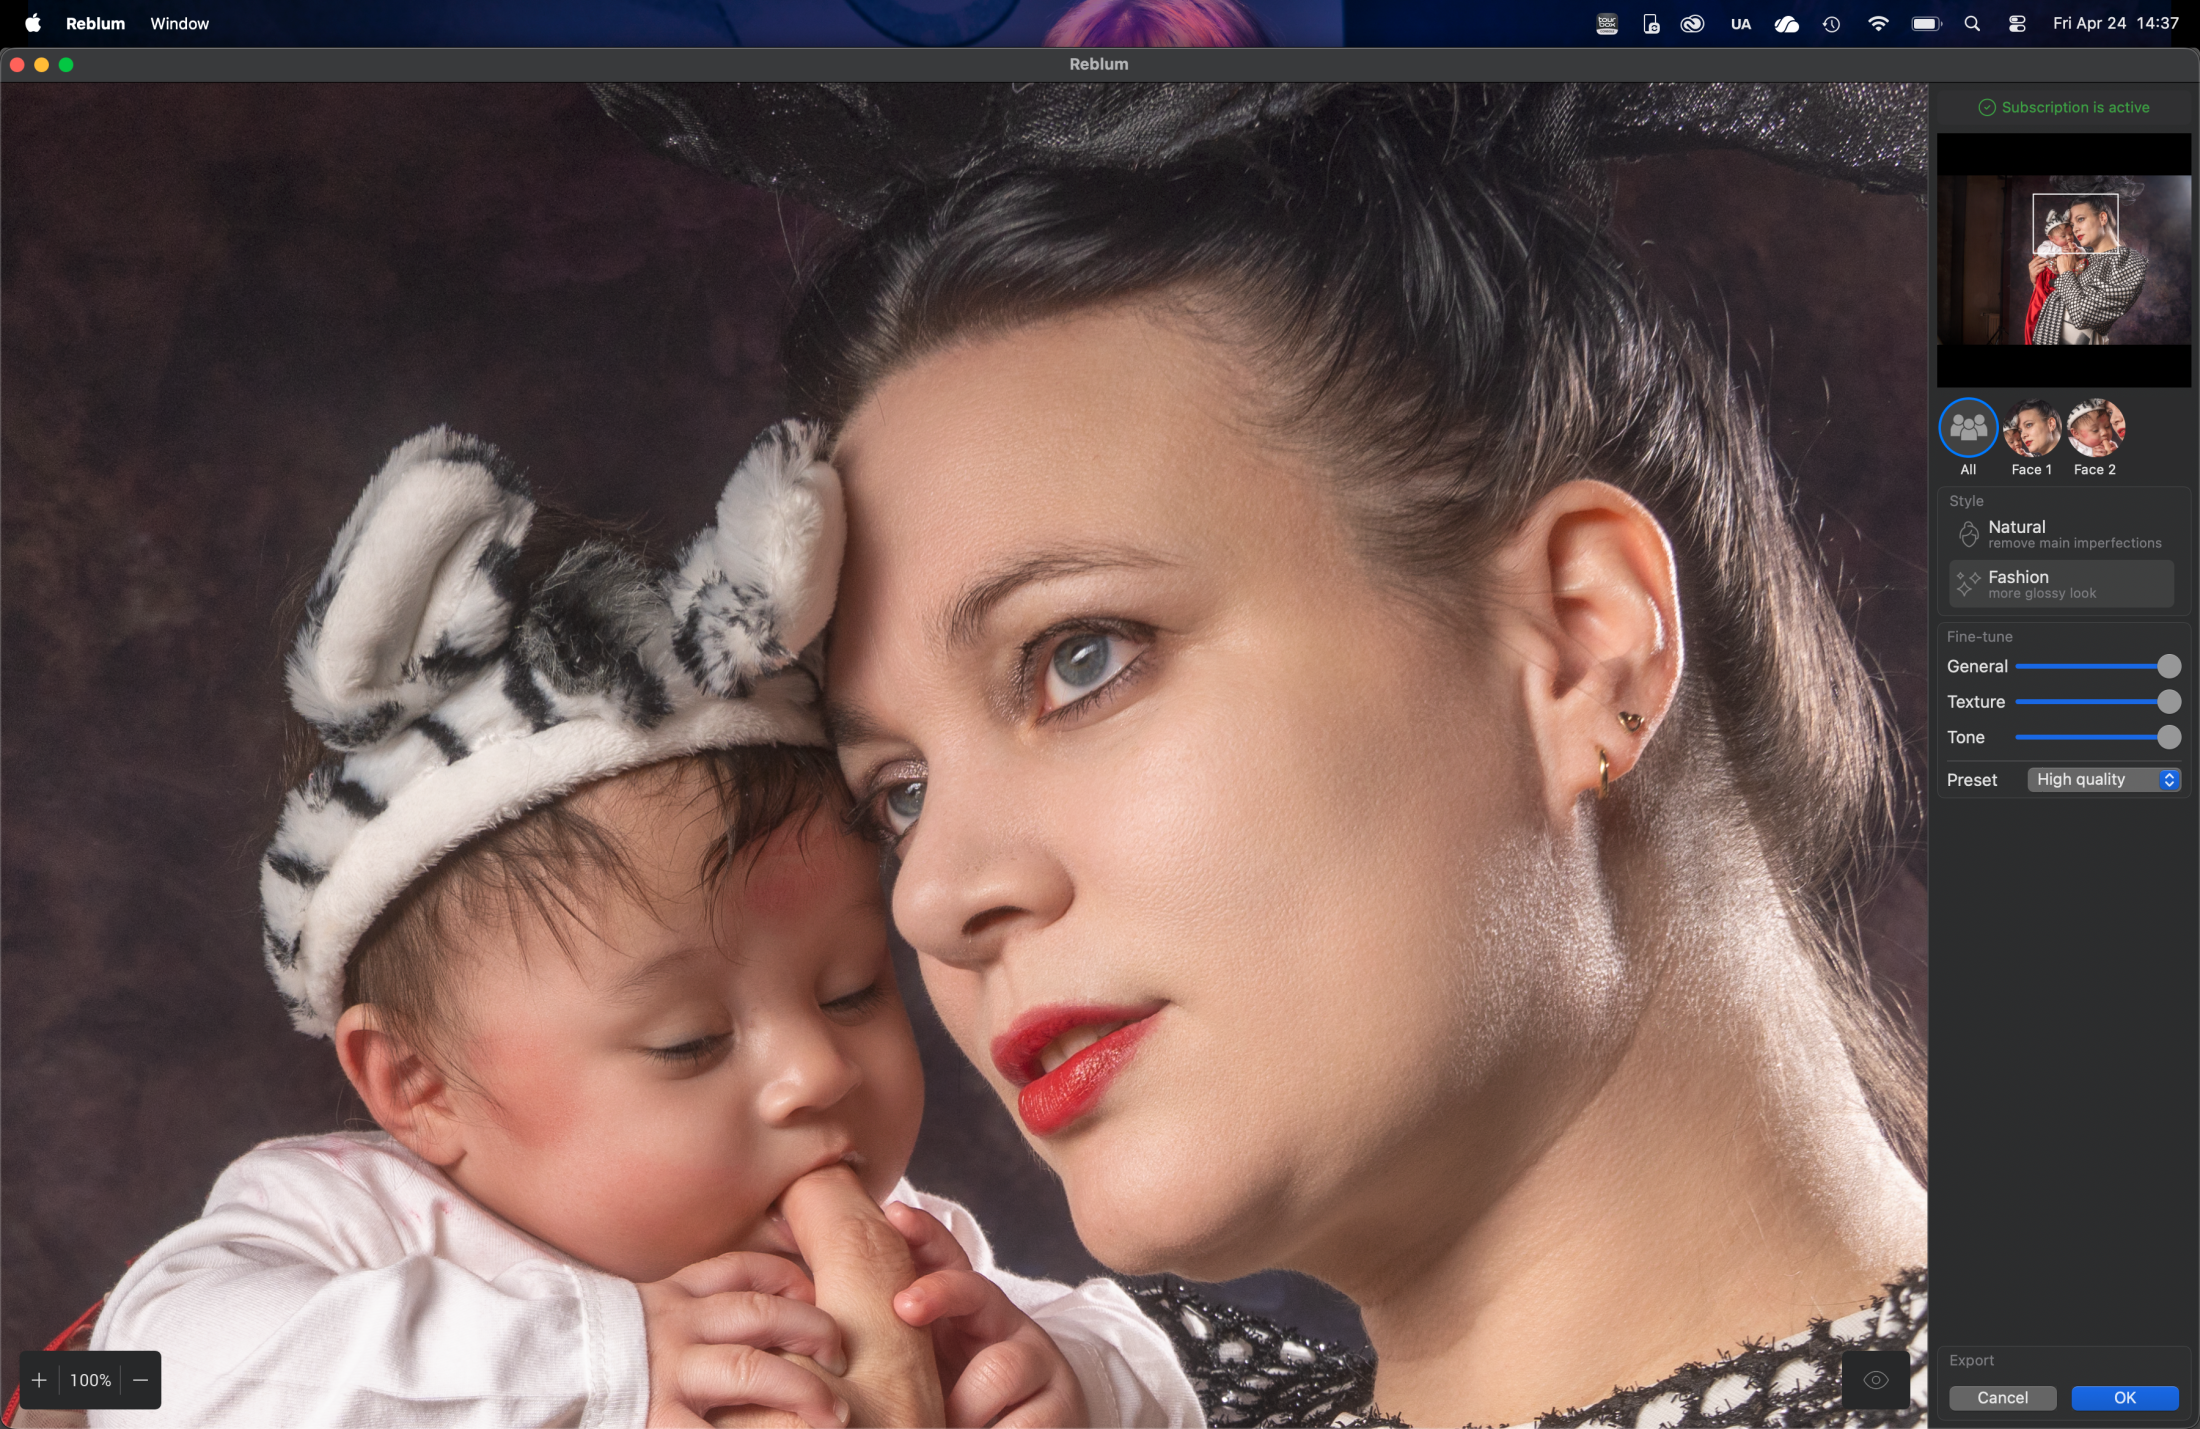
We did a quick shoot with Nadine after the birth of her daughter, and we had a little less time for makeup. So let’s see how Reblum skin retouching works its magic.

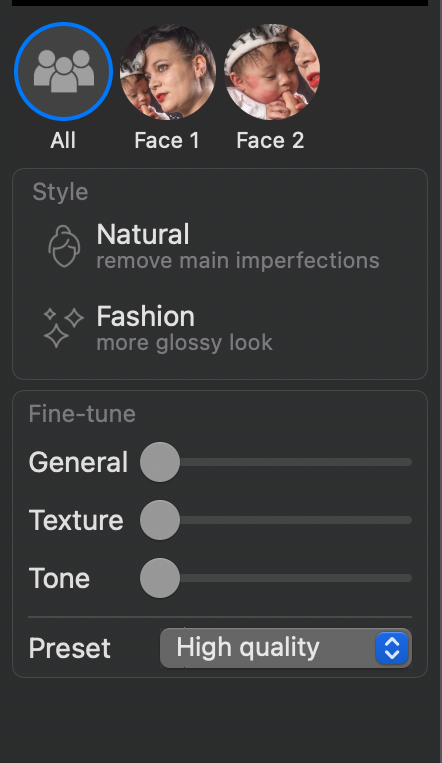
It detected two faces, and in this case. I show you how it worked on both faces.
Of course, you can also uncheck faces, so for example, only the ladies are retouched and the men keep their roughness.

So in essence, you really don’t need more than a few sliders.

General is great for control over the effect.
Texture is exactly what it says; it controls the details and the “sharpness” in the skin.
This is a slider that is really interesting to play with.
Tone works wonders on some models that have different colors in their skin, or it can smooth out colors, as you can see in the example above. I wanted to disable the filter for the baby, but it actually shows you exactly the power of the tone slider; this is not to be underestimated. It’s a slider that I used a lot when working in Capture One. And can make a huge difference.

Fashion vs Natural

In all honesty, the difference is very slight.
The Fashion setting is a bit more “aggressive” and would, for me, be the standard setting for flash photography.
For event photography like weddings, I would prefer natural in most cases.

Weddings….?

Reblum is awesome for event photographers.
When I started the review, I was not 100% convinced it would fit in my workflow or if it would stand out from other solutions.
And in just the skin retouching part, there is a lot of competition. In just batch processing, there are also other solutions. However, I think that Reblum just takes the best from all and combines them in one blazingly fast and super simple plugin. It does batch processing, and …. well, it just works. What more do you need… honestly?

Well ok because you asked

While I was testing Reblum skin retouching, I found myself using it more and more in my standard workflow.
Especially when combining it with BorisFX for the film looks it speeds up my workflow a lot.
But there is one thing I would love to see added.
“Eyes are the soul of the shot,” and I would love to see them add just a simple slider that will lighten up the eyes, nothing more, just a bit more light.
When I mailed Reblum with this request, I got a very quick reply…. “working on it.”

Conclusion: Do I like Reblum skin retouching?

The market for plugins is overwhelming, and

I’m pretty sure there are more solutions out there.
For me, Reblum is interesting for the way it can speed up your workflow. Especially when you shoot events and have to work through hundreds of shots. This will shave off hours or make it possible to deliver much higher quality photos to your client, simply because now skin retouching is a press of a button.

Another thing I really like is the one-time buy and get a lifelong license idea.
Let’s be honest, we already pay a lot o

f money to listen to a streaming service for music (where you can also find my music), and also watching TV and movies is getting more expensive by the year.
The thing I really hate is paying for plugins. I have no problems with the Creative Cloud concept; you get a boatload of software for a price that is a LOT cheaper than upgrading every year (we did that in the past, and trust me, that was painful). Both Apple and Adobe deliver a lot of goods for the money.

But paying for every photo, simple plugins, or one piece of software really has to stop!

OR give the option for a lifetime license.
Reblum runs locally, so no Ai us used to train on your photos. You don’t have to buy credits, and you can choose a subscription or a lifelong license for use on 2 machines.
For me, this is the perfect mix, and I’m using the lifelong license.
Now, as with most reviews of software, the software was gifted to me, but I would also have chosen the lifelong license.

So, if you are working with boatloads of photos and want to have a simple but great solution for skin retouching, I think Reblum will fit your needs perfectly.
But also, if you’re like me, working on 1 photo at a time speeds up your workflow, and the results are good enough for publication. For high-paying jobs, I would do a proper check and some extra retouching, but with most budgets nowadays, this works like a charm.

You can download a trial version from their website.
If you use our link when buying, you also support our work, and you get a cool 20% discount.

As always, the review is done 100% without input from the manufacturer.
I’ve also declined two reviews this week of software that I liked but did not stand out.
I try to only select products to review that can really add something to my and your workflow.


https://frankdoorhof.com/web/wp-content/uploads/2026/04/Reblum5.png 763 442 Frank Doorhof https://frankdoorhof.com/web/wp-content/uploads/2015/03/studioFD_Logo-1FV.png Frank Doorhof2026-04-24 18:00:272026-05-11 15:19:49Speed up your workflow with Reblum

Sit down and listen it’s about workflow in Lightroom

29-03-2026/in blog, Visions and technique/by Frank Doorhof

Workflow is key. That is why I use Lightroom

I absolutely love photography, and retouching is a nice, relaxing process for me.
During the workshops, I’m often a bit surprised by people telling me they don’t use Lightroom because it’s too difficult.
Or they are unsure what the perfect order is for developing a RAW file.
So today, we are doing exactly that. Let’s walk through the workflow and how it works.

How was this triggered?

Recently, a friend of mine showed me a diagram for the “perfect” workflow in Lightroom.
It started with merging images in HDR/Panorama, then noise reduction, and then adjustments.
In all honesty, this triggered the blog post: noise reduction as a first step…

Your RAW developer is not dumb

So my advice is very simple: follow the workflow in your software.
Unless you know what you’re doing, of course 😀
Now this could be the end of the blog post, but I want to dive a bit deeper so you also understand the way I build a workflow.
Do remember that a workflow is very personal, so I try to keep it as mainstream as possible.

How I work in Lightroom: step by step

Importing images from my camera

The first thing we do is, of course, import the images.
This is already a vital step, because it can be done in a few ways.
Personally, I strongly advise copying your images to external storage (like a NAS) and using Lightroom to import them by ADDING them, not copying.
This way, the images always stay in the same place, even if Lightroom might one day crash, and you lose your database in a worst-case scenario.


Make your base right

After this, it’s really just following the workflow.
The first thing I always do in a workflow is make sure my base is correct.
This means that I will crop my images and, if needed, straighten the composition.
This is also the part where I will boost my shadows to insane and look over the image for any problems that I take out with the healing, clone or Ai.
After this, I reset the shadow slider, of course, and continue.
The reason I’m boosting the shadow slider is to make sure I don’t miss any details in the darker areas of the image.

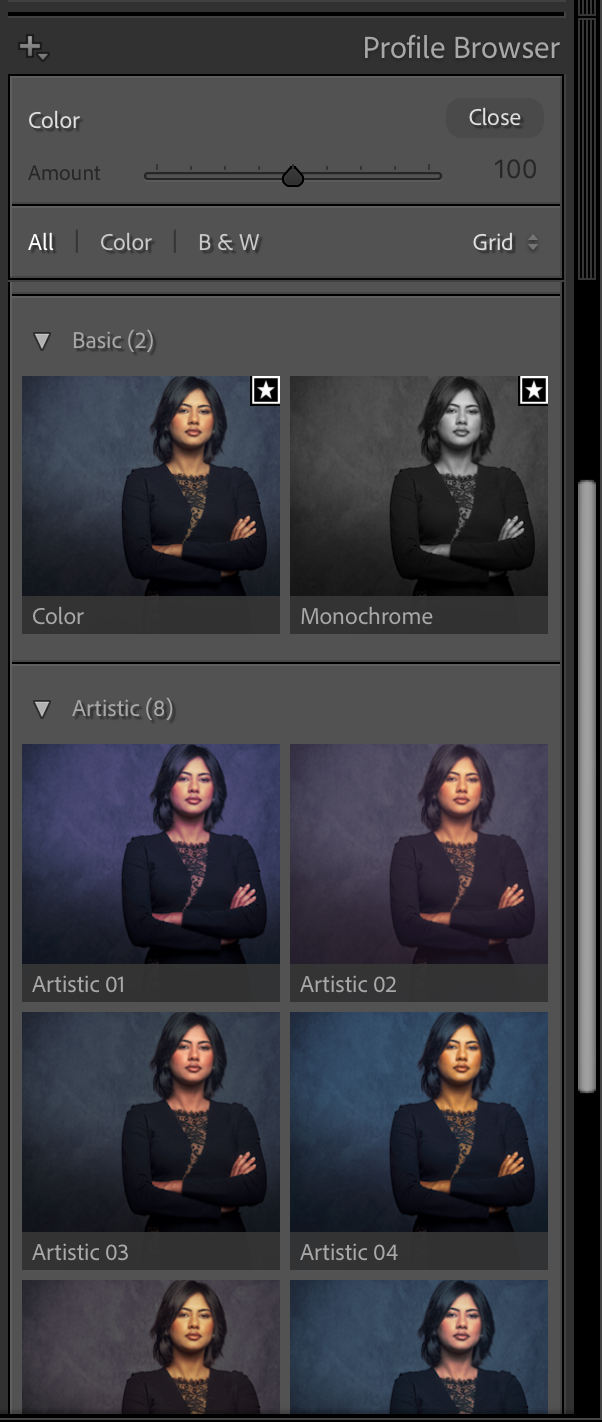
This is where you select the basic look for your images, or you select the created profile from a colorchecker to get accuracy. This can be a creative section or pure accuracy.

Let’s take a look

The first thing you do is select the profile you want to use.
This can be a profile from a colorchecker you created, or just one of the Adobe profiles.

We now have the RAW file all set up for the rest.
You can now, for example, merge your images for HDR/Panorama.

In the next section, we adjust the basic image.
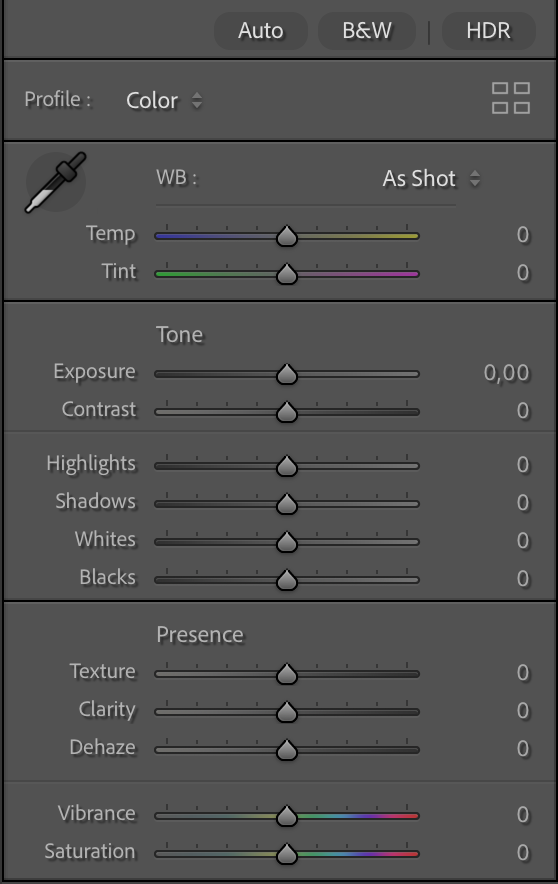
Here we set the white balance and add some contrast to your image, play with highlights and shadows, etc.
Color balance can be set with the picker by clicking on a white balance card (and syncing this setting to your other images).
Or you can select one of the settings, or play around with the sliders.
Personally, I always use a white balance card to set the color balance.
Not because I always keep my color accurate, but because when the base is always the same, I can very easily create presets or automated workflows where the end result is always predictable.

This is where you make the first adjustments to your images, the best you set up your lighting, the less you have to do here, but adding some contrast is with RAW files something we do often have to add.

Colors

After this, I mostly adjust the colors.
This can be done via curves, sliders, HSL, etc.
This is not a part for the accuracy, but already for the look I want in my final results.
This is the part where we build the look for the shot.

Sharpening

Now it’s time for some sharpening.
In Lightroom, we have very powerful options in the case of texture (fine detail) and clarity (a more contrast-based look)
In this section, you can also adjust the look of your image with Dehaze, and trust me, you don’t have to use it to control haze only; it can be an awesome creative tool.

After sharpening, I’m mostly done with my image.
I’ll go through the complete process again, starting at the develop stage and fine-tune contrast/shadows/highlights, etc.

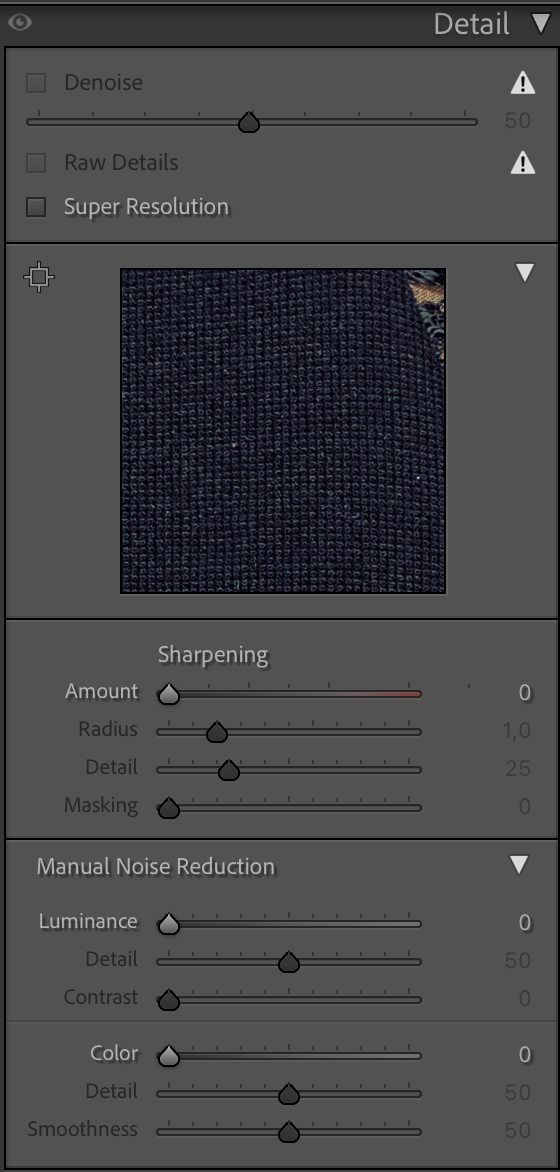
When I’m done with everything, only then will I start denoise, if necessary, of course.

The final step in the adjustments workflow is Sharpening, upscaling, and denoising

Why denoise not at the start?

You can, of course, run denoise at the start of your process.
However, when you open up the shadows, sharpen your image, play with colors, use super resolution, etc. ALL these settings can and will introduce noise.
Meaning you keep going back and forward to your denoise, in all honesty, for me, that doesn’t make any sense.
And brings me back to the start.

Lightroom and most RAW developers have a certain workflow for a reason.
If you are starting out with software like this, it can be incredibly intimidating when you see all the sliders and often names that might or might not ring a bell.
My advice is super simple… follow the workflow from top to bottom and ONLY when you start to feel confident, it’s when you can start to skip parts, or jump towards parts.
Lightroom is so incredibly user-friendly I’m sure you can get awesome results when you follow the standard workflow.

But Frank, there is more…

Yes, after this, there are several other options.
But they don’t influence the noise anymore.

However, they can be important.
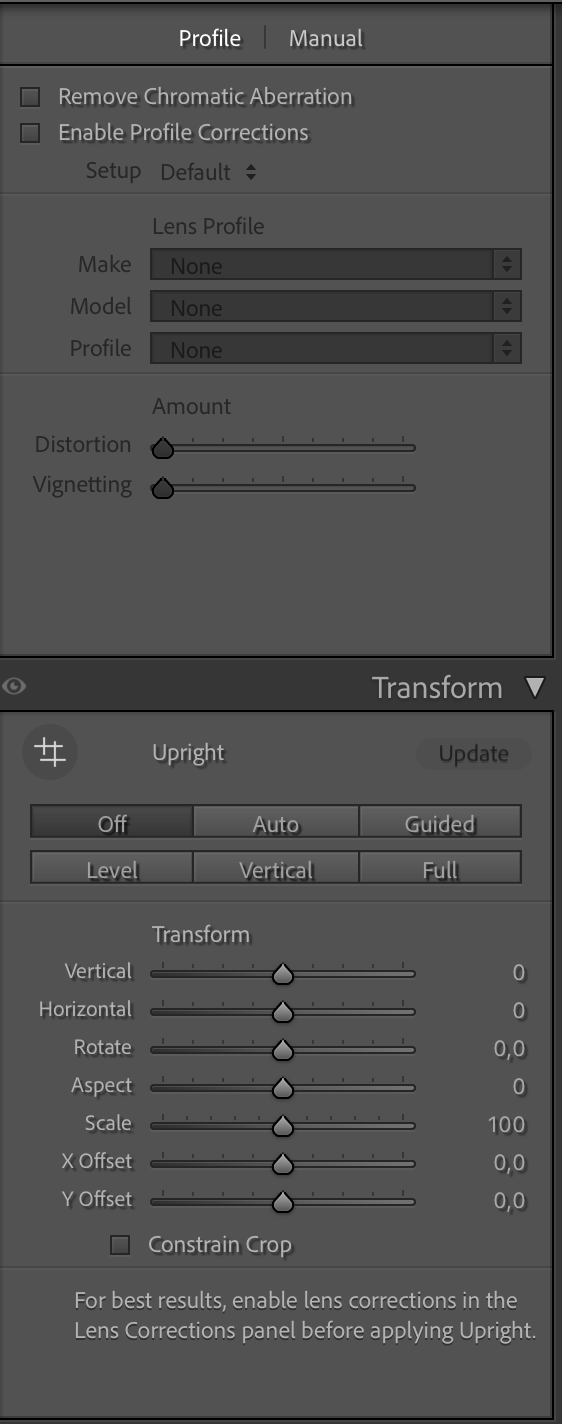
First of all, you are probably aware that not all lenses are created equal.
In essence, no lens is perfect, but luckily, Adobe created a huge database of lens correction files that can really change the look of your images positively.
If you have never tried this, make sure you check it out.

In this section, you can also adjust the image in a very flexible way.
“No more” distorted buildings due to wide-angle distortion and a lower angle.

a screen capture of my workflow in Lightroom

Choose your lens and voila

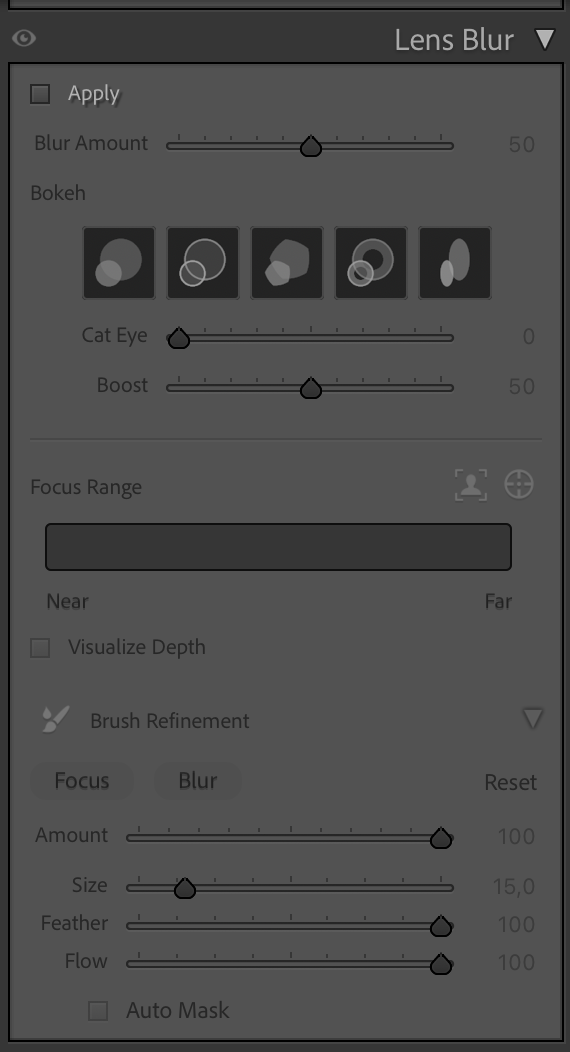
But you can also play around with lens blurs.
Which can be used for some cool, creative effects. Just play with it, and you’ll see the differences the bokeh makes.

a screen capture of my workflow in Lightroom

You can use this to create some really nice effects in your images.

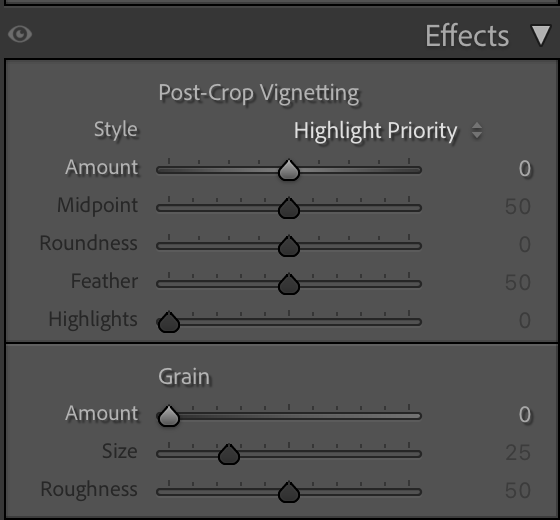
Vignette

This is also the part where you can add a vignette to your images, which really draws the viewer in.
Or you can use this to take away vignetting added by your lens; I think it was originally intended for that. To be honest, I use it mostly to add a general vignette on the photos, hardly visible, but when you take it out, you miss it.
(BTW, you can also create a vignette perfectly fitting for your subject with the local adjustments, just paint a feathered circle, inverse selection, and use exposure to create the perfect vignette. I also show this in the video.

By the way, do you see that adding grain is down here in the workflow, AFTER denoise….
Makes sense, right? But one thing that you might not know, or have tried yet, is to add grain to an image that was very noisy and after noise reduction looks a bit like a painting. By adding some grain, you can bring those images back to life. In most cases, our brains are sometimes easily fooled.

a screen capture of my workflow in Lightroom

Here, we can add or remove the vignette and add grain, if needed.


Conclusion, Workflow = Lightroom

Lightroom is an awesome addition to every workflow.
As with most RAW developers, they created the software with the workflow that works best in mind.
This means it’s often best to just sit down and slowly work your way down, try every setting, and see what it does.
I’m 100% sure you will get used to using Lightroom in a few hours and feel right at home in a few days, and say you never want to be without it in a week or two 😀

And because videos are sometimes easier, I have recorded a 2-hour Lightroom for beginners Digital Classroom.
And if you want even more information about Lightroom and Photoshop, get my 7.5+ hours tutorial via our webshop
If 7.5 hours is a bit too much, I also have a shorter video 100% aimed at Lightroom
And if you already use Lightroom, you can also order my full Lightroom Preset pack here.
It’s the same pack I use myself.

https://frankdoorhof.com/web/wp-content/uploads/2024/09/FRANK-did-you-know-adobe-lightroom-photo-24-1080.jpg 1080 1080 Frank Doorhof https://frankdoorhof.com/web/wp-content/uploads/2015/03/studioFD_Logo-1FV.png Frank Doorhof2026-03-29 12:59:112026-03-29 14:30:40Sit down and listen it’s about workflow in Lightroom

A great new addition to the iPad ecosystem

6-03-2024/in blog, News etc/by Frank Doorhof

The iPad ecosystem gained another great app

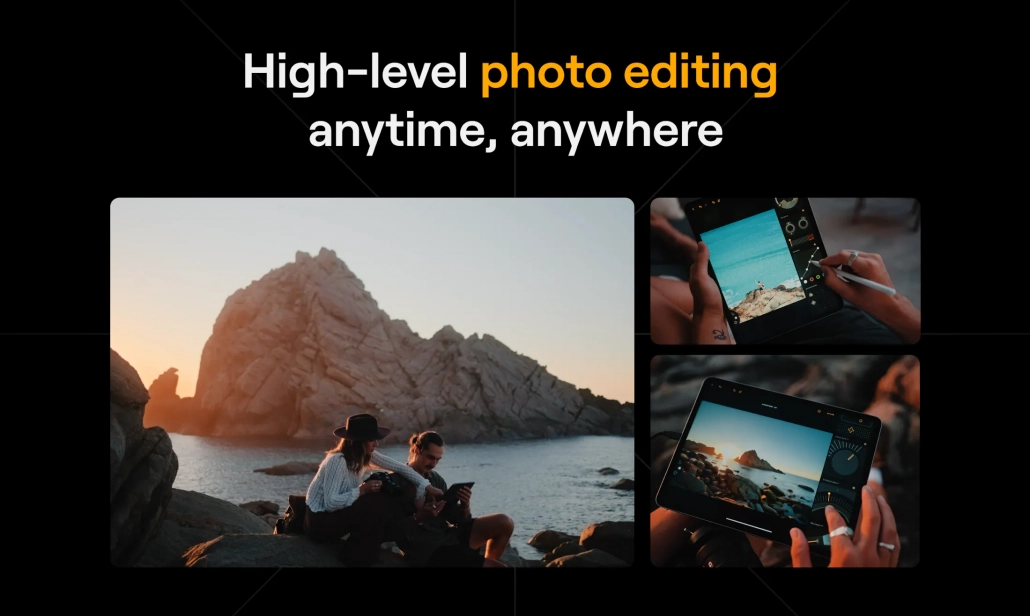
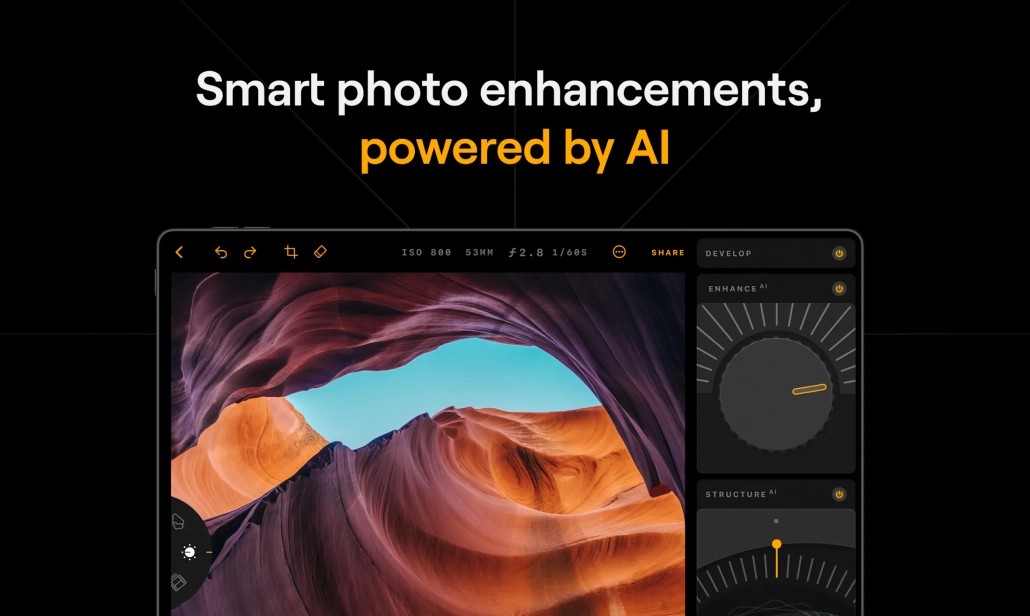
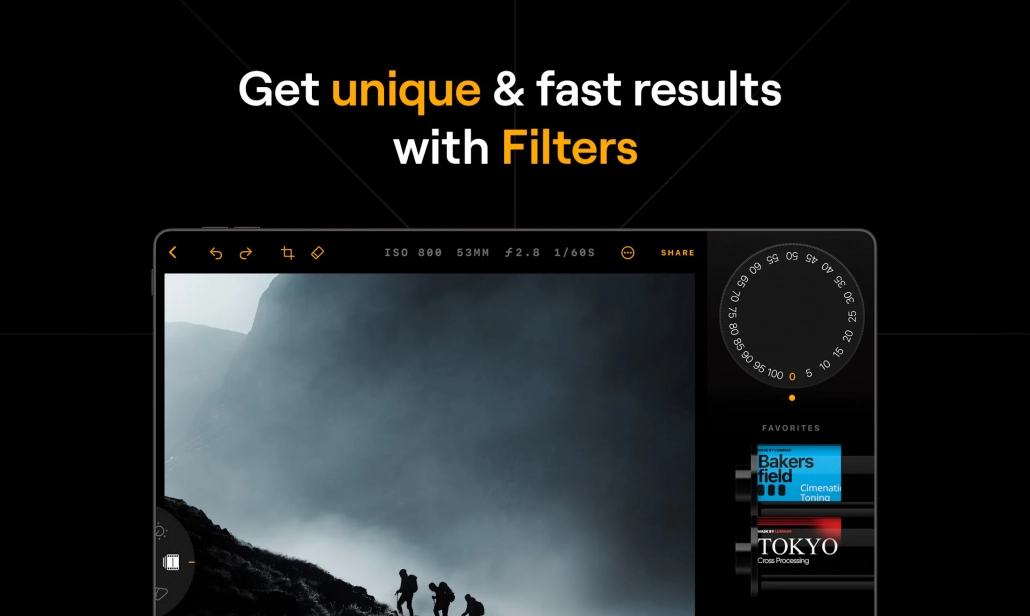
When I bought my first iPad Pro I was deeply disappointed. It was nothing more than a blown-up iPhone at that moment. But a few years later I bought the new iPad Pro.  And man,  did the ecosystem change over the last few years. So this blog is about the new addition to the iPad ecosystem: Luminar.

The M1 generation

I strongly feel that with the release of the M1 chipset Apple changed the playing field forever.
At the moment I was editing some drone footage on a Dell XPS i9. And although H264 went smoothly, for the H265 I needed to use proxy media (a sort of smart preview because the system can’t handle the original). To my surprise, my iPad Pro had no problems at all with the material… I was surprised but also motivated to find the perfect workflow on the iPad.

The main advantages

Let me start by saying that it’s no laptop replacement for me.
But it’s so much more.
I’m using Cascable to shoot tethered to my iPad Pro. Which means I can now bring my iPad on location (or in the studio). The advantages are numerous.

The iPad Pro runs forever on the battery and still has more light output than my MPB 14″ (MacBook Pro). The MacBook Pro is great for outside, but also the protection against the elements is much better on the iPad. With my laptop, I’m always worried about my keyboard or card reader catching dust or worse. Now I can leave my laptop at home and do the whole shoot with the iPad Pro.

The iPad Pro is also much easier to mount on a stand.  I’m using the Ulanzi myself which makes carrying around the iPad (still on the stand) much safer than dragging around an expensive laptop. Check out this video about tethering to the iPad 

But there is a limitation.
When I’m teaching I also like to show some retouching tips, and this is where the iPad always was rather limited with many apps for example not being able to output full resolution images or for example a Tiff 16bits ARGB. But things change.

Lightroom and Photoshop

Adobe released Lightroom and Photoshop on the iPad a while ago and in all honesty, they both work great. Recently Adobe even added generative fill to Photoshop on the iPad.

And even if you’re not in the Adobe ecosystem there are some really good alternatives such as Darktable, Procreate, and for example Affinity. I’ve tried most of them but I still keep going back to the Adobe suite. This has also everything to do that the link between the desktop versions and iPad versions is absolutely seamless with Adobe, and that makes my workflow a lot easier. Check out this tip where I turned the lights on in Photoshop for the iPad

New addition to the iPad ecosystem

So why this “news update”

Over the years I’ve tried several ways to tint my images, in short, give it my own look.
And although I love Lightroom a lot there are still some things I can’t do with Lightroom and I need to dive into Photoshop.

On the desktop, I’ve been using products from Skylum since they were called MacPhun and I always loved their approach to making something standalone but also fully incorporating it into the Adobe ecosystem. Nowadays you probably know them best for Luminar.

And man, am I excited because Luminar has now been released on the iPad.
I still have to test everything and see how it will integrate into my workflow with Lightroom. But for “looks” in my images, I can’t wait to start building new presets.

So if you’re like me also working a lot in the iPad ecosystem make sure to check out Luminar for the iPad, I think you will love it, and this is just the first version 😀 Keep following me for my experiences with this new addition to the iPad ecosystem


https://frankdoorhof.com/web/wp-content/uploads/2024/03/Luminar3.webp 1316 2199 Frank Doorhof https://frankdoorhof.com/web/wp-content/uploads/2015/03/studioFD_Logo-1FV.png Frank Doorhof2024-03-06 14:40:082024-03-11 19:10:29A great new addition to the iPad ecosystem

iPad Pro current state ….. is it Pro or not?

6-11-2019/in blog, News etc, Reviews, Visions and technique/by Frank Doorhof

If you have followed my work over the years you know it’s pretty much a one-man (and a woman) band. Meaning everything you see from photography, video and blog posts are done by me and behind the scenes, Annewiek helps with Tether Tools, Clickprop backdrops and simply put she helps me to do my work for you guys (she’s pretty awesome). Now I’ve been an entrepreneur my entire life and one of the things I quickly learned is “workflow control”, you can do a 12 hour workday in 6 if you have a perfect workflow compared to a shitty one, and when every hour is precious it’s very important to get the workflow down to perfection so there is also some time left for family, games, music etc.

Because we travel quite a lot and I give a lot of demos for companies, tradeshows, workshops etc. over the years we have a pretty solid workflow.
Up till a few months ago, I used the fastest laptop I could get, in my case often the Dell XPS series (present I’m running an i9) and before the Dell always the 15″ MBP with the almost fastest option (simply put the top end is just way too expensive). For tethering I’ve been using Capture One for ages and for storage and quickly editing street/travel photography Lightroom Classic is without a doubt, my go-to companion. For the more heavy editing…. well Photoshop of course.

Now I’m a bit of a workaholic when travelling but I also love to entertain myself on planes/busses etc with some movies, games etc. So when we travelled the standard stuff we brought were :
Annewieks MBP, my Dell XPS, a Wacom tablet, Annewieks iPad and I used a Huawei M5 tablet. This was a perfect outfit that could handle any situation…. except one….. very important one.

When we travel a lot is also done with our RV (when we are in Europe), and truth be told, we are on power a lot but it also happens (quite often) we are not, and editing the images of the day, writing a blog post and editing that day’s vlog on a laptop WITHOUT power… well that’s impossible, I love my XPS machine but when editing photos or video the battery life (of all laptops) pretty much suck, if I manage to get 90 minutes out of it I’m jumping with joy, but when I edit outside it’s more or less 60 minutes with the brightness on full power, and to be honest… it isn’t that bright to begin with when competing with the sun, and don’t even think about editing on a plane, it’s just too tight. My tablet I actually only used on the plane or buses and maybe sometimes in the evening or morning when we have a day where I didn’t shoot a lot.

So, in essence, we are travelling with a lot of gear which all does something, but doesn’t do all.
When Apple released the iPad Pro a few years ago I literally kept hitting the refresh button to order the gift to all creatives, the laptop replacing, powerhouse (I forgot to put magic in there somewhere but you know what I mean) iPad Pro, the real game-changer. Well, it did change the game I think for a lot of people, in fact, it even got me back into drawing again for a short period of time. But that Pro indication….. in fact it was just a blown-up iPad which in fact was a blown-up iPhone…. so why did I buy this thing…… yeah I kept wondering that for over a year after which I sold my iPad pro and never looked back. Over the years I progressed from iOS to Android (mainly due to the cameras and USB connectivity which drove me mad at times with iOS) and from macOS to Windows.
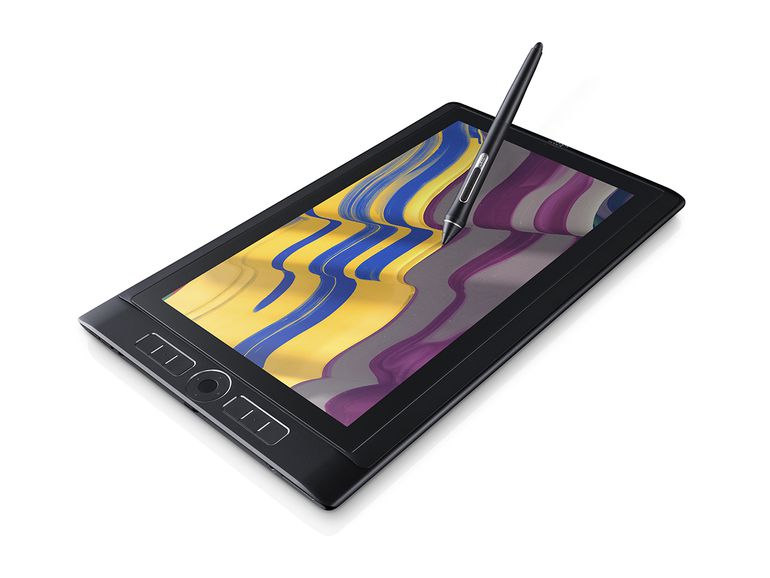
Surface series/Wacom Mobile Studio
In between my new (11″) iPad pro and the first experience I tested the Microsoft surface series twice.
The first time was a disaster, the machine kept crashing on me, the screen was way too small and editing video was… well impossible.
Of course we also had the Wacom mobile studio pro, I got the 15″ and loved it from day 1, but the lack of support and the lack of a proper stand made my love for this device melt like snow in a SoCal sun, I’ve put several videos out there to improve for example accuracy in Photoshop with the Mobile Studio but after every update something else seemed to break down so in the end I just gave up.

The second surface device I tested was “bingo” the surface book 2.
An amazing laptop with an awesome screen you can draw on, the main disadvantages were, however, battery life and the incredible drop in processing power when you went to tablet mode, and let’s be real, just for fun…. try editing an image in Photoshop without touching your keyboard…. impossible, and it’s even worse when you try to run premiere with just touch, it’s almost laughable if it wasn’t such a frustration. But in all honesty, the surface book 2 was the best laptop I ever used, and the only thing that held me back was the fact that there were a lot of “rumours” about a game-changing iOS and some plans with Adobe.
Adobe the Apple salvation?
Apple is not my Apple anymore.
When I see the keynotes I can’t really feel the same feeling I got when the iPad was released or the MacPro or…. Apple always had some cool stuff that nobody else did, integration between devices was flawless. The biggest letdown for me was actually the release of the touch bar MBP, getting someone from Adobe on stage to show Photoshop with her fingers on that HUGE trackpad, I just knew she would walk off and go back like Columbo/Steve Jobs and would say “oh just one more thing, from now on the touchpad is also compatible with the Apple pencil” I was so waiting for that moment but it never came…. I tried the keyboard, I tried to convince myself to be able to live without a card reader and HDMI and that 5000.00 wasn’t really……. ok that’s when I snapped out of it 5000!!!! are they fricking insane? I ordered my Dell XPS the day after for 2500.00 including 24 hours onsite support. I never looked back.

In this same period Microsoft, Huawei, Samsung etc. made HUGE progress in both cameras and connectivity between devices and now even between devices from different brands, almost everything that made Apple so awesome was now on the other side, but………
Lightroom CC and more
Lightroom CC on Android was a game-changer, I never liked Lightroom Mobile, but what Mobile did wrong CC absolutely did right, much better performance and finally, also a way to create your own presets and sync between devices without much of the limitations of Lightroom Mobile. At the moment I still think the Android version of Lightroom CC runs more smoothly on my P30 Pro than on my iPad pro, luckily Adobe finally did upgrade the iOS version to be able to batch edit images (something the Android version already had) so for me both are now about equal for what I need.

But Adobe didn’t stop there.
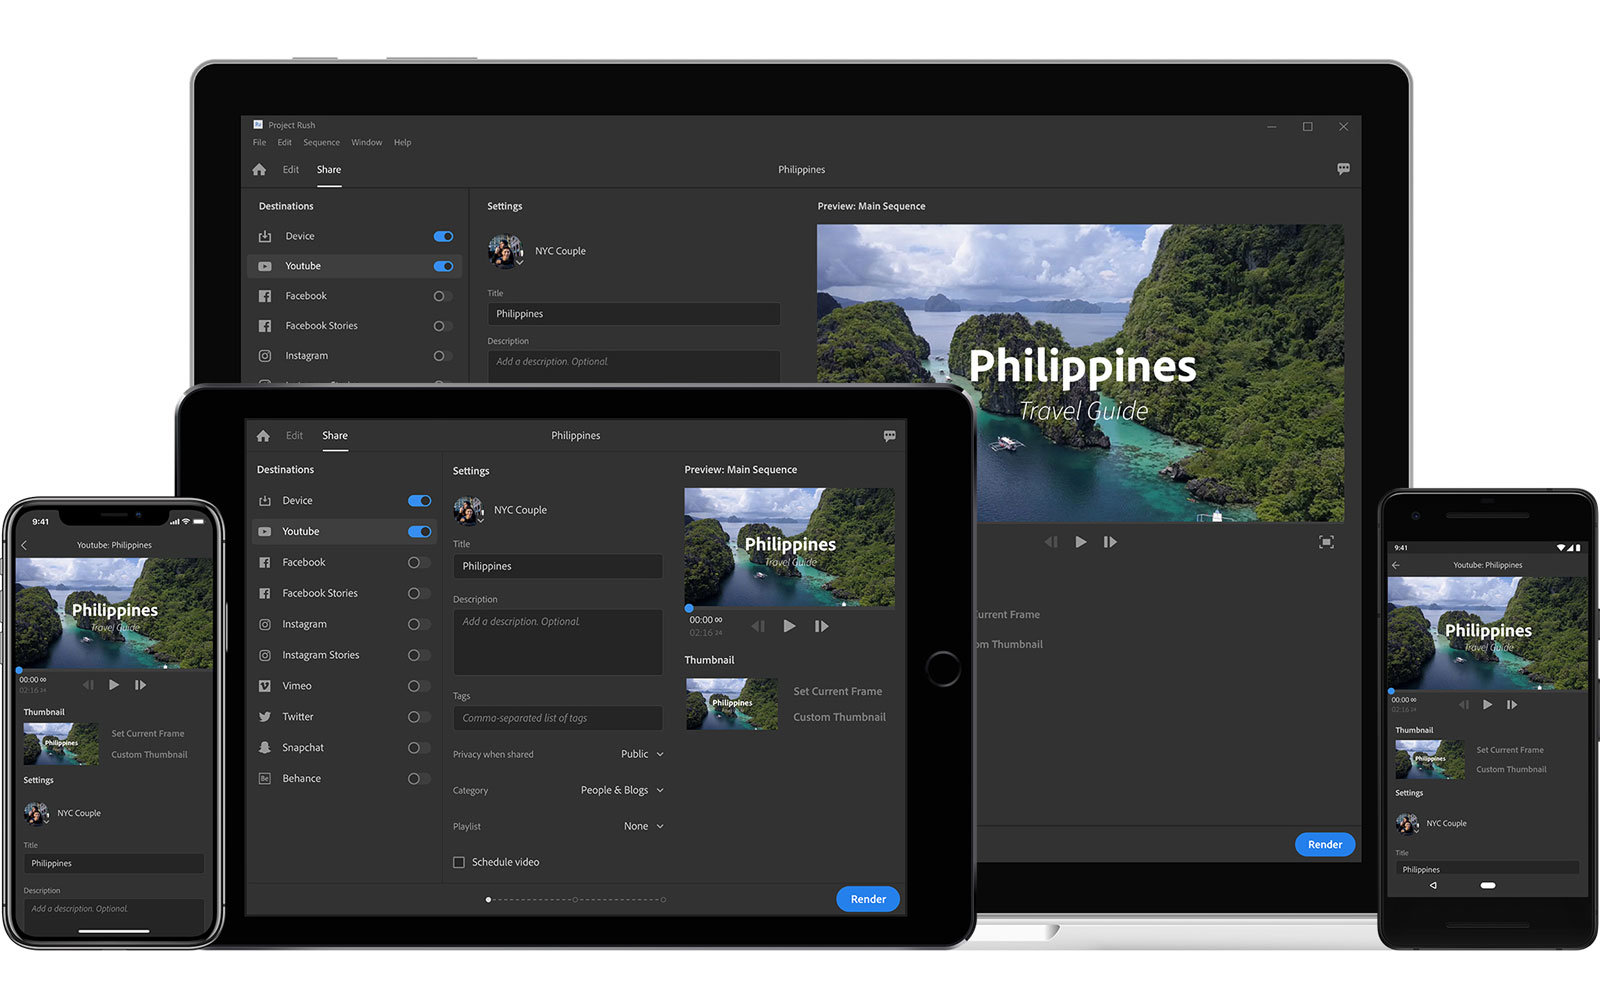
For video I always use my laptop in a workstation I created at home so I don’t spend all my time in the studio, but it’s still a fixed place. When I heard about Project Rush for the first time I was over the moon, finally some video editing that I can use for the vlogs and smaller educational videos, at that time I did try “Power director” for Android and although it’s pretty good it wasn’t really what I could use daily so Project Rush… bring it on.

A few months later we were together with Adobe at Photoshop World and I got the major hit…… Photoshop is coming to the iPad. Slowly I started to look at the iPad pro again but I also had a lot of doubts. How can you work with Photoshop and video if it’s a real pain to get your files on and off your iPad, especially when you don’t have internet or very slow internet. (for years we were stuck at 10mb/s down and 0.7 up (if the winds were right).

Slowly it’s getting together
With the announcement of iOS13 / iPad OS, I knew it.
Adding external hard drives and having a “real” file system that’s it, now we are talking.
So I ordered my brand new USB-C iPad Pro.
At first, I ran the beta version of iPad OS and am now on the final release candidate so I think it’s time for an update.

Software vs Apps
A lot of people will claim that an iPad pro will never be a replacement for the laptop because you don’t run full versions but apps. Well let me put that straight, it’s an excuse (in most cases) take for example the software Lumafusion (you might have heard that name before), Lumafusion is an insane video editor for the iPad pro that for me actually is debit to the fact I hardly use my laptop anymore. I loved premiere and could edit almost blind on it (for what I need) but having an iPad in my lap and being able to do everything with touch is unbelievable, in fact 99% of all the video you see online from us is edited on the iPad pro with a mix of Rush and Lumafusion. And of course the desktop app can do more but in most videos, we don’t use multi-cam and I don’t need face-tracking with object avoidance nuclear radar interpretations…. (although a stabilizer would be cool inside Rush or Lumafusion, but there are very good external apps).

Same goes for office applications, I don’t need the full-featured desktop experience, I need to be able to write, edit and read and that’s it. So apps vs software are in most cases a bit like range anxiety with Electric Cars, you worry about it when you don’t own one when you work with and own one you will quickly see that the benefits highly outweigh the negatives.

But is it really pro?
Well, what is a pro?
Let’s see when an iPad pro can really replace a laptop.
Travelling salesperson or manager: without a doubt
Consumers that surf, read, watch movies etc. : without a doubt
Heavy media users and gamers: without a doubt (but with other games and MUCH longer battery life)
People that love to draw: oh heck yeah, can’t think of any device more suited for that
People that vlog: yep, without a doubt, unless you feel you have to Spielberg
Podcasters: oh yes, without a doubt, in fact, it would be my favourite thing I think.
People that do photography and video:……… you might expect yes but it’s different from that.

I don’t want to say yes or no, let’s just see what I think and experience.
Adobe (again)
Adobe for me is a company I love. I know they get a lot of hate about subscriptions but I would rather get updates weekly and pay 12.00 a month that get an update once a year and pay 199.00 for that update, often people seem to forget that without a continuous income stream you can’t do research and development. That being said, I’m a bit disappointing up till this point on a few key elements that actually make me wonder if I will continue with the iPad pro.

Lightroom CC
Lightroom CC is my mobile world, I can’t stress how much I love this app. It’s on all my devices and it’s the perfect companion when travelling, and because I only use it when travelling even the 100GB cloud space is more than enough, even when I save all the images I take during a 2-week trip. I love how I can work on every device and when I arrive back home all my images are already in Lightroom Classic and the only thing I have to do is check my edits on a calibrated BenQ monitor and I’m done. Absolutely awesome.

However……
Lightroom CC is incredibly crippled by one simple thing.
Why the heck can’t we rename images?
Now I understand Adobe wants us to move everything to the cloud but did they ever think about people (like me) that often don’t have good internet in hotels (try uploading images with 0.07 up) and that being said, I just want to be able to name my images the way I want them and not the way Adobe wants it.

Not being able to rename means that during travels you can’t really export any images to clients because the moment I’m home I’m renaming all my files in Lightroom Classic so I can never find something back on a filename that I send out on the road. Something that’s so essential should be in the software. But let’s not blame Adobe…
Batch renaming part II
So it doesn’t work in Lightroom CC, ok we can work around that right?……
Well…..
Silence…..
No we can’t.
And I’m still a bit flabbergasted by this.
How can Apple call a device Pro and a file system let alone a laptop replacement if in the WHOLE Apple ecosystem (including apps) there is not ONE option to batch rename images? what’s going on here? this is the first and most important thing I do in my workflow, rename images by location and date. I searched high and low and can’t find ONE app that allows me to batch rename images (if someone does please let me know). In the end I did find a solution via automation but that’s also not really a solution you can work with, it’s a lot of steps and it does take some time. And time… well we don’t have that much.

To be honest this is the biggest problem I have (such a small thing).

Ok so what does work
Let’s be fair, I love my iPad pro and as mentioned before there are always cons and pros, and if the pros outweigh the cons you go for it. So let’s see:

Presentations:
Works like a charm, it did took me a while to find the proper remote but it now really works like a dream. Even editing presentations is fast and almost just as powerful as on the desktop. At the moment I’m mostly using KeyNote but also Powerpoint works great on the iPad.
CHECK 100%

Shooting tethered:
Mixed bag.
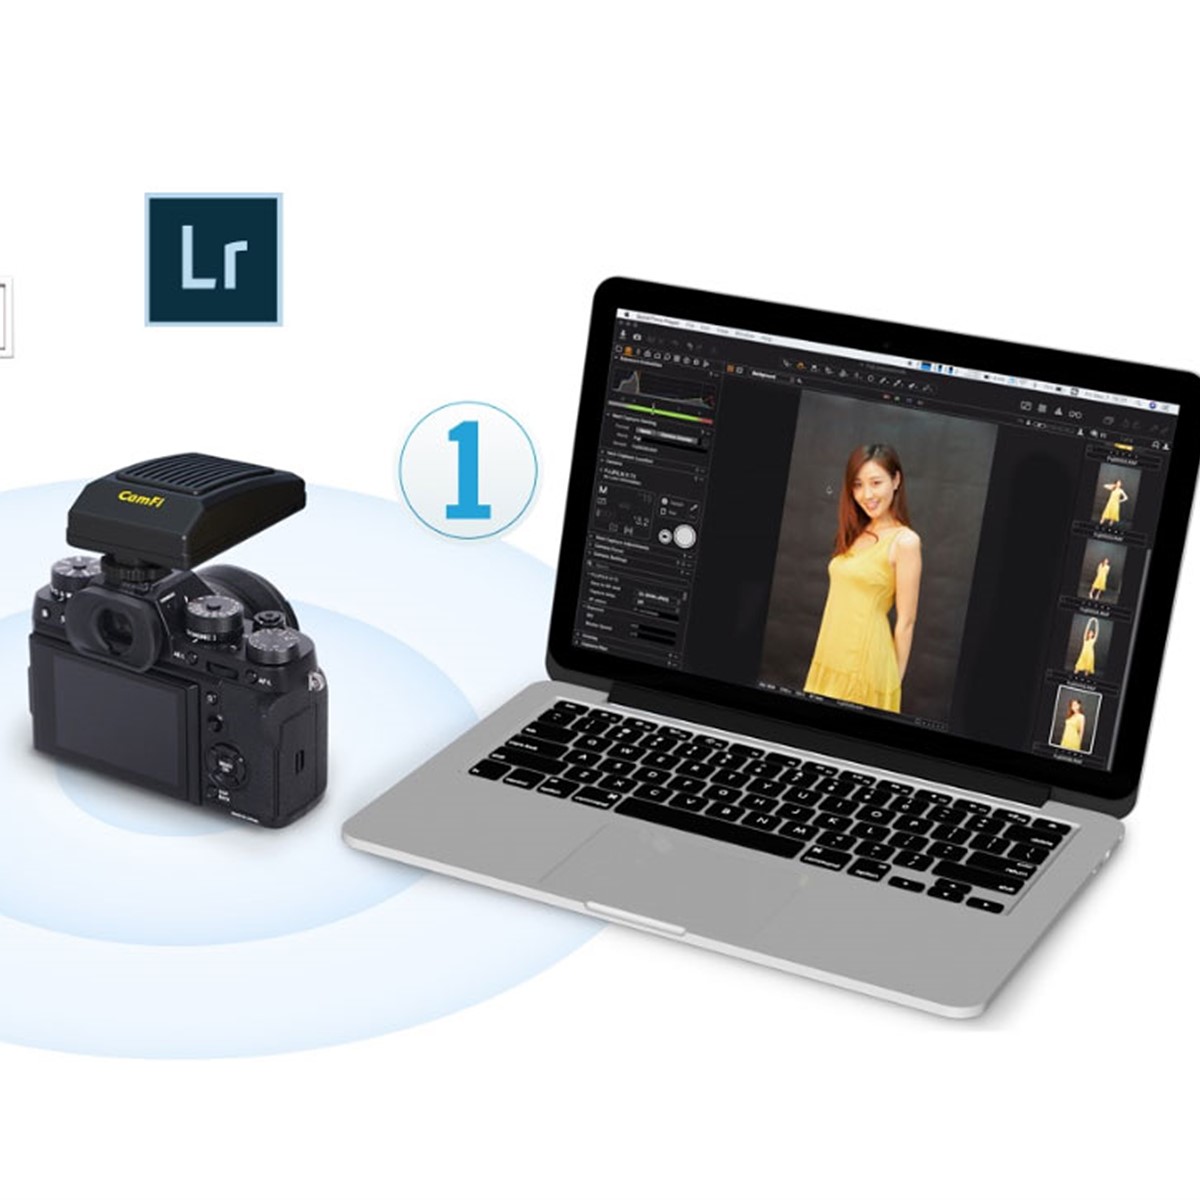
When I use the Sony app it can work like a charm, but it can also frustrate the heck out of me. I’ve had situations where images took 4-20 seconds to come in and I’ve had situations where they only would come in when I was 1 meter away from the iPad Pro. For a while, I tested the CamFi (I’m shooting Sony so Camranger and case air don’t work at the moment) and that was a totally different experience, everything came in blazingly fast and even at Photoshop World from a distance of over 30 meters it still didn’t miss a beat. In a few week a new Tethertools product is being released with even better performance (and for Sony) and I can’t wait to test that one out.

Still, I really want a solution where I can also shoot with an USB cable. Let’s be honest wifi is still a risk you take and I just can’t afford to be somewhere and say “sorry… we don’t have images coming in but they are awesome, trust me”. I do believe however that with the opening of the USB-C port it won’t take long before someone will pick this up. And with a rock-solid wifi connection, I’m willing to wait for this (in case of emergency I have a solution on my phone that works with USB-C tethering, and as long as the people see the images it’s fine).
CHECK 80%
Media consumption and comics/reading/gaming
Duh, not even gonna talk about that
CHECK 100%

Video editing
With both Rush and Lumafusion I almost dare to say that unless you want to create something really special 99% of the edits can be done in Lumafusion and a lot in Rush. Main advantage of Rush is that you can start mobile and do the final edits on the desktop.
CHECK 90%

Music creation
Oh man…… I just can’t express how much I love the iPad for this.
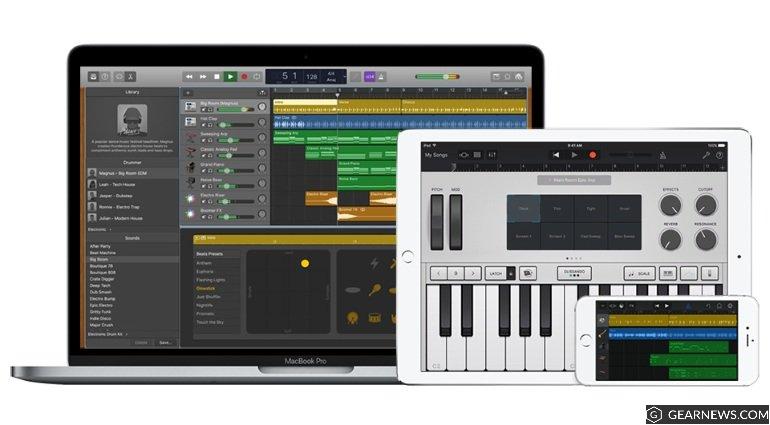
Garageband is insane, combine it with apps like ToneBridge and iRig and you can lock me away for months and I will not get bored for a second. If you want more? there are several Pro DAWs on the app store ranging from ok priced to rather cheap. Also try to connect your iPad pro to your desktop DAW for some cool slider action.
CHECK 100% +++++

Photography
Ok there we go, the moment you’ve been waiting for.
Let me forget about that renaming thing.

For a good conclusion I have to do it slightly differently.
If you’re a traveller and do most of your edits in Lightroom I would say that the iPad Pro is amazing and will without a doubt replace your desktop. Lightroom CC is fast and multi-device (which for travelling is so cool and handy), add to this the fact you already have a backup in the cloud and you can see that this is a winner.

I would say for the travel/nature/street photographer
CHECK 99%

Ok, now we need a bit more.
Panoramic shots
I’m flying my drone and I want a panoramic shot (this would also go for the previous one btw) at the moment Lightroom CC doesn’t stitch, and also the just released Photoshop doesn’t. But don’t worry, there is another app out there called Afinty Photo and believe it or not that one does stitch panoramic shots. But…. the last time I tried it it took Afinity over 20 minutes to do it…. editing a complete vlog in 4K took less render time, so that’s next to useless unless you only have 1-2 panoramic shots.

FAIL 10% (it can be done)

Ok now we take a look at the photos that need editing
On the desktop most of my edits are done in Photoshop with my model photography.
Although with the new texture slider Lightroom can do some good skin smoothing, running a plugin like Portraiture is no competition. Also tinting with Exposure software, or making an image pop with Topaz studio/Luminar is a breeze and very fast. When we take a look at the iPad Pro we have a few options.

  1. Afinity Photo
    This is the best thing you can get at the moment that mimics Photoshop. It’s a mix of frustration and love I have for Affinity. Somehow when I follow my workflow to the letter it “kinda” works, but I’ve had a lot of struggle with layer mask and reselecting them, also merge visible or selected doesn’t work and don’t even try to open something else on iPad iOS 13.2 because somehow they broke multitasking so all your work will be gone.Overall I can almost anything in Afinity, including some pretty good skin work, healing and cloning however feel awkward and although it gets better it’s still very work-intensive compared to the desktop
  2. Photoshop
    Just released so it’s not really fair to give my opinion, but I still going to do it.
    We’ve been waiting for a year (even longer for some) and to be honest the release does disappoint me a bit. I love to tint my images via curves and seeing that there is no curve option just made me sad, I can do it with levels in a similar way but …. come on no curves?
    Also I have a lot of things that simply don’t work, messages like “this is not available on your device” sorry…. what? I’m not running Android where there is a difference between devices, this was designed for the iPad pro and I’m running the latest one…. why?, how?
  3. Snapseed
    We all love snapseed, and I mostly use it for tinting. For real photo-editing? Not really
  4. The others
    There are a LOT of editors on iOS and I don’t want to say they are not good enough to mention, but let’s be honest there are not a lot that have the features of Afinity and Photoshop so I left those out mostly because they have severe limitations in export, resolution etc.

If I look what I’ve done so far, I’m able to deliver the “same” looks and quality to my clients than I would do on my desktop, that being said….. it does take me at least twice as long per image. So I would say
CHECK 80%
Finally the file system
The promise, the thing, the magic of the iPad….

Well for me the disappointment of the iPad, well ok that’s a bit too harsh.
I’m very happy with it, you can now just connect an external SSD, card or whatever and you can easily copy stuff from and to your device, that part is awesome and well needed. So what don’t I like?

Well, it’s the way how.
For example the film roll is still fenced off like crazy, you can’t go to your photos via the filesystem, and if you want to copy for example images to photos you simply can’t….. unless you use the share option. When you are in photos you can share via filesystem so it’s all possible but it’s not like Apple (easy and one-click). I also feel the speed is limited (a lot) making copying huge amounts of data very time consuming, and finally you don’t really see what’s happening, I would love to see an indicator of percentage or time. For me the best way to work with the filesystem is just to have to windows next to each other and just drag and drop.

Another cool addition is the connection to network locations, but in our situation, we often lose the connection and it’s quite buggy when I want to copy files or delete files on my NAS (as in it just doesn’t work or is very slow).

I would say that for normal every day use it’s fine, but it needs a lot of work before you can even add the P from Pro.
Also we really need to see the option in the apps, meaning I can just use the file system in Lightroom CC, Lumafusion, Rush etc. At the moment Rush, for example, is not able to import anything from another location on my iPad than Photos.
Check 51% and 70% if apps start to support it.

Hardware
Finally let’s take a quick look at what I use as hardware
For the cover, I have one cheap cover that just protects the iPad when I don’t need a keyboard.
For the keyboard, I opted for the Logitech which I love, but it does make the iPad pro a bit heavy for reading in bed for example. I think if I would do it all over I would opt for the Apple version, the keyboard is a lot less but it does make the whole experience a lot easier to carry and you don’t have to switch cases.

Apple pencil without a doubt, don’t go for the competition, you will be using it a LOT

For connectivity, I’m using the Hyper solution. I really like this one and opted for Hyper for the simple reason that most of their products are well supported and good quality and seeing I’m using it like a pro device I don’t want any surprises. Do realize you have to disconnect it every time because it does drain the battery.

I’m also using a magic touchpad (I still had that one) for when I want to connect the iPad Pro to a monitor and use a separate keyboard and mouse like functions.
Conclusion
You might think I’m pretty harsh on the iPad pro.
And I might indeed, but let’s make one thing clear…. I strongly believe that in 2 years time we don’t travel with laptops anymore but with tablets like this. The reason is incredibly simple. You can do almost everything you can do on a laptop, in fact you can work faster and longer with creative software, the Apple pencil is just insane in how it works (and I love the new charging option).

The reason I’m harsh is more also towards Apple.
They charge you a premium price for all their products and throw around terms like magic, unbelievable etc. almost every minute in a keynote, this will, of course, strengthen the expectations someone has of a product. I already feel the iPad pro was wrongly launched, although people that draw will disagree and they are right, and after giving the iPad pro a second chance I can’t say I’m overall disappointing but it’s a far cry from what Apple makes you believe. The weird thing is…. it’s 98% there and that’s the most frustrating thing if a device doesn’t work at all you can just throw it out and don’t think about it.

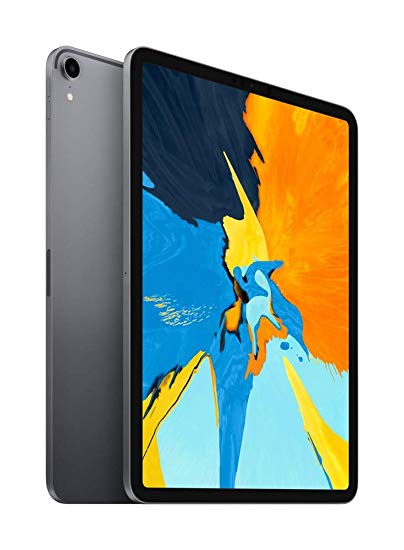
The iPad Pro is a marvel.
I can edit 4K video smoothly on the timeline where my i9 needs proxy for h265 (insane), rendering a 10 minute video takes 8 minutes on my i9 en 10 minutes (real-time) on my iPad Pro (again insane), the screen is double as bright outside as my laptop which is a major deal when teaching workshops on location plus the battery just keeps going.

The apps are great.
Afinity photo is great for almost all photo-editing (but needs some serious bug fixes and performance boosts)
Photoshop I strongly believe in, but not at the moment… I know for sure that in a year we will have a different Photoshop on the iPad than the framework we see now, at the moment it’s a cool start but it doesn’t come close to the features in Afinity, but that being said, I think that in 2 years time Photoshop will be the ruler on the iPad Adobe just needs to start adding things and they already promised a very aggressive upgrade program so I’m full of confidence, and till that moment I can do everything with Afinity I need.

iOS itself is the thing that worries me the most.
Apple is always very “my way or the highway” and I just hope that by opening the USB-C port they don’t limit it for third parties to for example create tethering solutions or external connections.

At the moment I will continue using my iPad pro as a daily driver and my laptop is actually only used at the moment for our live streams and music recording (I like working with cakewalk on the desktop a bit more than the “limited” Garageband for full recordings especially with additions like EZkeys and EZdrummer etc). So overall I can say.


Yes, the iPad Pro can replace a laptop (finally) but if you are a demanding person (like me) there are some sacrifices you have to make. If they finally fix that batch renaming that would be a major improvement.


https://frankdoorhof.com/web/wp-content/uploads/2019/09/Apple_iPadOS_Today-View_060319_big.jpg.large_.jpg 650 816 Frank Doorhof https://frankdoorhof.com/web/wp-content/uploads/2015/03/studioFD_Logo-1FV.png Frank Doorhof2019-11-06 12:16:132019-11-06 18:12:49iPad Pro current state ….. is it Pro or not?
Page 1 of 212

Newsletters

Subscribe to our newsletter for updates, discounts, and much more

English news letter
Dutch news letter

Interesting links

Here are some interesting links for you! Enjoy your stay :)

Snel naar

  • Blog
  • Learning with Frank
  • News etc
  • Reviews
  • Shop products & books
  • Contact

Contact

Studio Frank Doorhof:
Constructieweg 8
8305 AA Emmeloord

The Netherlands
+31-6-14522327

Or Email : info@frankdoorhof.com


© Copyright 2000 - - Frank Doorhof
  • Link to Facebook
  • Link to X
  • Link to Youtube
  • Link to WhatsApp
Scroll to top Scroll to top Scroll to top