What happens if you change your photo to Black and White?
The choice between black and white, or color can be tricky.
For me personally I sometimes shoot something with the intent to make it black and white. But then when I see the results I often keep it in color, because I just love the way it looks. And what happens if you change your photo to Black and White?
Sometimes you might shoot something that is very colorful and you don’t even think about black and white. That’s why I post this today. Luckily with digital, we can of course do both 😀
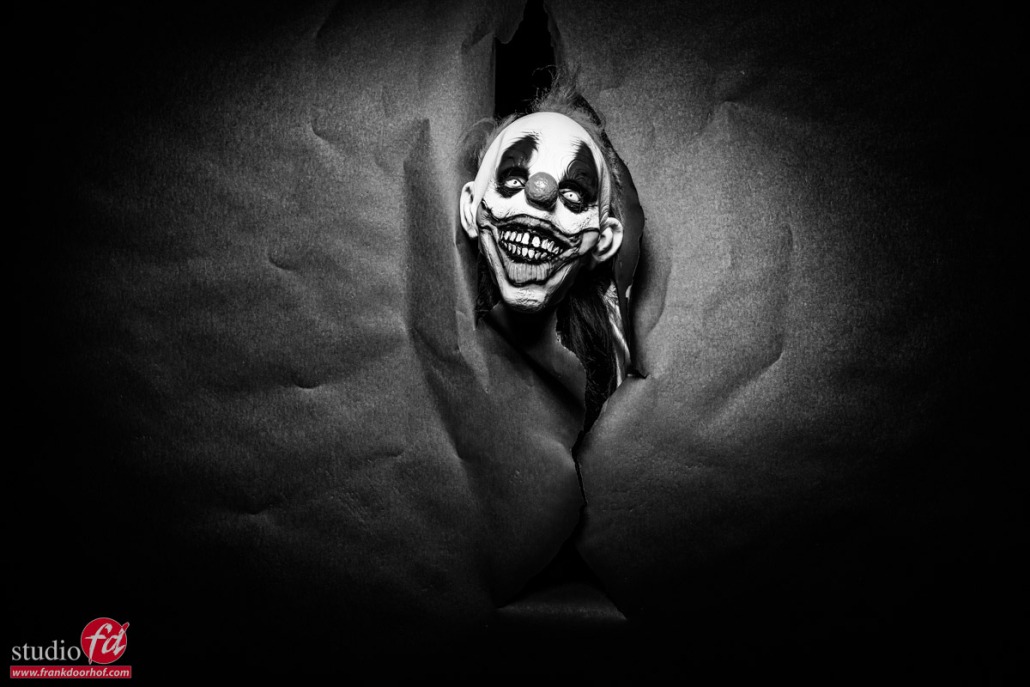
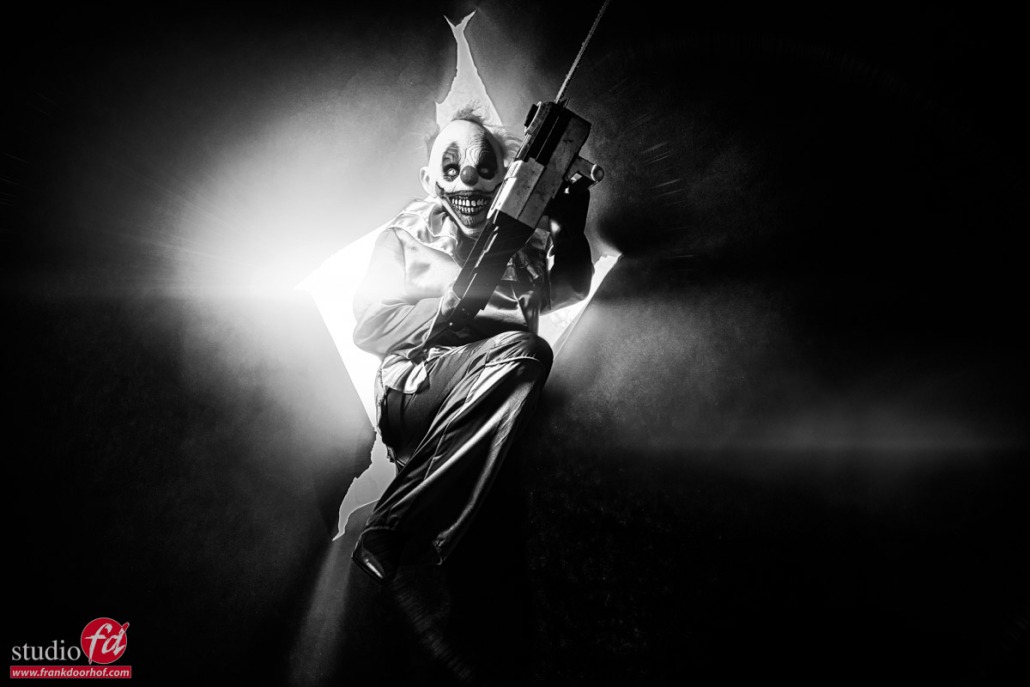
The horror clown is back!
Well she was here just 2 days ago, so she was not really gone 😀
But as you could have seen in the previous blog post about the horror clown, the color was pretty colorful. So this is the kind of set where you might not immediately think about a black-and-white conversion, but…. think about this.
Black and white doesn’t just mean we take out the color.
In fact, you can still manipulate the colors via the H(S)L adjustments in Lightroom. A bit like in the old days photographers did with filters. We can now manipulate images to our hearts’ content in our RAW convertor.
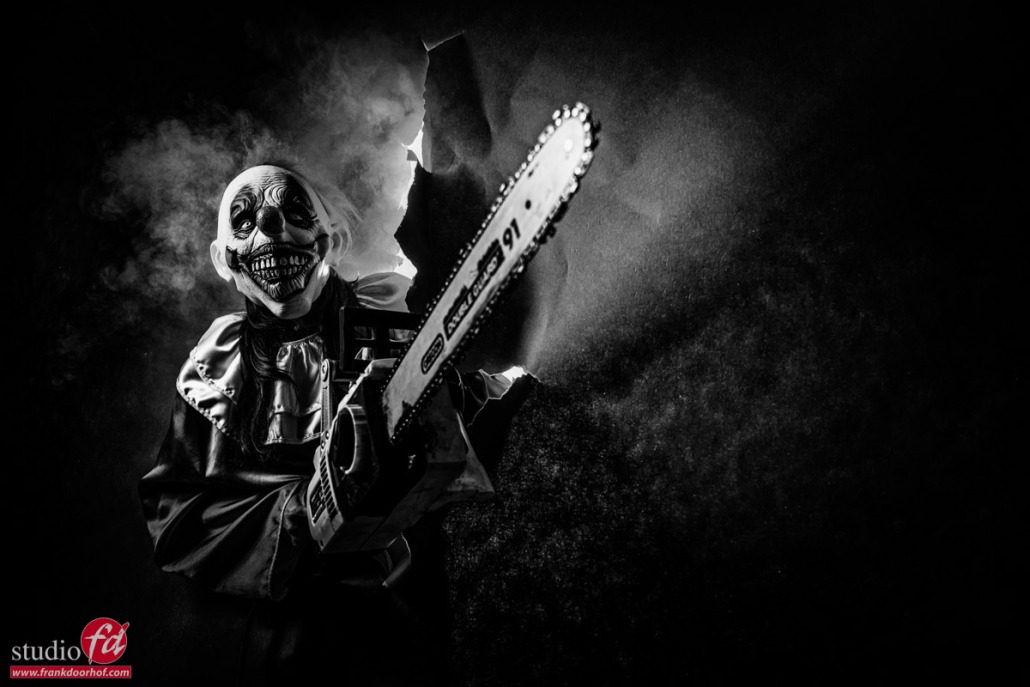
The idea of black and white in this setting is not to take out color but to inject a lot of mood and make the images more creepy. And that’s the cool thing about black and white. I sometimes make the joke
“if you mess up a shot, add a lot of contrast and noise, make it black and white, and voila instant art”
It sounds weird, but it’s really true.
If we look at a color image that is just slightly out of focus or has a shadow that’s not 100% correct in color we immediately see this as “bad”. But make it black and white and we see it as mood, or we don’t even notice it. Now that doesn’t mean that all my images that are black and white are “bad” images of course. But some street photography images have been “saved” that way in the past 😀
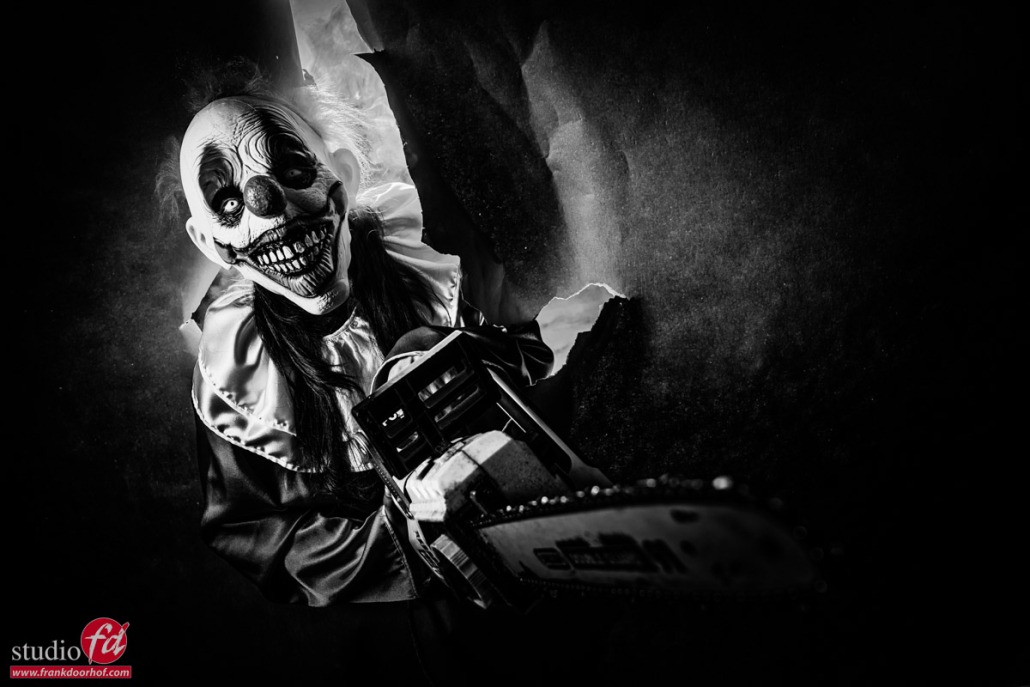
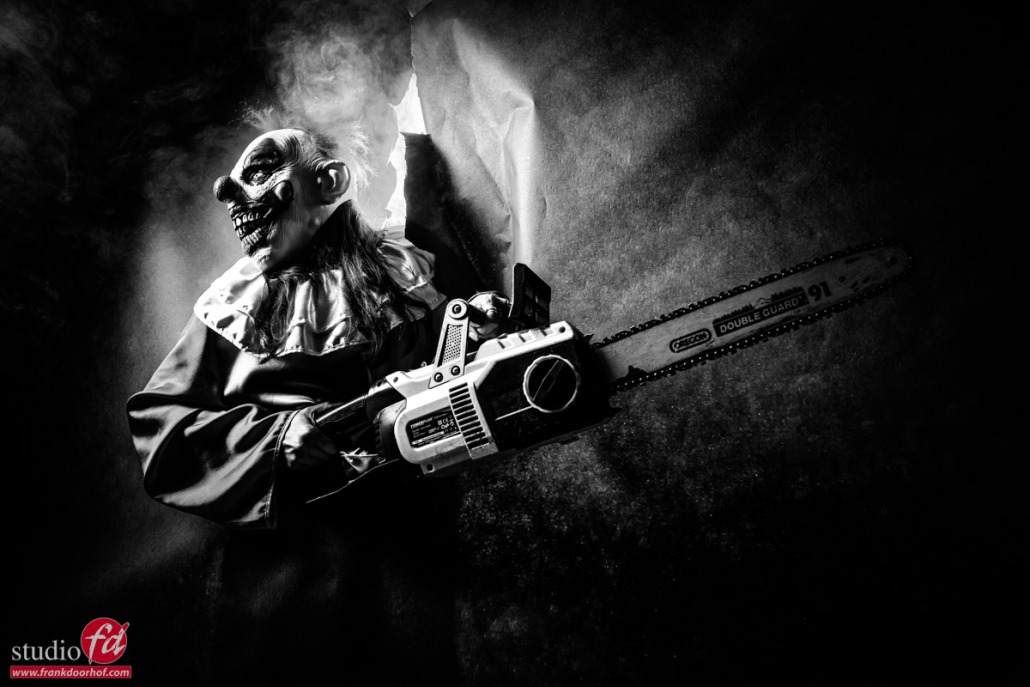
As you can see the images get a totally different vibe and look.
For me even more creepy than the color versions.
Learning all about lighting in our workshops
For me teaching the workshops is not all about lighting.
Personally, I think there is a lot more than just lighting or a cool/fitting backdrop.
A good photo is a cooperation between the model and the photographer. So coaching and making a model feel at ease is vital. But after that, the real creativity comes into play, and during the workshops, I try to focus at least 80% on creativity.
This can be with lighting, but also with the storytelling part.
As mentioned in the previous blog post, working in “super creativity” model can enhance your skills way above the level you would achieve if you only shoot what you are hired for. Plus if you can shoot images that your client is not used from you it could very well be that he/she asks for something a bit more creative.
https://frankdoorhof.com/web/wp-content/uploads/2024/05/Felisa-16-May-04-2024-Edit-2.jpg8001200Frank Doorhofhttps://frankdoorhof.com/web/wp-content/uploads/2015/03/studioFD_Logo-1FV.pngFrank Doorhof2024-05-09 17:00:482024-05-16 11:47:38What happens when you change it to Black and White?
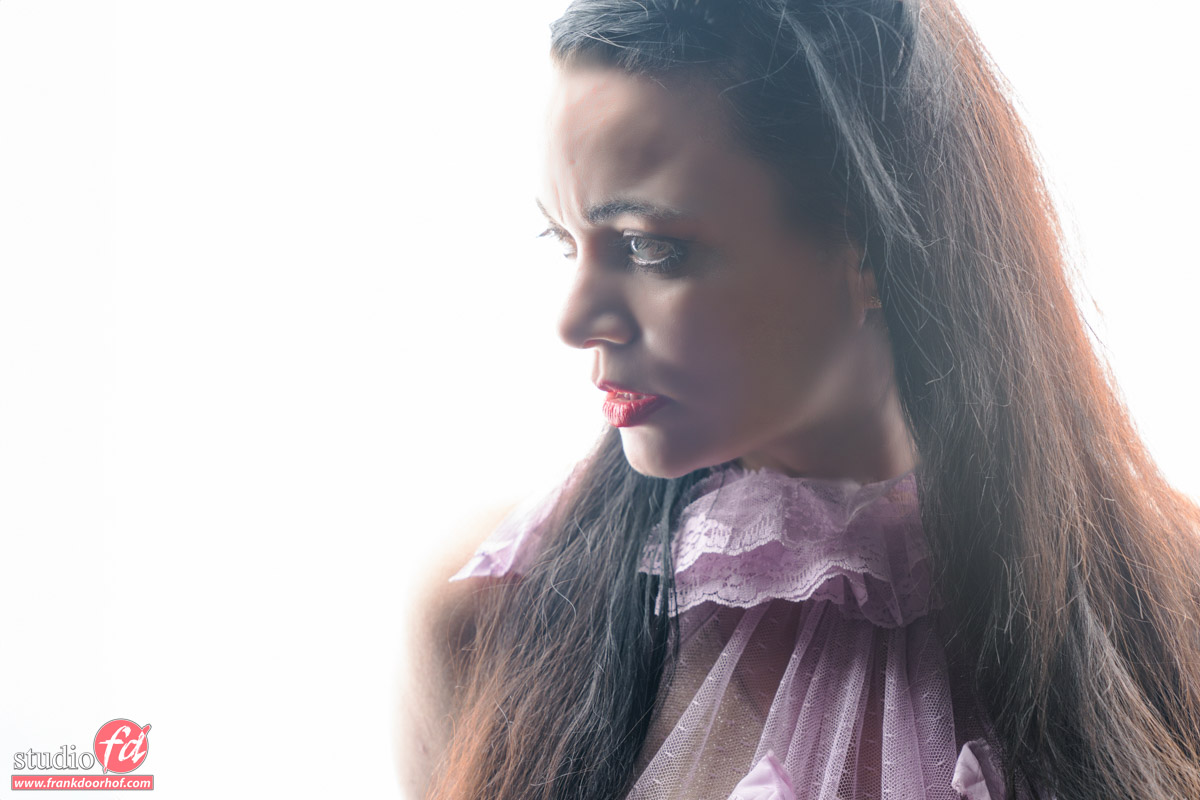
Sometimes you’re looking for something different, something a bit more daring or edgy.
Now mostly during normal shoots we always try to keep the lights out of the final results, but also to take out as much of the flare as possible. For the flare we have great coatings on lenses nowadays so when you add the sun hood on your lens you probably won’t have any problems with flare.
Something else
But as mentioned, sometimes we want it differently.
In the shot I’m still using a mainlight (Geekoto GT400 with the 26″ softbox) but the most of the effect of the shot is coming from the striplight in the back. For the extra flare I’m using a K&F Concept black diffusion filter on my lens.
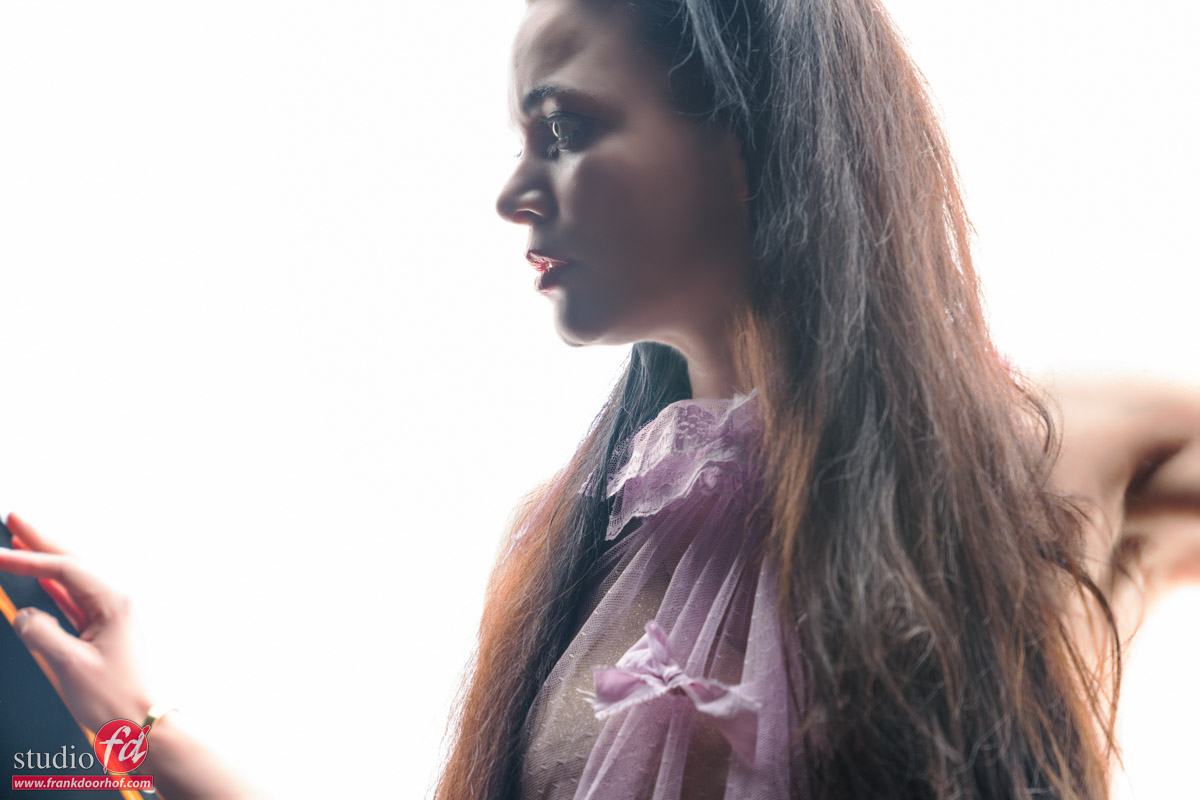
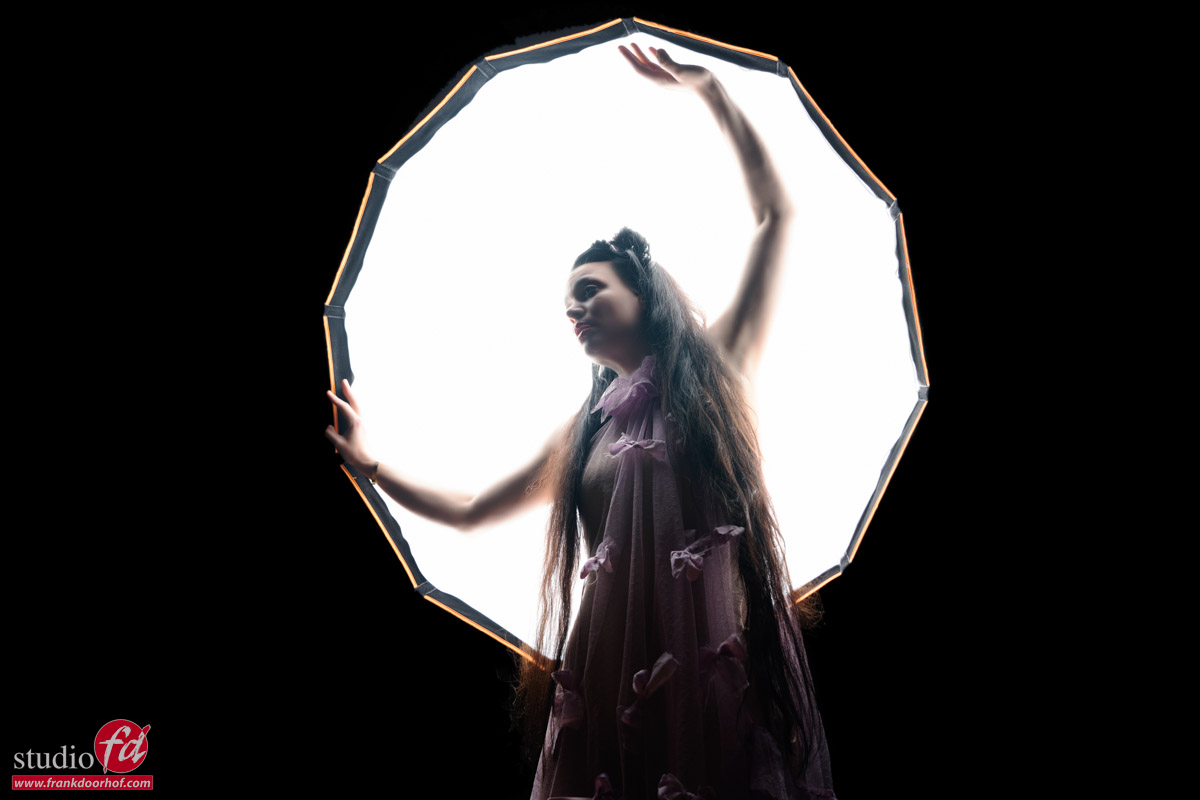
One big softbox
Now what if we replace the striplight with just a big softbox and don’t even add a mainlight source?
We get a very nice setup for some high-key portraits or just fun/different shoots.
You do have to be careful which way the model looks, straight on will be very ugly in most cases, but looking to the side can work like a charm.
Do make sure to take of the diffusion filter 😀 that will be a “little” bit too much.
Model : Nadine
Conclusion
As you can see using your light in different locations can give you awesome results, but getting the lights in the frame and giving them a purpose within the shot can really spice up the results, add some special effects with filters and … well your own creativity is the limit.
https://frankdoorhof.com/web/wp-content/uploads/2024/02/Nadine-23-December-16-2023-Edit.jpg8001200Frank Doorhofhttps://frankdoorhof.com/web/wp-content/uploads/2015/03/studioFD_Logo-1FV.pngFrank Doorhof2024-02-17 18:00:462024-02-13 10:58:00Lighting tricks that work…..using the light behind your model, yes it works like a charm but it’s special
This blog post is about the workshop: mixing strobes with available light. Why is it difficult? Or is that just the impression? An explanation and of course, some results with our wonderful model, friend, and stylist Nadine Stephan.
The problem of mixing strobes and available/ continuous lighting
For loads of photographers mixing available (or continuous) light and strobes can be a real challenge. Still in essence it’s incredibly simple.
We have to remember our famous triangle of ISO, Shutterspeed, and Aperture.
When combining flash with continuous lighting we always have to remember that the flash is a pulse and the continuous lightning is cumulative (meaning it adds up over time).
Our flash is also a lot more powerful than, for example, LED lights. This means we start with the strobe on the lowest possible setting. This is one of the reasons I always advise buying strobes that can be adjusted in a wide range and are not too powerful. We don’t need 1000W in a studio environment. But 200-400W is actually the sweet spot. Outside you can use the same strobes on HSS and literally kill the sunlight without any problem. In our studio for these setups, we use our Geekoto GT400 strobes and GT200/GT250.
ISO and aperture are important when mixing light sources
If we know the output of the strobe we have to of course also look at the lens we are using. It makes no sense to set the strobe to f1.4 when you’re shooting with a f2.8 lens. However, don’t adjust your strobes yet….. remember that we need as much light from the continuous light as possible. So if the strobe is not outputting enough, just raise your ISO till you read f2.8 (if that’s your widest aperture).
Now that we know the ISO and the aperture we forget about those two.
Meaning you are not changing those anymore. Everything from here on is done with the shutter speed.
A faster shutter speed means the lights will be dimmer. Slower shutter speeds will make the lights appear brighter.
You can now exactly setup the shot exactly the way you want by experimenting with your shutter speed.
Some things to remember when mixing strobes with available (continuous) lights
Always start with an image without strobes and your intended continuous light to see what’s going on. In a perfect setup the image would be 100% black. Now add the continuous lighting first to see how it looks. And finally add the strobe (this is after we already metered everything and is more of a test to make sure there is no extra light, we don’t want in the shot).
When you can’t get your strobes low enough, you can always experiment with other modifiers. For example, a striplight with a grid will “eat” much more light than a beauty dish or open reflector. And if that’s still not working you can always think about adding Neutral Density (ND) filters to your strobe (not the camera, because that won’t benefit you, due to the continuous light you have to mix).
Do always remember to turn off ALL the lights in your studio INCLUDING the model lights of course 😀
If you don’t, it won’t always be bad, but you have to realize that they will influence your image.
Some results from the workshop
During my workshops, we always try to do 3-5 sets. And during this workshop we managed 4 amazing setups. But because only 3 were done with mixing strobes and continuous lighting I’m just showing you these in this blogpost.
Model and Styling: Nadine
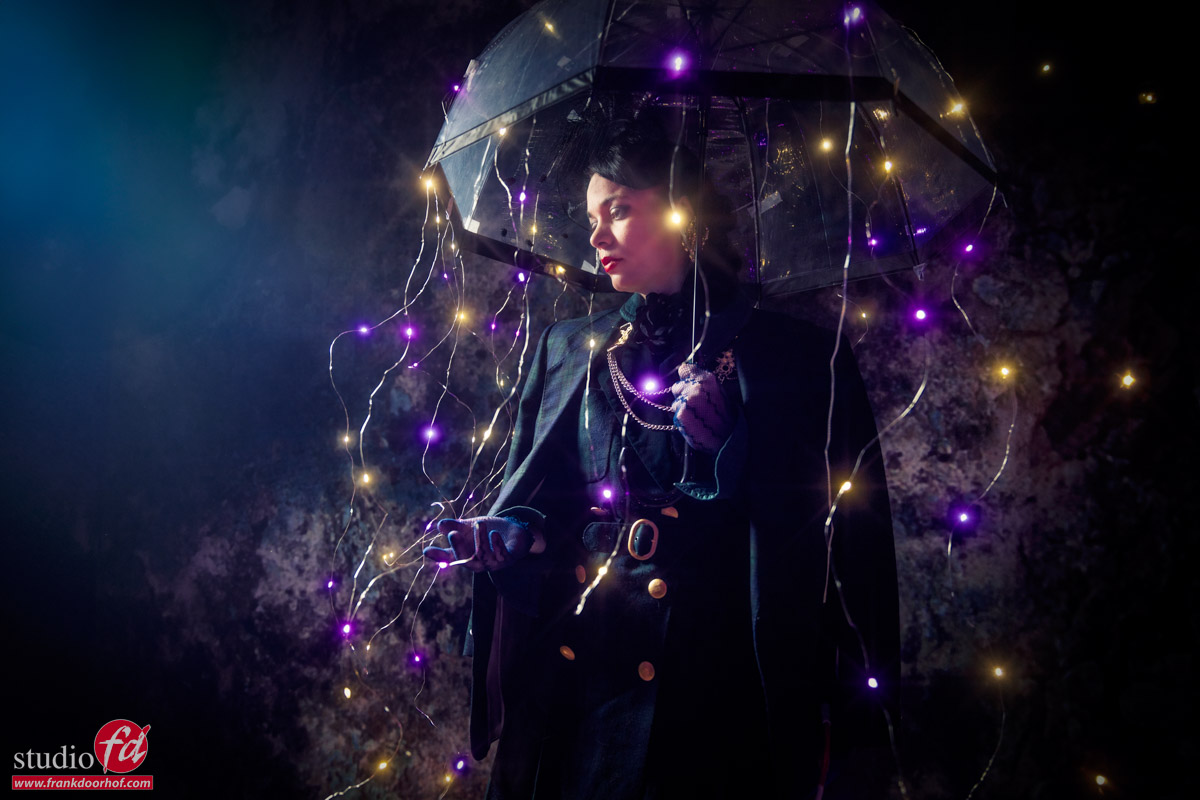
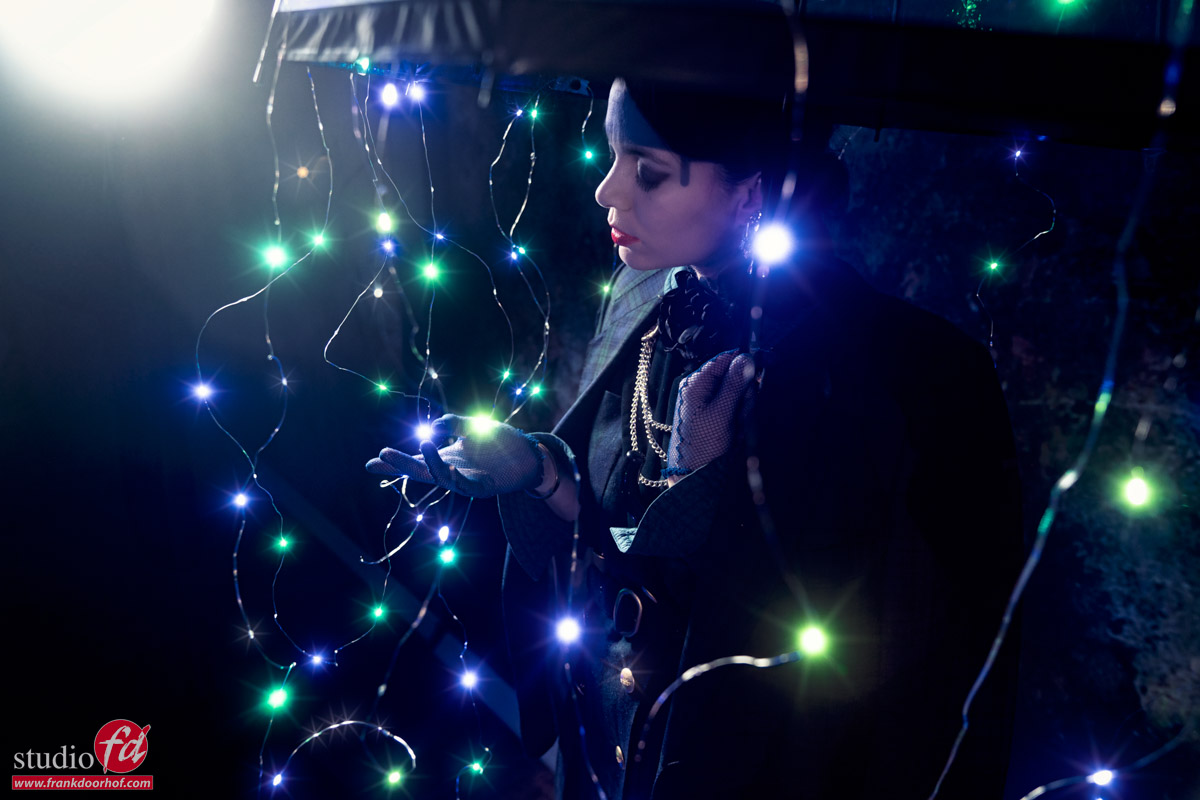
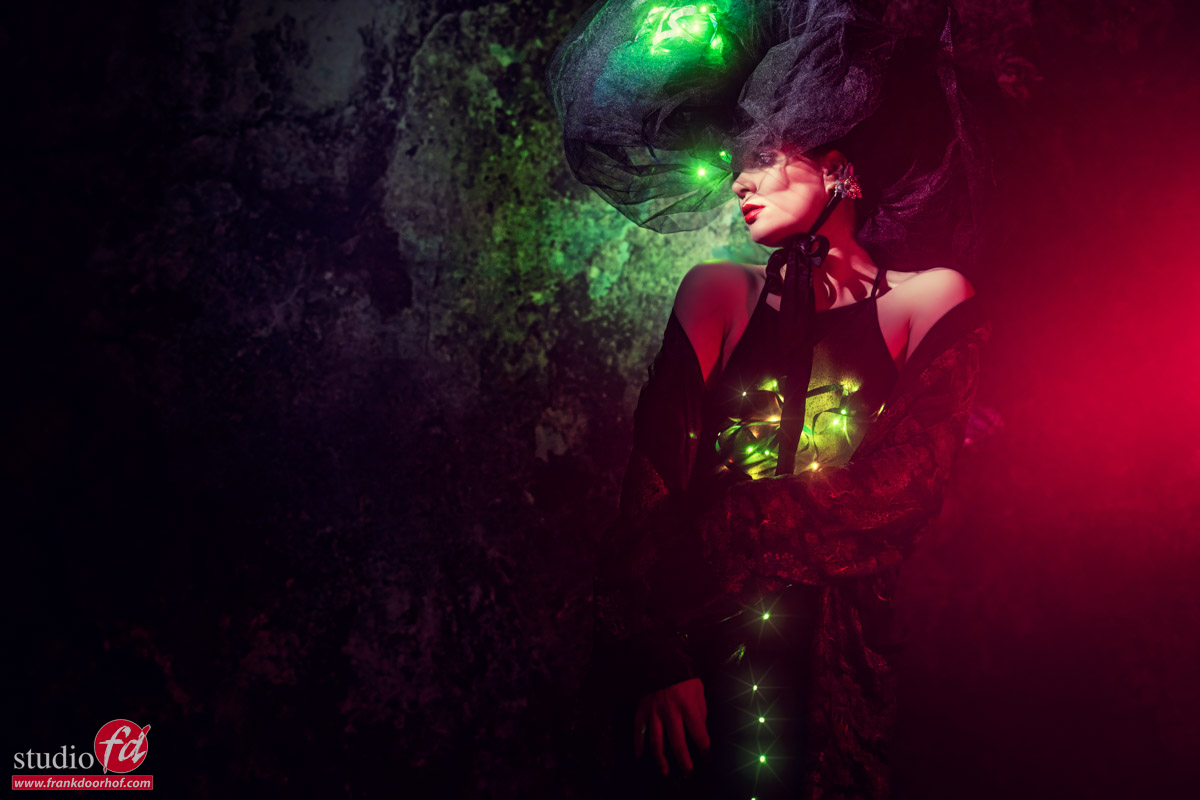
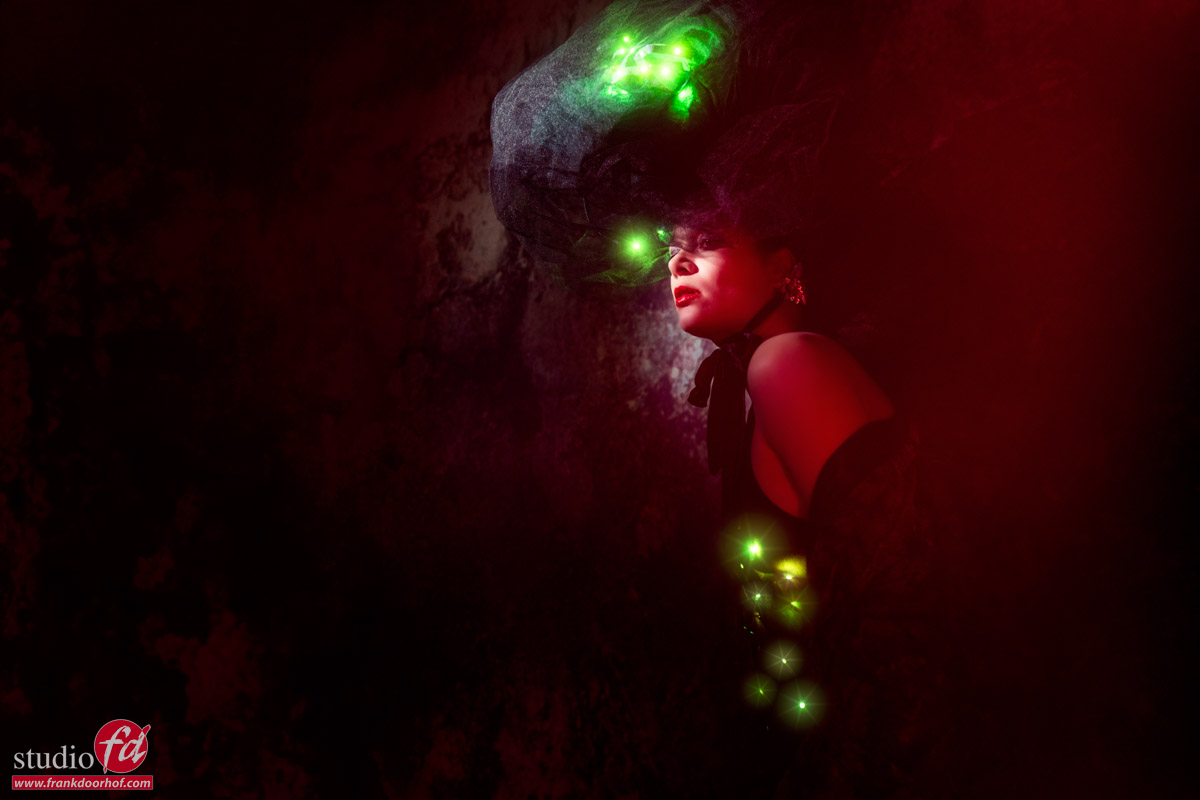
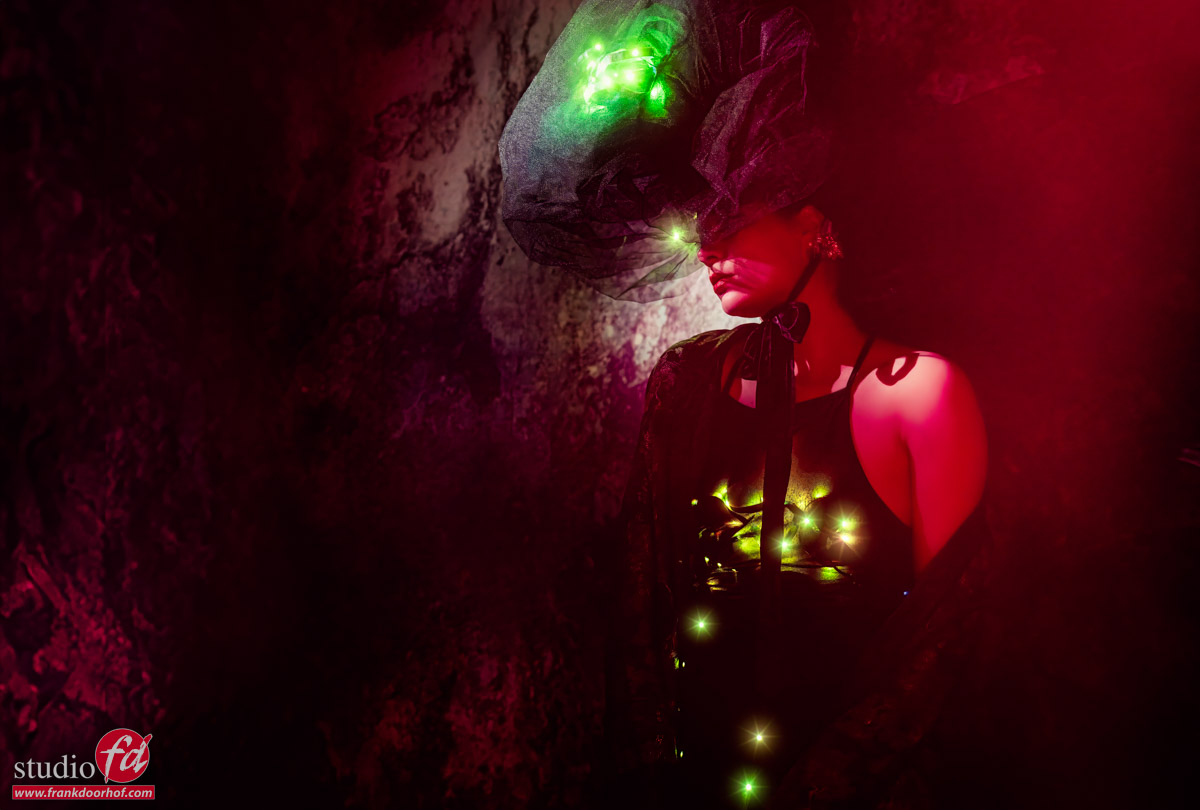
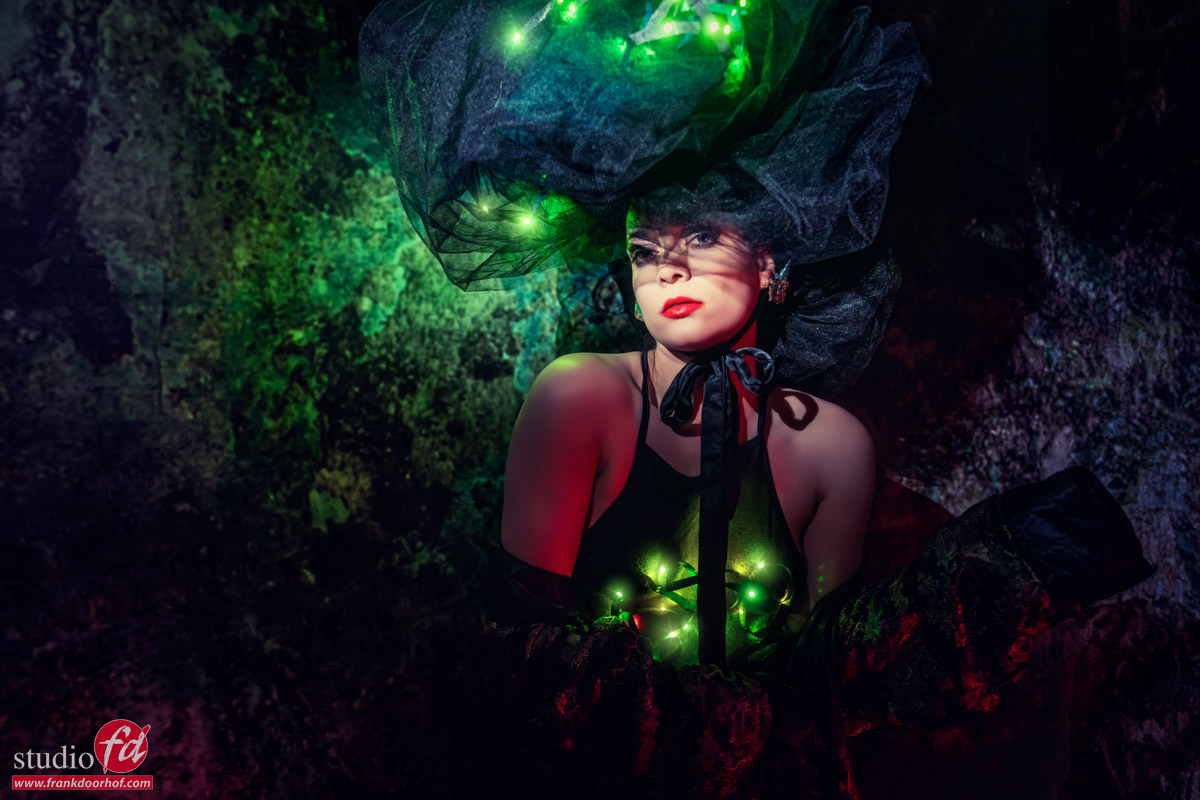
Set 1
The model is lit by the strobe
the lights blink in different colors
different angle
For the first set, we used some Christmas lights on an umbrella.
I’m using a small beauty dish with a grid as my main light source. I included it in some images for some added effect.
Set 2
In this set we had to push the ISO a bit further because there were fewer lights and the whole set was pretty dark.
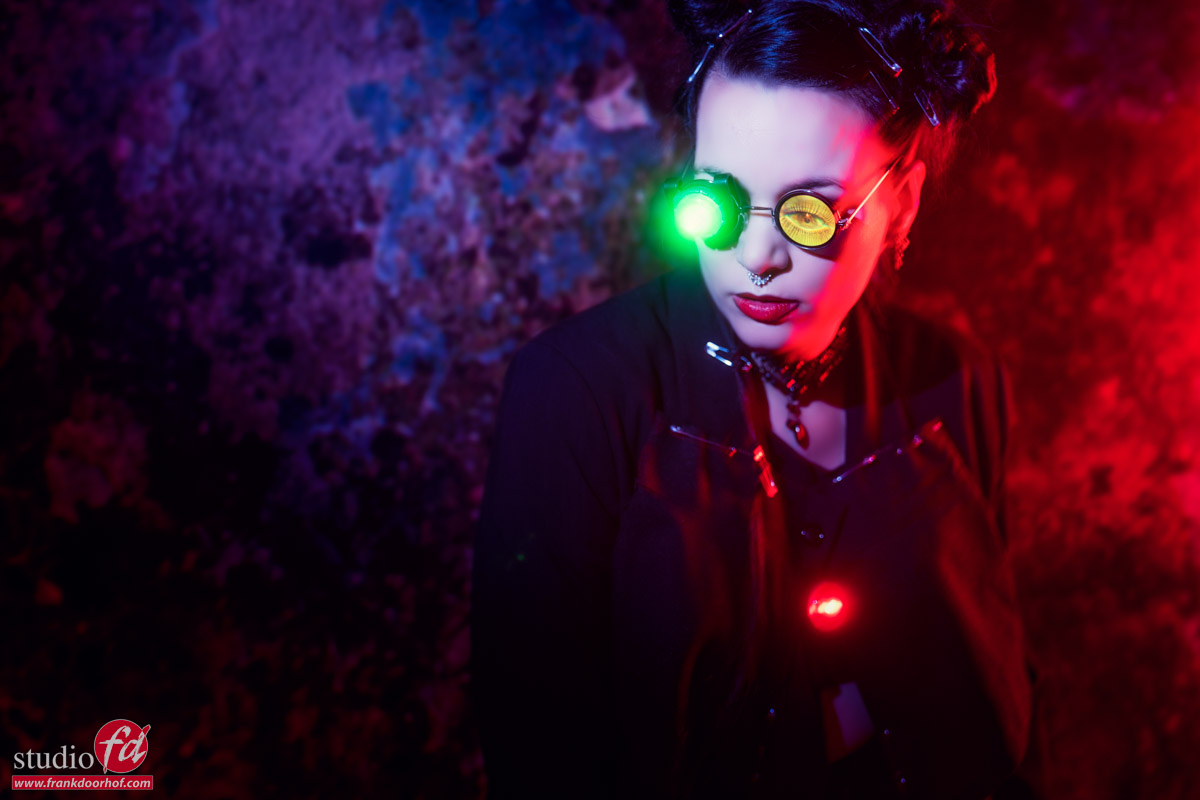
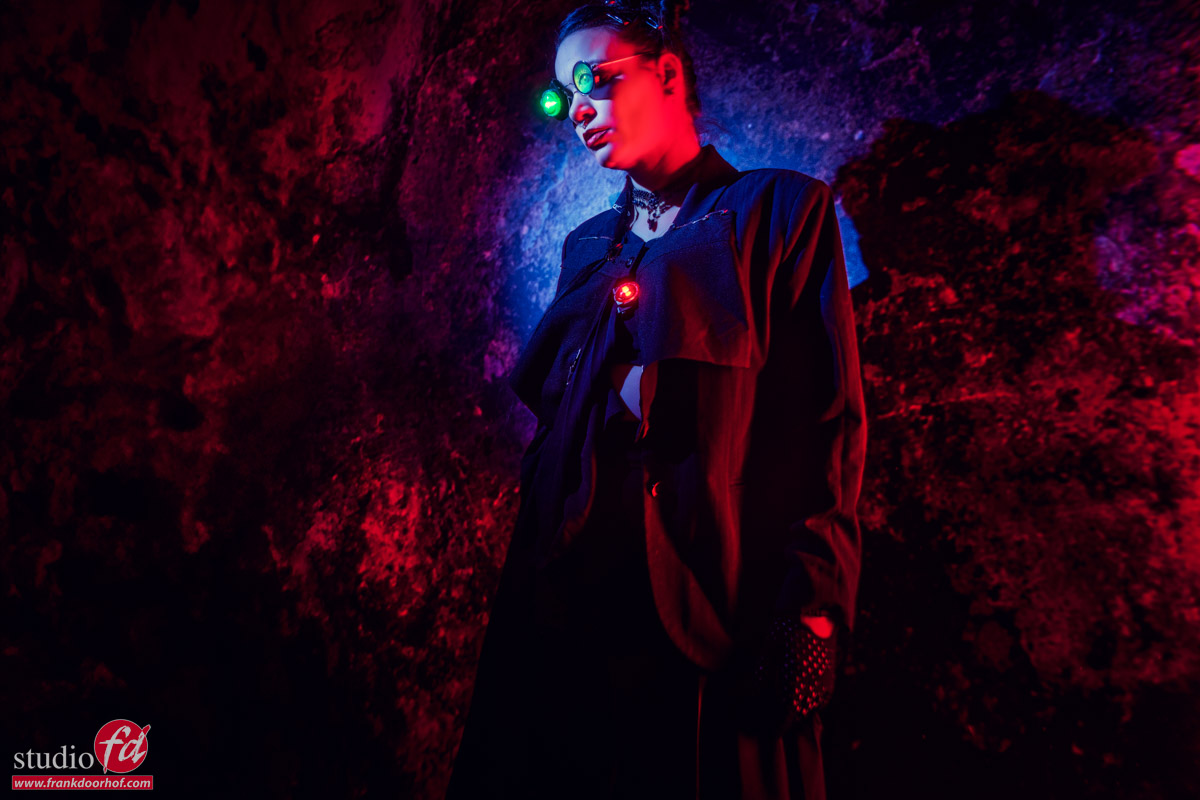
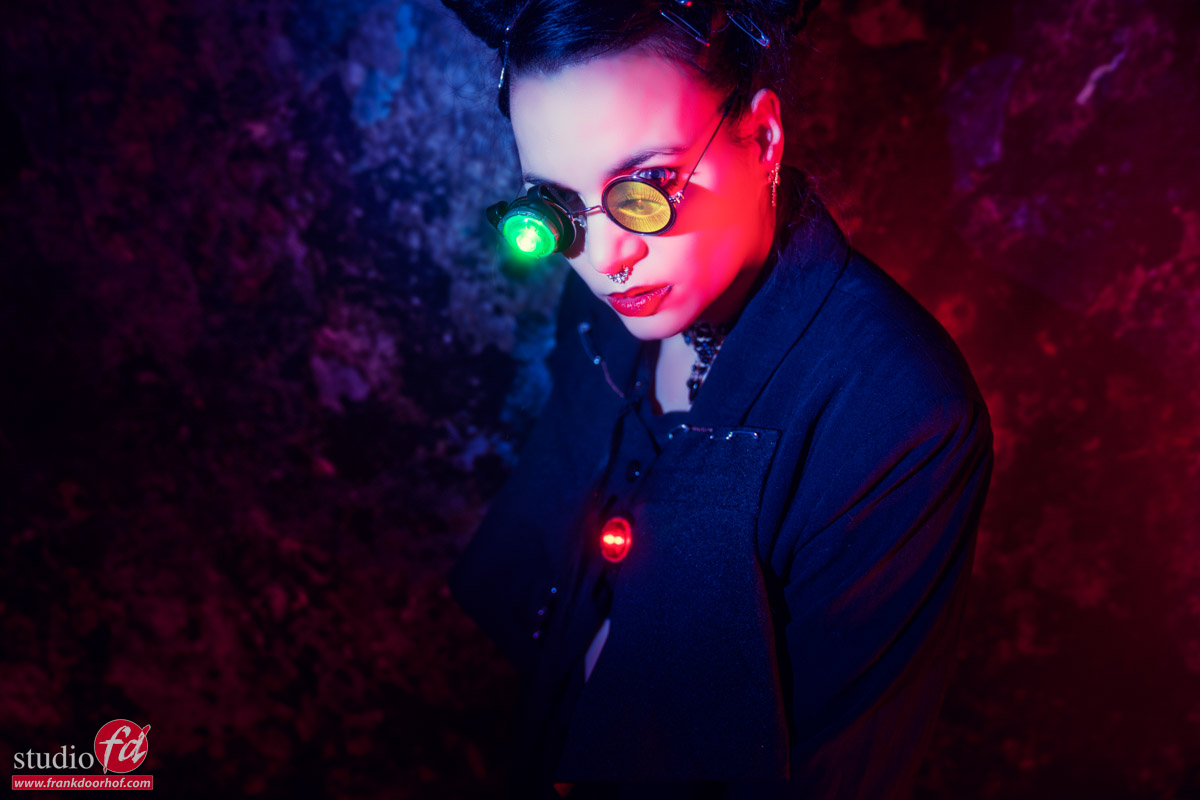
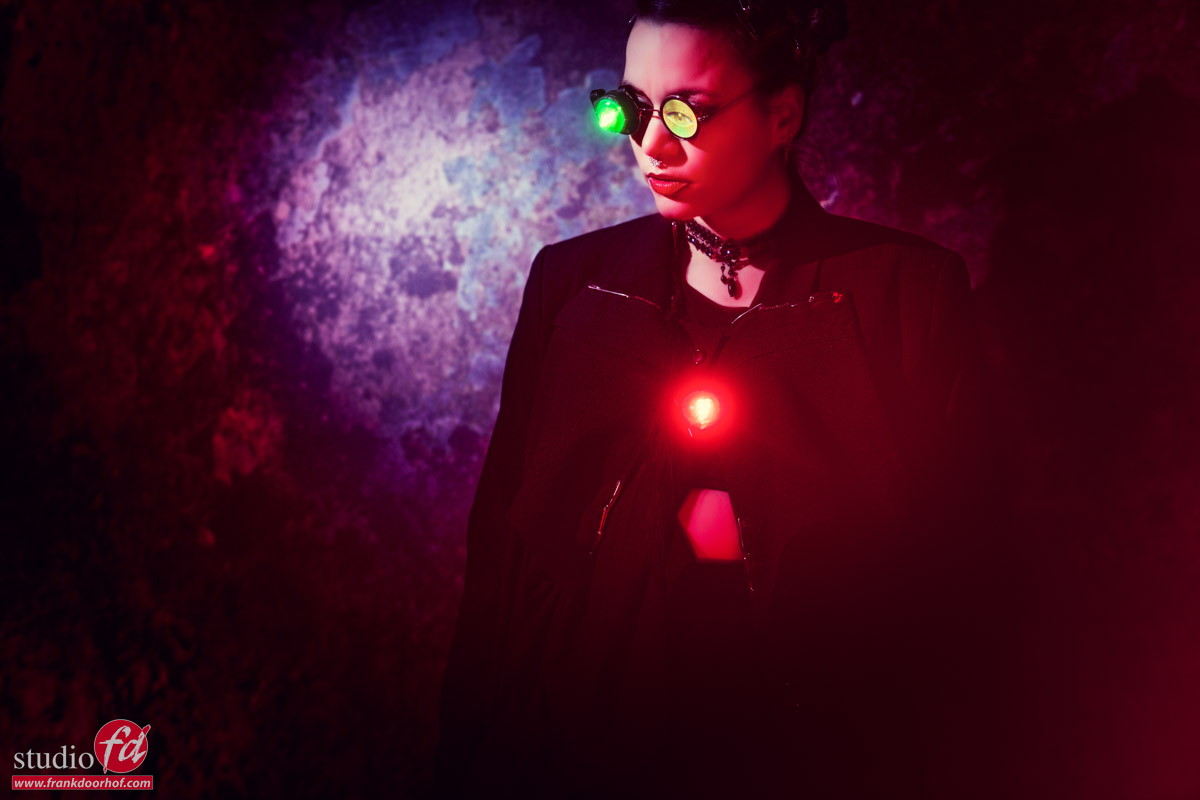
Here I’m using our Rogue snoot on a Geekoto GT200 and our magnetic dome from Rogue with a red gel on a Geekoto GT250 for some added effect.
The red gel is placed away from the model and by moving the camera position slightly forward and backward I have total control over the amount of red entering the set. This can give some great “art” looking effects without using Photoshop. In fact, all the images in this blogpost are largely straight out of the camera.
We even used a red color gel from the side
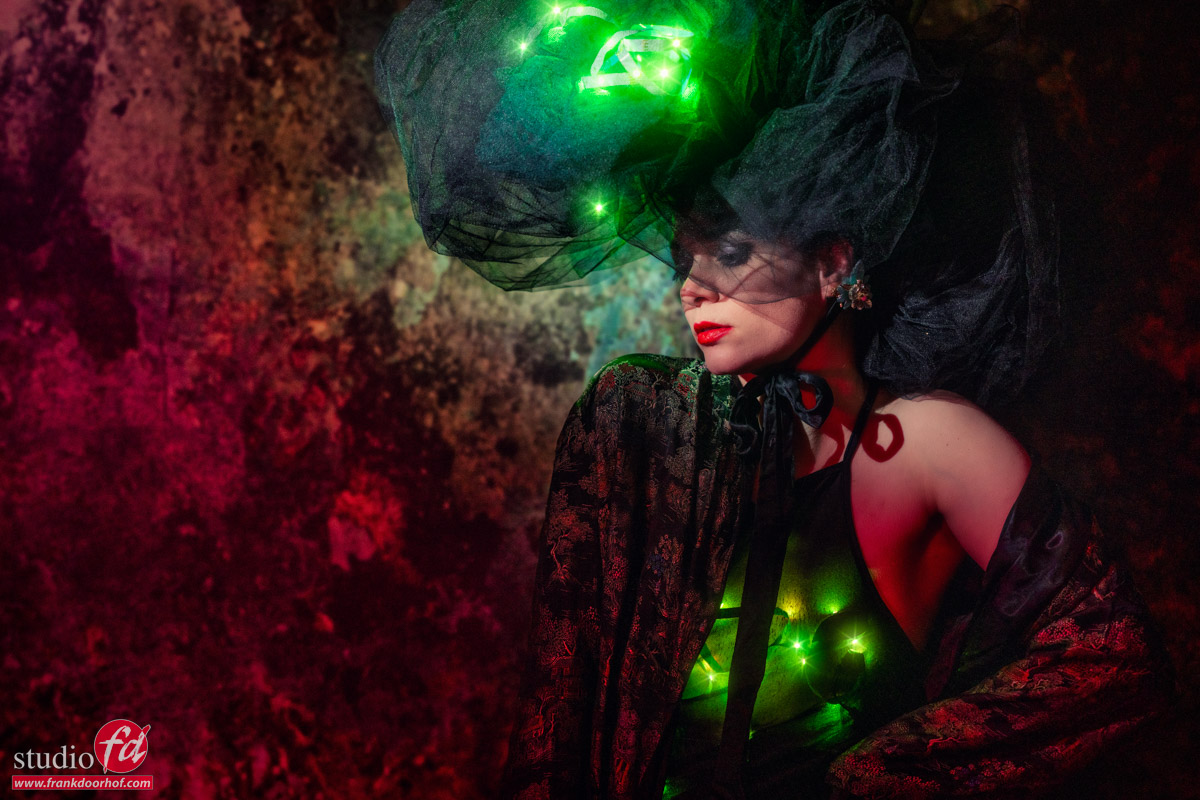
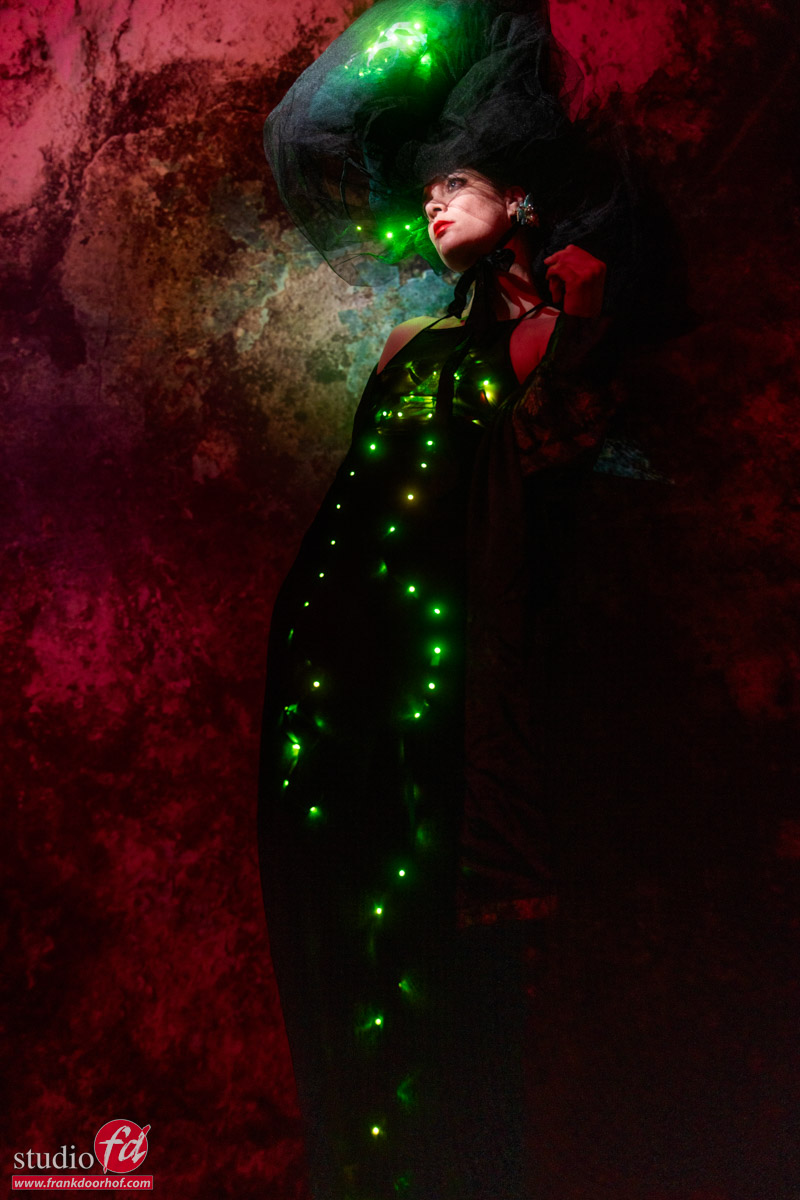
Set 3
For this set I’m using the same Rogue Snoot but on a slightly wider setting.
This snoot can be used in 4 different ways (and if you add the diffusion option 8 :D)
And our intern is holding a Nanlite Pavo tube on red, from the right.
Using a red and green led light (used for running in the dark). A blue color gel on the snoot. And a big red LED tune from the right.
Mixing strobes with available light is not difficult
I hope this blog post helps you a bit when you have to mix light sources yourself. It’s not hard at all but you do have to realize that you are working with higher ISOs. On modern cameras that’s not a real problem. But in some cases, you will need some noise reduction.
Also, take into account that with slower shutter speeds the model has to be completely still. The flash will freeze the face but if she/he moves it will register as a weird shadow line, and the rest of the image will be soft. As you can see in some images you can use this creatively but you have to be aware that it can happen (to use it).
For more info on our products please visit Geekoto.nl for our hybrid strobes and soft boxes that collapse very small ClickBackdrops.nl for our awesome backgrounds and floors IQwire.nl for our 5 and 10mtr tether cables Rogueflash.nl for our Rogue products
https://frankdoorhof.com/web/wp-content/uploads/2023/11/Nadine-82-November-11-2023-Edit.jpg8001200Frank Doorhofhttps://frankdoorhof.com/web/wp-content/uploads/2015/03/studioFD_Logo-1FV.pngFrank Doorhof2023-11-13 18:00:582023-11-13 19:09:03Mixing strobes with available light for awesome model photography results with attitude and mood
An Apple fanboy taking the jump for creative freedom on a device that does what he wants… but it’s not an Apple…. it’s actually a lot better.
Ok yesterday I picked up my Mobile Studio Pro 16 from Wacom.
I opted for the fastest version with i7, 16GB, 512SSD and of course 4K screen.
Let’s take a quick look in short about my thoughts before you watch the video.
Why?
Very simple.
Apple dropped the ball and keeps dropping the ball.
First of all the new MacBookPro is hardly a pro device anymore, it’s lighter and smaller but has less battery life, problems with GPU under heavy stress, fans that kick in way too late and misses A LOT of ports, also power wise for what you pay its VERY underpowered to say the least. I believe in a USB-C standard, but I also believed in a TB standard (because Apple told us).
I was hoping for a new machine with some form of touch and incorporation of the Apple Pencil for retouching. When I saw the big trackpad I thought… “there we go” but no…. also looking at pricing I don’t think I’ll be able to afford the next MacPro version, I expect that IF Apple updates this beast (I still love mine) it will start at 6000.00 for the base model and in all honesty I do make a living off photography but if I would order what I need for editing our videos this would probably set me back 10.000 and in all honesty that… I can’t afford.
Seeing Apple really closes the door on ANY form of touch (or Apple pencil inclusion) I feel we are on a dead end, so when looking at what the competition is doing with Microsoft releasing a third (already) generation of the Surface Pro and Wacom recently releasing the also third generation of the Companion (now called Mobile studio pro) I think it’s time for people like me to look over the mountain to Windows 10… because all these machines run that other OS, the OS where we always joked about “Once you go Mac you never go back” and I still agree…. in some form.
First evening with Windows
The Wacom Mobile Studio pro comes with Windows 10 pro pre-installed. You do need to setup the Wacom drivers first which appears a bit weird, but in essence it’s a small job, I think it’s because you first have to setup Windows itself.
The setup of windows very much reminded me of MacOs in some things, and is a far cry from the last time I installed a Windows version (I did update to 10 on a notebook). It all looks sleek and nice. There even is a fingerprint sensor in the Wacom that is setup REALLY fast and works very well, still don’t know what to do it with exactly but that’s to find out in the coming days right…..
On the desktop Windows 10 looks ok. I do miss the nicely rendered menus from the Mac and the overal look, Windows still looks like it’s an 90’s operating system that has been upgraded. But that’s not a bad thing some people love the squares and the look of the preferences/settings but for me it all looks very old fashioned. But in essence it doesn’t matter because I’m not using this machine for it’s OS I use it to create and the desktop etc. looks all very nice and smooth not a real difference with what I like from the Mac, start menu is nicely organized and the “metro” look I also like although it’s again a bit square.
Gestures
As you can see in the video I’m trying out some gestures and I think it’s a huge debit to the Wacom that everything is silky smooth, I tried the same gestures on a high-specced Vaio laptop I own and it’s without a doubt less smooth, it works but it doesn’t give me that “iPad experience”
What I really really like is the gesture options in for example Photoshop and Capture one, zooming in on images with just pinch and zoom is amazingly handy and I already see myself doing this on my MBP within a few days realizing it doesn’t have touch 🙂
Speed
This thing is FAAAAST.
It’s a far cry from my Macpro (Dual D700’s with Final Cut Pro X is sick) but rendering and editing in Premiere is amazingly smooth and easy. I do have to get used to not being able to just trim clips like with the magnetic time line but I can life with that and as soon as I have a proper keyboard with touchpad (Logitech K830 on order) I’ll test this again. Photoshop and Capture One both run like I hoped.
Tethering
Tethering I tested in Capture One and works, connection is really fast and images come in just as fast as on the MBP, didn’t expect anything else, although I was a bit afraid with the USB-C dongle.
Problems
None yet expect some weird behaviors in Premiere.
Mostly due to my touchpad and keyboard not working properly (I use a very low budget and older Logitech), but one thing did frustrate the heck out of me and that’s the fact I can’t just import my MTS files anymore without loosing audio. I have to copy the whole structure of the card, and that’s not a good thing. On the MBP and in premiere I was able to just copy the MTS files and drag them into Premiere. Hope I’m missing something here.
Another problem is that the Wacom Mobile studio pro is “clean” on the back, meaning there is no VESA mount option, for me that’s a bit of a problem because during workshops I love to mount my display on a stand so people can see what I’m doing. My MBP was always on a Tethertools table but when we started shooting wirelessly in some situations I used an iPad Pro on a mount from Wally and connected to a stand. Let’s hope something similar will be released for the Wacom Mobile studio pro.
Another thing is the stand… there is no stand in the box (and I knew this) I have one on order but without it I think it’s usable but not as a laptop replacement, so make sure you get a stand when you buy one.
The final piece of critique I have is on the speakers.
I don’t need great speakers but the speakers in the Mobile Studio Pro are…. well they make sound let’s put it that way. Compared to the MBP it’s a lot of steps back. On the other hand…. it’s not really important, they make sound and you can always use headphones (yes there is a headphone jack), and I’m already looking for some BT speakers if I really need it.
Size
Loads of people asked me if a 16″ wouldn’t be too big to carry around.
And I can only say “NO….are you nuts it’s awesome”
I think we have to be clear here.
Apple labeled their MacBookPro because it was meant for the Pros, it was bigger, 17″, heavier, had a load of ports, it was FAST and it was… well a pro machine. It still looked beautiful but it wasn’t a small laptop at all. Later they dropped the 17″ which I think was sad and I bought a 15″ with Retina I fell in love again, but now the route is more to small and sleek and I think that’s where we are on the point that I want to make….
I’m not someone that will sit in starbucks and take out my shiny nice MBP put it on the table and start doing my Email or spreadsheets, when I do something on the road it’s work on images, draw, watch a movie etc. And in most cases I have room when I do this, it will be in a hotel room, at home, in the RV, outside in a park or whatever.
But most of all when I create or retouch I NEED real estate, I can’t work in a 10x15cm space to retouch a model shoot. And on smaller screens (with all due respect) I feel like I see more menu’s than drawing/retouch space. This is also why I LOVE the 16:9 form factor instead of a 4:3, the less room that is taken up with menus and other necessary stuff the more space I have to be creative or work.
In the video you see me comparing the Wacom with my MBP 15″ late 2014, it’s bigger but it’s not too big, it fits in a 17″ sleeve perfectly. And if I want to check mail in a starbucks I’ll take out my iPhone or iPad Pro. This baby is to work.
Charging on the go
AWESOME, this is what I wanted.
Let’s be honest, when you are just using your pc/tablet whatever for email or browsing battery life is no problem, you’ll be kicked out the place before the battery dies. But when you do video editing and retouching battery life becomes VERY important. By charging via USB-c you can now use external batteries like the HyperJuice to power your tablet for DAYS if necessary. We own a reasonable sized HyperJuice and it kept my MBP during a full shooting day at 100% with easy. I still have to test this on the Wacom but I expect nothing less. This was also one of the things I didn’t like from the Surface Pro, it used it’s own charging connector making it impossible to connect it to the batteries, unless…. well I didn’t feel like hacking it (never a good idea with power).
Hardkeys
LOADS of people ask me “why the wacom, it’s so expensive”
Well yeah it’s not cheap, but you get a LOT.
First of all like the title says you get hardkeys, if you don’t know how important those are I guess you’re not retouching a lot. There are software emulators that can give you keys but you still have to take your eyes off your work (also one of the biggest problems I have with the touchbar (emoticon bar) on the new MBPs) With hardkeys you can find them blind and use them. This was also another reason for me to go for the 16″ because now I have 8 and a rocker ring 😀
In fact I would love to have even more, so I’ll try to connect an EK remote to it very soon.
The less I need a keyboard the better and the EK remote had 15 keys, add the 8 of the tablet and I think we have no need for a keyboard anymore.
The screen
yeah what can I say.
WOW, WOW, WOW
This is one gorgeous experience. 4K resolution in such a “small” size means you LITERALLY see one smooth surface, it’s silky smooth. Lightoutput is also enough although more is always better when working outside, but that will also cost you dearly in battery life and contrast ratio when lowering the screen output, so I’m more than fine with this. And 96% adobe RGB is of course a welcome bonus.
The surface doesn’t feel like glass like you would expect from a “laptop replacement” but remember this is a creative tool, it’s designed to be used with a stylus and create stuff. And that’s what the screen does, it feels great with an even more tactile feel than the Cintiq and it doesn’t blur the resolution. With the iPad pro you can use screen protectors to get this feel too but it blurs the screen slightly PLUS you add to the parallax problem (your pen hits the glass and the real drawing is below).
The pen
This baby is also great.
8000+ pressure sensitivity levels, yeah great but how does that feel?
Well I’m not a digital artist (although I love to draw) but what I saw yesterday in Photoshop the level of control is INSANE, you can go from hardly visible to big bold lines without glitches… nice. But I’m not good enough to use this… but I’m sure there are people out there that do.
As you can see in the video parallax is gone, speed is great so what more to wish.
One more thing you have to realize btw, although the Apple pencil is great and works like a charm it’s not a pixel device, meaning it works in clusters, the Wacom units are pixel based meaning you use the FULL resolution for drawing, for real artists this can make a huge difference.
3D scanner
If you’re into 3D modeling the mobile studio pro comes with a really cool (so they told me) 3D camera which can be used to scan objects for 3D modeling. And according to a friend of mine it works like a charm. (just saying)
More to come
In the coming days I will post much more on my experiences, problems and of course the experience I have with Windows.
The next blog post will give you some tips on software you can use as alternatives to Mac specific things.
Fan noise
Loads of people ask about this.
The MBP is quieter for a longer time, but WHEN those fans hit you hear them VERY good.
The mobile studio pro is MUCH less loud but the fans kick in a soon as I started rendering, so I braced myself but to my surprise they never really got any louder, they just kept the device in working order it seems where my MBP waits till it’s probably almost to late and than starts cooling like crazy.
Oh and one more thing
Love the Cintiq?
never could afford one because it’s “just a display”?
Now you can. With the Wacom mobile studio pro you can use a Wacom link and use your tablet in Cintiq mode on your Mac or PC.
Apple?
I never was a real Windows fan when I switched to Apple and I never really looked at Windows. In my memory Windows is slow, gets slower over time and is chunky and overly complicated compared to Apple. In essence however as mentioned before I never use the OS that much, I use the programs. And when I now see how incredibly smooth you can switch from gestures to the pen and to the keyboard and touchpad in Windows 10 and Adobe and Phase One software (and probably also Manga Studio) I really and I mean REALLY can’t imagine why Apple is so against touch…. it’s not that if you go touch you have to do everything with touch but browsing for a few minutes on the net with a touch unit is absolutely something I never want to mis again, it’s seamless, it’s smooth, you can zoom it’s an experience that is fitting this time period. Seeing the fact Apple is CLEAR about not incorporating touch I’m very afraid that Apple will see a HUGE decline in customers that will switch to the real professional creative tools like this Wacom Mobile studio pro.
Ok before the video : Pros and cons
Pros :
Screen, pen, speed (i7 version), touch/gesture/pen/keyboard/touchpad combination, surface of the screen, size, form factor, kensington lock, 3D scanner
Cons :
no stand, no vesa mounting option, not so good speakers
In the middle (can go either way) :
Windows 10 Pro.
I shot this special episode of behind the closed DOORs with my first impressions.
https://frankdoorhof.com/web/wp-content/uploads/2016/11/Wacom-Mobile-Studio-Pro-m.jpg5001440Frank Doorhofhttps://frankdoorhof.com/web/wp-content/uploads/2015/03/studioFD_Logo-1FV.pngFrank Doorhof2016-12-09 20:00:322016-12-09 18:04:33Wacom Mobile Studio Pro in depth review Part I