Frank Doorhof
  • Blog (articles)
  • Rent our studio space
  • MAIN SHOP
    • MAIN SHOP
      • Orders
      • Account details
      • Downloads
      • Addresses
      • Lost password
      • Cart
      • Checkout
      • Terms webshop
      • Return policy
      • Privacy Policy
      • Privacy Statement in3. Dutch customers only. When you want to pay in 3 parts
  • IQwire Tether Cables
  • Rogue Modifiers
  • Geekoto Flash and Modifiers
  • Platypod
  • Click Backdrops
  • PORTFOLIO
  • Learning with Frank
    • Dutch workshop agenda
    • Workshops
    • A Year With Frank
    • Online 1:1 workshops
    • 1:1 workshops in English
    • Portfolio review by Frank Doorhof
    • Patreon
  • Support our work
  • Merchandise
  • Digital Classroom LIVE
  • Our YouTube channel
  • Biography Frank Doorhof
  • Services
  • Discounts etc
  • I need help
  • Menu Menu
  • Shopping Cart Shopping Cart
    0Shopping Cart
  • Link to Facebook
  • Link to X
  • Link to Youtube
  • Link to WhatsApp

Tag Archive for: apple

Synology BeeStation: Is this the perfect external drive setup?

23-01-2026/in blog, Reviews/by Frank Doorhof

Demand for storage is growing. Is the Synology BeeStation the perfect external drive?

As creatives, we love to create. It doesn’t matter if it’s video, photos, artpieces or the music we create.
All these files need a place to be, and very soon, you are running out of space on the main drive.
And because it’s never a good idea to store your data on the main drive. It’s easy to end up with a closet filled with USB drives. This is not only a problem when you use a system like Lightroom, but also when you want to create a proper backup strategy. This blog is about the Synology BeeStation.

Storage

As you probably know, before we started the studio, Annewiek and I ran a computer company. And there are, of course, plenty of people who don’t need a lot of storage.
If you work on some documents, surf the web, and read the paper, you probably are more than happy with the internal hard drive.

However, in today’s world, most people use smartphones and shoot loads of images and videos. The problem with digital is that if something is gone, in most cases, it’s really gone. You will be shocked at how many people have thousands of photos on their phone but don’t make backups. Meaning if they lose their phone, everything is gone.

Dataloss

If there is one thing that freaks me out, it’s dataloss. During the 20+ years in the computer company, we have experienced real dramas with people losing every single piece of family history. Simply because they saved all their photos and videos on the internal hard drive. And there is one thing very sure about hard drives.

There is a day they WILL fail; this day can be today, or tomorrow, or in 10 years.
And it will ALWAYS happen when you are not ready for it.

So if you care for your data, always make sure you create at least one backup on an external device or in the cloud, even if you never run out of space.
With smartphones, this is pretty easy; both Apple and Android have solutions that you can use for “almost free”.
But, if you want to backup a lot of data, there are several solutions on the market. Today we are taking a look at the BeeStation from Synology.
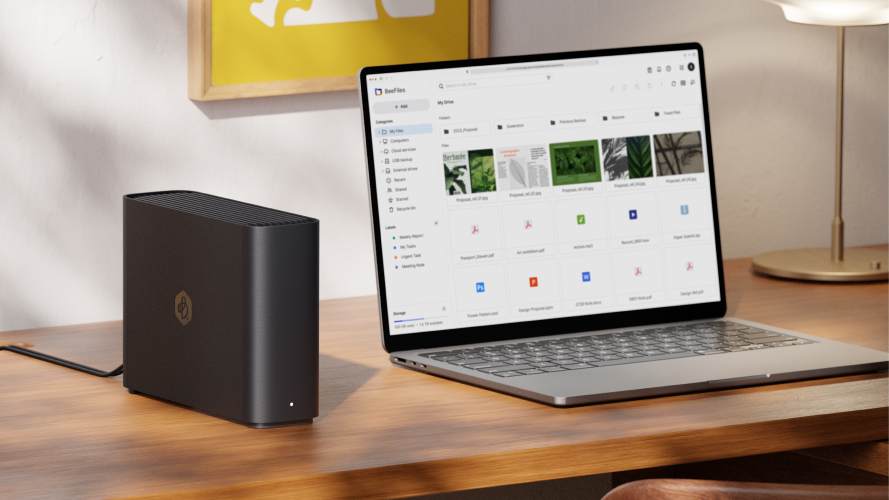
Synology BeeStation

The Synology BeeStation vs NAS

You probably know the name Synology from their NAS systems.
I’ve been using Synology myself for as long as I can remember, and also in the computer company we often advised Synology due to their durability and support.

Let me start by explaining the difference between the BeeStation and a NAS.
Both the BeeStation and a NAS are connected to your network and the outside world. They are designed to be run 24/7. However, there is a large difference between the two. The BeeStation runs with one hard drive where a NAS always runs with several hard drives.

NAS for backup

With a NAS, the data is usually stored spread out over several drives. This means that if one drive fails, you don’t have to panic. Take out the drive, put in a new one, and let the NAS rebuild. Also, when you run out of space, just add a new drive (that is larger than what you replace), and your NAS will add it to the storage pool. A NAS is the perfect backup solution.

In our studio, for example, we use two 8-drive Synology NASes.
In the Synology OS, there are several options to create backups; in our case, we chose to have a mirror setup.
The system automatically starts up at a certain time. The main NAS is mirrored to the backupNAS and when it’s done, they shut down. A pretty foolproof solution as soon as it’s set up. You can even have the system email you when there is a problem.

Clean your NAS

Do make sure you check your NAS ever once in a while, make sure it is off the floor so dust is less of a problem. And make sure that you occasionally clean the NAS, also on the inside/Fans to make sure the dust doesn’t shorten the lifetime.

As you probably guessed, on a NAS, your data is pretty safe; if a drive fails, there is no problem. Howeve,r if several drives fail at the same time, or the NAS dies itself you will still have dataloss in most cases. So, also when you use a NAS, never use it as your only backup. I know it sounds expensive, but always ask yourself, “If I lose all my data, how much would it be worth to have it back?” I can almost guarantee it’s a lot more than an extra drive/NAS/cloud storage.
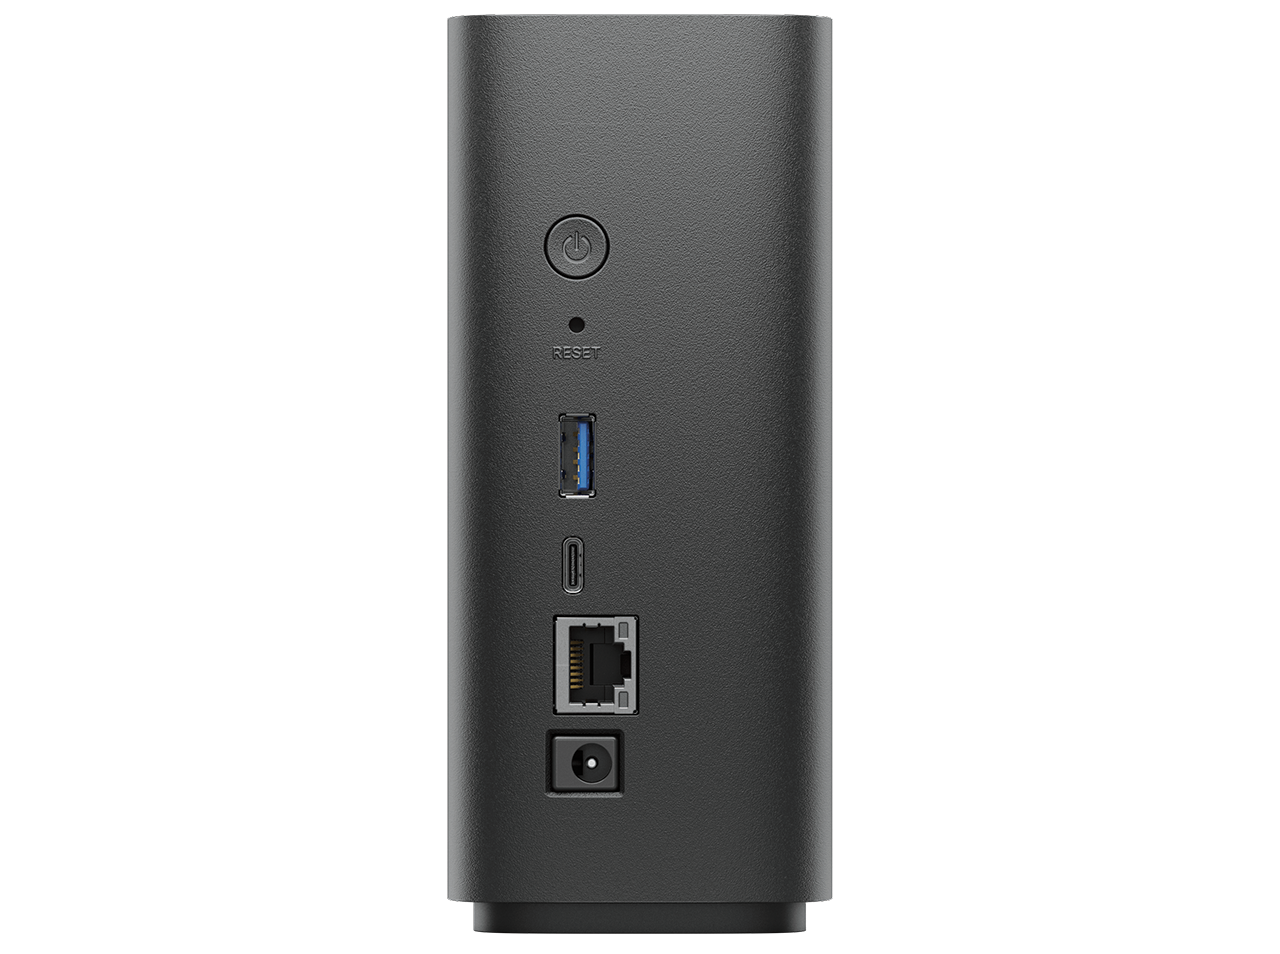
close up of the Synology BeeStation

The Synology BeeStation

When I saw the first announcements of the BeeStation it immediately caught my attention.
In fact, I believe this is the perfect device for a lot of groups, due to its many features and super simple OS.
Let’s take a look at some of the ways you can use your BeeStation, and how we use it.

Backup from Phones and Time Machine

Annewiek and I both have iPhones, iPads, and MacBooks.
If there is one thing that Apple really nailed, it’s making backups.
For our MacBook,s we use TimeMachine which you can use with an external drive or a NAS system.
Annewiek and I have both created a TimeMachine backup on the BeeStation.
This means that as soon as we start our day, the Mac is synced with TimeMachine without having to connect an external drive. This not only reduces the chance of “forgetting” to create a backup, but it also means we have a lot more points to go back to due to the continuous backup process.

For photos made on our phones/iPads, we use the Photos app.
The app is installed on the phones and BeeStation, which means that as soon as we shoot images or video, they can be uploaded to the BeeStation.
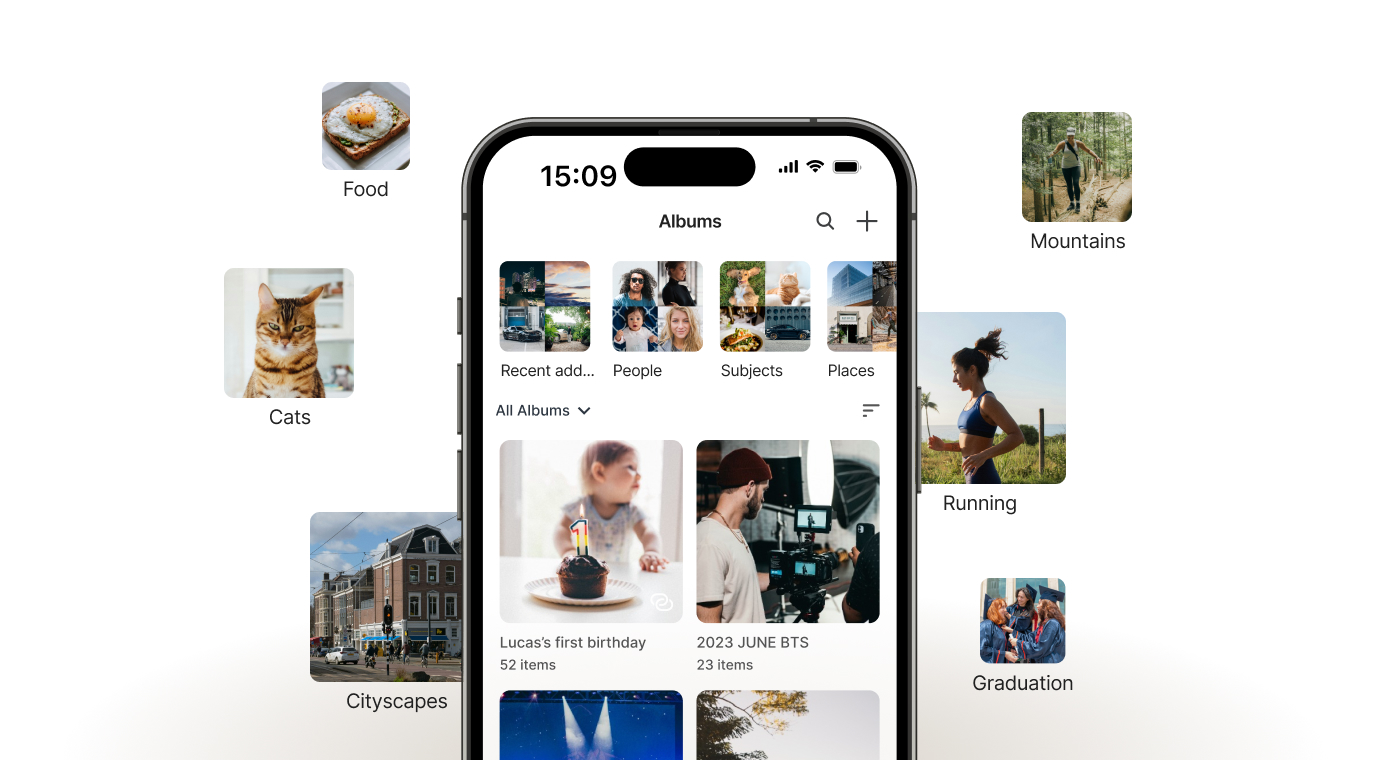
synolgy app, also usable with the Beestation

Sharing memories or work

The Photos app is not only for backup.
In fact, in the last few years, the app has grown into a full ecosystem for photos/videos.
First of all, you can of course create your own albums or use the AI functions, which work pretty well, to be honest.
But you can also choose to share different albums with different people.
For example, when we travel, we love to keep our parents and friends updated. With the Photos app, it’s very easy to create albums where we back up everything from our phones and select the images we want to share with that group. It’s a fun way to keep the family updated.

And of course, you can also use the Photosapp for assignments, share ideas like moodboards, or use it as your portfolio.It’s a lot more powerful than most people think.

Backups on the Synology BeeStation

Besides Photos and TimeMachine, you can also use the Synology BeeStation’s own sync system to back up files or whole drives.
I’m actually using the BeeStation sync for my external 4TB SSD drive, which I have connected to my MacBookPro. If your OS doesn’t support TimeMachine the BeeStation sync is a really nice alternative; it’s been running very smoothly so far.

Each Synology BeeStation device includes one 3-year Acronis True Image Essentials license for one computer, if you want yet another backup solution.
I think we can say that Synology got you covered with backups.

But there is more
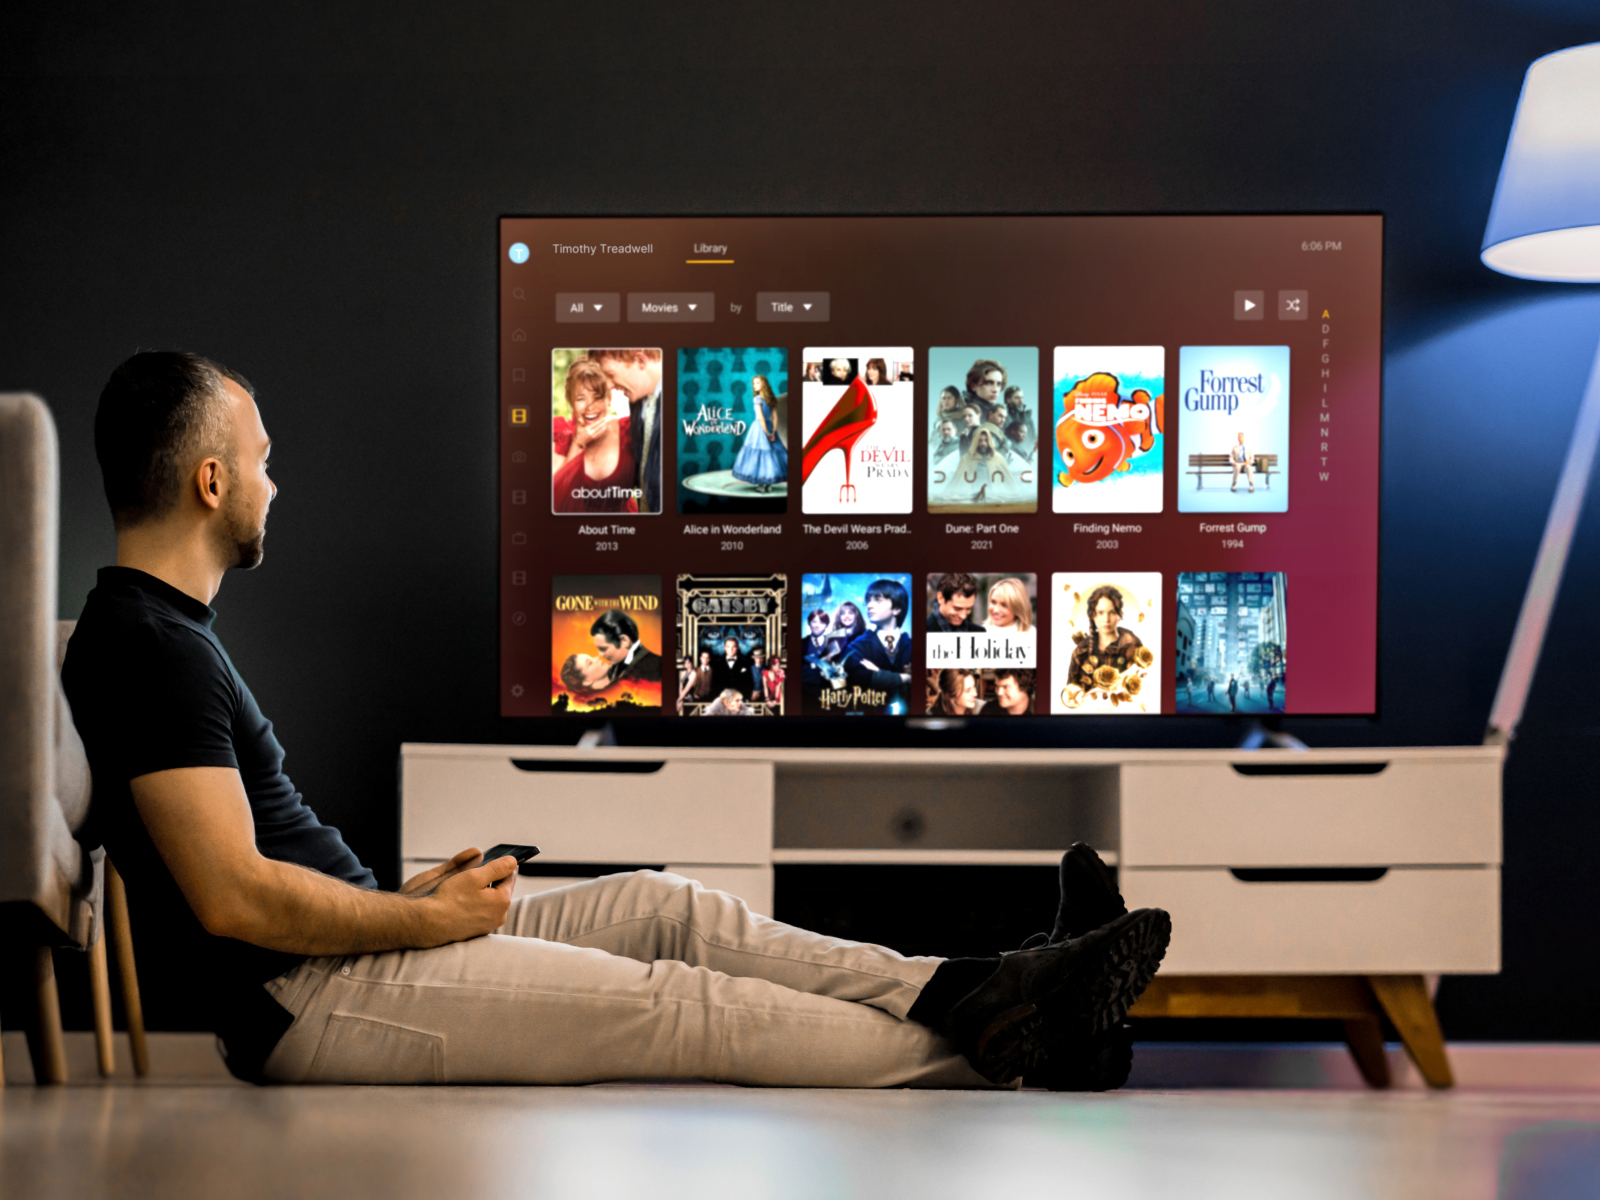
Using the Synology BeeStation in your Home Theater

We live in an age where we can experience movies in a real cinema-like experience.
So the demand for ways to watch and store our movies has also grown over the years.
You can, of course, stream your entertainment via online services like Netflix. But often we have collected loads of DVDs, BDs, and “downloads”,  and because that material is often not available online, it would be great if there was a solution to browse your catalog, read about the movie, and start the movie.

Loads of people have digitized their DVDs and BDs and use PLEX to browse, access information about the movies, and start playback.
The Synology BeeStation supports PLEX integration, which makes it a great centre for your Home Theater.
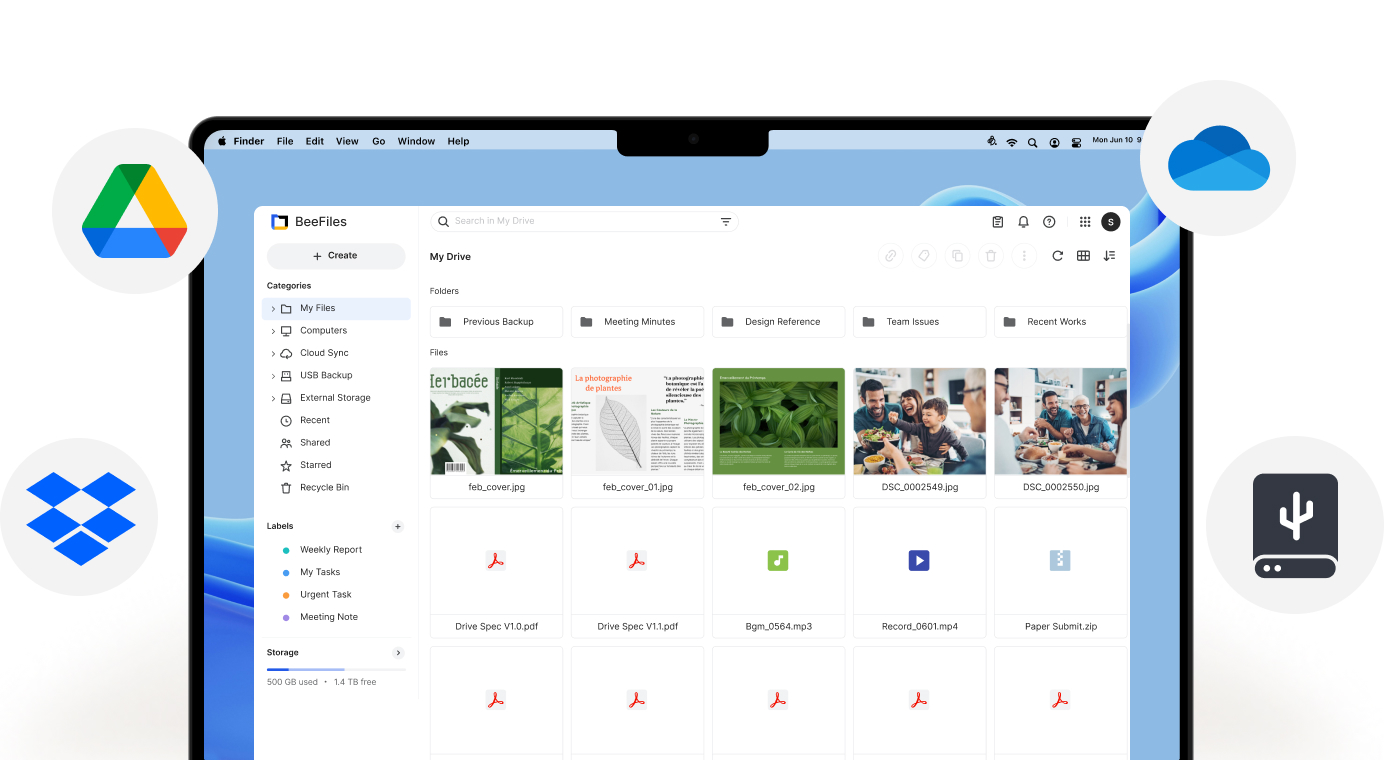
Synology BeeStation as your personal cloud storage

Personal Cloud storage

There was a time when the term “cloud” or “cloud storage” had the same magical effect as AI today.
But with solutions like the BeeStation, having your own personal “unlimited” cloud storage is no problem anymore. With the BeeFiles app, you can always access your files, upload, and share.

Seeing the situation in the world today, I think it’s wise to use a personal cloud instead of an online cloud service for data you would normally store on OneDrive, GoogleDrive or Dropbox. BeeFiles is a great alternative that I can highly recommend.

The Operating System itself

I’m one of those nerds who can work out software and gear without needing a manual in most cases. But don’t let me fix your car. But we also know people who are the opposite, or think about our parents/grandparents, who probably also shoot a lot of images and videos on their phones.
Giving them a NAS can be problematic; the setup can be complicated, and there are often too many features and procedures to keep everything working perfectly, and if it goes wrong…. long story short… enter the Synology BeeStation.

The OS is super simple.
Setup is almost 100% automatic, and after tha,t it’s a matter of simple screens with clear instructions.
If you make a mistake, it’s really 100% your own fault. I can vouch for that because I made a mistake, because I literally overthought the system.
After turning off my brain and starting agai,n it all worked flawlessly, to prove how foolproof the setup is.

Back up your Synology BeeStation

You can use the USB connection on the back of the BeeStation to copy files from an external drive to the BeeStation for a faster backup. Especially with a lot of smaller files, a first-time backup via the USB connections saves a lot of time vs over the network.
However, I would highly recommend buying a proper external drive with the same capacity as the Synology BeeStation and using that as a backup drive for the BeeStation. This way, you have a pretty good backup strategy.

Is it all positive?

Yes, pretty much.
During my review, I’ve used the Synology BeeStation extensively and found it to be very similar in usage compared to the professional Synology NAS units I’ve been using.
Due to the simple setup procedure, I think it’s the perfect device for people who want something that is simple to set up and maintain but doesn’t really limit them in use cases.

Yes, for creators!

But also for creators that demand speed and being able to share and access their data all over the world, but also want to make sure the data the images they shoot on location are safely backupped. What I didn’t mention yet is that the Synology BeeStation is a great performer when it comes to speed. Synology really did their best here to create a device that will fit a really broad range of people from 5-105 I dare to say.

The Synology BeeStation is available in 4TB and 8TB versions.
When you use it for several TimeMachines and backups of photos I would highly recommend getting the 8TB version.


Read a Dutch interview about Synology in Shoot.be

Check this video from 2021 about the use of a Nas 

In this blog I show an easy local way to backup 

https://sy.to/pk2jp (one of the Synology partners)

https://frankdoorhof.com/web/wp-content/uploads/2026/01/beestation-5.jpeg 500 889 Frank Doorhof https://frankdoorhof.com/web/wp-content/uploads/2015/03/studioFD_Logo-1FV.png Frank Doorhof2026-01-23 17:14:192026-01-27 18:02:40Synology BeeStation: Is this the perfect external drive setup?

That setting that drives you nuts during the calibration process on Mac (and windows)

21-09-2024/in blog, Visions and technique/by Frank Doorhof

Calibration is important

I think most of us will agree on this. If you want proper colors and happy customers (depending on the assignment of course) it’s very smart to calibrate your monitor at least once a month, but preferably before every important retouching job. But what are the important settings during calibration?

Calibrating your monitor is super easy.

I’ve been using Calibrite (X-rite) products for years. They are easy to use and compatible with the hardware calibration options inside my BenQ monitor. This is a big plus because although the software from Calibrite is great, hardware solutions are always better, of course. Most professional and semi-professional monitors support hardware calibration.

By the way, if you are in the market for a new monitor and you live in the EU drop me an email, I have a few 10% discount codes from BenQ
They have been supporting my work with Digital Classroom for years and love to give you guys a nice discount.

Anyway back to the story.
Even with easy software, it’s sometimes easy to get an error that… well you can’t fix.
You checked everything, and although you know your brand new monitor should really be perfect, it’s far from.
Or maybe you don’t know how to read the rapports and just wonder why there is so much fuzz about professional monitors.

Step 1

This one is for all systems.
When you are using the HDMI connection make sure your monitor is set for 0-255 or FULL RGB.
If it’s set up for 16-235 (video) you will get all kinds of weird behaviors, very noticeable in the dark and bright areas, but in essence, your whole image looks way off.

When you are using USBc, TB, or Display port you don’t have to check this.
Those connections automatically select the right output.

So is HDMI bad… absolutely not, it’s just as perfect for what we do as USBc and Displayport, you just have to check that one setting.

Step 2

And that’s the nasty one.
In the Mac, there is one setting that will almost certainly have you scratching your head and probably a little bit in panic mode.

If whatever you do, you can’t pass the final certification from your calibration and the errors are constantly changing per calibration, there is probably one setting you forgot the turn off. You can find it under “Displays” in Mac OS.

important setting during calibration

This one will give you A LOT of issues when you want a stable and trusted display.
So turn it OFF.
This goes for all settings with labels like “auto”, “Enhancement”, “Super”, “Real”, “natural” etc.

Just turn everything off and run the calibration software.
You will see that you will pass the certification without any problems now 😀

Don’t forget this important setting during calibration!

If you have any questions, feel free to leave them below, or reach out via our social media.

Read more about colors in this blog about Working with Colors 


https://frankdoorhof.com/web/wp-content/uploads/2024/09/Untitled.png 2048 2048 Frank Doorhof https://frankdoorhof.com/web/wp-content/uploads/2015/03/studioFD_Logo-1FV.png Frank Doorhof2024-09-21 18:00:542024-09-19 13:36:18That setting that drives you nuts during the calibration process on Mac (and windows)

Adding more storage to your MacBook Pro (or other laptops) and what to look out for

7-09-2024/in blog, Visions and technique, Webinars and instructional videos/by Frank Doorhof

Apple is great but some things are insanely expensive

I’ve never been a huge Apple fan, but I do love their products.
Let me explain.
They just work, and they work great together. For me this is vital because I work mostly on my phone but want a fast and seamless integration with my laptop when needed, I also love to edit my images in Photoshop with the iPad Pro in extended screen mode. In other words especially the last few years, Apple found their way back to the creatives after releasing some horrible horrible laptops.

The M series changed it all for me.
My first M product was my iPad Pro, and in all honesty I still use the M1 12.9 iPad Pro.
It’s great for editing, reading comics and magazines, watching movies, browsing and of course connecting a controller and have some fun with Call of dutch mobile 😀

The M series in the iPad Pro actually made it possible for me to edit video better and faster than on my Dell XPS i9 windows laptop, which in essence blew me away, I never expected a tablet to hands down beat my super expensive laptop that was fully specked out.

At the moment I’m running a M1 Pro 14″ MacBookPro which will be replaced as soon as the M4 pro is released, not because I really need it, but I do find that when screen recording heavily AI driven software I do start to experience the limits of my laptop 😀
For normal use I would not know why to upgrade to be honest.

Although I feel that the MacBookPro’s at the moment give the best bang for the buck, there is one thing that is incredibly expensive when upgrading, and that’s internal storage. My photos and videos are all stored on 2 synology NAS systems but when working on several video projects, music recording etc. the internal drive is even with 1TB a “bit” on the small side. But upgrading is in my opinion way to expensive, so I was looking for a great solution.

Most solutions are based on the SD card slot which doesn’t make sense for me due to the speed hit and also the lack of really large storage. I need at least 4TB extra and also an option to work from that drive, or use it as a scratch drive.

On Amazon or your favourite supplier you can get pouches you can put on the back of your laptop.
I found that they are large enough to hold a small harddrive.
So I bought a 4TB small SSD and that’s where the troubles started.

Watch out and beware

Of course we all know (I hope) that there are different kinds of cables.
There are cables that are just for charging and cables that support USB3/C or ThunderBolt connections.
The USBC connector has many faces so to say.
And the problem is that often we don’t really notice it unless you start testing.

First of all
Don’t ever buy cheap cables.
Most of the cheaper cables will downgrade the speed of your external SSD to a very slow USB2 speed. Which means you think it works but copying files is incredibly slow. These cables are often only meant for charging your phone or tablet. But they do recognise the drive, which will often confuse the user.

Another thing is the shielding.
My first cable I tried was of a good shielded quality, but still my wifi was very unstable, losing connecting all the time and the speed was horrendous, all was great when I disconnected the cable.

At that point I almost gave up, but decided to order an even better shielded cable and finally, no more unstable wifi, no more slow transfer speeds, it just works like a charm 😀

When you order a cable make sure you order a very high quality USBc or TB cable.
Especially make sure the shielding is top notch.
I also highly recommend angled connectors. It’s always better to transport the laptop with the cable disconnected but it happens regularly that we don’t and with the angled connectors it never gave any problems, but to be sure, just take it out of the port.

Now because images say more than words, I made a small video for you.


https://frankdoorhof.com/web/wp-content/uploads/2024/08/More-storage-for-your-macbook-pro-for-cheap.png 720 1280 Frank Doorhof https://frankdoorhof.com/web/wp-content/uploads/2015/03/studioFD_Logo-1FV.png Frank Doorhof2024-09-07 18:00:242024-09-05 17:43:39Adding more storage to your MacBook Pro (or other laptops) and what to look out for

iPadOS my first impressions (mixed)

14-09-2019/in blog, Reviews, Visions and technique/by Frank Doorhof

As you probably know we are working on a fully laptop less workflow for photography and video based on the iPadPro.
In all honesty I was more than happy with my Huawei M5 tablet and didn’t feel any need to go back to Apple (I sold all my Apple gear a few years ago and are 100% satisfied with my P30Pro, Garmin VivoActive, ChromeCast and Windows Machines) but thanks to the iPad Pro, but mostly the apps, I decided to take the plunge and order an iPad Pro with Pencil 2. So far so good.

When the iPad pro 12.9 was released I was I think one of the first that hit refresh, refresh, refresh to order one, and a day later I could pick it up, the PRO ipad…. wow….. and what a disappointment. No apps that really used the iPad “pro”, it was literally just like the iPad just a blown up iPhone, nothing wrong with the iPad by the way I loved it, but it was a FAR cry from a pro device (what is it with that Pro title anyway, it seems soon I can Pro underwear and Pro socks or something).

So my first experience kind of sucked, Apple promised the heavens and it delivered a slight hell. A totally closed up system without any serious apps. But things have changed, not thanks to Apple (where is Final Cut Pro iPad for example) but thanks to companies like Lumatouch with Lumafusion (which is absolutely mind boggling), Adobe with Lightroom CC and soon Photoshop iPad and of course Affinity Photo. All great apps which are mainly focussed on iOs which I think is a bit of a shame because the Android tablets are very fast too, anyway long story short, when they announced iPadOS my interest was peaked, FINALLY an open file system.

Now why is that important
Try travelling with an iPad a few times and you know.
As long as you have blazingly fast internet… no problem but we recently visited Johannesburg and had to work with a stunning 2MB down and 0.09 up (yep I didn’t make a mistake really 0.09 up) meaning uploading my images to Lightroom CC was impossible, we started uploading 20 images at night and the next morning we hit 25%, Starbucks was my favorite place, but they only offered 5GB a month for free so uploading a vlog was impossible but for photos it was ok. But this shows the incredible limitation of iOS as it is. One could say… “use an external drive” well yeah… and no. You know copying with 100MB/s is ok but thanks to the limitations of the iPad pro I somehow never was able to break the 4MB/s to my harddrive (LaCie CoPilot) although uploading to the iPad worked ok with 20MB/s, connect it to my PC and it broke the 100MB/s with ease. So think about making a backup with 3MB/s of 25GB each day…. you get the idea I think. Add to this that you can’t let the iPad run all night with a harddrive connected because you can’t charge the bloody thing because it only has one port and with a dock the harddrive wasn’t recognized and you know why the iPad Pro with iOS is no pro device at all.

Which is a shame because as mentioned the apps are there. And in all honesty I can 90% of my work with those apps. So the idea of not bringing my laptop during travels is awesome (especially with the Apple pencil).

So what works?
Under iOS everything works, but getting stuff OFF the iPad Pro is a disaster, without fast internet, connect it to your PC for example and images can come off but videos are not seen (WHY) also it’s super frustrating to not be able to just use my downloaded music from talentsy/epidemic in Rush and Lumafusion without making two folders with the same content (come on). But it works if you stick to your workflow.

At one point even batch renaming was “semi” possible, still ridiculous no app or apple supports this and you have to use automator, but hey, it works (semi).

Powerpoint/keynotes work great, every projector and TV we used worked flawlessly, expect at my seminar at B&H we couldn’t get the ipad pro outputting a signal, but that was only once, luckily we had a backup and that one worked (phone and laptop). Shooting tethered wirelessly worked flawlessly with the Camfi (not stable/fast enough with the Sony app) and of course video editing and photo editing is no problem at all, if you can life with the photo apps from Apple (which is a disaster for a pro but ok).

iPadOs
So iPadOS
Ok I didn’t want to install it while travelling and when we arrived back I decided to wait for the final release, but seeing it’s only end of September and it’s now the 14th and I use the iPad pro almost every day I took the chance and installed iPadOS. And lets see at what I think and found out.

  1. External drives
    Yes it works, well semi.
    You have to format your drives in ExFAT, don’t try anything else it won’t work, don’t try to format on the iPad pro… because it doesn’t have an app for that, which I think is ridiculous seeing harddrives come mostly not in ExFat when you buy them, so you still need a computer to format them.
  2. External drive speed
    This is a HUGE disappointment for now, I hoped for a speedy way to copy my files or maybe even work straight from the hard drive, well forget about it. I did a quick calculation based on time and file size and I think the iPad pro tops out at max 25MB/s and this is with an SSD that tops out at 300MB/s on my desktop so it’s not the SSD.
  3. External tumbdrives
    Works although I only tested a few, speed was nothing more than usable
  4. Open file system
    NO WAY….
    This is not what I expected.
    Yes you can use external drives and files (the app to browse etc) but it’s still very iOS (like) for example there is still no way to batch rename files, the files app still doesn’t show you the film roll etc but I have some tips for that
  5. Look and feel
    Now for some people this is the biggest change but in all honesty I don’t really care for it, but I have to say, getting more apps on one page is awesome and well overdue, also the widgets on the home page is cool and of course Dark Mode and a full browing experience and semi multitasking is great, but that isn’t what I hoped for the most, but it’s cool don’t get me wrong.

Some tips for copying
For me the most important thing was getting files on and off and browsing via apps.
Well the most disappointing factor is that NONE of the apps so far use this option, Lumafusion still needs the import folder, Project Rush doesn’t even have the option for a folder or external drive (only cloud etc.) same with almost every other app I tried, BUT that being said this is still the beta so I guess the apps will be updated, if not…. I have to be honest I’ll go back to a laptop because this is just a very cumbersome way to work, that being said I’m almost sure they will update the apps so just wait for the final release and for now ignore that remark 😀

Ok so how do you go to and from the film roll.
Most apps use the film roll from apple for all the files, but how do you get files from the film roll to your harddrive and from your harddrive to the film roll when you don’t see the files/drives?

When you are in Apple’s film roll just select the files and select/copy. Now just leave the film roll and go to files and long press and use Paste. It took me a few minutes to figure this out because I expected actually to have it available a bit more obvious. Going from files to the film roll is a different story…. pffff.
Select the files and use SHARE, now under share use SAVE FILES and voila it saves it into the film roll. So it’s doable but it’s still very iOS like.

Conclusion
I still haven’t test a lot more like mouse support etc. because for me the most important thing is that file system.
So far so “good” I’m ok with how it works (when I figured it out) but I don’t feel like I’m working with an apple product and it hurts me to say this but I really feel Apple lost it’s way, and iPad OS so far shows this very clearly. For me Apple was always simple, easy to understand and very very clear how it works. At the moment (and it’s still in beta) we have a file system that works, but it’s not Apple worthy, it’s not impossible to use it (far from) but it’s more complicated that it needs to be, I only want to say… look at Android. For years I’ve been able to just connect it to my desktop and see all my files and copy back and forth without any limitations, also within Android most apps just let you select files from different locations. If you’re not careful it can become a mess but let’s be honest it’s the same on your desktop.

Apple has an amazing, magical (to speak in keynote words) device with the iPad pro, and I really mean this, it’s a kick ass device with incredible speed and battery life for what it does, yesterday I edited a complete vlog again and after editing, rendering and uploading with almost full brightness it only took a 18% battery hit, my laptop would be almost empty (remember these are 4K vlogs with edits in video and audio) and 10 Minutes vlog only takes 10 Minutes to render, my i9 on premiere pro does it in similar times so that’s just incredible.

What I miss is that Apple sauce. That very easy to understand interface, that interaction between the human and the machine (well you know what I mean), It seems like Apple is going backwards in a fast tempo for user interface but also going forwards in other departments like finally a full browsing experience (although on Chrome you can also ask for the full version of a website, but ok I’ll give them that).

What’s your opinion?
For me I just hope they make the copying to external devices much faster, 25MB/s in 2019 is really not from this time, we need at least 100MB/s and on USB-C that should be more than possible. Also I hope they open up the file system a bit more and make it integrate with the film roll like it should be. Or make the film roll an app like gallery and open up the folder film roll, now it’s really that it’s a fully closed app with all your photos which you can’t rename (still find that weird to the max) and can’t see on the iPad itself.

For now I think the iPad pro is an amazing device and a real game changer, the Apple Pencil 2 is just sick (in a very positive way) and the apps are more than adequate replacements/helpers for the desktop apps, it’s not that I really miss things, even skin retouching is easy with both Lightroom CC and Affinity (and soon Photoshop), but the file system REALLY needs some more work, but at least we now have something. It’s just a shame that a real Pro device is still a bit crippled by Apple that can’t seem to make up it’s mind if it’s fashion brand or a creatives dream company (which it once was).

Looking forward to your opinions.

https://frankdoorhof.com/web/wp-content/uploads/2019/09/iPadOS-the-iPad-is-a-big-boy-now-so-it-gets-its-own-operating-system.jpg 627 940 Frank Doorhof https://frankdoorhof.com/web/wp-content/uploads/2015/03/studioFD_Logo-1FV.png Frank Doorhof2019-09-14 08:51:582019-09-14 08:51:58iPadOS my first impressions (mixed)
Page 1 of 512345

Newsletters

Subscribe to our newsletter for updates, discounts, and much more

English news letter
Dutch news letter

Interesting links

Here are some interesting links for you! Enjoy your stay :)

Snel naar

  • Blog
  • Learning with Frank
  • News etc
  • Reviews
  • Shop products & books
  • Contact

Contact

Studio Frank Doorhof:
Constructieweg 8
8305 AA Emmeloord

The Netherlands
+31-6-14522327

Or Email : info@frankdoorhof.com


© Copyright 2000 - - Frank Doorhof
  • Link to Facebook
  • Link to X
  • Link to Youtube
  • Link to WhatsApp
Scroll to top Scroll to top Scroll to top