Reviews on gear and software

BenQ SW321c review and opinions

Some reviews are easy and some reviews are hard.
To be honest writing a review about a monitor can be quite easy, but also incredibly hard, actually the better a monitor gets… the more difficult it gets writing a review. When for example a monitor has color issues, or luminosity errors you can explain what it is and why it’s important to take note of that. This often means that writing reviews for cheaper monitors is a blast, loads of things to explain so to say.

So why do I start this review with this small note…
Well you have to know a bit of history.

Years ago during an UK tradeshow I met the guys from BenQ for the first time, at that moment they told me they were starting to promote specialty monitors for video/DTP and photography and they wanted to really make a dent in the market to deliver high-class, great specked monitors for very affordable prices. Now from any other company I would probably just thought “yeah, sure and who are you again” because let’s be honest the market had been very tightly controlled by only a hand full of brands, and in fact at that point most photographers only edited on 2 brands if they were serious about their work.

So why did I take BenQ serious from the Get-go.
When you look at companies there is always a history, and what most of you probably already know is that before we took on photography full time Annewiek and I ran a PC-company for over 20 years (with great success) and one of the things we always experienced is that if a gamer entered the shop it was always …. BenQ. We’ve sold pallets of BenQ monitors to the gaming community in our area, but also CD drives and the nice thing from the BenQ products was great support and they hardly ever broke down, and on latency for gamers…. well if negative was an option they would probably add this too. So this is a company that didn’t just appear out of nowhere, I dare to say that if one company knows how to build imaging display for pro work BenQ absolutely would be on that short list without any doubt. So when they announced the new line I was all ears, eyes and what not more.

My first BenQ monitor was several hundreds of euros cheaper than the monitor I used at that time and to give you an idea about technical knowledge I have to tell you a small story.

The monitor I was using at that moment had a hardware calibration unit.
Now I never got this feature, it metered in a corner, it was a tristimulus meter and was not replaceable and could not be recalibrated. When I asked about this “weird” solution I got some even “weirder” answers.

First off all, the meter was linked to the monitor so it knew the degradation of the panel and adjusted itself, also it was placed in that position because…. well never got an answer to that one.

Well let me burst your bubble for now.
Besides running a PC-shop for many years in 1997 we also started a Home Theater branche (this is also how we worked with BenQ in the past) in 2001 we were in the states (yes during 9/11) and I got my ISF certificate (Imaging Science Foundation) I won’t go into the very technical details, but let me put it this way, I know how to calibrate a display manually and I also understand how an analyzer and a panel works, and how they interact.

It’s impossible to calibrate an analyzer to “predict” the degradation of a panel for professional use. For consumer use you will get close enough, but for critical work it’s absolutely ridiculous to make statements like that, Both panel and analyzer drift over time. For our professional analyzers we send them in every year or two for a recalibration, this is not cheap but it’s necessary for professional grade calibrations. Now both drift, but they won’t drift according to a “plan” we could only wish, no both drift in different ways, also depending on the surrounding area of course, usage and simply put the panel itself.

One could roughly say that for professional use an automated calibration system could work just fine for 2-3 years, after that we go down to consumer level, still ok, but depending on your own nitpicking, not that good anymore.

And than talk about placing, why in the middle or corner or edge?
Well when you look at your monitor you mostly look at the centre, right?
So it makes sense to calibrate that part, so why should you calibrate only a corner or edge?
It just didn’t make any sense at all.

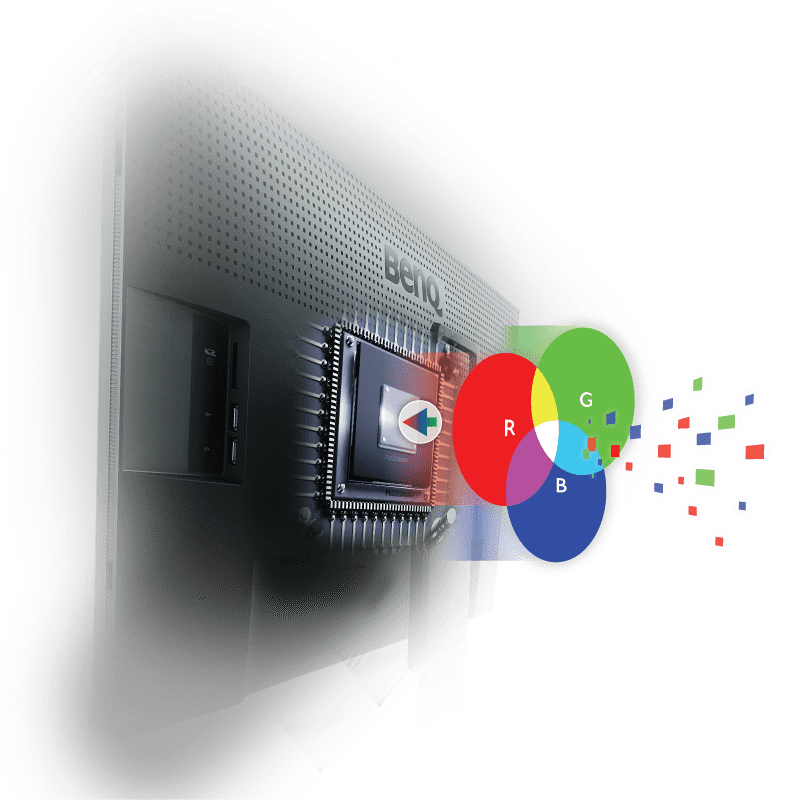
Now one of the main reasons these kind of solutions are actually very good is because those setups use something called hardware calibration. Let me make this really simple. With a normal calibration the software creates a so called ICC profile, this is a profile where you set a goal (for example Adobe RGB) and the software “calculates” from the sensor readings how far certain colors are off and corrects this, so for example you will see R +1, -10, +3, often these calibrations are done on the primaries (RGB) and secondaries (CMY) and often also some shades in between, during the calibration you also see them vary in output, this is mostly used for gamma and to prevent clipping within the colorspace/color.

In all essence it’s not really hard to understand.
We have a fixed set of coordinates and we have a variable set of coordinates that has to be “guided” towards that fixed set. In most cases you get pretty darn close, but it will never be 100% perfect, the difference is what makes a monitor good, better or worse. This is also why you often see 98% Adobe RGB and 100% srgb, it means that when calibrated to Adobe RGB you will get 98% close, and when calibrated to SRGB you get 100% close.
Now where does it get interesting.
When we do this in software there are limits. Think about what happens when you use curves in Photoshop, when you pull on two sides everything is fine, when you start adding 3-4-5 points you will see huge problems in for example an 8 bits version, and less problems in a 16 bits version. The reason is again simple, with 8 bits you get 256 steps of luminance per color and in 16 bits you get a whopping 65536 tonal values PER color. Don’t confuse this with a 10 bits panel (which the 321C uses). As you can see here the difference between 8 and 10 bits panels.

8 bits
10 bits

When we look at the calibration itself we have a few options.
Profiles can be matrix-based or LUT (lookup table) based
both of which include the white point of the device (mostly D65 or 6500 degrees Kelvin)
Matrix-based profiles are small and LUT profiles are larger and also a lot more complex.

  • matrix profile is a mathematical model made up of the three primary colorants of the device and some simple tonal curves, referred to as a 3 x 3 matrix.
  • LUT-based profile contains much more information, consisting of a table of numbers that allows you to find an input value and its corresponding output value.

One could say that simpler devices could use a matrix profile, it’s fast and easy.
But for monitors and printers I’m a huge supporter of a LUT based calibration.

This is also where the monitor comes into play.
You probably heard the remark hardware calibration quite some time when you read my reviews. This actually means that you don’t calibrate your monitor via an ICC profile, there still is one, but it will be “neutral”, all calibration is done inside the monitor. Personally with the BenQ I always choose the 16bits LUT, native panel, V2 (don’t use V4) relative blackpoint (with relative it will keep the gamma in tact, with absolute it will yield a higher contrast ration but gamma is sacrificed a bit) and large. This takes some time but the result is butterly smooth and very accurate.

Now there is one setting missing, and I want to give some extra attention to this, light output?
When a gamer or consumer buys a monitor one of the things we always heard was “light output” and a rule of thumb was… the brighter the better. Well that’s true for those usages, but what about DTP or photography? everyone that ever edited an image on their phones or iPad in a dark room with the brightness on full blast knows this hurts your eyes, but also the results are WAY too dim, in other words as soon as you look at them on a normal monitor it’s just too muddy and dark.

But can’t you just lower the output of the monitor?
Yeah to a certain extend you can, but you do have to realize that there is a limit, at one point the contrast (white point) will keep going down, but the brightness (blackpoint) won’t, you are now entering the danger zone, you are now seriously hurting your contrast ratio, and this…. you don’t want to do.

Seeing we need lower light output for photography (mostly between 80-130 cdm) it’s wise to choose a monitor that has a sweetspot for contrast ratio around that light output, although now a days with HDR this is a bit different, but let’s for now keep that out of this story.

End of the story
So for a good monitor that can be used for photography we need :
Hardware calibration, with a replaceable analyzer (not a fixed one)
A sunshade (also handy when you have a controlled lighting area)
At least 98% Adobe RGB
A good panel that doesn’t look red on one side and blue on the other (and yes there are a lot of them out there)
A good panel that doesn’t look like a natural vignette (brightness differences, very annoying)
Good service and support
Good price

pffff sounds like a lot of boxes to check.


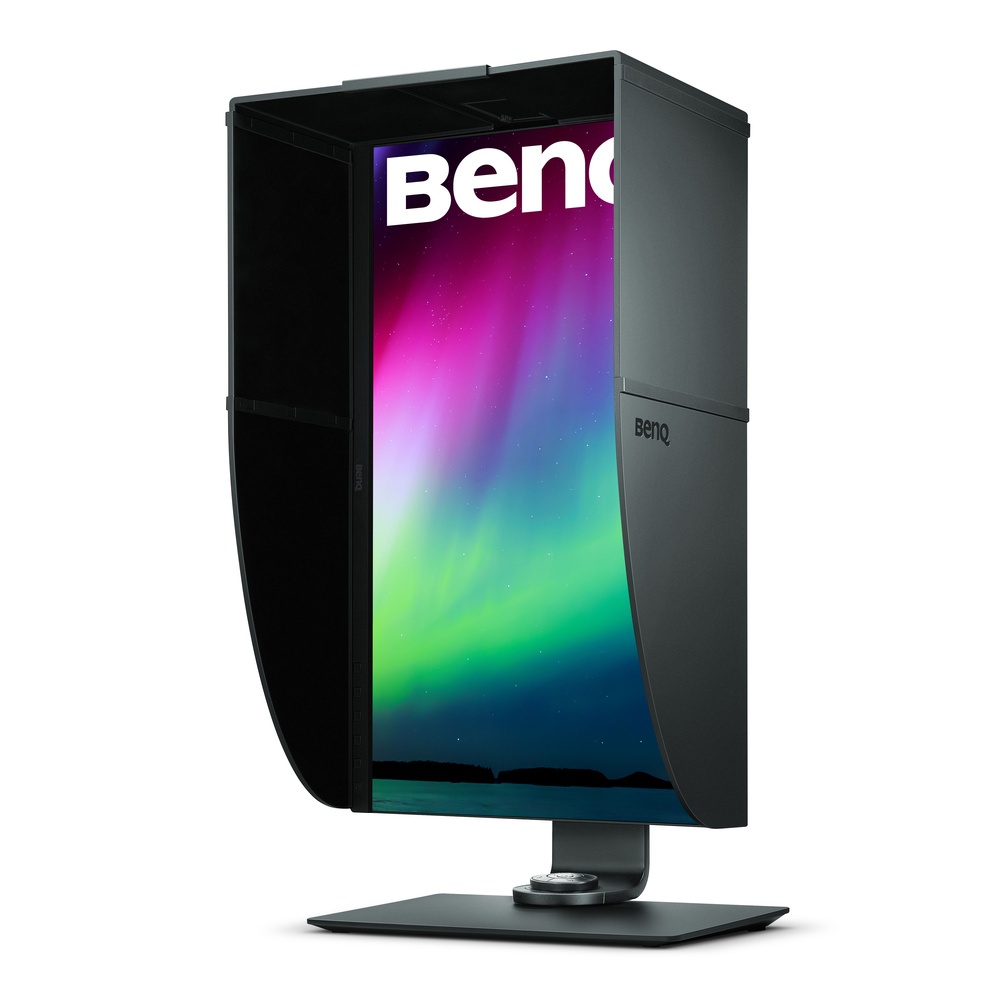
The sunhood can be mounted in landscape and portrait

321C (or like I like to say it 3.2.1 COLOR)
Let’s take a look at the beast that is called the 321C
First off all I appreciate you guys still reading so let’s make this very short.
The 321C checks all the boxes, BenQ really picked a great panel for this monitor.
I could have stopped the review here, or bore you guys with technical details which you can also find on the product page, and I hate those kind of reviews so I’m not spending any time on that, let me put it this way…. it’s very impressive on paper.

However, being impressive on paper doesn’t mean anything when you have the monitor on your desk.
So let’s take a look at some things that REALLY caught my eye.

The first thing is of course color. I’ve had several BenQ monitors on my desk over the years and they all are great value for money. I love their P3 series for step in photographers that need a bit more than sRGB but can’t yet afford a full ARGB monitor, but I also love their professional series. Now seeing the pretty steep price difference between them I was very curious to see what this monitor brought more.

Connections
Let’s do the boring stuff first.
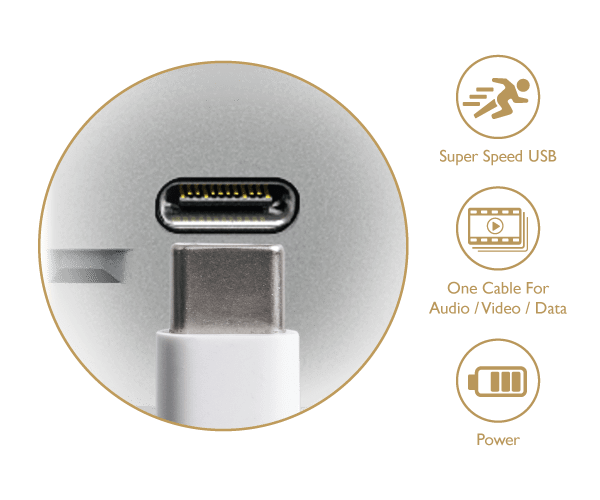
This is a USB-C monitor, and all devices should be by now.
It means no slow ports if you connect to your monitor.

You get
HDMI (v2.0) x 2DisplayPort
DisplayPort (v1.4)

USB 3.1 Hub
USB Downstream x 2USB 3.1 Hub
USB Upstream x 1USB
Type-C Yes (PD60W, DP Alt mode, Data)

Card Reader SD/MMC type
Support Format: SD/SDHC/SDXC/MMC
Sharpness
I can’t really put my finger on it exactly but the 321C is a seriously detailed monitor, the first time I connected it without proper calibration I already saw that my taskbar was more defined, looking a bit more 3D, after calibration some “blooming” was gone and it was crystal clear (no pun intended) this monitor is fricking sharp, the panel and coating is one of the most detailed I’ve ever seen in a monitor. Now do be careful, sharpness can also be added digitally, this is however not sharpness, this is “ringing”, do remember that your monitor has a fixed resolution and if you send in that exact resolution you can never ever get a sharper image than without any processing. In projectors and TV sets you do often find sharpening via for example super resolution or 4K enhancement modes, and in movies this can work like a charm, but you always have to realize that you are losing fine details. So for a monitor on which you have to do sharpening for output to a digital billboard, poster or thumbnail it’s vital that the signal is as clean as possible, and from what I can see…. the 321C is pretty close to “honest”.

Coating
Another thing is the coating.
Also here I can’t really find any information on it from a technical standpoint (not important) but it just “feels” different. All the BenQ monitors I used before were pretty similar in appearance and “feel”, this one clearly is different, and in a very positive way. The glare is different (don’t worry these screens are matt and don’t glare like some consumer screens, laptops or iMacs. But still it feels different if you know what I mean.

Paperlike
This is brandnew, and in all honesty, I’m a bit skeptical about this feature.

The main reason you buy a monitor at this price point is of course to be able to judge an image or piece of work on color accuracy and dynamics, so you need a very “honest” preview of what’s to come. Now we all know the frustration that when you send something to your printer it comes out like junk. With paperlike the 321C makes it possible to judge the output of your printer on the screen, sounds awesome right? (and it is) but there are some things you REALLY have to be careful about.

First off all.
You have to make sure you calibrate your monitor before every “judging” round, at least let it warm up for 30 minutes and calibrate, but also your printer has to be calibrated or using a profile that is valid for the kind of paper and inkts you use. We for example use Epson Premium Luster paper almost exclusively, I’ve calibrated my Epson 3800 for this paper and my PC, when Annewiek prints something it looks slightly different, (after I gave her my settings not anymore, so there is a huge BUT there)

In essence paperlike is absolutely fricking awesome.

By using paperlike you can select your printer and paper and see on the monitor what would roll out of the printer. You have realize that a printer has totally different colors than a monitor, we call this subtractive color or additive colors. A monitor emits light and uses RGB as main colors (although you also see some panels using extra Yellow) and a print actually reflects or absorbs light and uses as a base CYMK (K= key). Add to this that also the colorspaces are different per paper and inkt and that in a dark room the monitor will look awesome but the print sucks, and outside the monitor will suck and the print will look awesome…., and here we go…… you get the idea why these worlds can cause so much frustration for you (and me).

Paperlike promises (and does) solve some of these issues.
And let’s be honest, we don’t and never will have exact the same image on screen and on paper, but it has to be as close as possible of course. So what does paperlike, or paper color sync do?

First off all the monitor itself has to be prepared for this, and this is were that new coating comes into play, it’s just a bit more closely to paper so to say. After that it’s actually pretty simple. You can download the free software from BenQ, install it and choose your printer and paper…… yeah…. well don’t know what to say more, it’s really that simple. No voodoo or magic, it’s actually a very smart thing they did, and I can’t imagine why this wasn’t released earlier.

Now one could say…. “he Frank we have a softproofing in Photoshop and Lightroom?”, and indeed yes you do (well spotted), but see this as a WAY WAY more accurate way of doing that softproofing, I advise everyone to use softproofing when you shoot for important work where color accuracy and gamma are vital, and Photoshop comes a long way, but if you want it “perfect”….. well you really should think about the 321C.

Now as mentioned you do have some severe limitations, and it’s up to BenQ to see how this will work in the future.
The limitations are actually to be expected and should also be there, this is NOT negative, in fact it’s 100% POSITIVE, if they would have released a one size fits all solution it would be just a slightly better version (or worse) of Photoshops proofing.

What they did (and still do) is take into account readings from papers, printers, ink AND the monitor and throw them into profiles. This is a proven and very accurate way of working, heck it’s how we all look at our monitors displaying Argb when we edit, it’s just measurements and profiles, nothing more. To make a monitor and print look similar this is however not an easy task, and a lot of people will be disappointed. Like I mentioned before it’s vital to realize that a monitor is NOT a print and a print is NOT a monitor. Use colorsync in a dark studio and you will wonder why you’re print looks like crap, so for serious judging EVERY print station should be outfitted with a full spectrum daylight bulb/led light. ONLY that way can you really judge a print.

One might wonder, what if a customer……
Well I know your pain.
We’ve had exhibitions where my images looked awesome, and we’ve had exhibitions where I hardly recognized my own work. The key element was light. One gallery used natural light from outside and to put it mildly, some moments they looked ok. And the other gallery had lights mounted on every single piece of work, to be short… that looked right.

But when you have this into place, the results can be shockingly accurate.
Ok so what about that limitation I keep telling you about, that was the light right?….. no sorry.
To make this work you really have to be using the printer AND paper AND ink that is available in the BenQ software, at the moment it’s still a bit limited but seeing they can add profiles very easily I expect this to grow a lot during the coming months.
The Puck
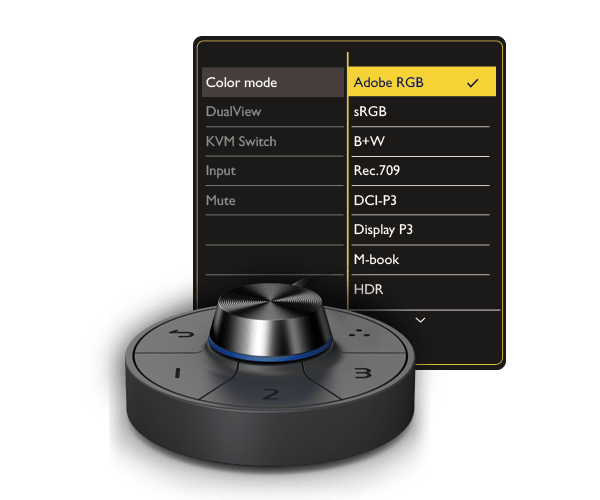
With the 321C we find the “famous” BenQ puck.
In all honesty at first I didn’t use it all, and still it’s…. well it’s connected and I do use it occasionally, but there is one thing that is really cool about the puck. You can program two color spaces under the buttons, so with a press of a button you can set your monitor to the sRGB colorspace or to Adobe RGB, this is a very very useful function when you publish a lot for the internet.

But there is one other feature that I think is very useful for some people

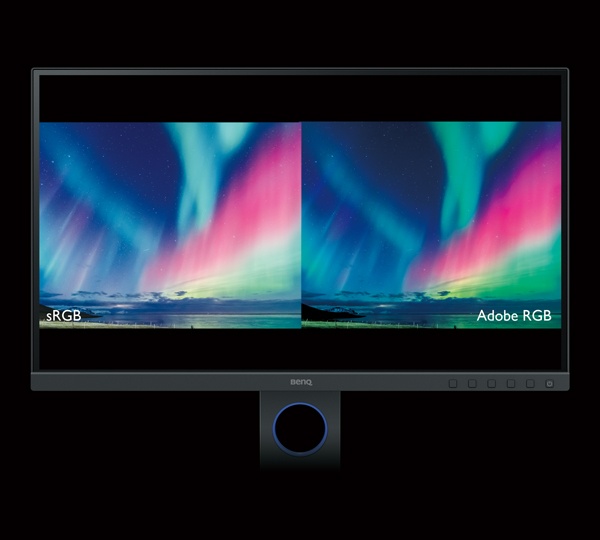
GamutDuo
Connect the BenQ with 2 cables and it’s possible to see an Adobe RGB version next to a SRGB version on the same screen. This is a huge thing for people that will convert to colorspaces a lot and where it’s vital all the nuances are shown.
Multiple monitor accuracy
In the top line of BenQ you can add several monitors together and they will give you a very similar look and feel of your images. This is something that might be very important for video editors, for photography I don’t use that feature but when doing video on 2 monitors I often use one for a preview and one for the time line, having a proper balance between those two is not only easier but can actually be vital for proper color grading and balancing the contrast.

Conclusion
We have arrived at the end, wow you kept reading (or did you skip).
This is not the cheapest BenQ monitor and one might wonder that if you don’t need the Paper color sync software if it’s still the monitor for you? Well let me try to answer that.

In all these years that I’ve edited images/video on a boat load of monitors this monitor really shines above all others I’ve tried. I’m just in love with the coating and the sharpness of the monitor and for me, even without the paper color sync software this warrants the premium price and lets be honest compared to the competition this is actually a pretty standard price for the high-end monitors, in fact taking everything into account one could say it’s not that expensive, although it’s still a lot of money.

I do have to come clean on one part.
I’ve already seen and worked with this monitor since December, I believe the first beta sample was in our studio for the first look and I’m running on one of the first production models. One could ask “why wait so long for a review”

Well the reason is very simple.
Sometimes you see reviews minutes after a product is released, we also sometimes do this and one might wonder “how the heck?” well some products we get a few days or even weeks before the release and with some products you know within hours or days if it’s good or not, but a monitor….. I never trust reviews of monitors that appear right after the release. In my opinion you have to also take into account how the monitor grows on you and how it keeps it’s color. Now even a few months of intensive use is not enough for that last question, I can only say “so far so good”, but that growing part I can be very short about. Over the past few weeks the monitor keeps growing in my appreciation, due to the lock down I’m working a lot from home, on another BenQ monitor (of course), every time I walk into the studio and I work on the 321C I go “aaaaaaah…..” and that’s a good thing, the 321C is a very complete monitor with more features than most of us will ever use. It’s simply put a monitor for the serious pro that demands “everything” from him/herself and also expect the gear to follow that trend. And the 321C can keep up…. it’s awesome.

Add to this that the 321C is verified by Calman (a professional calibration system that I also use) and it’s also Pantone validated and you just know this is not just talk or commercial mambojambo.

During the review I aimed at photographers but I do have to add that the 321C also support HDR10/HLG and supports the native 24/25P frames per second that is important to detect judder during editing.

HIGHLY recommended for pros, or hobbyists that are not satisfied with “it’s pretty accurate”


Insta360 R one first ideas and opinions

To be 100% clear….this camera was borrowed from our friends at Degreef & Partner. So I did not buy it myself (but there is a huge chance I will)

https://www.degreef-partner.nl/nl/insta360-camera.html

I love 360 cameras but have (so far) always been disappointed by the resolution. For social media it’s often good enough but I just love to be able to zoom in and experience the scene a bit more like I saw it in real life. Coupled with the 180 degrees cameras this means you need a lot of resolution. In the last few years I’ve tried several low cost solutions from Huawei and Samsung and to be fair for what they cost they are fun but also junk when you want to do video or use it for something else than social media. I’ve also tried the Ricoh solution (4k) and was much more impressed by that one to be honest, but still….. video not that well.

So when I heard about the new modulair Insta360R one I was very interested and asked for a review sample.
Now to be fair, this is NOT the review.
Just some first opinions.

The thing I really like about the insta360 approach is that you can switch over camera modules (or battery modules) and that way you can switch from 360 to a 1″ camera and a normal action cam. At the moment I don’t have a 1″ camera version so all my opinions are based on the normal action cam and the 360.

Photos are pretty impressive in 360 much better than what I tested before on the Ricoh (but that was 2 years ago)
Video is incredible with good light but don’t use the enhancements because you’ll see noise. Low light…. Needs improvement

Somethings I don’t like
Would love to be able to switch lenses without taking the battery off
Startup time could be faster
Low light performance is not that good, photos are great but video really suffers in low light, this will probably be miles better with the 1″ version so in all honesty if you have the option I would skip the normal action cam and go straight for the 1″ version if you (like me) use the camera mostly in darker areas, I hope I can test the 1″ also someday.

What I do like
App and software is just fricking awesome. Editing 360 is almost childsplay it’s so easy on both iOS and Android that you don’t even think you need the desktop app, until you install it, it’s very complete and includes a Premiere plugin (yeah) The thing I really like for video is the speed in which you can edit, in the app there is a sort of “go as you go” mode which means you just play the video and move the camera around and that creates the keyframes, you can also just add keyframes and switch from a normal camera look to a tiny planet and move around or twist, it’s pretty insane what you can do and how fast. I remember trying to this a while ago in Premiere and after an hour or so I got something decent and decided it just wasn’t worth all the effort, now it’s almost in real time, this is really awesome and just pushes your creativity to the max.

The app itself has loads and loads of settings for different situations like HDR, nightmode, burst etc etc. are found in the mobile apps so the camera will fit almost any purpose.

Image stabilization is spot on although not as good as the Osmo Pocket (which is to be expected seeing that one has a gimble, but that being said… it’s very impressive.

It’s a modulair system. Just let’s hope they keep adding modules instead of going to another modulair system. Which I think they probably won’t. Because this works really well

First ideas
I still have to test a lot more and have some ideas how to use this in a educational and BTS setup. Let’s just hope they don’t need it back soon.
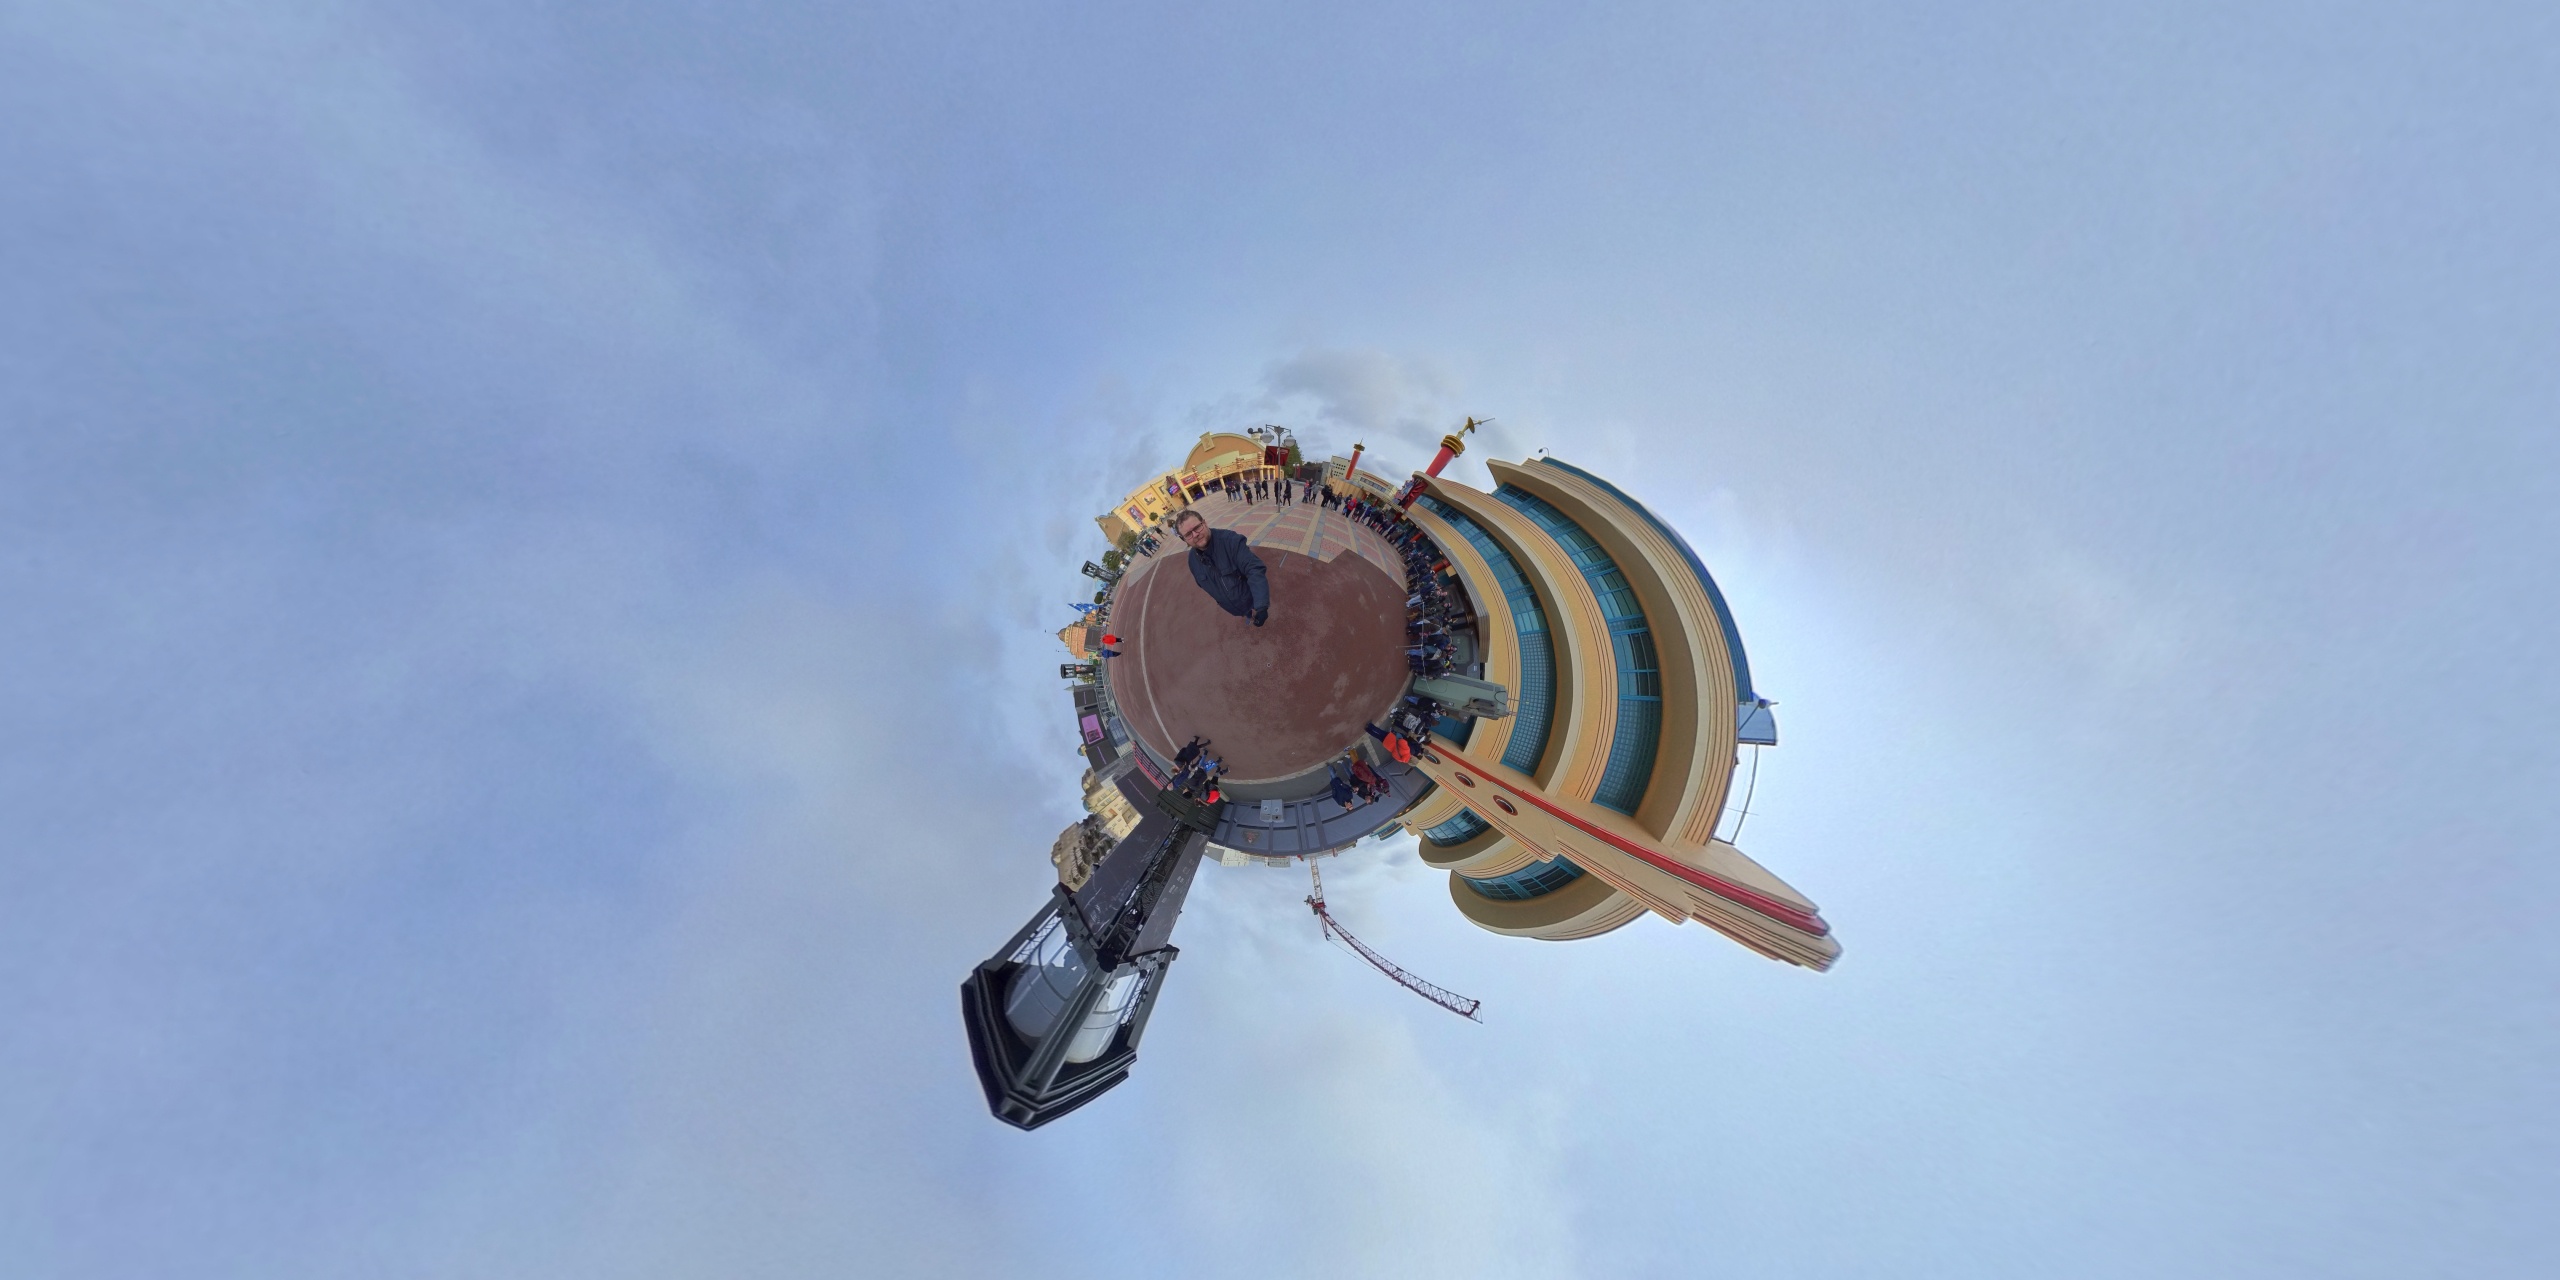
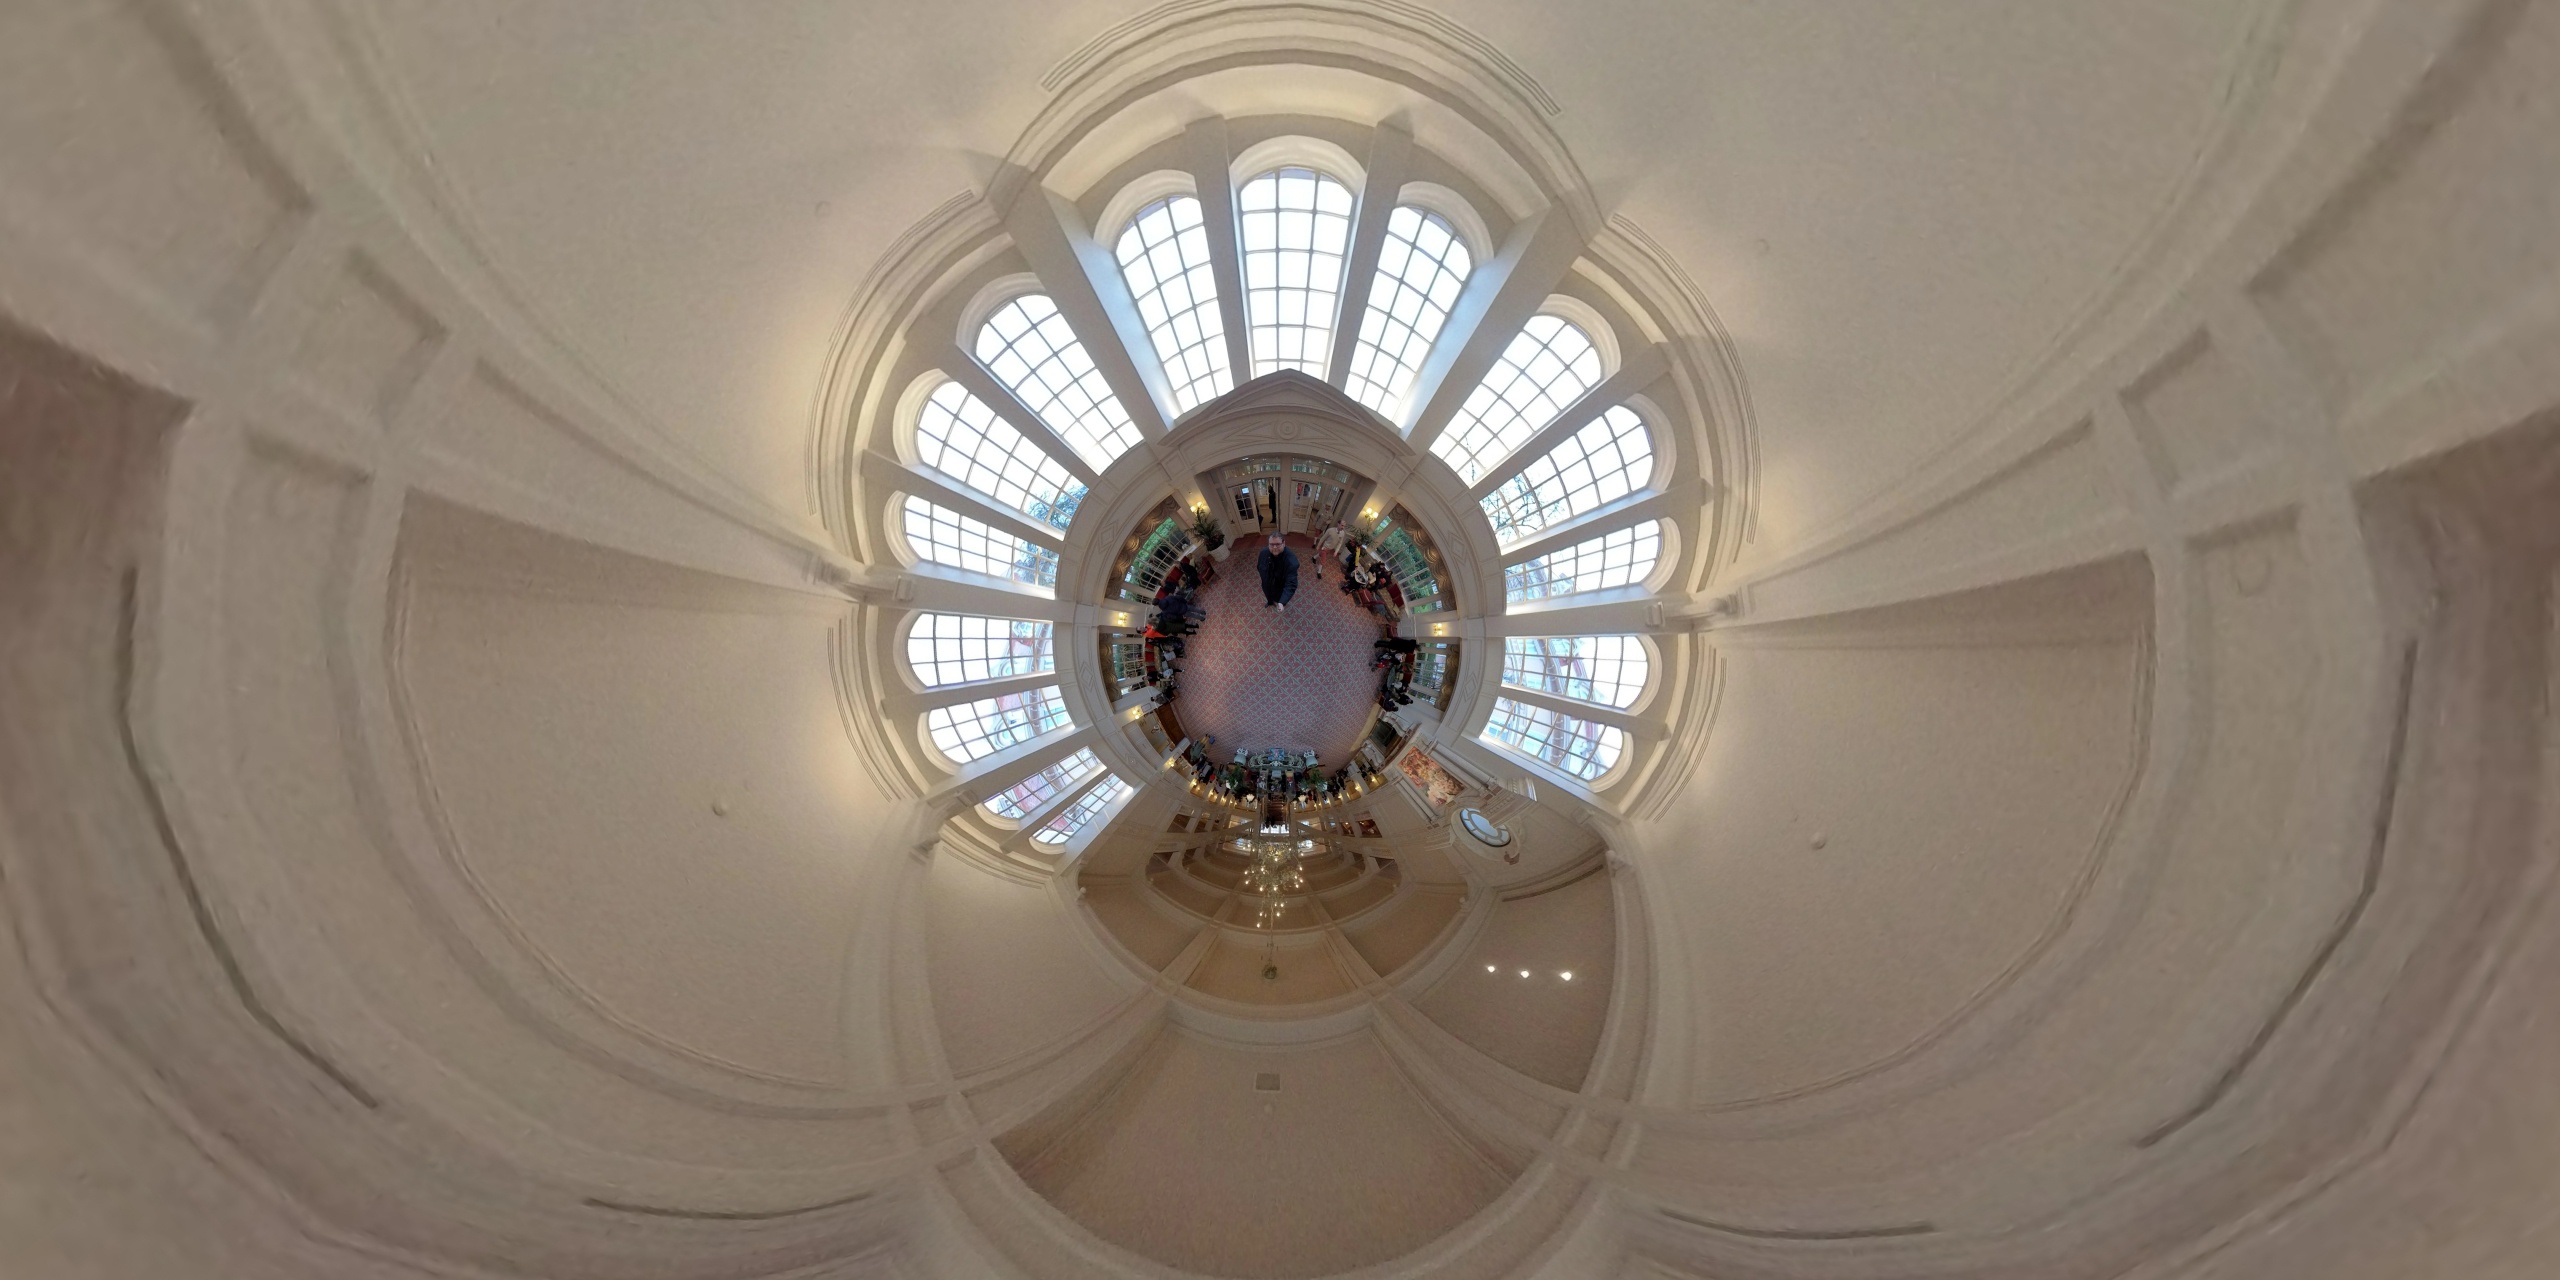
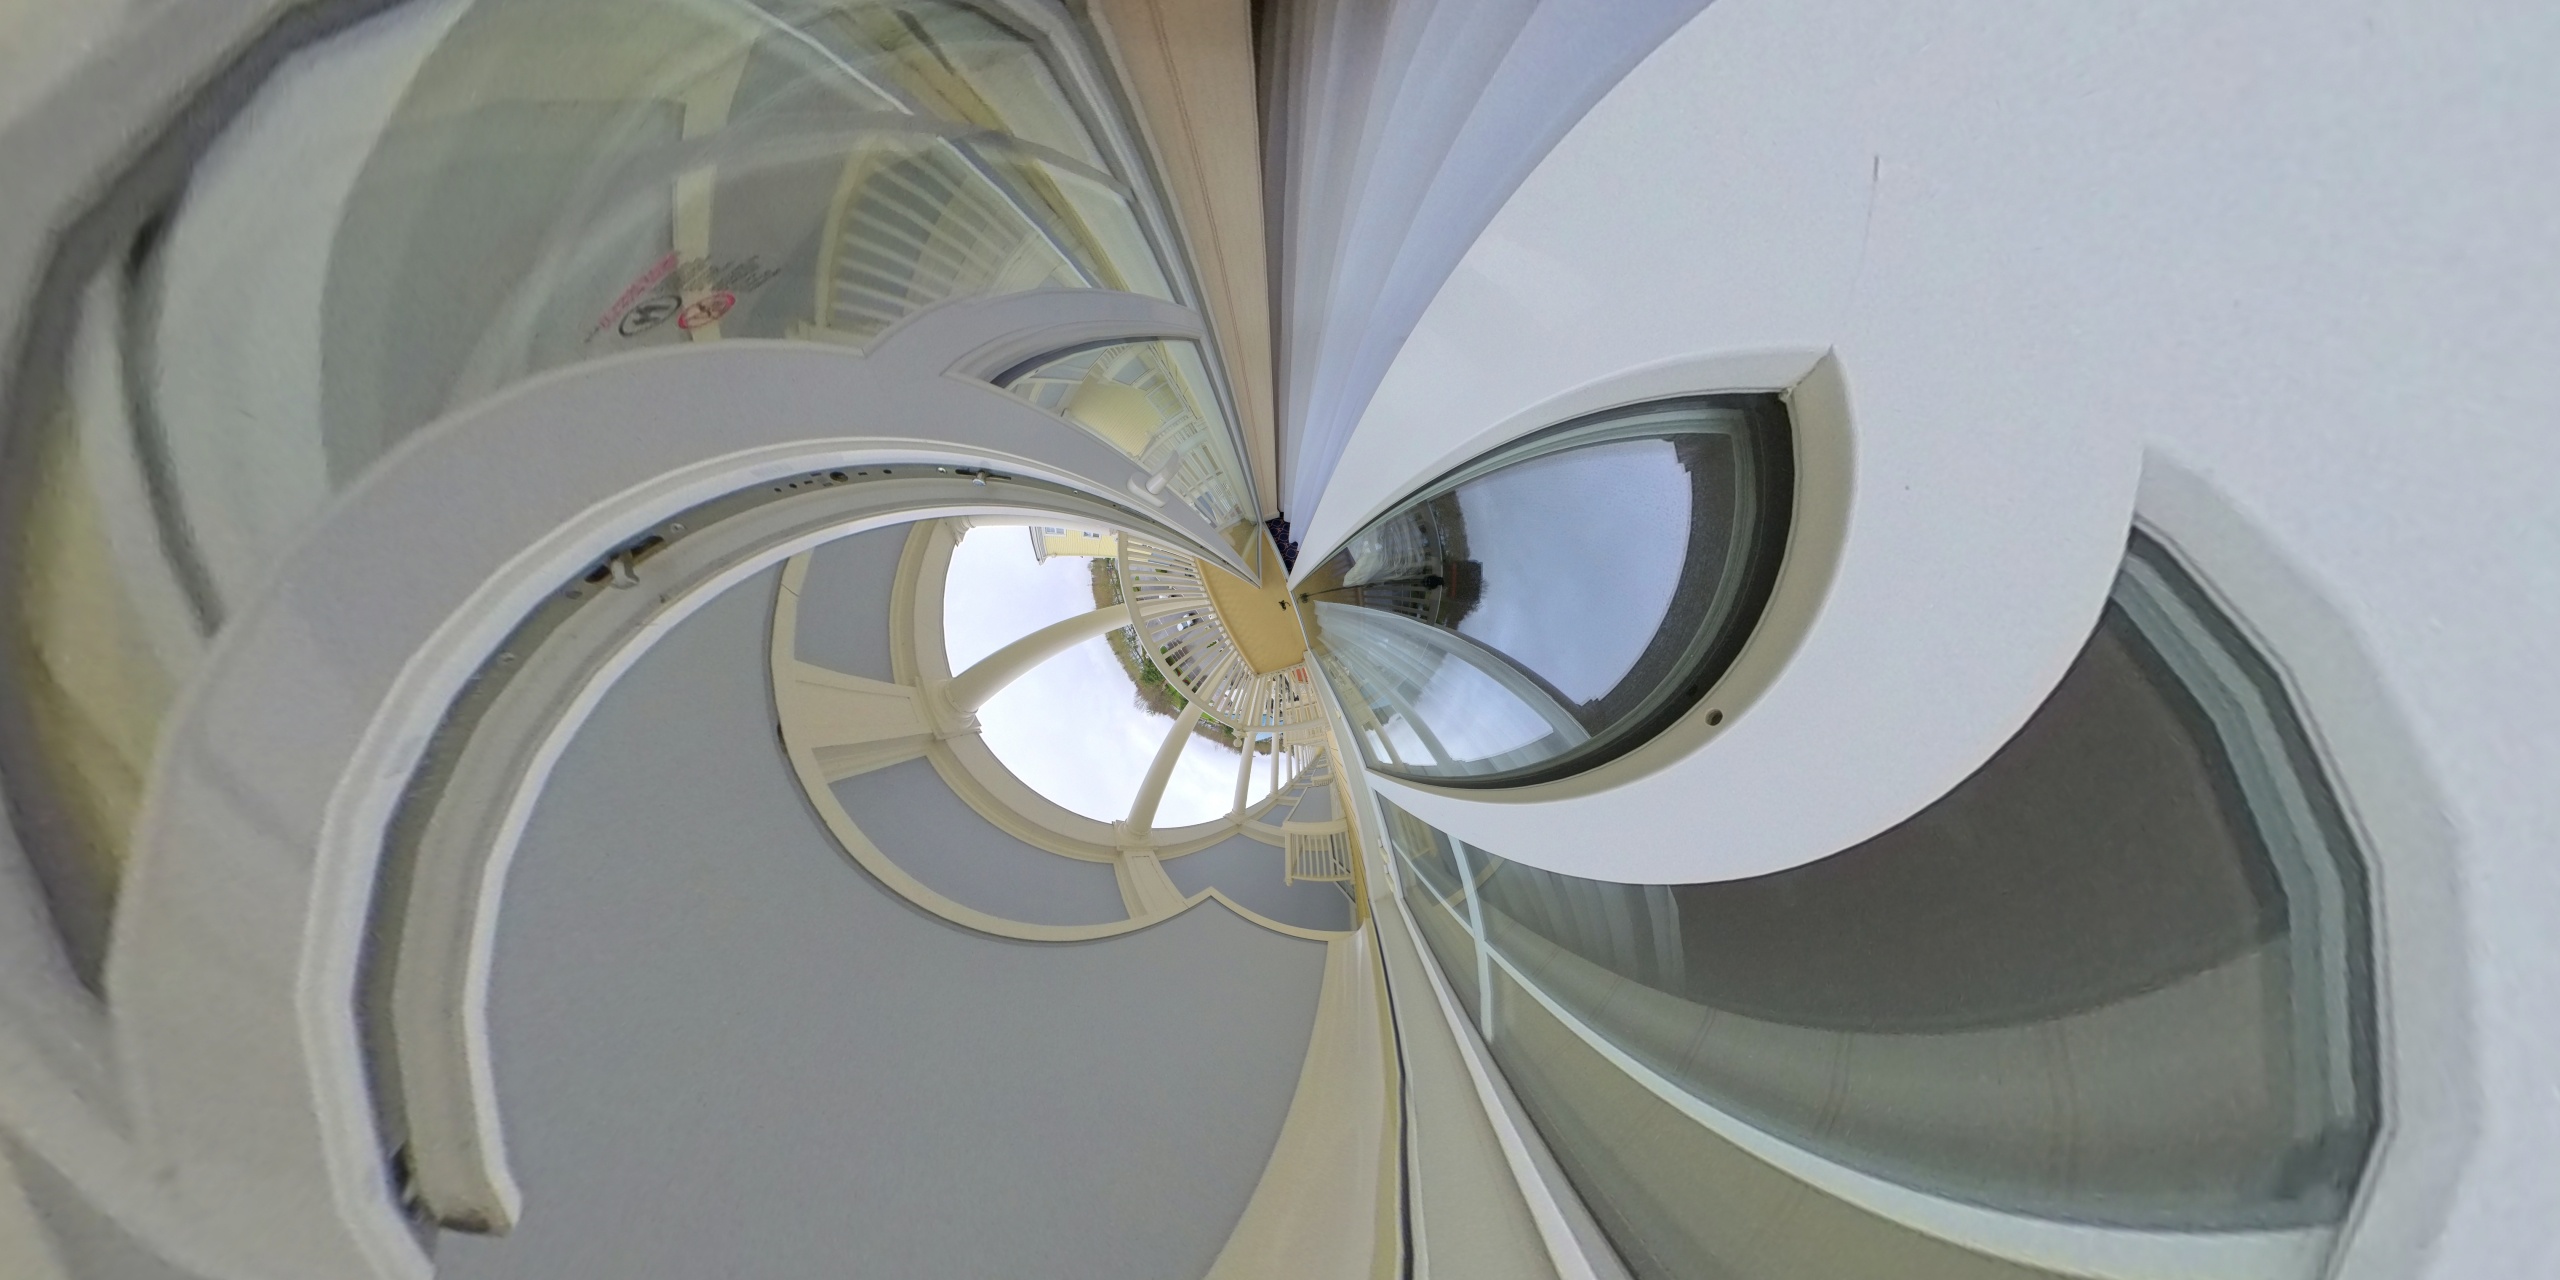
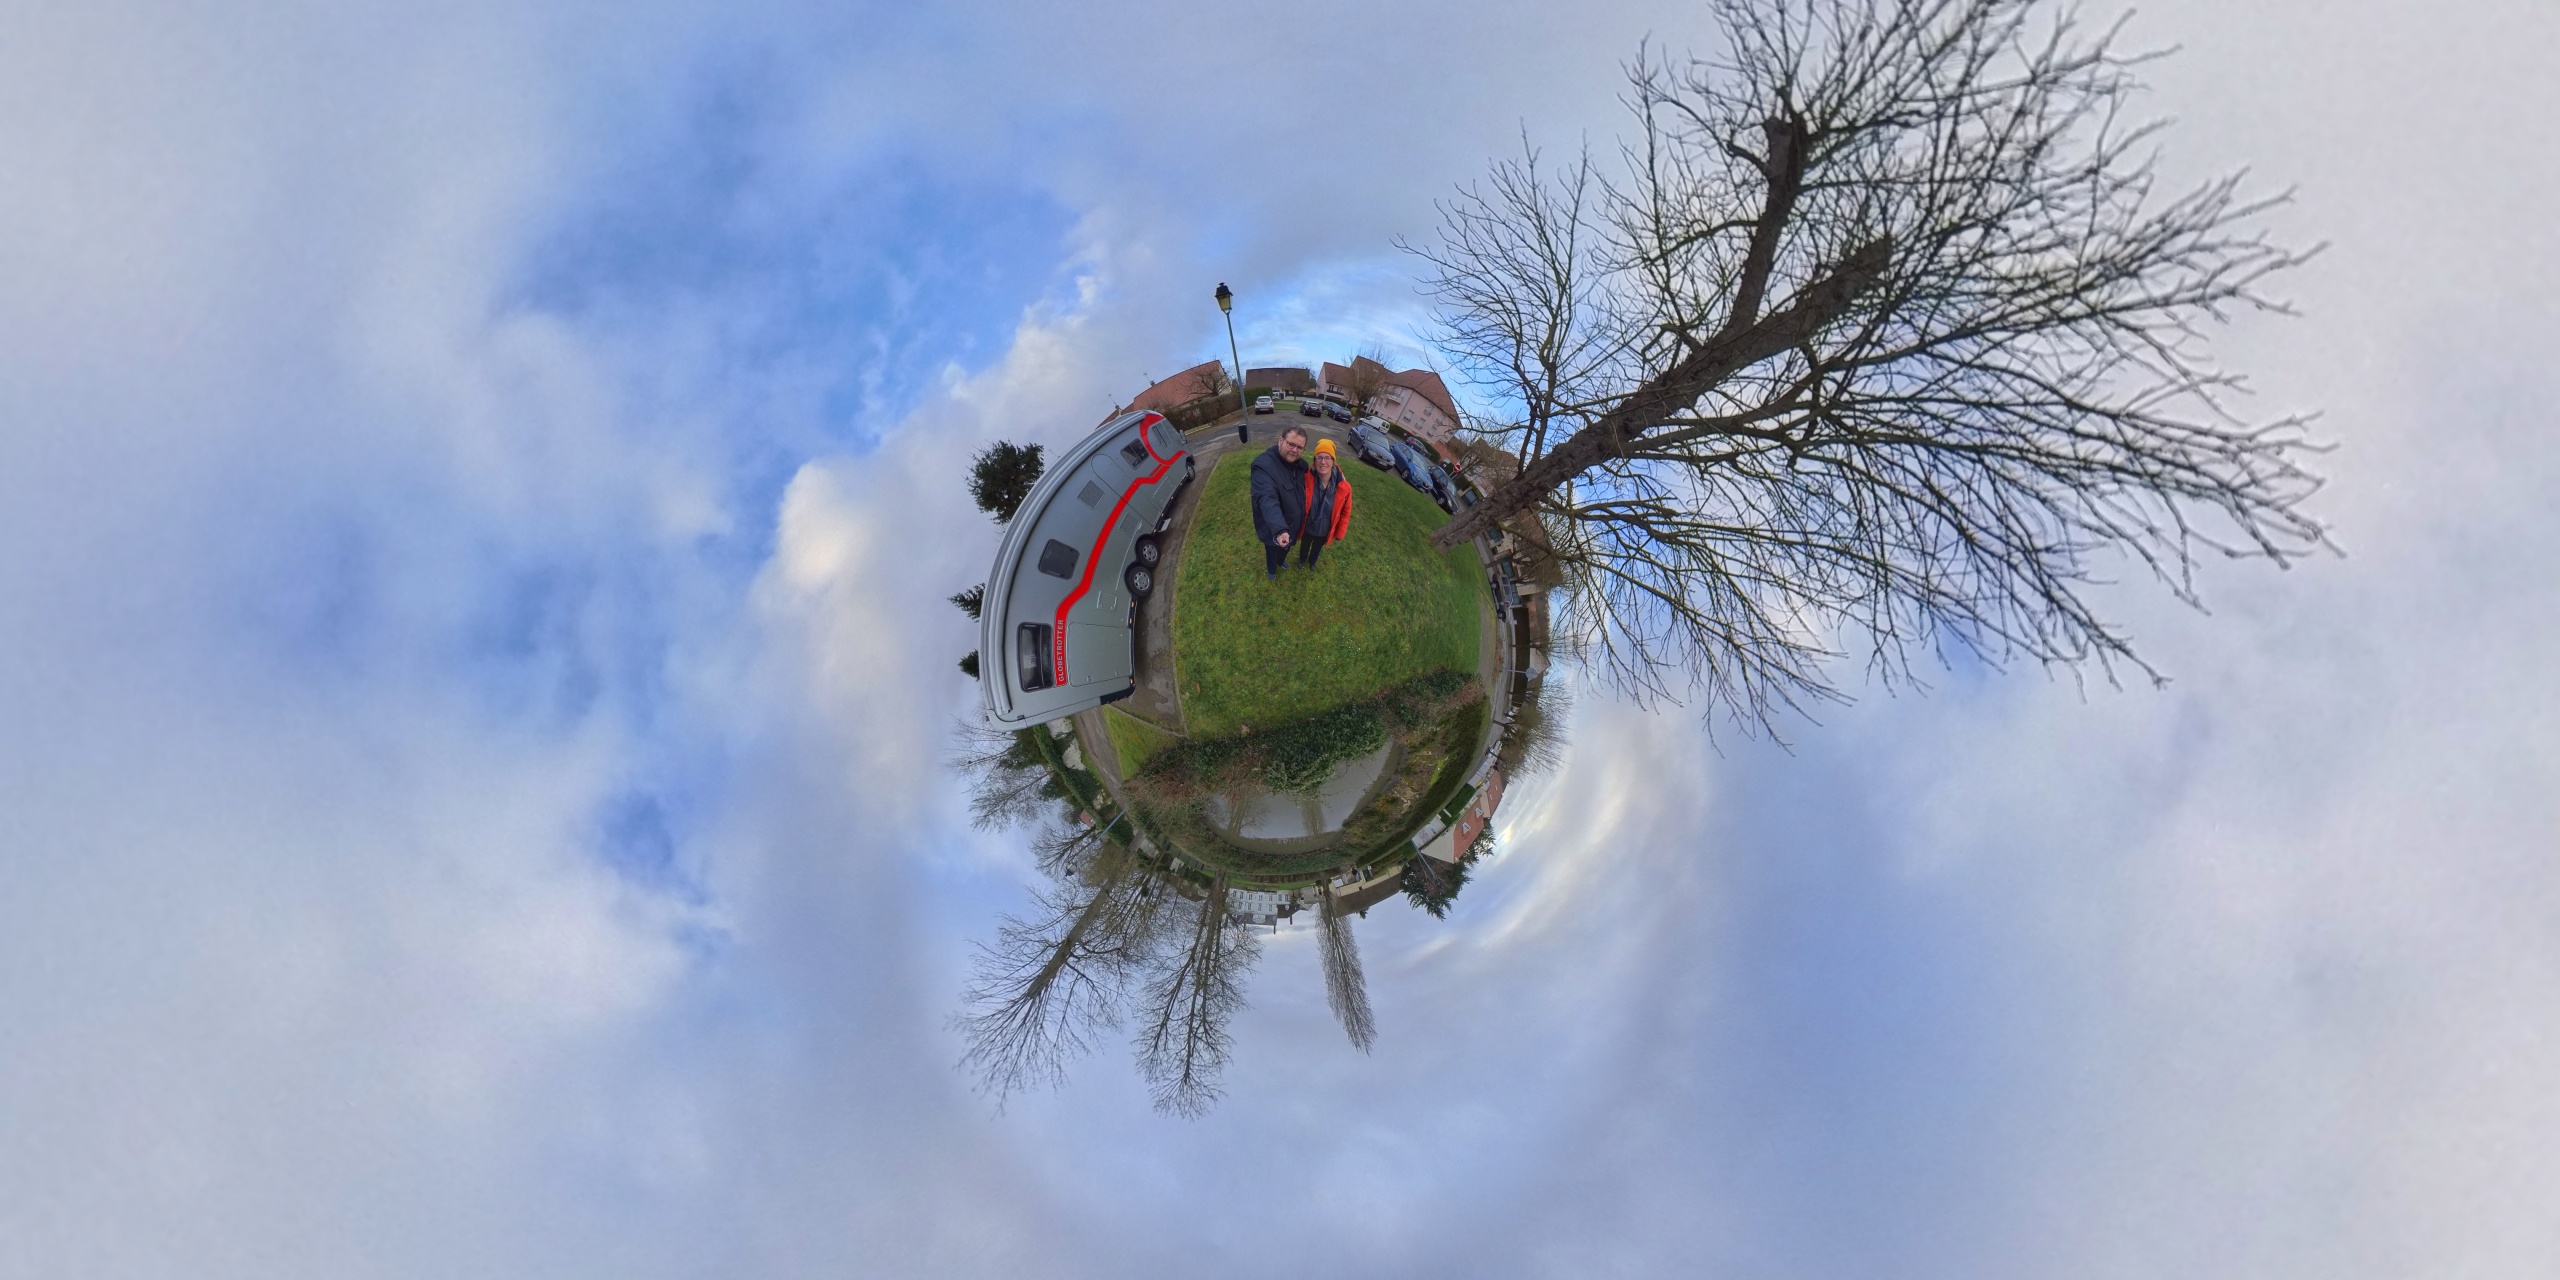
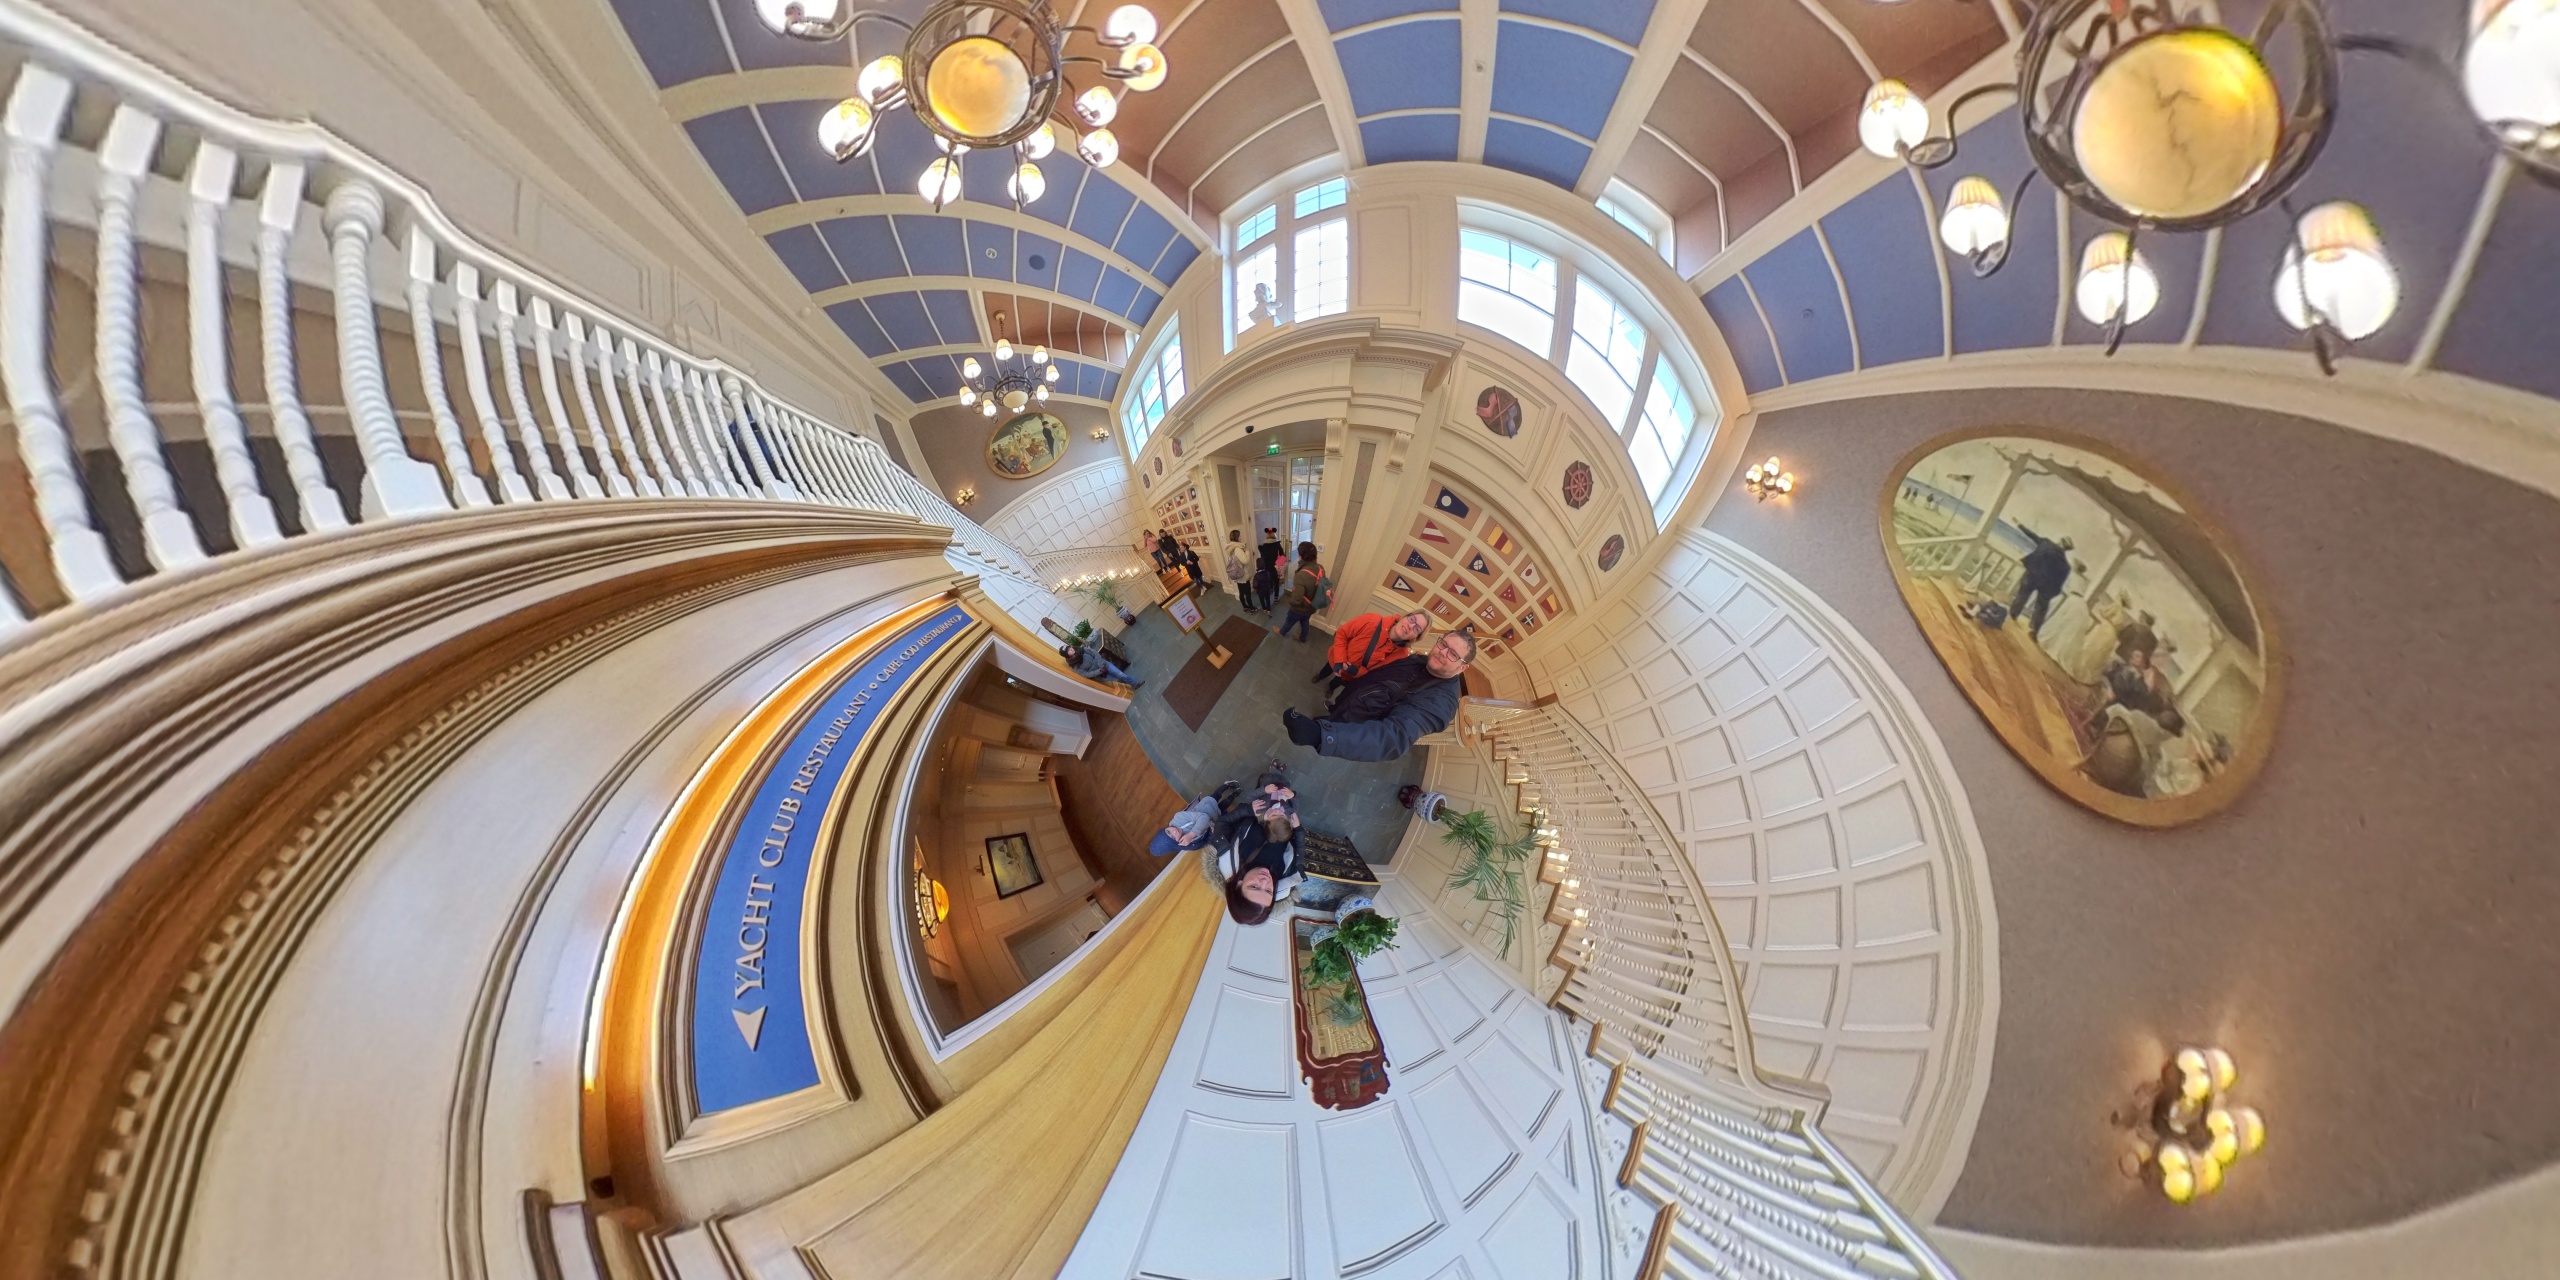
It’s amazing to play with 360 images and videos and although it’s very gimmicky I just love the little planets, so for now I’m closing this first post with some tiny planets I shot this weekend in Disneyland Paris, it was terrible weather so I didn’t do what I wanted to do, but still I think you get a pretty good idea about the quality, now shoot in GOOD light conditions and you will be stunned I think. Let’s see in the next post which I will make after the workshop this weekend.

Adobe bashing….

I was thinking about this…
Is it smart to post this, or should I just keep quiet…..
Well I think it’s not smart to do this, but I’m doing it anyway.

Recently on Petapixel there was an article that discussed the Creative Cloud.
As many of you know Adobe switch over to a subscription based system a few years back.
For me as a pro this has a lot of benefits.

More upgrades, more free apps, fonts, brushes etc.
And of course cloudstorage.
All for a very reasonable price of on average 10.00 a month for the photography plan.
When it was announced at Photoshop World most responses were very positive.


Now don’t get me wrong
Although I’m an Adobe influencer (let’s get that out of the way immediately) they don’t own me or my words, so everything I post here is 100% my own personal opinion, not sponsored or even asked for by Adobe, in fact I don’t even think this article will ever be read by someone with Adobe.

Let me start by saying that although I love Photoshop and Lightroom I’m also (like many of you) sometimes frustrated by the speed of Lightroom. I’m running a very fast PC (and before that Mac) and Lightroom Classic is faster than before but building a 1:1 preview is still a lot faster in Capture One. Also I think it’s just plain “dumb” to not support Sony for tethering. Also the hotfolder solution if you want to use Lightroom for tethering is very slow and in fact unusable.

That being said.
Lightroom has gotten a huge performance boost a while ago that made it a lot faster on my machines, it’s not Capture One fast, but it now at least is not a waiting game anymore. But there are also bugs, and with a suite as extensive as Creative Cloud and also the development of their apps it’s impossible to have a bug free environment, that’s why it’s always wise to just wait a few days before upgrading to a new version.

Let’s look at what I use and love.
For me working with Lightroom CC is a dream.
We travel a lot and I also love to use my phone for photography, with an unlimited dataplan on my phone Lightroom CC is awesome. Everything you shoot is in the cloud and can be edited on my iPad or in Lightroom CC on the desktop, but (and a lot of people don’t know this) you can also sync Lightroom CC in classic, in a separate folder. So what I do is upload everything on the road in the cloud and edit, when I’m home I start Lightroom Classic and get all my images including adjustments into my catalogue, you don’t want to know how I love that and how much time and hassle that saves me during travels. In fact the last year we started travelling with a laptop but just an iPad pro, what a delight and only possible thanks to the Creative Cloud.

Now I earn money with photography so paying 10-40 a month is something that is tax deductible and in essence it costs you half as an entrepreneur.

Now pricing
Is it really expensive?
No not really for what you get.
We pay more for our accounting software on a yearly basis than for the complete creative cloud, and creative cloud at least is fun.
Also when you would switch to capture one (what a lot of people seem to think about), let me start by saying Capture One is awesome, previews are amazingly fast, we have focus overlay and tethering is stable and fast and supports a lot of cameras, but…. (and I always say everything before but is BS) you also pay a subscription if you want to stay up to date or you pay a considerable amount of money each year for your upgrade. What you get is a very solid and stable software solution, but it’s very crippled compared to lightroom for catalogue work (smart albums, map module (yes I use that all the time for travel stuff) etc.) for retouching it’s slightly better than Lightroom but cloning is more confusing.

Meaning when you want to do real work… well both lightroom and Capture One are nothing compared to Photoshop.
Now if you have hours to spend, sure you can do it without Photoshop but I’m at least 5x faster in Photoshop than in both Lightroom and Capture one, plus smoothing a background is impossible in Lightroom or Capture One without a very frustrating and time consuming process, in Photoshop I can do it in under a minute via layers and selections.

So let’s see if we compare CC photography to Capture One we end up at around the same yearly costs, if you want to stay updated, and you better because you can bet your life on it that when you buy a new camera in 2-3 years time it’s not supported by the 2020 version of Capture One or Lightroom. So in the end you have to anyway.

Research and development
Often people forget this, but it’s vital.
When you have a steady income revenue you are able to progress in your research and development, plus if everything is in the cloud, updates can be pushed to the consumers every second instead of once a year or a semi update every 6 months. Remember this? paying 600.00 for an in-between update? but if you didn’t you would pay full price by the next release ?

There are software makers that promise free updates life long.
Please, wake up, this is not possible.
No company can run without income.
At one point the market is saturated with that first boom/explosion of sales. Of course the first year they sell a boat load of software, but the second year it will level out and the third year only a few people will buy it, so how can you promise LIFE long upgrades if there is no income from that software anymore? Maybe they will add some bug fixes but figuring out new RAW conversions or adding new features all take hours and hours of work done by a whole team… and how do you pay those people without income, and also crossplatform, wow I would love to see their predictions for the future, but I think it would mean don’t every upgrade your device or camera and we make sure that what you have now keeps working. What would mean that in 3 years time android, iOs, Windows and Mac are on a different OS and your software still runs fine… but not on the new hard/software. But at least your bugs are fixed right?

It’s not that rosy as you think, and trust me I’ve seen it before with software like Lucis Art where I shelved out a considerable amount of money for life long support (and we talk about a lot of money) only to be greeted 1 year later with the message, “we will not support 64bits systems, just stay at 32 bits” excuse me….. so that was money down the drain. But to be expected, but I’m never gonna fall for that again.


Some remarks
Now my views are my views but I do want to address some things I saw in that post that really make me sick to my stomach.

“I only edit jpgs and don’t need all that BS that Adobe forces down my throat”
Well simple, don’t use pro software if you don’t need it, there you go free advice.
You can use Gimp, Photoeditor from Windows or Mac there are plenty of free solutions.

“I lost a years work thanks to Adobe”
No you are to blame and it’s ridiculous to blame a company because YOU forgot to make backups. Adobe is NOT responsible for your own stupidity if you don’t backup, it’s the first thing you should do, everything you want to save or keep or love, backup.

“I work on a sat connection and uploading every image before I can edit it takes forever and kills my data, plus I can’t open Photoshop without logging into CC, plus sometimes I have to wait for hours because Adobe automatically updates”
You wonder if they even have CC?
Or just love to hear themselves talk.

First off all, you don’t have to (and never had to) upload images before editing, that’s just insane and ridiculous to even think that, even when using Lightroom CC you don’t have to. You can edit your images without any internet connection, now if you want to do it crossplatform yep… now you need internet. But if you work with Photoshop there is nothing you have to upload, we often travel and my laptop is often without internet and it always worked flawlessly with the complete suite.

Also there is no automatic updates, updates you can find in the CC app, and YOU can choose when or even IF you update, some people stay on the old version for weeks or months, Adobe doesn’t force you to update, it’s all up to you when.


There were a lot more but most are just bashing the writer and adobe.
Guys it’s very simple.

Why?
Why?
For the price of one starbucks visit a month you have cloudstorage, Lightroom CC and Photoshop. The industry standard with loads of mobile apps, weekly updates (if you chose to), loads of videos online to learn and very active forums.

If you don’t need pro software, don’t use it, it’s simple
I think however that a lot of the hate comes from people that used to have pirated copies of Photoshop which now of course don’t work anymore, or they bought second hand software which is now outdated.

I’ve visited all the Photoshop Worlds and saw all the Adobe keynotes and can only say one thing, for the price you pay you get a boat load of features and support and they keep adding new things, think about the growth Lightroom CC on iOs and Android has made, from useless to fully replacing my laptop when travelling. And look at Photoshop for iOs, at the moment it’s very fast and stable, but lacks a LOT of features, however I think it’s very smart to do it this way, learn to use it as it is, and add feature by feature this way you learn with progress and most importantly for the development team it stays much easier to not build on bugs, by releasing small updates in cycles it’s easier to find and kill bugs before they become part of the program and you have to make solutions around it, it will take longer but I think in 2-3 years we have a much better Photoshop on iOs than if it would have been released all at once.

If you want to be angry at a company be angry at for example dropbox.
Where adobe keeps adding things dropbox literally destroyed part of my workflow. We have a large dropbox because we got a lot of friends in and for years this was our main hub, without any form of “you have it you keep it” they switched to 3 devices max, which is incredibly stupid seeing most people already have more (laptop, desktop, tablet, phone) so dropbox is forcing you to get a subscription that (again) is more expensive than creative cloud, and with CC you already get cloud storage.

For the love of whatever, I really can’t see why Adobe is overpriced for 10.00 a month, really I can’t.
For us
We use photography and video on a daily basis.
Thanks to lightroom Classic I’m able to find images really fast thanks to smartalbums and keywording.
If I want to know where I shot something I love using the map module.

Photoshop makes it possible to edit my images really fast and is compatible with all the plugins I love like Exposure software, Luminar, Imagenomic, Topaz and DxO

Lightroom CC is becoming my favorite over the last few months for everything mobile.
When it was Lightroom Mobile I never really used it for longer periods, but since CC works different (and we now have steady and fast internet) it’s now becoming my main hub for travelling and when I want images from my mobile device to the PC/Mac.

Cloud storage is enough to cover a full two weeks travel with photos, meaning I don’t have to worry about backups anymore.
Thanks to Adobe and the connectivity I don’t have to drag my laptop with me anymore and everything is automatically backupped and ready for me edited and all when I’m home, just drag it to the right folders on my DAS and I’m done.

Is it perfect, heck no.
Lightroom CC misses the rename functions which I still think is insane, but I do understand why it’s not working (cloud syncing would be needed when renaming images), but at least give the option when importing images.

Is it solvable?
Well it wasn’t until I contacted the guys from filebrowser on iOs and they listened to what I think a lot of people wanted and they added within a few weeks a batch rename function. In combination with the new iOs13 “open” structure (talk about not delivering what you promise Apple) it’s a very workable solution. It’s not perfect but at least it’s better than dragging my laptop with me just for renaming files.


In conclusion
Why hate on a company that delivers PRO software for 10.00 a month?
If you don’t need it… don’t use it.
If you can’t afford 10.00 a month….. you probably also can’t afford that new lens that retails for 1000.00 but is only slightly better than the one you already have.

Look I get it, trust me (I’m Dutch)
I HATE paying money for software or subscriptions, in fact it took me a while before we subscribed to Netflix, but it’s the best thing we ever did, we now even have prime and disney+ it’s a mindset thing.

Adobe in my opinion delivers more than you pay for (A lot more), is it perfect…. heck no (tell me one company that is)
If you don’t need it, don’t do it, but please stay reasonable.
Loads of people couldn’t afford Photoshop when it was sold for 1000.00 and up, now for 10.00 a month they can and they even get a lot more extra.

Yes I know it’s frustrating that Lightroom isn’t sold separately anymore, but again 10.00 for the photography plan is about 120.00 a year.
Lightroom was priced I believe just under 100.00 (don’t remember) thus for 20.00 more you now have so much more.
Of course you can “complain” about everything and luckily we live in a free world.
But I also wanted to write this to maybe shed some more softer light on it.

KEEP IT CIVIL in the comments.

Tethertools air direct

I love to shoot tethered, and to be honest I strongly believe that if you run any kind of studio tethering should be something that is key for a good photoshoot.
The main advantage is of course that your client (and you) see the images on a big screen, this makes it much easier to show the results, check lighting details and of course focus.

Normally I shoot with an USB cable like probably most of you.
It’s very simple, connect to the camera, connect to the PC/Mac, start software and go….
Well it’s not that easy sometimes but in essence it is.

Now in the past I’ve tried several solutions that promised wireless tethering, and let’s set them next to other to start.


First we have the internal cards
You probably all have seen some of those in the past, and they are still being sold.
I can be very short about this solution, I’ve tried 3 different cards and they all ended up being returned.
yes it worked, kinda
Sometimes the connection was rock solid, to be very flacky the next day, and not working at all a week later. And it’s quite easy to understand why, especially after reading solution number 2.


Second we have the build in wifi
Most new cameras have some form of wifi build in, and also my Sony camera has this option.
Now in the case of Sony they actually have a really good solution (so far the best I’ve seen), it works great in our studio, solid connection up to let’s say 15 mtrs away from the tablet and images come in almost as fast as via USB. Now don’t be fooled by this remark…. when you shoot with the Sony software you can select to send over the RAW files which takes forever, or a preview JPG, this preview JPG is very lightweight and is 2MP, so this goes through the air pretty fast. One could say… why not use this Frank?

Yep, I understand that question.
Well first off, the solution was pretty basic a few years ago. You could only use it as an app that you started on the camera and the viewfinder and some other things didn’t work anymore, so you could use your phone or tablet as viewfinder or the LCD on the back of the camera, not a big thing but I like the viewfinder. Luckily in the modern Sony cameras we now have the wifi build in the real camera OS, so you don’t need to take any sacrifices in viewfinder or other settings. However….

This works like a charm in our studio.
When I test it in a hotel it works like a charm.
But I’ve actually only had 2-3 workshops where the solution really worked as it should, in all other situations the connection was very slow (20 seconds for 2MP raw), very unstable (sometimes 1 seconds sometimes 20 seconds) and in some situations I couldn’t even walk further away than 1 meter from my tablet.

The reason is pretty simple to explain.
The wifi signal uses 2.4GHZ and 5 GHZ, but both bands can be pretty busy and overcrowded, especially in event spaces or for example in a cellar with a lot of iron it’s not an ideal solution for a weak wifi signal. And that weak is key. When we look at what the camera transmits it’s of course a lot weaker than an external solution. Meaning it might work, but there is a huge risk that in other location it won’t. In all honesty it’s a risk I can’t take, and shouldn’t either.


Third we have the external solutions
This is where the fun starts.
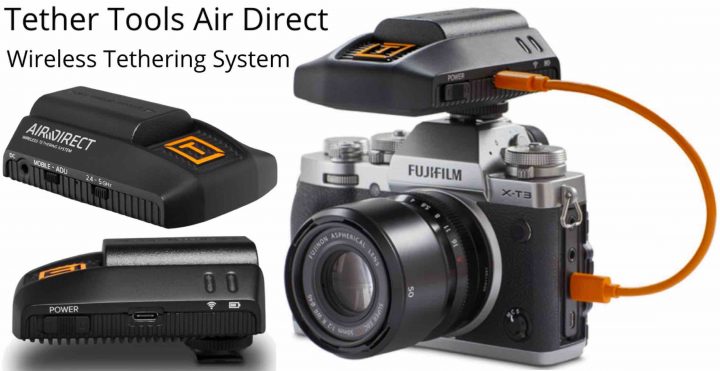
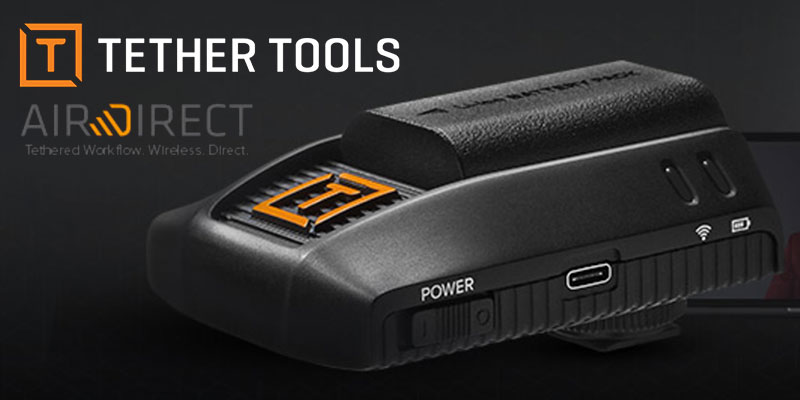
Today we take a look at the brand new Tethertools Air direct.
I do have to say right from the start that Annewiek and I are the Dutch distibutors for Tethertools, but… that won’t hold me from being 100% honest in this review, so I’m not going to sugarcoat anything what I write down is something I stand 100% behind.

The first wireless solution from Tethertools was the case air, and although that one was working great for almost all cameras there was still that issue that haunts me… no Sony support. And you see this with a lot of devices or solutions that use tethering and as a Sony ambassador that drives me nuts, why not just give the SDK to manufacturers so they can make devices that don’t just work with Canon and Nikon, I just don’t get it. Yes we can tether in Capture One, but I also like to use Lightroom or smartshooter… and you guessed it… they support the files but no tethering, but ok let’s not get too much off topic.

The case air was awesome for people that needed a small, relatively fast and most of all easy to use wireless tethering solution.
But if you want something a bit more professional and supporting Sony… well now we have the Air Direct and it’s a pretty awesome solution that checks almost all the boxes.


Air direct
Let’s see what the air direct does in the boxes that I want it to work.
First off all, the Air direct makes tethering possible to the desktop for almost every camera including : Canon, Fuji, Nikon, Sony, Olympus, Panasonic LUMIX, Phase One, Hasselblad, Leica models with USB tether. It’s of course not designed for non-supported camera models in your software.

All devices (semi check)
One of the things that I find essential is that it should work with both mobile devices (Android and iOS) but also with the desktop on both Mac and PC, and that last one is a huge thing. On location I shoot mostly wireless to an iPad pro with a laptop as backup if the wifi doesn’t work but in the studio or when I want to also retouch images it’s important to also be able to shoot tethered to a desktop, and preferably to my own software.

Well the Air direct does it all, and with some cool tricks.
First of all when you use a Canon or Nikon you are able to use the Android/iOS app.
When you own a Sony… well not yet. But Tethertools confirmed that a Sony solution is coming on the Air Direct, so I’m pretty confident we will see that soon/semi soon.

And the mobile app does it “all”
As they say themselves:
“Go Mobile with Air Direct’s robust app for instant image visibility and intuitive camera controls. Change settings, set timelapse and Bracketing, Shutter Release, movie mode and more with Canon and Nikon”

All software (Check)
Oh this is so cool.
I’ve only seen one other device that can do this and it’s such a great solution that when you once used it you don’t want to be without.
On the PC/Mac you can install a small app called ADU, now if you don’t read the manual, you can download it from https://www.tethertools.com/adu
You just run this app in the background, connect to the wifi of the Air direct and after that you can start with your favorite software, do beware… that software should support your camera via USB, you still can’t shoot tethered into lightroom when the camera is not supported.

Software supported by ADU :
Phocus, Capture One, Smartshooter, Lightroom Helicon remote, Canon Eos utility, Nikon Camera control 2, AstroDSLR, Darkroom core
And probably a few more.

In essence the software just sees your camera as if it was connected via USB, pretty cool especially if you don’t want to change your workflow. Oh and don’t worry if your camera is not supported in Lightroom, as always you can use hotfolders in Lightroom and shoot tethered that way.

RAW and JPG or…. (check)
Well this is real biggy.
Sending over RAW files via Wifi is not my hobby, and I can already tell you that if you expect that to work fine…. well stop reading sorry buddy not going to happen soon.
RAW files are awesome but also very large and Wifi is just not able to send 10 RAW files over the air in 2 seconds like a USB cable can handle easily. That being said, when you shoot wireless there are other solution that work “great”. You see me using quotes and that’s because this is were you HAVE to make a sacrifice in your workflow (later more on how they could solve this a bit).

With the Air direct you can filter out the RAW files on the mobile app and send JPGs to the mobile device and leave the RAWs on the card.
On the desktop site we don’t have that option and you have to set this up in the camera.
On the Sony you can easily set it up to shoot RAW+JPG but only send the JPGs to the computer, a small disadvantage is that Sony only allows 2MP JPGs to be send over, unless you also want the RAWs there, which in this case we don’t want to. So we have the RAWs on the card and 2MP JPGS going through the air with a pretty fast speed, in fact it’s almost faster than my RAW files via the cable (nice). Disadvantage is of course that you have the RAWs on the card so if your client gives stars it’s on the desktop not on the RAWs, but that’s easy to fix.

First off all make sure all file names are on original if possible in your software.
Just give stars, ratings whatever.
Now import your RAW files next to the JPGs and sort on date/time, now you see your selects next to the RAWs, just select the RAWs and star them, now you can delete all the JPGs. Even if you can’t use the same names this method works like a charm unless you shoot a million images in burst mode and have to select 1000 I would not want to do that, but for a normal session with let’s say 200 images and 20 selects it’s easy peasy.


Connection to a router (Not yet)
When you are using wifi with a wireless solution it’s often a 1:1 connection (direct connection) this means that you sacrifice the wifi from your desktop or mobile device for the connection to the wifi transmitter on the camera. Now in most cases this is absolutely no problem. But in our specific case it did give me a challenge. We also use chromecasts in our studio for display on the big screen tv’s and well those are also on Wifi and you can’t connect to them via a wired PC in most cases if the wifi is in other subnet (like with us). Luckily the Chromecast Ultra also has a wired option, so in our case it was a matter of just using a network cable to the chromecast to make it connect to the wired subnet. Again in most cases this is not a real problem (also not for us). However…. when you are able to connect to a hotspot in your room/studio it does maximize your range, now we can get app 30mtrs away from the PC before the connection is lost, which is pretty good seeing that puts about 2 walls between me and the desktop, but I’m 100% sure that if we connect to our wifi network in the studio I would have 100% connection even when we walk around the studio outside. so that would be cool.

Our contact at Tethertools confirmed this is on the roadmap, so that’s pretty awesome.

Battery life (check, check double check)
Oh this is a problem.
Up till now if you want to shoot a whole day you better prepare for some frustrations or external battery solutions like a powerbank, and I hope for you that the USB input isn’t shared with the USB to the camera because than you also need a hub, and let’s be honest the camera is big enough right?

This is also something the Air Direct tackles beautifully, yep I’m getting excited.
Now this is something that a lot of people won’t get why I get so excited about this, but trust me you will.
The Air Direct uses standard Canon batteries as powersupply. In real life this means you can just switch batteries when it dies (charger is included) and Canon batteries can be bought for next to nothing if you are willing to go for third party brands. Now don’t worry about weight too much, normally you have the battery inside, now it’s outside so in weight it really doesn’t make a huge impact.

I can’t yet say how much the battery life is, but I did a complete workshop with the Air Direct and right at the end was the first time I saw the red light coming on, so that would mean app 5-6 hours. And what if you have to change batteries? well it’s a hot swappable solution so no downtime, just take the battery off and put a new one on without losing connection. And if you don’t want batteries or you use a fixed setup… no problem just use a powerbank or AC power.


Speed (check)
Well it’s never fast enough of course, but the Air direct has everything covered to be one of the fastest yet.
You can use both 2.4GHZ or 5GHZ (switch on the side to select)
The Air direct also has 2 very high powered antennas inside to make sure you have the most solid connection and therefore stable and fast transfer speeds. Again you are not going to be able to shoot RAW if you need it fast, however when you are shooting still life or products it might be that the transfer speed is more than enough for you, there are so many situations where speed is no real issue and in that case you can finally just send the RAWs over the air without waiting for ages.


Cables (check)
One of the biggest frustrations for me is often that when I buy something I want to work with it right away and often when you get the device you find out that your camera has a different connection than the delivered cable… aaaaaargh.  Well the Air Direct has you covered, in the box are a few cables that will probably make 99% of the available cameras work right away. There is even a Phase One cable for sale (this one is extra).


Price (check)
Of course I’m Dutch so we always want it as cheap as possible.
Now the Air direct is not cheap, let’s get that out of the way.
But you do see check… so what’s the deal.
Well first of all this thing is a tank. It’s build to last.
Plus you have the external battery that is also supplied in the box, and that battery plus the charger plus all the cables all represent a value, and when I add this all together and look at the competition the price is actually pretty decent (even without all those extras) so Tethertools really made something interesting here.


Semi conclusion
Ok overall I think we checked my boxes, but seeing this is week 1 and a lot of stuff is still being worked on I called it Semi conclusion.
I strongly feel a Sony mobile app is a key element for a solution that I can support for the full 100% and seeing Tethertools confirmed it’s in the works I guess it will be here soon. And for now I use it on the desktop and laptop during workshops/demos. So don’t expect anymore cables on location.

For what it does at the moment I think when you’re a Canon or Nikon shooter you should absolutely check it out and get it.
For all other brands like Fuji, Sony etc. Your camera will work flawless on the desktop. You can tether like you normally are connected via a wire (only JPGs if you want to keep the same speed) and if you never use a mobile device to tether that’s it it’s awesome and fast. If you do want to be able to also use mobile devices (for me the iPad pro is very important) I would probably just wait a few weeks and see what’s going to happen, I don’t want to give you a “buy now” advise when I don’t have a working mobile Sony solution in my hands. As soon as we get a beta I will immediately update the review and social media. This is also why I’ll probably wait with the video review or do it in two parts. I really want to cover all bases.

For what it is now (one week after release) I can highly recommend the Air direct. It’s pretty unique in what it does and having that external battery is for me the main reason to choose the Air Direct over the competition PLUS the promised mobile app support for Sony that is.

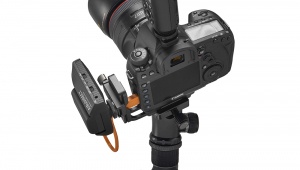
Now when I posted some images online of how I mounted the Air Direct I immediately got some responses from people that claimed it was ugly, too big, etc. Well I have one very simple answer for that…  make it smaller and it won’t work as well. All wireless solutions with specs like this are big (even slightly bigger and heavier than the Air direct). But let’s just get the elephant out of the room, yes it’s big (not ugly) and yes you need to mount it somewhere on your camera and although it does have a hotshoe mount it doesn’t have to be on the hotshoe. We opted for the bottom of the camera. So on top is my remote for the hensel strobes and on the bottom is my tetherblock (which I normally use for guiding my tethercable and mount my camera on a stand) on the tetherblock we use another Tethertools product called the AD-Arka but there are many other solutions that makes mounting the Air Direct pretty easy and just where you want it.
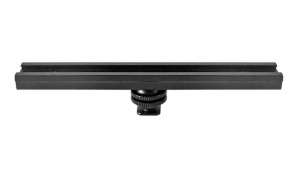
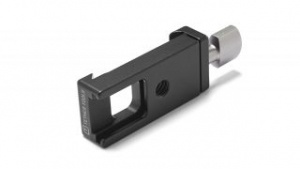
Think about the following options:

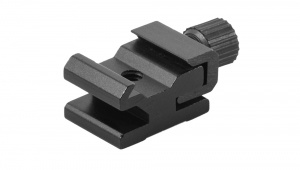
This is the Rapidmount coldshoe.


But the Rapidmount also works of course


This is the AD-Arca that I use

And finally of course you can also use a L-Bracket with the AD-Arca


So what can be better?
Well I close with this because this is not just Tethertools but for all wireless solutions.

  1. First off all make sure you can set the JPG filtering in the app. Now you’re bound to what your camera let’s you setup and with Capture One I can’t get the images nice full screen (I can in Lightroom) this is a limitation of capture one by the way not Sony or the Air direct, but it would be nice to be able to send for example small JPGs that are larger than 2MP to the desktop with the Sony cameras. If you do the filtering inside the app like on mobile devices it’s much easier and more flexible. It’s not a deal breaker at all, but it would be handy.
  2. Stars are often given by clients or models during the shoot, this means an image is marked as “awesome” and selected. It would be nice if those stars SOMEHOW are also transmitted to the camera, I have no clue if that would be possible but it would be nice.

Final thoughts
When I showed the Air direct online one of the most heard questions was “why?”
And don’t worry I get it.
Why would you spend 300+ for a device when you can tether perfectly including RAWs with a cable.
Well you are 100% right, can’t say anything else. Tethertools deliver a whole line of products that are aimed at wired tethering and it’s awesome, I’ve been using their products since the company was literally a two man outfit (man have they grown) and I have no issues with wired tethering at all, I’m a HUGE advocate for it. However……

There are many many situations where shooting wireless is just plain awesome

Let’s just only think about


working on location
When I teach a workshop on location I had to bring a laptop (plus external powerblock), 15 mtrs of tethering cables, meaning also a repeater and two extension locks to make sure I don’t get any dust or water in my connections. And of course we also need a jerkstopper on the laptop and one on the camera. Limit… 15mtrs and every time we move location we have to take everything with us. Plus 15mtrs cables with locks take up some room and weight (when flying). Switching to wireless means no more wires but also no more laptop (when iOS or Android is supported). In fact I’ve done quite some workshops and demos wireless already with different solutions and working with an ipad pro wireless in the field is just…. well it’s awesome it feels like going from 1980 to 2020. Battery life is no issue at all, brightness outside of the iPad pro is so bright it blows away my laptop, plus we don’t need a stand and tethertable for the laptop anymore, just a small stand for the iPad pro, or someone just holds it. It’s not connected anymore so you can drag it where ever you want without disturbing the shooter. Also it’s now possible to just move around without thinking about cables.

Working on tradeshows or demos
Often it’s a matter of 5 minutes between speakers so you have to setup and get ready in less than 5.
With cables it’s doable but it’s a bit of a hassle, with wireless just connect the ipad pro to the projector and… well that’s it in essence you’re done. No more stress.
Also no more worries that when you demo on a booth people stand on your cables and cables get damaged, meaning end of the show or replacements, and do that a few times and your Air direct is “free”

In your own studio
When people walk around in the studio there is chance (huge) that someone stands on the cable, you don’t realize it and before you know it the camera is on the floor (yep happend to me a few times). With wireless no more worries.


Final Final thoughts (for now)
Working wireless does limit yourself.
No RAW files. You have to empty the card later and match the stars (if you don’t do that during the session, no issues what so ever, just delete the JPGs and copy the RAWs and start selecting).

But that being said, working with a device like the Air Direct the limitations are kept at a bare minimum. The device is built like a tank, it’s super fast (for wifi) and it connects to the software you know and love. Plus you have the option for mobile apps.

I can only say “highly recommended”
Now get that Sony app working fast. 😀