Does the TourBox Lite change your workflow?
Last week we received the TourBox Lite for a review. In this blog, you’ll read how it changed my workflow.
Workflow importance
One of the things I always teach during workshops is workflow.
It might sound boring but having a proper workflow is essential to get not only consistent results but also to simply save time for other important things in life 😀
When we talk about workflow we often talk about settings and the order in which you edit in Lightroom, Photoshop, or your favorite editor.
But there is a lot more.
With the release of the iPad Pro I (and many with me) thought the world would change forever and we would not need laptops anymore… well a few months later I sold my oversized iPhone and closed that chapter. But many years later I bought the 11″ iPad Pro and that changed my workflow forever.
iPad Pro 12.9″
At the moment I’m using my iPad Pro 12.9 for almost 99% of my sessions in combination with Cascable to shoot tethered, and let’s be honest, especially on location, you can shoot all day with the iPad, it has more than enough light output for outside, it’s well protected against the elements and… well it’s not about the iPad today, but it’s a game changer. The iPad Pro is an important part of my workflow.
Retouching with the iPad and a laptop
For me, most of the time is spent on retouching. Like most of us, I love taking photos but retouching… well it has to be done. Don’t get me wrong it’s a lot of fun in most cases, but in a lot of other cases it’s something you have to do and the faster it can be done the better.
In the studio (and at home) when I work in a static setup I use my MacBookPro 14″ M1Pro connected to a 32″ BenQ monitor and retouching is done via an XP-pen drawing tablet (with screen), which works like a charm. But I have to sit behind my desk.
Sometimes I also want to edit on the couch. When traveling, in a hotel, and sitting behind a desk is not always ideal. Having a laptop with a touchpad is doable but not for everything. You just need more control sometimes, especially with selections or skin retouching.
Luckily Apple has a great solution for this.
You can connect your iPad to your MacBook and use it as an input device. In fact, I’m having my MacBookPro on the table and holding my iPad and Apple Pencil on my lap.
Full Photoshop on the iPad
Well ok, there is an app on the iPad called Photoshop. Although it gets better every release, it’s a far cry from the desktop version. So to do proper retouching I still need the full version of Photoshop (at the moment). This is where the connection between the iPad screen and MacOs works like a charm, there is however one HUGE disadvantage.
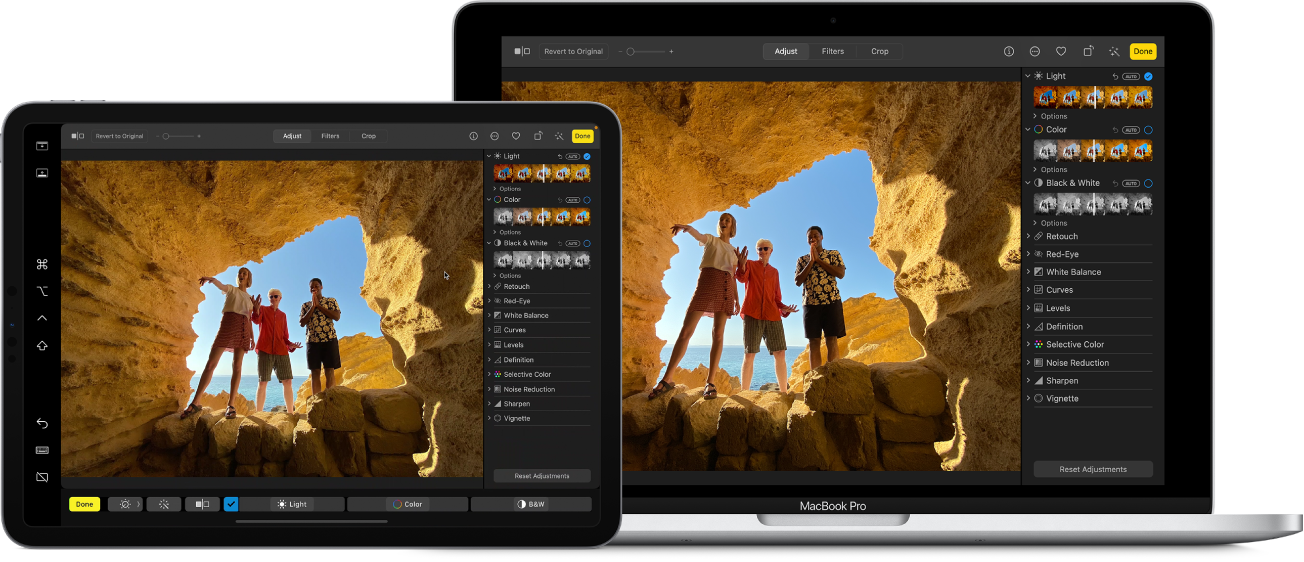
Where are my keys…. oh there
As you can see in the image the iPad mirrors the MacBook and when using an Apple Pencil retouching becomes really close to using a real drawing tablet. Some things are a bit “wonky” but overall it’s a huge improvement over using the touchpad and especially on location this is the biggest improvement in your workflow in years.
But…. we all know that for Photoshop we also need key input.
Try to use Photoshop just with a pen and you will within seconds find out that you can’t do anything. For almost everything, you need keystrokes. Now luckily Apple knows about this so they offer a floating “keyboard” with the most used keys like COMMAND, CRTL, SHIFT, SPACE, etc.
I don’t know about you, but I like it because there is nothing else. But it’s far from perfect. You don’t feel the keys, they take up space and on the iPad screen size is something I don’t want to sacrifice.
Hardware solutions
Over the years I’ve tried several input devices and although they all promise that you will speed up your workflow 10-fold and everything is easier and…. well you know what I mean. In real life, I never really found something that stayed.
Most of the devices I tried are too light, meaning they “walk” over my desk, adding some anti-slip feet helps but it’s something I have to add myself. Other devices were not well-formed which meant I had to move my hand too much and because most buttons had the same form I still needed to look at the device, which made the device useless for me because I could as easily just use a keyboard.
The TourBox Lite changed my workflow
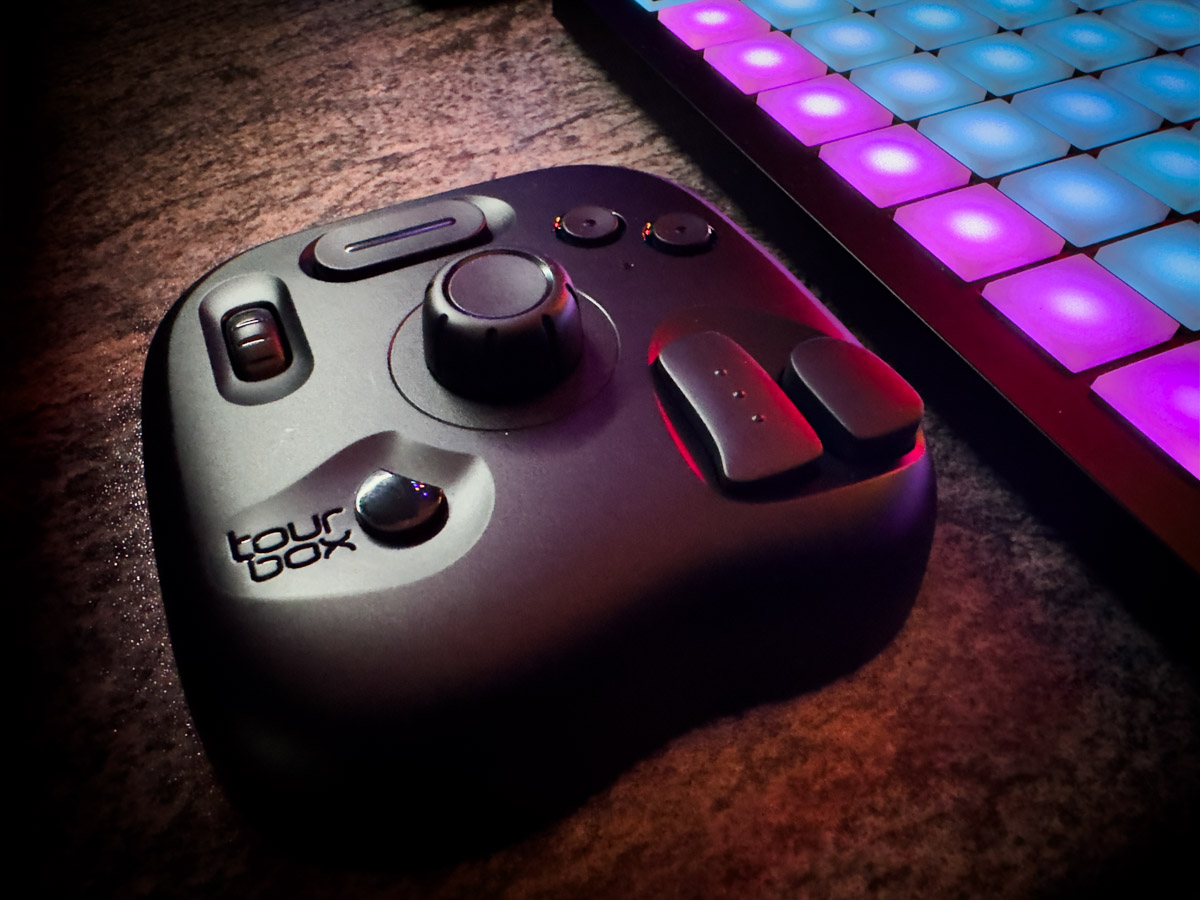
TourBox Lite (2024)
I think I found the perfect solution to improve my workflow.
A left-handed device (yes, read on if you’re like me right-handed). that just hits the nail on the head.
The TourBox Lite is the newest addition to the TourBox family and retails for just under $100 which in my opinion is a very critical price point.
When unboxing the first thing that caught my attention was the weight.
You expect something from that size to be a lot lighter, now I’m not saying it’s TOO heavy, in fact, it’s perfect.
It doesn’t move around on my desk and it’s light enough to carry around easily in your backpack.
At first glance compared to some other products you might think “There are not a lot of buttons there”.
But let’s be totally honest with each other.
This is NOT a keyboard replacement, it’s a workflow device, and when you look closely at what you really need I have to be honest that I don’t really miss any buttons.
TourBox Lite workflow advantages
One of the cool things about the TourBox series is that you can add app 100 actions to the buttons.
They make this possible by using combinations and also double clicks.
I’ve been testing the TourBox Lite for a few days now and for example, in Logic Pro I’m using the double click on the play button. One time means STOP/PLAY but double click means GO BACK TO START. This is an action you use all the time and having it under one button is just genius and feels very natural.
For Final Cut Pro and Lightroom/Photoshop, I’m using the scroll wheels to zoom in and out and change the brush size and that speeds up your mobile workflow a lot.

More options
I started this blog post with a story about how the iPad changed my workflow and the TourBox Lite is for me a huge upgrade. I can now just leave my laptop on the table (or floor) and use the iPad Pro with Apple Pencil and the TourBox Lite to work through my whole session without ever needing to touch my laptop. This is huge 😀
But when I’m not using the iPad Pro for retouching I still have it next to my MacBookPro and use it for almost all software I use. The fun thing is that with the other devices I tested I always found out after a few minutes I was using the keyboard and actually forgot that I also had another input device.
The TourBox Lite is designed for left-handed use, and that’s genius.
I’m mostly holding my XP-pen or Apple Pencil in my right hand and my left hand is free to operate the keyboard. But also when adjusting parameters when using Logic Pro and holding a guitar, having the right hand free to hit the strings and the left hand to adjust is really comfortable.
Of course, you can use other devices also with your left hand. But this is I think where I like the TourBox Lite more. Because I don’t have to move my hand. I position it and it hardly has to move. Another huge advantage is that all buttons feel slightly different. My other device uses mostly the same buttons where you have to put stickers under to see what you’re doing. Well in a dark studio, this already doesn’t work and often ends in frustration. And that you only use the dials and buttons on the keyboard, which I think is not the way it should be 😀
So many options, so little time
You probably already picked up that we can program A LOT of combinations but how do you remember everything?
For me, that’s always been a problem.
When I start with a new software suite I try to first learn the most important keystrokes. And luckily it’s often pretty straightforward. But even with a normal keyboard, especially at the start, you have to sometimes look up the keystrokes.
With these kinds of devices for me, that’s always a problem. On the keyboard, I can mostly find my most used keystrokes but when you use several suites at the same time it can become really messy with input devices.
The TourBox software has a really nice option where you can link software to the TourBox. This means as soon as you open the software it will open the preset on your TourBox too. This makes it easy to switch between software but doesn’t solve my problem of remembering what is what.
You can of course just try or maybe even have the editor open on another screen, but I actually love the way TourBox chose to use a HUD solution that can be customized, moved around, and setup exactly the way you like.
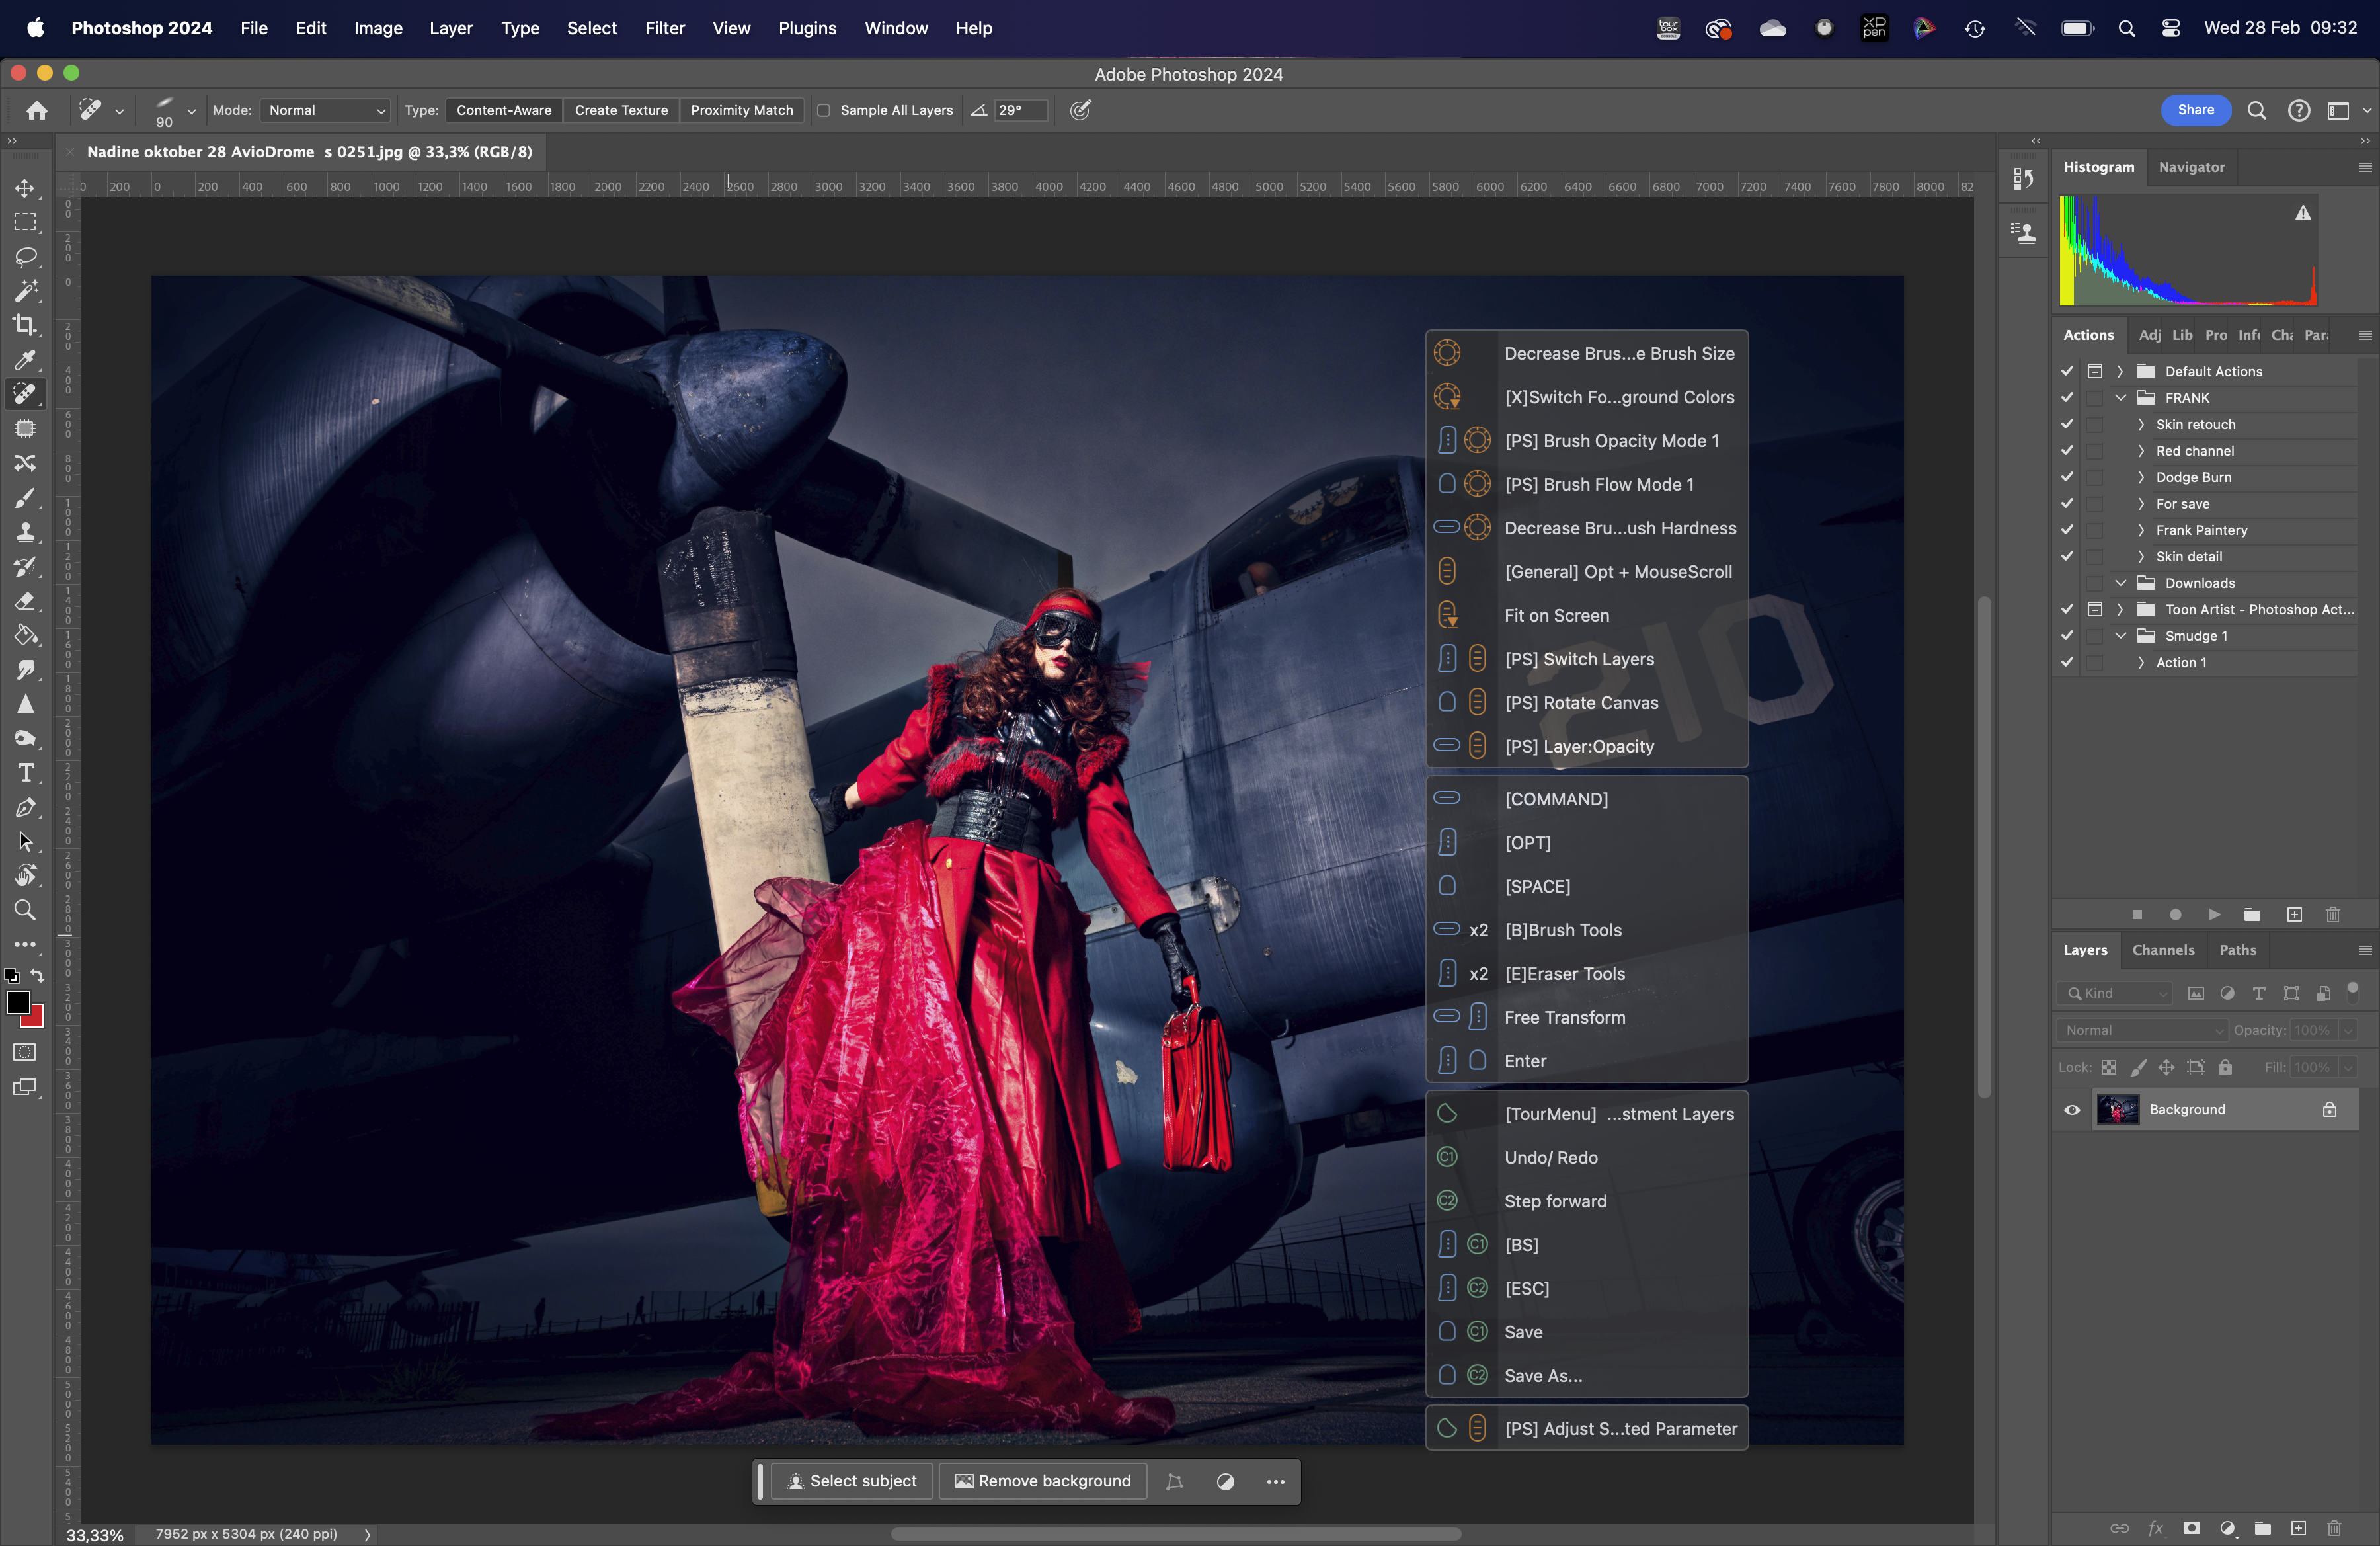
When you press a button it will also show up in the HUD.
Now in most cases you will probably only use the HUD for a few days or weeks, after which it should probably be a matter of feel and muscle memory.
In conclusion, did the TourBox Lite change my workflow?
The new 2024 TourBox Lite is a very interesting input device.
It’s small enough to be used on the couch with your iPad. But it has enough buttons and combinations to even help with more complicated workflows.
The price point is spot on, but you sacrifice a bleutooth connection and some extra buttons that you can find on the Elite. But if you have no problem with working with a USB-C cable, I don’t see an issue there.
Are there things to improve…?
Yes of course 😀
I would love to see a small backlight at the buttons. I mostly work in light-controlled areas which means that the TourBox is located next to my keyboard in the studio and there is hardly any light hitting that area. Because all the buttons feel different it’s not a big deal, but it would be nice, and shouldn’t be a problem seeing the TourBox Lite is connected via USB-C anyway.
For me, the TourBox Lite hits the nail on the head.
It has enough buttons, the right price point, great software, auto switching apps, HUD, and of course well designed so you can use it with one hand and minimal movements (great for long hours of work).
I lost my interest in this kind of devices but this one has shown me that it can be done right.
HIGHLY RECOMMENDED.
Also, want a Tour box?
When you use this link for your order, you also support our work: TourBox Lite
For BenQ we have a 10% discount code for European customers, if you are in the market for a new monitor, drop us an email for the discount code.
Disclaimer:
I was sent the TourBox Lite by TourBox to check out.
ALL reviews I make are 100% my real opinion and not motivated by manufacturers, our readers demand and deserve a real and honest review and that’s what I do.


 Let’s first take a look at the specs of this monitor