My blog, although I don’t see myself as a blogger but as a Photographer I will try to blog some interesting material during the weeks.
Expect at least 2 updates a week.
When working with photos or videos the correct white balance is essential to get natural looking images/video.
But it’s also important when you use presets to tint your images, if your base is not correct every time your presets will look different every time.
When shooting raw you can correct a lot yourself, but with video it’s often not that easy because you’re shooting on a compressed format. Today in the video a quick tip on how to get proper white balance on you video camera, or photo camera in a few seconds with the brand new ExpoDisc V3.
https://frankdoorhof.com/web/wp-content/uploads/2023/08/ExpoDisc-v3-1.jpg15001500Frank Doorhofhttps://frankdoorhof.com/web/wp-content/uploads/2015/03/studioFD_Logo-1FV.pngFrank Doorhof2023-09-18 08:00:572023-09-08 13:30:08Get your white balance correct easy and fast
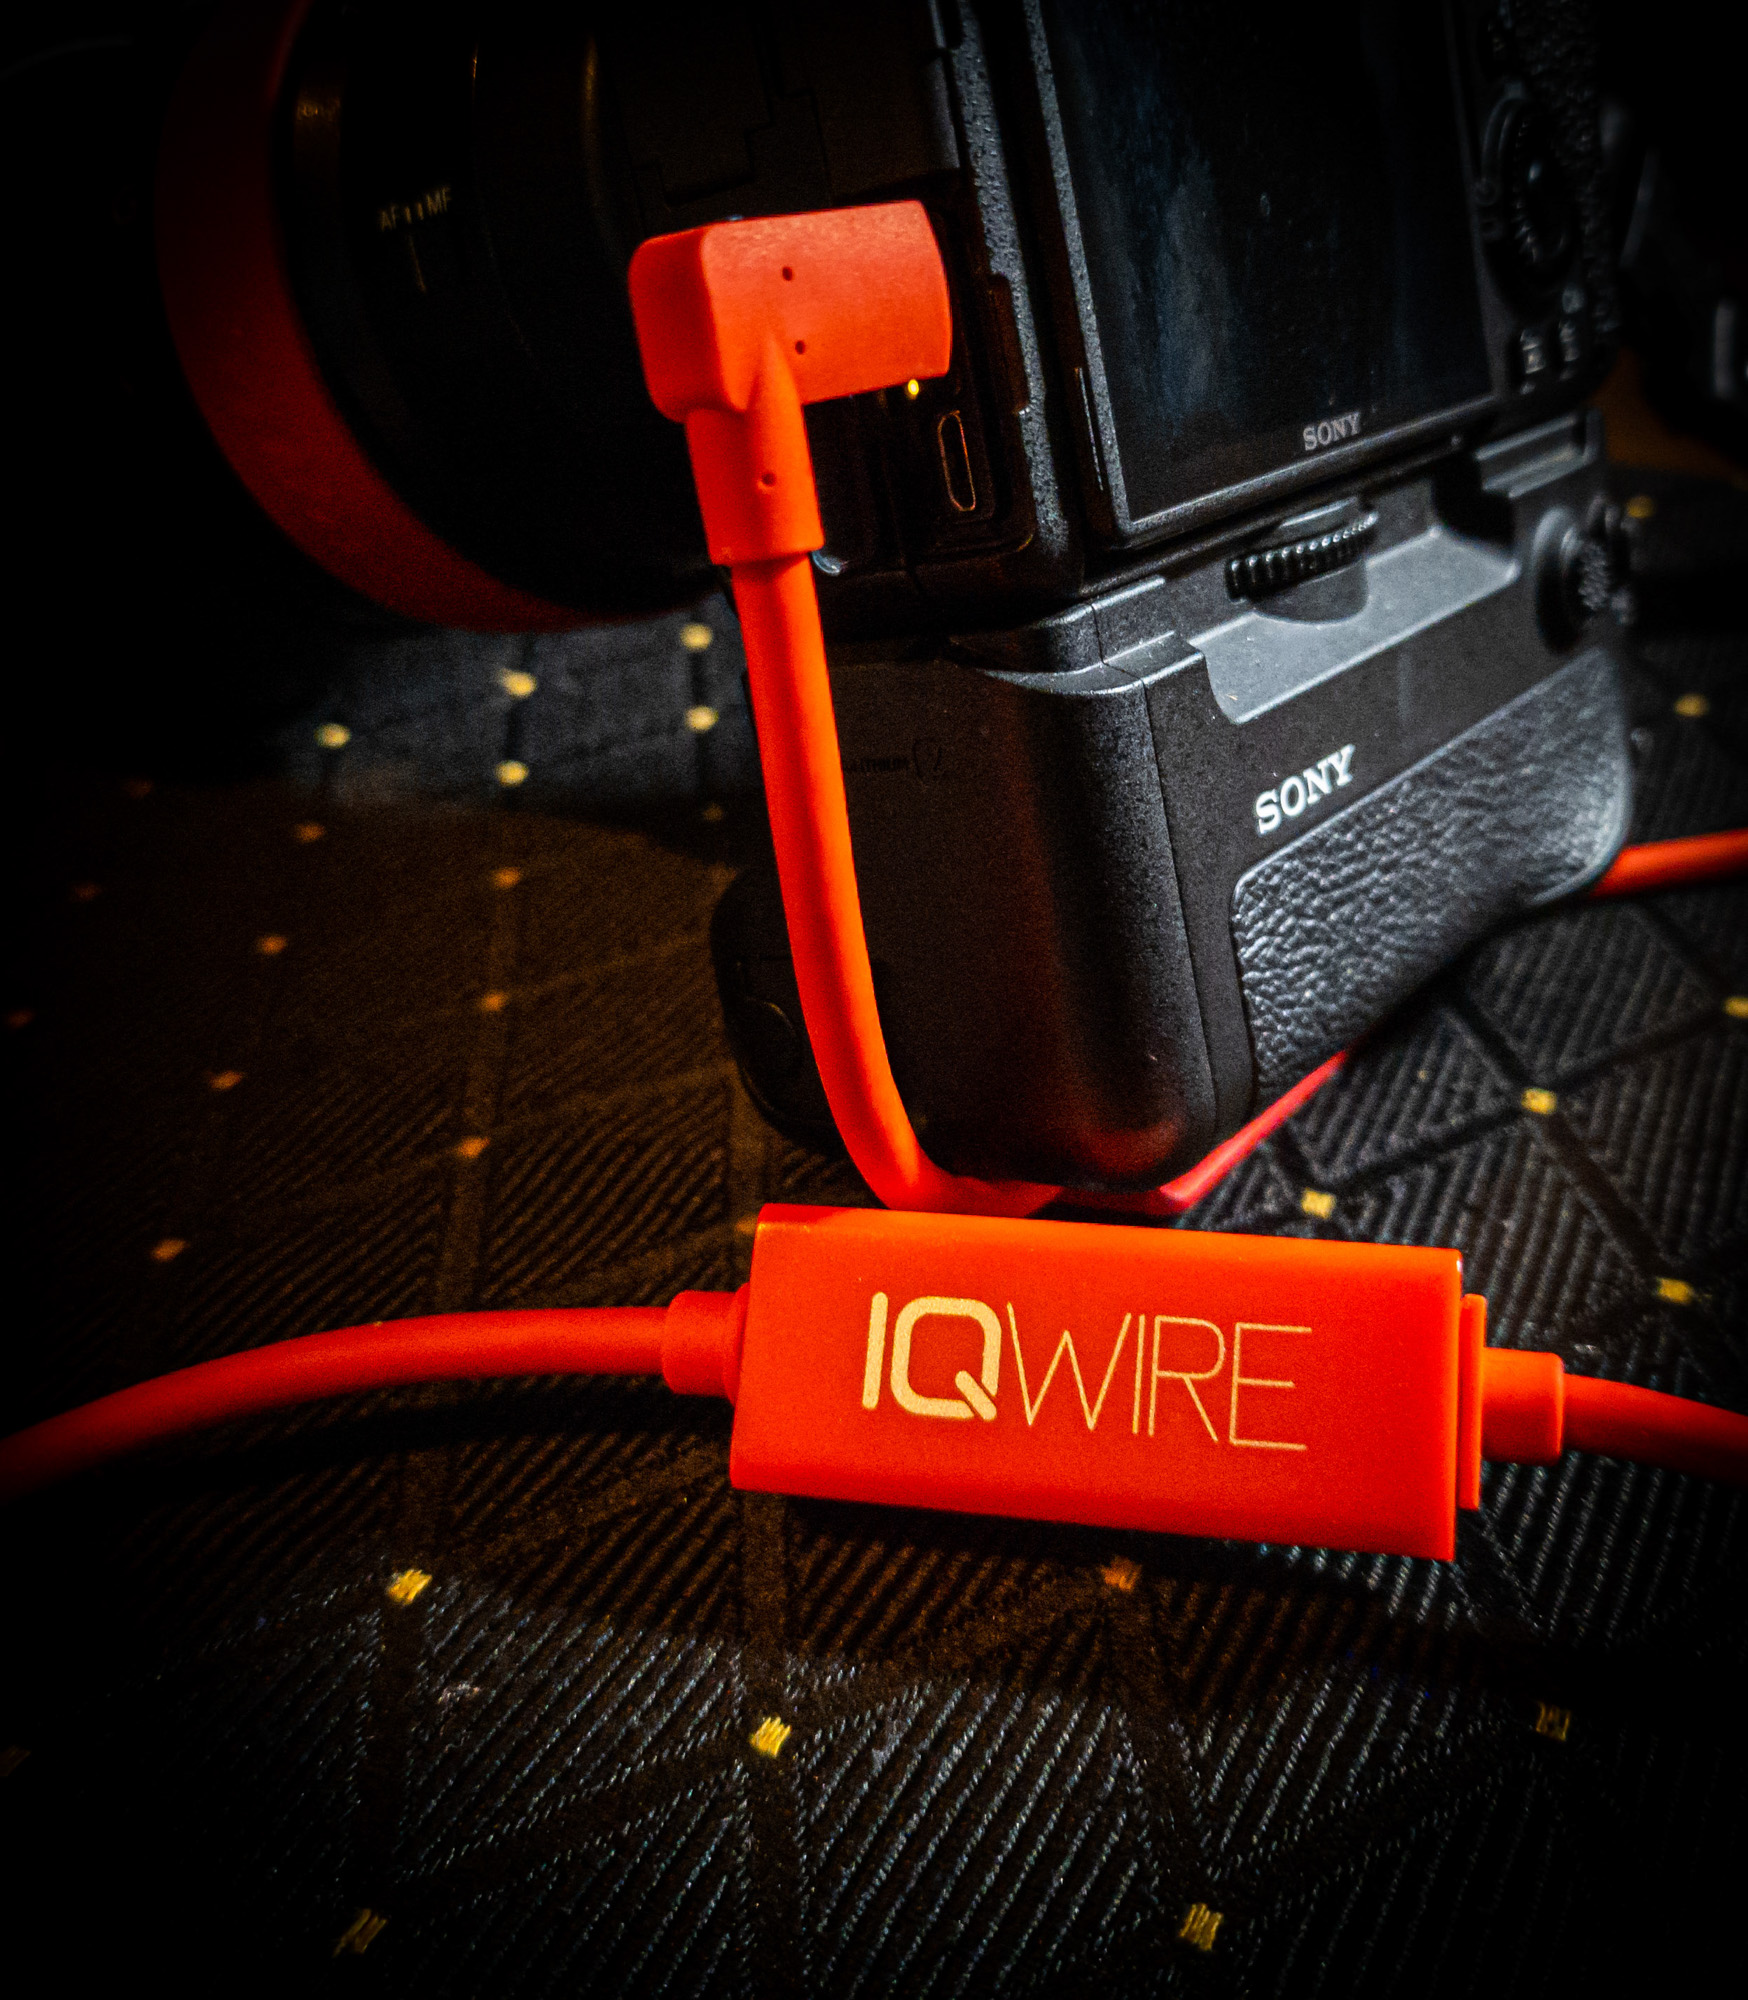
After using other products for years I used everything I liked and didn’t like to get something that would be as close to perfect as possible.
The result… the CableBlock.
The best way to protect you camera during tethering is to make sure there is as little stress as possible on your port.
Our IQ-wire cables use angled connectors on the camera side, which already makes the connection more safe if the camera would roll over the cable. But to make it 100% safe you need to make sure the cable is 100% secure.
When using solutions that are hanging on your camera are just a safeguard, the cable will still move around when you shoot or switch from landscape to portrait mode, in the end it’s a lot better than no protection, but for longer use it’s not the way to go.
The CableBlock is a Arca compatible mount with special guides for thinner and thicker cables.
It’s smaller than other solutions so it’s still possible to open up your battery compartment and on smaller cameras it’s much more comfortable in your hands. It’s also not necessary to use a coin or screwdriver to mount or unmount the CableBlock, you just use the little “holder” and turn it to tighten or loosen the screw, it’s super easy. Of course the CableBlock is protecting your camera also by using 4 rubber feet. And finally it’s bright red 😀
Although mounting it is super easy, we still get some questions about the best way to route the cable, so in this video I show you how to do it quick and easy.
https://frankdoorhof.com/web/wp-content/uploads/2022/09/CableBlock-in-use00001-copy.jpg20001748Frank Doorhofhttps://frankdoorhof.com/web/wp-content/uploads/2015/03/studioFD_Logo-1FV.pngFrank Doorhof2023-09-12 19:00:292023-09-08 13:23:35The best way to protect your camera during tethering
In todays blog post a video about one of the most beautiful lighting setups, the Rembrandt setup.
I also show you my favourite way of making this setup even better by adding an accent light.
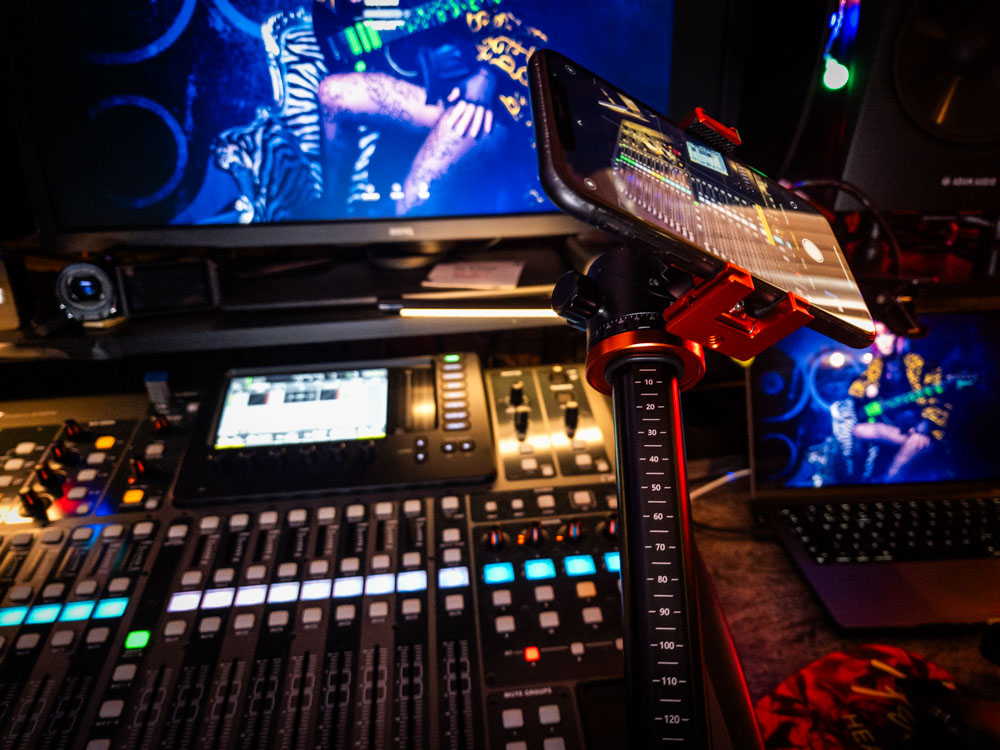
Today a cool new product video.
Our mobile phone is getting better with video and photography almost every year, and they are great for those more difficult to reach angles/locations where a larger camera is not handy or possible at all, so we use them actually more and more for video and photography. A lot of the vlogs are filmed 100% with my Samsung S22 and Annewieks iPhone, but we also use them for B-roll during tutorials. In some cases they even work much better than pro-cameras.
One of my frustrations is often the problem that I want to mount the phone in more extreme angles but need it to be stable enough to control and not shift positions, so a flexible and stable platform that doesn’t stand in the way.
In this video I show you a very nice budget friendly solution to get pro results from your smartphone, well at least pro angles 😀
The tripod I’m using in the video is the new K&F Concept 119 tripod which we are testing at the moment, as you can see in the video it’s a really nice tripod with a boom arm option, which makes it perfect for this setup.
You can order the tripod 119 and mount online, your favourite store or via our webshop.
You can order the tripod 119 and mount online, your favourite store or via our webshop.
https://frankdoorhof.com/web/wp-content/uploads/2023/08/KF-Concept-telefoon-statief-houder-9-August-18-2023.jpg7501000Frank Doorhofhttps://frankdoorhof.com/web/wp-content/uploads/2015/03/studioFD_Logo-1FV.pngFrank Doorhof2023-08-18 15:34:152023-08-24 17:57:03Mounting your smartphone on a super flexible and stable platform for video and photography

You must be logged in to post a comment.