Frank Doorhof
  • Blog (articles)
  • Rent our studio space
  • MAIN SHOP
    • MAIN SHOP
      • Orders
      • Account details
      • Downloads
      • Addresses
      • Lost password
      • Cart
      • Checkout
      • Terms webshop
      • Return policy
      • Privacy Policy
      • Privacy Statement in3. Dutch customers only. When you want to pay in 3 parts
  • IQwire Tether Cables
  • Rogue Modifiers
  • Geekoto Flash and Modifiers
  • Platypod
  • Click Backdrops
  • PORTFOLIO
  • Learning with Frank
    • Dutch workshop agenda
    • Workshops
    • A Year With Frank
    • Online 1:1 workshops
    • 1:1 workshops in English
    • Portfolio review by Frank Doorhof
    • Patreon
  • Support our work
  • Merchandise
  • Digital Classroom LIVE
  • Our YouTube channel
  • Biography Frank Doorhof
  • Services
  • Discounts etc
  • I need help
  • Menu Menu
  • Shopping Cart Shopping Cart
    0Shopping Cart
  • Link to Facebook
  • Link to X
  • Link to Youtube
  • Link to WhatsApp

This Photoshop tip will save you clients and embarrassment

17-07-2025/in blog, Visions and technique, Webinars and instructional videos/by Frank Doorhof

Did it ever happen to you?

A client told you that you missed something in a shot.
And of course it happens to everyone, and in most cases it’s something in the skin, maybe a small speck on clothing etc.
And there’s nothing wrong with that; it’s often a matter of opinion or simply something you missed. However, all these changes are cosmetic and could also be left in without harming the image. In this blog, a Photoshop tip about shadow detail.

The things you missed I’m talking about are much more frustrating.
So let’s see what they are and how to solve them.
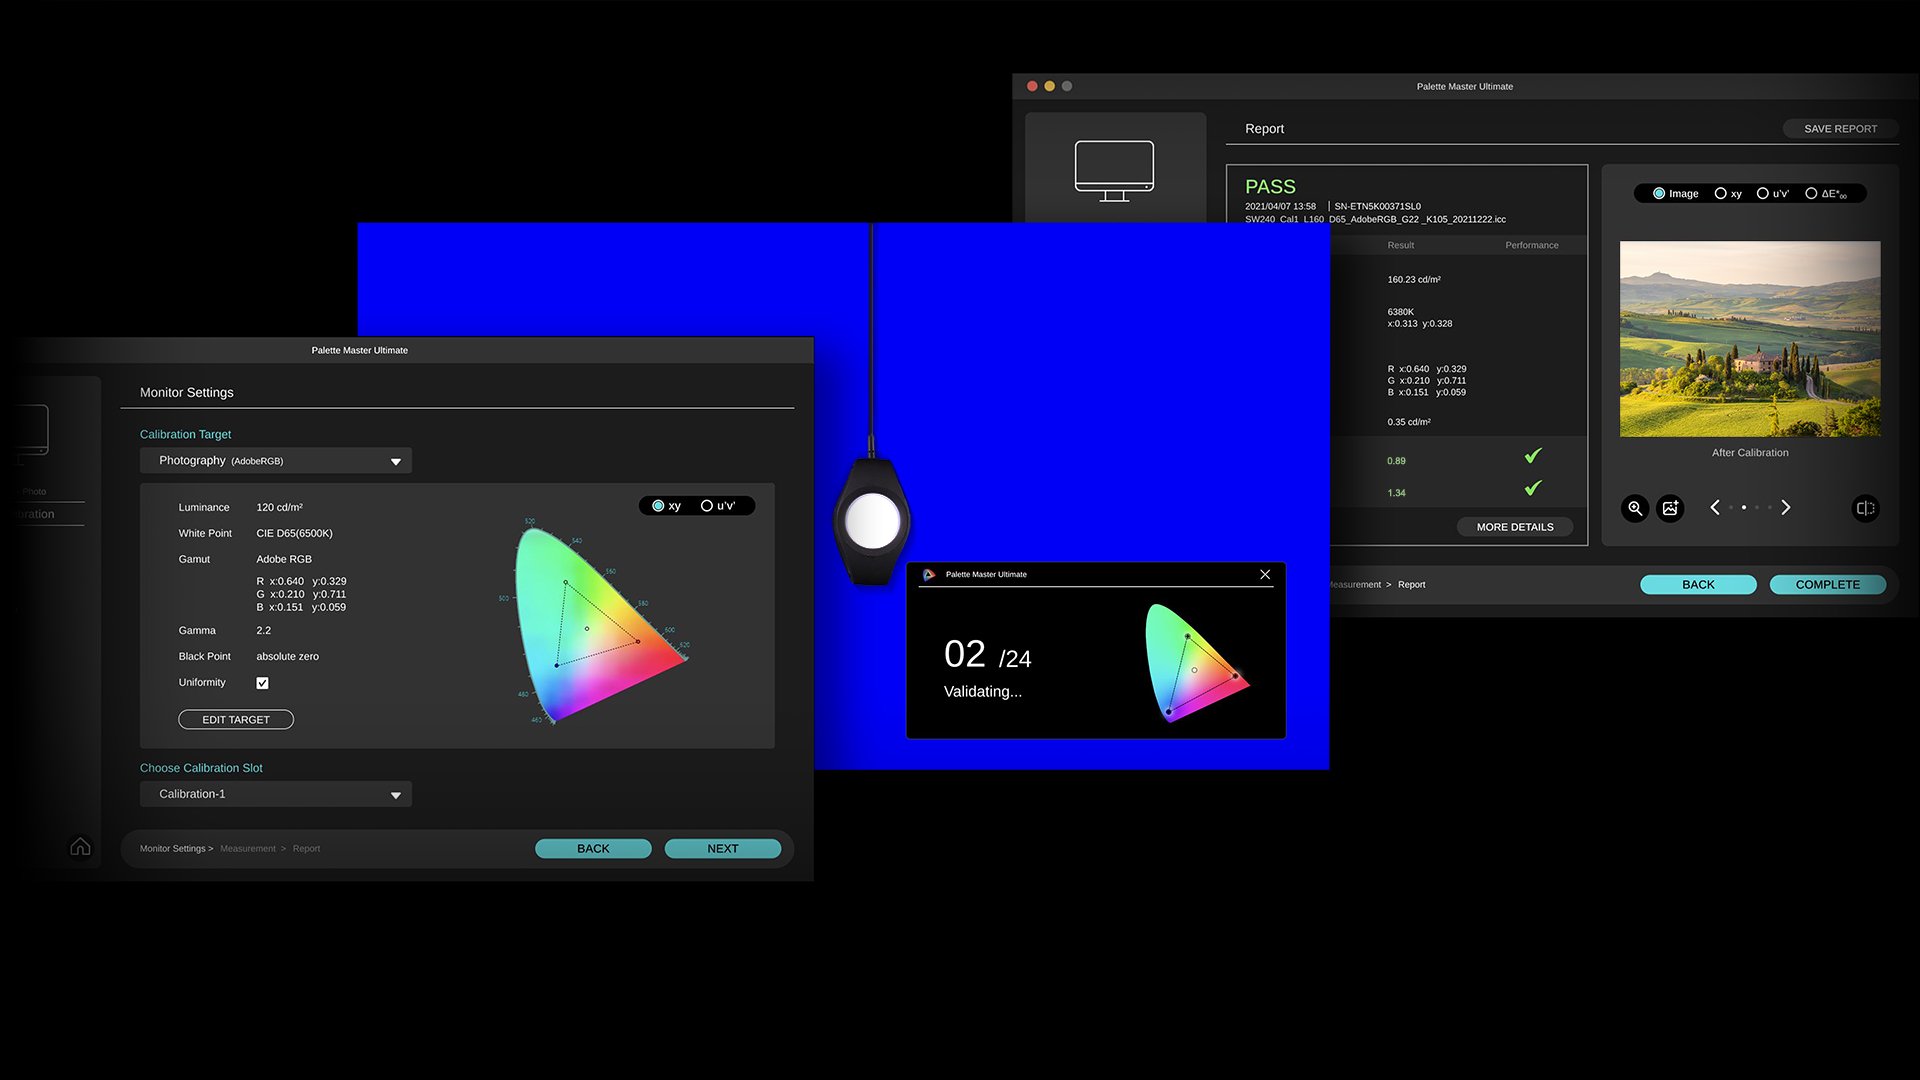
Calibrated screens are a must, but….

I’m a huge advocate for a proper monitor and calibration.
This is one of the reasons I’m using the BenQ line of monitors; they are very color accurate and offer hardware calibration. In short, you get the best possible performance for your money. But although on your side everything is 100%, it doesn’t mean your client has a properly calibrated screen.

In most cases, this is actually not really a problem.
When we judge images, we have a proper reference point, in my case, the BenQ monitor.
For me, this means when I edit on my laptop, I know how the reference images look compared to the BenQ, and I can do a lot of my work, but I always go back to my reference before I send something to a client or put it online.

Your client has a similar thing.
He/She knows actually how images look on their screen, meaning that’s their reference.
If the monitor is too blue or too red, it will mess up the original colors, but for your client, it will look like everything else.
However, when you work with a brand that needs color-accurate images, it can be a good idea to set something up for your client to judge your images on.

Educate/help your clients

When we shoot for a client that has color-critical work, I will advise my client to calibrate their screens. Or at least visit our studio to check the images on color accuracy.
It can often happen that you send in images that are rejected due to color issues, while there were no issues on your side. Especially when you just start out, or this is the first time you work for that client, you want to make sure that the first impression is spot on.

The problem is mostly that the client compares the colors on his screen with the fabric in his/her hands.
This will not work unless the monitor is 100% color accurate.
Also, a monitor and fabric both create the colors we see differently, so there will always be a part that will differ.

One way to prevent this is to educate/help your clients, especially when you start working for a brand. It’s a good start to talk to them about the way they judge images.
This will always be considered a big plus for your client.
It shows them you know what you’re doing, but also have passion for what you’re doing.
Both are great benefits to have.

You could for example, offer to calibrate one screen for them to check color accuracy on.
Calibrite has great, simple color analyzer that will work like a charm for this. You show it once, set the timer, and check from time to time (vital part :)).
If they don’t have a proper screen, BenQ has a great lineup that can be used for this kind of work.
Their P3 or AdobeRGB screens, for example, are great for this.
(If you live in the EU, drop us an email for a 10% discount on BenQ screens)

If you work with prints, think about this awesome tool from Pantone.
I can’t tell you enough how great those work. If you send in prints, and the client isn’t happy with the quality, in most cases, this is due to wrong lighting.
By using these stickers, you can super easily assist your client to get the perfect lighting.


But what was that tip about Photoshop about shadow detail? Continue reading.

But then….

You did everything right. Every little skin detail is perfect. There is nothing on the clothing that could be improved. And still you get the message “you missed something”.
You check your images again and again, it drives you almost insane….”What.. WHAT did I miss?”

I did forget to mention one thing.
Color is not the only thing that can mess up your image on a non-calibrated screen.
Also, black level and contrast are MAJOR killers.

When we edit images, we are working in a calibrated environment, which means :
1. Our grays are neutral (grayscale)
2. Our colorspace is correctly rendered (CMS)
3. The difference between black and white is even according to room lighting (Gamma)
4. We see the proper shadow detail and white detail (Contrast)

And this last one is where we have a problem when we send in images.
When a client has a setup where the brightness is too low, you will probably hear that there is not enough detail in the dark areas.
And when a client has a setup where the contrast setting is too high, you will probably hear that there is no detail in the whites.
When a client has a setup where the brightness is too high, you might get remarks like, “your work looks incredibly sloppy in the backgrounds”, or your client simply doesn’t call you back after the test session because it’s so bad.

The first two are easy to solve on your client’s side.
When I teach a workshop somewhere and I don’t know the screen setup, I always bring this pattern.
You can also send this to your client and ask him/her to set up the monitor’s brightness and contrast settings so they can see all the steps in the pattern.
This will already solve a lot of issues, on most monitors, the brightness and contrast settings are way off for color accuracy.
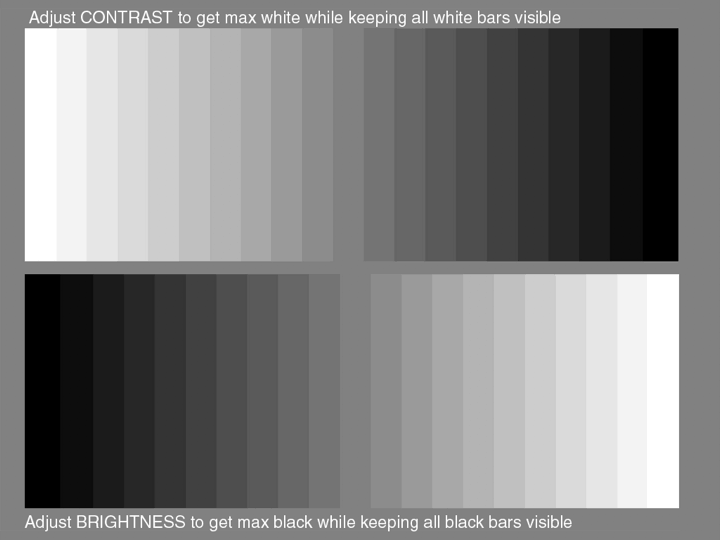
Photoshop tip about shadow detail

I always give this image ot my clients to check shadow detail

So we are left with that final one.
It’s actually the problem that the client sees MORE detail than you in that case.
You don’t want to know how many times I thought I took out all the power cables, and still found one when I used the trick I’m going to end this post with.

Fix it before

When I started with my studio, I thought it was a great idea to use black power cables.
A dark studio, black power cables. What could go wrong?
Ok, well that luckily didn’t happen (a lot), but what I actually mean, is that when you have to retouch an image, for example, with a dark background and black cables,  it’s very easy to miss something in the deepest shadows, and now imagine your client does see this detail.

To make it easier to clone out cables, I found out that it was much easier to take out light gray cables compared to the black ones, and it’s safer.

So, how can we make sure nothing is lurking in the shadows?


I hope you liked this quick tip about shadow detail in Photoshop
If you have any questions for a future episode, drop us an email at info@frankdoorhof.com
Always appreciate a like and a subscribe on our YouTube channel.
https://frankdoorhof.com/web/wp-content/uploads/2025/07/Graysteps.png 540 720 Frank Doorhof https://frankdoorhof.com/web/wp-content/uploads/2015/03/studioFD_Logo-1FV.png Frank Doorhof2025-07-17 18:00:062025-07-13 13:16:59This Photoshop tip will save you clients and embarrassment

A really fun shoot and a box

14-07-2025/in blog, Visions and technique, Webinars and instructional videos/by Frank Doorhof

Sometimes it’s just fun

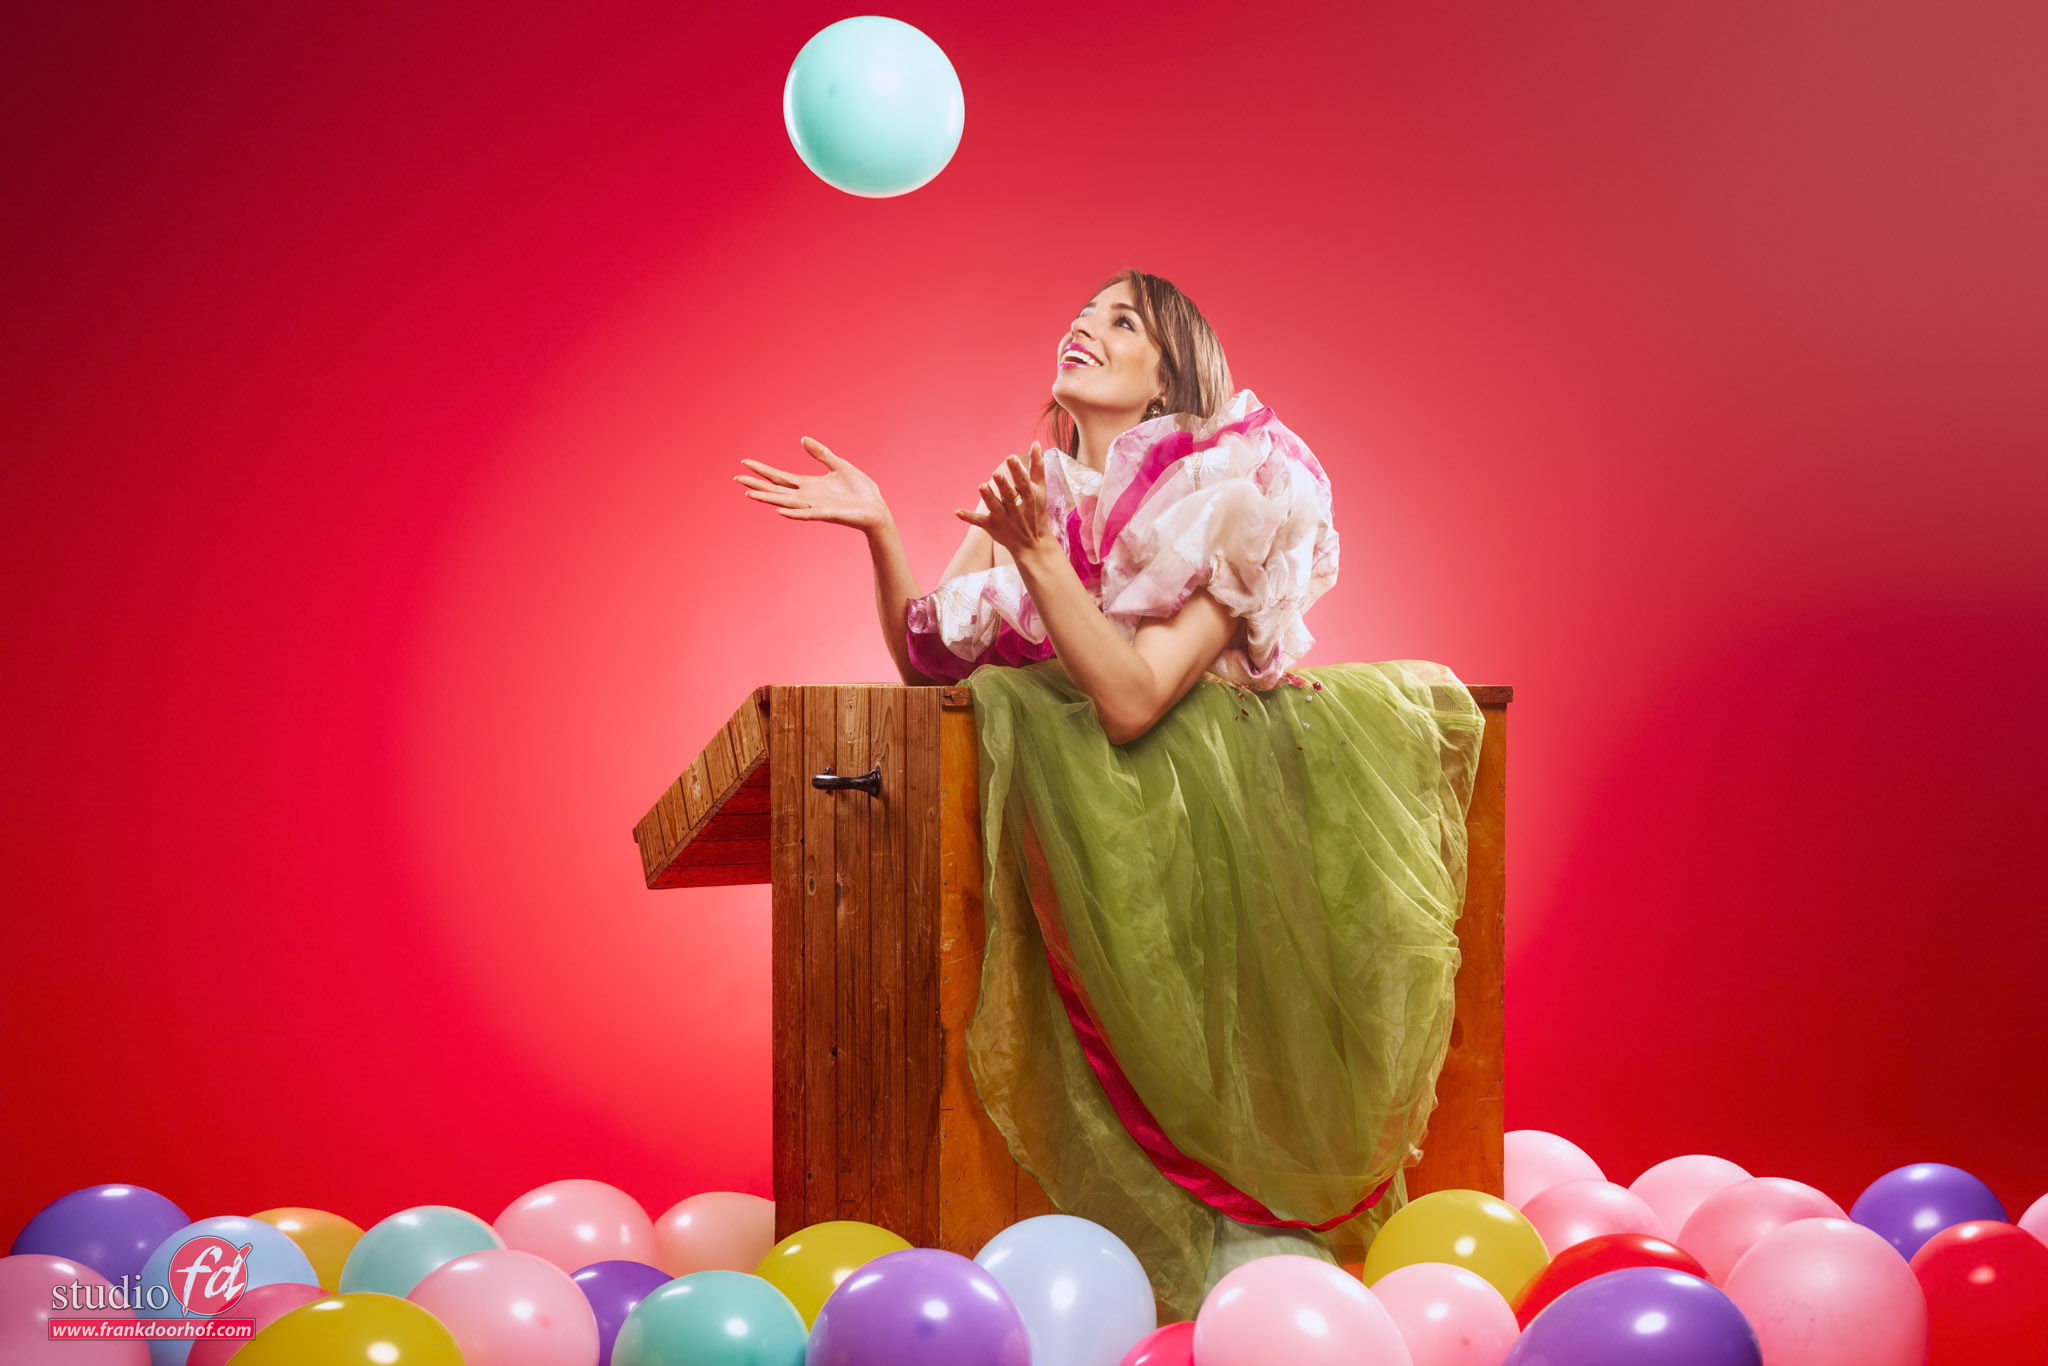
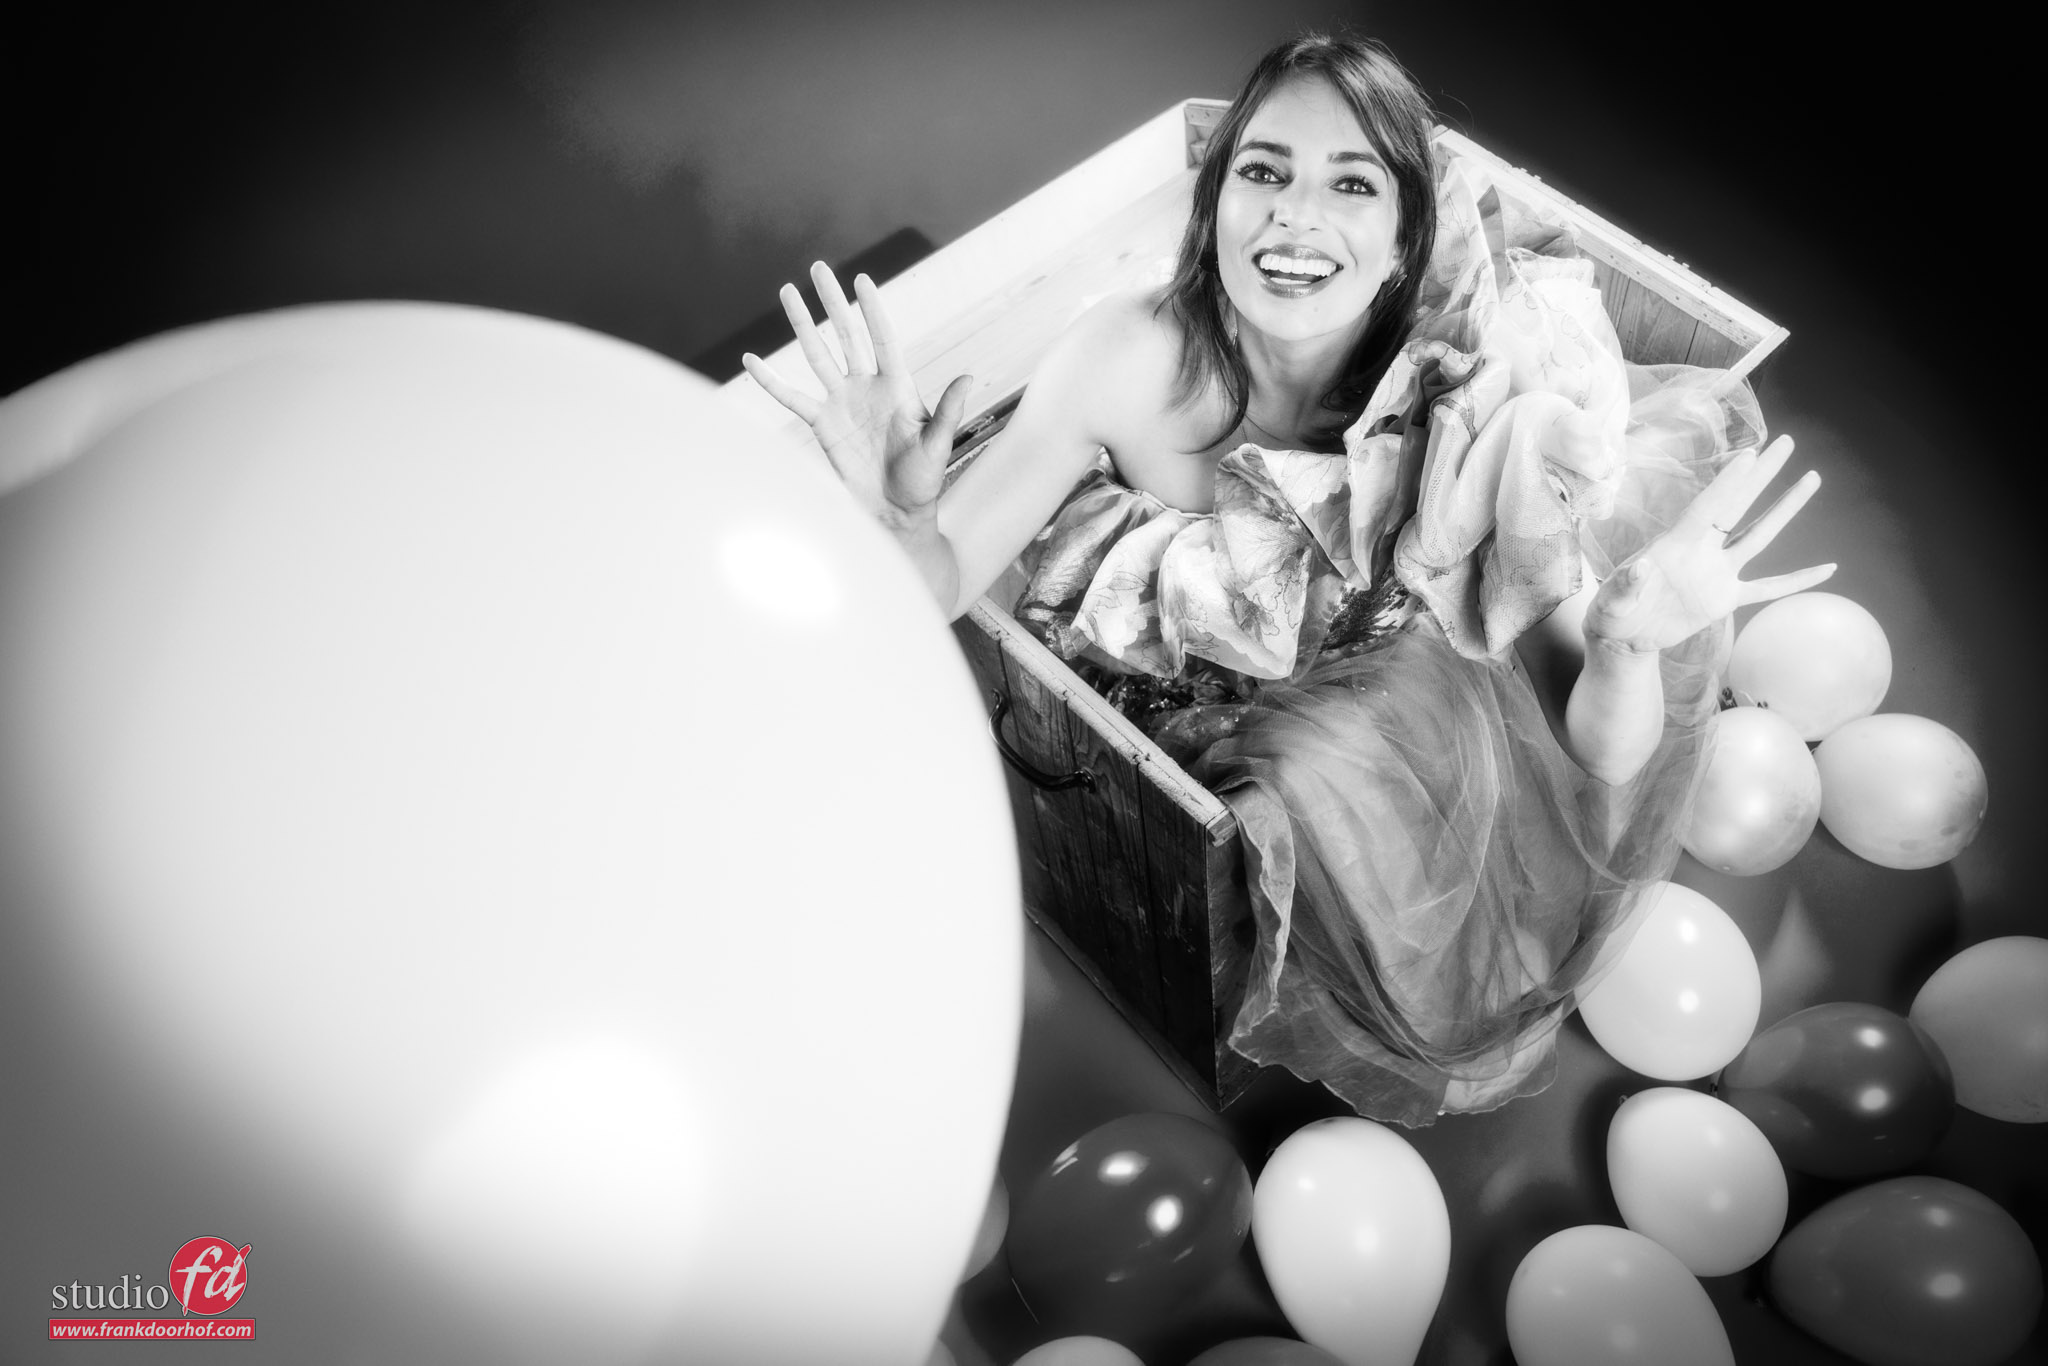
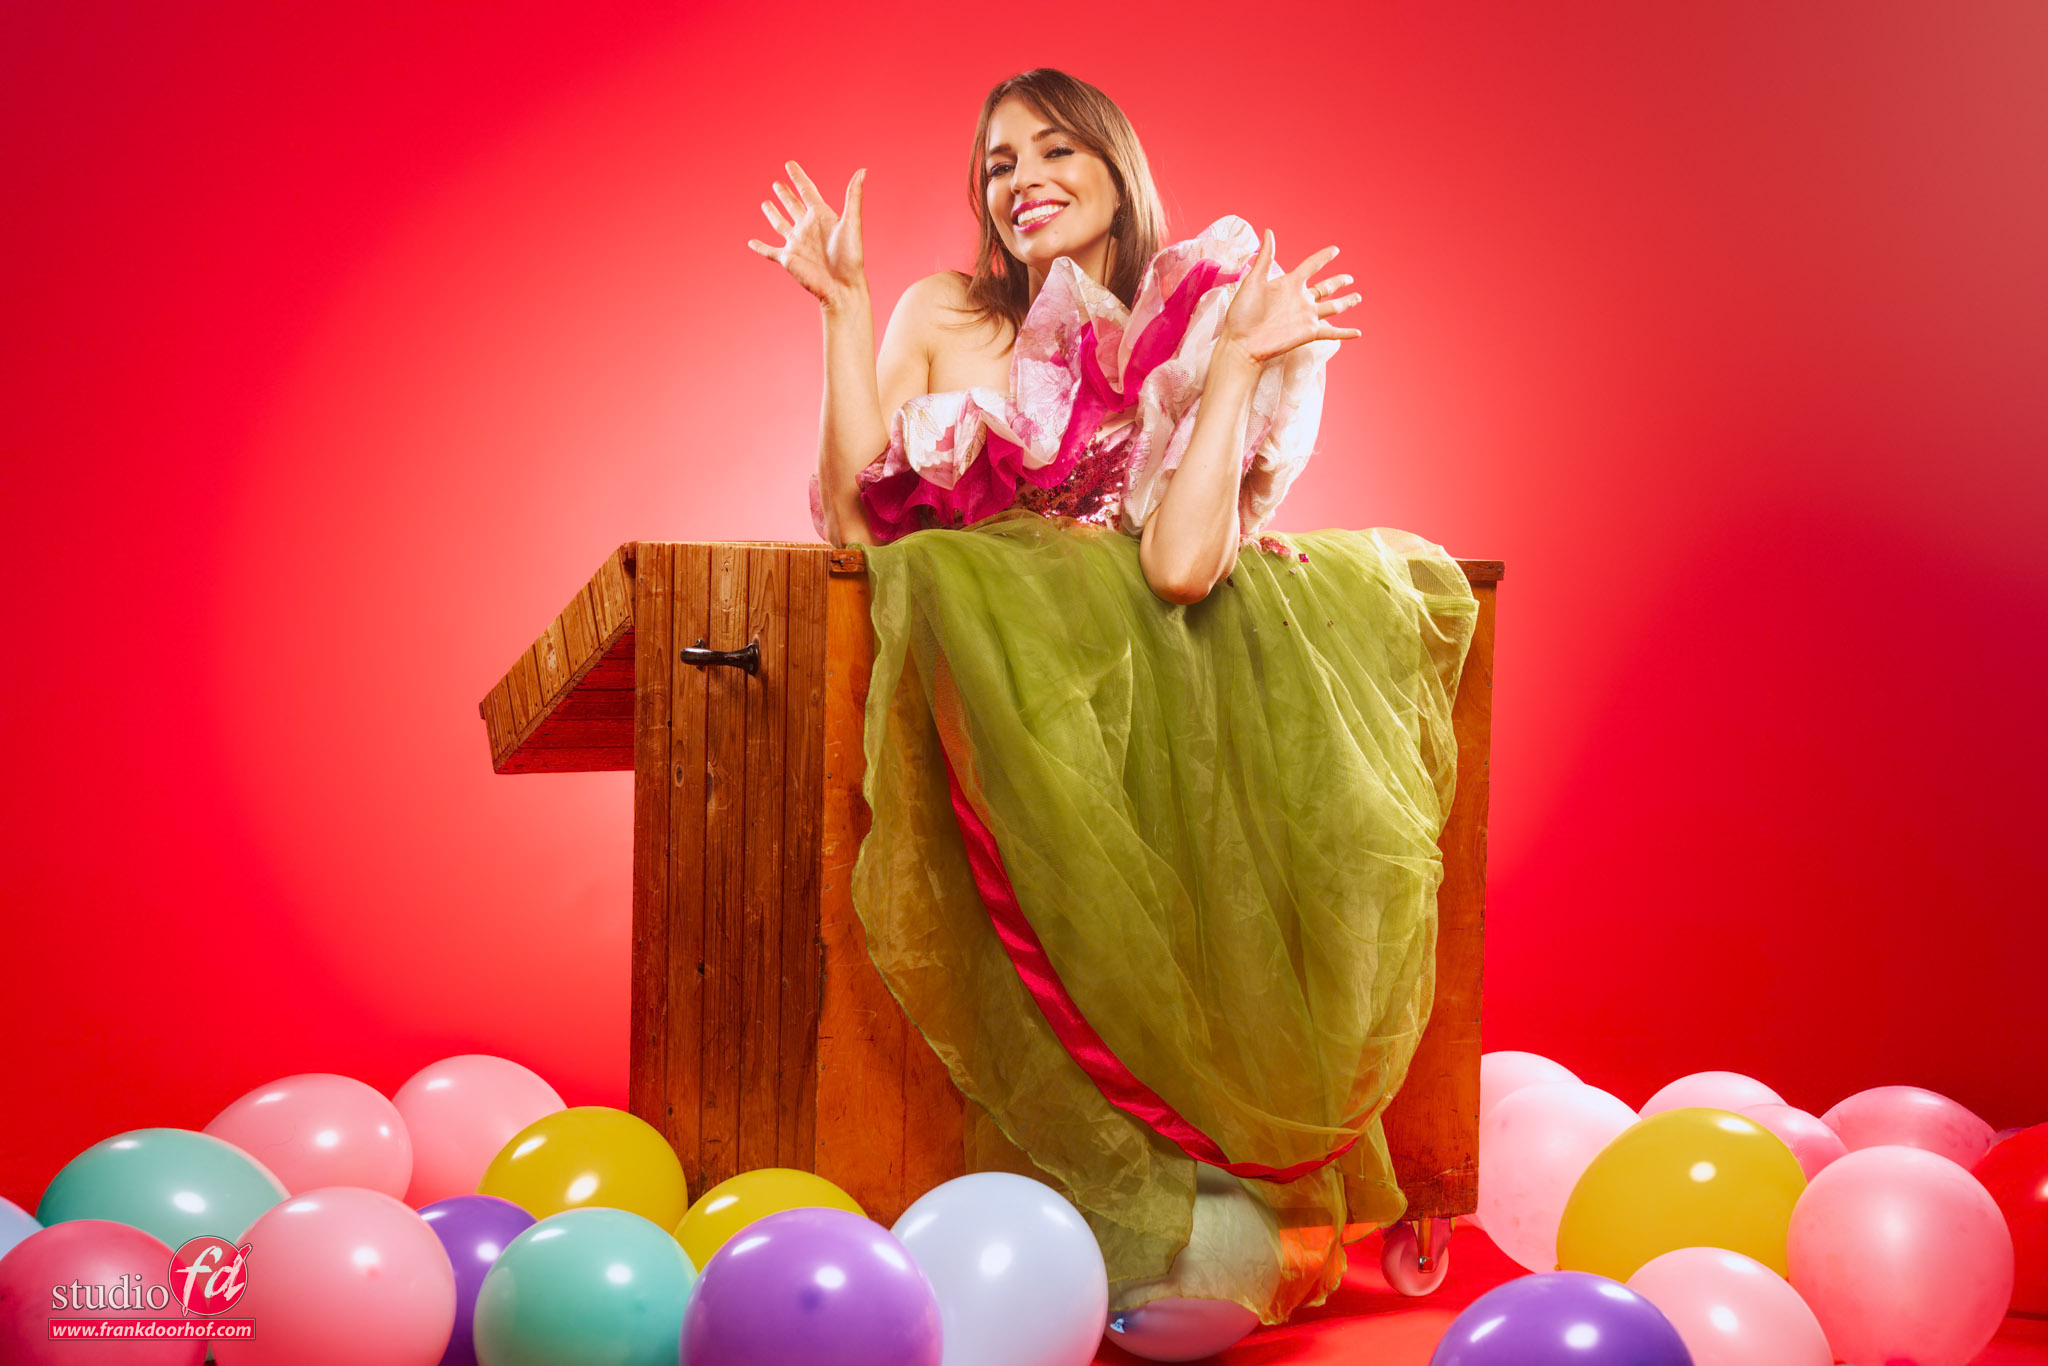
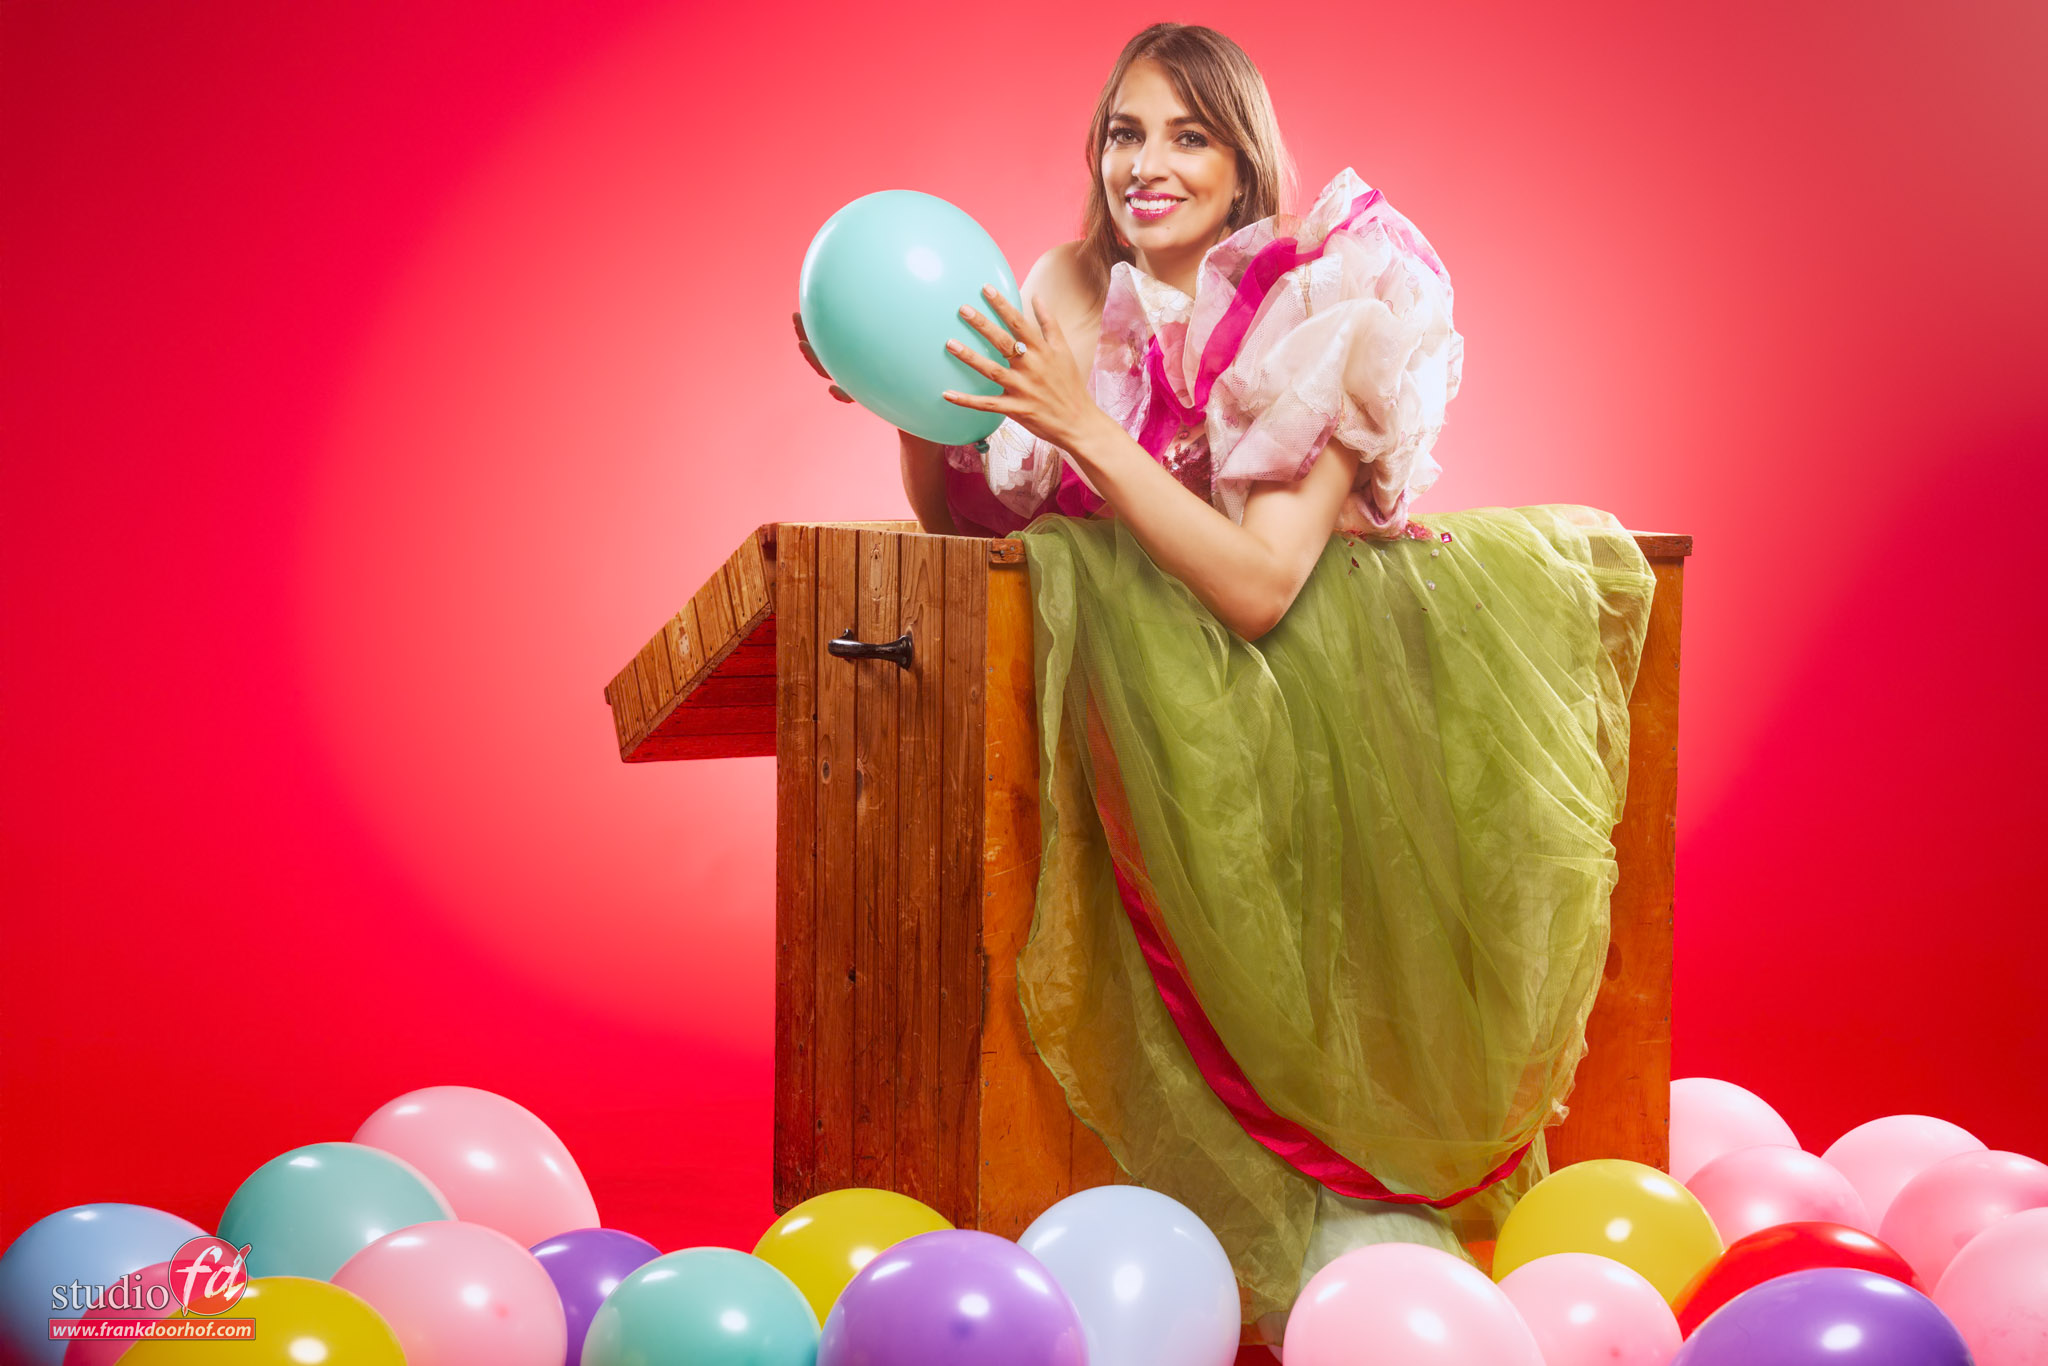
Not all photos are serious of course, sometimes it’s just fun to play around with some balloons and a box.
And that’s exactly what we did during this setup with our model Felisa and a box filled with balloons.
Add a screaming pink background, some more flat lighting and voila.

But because it’s always more fun and easier to see the lighting setups in a video, we also did a small “How did I shoot this one” video about this setup.

https://frankdoorhof.com/web/wp-content/uploads/2025/07/Felisa-56-May-31-2025-Edit.jpg 1366 2048 Frank Doorhof https://frankdoorhof.com/web/wp-content/uploads/2015/03/studioFD_Logo-1FV.png Frank Doorhof2025-07-14 18:00:312025-07-12 12:08:01A really fun shoot and a box

The behind the scenes story

6-07-2025/in blog, Visions and technique/by Frank Doorhof

Concert photography, don’t forget the behind-the-scenes

Often forgotten, but often most appreciated

In the previous blog post, I already talked about the techniques, gear, and shared photos from the concert. But today I want to talk about something else. Behind-the-scenes shots.


Photography is storytelling

As photographers, we are, of course ,storytellers.
From the Stone Age up till now the main reason we shoot photos, paint, draw, create music, etc. is to tell stories, process our emotions etc.
Well, ok, I also don’t know where some photos fit, but overall I think it’s pretty accurate.

In essence, “we capture unique moments in time that never come back again.”

When I shoot a concert/event, I always love to shoot some extra behind-the-scenes images.
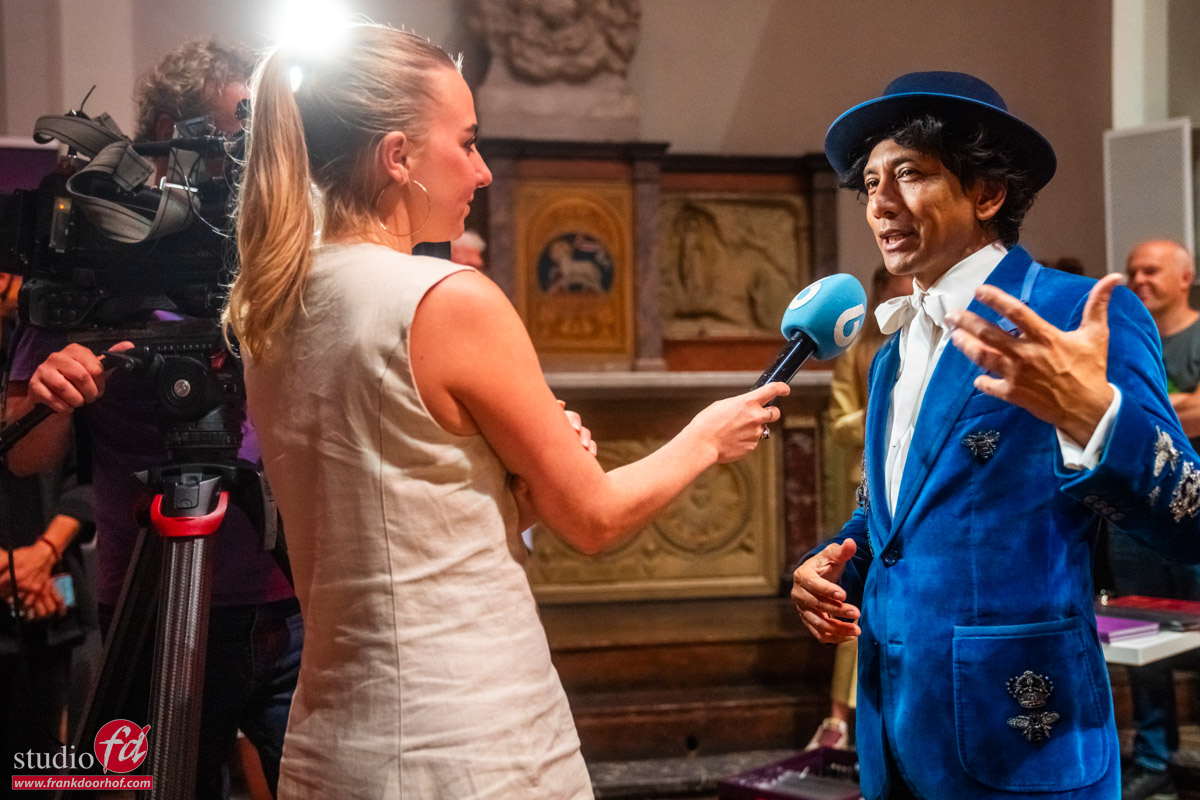
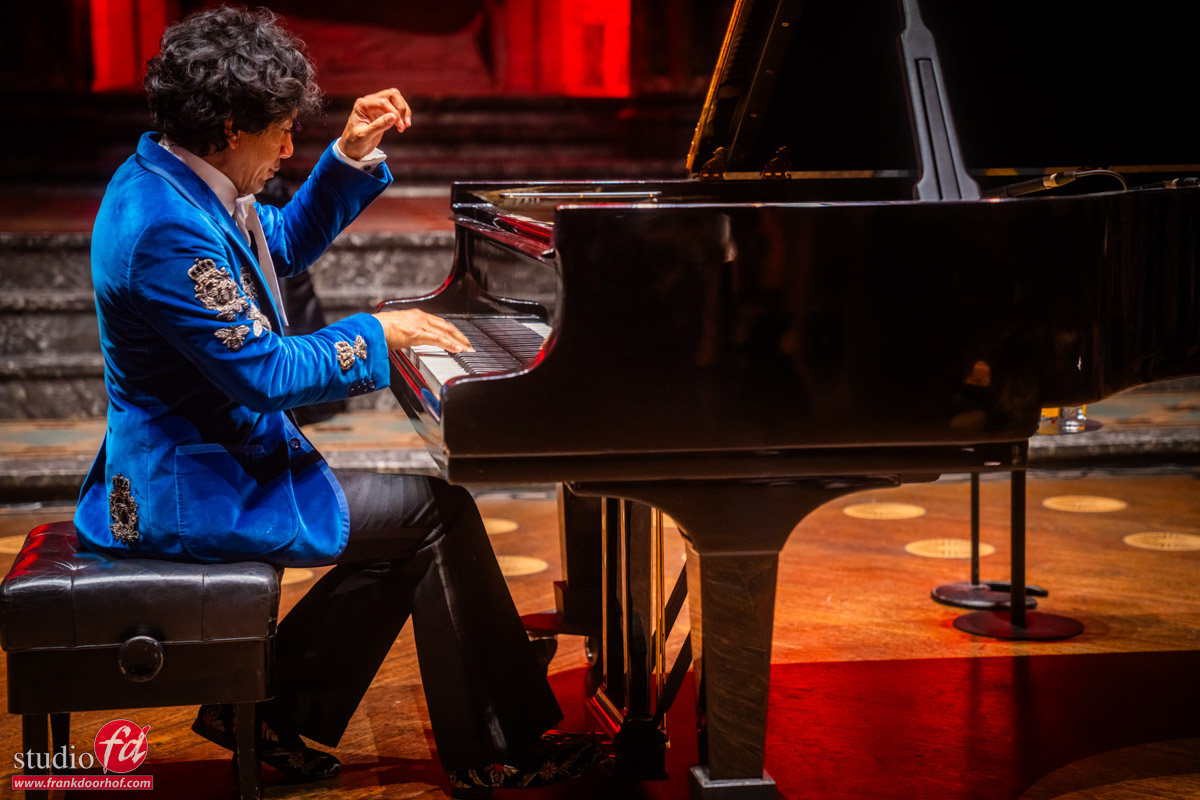
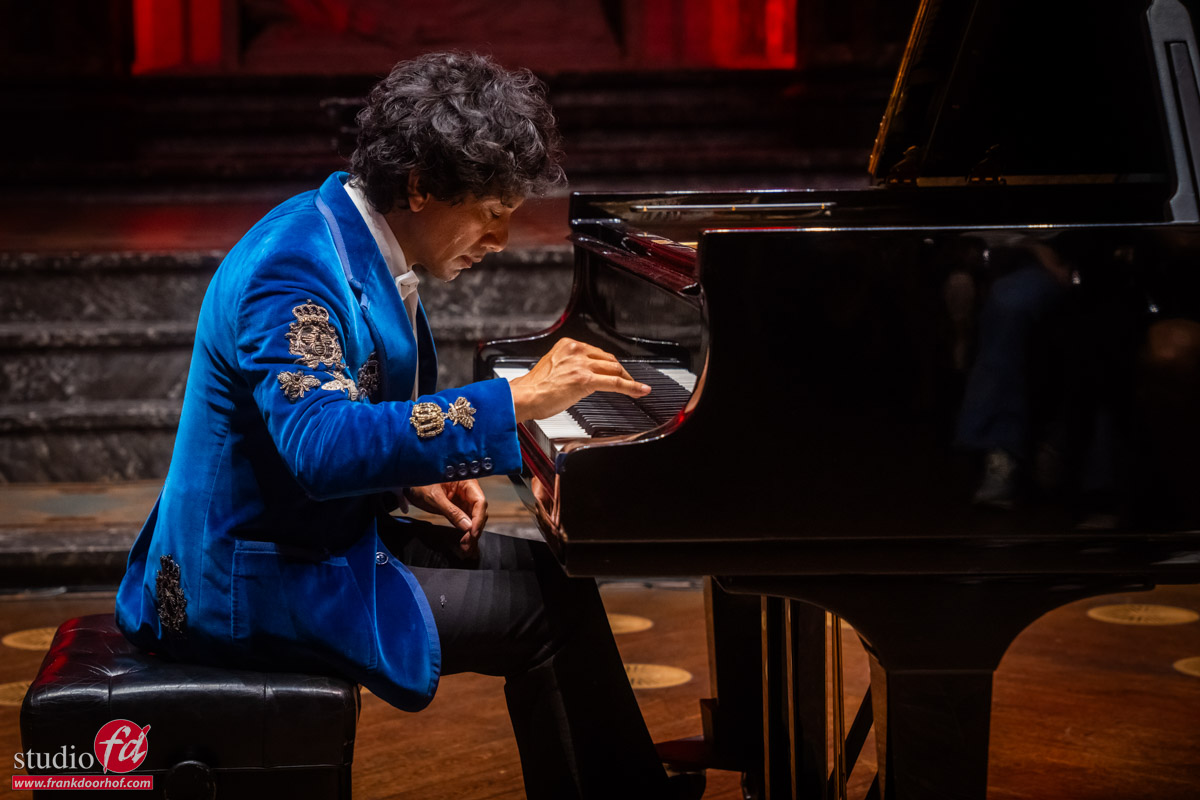
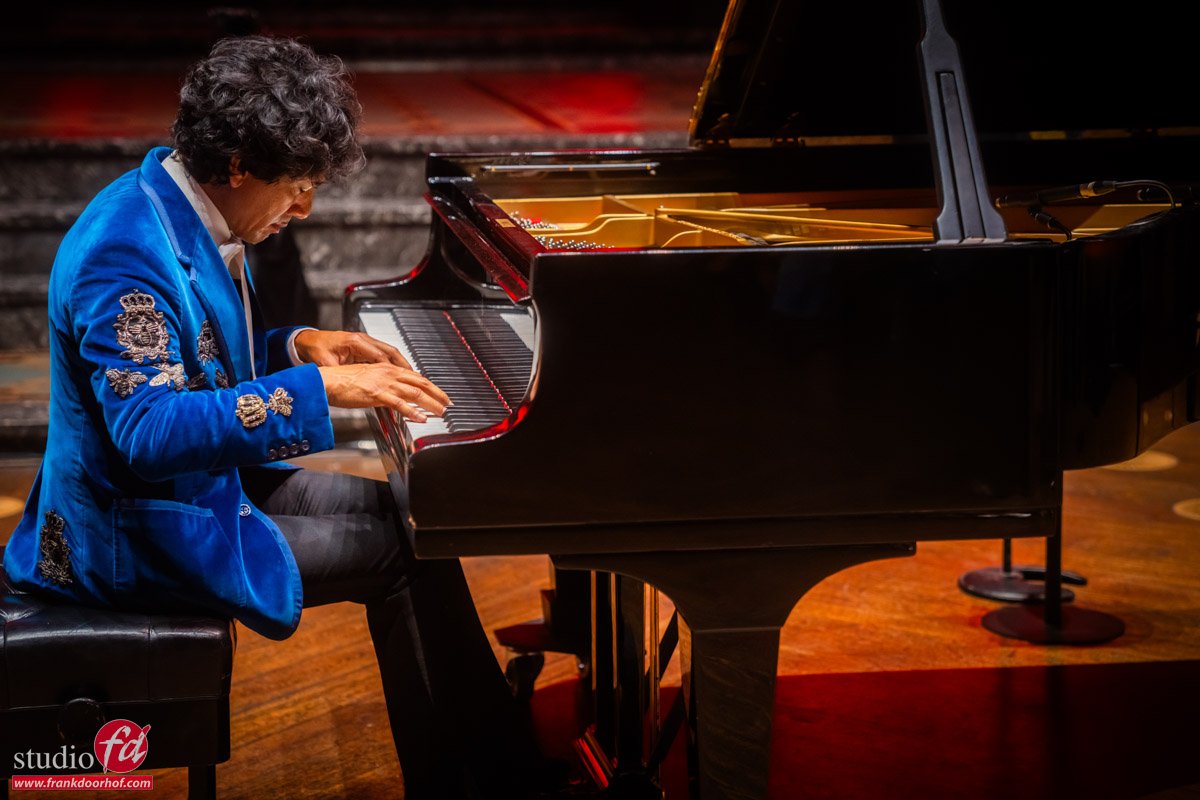
Also, during the recent concert in the Duif with Wibi Soerjadi I shot some behind-the-scenes images I wanted to share today.

behind the scenes concert photography behind the scenes concert photography

Why shoot behind-the-scenes shots?


Of course, I still try to do my best to get interesting shots, lighting, etc.
Behind-the-scenes doesn’t mean “just spray and pray”. You can get some really nice results by just taking some extra care of lighting, angles, etc.
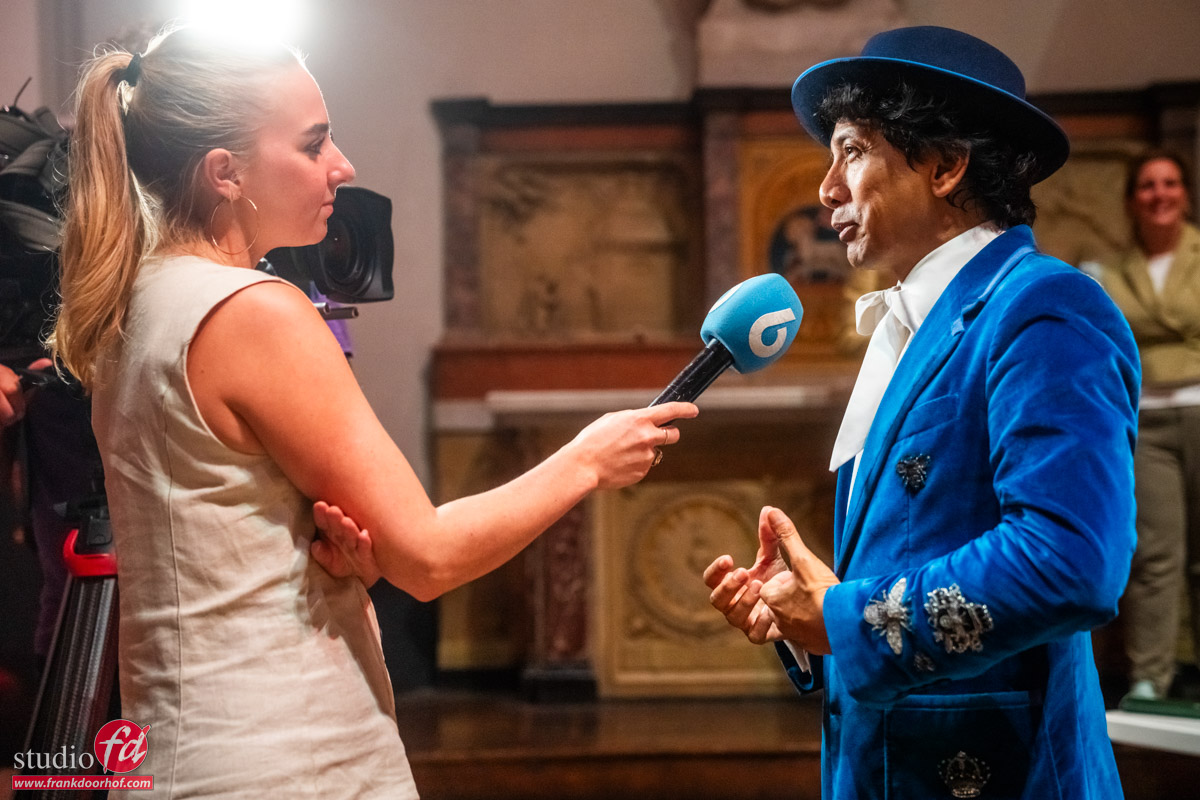
During the TV interview, I used the light from the camera in combination with the K&F concept black diffusion filter for a very nice soft glow in the image. Using a lower angle, I got some nice contrast in Wibi’s face, and it made the storytelling part more interesting.

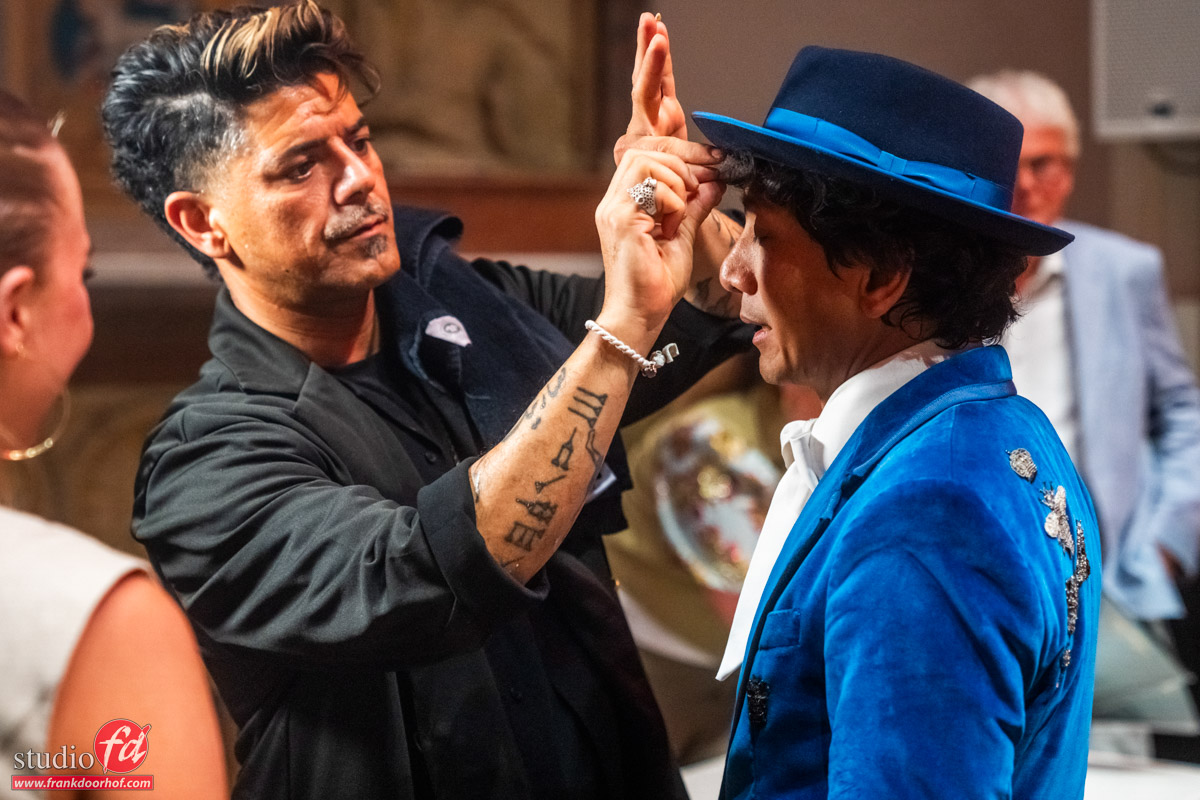
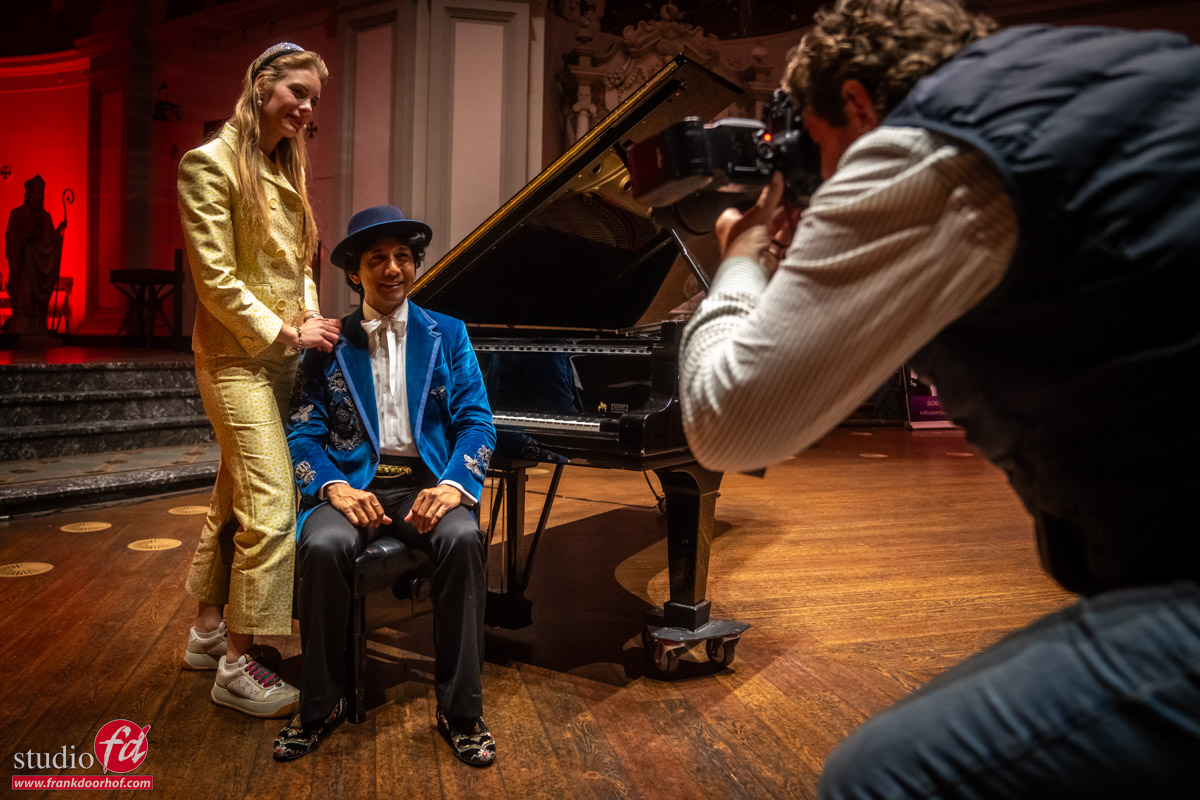
But also capture that quick moment where his stylist quickly adjusts some final details.
How many of those images do you think he gets?
And how handy would it be to have an artist’s stylist as your fan for the great images you always give him/her.

Behind-the-scenes, concert photography

As photographers, we often don’t have a lot of images where you can see us at work.
So when I saw that Edwin Smulders was taking some images of Wibi for the magazines he works for, I thought it would be fun to shoot some images of Edwin at work.

Behind-the-scenes images are great for you as a record of the events.
And behind-the-scenes shots are great for the artist. It’s a registration of details they don’t always get or think about.
Don’t forget, behind-the-scenes images are also great to build networks and friends. Often, the people behind the scenes work very hard and love the images. So, they are always much more open to let you do your work. Or even get you access you would normally never get, even if your event photos are top notch.

I can’t stress enough the importance of some behind-the-scenes images.
So the next time you shoot an event, or even a family, in your studio. Think about the behind-the-scenes or fun shots.
It happened more than once that my client prefers the fun shots I took during a shoot compared to the more posed (read slightly uncomfortable) shots.


https://frankdoorhof.com/web/wp-content/uploads/2025/07/Wibi-Concert-De-Duif-573-June-27-2025.jpg 800 1200 Frank Doorhof https://frankdoorhof.com/web/wp-content/uploads/2015/03/studioFD_Logo-1FV.png Frank Doorhof2025-07-06 18:00:492025-07-19 15:22:38The behind the scenes story

Wibi Soerjadi at the Duif in Amsterdam

3-07-2025/in blog, Visions and technique/by Frank Doorhof

Shooting a concert can be a real challenge

As a photographer, I love challenges, but some will also add a lot of stress, especially when the bar is already set pretty high. This blog is about concert photography tips and tricks.

I’ve been photographing Wibi Soerjadi for many years, and over the years we’ve become close friends.
One of the advantages of knowing the artist very well is that I’m allowed to shoot the whole concert from any angle I wish.
Well, ok, there are some limitations of course. I’m always aware of the audience and behave as a guest instead of part of the organisation.

But overall, I’m pretty free in what I want to do.

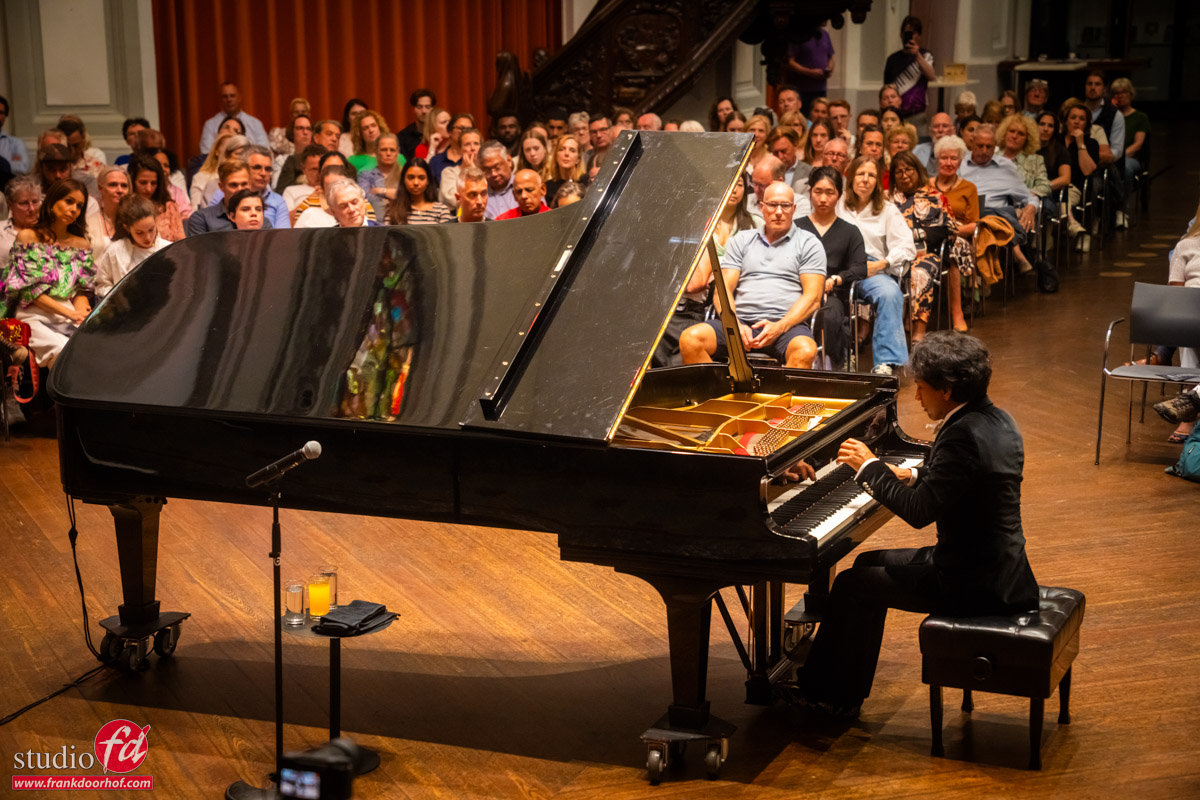
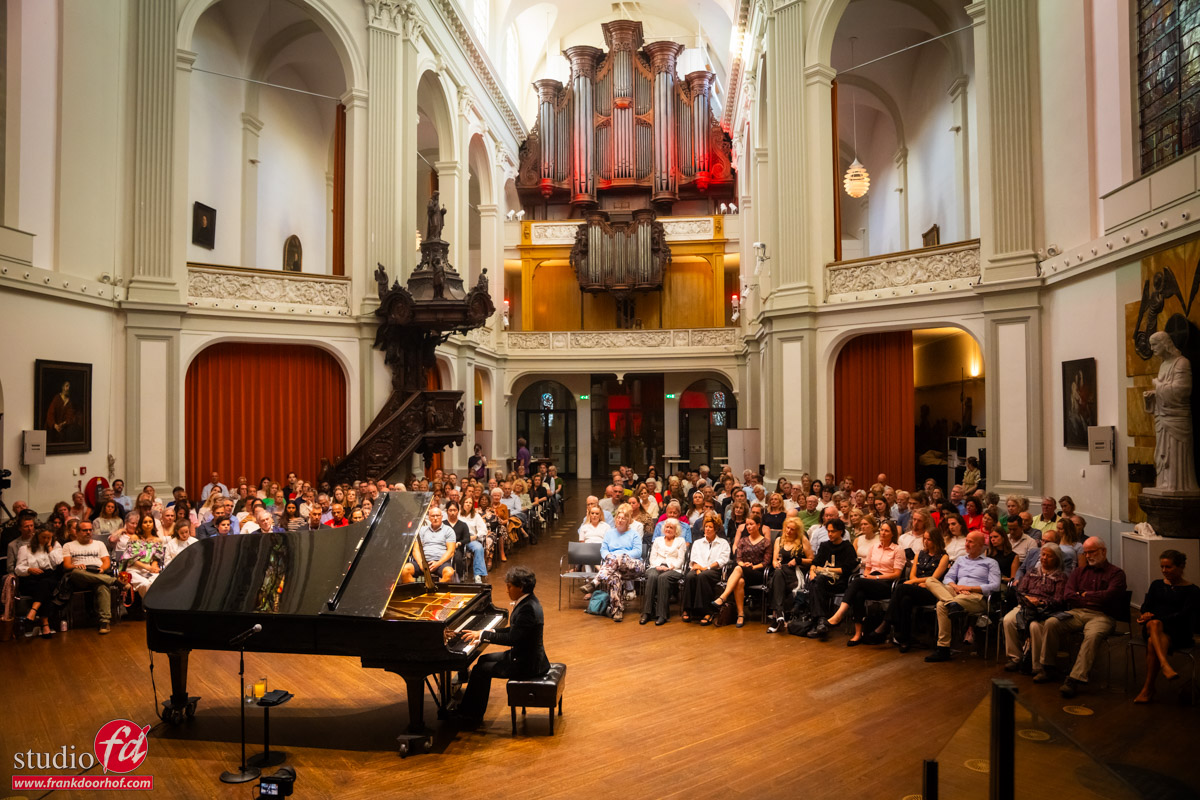
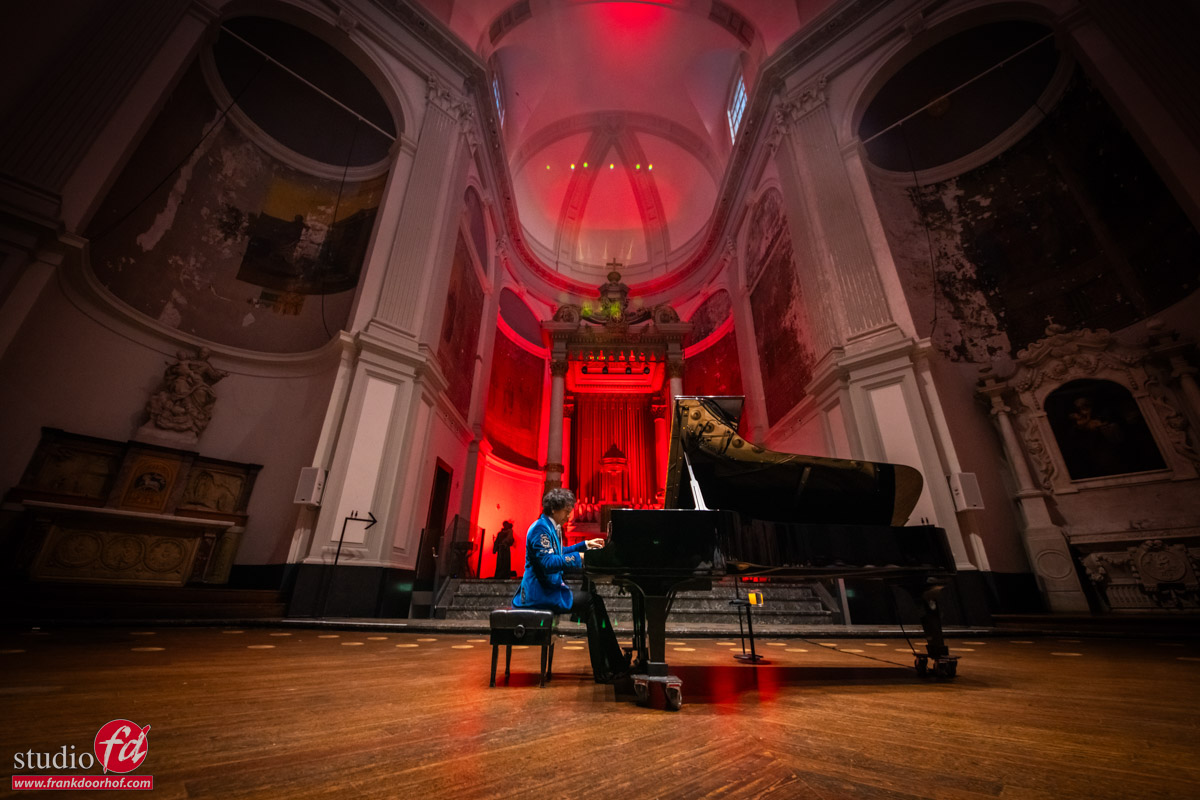
concert photography tips and tricks, Wibi Soerjadi in De Duif in Amsterdam

De Duif in Amsterdam is a former church. It’s located between houses.

The camera challenge during concert photography

As mentioned, I’ve been shooting Wibi for many years, and it’s awesome to see how much better cameras have become.
Especially with live piano recitals or orchestra’s there are many obstacles I never realized when I started doing these kinds of concerts.
I’ve shot some rock performances, and although they are tricky, the lighting is often great for creative photography. You can often work with a shallow DOF, and as long as you have enough going on on stage, like smoke, colored lights, etc., it’s easy to get a lot of different moods and feels in your images.

When I shoot Wibi, it’s “slightly different”.
Except for the awesome Christmas concerts in the Royal Concertgebouw in Amsterdam, the lighting is often non-existent, or very dim, and almost always constant. In other words, if the lighting guys don’t do their work correctly, I end up with blowout images or awful shadows. Luckily, I have had some control over the lighting for the last few years and am allowed to change spots and outputs. Which in all honesty, makes my life a lot easier. It doesn’t create magical studio lighting setups, but at least I can get rid of a too harsh accent light or a spot that’s too bright or reflecting in the piano. It helps a bit.

And sometimes there is no lighting at all, or just a small accent light to highlight the location, like in the situation you are going to see today. Let’s continue with some concert photography tips and tricks

So, what is the challenge for the camera?

Aperture and focus assist


When I shoot Wibi, for example, I have a few things I need.
I want the artist’s face sharp, but also at least one hand, and preferably both. Which also means you can see the venue and the audience, preferably slightly out of focus. This is also one of the “demands” or “things that make my clients happy,” no f1.8 shots, but showing the location in these kinds of shots is pretty essential.

So I’m mostly shooting at F2.8-F4.0, depending on lens and location.
Because I’m mostly shooting during the concert itself, I have disabled ALL focus assists, so no “searchlight” and no beeps, and of course, the silent mode is engaged.

Funny anecdote, when Sony introduced the silent mode, one of the first concerts I tried it out at was during a concert by Wibi. Because I’m really close to him, I get an awesome experience. But the disadvantage is that he actually hears everything I do. And although I’m always very careful not to disturb him, I thought it was pretty funny when I got a message during the break if I took any photos because he did not hear anything. For me, it was now proven, the silent mode is essential 😀

Now, don’t get me wrong, a fast lens still has huge benefits.
The faster the lens, the more accurate and faster your autofocus system will work, seeing the camera always focuses with a wide open aperture.
Because I’m moving around a lot and a piano recital is pretty “static,” I want to make sure I shoot from as many different angles and positions as possible. This limits my choice a bit in “fast glass,” so my choice is the Sony 24-70 f2.8 G-master. I’m also carrying a second body with a Sigma 12-24, which I use for some audience shots and more “funky” angles. For some images, I will switch lenses between the bodies (one is an A7RV and the other an A7RIII).

Shutter speed

Besides having to shoot with a reasonable depth of field, I also have to shoot a lot of the images on a rather high shutter speed.
Wibi moves around pretty fast, and the best shots for me are the ones where his hands are frozen in the air with maybe just a slight trail of movement but the face has to be razor-sharp. This mostly means that my standard shutter speed is 1/125, with some images to make sure I get them at 1/250-1/500.


ISO

And of course, the ISO
This is where I have seen a HUGE boost in performance over the last 3 years.
Especially the Sony A7RV has made a huge step forward in focus accuracy, but also in high ISO noise. It seems to be easier to remove than on the A7RIV.
Because I’m shooting on a smaller aperture and with a higher shutter speed you would normally prefer in these kinds of lighting situations, I have to accept that my ISO is mostly all over the place.  Some images are shot at ISO1600-3200, which is fine and almost needs no noise reduction except a slight adjustment in Lightroom. But often I’m hitting the ISO16000-32000 with peaks to ISO64000, and although for the internet those images can be used, they are not suitable for large posters, billboards, or pillars.

And this is where technology has made a HUGE step forward.
I’m using mostly a mix of Topaz PhotoAI and the new Lightroom online AI noise reduction.
Both solutions are 100% improvements over anything I used before. Especially in small details like hair and reflections, the new algorithms are great for keeping a natural look without that paintery look we all “hate”.

An added advantage of Topaz PhotoAI is that if the camera slightly misses focus, I’m now able to correct this. It’s no magic wand that will fix everything you mess up, but it can save some images that were very close but not perfect.


Todays concert

Today I want to share the results from a very special one-time concert.
The concert was in a beautiful location, “The Duif” in Amsterdam. As a photographer, this is already great, so I wanted to make sure I got the best out of the location.

The first part of the concert was a collection of classical pieces. The second part, however, would be the first and probably only time Wibi would perform an 11-part composition, “Flashback,” he wrote to deal with a personal loss. Because I knew this part would be nerve-wrecking and very emotional for Wibi, I decided to do something I normally never do (and it was the right choice). I wanted to make sure I got ALL my shots before the break so I could just sit on my chair and enjoy the composition, shoot some images in between from that location, and not disturb Wibi at all.

As mentioned before, you have to work with the lighting and location you are given.
In my case, “angle is essential” because otherwise I don’t see the piano, the artist, or the hands.
So, for the first series, I’m sitting about 1 meter away from Wibi slightly higher, with the option to go down on the stage in one move and shoot from a very low angle (love those shots).

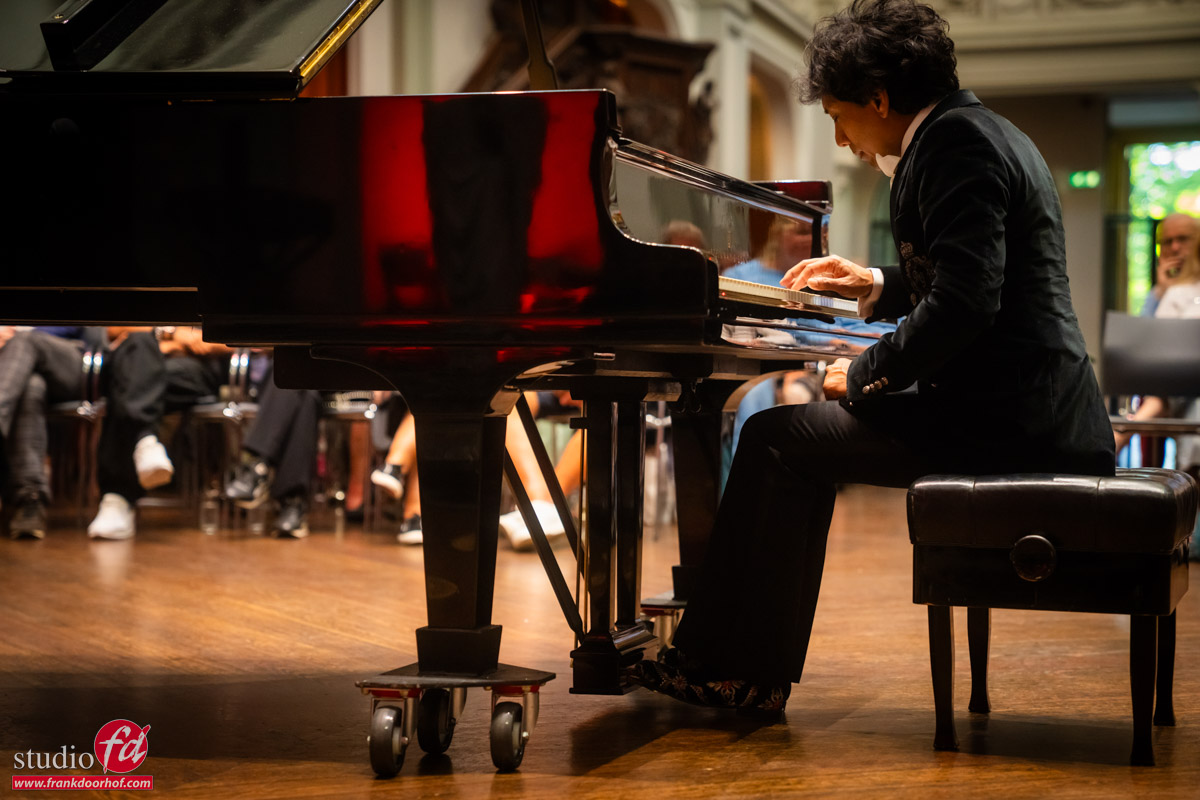
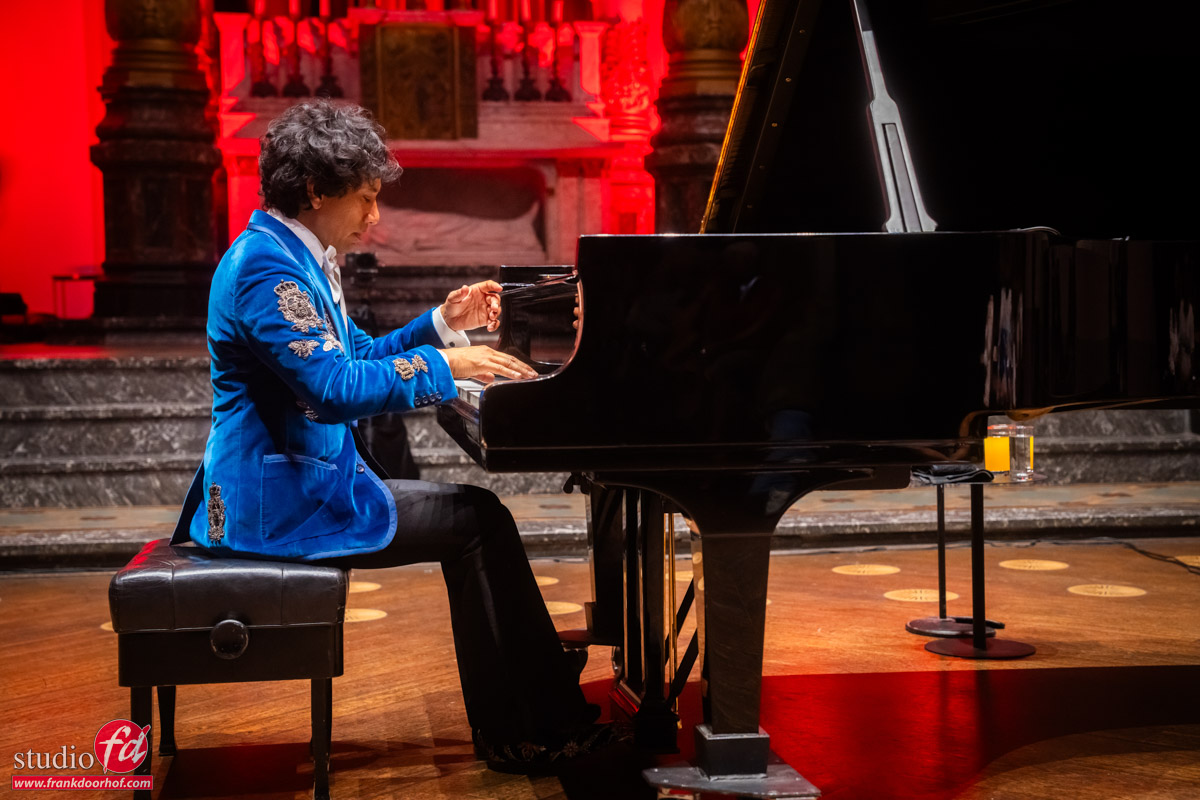
concert photography tips and tricks, a close up of Wibi behind the piano in De Duif in Amsterdam concert photography tips and tricks. you see the audience in the back of the Wibi Soerjadi concert in De Duif in Amsterdam

As you can see, nothing wrong with the shots.
They are proper “registrations,” but we want mor,e of course.
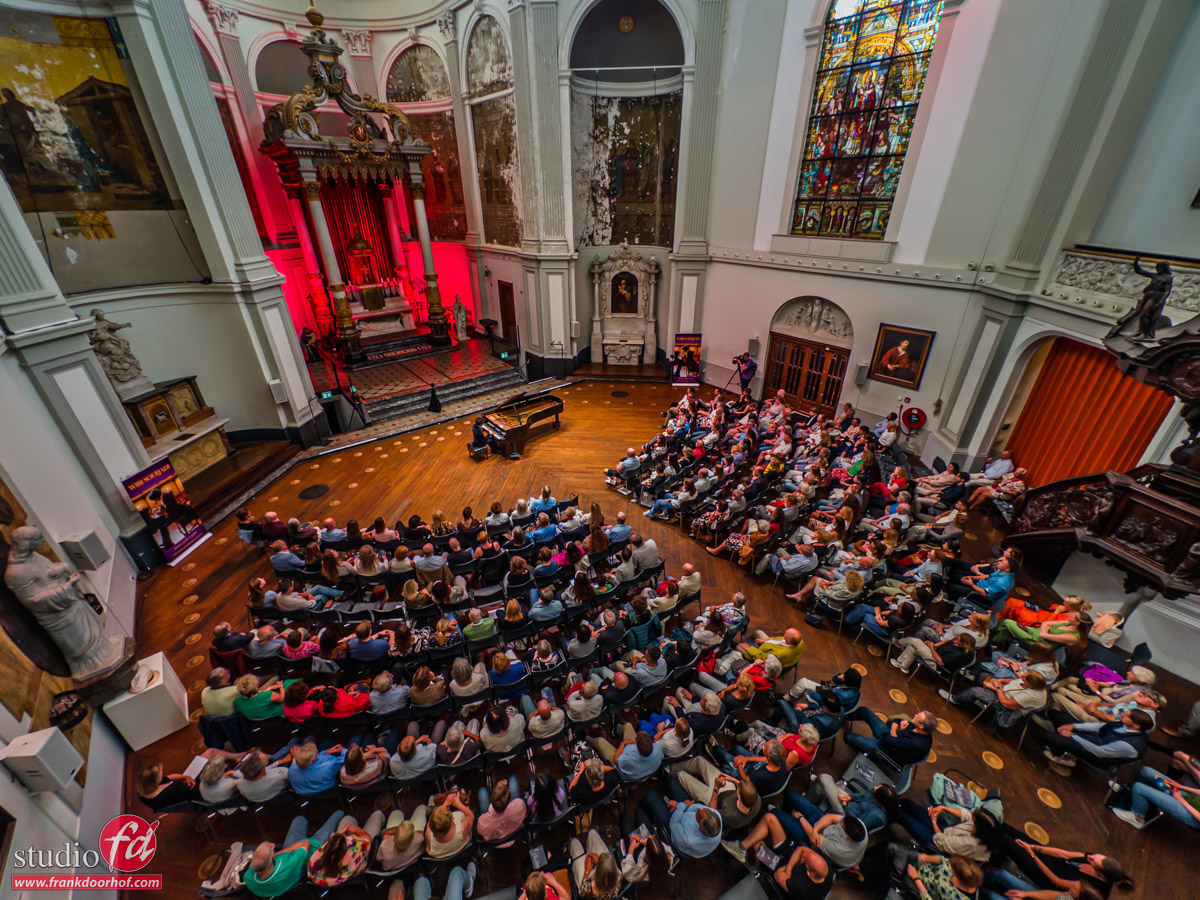
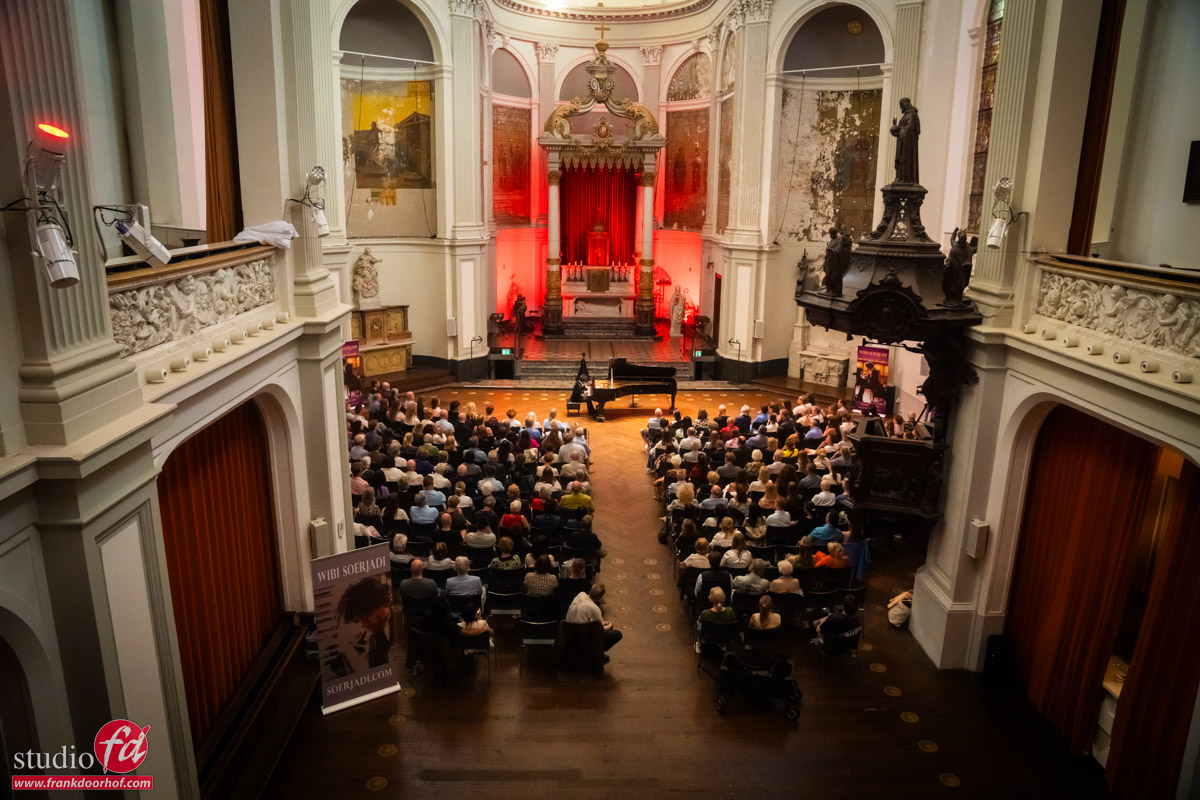
So, let’s run upstairs and shoot some images from the balcony.

concert photography tips and tricks. shoot a concert from above, you see the audience, the former church and wibi playing the piano

This is the moment I had my lightbulb moment.
The light was going pretty fast, and the red spot behind Wibi started to show up a lot more than before the concert.
This could be fun.

After the break, I stayed in my seat for the second part of the concert.
One of the perks we have is that I can select my seating, so in all honesty, the following shots are from a position I chose to shoot from.

Don’t forget the close-ups

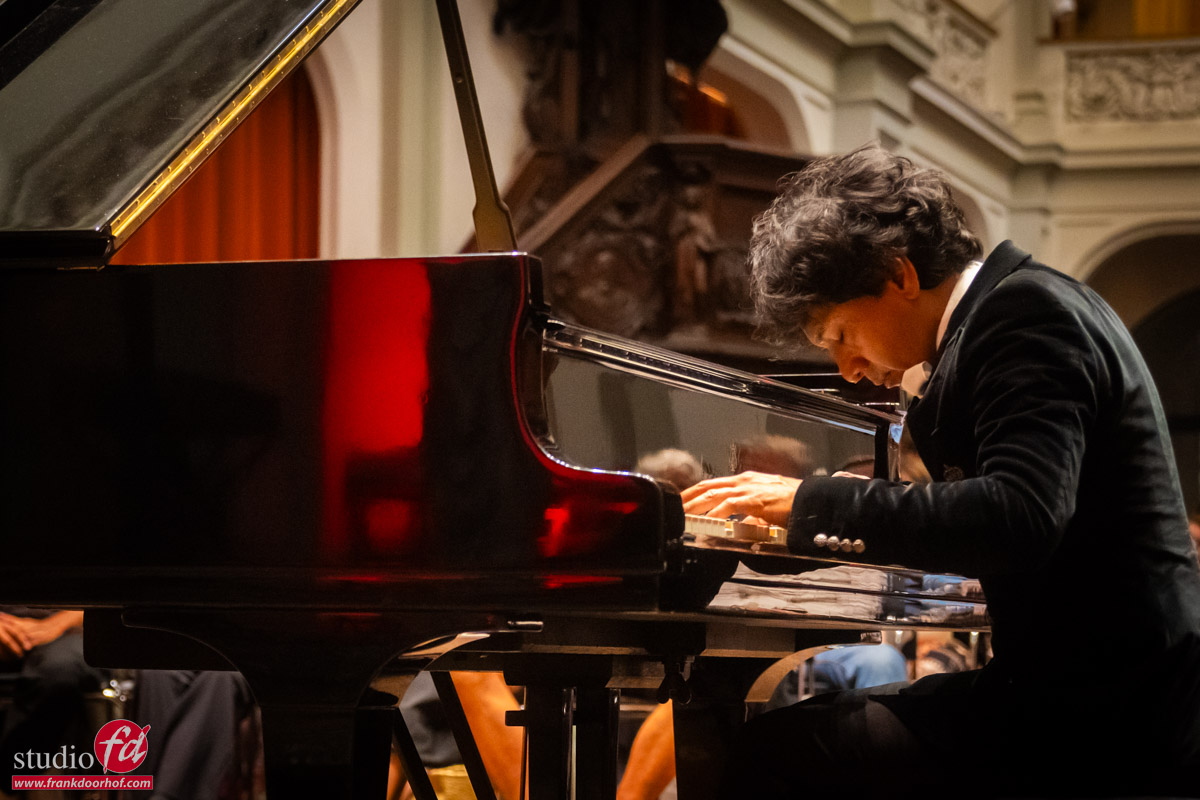
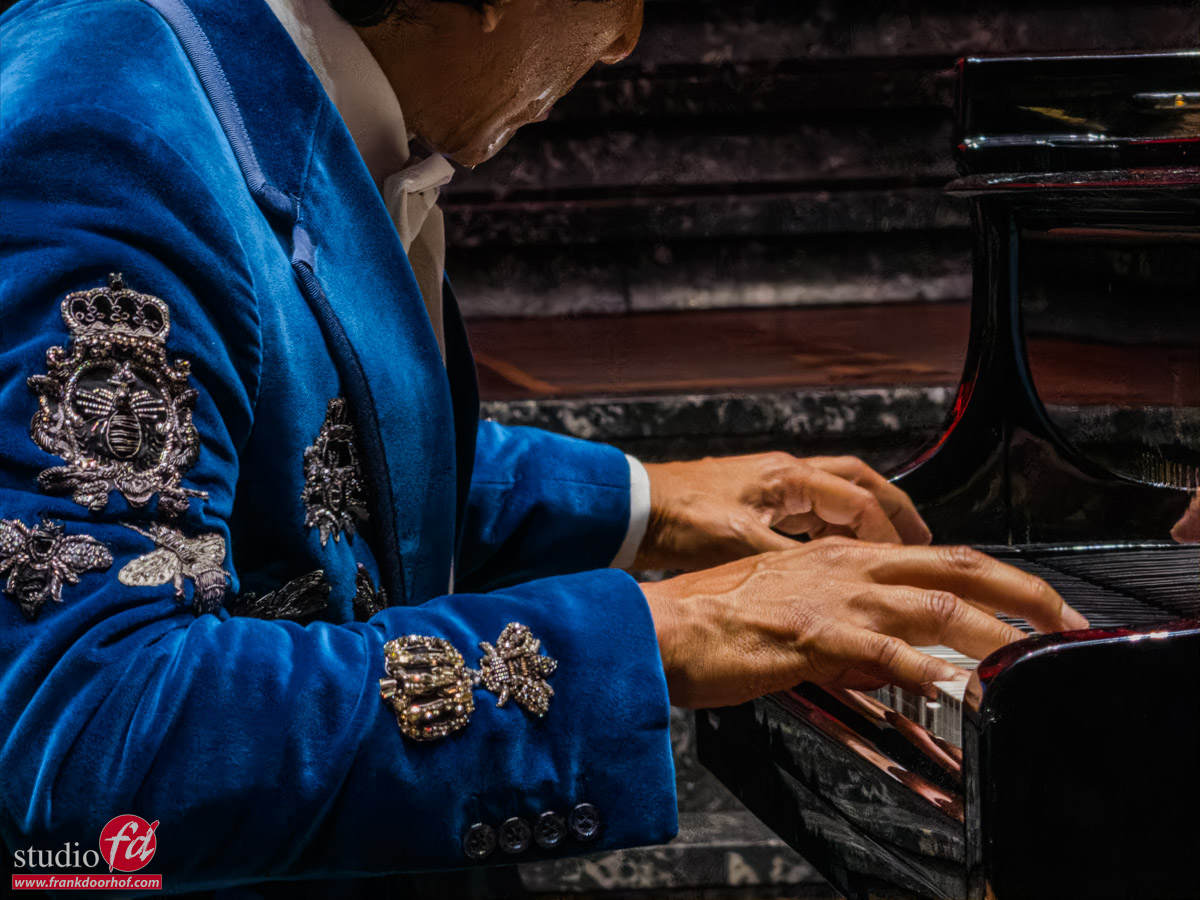
Here’s another tip about concert photography. First, I always try to get some nice close-ups.
During the first part of the concert, there is no sweat and the artist will look fresh and full of energy. These are the perfect moments for the power shots, the shots that will be used in publications, magazines, etc.
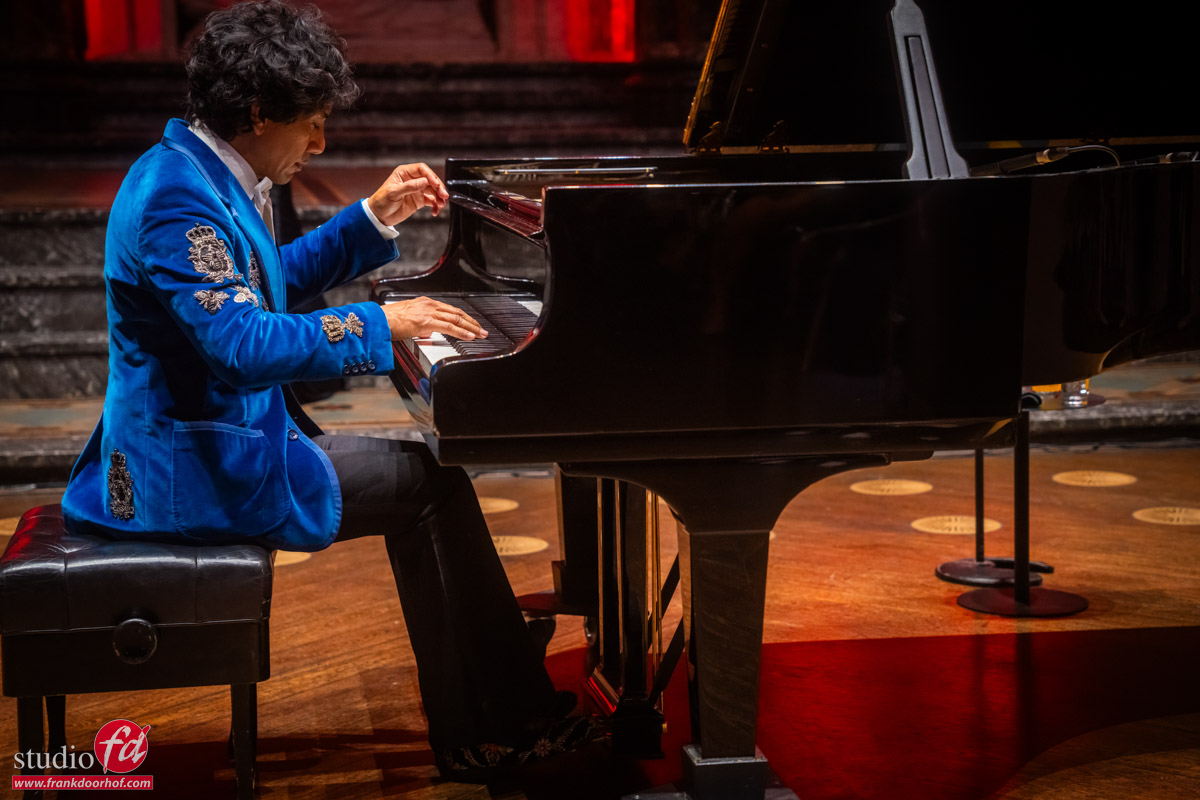
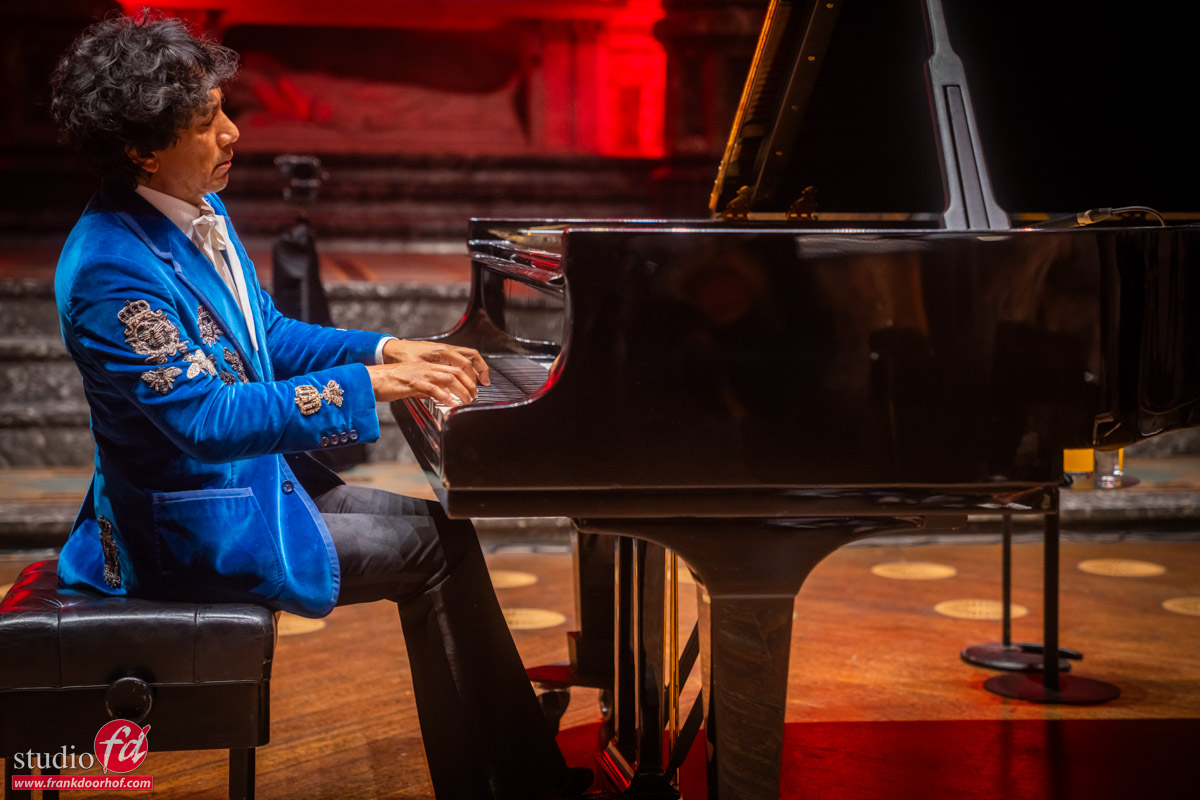
Personally, however, I love the close-ups in the second part of the concerts (I know Wibi prefers the “fresh” ones). For me, the emotion, the sweat, and the expression have so much more power. So I always shoot both 😀

concert photography tips and tricks

concert photography tips and tricks

Another one of my concert photography tips and tricks: take a close-up

concert photography tips and tricks

As you can see, it’s pretty “static”.
There are some different positions of the hands, expression etc. but overall it’s dare I say it… “pretty boring”.

So let’s spice it up.
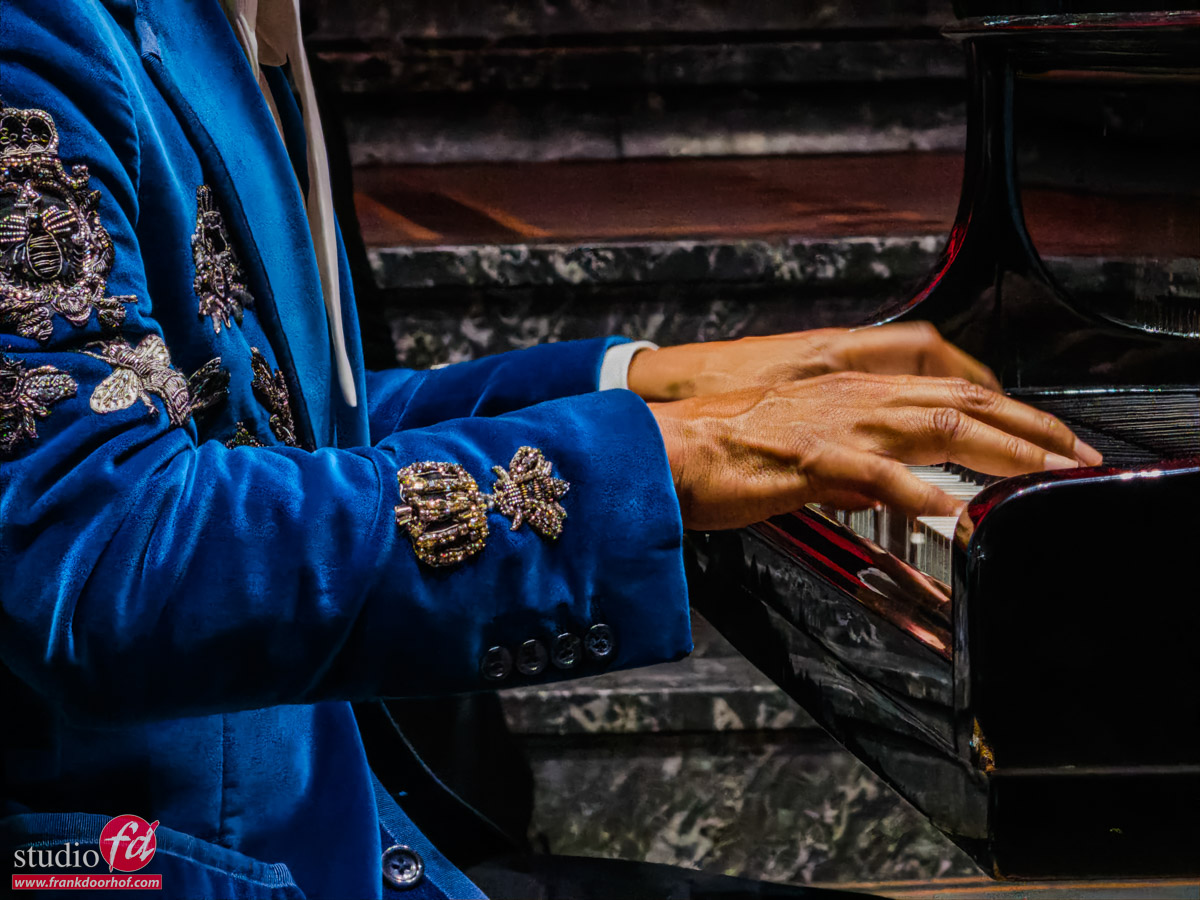
One of the tricks is extreme close-ups.
In this case, I’m using the 10x zoom on my iPhone to try out the new Adobe camera.
And I’m pretty impressed.
The images look great, but in reality, the lighting was pretty tricky.


More concert photography tips and tricks

It is better for me, draws me more into the story, but it doesn’t show the location.
So, that’s why I love the flip-up screens.
I’m shooting a lot in live view mode both on location and in the studio.`

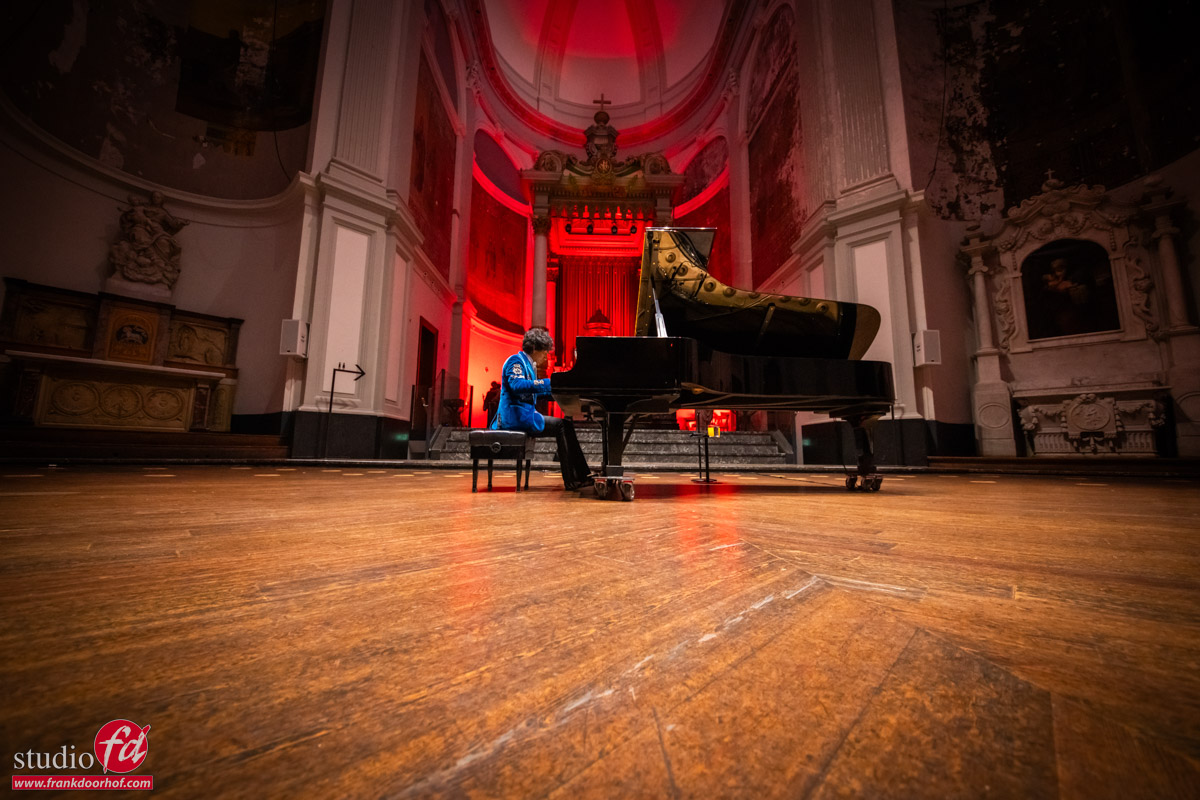
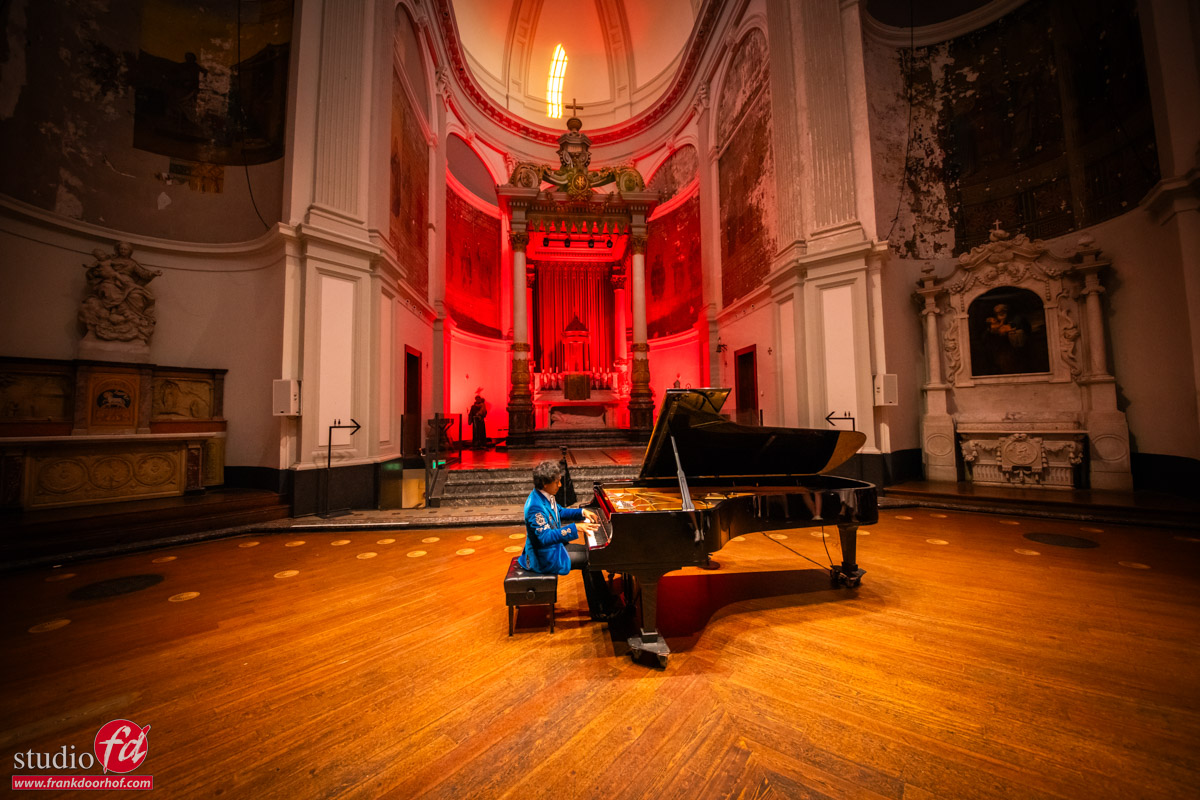
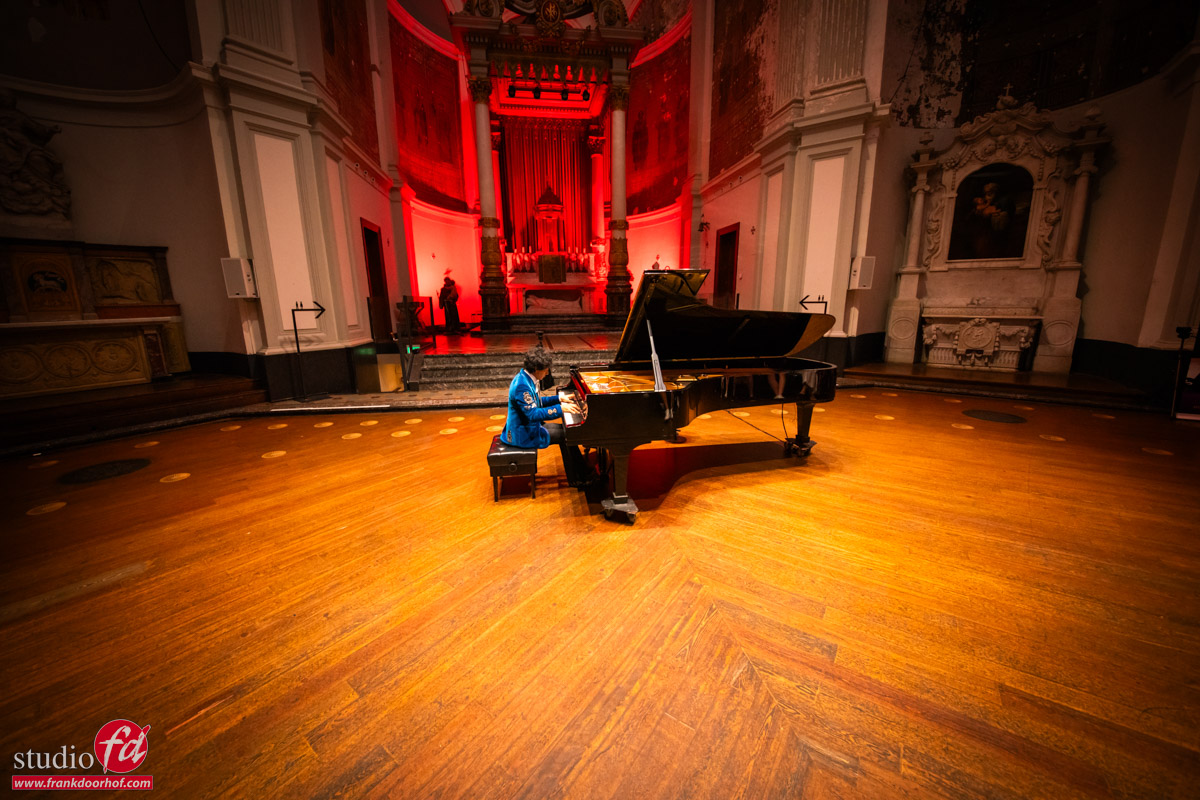
In the studio, it helps a lot that you are automatically shooting from a lower angle, but it also makes eye contact with your subject a lot easier and more “friendly”. On location or in situations like these, I love to use extreme angles. And when using a wide(r) angle, you can really play with the location and “distortion”.

Let me explain.
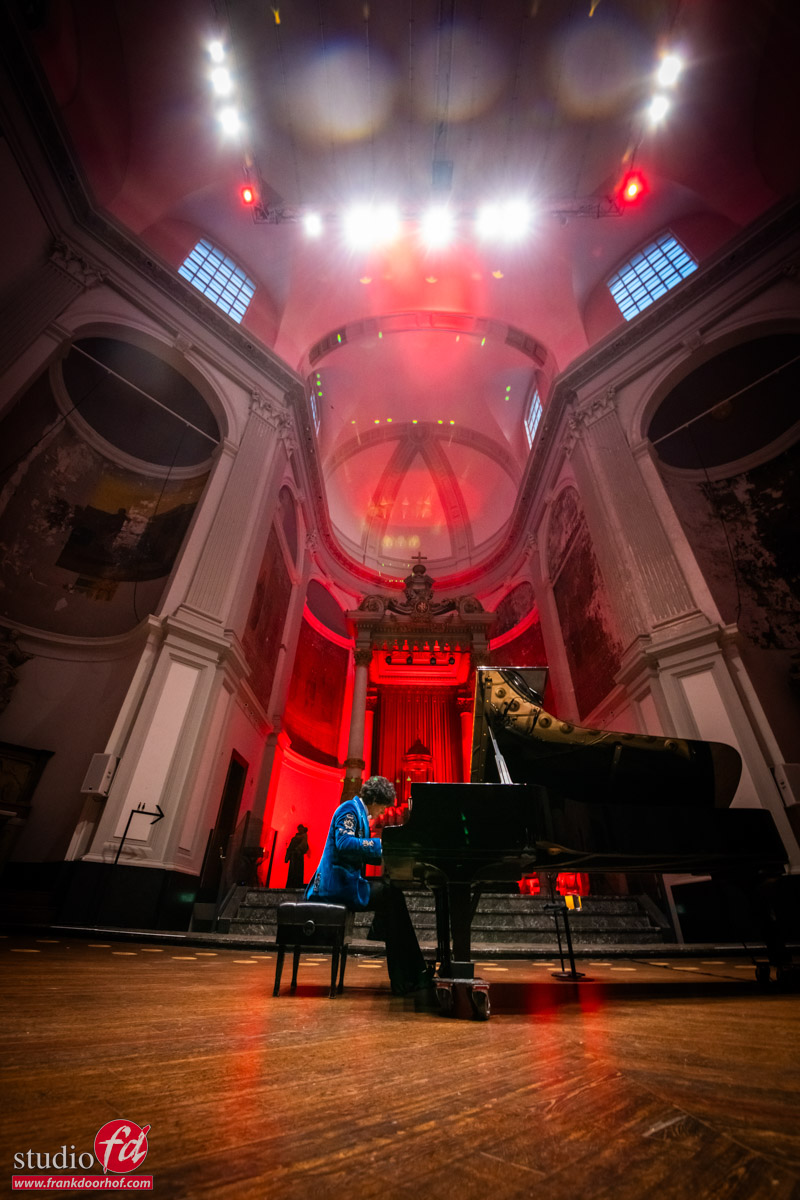
These three images are all shot from the same location, but due to the wide-angle effect, all the angles are very exaggerated, creating an awesome, almost surreal look.
The added advantage is that you can get the whole scene in the frame.

concert photography tips and tricks, shoot from a very low angle

So, depending on where you leave the space, you can play with the look of the scene.
But how about going even more extreme?
I think the following images are some of my all-time favorite concert images.
And the trick was just having loads of luck with the lighting in the ceiling and finding it in the corners of the lens.

concert photography tips and tricks Wibi Soerjadi

Conclusion, concert photography tips and tricks

I hope you enjoyed the behind the scenes look during this special concert and how I got the shots.
All images are almost straight out of the camera.
I only do slight adjustments in Lightroom with these kinds of events. Although in some images I took out reflections in the piano from the audience, which in this case were very distracting.

All events are different, and all clients/artists will have different requests and demands.
The best advice I can give is “behave like a guest that can be kicked out at any moment”.
The audience paid for a relaxing evening, and having a photographer walking around, using flash, tripods, and coaching the artist is, of course, not done. I always try to move between pieces and always put the audience first. I guarantee you that if you follow that simple rule, people will let you do your work and probably even help out. I’ve been offered seating more than once when I was kneeling on the floor or when people were helping out with cameras. It’s all about your behavior, although some people will always find something to complain about.

As most conclusions go, we have to end it.
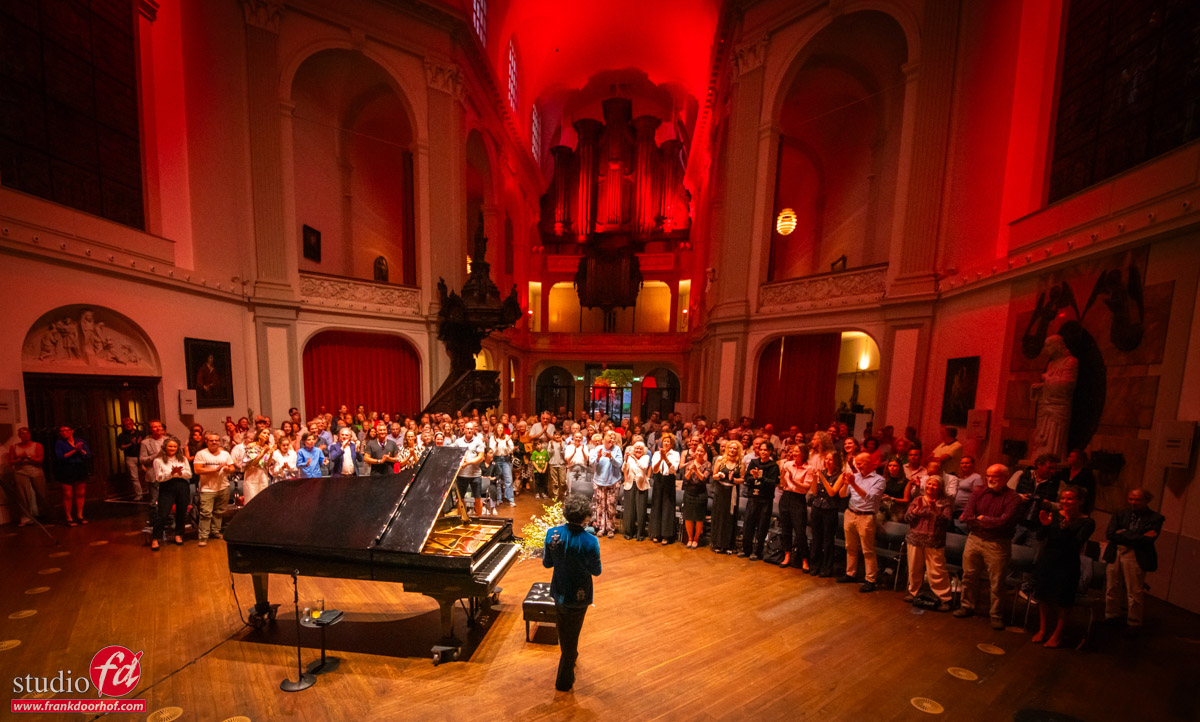
So for the last shot, I ran back up on the stage and used wide-angle shot to get in the audience and Wibi.
And see there… also the red in the back is now much more noticeable.

concert photography tips and tricks. applause at the end of the concert of Wibi Soerjadi in Amsterdam


Read another blog about concert photography (also with Wibi Soerjadi)


Want to join a concert of Wibi yourself? Check out the Wibi Soerjadi calender 


https://frankdoorhof.com/web/wp-content/uploads/2025/07/Wibi-Concert-De-Duif-323-June-27-2025.jpg 722 1200 Frank Doorhof https://frankdoorhof.com/web/wp-content/uploads/2015/03/studioFD_Logo-1FV.png Frank Doorhof2025-07-03 17:00:432025-07-03 17:56:49Wibi Soerjadi at the Duif in Amsterdam
Page 1 of 212

Newsletters

Subscribe to our newsletter for updates, discounts, and much more

English news letter
Dutch news letter

Interesting links

Here are some interesting links for you! Enjoy your stay :)

Snel naar

  • Blog
  • Learning with Frank
  • News etc
  • Reviews
  • Shop products & books
  • Contact

Contact

Studio Frank Doorhof:
Constructieweg 8
8305 AA Emmeloord

The Netherlands
+31-6-14522327

Or Email : info@frankdoorhof.com


© Copyright 2000 - - Frank Doorhof
  • Link to Facebook
  • Link to X
  • Link to Youtube
  • Link to WhatsApp
Scroll to top Scroll to top Scroll to top