As you all know we are working on figuring out if the iPad pro can be a full replacement for a laptop. Well let me rephrase that, it will never fully replace a laptop, but let’s say I want to see if for travel we will be able to leave our laptops at home and do everything on an iPad pro.
So what do we do?
Well first off it’s the simple things like Email, browsing, media consumption, reading comics/magazines, playing games while flying etc. and I can say… well as expected no problem at all.
But I also do a lot of video editing, and this was a bit of a challenge on the Android tablet, although there is a good file system (please hurry up with iPad OS Apple) there are no real killer apps for video, of course we have Powerdirector which is pretty awesome but also pretty limited, I could do my videos on it but only if I’m willing to cut corners, which in all honesty is ok for once but certainly not for every video. Project Rush is awesome but only on Samsung phones, so this actually pushed us towards the iPad pro, now I have to add that although I love project Rush, when travelling I need a bit more (seeing I can’t finish projects in Premiere when I don’t bring a laptop) but luckily there is LumaFusion, and oh my… if there ever was a reason to run out and buy an iPad pro it’s LumaFushion, I can’t really express in words how awesome this app is, think about everything you want from a good video editor and LumaFusion has it, and editing with touch…. it’s just awesome.
Ok but today it’s about something else.
And it’s actually about something that will be easier soon, but still I wanted to give you this tip.
The Lightroom CC problem
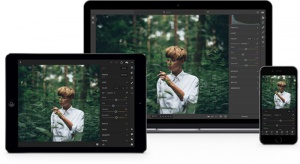
Lightroom CC is a game changer, let me make that a bit more clear it’s a GAME CHANGER… sorry for shouting, but it really is. The moment Adobe released Lightroom Mobile I was intrigued to see where this would lead, and in all honesty it never went anywhere, it was a total disaster, this might sound harsh but I’m totally honest it was just unusable due to the fact you were very limited to what it would hold picture wise. Lightroom CC changed everything, now you can really work on your files both in the cloud and locally and it’s just a very well thought out application. I still miss some things but I’m pretty sure Adobe will add this to the future releases.
But it’s not all perfectly.
Let me just walk you through the frustration and how I solved it (well pretty much). I’ll give you 3 solutions that will hopefully fit everyone.
Do remember that when iPad OS is released, it will be a LOT easier.
Normal situation
We shoot outside and come home with 300 images.
Downloading the images on the iPad pro is no problem, I use a 512GB version so for small trips this is more than enough to hold all the images, but… when shooting in cities like New York for a week it hardly is enough (I really shoot a lot of images on the streets)
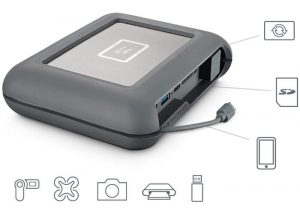
The DJI Copilot is at the moment a must have when you want some serious work done on an iPad (pro)
So my idea was the following
Use the DJI CoPilot to empty the card to let’s say folder “Day 1”
Now import all the photos into Lightroom CC and….. oh wait this is Apple.
First import all the photos into photos, and than import all the photos into Lightroom CC.
Now star/flag the ones I want and delete everything else.
Now edit the files and just leave them on the device in the album “Day 1”
Day 2 comes and we do the same.
Empty the card on the DJI CoPilot.
Import, flag, delete, edit… done.
Well yeah, sounds great right?
When I’m home I just copy all the days with all images from the DJI CoPilot to my desktop.
Now sync up Lightroom CC and choose “Save original + settings” and just copy these OVER the files that are already on the desktop.
Now when you sync everything up in Lightroom Classic it will import all the images and will show you the flagged images including the retouches so you can save them as TIFFs, or just leave them there, whatever fits your workflow.
Sounds great right?
Well yeah it is, it saves you a lot of space on the iPad pro, all your files are save on the external drive and the retouched images are in the cloud, or on the iPad pro when there is no internet to upload, easy peasy awesome….. well not quite.

The Apple issue
When you delete all the images in Lightroom CC that you did not select, it doesn’t delete those images from Photos (film roll). So you have a few options to work around this.
When you don’t shoot a lot of images
Don’t
If you only travel for a weekend or don’t shoot a lot, no problem at all 512GB is a lot of space so you will not have any issues at all.
Just backup everything from the iPad when you’re home and you’re done, and with Lightroom CC you don’t even have to connect anything it just syncs everything.
When you shoot a lot
Creative Cloud storage is not free, and it isn’t much in most cases, for me it’s 100GB sounds like a lot, but if I can fill a 512GB iPad… well do the math (it’s not that hard). So we have to find a way around.
Solution 1 (not perfect)
Import ALL photos into Photos (filmroll)
Now just browse and select everything you like with a hart, this will put it into the favorites folder
Now it’s easier to select all the other images and delete them so only the favorites stay, import only the favorites into Lightroom CC and you’re done.
This is already a very fast workflow and works pretty well. But we want more speed of course.
Solution 2 (pretty cool)
Import ALL photos into Photos (filmroll)
Now download the free app called “Slidebox”
This is a really cool app.
When you open the app you can “tinder through your images”
Swipe left and right to go to the next or back
Swipe UP and you thrash an image, selecting the keepers this way is incredibly fast, and Slidebox saves your trashcan so after your selection process just look in the trashcan before you say “delete all” and you’re all done.
Now import the left over images into Lightroom CC and… voila.

Solution 3 almost perfect, well at least it’s very close
On the road just empty the cards on the DJI Copilot
Now via the browser app from DJI create the folder structure and copy everything where you want it, do remember that renaming is not possible in batch (yet)
Now instead of creating the selection in photos, just import everything into Lightroom CC, but put your tablet/phone on airplane mode (unless you have a steady and fast internet connection).
Make your selections and only keep the images you like (the 5 stars)
Now Lightroom CC only has the selects
Take your device out of airplane mode and let Lightroom CC sync to the cloud
It will now upload all the files that are still in Lightroom CC
When this is done.
You can now safely remove all images from your photos app (remember the full res originals are now in the cloud)
When you’re home copy everything to your Lightroom Classic locations, don’t rename yet
Now sync Lightroom Classic with the cloud
Drag the images to the same locations as the RAW files
And now you can rename everything but keep the edits
This workflow is the fastest and saves you a lot of space on your tablet. The only disadvantage is that first you have to trust the cloud (remember the originals are still on your drive so the worst that can happen is losing the edits) and when you’re without wifi or connection you can edit in Lightroom CC but not in an external program for the simple reason the original files are not on your device, only smart previews, unless of course you set it up that Lightroom CC saves the original files, but that will cost you space.
Conclusion Photography workflow
The main problem with all Apple products like iPhone, iPad etc. is that you don’t have a proper file system, when I look at what my Android devices do it’s so much easier to work with larger file amounts, you can just open with an app from every directory where on the iPad I often have to move files from one folder to the other via via (it’s not user friendly and the chance that you make a mistake is huge), however with the announcement of iPadOS this will all change (September), after that update you can just use external drives and work from those and you will have a proper file system, I just hope the apps will also support this…. but I guess productivity apps like LumaFusion and Lightroom will do this without a doubt.
Now when you read the solutions you might think it’s a lot of work… but trust me it isn’t.
IF there is a good file system it will be faster but in all honesty solution 2 is a very fast way to work around this and solution 3 is using all the sync options from the cloud which makes that one actually my favorite, the only thing you have to keep in mind is that you don’t rename your images before the synced images and the ones from the drive are all together in one location.
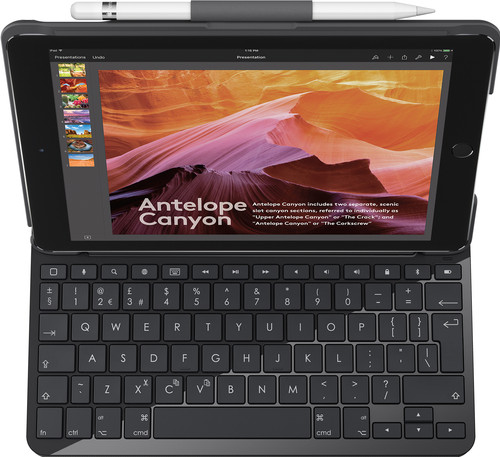
A keyboard case is a must if you want the iPad to replace a laptop. I’m using the Logitech slim because of the back lit keys.
Conclusion on the iPad pro so far
I get a lot of questions about what I think about the iPad pro so far.
Let me state by saying I’ve always been an Apple fanboy, and although I didn’t own any Apple products anymore I still followed the news and keynotes and it actually really hurts me seeing Apple has lost it’s way to be attractive to creators like me (people that are willing to spend some money but don’t have a money tree in the garden) however with the arrival of iPadOS this might totally change for the iPad line up, especially the Pro line up, let me quickly explain.
Video editing
The limitation is without a doubt that you work with apps instead of full programs, on the other hand…. isn’t an app also a full program?
When I look at for example LumaFusion (coupled with a good filesystem (and this is really key)) I can only say that although it’s an app on a tablet I can do the same things I can do with premiere or Final Cut, ok this is not true… let me say it like this, I can do everything I need. And believe it or not, but editing on the iPad pro is actually faster than on my Dell XPS 9570 i9 with 32GB, yep I hear some people going like “Really Frank, come on be serious”, oh I’m very serious (almost to a point it hurts). I’ve edited a vlog the other day including some H265 drone video material, my normal 4K material I can edit on the Dell without using Proxy (as long as I don’t grade), but H265 drone material…. well it doesn’t every play on the time line on 1/4 resolution, if I don’t use proxy it’s unworkable, and rendering afterwards takes a long time.
On the iPad pro believe it or not, drop it on the time line, grade as much as you want and it’s buttery smooth, I actually didn’t notice a difference between the normal 4K H264 and the Drone 4K H265 material, and that boys and girls, ladies and gentlemen is SERIOUSLY sick and impressive. Rendering same story, 10 minute 4K vlog in the highest quality renders in almost real time, 10 minutes and 5 seconds….. wow. On the Dell this is app the same but again that’s one of the fastest laptops on the market as far as I know.
Photography
When I look at Lightroom CC it’s perfect for mobile workflows, same with Project Rush although at the moment I prefer LumaFusion because it has more options that I need (like speed ramps). Also with Lightroom CC I can’t really say I’m feeling I’m working with a crippled app, and let’s be honest when the whole iPad “pro” started that was what you got, shameless promoted very limited apps that in all honesty couldn’t be take seriously. If you can’t export files in anything else than HD JPGs I really can’t take an app seriously, unless you’re an Instagramer maybe.
I can’t wait for Photoshop to arrive on the iPad Pro, for the time being I’m using Affinity Photo and in all honesty I was blown away by what it could do, but…. also a bit dissapointed about the speed, I tried to create a 21 file panorama from my Mavic Pro 2 (Hasselblad version) and this took a staggering 20+ minutes…. yeah serious, my laptop does it in under a minute in Lightroom Classic. Seeing how fast the iPad pro edits video there must be some bugs in Affinity because this is really slow. On the other hand I’m not a programmer and it could very well be that the limitation here is actually the 4GB internal memory of the iPad pro. Overall Affinity is relatively smooth on the iPad pro even with 60MP files it all goes very well, inpainting (a sort of content aware fill) is sluggish on larger areas and far from what Adobe does with Content Aware Fill but…. for an app on a tablet I take my hat off to Affinity and take a deep bow, this is a pretty good and solid photo editor that actually gives you everything you need to retouch.

Doodling or serious drawing
What can I say.
The new iPad pro (my previous one was a 2015 model) has a much better Apple Pencil experience, mostly because you have a different screen and now there is hardly any space between where you touch the glass and where you draw, now in all honesty I draw ok but not good enough to even notice that, but I can imagine that real artists see this as a huge improvement. Same for the insane 9ms lag….. I already thought the 20ms was insanely fast.
For drawing I highly recommend Adobe of course but also check out Procreate or MediBang Paint, especially when you’re into Manga you will love the last one, but Procreate is for me the allround winner, start drawing with it and I can guarantee you you will be hooked. The Apple pencil and the iPad pro are a dream for people that love to draw (I guess).
What’s missing?
A few things.
Somehow I couldn’t get my Powerpoint presentations to run, I stored them all as odb files (Open Document files) mainly because I want them to work in all situations also when I have to change laptops with someone, but this was apparently a mistake. Everything about 300MB wouldn’t open in both Keynote and Powerpoint. Solution was to open it on the desktop, save as PPTX and import that into Keynote and save and voila… now it all works. I just need to find a good remote to control Keynote.
Filesystem we talked about and that is coming, and I hope that solves my other problem.
With tethering I can use the Sony app, which works like a charm, it’s fast, it’s stable and it does exactly what I need, showing images on the screen when I shot them within a second. And I can also switch to Live View mode so students can see what I see and how I frame a shot. BUT…. there is a huge problem with wireless tethering. Although it works at home, in the studio or out in the open field, don’t ever try it on a tradeshow floor and expect it to go flawless, yes it can work, but most of the time it will be flaky or you have to stand really close to the tablet. With iPadOs and the opening up of that USB-C port I really hope we will soon find a solution to shoot tethered into lightroom CC via USB, that would really be the ultimate solution.
What’s so cool?
Well let’s keep it short ok?
When editing video and photos on my laptop the battery runs down fast and I mean FAST.
On the iPad pro of course the battery runs down faster than when surfing the web but in all honesty I’m stunned by how long the battery actually lasts during heavy loads, if I remember correctly editing the vlog took me about 45 minutes, rendering took me another 10 and I believe I lost about 15-20% of my battery life, that’s insane. This makes it 100% possible to edit on the plane and don’t worry about losing your media consumption tablet when you’re done.

add the amazing Omnicharge to the package and you will “never” run out of juice on location.
See my review here : YouTube review for the Omnicharge
But there is more to that.
When you run on the battery on a laptop you are almost forced to use the on board GPU which is VERY slow compared to the dedicated GPU which you can use when on power. And when you’re running a tablet like the Surface book 2 (without the base) you don’t even have the option to force the dedicated GPU plus the battery will die incredibly fast. Now in a hotel that’s not a big problem, just charge, but on a plane you can often charge a tablet via USB (in almost every seat) but power for a laptop…. well not so easy unless of course you fly business.
And finally…..
Oh my……
As you all know I love playing guitar, and recording yourself is of course possible on Android and on iOS, but writing your own music is a different story. Garageband from Apple is one of those genius programs, you can’t really understand what I mean unless you’re a musician or ever tried Garageband, I can literally find NOTHING on Android that comes even close, and yeah I really tried a lot of apps, nothing compares to Garageband, the autoplay instruments, awesome loops, style drummers…. pffff I get so excited by writing this I want to play and record something, it’s so addictive, and the end result is fully usable.

Garage band alone (coupled with an iRig HD2) would be a reason to invest in an iPad
Of course there will be people that say “just bring a laptop, I can’t understand why you would spend money on a tablet”.
Well I have a very good answer for that (I think).
My laptop that I need for video editing has to be specked out, so it retails for app 2800.00 Euro.
The iPad pro I now use is the 11″ 512GB version and retails for under 1500.00 Euro, including a keyboard case and the Apple Pencil.
Plus when travelling I don’t need to bring : the Dell, the powersupply, my Wacom Tablet, Mouse. Which in all honesty saves me not only a lot of weight but also stuff to carry around and take care off. Add to this that I never worked on my laptop when flying or on a bus, but the iPad you just grab from your bag and you can work on it. It’s a totally different experience.
I will post some more updates when you guys are interested, and feel free to ask me questions about problems I encounter or solutions. I’m having a boat load of fun to be honest figuring everything out, and it’s painfully clear that the iPad pro was NEVER a pro device, but with the filesystem in iPadOs it will be.
Like this:
Like Loading...











































You must be logged in to post a comment.