Tag Archive for: photographer

On location photoshoots : how to kill the ambient light part I

Locations are awesome


But what if they are not? Well, it’s up to you to make them awesome.
Sounds difficult?
Well, it can be, but with the proper lighting and lighting techniques you can create stunning images in locations that are far from awesome. Killing the ambient light is one of those techniques.

Workshop “On location in Emmeloord”

During this workshop, we scout locations close to our studio that look uninteresting but have the potential to become awesome. This is a great workshop to get more secure when working for clients in locations that are a bit less inspiring (or in other words 50% of the time).

During the workshop, I explain the techniques but also tried to create something different in each location.
For this workshop the model was Nadine, and as you can probably see she’s is pregnant so that was a great option to also shoot some pregnancy shots of course.

Today one of the sets from this workshop.

I’m using our Geekoto strobes on HSS in this video.


And, the final results

killing the ambient light

We took this picture during a sunny day and killed the ambient light

killing the ambient light


Day2Night

Killing the ambient light is also called Day to Night (Day2Night). Pictures are taken during the daytime. But it looks like it was taken at night. A lot of my students are interested in this technique. And I always try to incorporate such a scene in the workshop outside.


In this video I went to Times Square in New York, and I’ll give you some tips to look like you took the pictures at night

Check out another video on location with Nadine ad styling of course 

We also did a workshop outside with a Tesla car and model Lois 


Audio is one of the most important things in video

When the audio is bad I often stop the video

Honestly, I can watch a video with imperfect image quality, but if the audio is bad, I’m out. Audio is one of the most important things in video.
For years I’ve been using a Sennheiser wireless lavelier microphone. I always bring this to shows and use it during almost all videos and live streams. And it just sounds awesome and never fails me. But it’s expensive. And for most starting creators it will be overkill, plus in all honesty, you always have to put the wireless transmitter somewhere. It’s not a super small device. Over time I’ve had several (expensive) cables replaced.

Over the years I’ve tested several alternatives from all kinds of brands. And although some are really nice they never really pulled me away from the Sennheiser.
On most cheaper mics my voice sounds like it’s coming from a can without any bass and harsh highs. But they do have something really nice and that’s size and connectivity.

Audio is one of the most important things

My Sennheiser set never lets me down

We use different audio devices

The time that you shot video on a handycam, photos on your photo camera, etc is over.
Nowadays we use a combination of capture devices, sometimes we shoot behind the scenes or B-roll with iPhones, Osmo Pocket or a Sony A7RIII. So when you buy an audio system you have to make sure it will work on all your devices, and as easy as possible.

I think we found the solution, and I love it.

The Saramonic Blink 500+ Wireless Audio System with 2 mics

Audio is one of the most important things

The Saramonic Blink 500+ contains one receiver unit and two wireless microphones.
And that immediately makes it a very interesting set for creators. It now becomes super easy to quickly interview someone on location (or in the studio of course). The connection is made super fast, as soon as you take the microphone out of the case (which charges everything) it is almost immediately connected to the receiver. So no more taking the lavalier off and using it as a microphone to interview someone. Just quickly give them their own mic, which also makes editing audio after the fact much faster and easier.

As mentioned before we need something that can be easily connected to all the devices we use, and the Saramonic doesn’t disappoint there.

Audio is one of the most important things

“One Size Fits All”

In the box, you will find different cables and connectors, and in all honesty, I think they cover an impressive array of connections.
It works just as easily on your iPhone as on a console and all without changing settings, just choose the right connector.

Always charged (well almost)

Nothing is more frustrating than empty batteries.
The Saramonic microphones and receiver are stored in a nice case that is both sturdy and not too big. So it will fit easily in most camera bags or even your jacket pockets. The case keeps your devices charged until you take them out. So as long as you make sure the case is charged you know you will always have a full battery when you go live. Now the first time you think about a built-in battery it might be a bit scary. With the Sennheiser, I can easily switch batteries when they run out, but with a built-in battery…. well when it’s empty that’s it. Luckily the battery time with up to 20 hours for the microphones and 16 hours for the receiver it will cover most, if not all activities.

Going the distance

A few of the sets I tested where okay when I stayed close to the receiver. But several mics became a lot more noisy or flat sounding when I walked further away from the receiver. And most even lost connection when I went to the makeup area, which is in a different part of the studio. The Saramonic promises 150 meters, but to be honest I always take those numbers with a grain of salt, and mostly it means in the open field. I didn’t test that but I did walk to the makeup room and didn’t hear any difference in audio quality, and also no extra noise, which actually surprised me a bit, but in a positive way 😀

Where to put it your mic?

We need to place the microphone somewhere of course. With the Sennheiser I’m using a small lavalier microphone, which is great because you hardly notice it. But the disadvantage is that you also have to put the sender somewhere, and that is in most cases my pocket. With the Saramonic the microphone is larger than my lavalier but it has a huge benefit. You can clip it on your clothing, but often it happens I’m wearing a sweater where it’s not really handy to clip a microphone on. And in that case the Saramonic has you covered too, if you don’t want to clip it you can also use the magnet.

Some key specs

Of course, it’s always important to get the specs right, so here we go.
– Up to 150 meters of wireless transmission.
– Separate noise cancellation control – 48 kHz HD audio format retained.
– Wide-range 20 Hz – 20 kHz frequency response – delivers exceptional high-quality sound.
– Low-cut filter (75 Hz / 150 Hz) – cut off low-frequency noise from common.
– Up to 20 hours of operating time for a transmitter and 16 hours for a receiver.
– Comes with a windproof capsule – minimize unwanted wind noise.
– Attach the transmitter to your clothes with the included magnet.
– Receiver’s 3.5 mm headphone output – monitor your audio in real time.
– High-resolution OLED display – see vital information at a glance.
– Mono / Stereo Safety Track output setting.
– 3.5 mm TRS analog output, USB-C, and IOS Lightning digital output – universal compatibility with cameras, smartphones, and computers.
– Charging case included – make the kit easy to carry on.

In practice

I’ve been using the system for a few weeks now and can honestly say that I love it.
I find that I use a lot more than the Sennheiser. With the Sennheiser I regularly got tangled up in a cable or had fights with the transmitter during shoots. Plus when filming on location it was very uncomfortable to be always “mic-ed” up and taking the lavalier off when interviewing someone. The Saramonic solves all these irritations. We have it with us in the photo case. As soon as we want to film something it’s connected to the camera and I clip on the mic. Give the other mic to the other person and we’re ready to go. Add to this some noise reduction (although I like to edit audio after the fact personally) it’s very nice to have.
I’ve been using the system in the last episode of Digital Classroom in a live setup and it performed without any problems for the full broadcast. We didn’t lose connection once.
The problem with the live broadcasts is that it always compresses the audio so for the second part of the review I’ll create a video in which I show you the Saramonic in action with the proper quality.

Conclusion

When you want a proper 2 microphone setup that is super easy to use and works without any problems on most capture devices, gives you a good audio quality and some extra features for a very reasonable price. I would highly recommend you check out the Blink series from Saramonic, it might be the perfect solution for you.
I’m not paid for this review. We met the guys from Saramonic at a tradeshow. They gave me one of their demo units to test out.
The review was not seen by them before release and is 100% my personal opinion.

Directional light is so much cooler

With directional light, you can really make your model jump out

We recently filmed a brand new class for KelbyOne with our model Claudia.
The video is all about using one strobe and how, by changing light shapes and angles, you can still create totally different looks like using directional light.

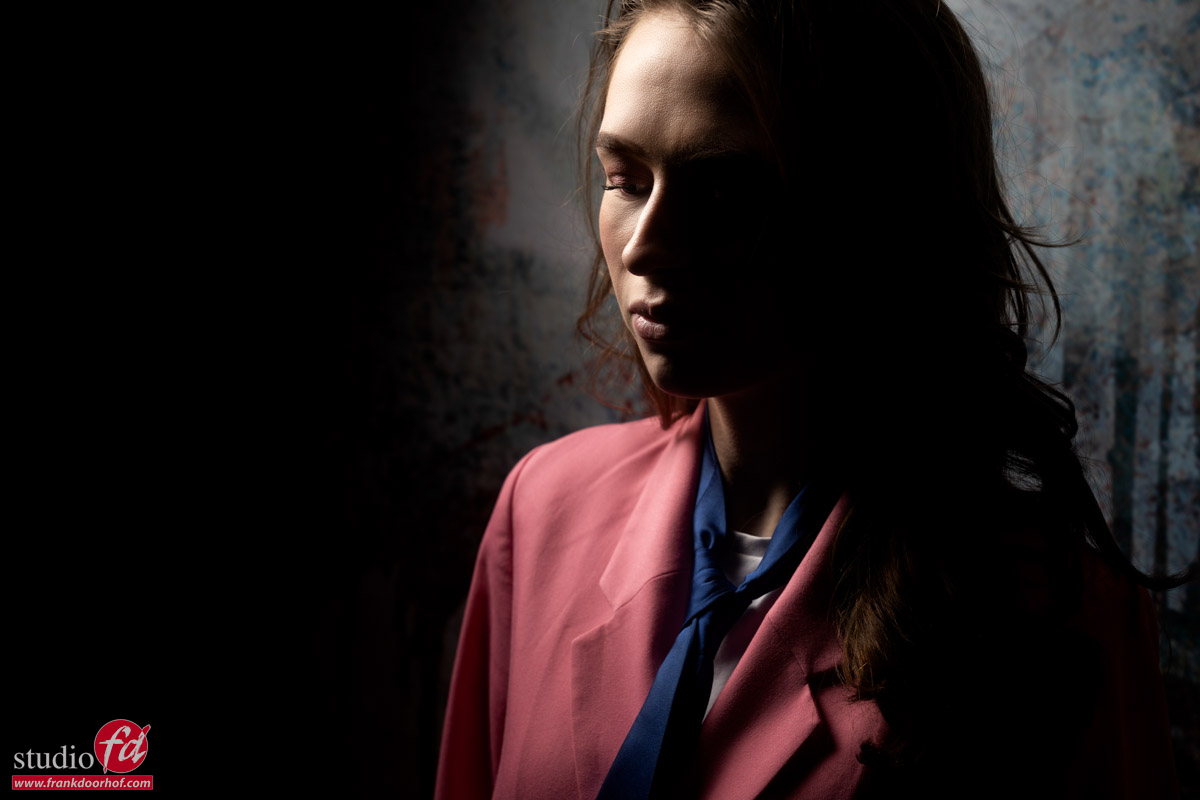
Today I wanted to show one of the sets in which I show one of my favourite setups.
In this case, I’m using my main light under an angle from above aimed down.
Because Claudia is wearing glasses I don’t have any problems with shadows under the eyes, or the eyes not getting enough light so I can maximize the direction of light.

The cool thing about this kind of setup is that if you move around your subject the look changes dramatically.
For the mainlight you can use a small softbox like our Geekoto Quicky or for example the Frank Doorhof Rogue Flashbender in striplight configuration.

directional light

Although the whole class is about using one strobe. In this setup, I decided to break that rule and add one more strobe with a blue gel.
In this case, I’m using a blue gel from our Rogue magnetic system.
This is an awesome technique in which you first create a focused light pattern on for example the face of the model and make sure the rest is as dark as possible. Now use the second strobe with the gel on a lower setting than the main light and you can get the effect you see below.

Of course, you can experiment with the output and colors.

directional light

Want to see the whole class?

Of course you want 😀
visit www.kelbyone.com for all my classes.


Want to visit a workshop?

If you think “that’s for me, I would love to learn more”
Then visit photography-workshops.eu for the Dutch workshops.
But if you are not living in the Netherlands or don’t speak Dutch we also have other options.
If you let is know 2 weeks in advance I can teach the workshop you want to visit in English.
Or if you can’t travel to our studio we also now offer the option to get a full 1:1 experience with 5 different camera angles, lightroom/Photoshop view and a talkback channel, you also get all the raw files and retouched results from the workshop. Visit our online workshops page for more info.

How to murder your Husband, a Halloween Frank Doorhof Special

It’s Halloween so it’s time for horror

When it’s Halloween it’s time for some cool images of course.
We already showed you the video this morning but now it’s time to see those gory photos in full glory.
I hope you enjoy them as much as we did creating them, and trust me this was one of those workshops where the group totally went for it, I can’t wait for you guys to see the images popping up on their timelines 😀

But in this blogpost… well it’s time for my images.

DISCLAIMER
if you are easily offended don’t read the blogpost, it is Halloween so everything is in good fun of course.

Story time

Photography is paining with light, we all know that expression but for me personally it’s also a large part story telling.
You can do this with sets, lighting, expressions, props etc. but also with adding some special effects in Photoshop.

For this story we knew before hand it would rely heavily on using Photoshop and for me also Boris FX (totally love their optics software). That doesn’t mean however that you can just shoot it all against a blue/green screen of course.
For some images we needed smoke, and besides that I always try to shoot my images already in a setting so that I can use them if my Photoshop skills are not what I thought they were 😀

In this case, I think the images turned out pretty well.

So let’s start.

How to murder your husband

Of course we all love our partners, but what if you can’t stand your husband. And after years of hiding your anger one Halloween night it’s enough. You can’t face the truth yourself so you decided to go to the cellar and put on the mask.

“Honey, can you come downstairs please I need some help”
Yeah help you don’t really need right?
She already got something heavy and put on her wedding dress (because you can see the blood better, and it was more dramatic than jeans and a tanktop).

When the husband comes down the stairs he started laughing “What are you wearing, lol you think it’s already Halloween dummy”

“YES IT’S HALLOWEEN”
And that’s the last thing he heard besides the blows hitting his head.

After the fact she looks at the lifeless body and realises something terrible,….. it’s going to stink like crazy so we have to get rid of the body.
Luckily there is a forrest close by, and the drags the body behind her to a place where no-one will ever find him.

After she dug the grave it was time for the “till death do us part, part”
She took of her cheap wedding ring he got at the pawnshop in Vegas and after 13 years still read the name of that other woman you never met.

Closing up the grave she felt liberated, happy but… also a little bit sad. She did ruin a perfectly great wedding dress.

The grave is closed, the ring is gone, the wedding dress is soaked in blood (this will be a huge cleaners bill).
But one thing still has to be done.
One flower for total liberation

This is how the story end… or does it?


yes it does for now.
But I still wanted to share one more image from this workshop. It was actually an image to test a setup but I still liked it enough to include it into this post.