Tag Archive for: lightroom

TourBox Lite, this will change your workflow forever

Does the TourBox Lite change your workflow?

Last week we received the TourBox Lite for a review. In this blog, you’ll read how it changed my workflow.

Workflow importance

One of the things I always teach during workshops is workflow.
It might sound boring but having a proper workflow is essential to get not only consistent results but also to simply save time for other important things in life 😀

When we talk about workflow we often talk about settings and the order in which you edit in Lightroom, Photoshop, or your favorite editor.
But there is a lot more.

With the release of the iPad Pro I (and many with me) thought the world would change forever and we would not need laptops anymore… well a few months later I sold my oversized iPhone and closed that chapter. But many years later I bought the 11″ iPad Pro and that changed my workflow forever.

iPad Pro 12.9″

At the moment I’m using my iPad Pro 12.9 for almost 99% of my sessions in combination with Cascable to shoot tethered, and let’s be honest, especially on location, you can shoot all day with the iPad, it has more than enough light output for outside, it’s well protected against the elements and… well it’s not about the iPad today, but it’s a game changer. The iPad Pro is an important part of my workflow.

Retouching with the iPad and a laptop

For me, most of the time is spent on retouching. Like most of us, I love taking photos but retouching… well it has to be done. Don’t get me wrong it’s a lot of fun in most cases, but in a lot of other cases it’s something you have to do and the faster it can be done the better.

In the studio (and at home) when I work in a static setup I use my MacBookPro 14″ M1Pro connected to a 32″ BenQ monitor and retouching is done via an XP-pen drawing tablet (with screen), which works like a charm. But I have to sit behind my desk.

Sometimes I also want to edit on the couch. When traveling, in a hotel, and sitting behind a desk is not always ideal. Having a laptop with a touchpad is doable but not for everything. You just need more control sometimes, especially with selections or skin retouching.

Luckily Apple has a great solution for this.
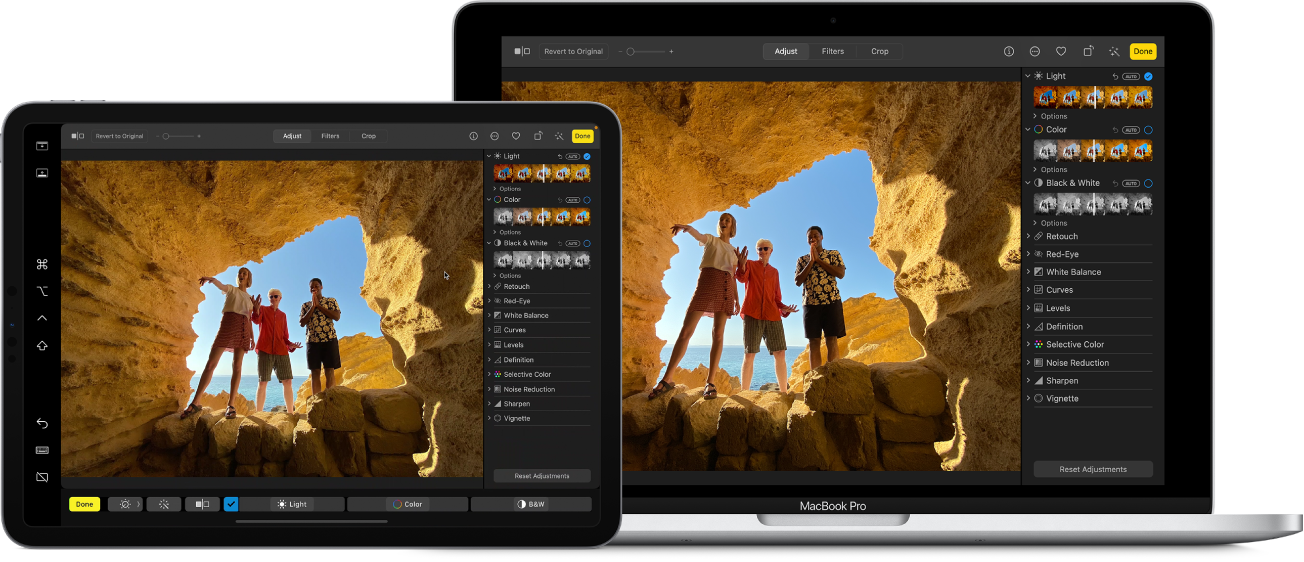
You can connect your iPad to your MacBook and use it as an input device. In fact, I’m having my MacBookPro on the table and holding my iPad and Apple Pencil on my lap.

Full Photoshop on the iPad

Well ok, there is an app on the iPad called Photoshop. Although it gets better every release, it’s a far cry from the desktop version. So to do proper retouching I still need the full version of Photoshop (at the moment). This is where the connection between the iPad screen and MacOs works like a charm, there is however one HUGE disadvantage.

the iPad is an important part of my workflow

Where are my keys…. oh there

As you can see in the image the iPad mirrors the MacBook and when using an Apple Pencil retouching becomes really close to using a real drawing tablet. Some things are a bit “wonky” but overall it’s a huge improvement over using the touchpad and especially on location this is the biggest improvement in your workflow in years.

But…. we all know that for Photoshop we also need key input.
Try to use Photoshop just with a pen and you will within seconds find out that you can’t do anything. For almost everything, you need keystrokes. Now luckily Apple knows about this so they offer a floating “keyboard” with the most used keys like COMMAND, CRTL, SHIFT, SPACE, etc.

I don’t know about you, but I like it because there is nothing else. But it’s far from perfect. You don’t feel the keys, they take up space and on the iPad screen size is something I don’t want to sacrifice.

Hardware solutions

Over the years I’ve tried several input devices and although they all promise that you will speed up your workflow 10-fold and everything is easier and…. well you know what I mean. In real life, I never really found something that stayed.

Most of the devices I tried are too light, meaning they “walk” over my desk, adding some anti-slip feet helps but it’s something I have to add myself. Other devices were not well-formed which meant I had to move my hand too much and because most buttons had the same form I still needed to look at the device, which made the device useless for me because I could as easily just use a keyboard.

The TourBox Lite changed my workflow

The TourBox Lite changed my workflow

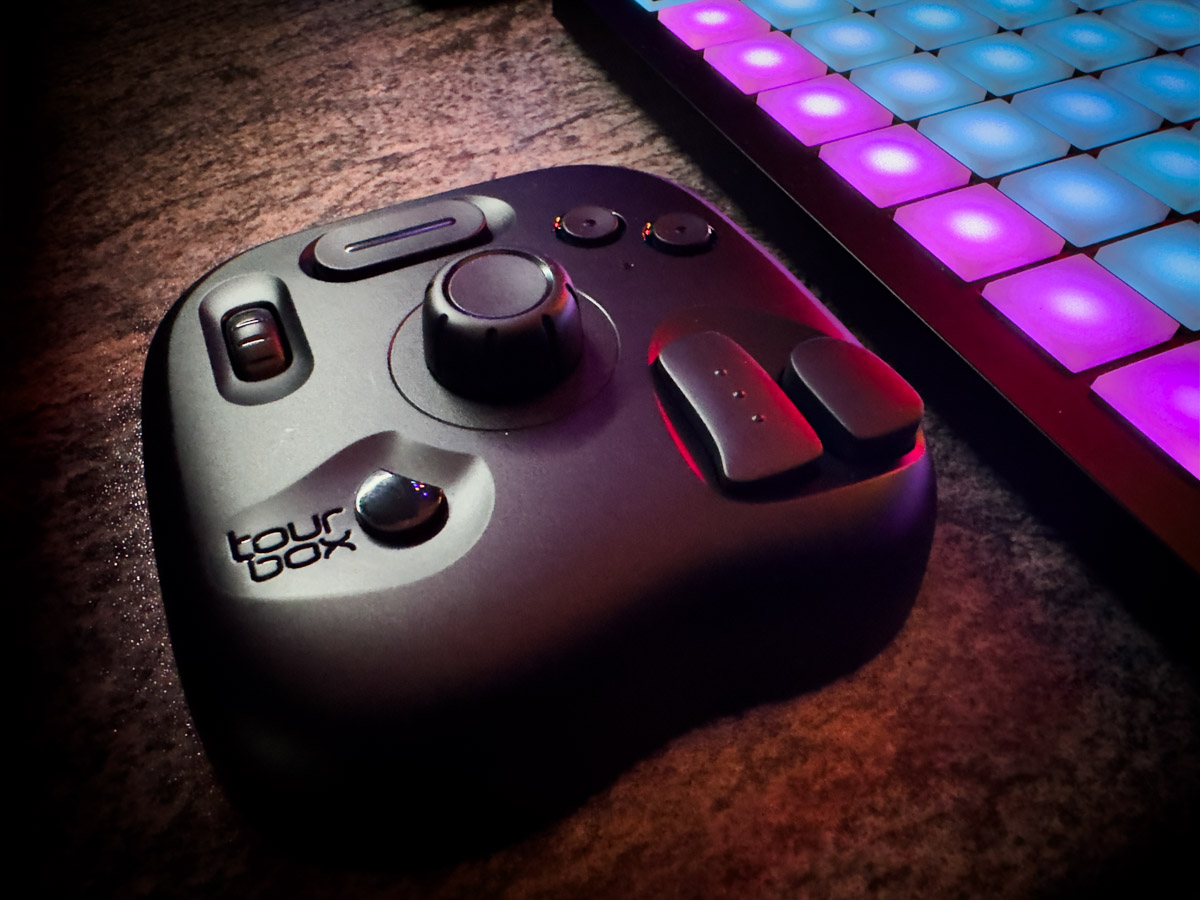
TourBox Lite (2024)

I think I found the perfect solution to improve my workflow.
A left-handed device (yes, read on if you’re like me right-handed). that just hits the nail on the head.

The TourBox Lite is the newest addition to the TourBox family and retails for just under $100 which in my opinion is a very critical price point.

When unboxing the first thing that caught my attention was the weight.
You expect something from that size to be a lot lighter, now I’m not saying it’s TOO heavy, in fact, it’s perfect.
It doesn’t move around on my desk and it’s light enough to carry around easily in your backpack.

At first glance compared to some other products you might think “There are not a lot of buttons there”.
But let’s be totally honest with each other.
This is NOT a keyboard replacement, it’s a workflow device, and when you look closely at what you really need I have to be honest that I don’t really miss any buttons.


TourBox Lite workflow advantages

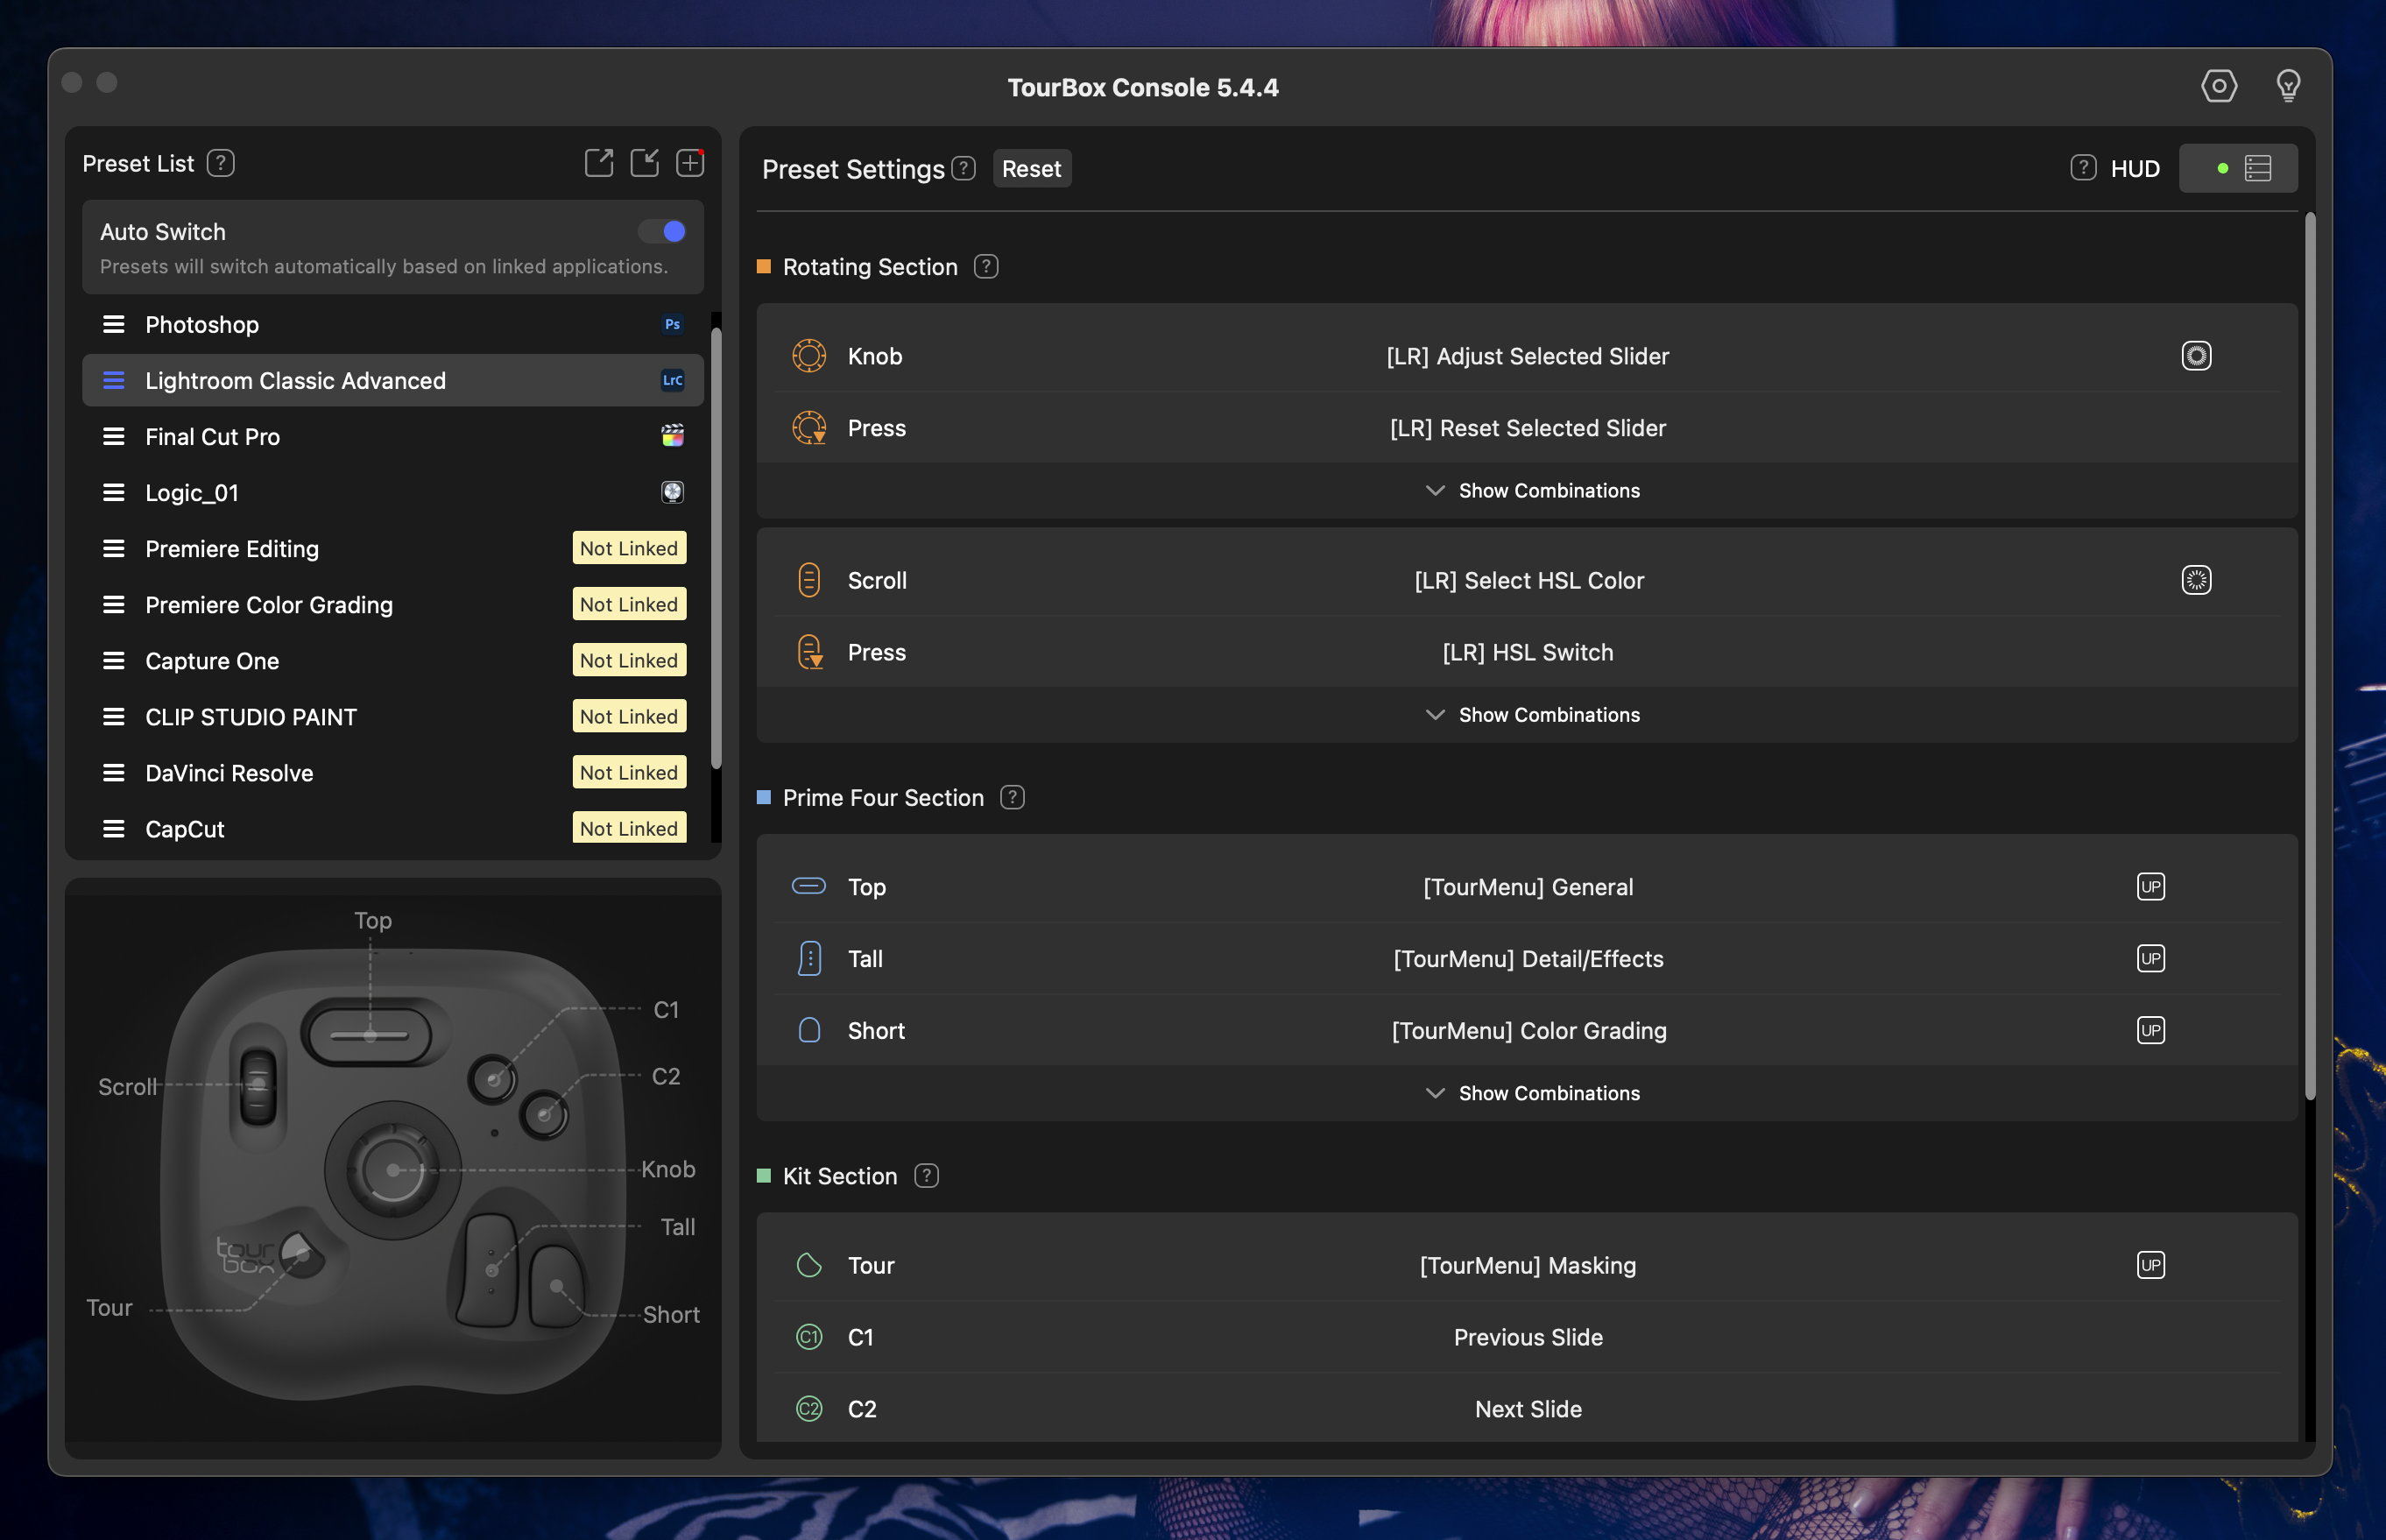
One of the cool things about the TourBox series is that you can add app 100 actions to the buttons.
They make this possible by using combinations and also double clicks.

I’ve been testing the TourBox Lite for a few days now and for example, in Logic Pro I’m using the double click on the play button. One time means STOP/PLAY but double click means GO BACK TO START. This is an action you use all the time and having it under one button is just genius and feels very natural.

For Final Cut Pro and Lightroom/Photoshop, I’m using the scroll wheels to zoom in and out and change the brush size and that speeds up your mobile workflow a lot.

TourBox lite console

More options

I started this blog post with a story about how the iPad changed my workflow and the TourBox Lite is for me a huge upgrade. I can now just leave my laptop on the table (or floor) and use the iPad Pro with Apple Pencil and the TourBox Lite to work through my whole session without ever needing to touch my laptop. This is huge 😀

But when I’m not using the iPad Pro for retouching I still have it next to my MacBookPro and use it for almost all software I use. The fun thing is that with the other devices I tested I always found out after a few minutes I was using the keyboard and actually forgot that I also had another input device.

The TourBox Lite is designed for left-handed use, and that’s genius.
I’m mostly holding my XP-pen or Apple Pencil in my right hand and my left hand is free to operate the keyboard. But also when adjusting parameters when using Logic Pro and holding a guitar, having the right hand free to hit the strings and the left hand to adjust is really comfortable.

Of course, you can use other devices also with your left hand. But this is I think where I like the TourBox Lite more. Because I don’t have to move my hand. I position it and it hardly has to move. Another huge advantage is that all buttons feel slightly different. My other device uses mostly the same buttons where you have to put stickers under to see what you’re doing. Well in a dark studio, this already doesn’t work and often ends in frustration. And that you only use the dials and buttons on the keyboard, which I think is not the way it should be 😀

So many options, so little time

You probably already picked up that we can program A LOT of combinations but how do you remember everything?
For me, that’s always been a problem.
When I start with a new software suite I try to first learn the most important keystrokes. And luckily it’s often pretty straightforward. But even with a normal keyboard, especially at the start, you have to sometimes look up the keystrokes.

With these kinds of devices for me, that’s always a problem. On the keyboard, I can mostly find my most used keystrokes but when you use several suites at the same time it can become really messy with input devices.

The TourBox software has a really nice option where you can link software to the TourBox. This means as soon as you open the software it will open the preset on your TourBox too. This makes it easy to switch between software but doesn’t solve my problem of remembering what is what.

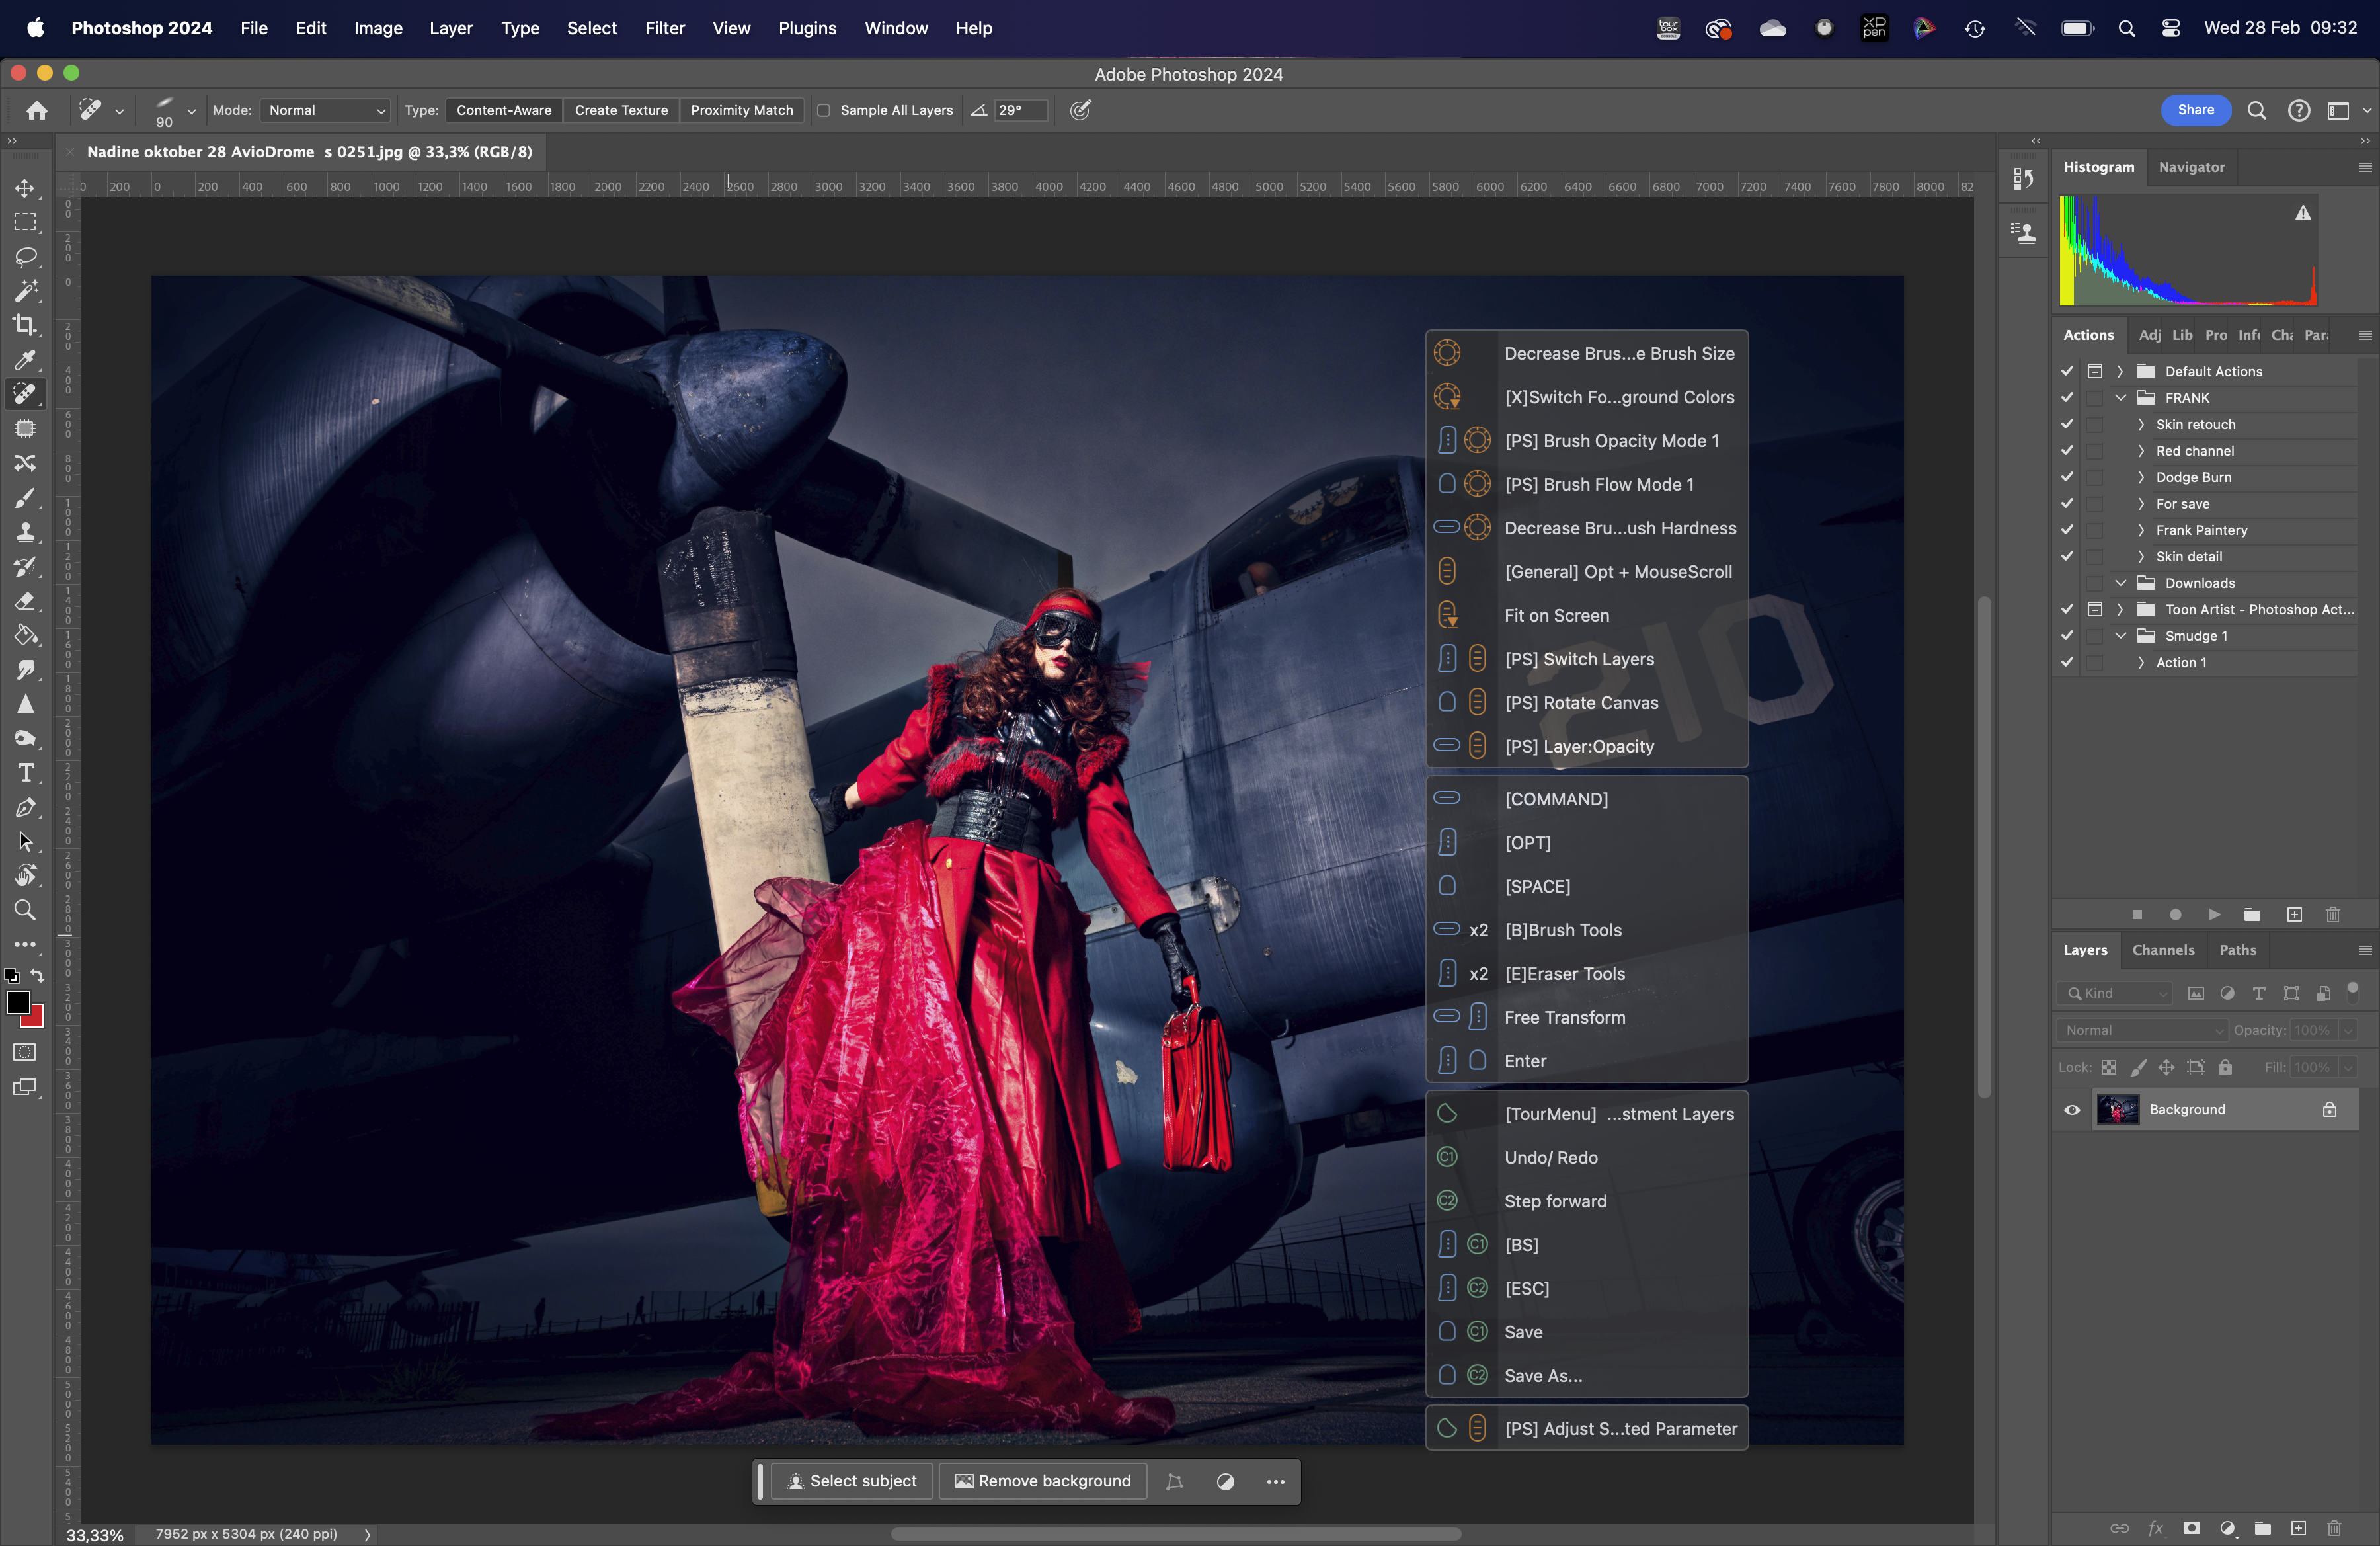
You can of course just try or maybe even have the editor open on another screen, but I actually love the way TourBox chose to use a HUD solution that can be customized, moved around, and setup exactly the way you like.

When you press a button it will also show up in the HUD.
Now in most cases you will probably only use the HUD for a few days or weeks, after which it should probably be a matter of feel and muscle memory.

In conclusion, did the TourBox Lite change my workflow?

The new 2024 TourBox Lite is a very interesting input device.
It’s small enough to be used on the couch with your iPad. But it has enough buttons and combinations to even help with more complicated workflows.

The price point is spot on, but you sacrifice a bleutooth connection and some extra buttons that you can find on the Elite. But if you have no problem with working with a USB-C cable, I don’t see an issue there.

Are there things to improve…?

Yes of course 😀
I would love to see a small backlight at the buttons. I mostly work in light-controlled areas which means that the TourBox is located next to my keyboard in the studio and there is hardly any light hitting that area. Because all the buttons feel different it’s not a big deal, but it would be nice, and shouldn’t be a problem seeing the TourBox Lite is connected via USB-C anyway.

For me, the TourBox Lite hits the nail on the head.
It has enough buttons, the right price point, great software, auto switching apps, HUD, and of course well designed so you can use it with one hand and minimal movements (great for long hours of work).

I lost my interest in this kind of devices but this one has shown me that it can be done right.

HIGHLY RECOMMENDED.
Also, want a Tour box?

When you use this link for your order, you also support our work: TourBox Lite

For BenQ we have a 10% discount code for European customers, if you are in the market for a new monitor, drop us an email for the discount code.


Disclaimer:
I was sent the TourBox Lite by TourBox to check out.
ALL reviews I make are 100% my real opinion and not motivated by manufacturers, our readers demand and deserve a real and honest review and that’s what I do.

Looking back at the first year of problem-free tethering and connecting photographers…

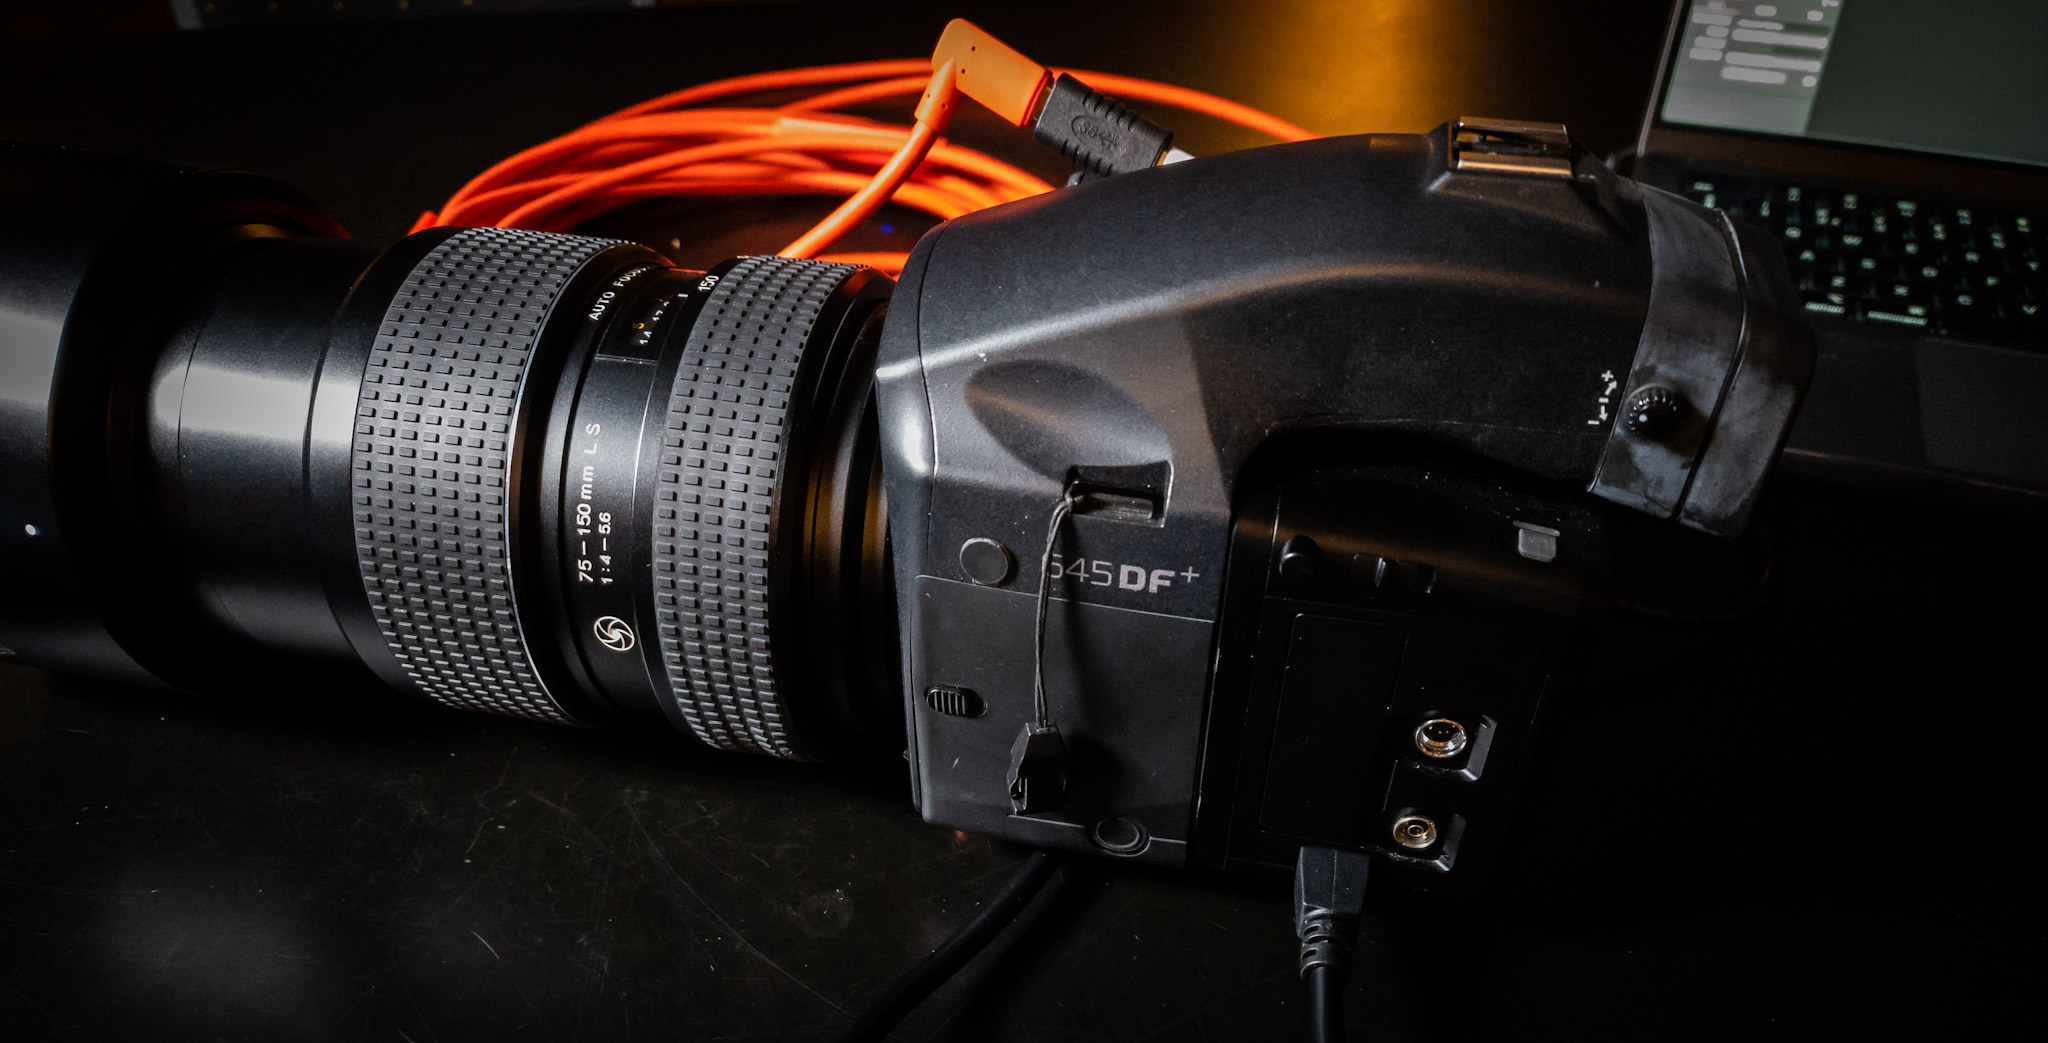
Exactly a year ago we introduced a new tether brand: IQwire. We used the 10-meter cable a lot. Problem-free! But there is more. Read this update about 1-year problem-free tethering with IQwire.

Facebook sends you reminders of what happened a year ago. And today Facebook showed the official announcement of us distributing IQwire in Europe.

What is tethering?

Shooting tethered is one of the best upgrades you can do to your workflow. In case you wonder “Tethering?” When we talk about shooting tethered we mean that we connect our camera to a larger display to see the images we shoot right away. This can be on a tablet like Android or iOs, but also Windows or Mac of course.

In the studio or on location this means you can immediately judge your images for focus, lighting, etc. But you can also add presets to the images so your client (or yourself) can get an idea about how the final image will look. Especially when shooting in BW this can be an awesome tool that really makes the difference. But also think about overlays where you are able to shoot the images straight into the publication with all the headlines, text, etc. already laid out so you can get perfect results.

What you might not know is that most modern cameras support shooting tethered. In most cases, software like Lightroom or Capture One supports your camera. But there are also alternatives, most cameras even have their own software which can or cannot be incorporated with Lightroom. Tethering is a serious workflow enhancement, and might I say probably one of the most important ones.

But time moves on and demands also grow

A camera that was cutting edge a few years ago is already surpassed by many generations that followed. This also means that the files are getting larger, but most of all the buffers of the cameras are getting larger, cards are getting faster and we are also able to charge our cameras via USBC. This means that the demands we have for our tethering cables are getting higher and higher.

Today it’s exactly a year ago I made a post on the internet that we would be releasing a new brand for Europe that would be able to solve most if not all problems that people experience when shooting tethered, and after a year let’s look back and continue reading about 1-year problem-free tethering with IQwire

the IQwire logo with slogan

Experience is key

I’ve been shooting tethered for as long as I can remember. It started with the famous yellow composite cable to a CRT monitor. A simple connection from the video out of my camera to the TV. Nothing fancy but it worked like a charm. Later of course I switched to wireless tethering with a special battery grip which in all honesty worked ok for JPGs but was way too slow for RAW files (nothing changed here). I believe that when I switched to Medium Format it was the first time I really was able to shoot tethered the right way via Leaf Capture. At that moment I was running Windows and there actually was no Windows version of Leaf Capture. But thanks to the awesome team at Leaf I was able to run an alpha/beta version of the software. Later I switched to Mac also due to the fact my Windows laptop was way too unstable in heat or wet environments.

Sony A99 could not tether

Fast forward a lot of years and I was asked to do the introduction of the Sony A99. At that moment a groundbreaking camera with an EVF and …. well…. no tethering. Seeing I was asked to do the official introduction in Dubai for an audience this was really a big issue. So I started working together with a small company that actually managed to get me a “working” version of their tethering plugin for Sony cameras, with the STRONG message, please don’t shoot more than 25 images, and please not too fast. To make a long story short it was a demo with not that many shots but I was probably the first one in the world that actually shot tethered with the A99.

Tethering can be complicated

We never stopped looking for better tethering solutions and for many years Annewiek and I worked effortlessly to make tethering problem-free for every photographer. You have to realize that just adding a cable to your camera doesn’t warrant that tethering works. It’s actually in some cases a very complicated process where drivers can block the tethering or power saving can cause lost connections. Dropbox can even totally shut off tethering, hardware drivers aren’t updated or not correctly, etc. I could write a small book about all the problems we experienced over this period.

But as mentioned times changed and we found that more and more photographers (including myself) demanded more from our cables and solutions. For me, it was important to be able to use 10 meters (33 ft) cables without any hassle of adding two different cables together. I want to tethering to work problem-free. Extending cables in reality just doesn’t work reliably. Even when using locks after a few months I started getting lost connections and we had to tape the whole system together. And let’s be honest if you walk on a stage you don’t want to worry about losing connection, you just want to shoot and trust your gear.

And we found a brand that does exactly what the modern photographer wants.

IQwire

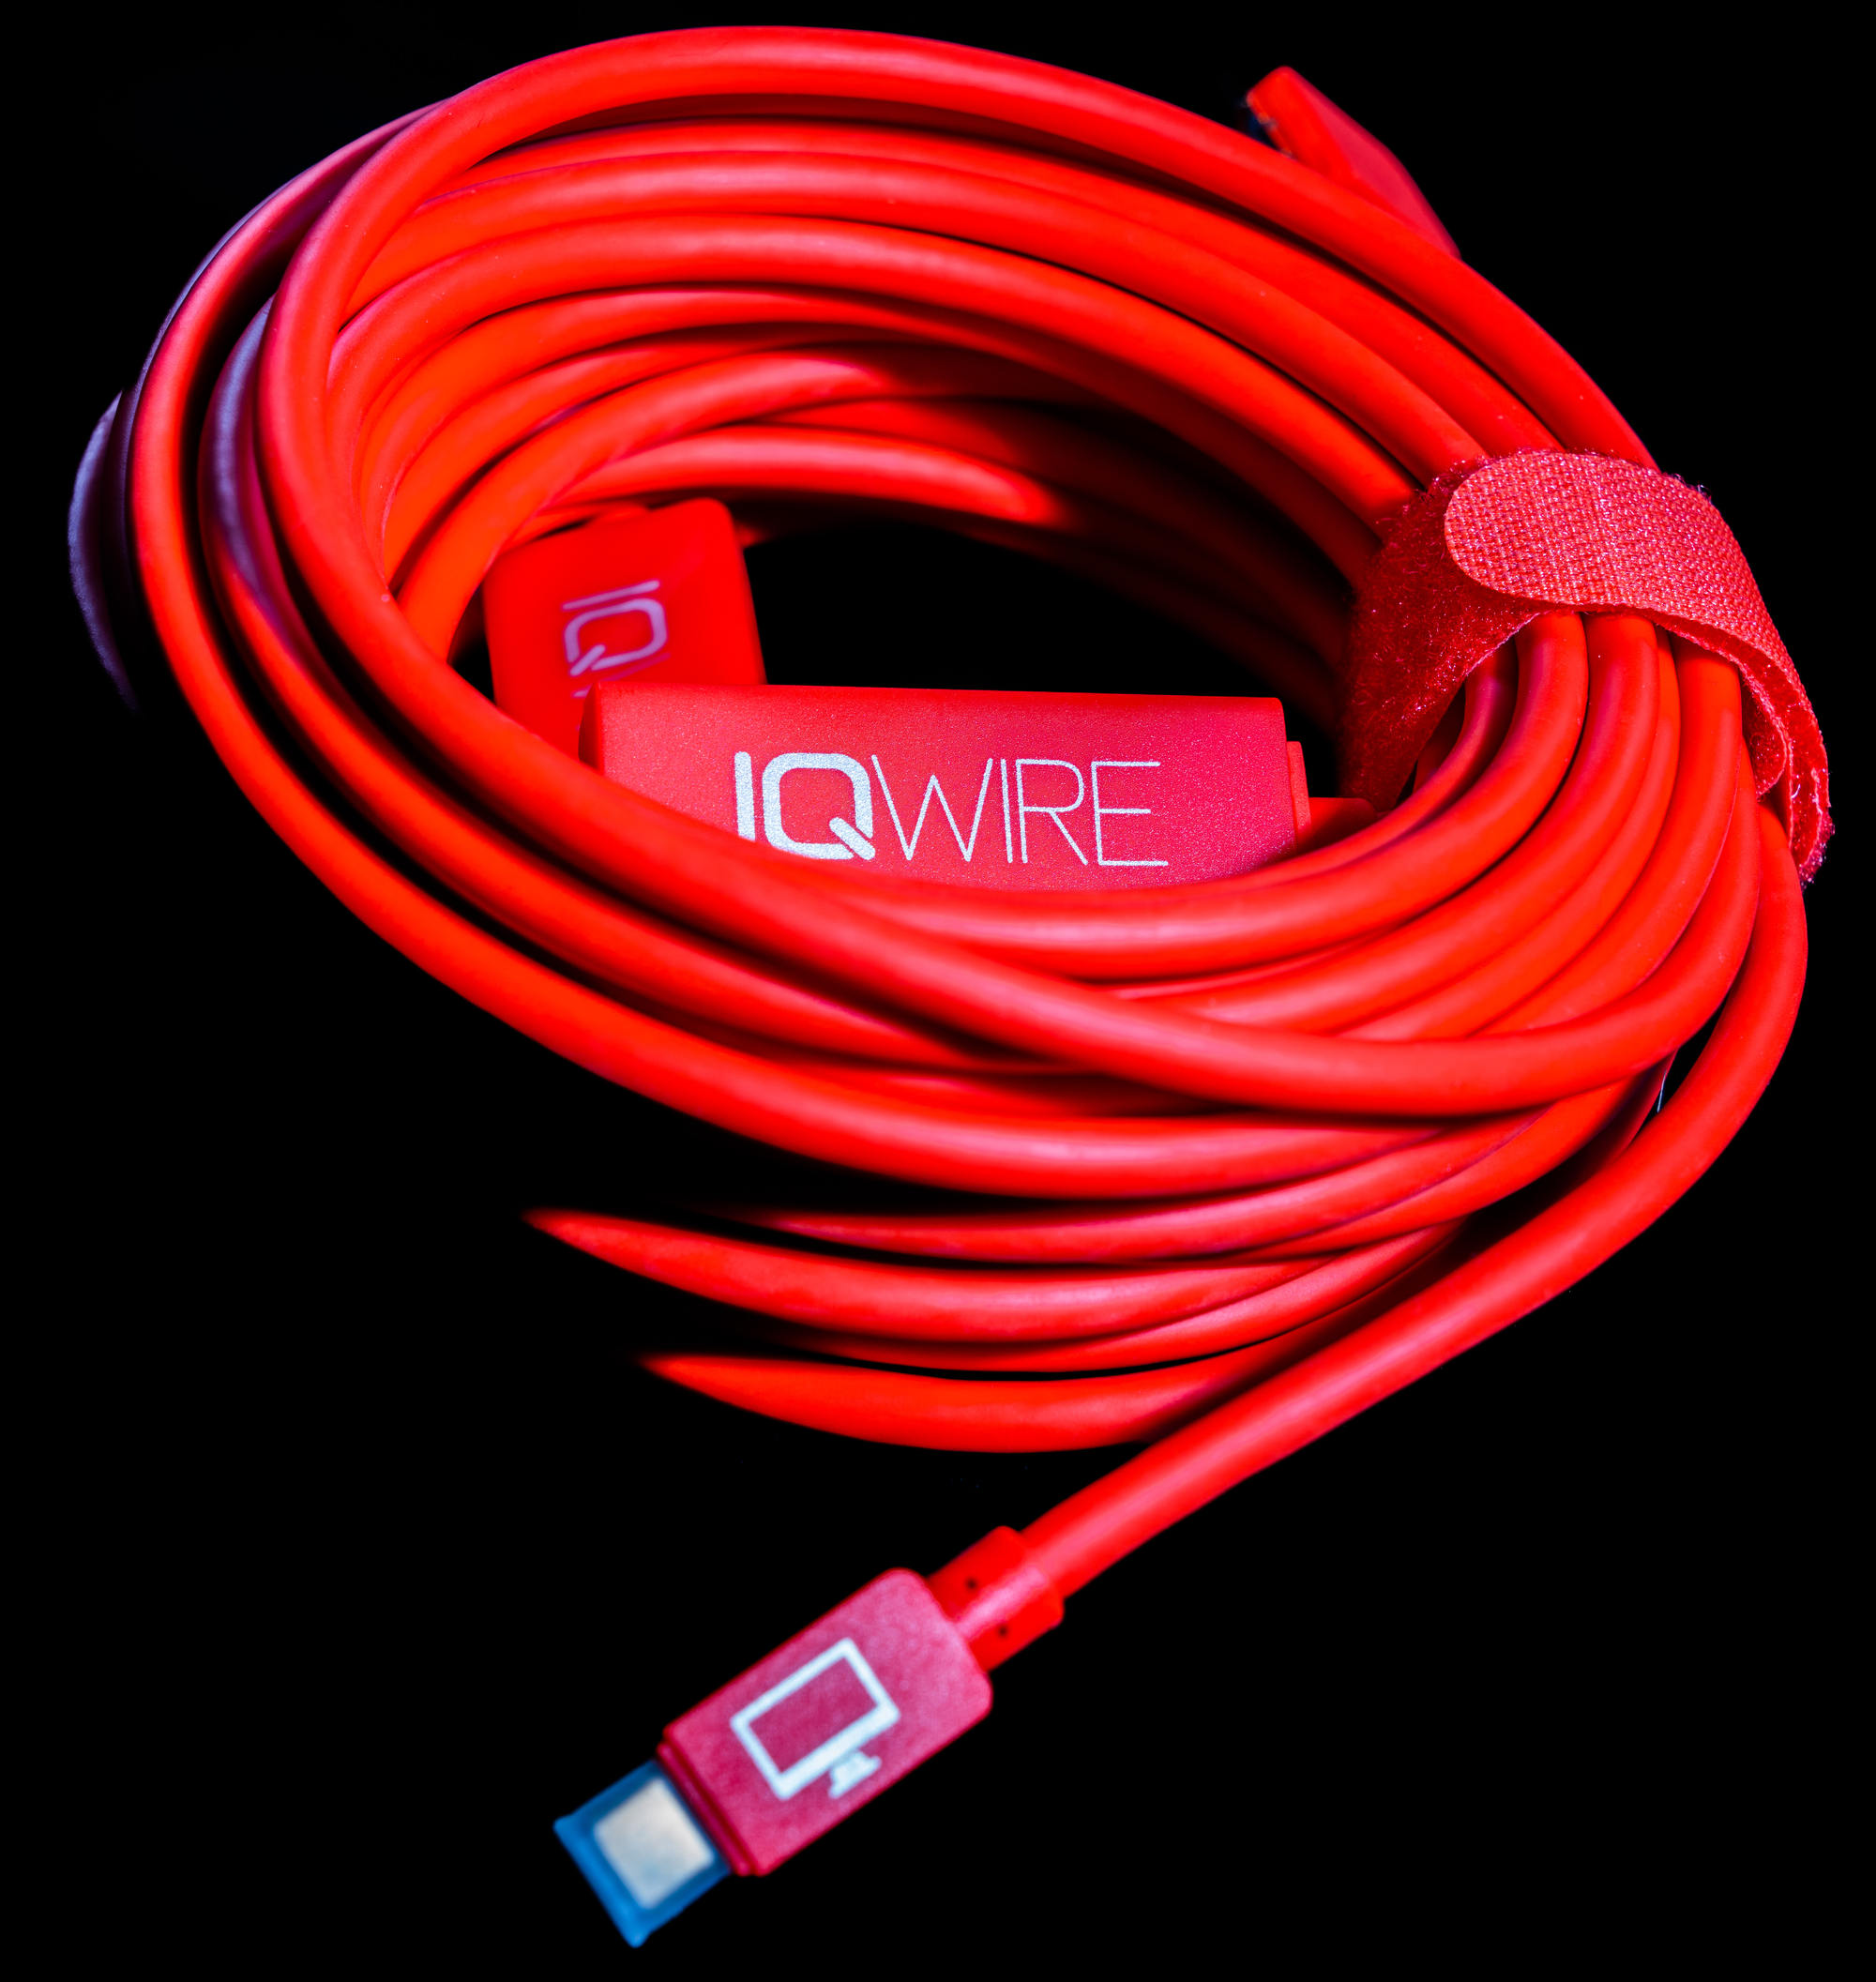
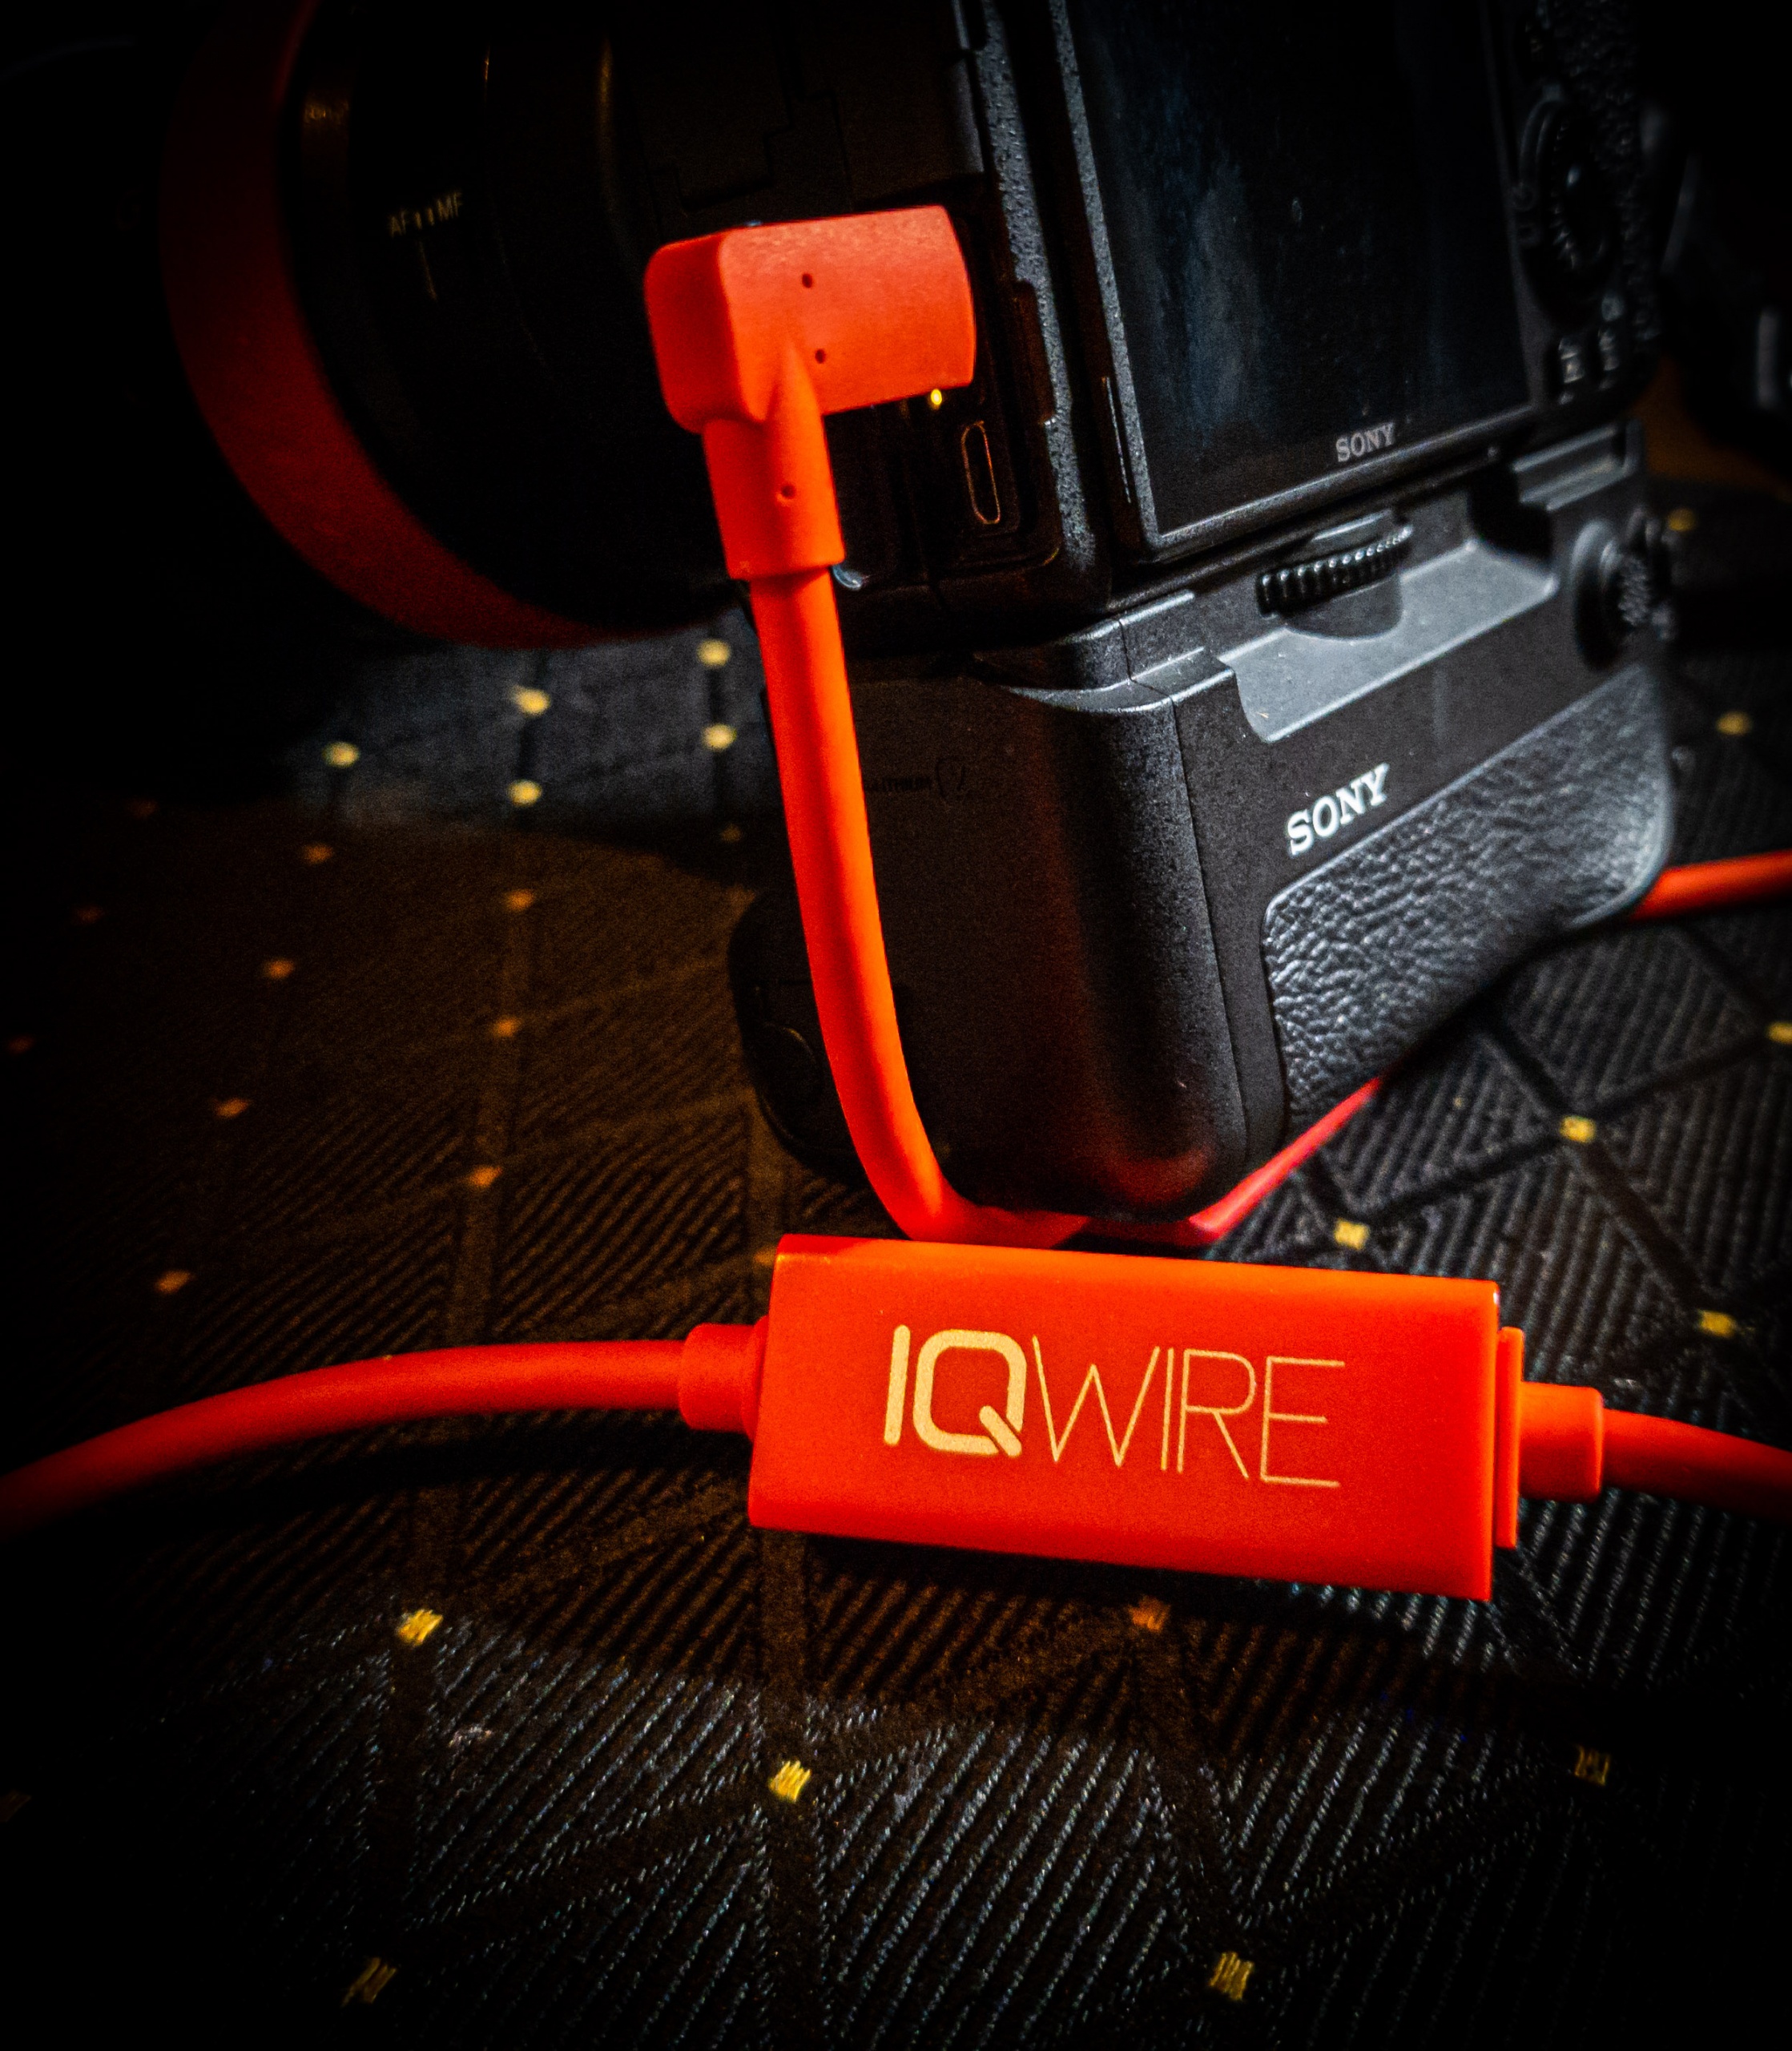
And the IQ is not there for fun or advertising. We deliver the IQwire cables in 5 and 10 meters lengths. So one problem for me was solved (length). However, when using 10 meters you are going beyond the limits of USBC (4.7 meters) so how do we make it work you might ask?

Well in the 10 meters version, you will find 2 boosters, and by using 2 boosters we have some advantages that no other brand has.

First of all of course the length, finally 10 meters without any extra connections.
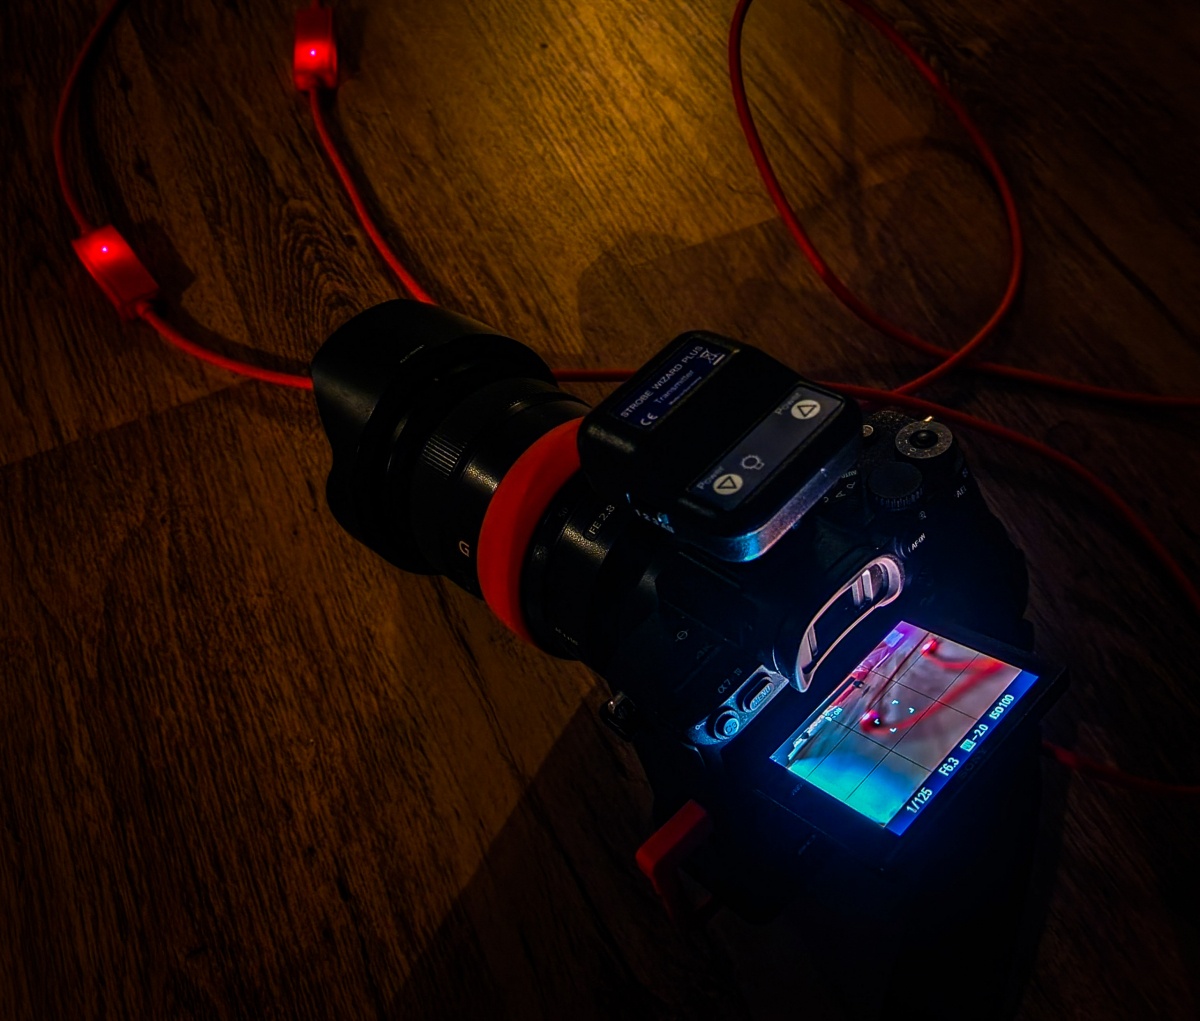
But by using two inline boosters we are also able to solve another huge problem. The fact that most professional photographers use several cameras. With the IQwire, we are also selling several pigtails and even a USB-A converter. This makes the IQwire literally one cable to rule them all. When you shoot USBC you just use the cable as it is. But if you need USB mini/B/micro or any other connection you are able to connect a so-called pigtail cable where you go from USBcC female to the connector you need. Our pigtails are app 15 cm in length but I did some tests with adding a convertor PLUS a 4.7 meter cable and to my surprise my Medium Format camera didn’t just shoot without any dropouts but even was able to charge on the lowest setting which proves how stable and well build the IQ-Wire system is. So that is what we call problem-free tethering!

And although you don’t really need a booster on 5 mtrs also our 5 mtrs cables have one booster.

But there is more

As soon as you connect your camera for the first time you will notice that the connection is blazingly fast. The camera is recognized almost immediately and there are no more pauses or hiccups during the session, all images come in at the same time and speed.

We did several tests ourselves and clocked a difference of up to 20% compared to the best other cables. According to a recent review, the reviewer actually claimed even faster speeds compared to an off-brand cable. The impressive fact from that review was he compared a standard 1-meter cable with our 10-meter cable.

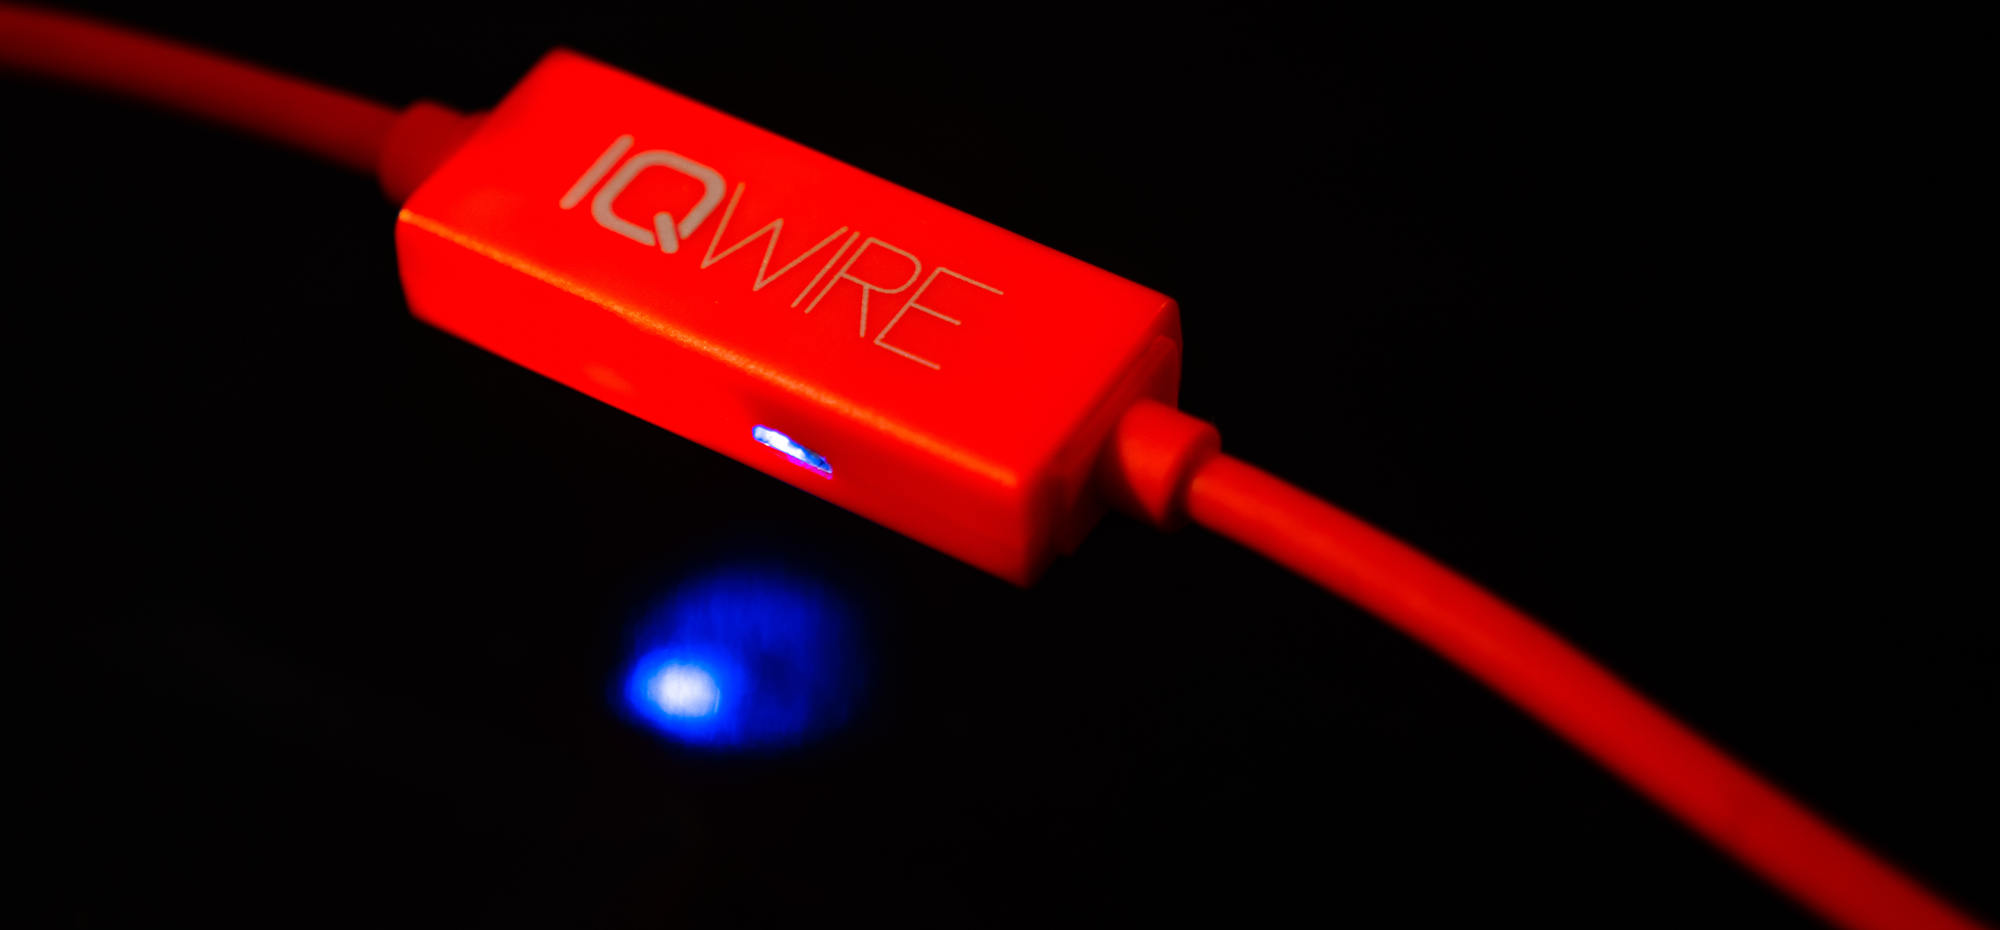
Part of this is of course due to the boosters. But also due to a small piece of hardware called IQ-connect. With IQ-connect you are always sure your camera and computer/tablet have the fastest connection and don’t disconnect the camera during the shoot.

With modern cameras, you can still shoot with standard cables of course, but if you want a reliable professional solution that can take a beating IQwire is the best choice in our personal opinion.

Read this update about 1-year problem-free tethering with IQwire.

Cascable logo, tethering software for the iPad

And more

When we look at the demands from photographers besides length we also hear being used iPad more and more. And let’s be honest, being able to shoot to a laptop is great, but you always have to carry an expensive piece of gear into environments that are far from friendly for anything that has air vents. Take your laptop to a beach with a little bit of wind and you know what I mean.

The iPad is the perfect solution for shooting tethered. I shoot with the iPad almost exclusively now and would literally never go back to the laptop. More battery life, much more light output, and much much easier to mount on a stand without the risk of falling over.

But you need software for this of course. And as mentioned before we always look for great solutions and found this in an app called Cascable on iOS. Do make sure you check if your camera is supported for wired tethering (they support a lot of cameras and even more wireless so make sure you check for wired too).

You guessed it… there is more

Now that we have the perfect cable in the perfect length, and a good tethering solution there is one thing missing.
When we connect something to our camera there is always a risk of damaging the port. This is one of the reasons I never advise people to empty their cards via the cameras, so how do we solve this with tethering?

First of all, IQwire uses angled connectors which already bring the risk down when a camera tips over when on the floor. (Never ever place your camera when connected on a stool or table, if someone hits your cable the camera will fall and probably not survive, so always place a connected camera on the floor). Due to the angled design of the IQwire the camera will literally turn over the cable protecting the port. But that doesn’t help when someone stands on your cable (of course you never do that yourself :D).

This is the first reason everyone should consider a 10-meter cable

When you use a 5-meter cable you have to take into account your own length (in my case 1.97) and the height of the laptop or tablet (mostly 1.50 meters). This means that if you don’t want your cable to “float” you already lose roughly 3.50 mtrs which means you can move around 1 to 2 meters around your laptop/tablet before the cable becomes a danger to trip over. With a 10-meter cable, this is much more than double. Now you can move roughly 6.50 mtrs around your laptop/tablet. This makes it not only safer to shoot but also hugely benefits the way you can use your set creatively. Being limited by length is incredibly frustrating.

But even when you use a 10-meter cable the port is still very fragile.
So you need something to connect the cable securely to the camera. Anything that moves around is not safe enough and just a small protection, as long as the cable moves there is a constant movement to the port which will eventually weaken the port and this will lead to lost connections.

For years I’ve used a solution that was expensive, very troublesome to take off and put on and was often cut into my hand. So we decided to create something that would work much better and would be a LOT cheaper.

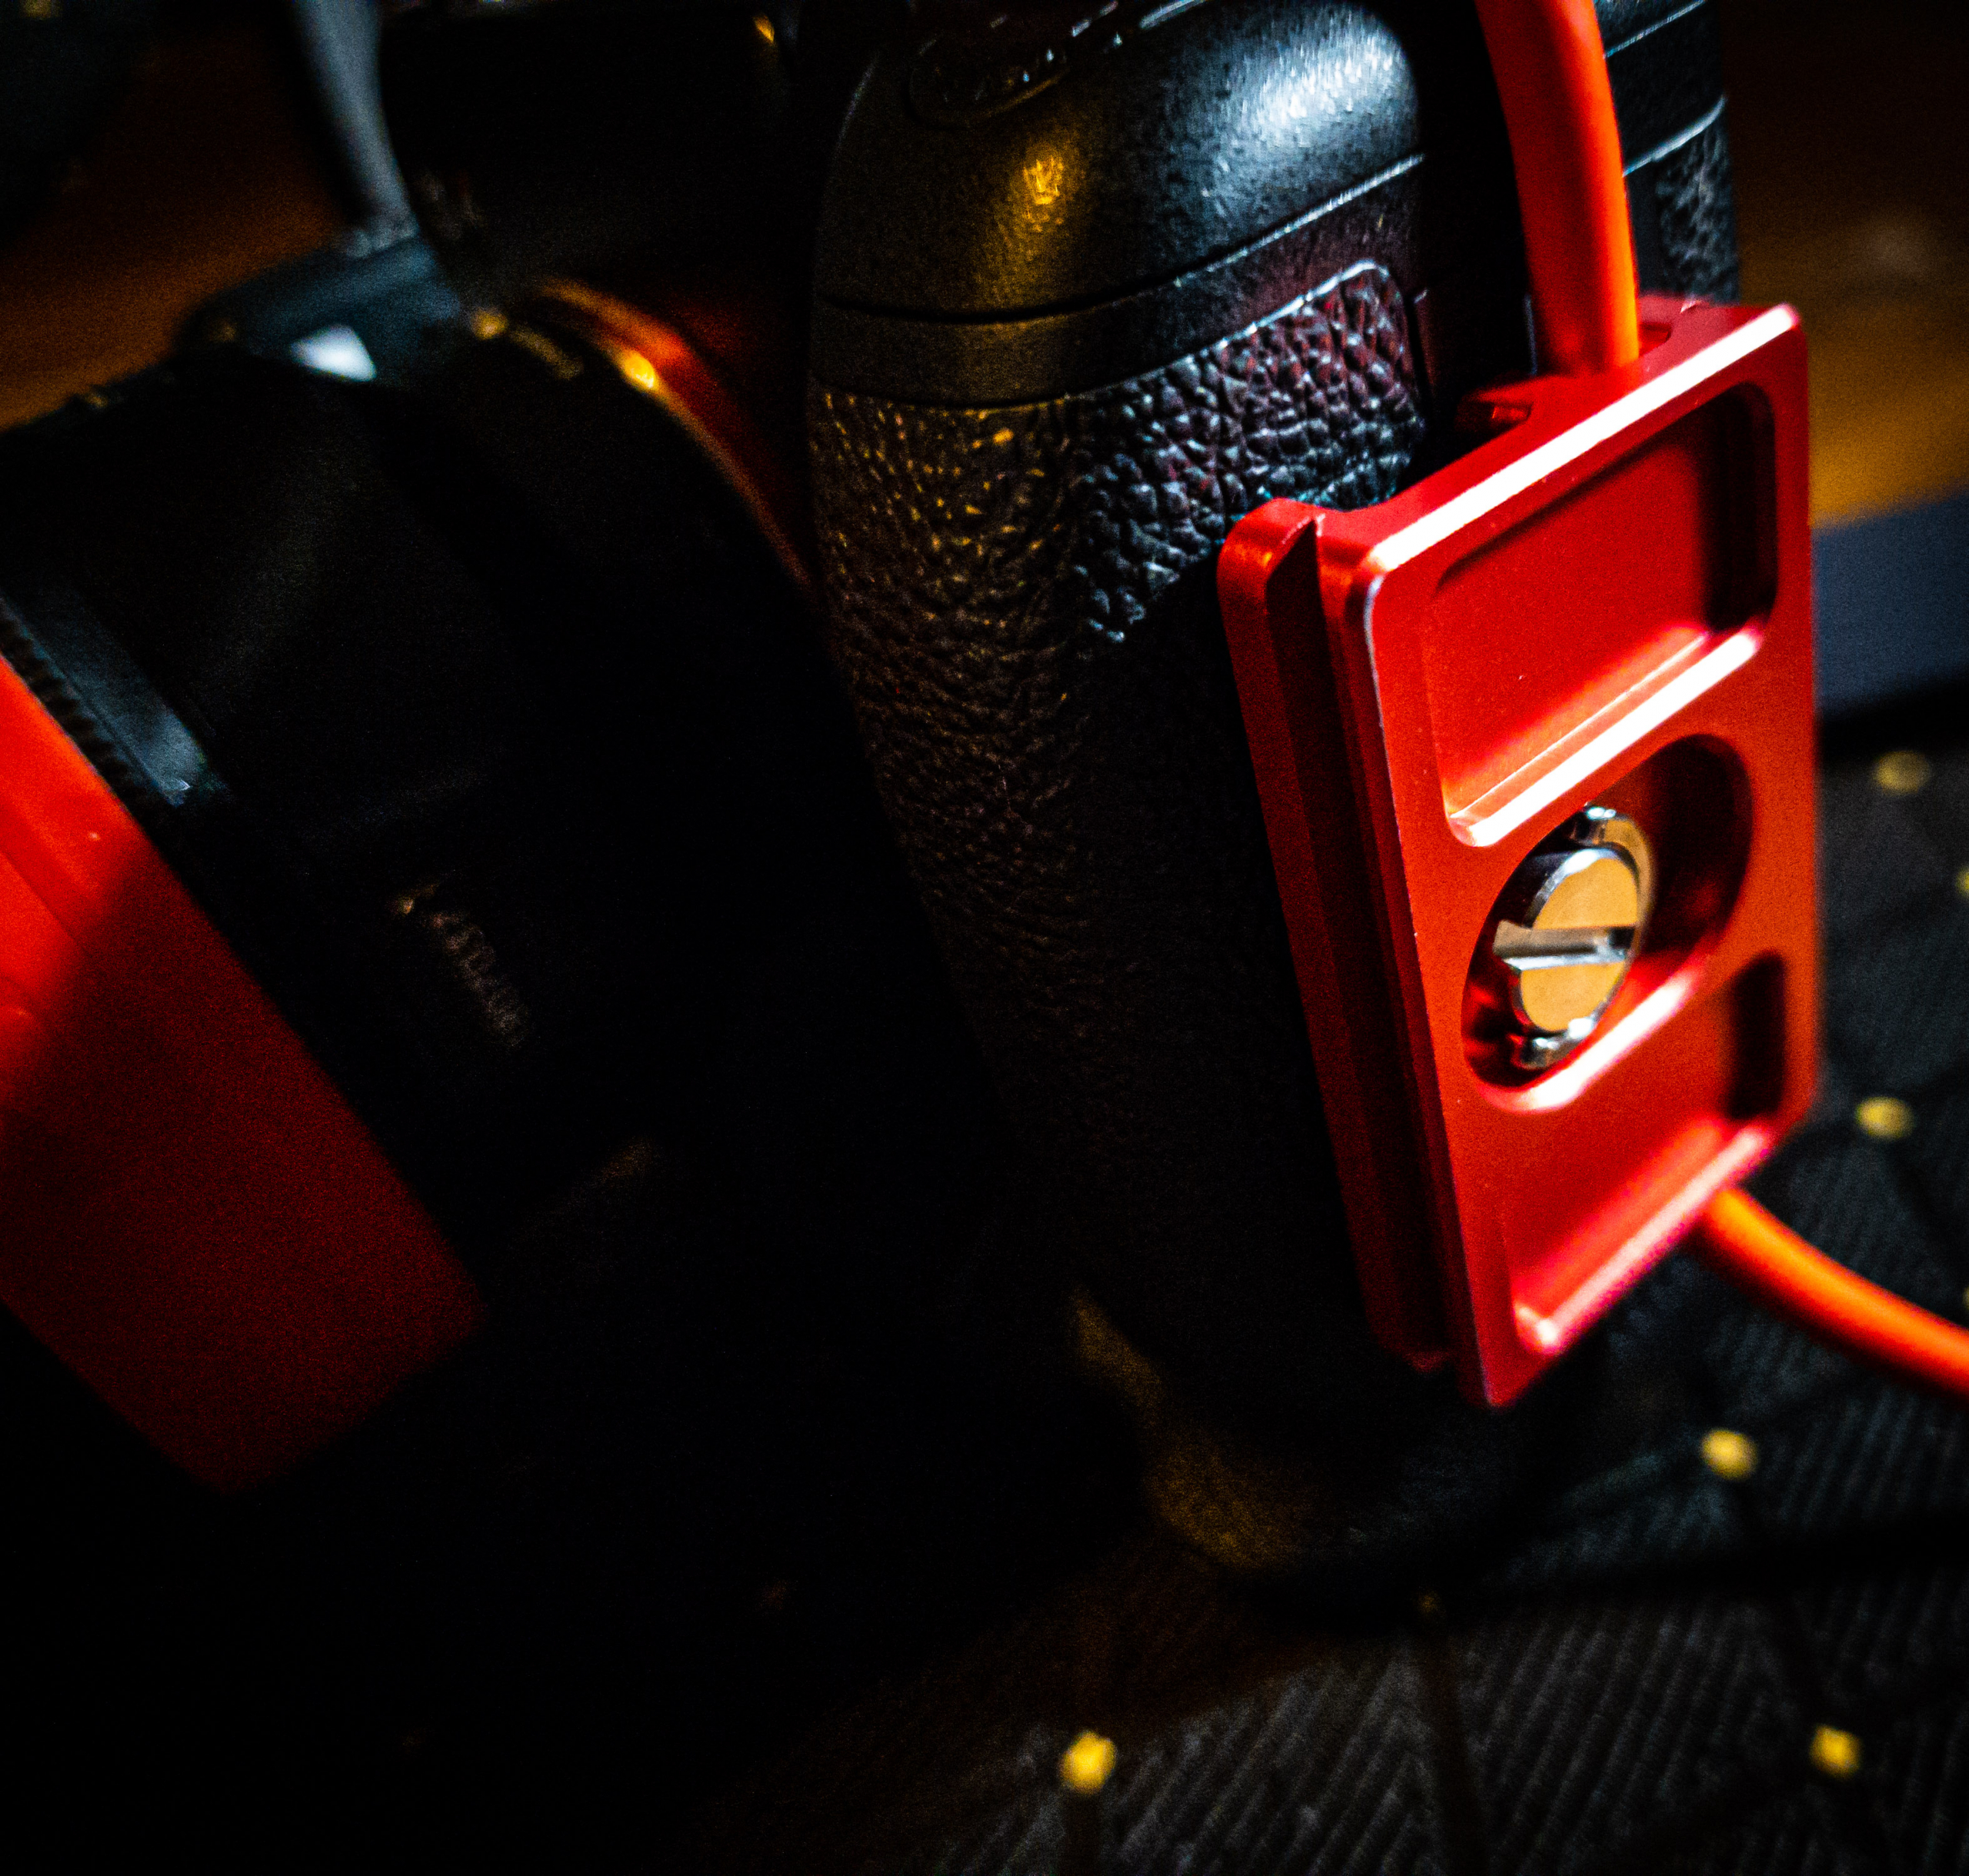
our CableBlock is red,small and also arca compatible for problem-free tethering

Enter the CableBlock

Our StudioFD “We Know Tether” CableBlock solves many problems you can find in competing products.
First of all, we opted for a smaller form factor. This means that on most cameras you can still access the battery compartment and the CableBlock doesn’t cut into your hand when using smaller cameras. But most of all we wanted an easy way to take the CableBlock off the camera, so we added a clip which you can quickly take the CableBlock off your camera or put it on of course. You can still use a coin or screwdriver but you don’t need to anymore.

And of course, the CableBlock is fire red which makes it stands out. It’s fully Arca compatible and the best thing …. we are able to sell it for 35,00 euros retail. And for the time being it’s actually delivered for free with the 10- meter IQ-wire when bought from our dealers.

Looking back

Introducing a new brand on the market is always a problem. But realizing it’s just one year ago we did the introduction it’s stunning to see we are now being sold in most camera stores in the Benelux. And getting orders from other countries far out of our sales region is nothing less than awesome.

We are very pleased with all the positive reviews we get from magazines, websites, and most of all our users. Everybody seems to love IQwire, and reading that people can shoot without any problems or hiccups is the icing on the cake of course, and the reason we always find the brands that deliver.

For myself
1 year using a 10-meter IQwire meant
ZERO lost connections
Still using the same cable
No visible degrading on the connectors and housing and even the cable itself still looks brand new although there were quite some instances where people and dog stood on the cable and I even (by accident) rolled my chair over the cable during a shoot a few times.

So do you also want to shoot tethered problem-free?

Like with most products there are brands that innovate and brands that keep everything the same. With IQwire we are ready for the future, are you already an IQwire shooter?

For more info see www.iqwire.nl
Buy the cable block here from us
Buy IQwire directly from us

You can buy IQwire and CableBlock in your favorite camera store

Why StudioFD?

Of course, you might wonder “Why should I choose to work with StudioFD?”
First of all, we have an unsurpassed experience with tethering. Without going into details (don’t want to hurt other brands), we’ve been working in the business of tethering for over 15 years building brands from the ground up with almost 24/7 365 support.

As a dealer, you don’t have to think about solving problems for your customer which costs time and often will not solve the problem. Instead, we take over the complete after-sales and will support your customer with all the questions they have and if something doesn’t work… Well, we will make it work (unless a camera doesn’t support tethering of course). Besides an extensive experience with tethering, we also ran a PC/Mac shop for over 20 years so we have a proper knowledge of the software and hardware needed to create a flawless workflow.

Dealers are welcome.

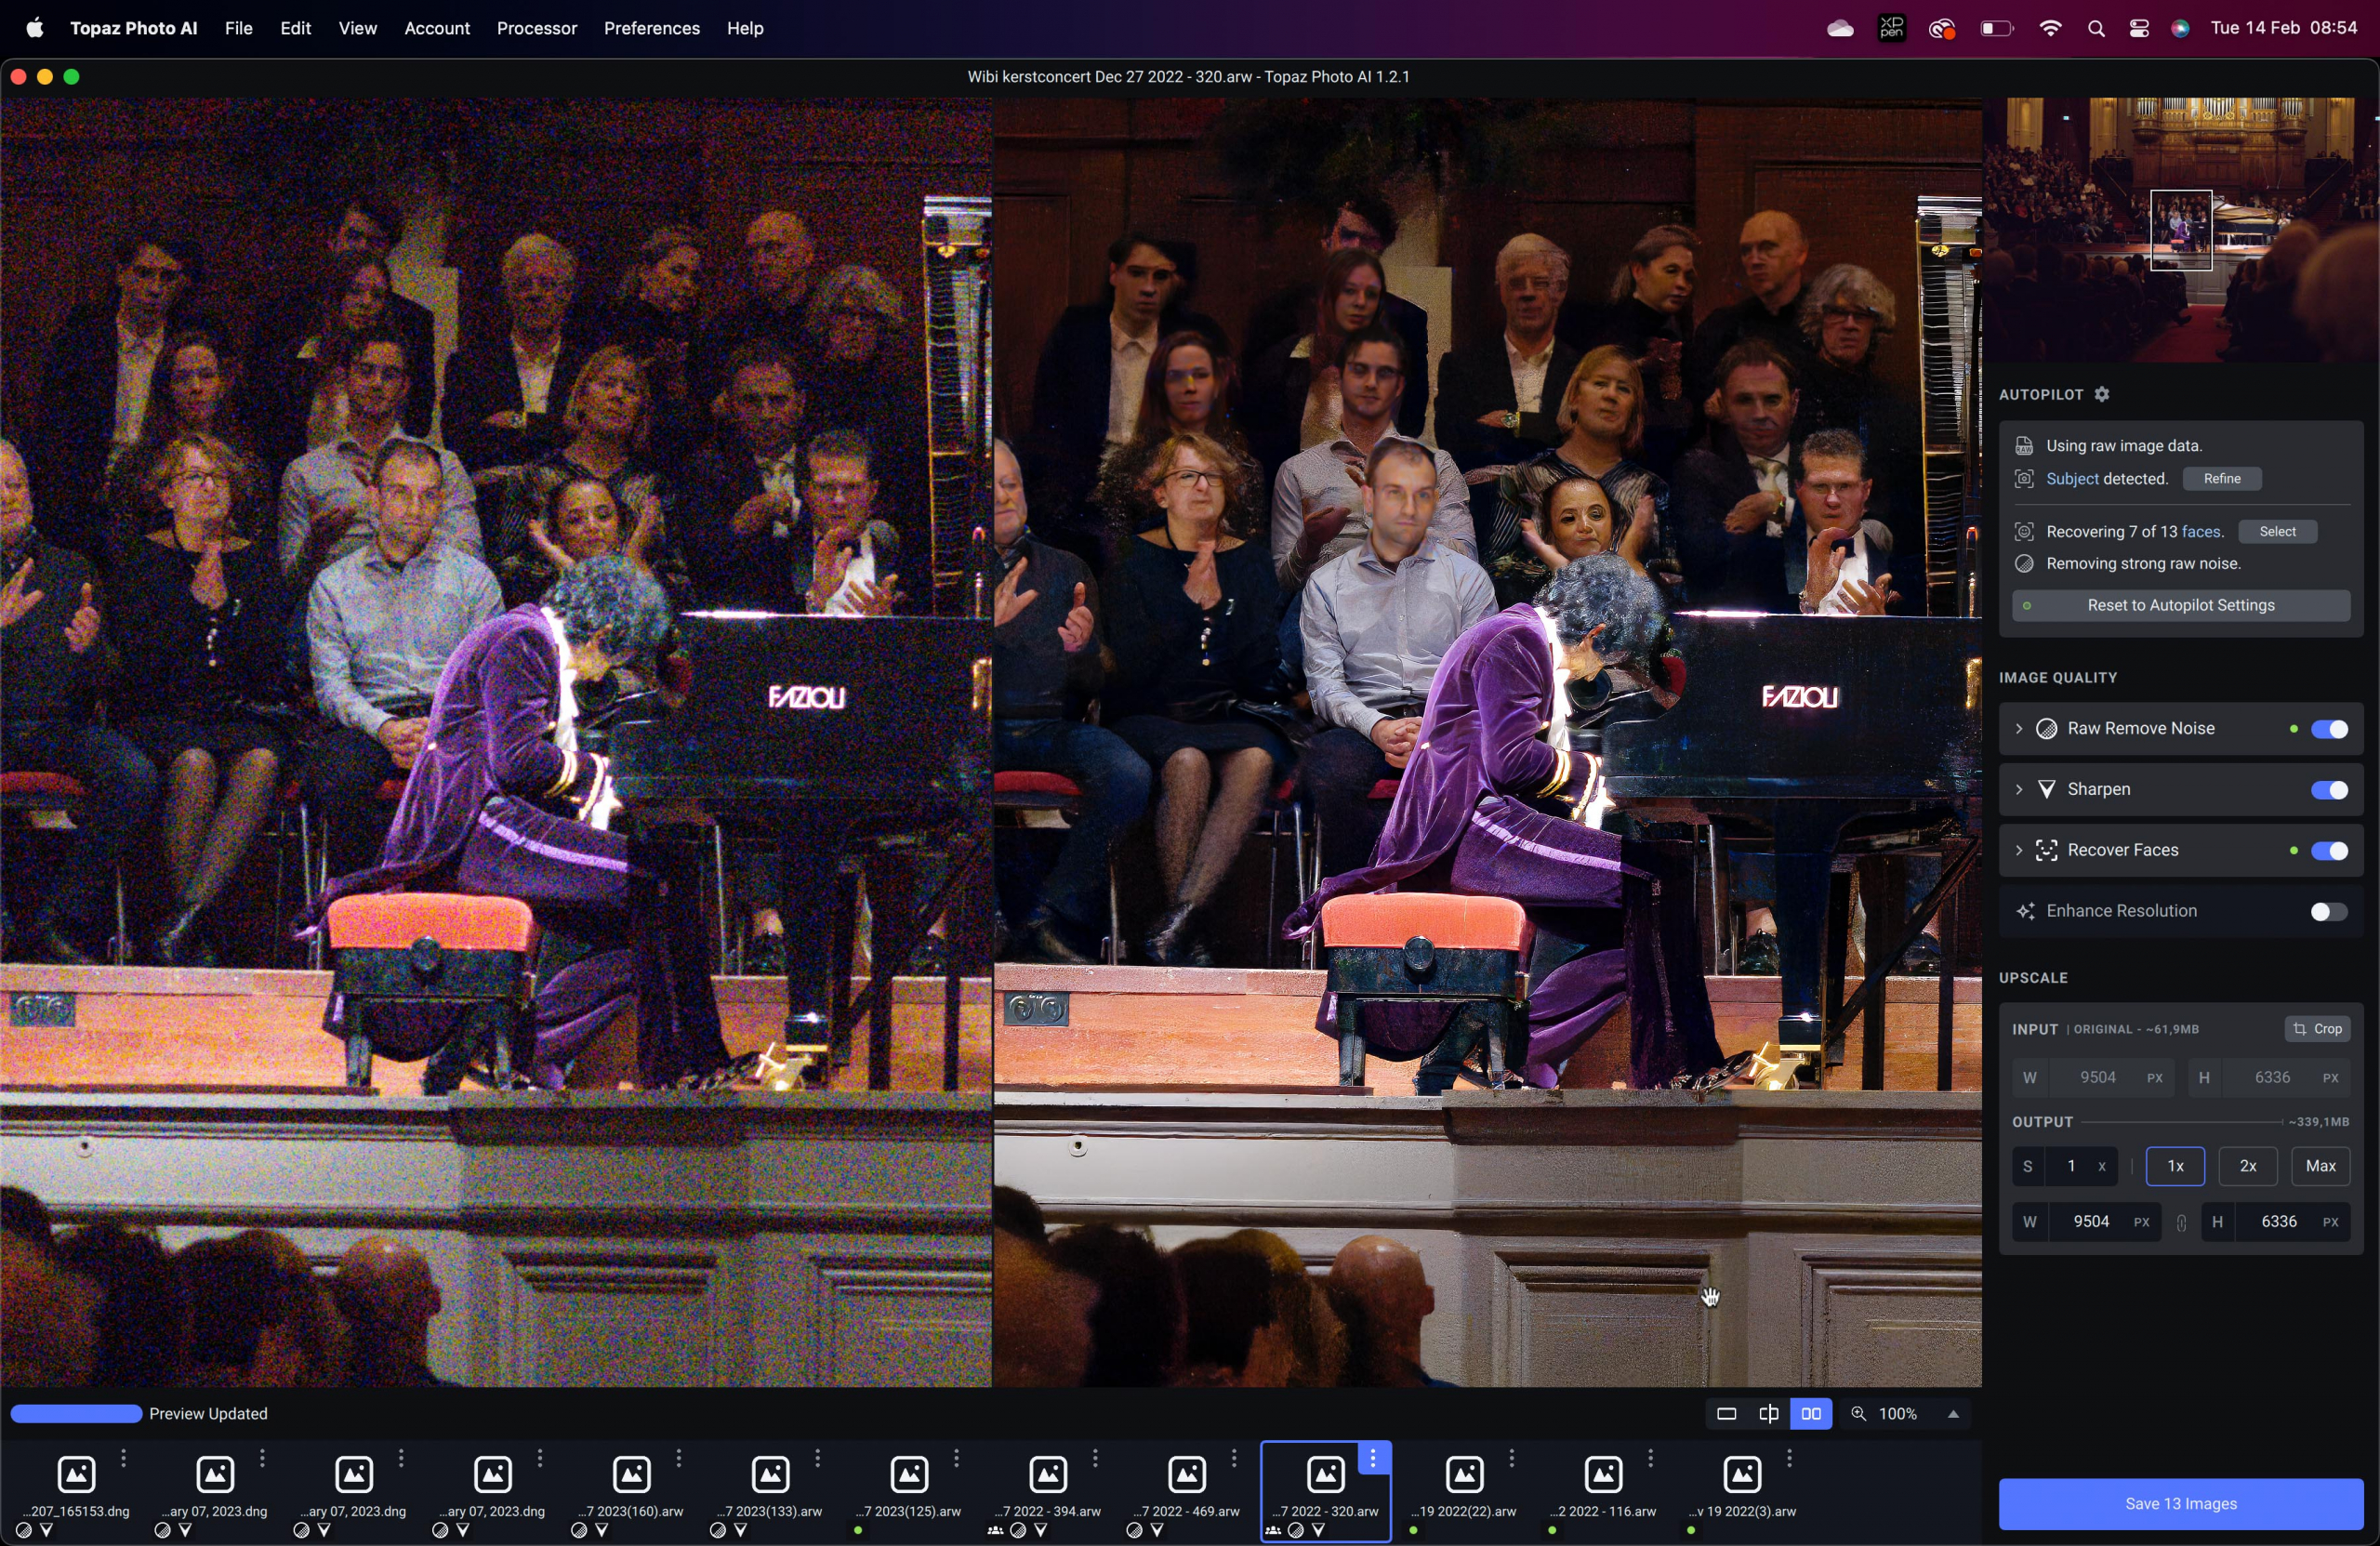
This is a game changer: Topaz Photo AI

It seems the world is going really fast nowadays.

Where a few years ago the term AI (Artificial Intelligence) was just something that you talked about in connection to some robot vacuums that were actually pretty dumb today the story is completely different and in all fairness, it’s an exciting but also frightening time.


Personally, I’m all for innovation but also have problems with some applications. Like probably most of you I am totally stunned by the quality of photorealistic images you can get from several AI image generators. But I also have to add I don’t see this as “art”. Of course, it looks insanely good, but it’s not “real” like where you create a set, light the set, coach the model, and take the image. In a group of its own yes! But Instagram is almost overflown with awesome-looking fashion shots where I literally thought “What a great photographer” until I scroll down more and see that the rest of his/her work is often below average/ It’s something I struggle to recognize as art, but maybe that’s just me.


The chatbots are also getting incredibly good and will probably be a real problem for education, but can help with writing articles and/or doing research. But do we really want to see the same kind of reviews without any personal input from a real human being? I don’t think so, but again it can help a lot with research and I’m excited to see how AI can be used for medical and scientific applications. I truly believe we are on the verge of some major breakthroughs. We have to find ways to incorporate AI into our workflows without losing the “soul” we all put into our work.


So why this intro about AI? 


Well, a lot of software nowadays uses the term AI. And in all honestly most of the time it does do it work pretty well. But nothing where I really had to pick my jaw up from the ground. Yes, the first time I saw Content Aware Fill I had that kind of moment, and that was way way before it was officially released and became much better. Today I can tell you I had the same sort of experience, and probably even more important.


Photography for me is freezing unique moments in time that will never come back again.
But Photography sometimes also means we have to capture those moments in situations that are far from perfect. So sometimes images are a little bit soft or have some tremendous noise because there wasn’t enough light to capture a razor-sharp clean image. Now I can’t even remember how many images I threw out that were just not “usable” at that time… But what if I told you that those cherished memories from our loved ones can be saved? That those concert images can be stunning and noiseless? And that time you missed focus is not a real problem anymore… would you label me crazy? or tell me “yeah, well we can sharpen it a bit, and use some filters, but it’s not sharp so it can never be as good as shot right at the moment we took it”


Well, I would have said, “absolutely” a few weeks ago, but not anymore.
Enter Topaz Photo AI.


Topaz Photo AI 


I’ve been a Topaz fan for years. They always deliver awesome plug-ins or standalone solutions that really add something to my workflow. It’s hard to really describe, but a lot of plugins work great on razor-sharp images, or images where there is a little bit of noise. But when I started testing Topaz Photo AI my jaw literally dropped to the floor, and for the first time, I was literally wondering how the heck did they do this….

I can talk for hours about the importance of proper focus, controlling noise on location, etc. but sometimes you just don’t have that option. All the images that would normally be unsuitable for release are now…. “perfect”. So let’s take a look at some samples.


Let’s start very simply with something that happens to all of us.
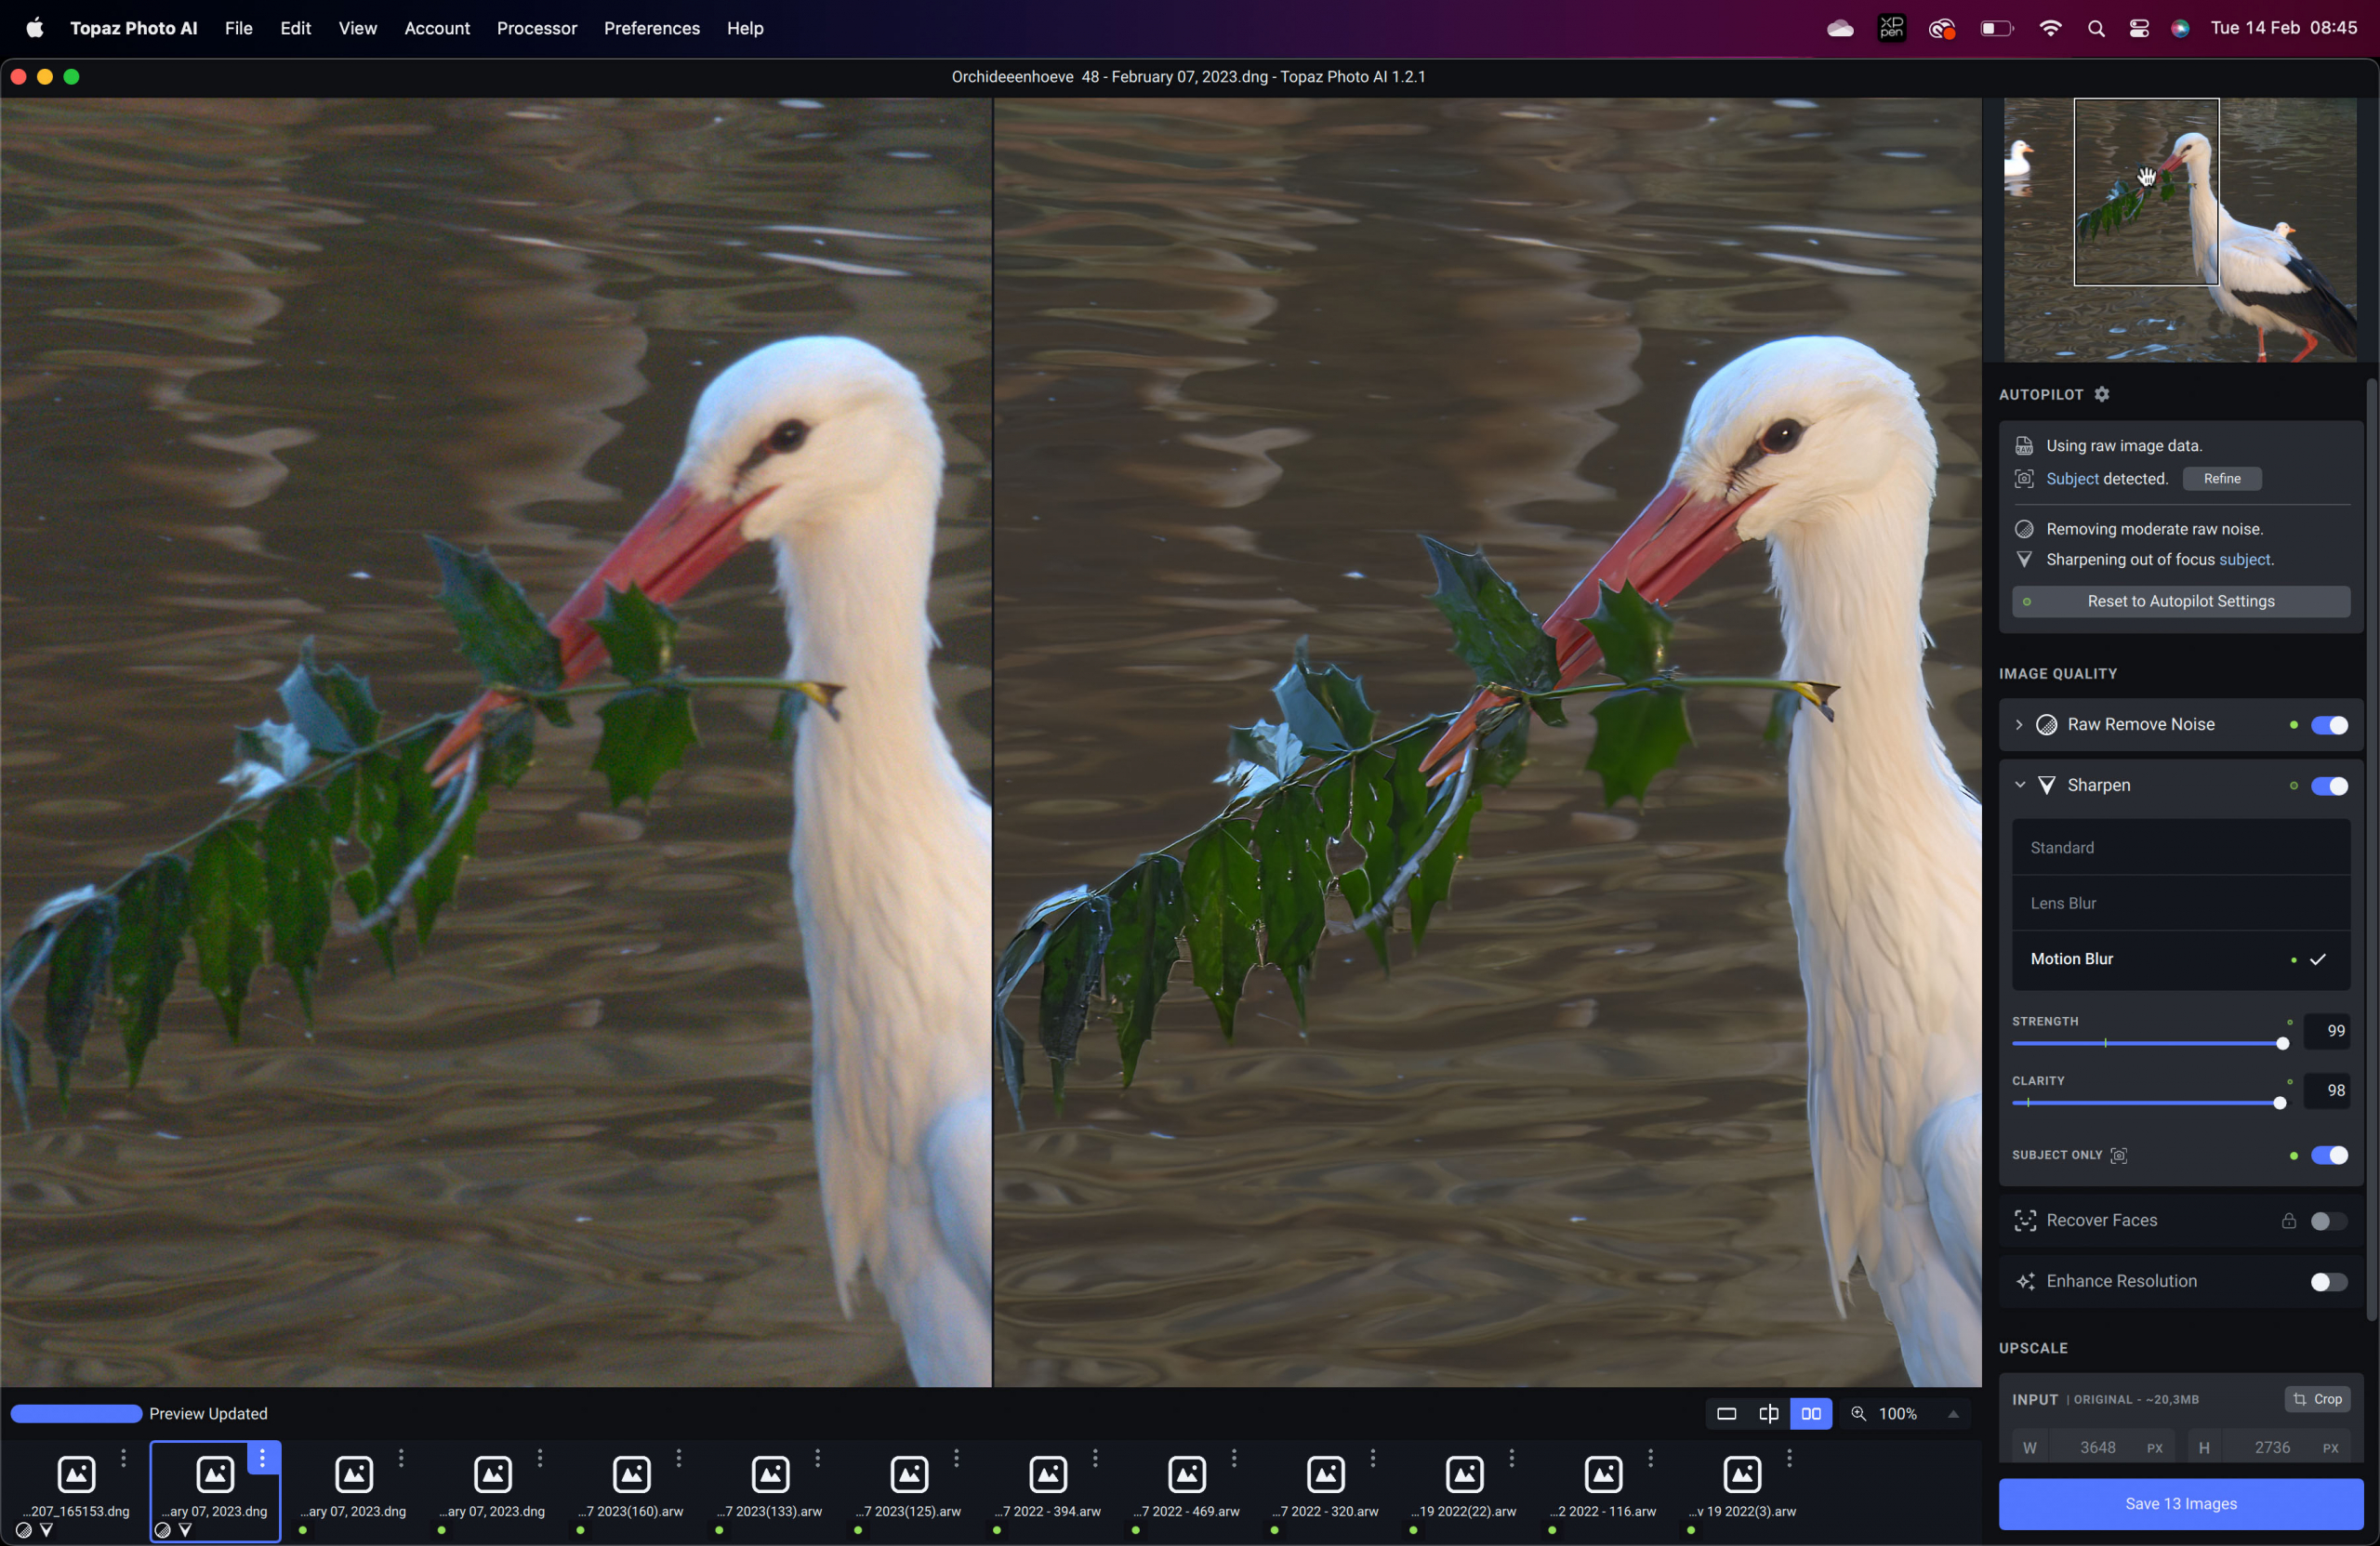
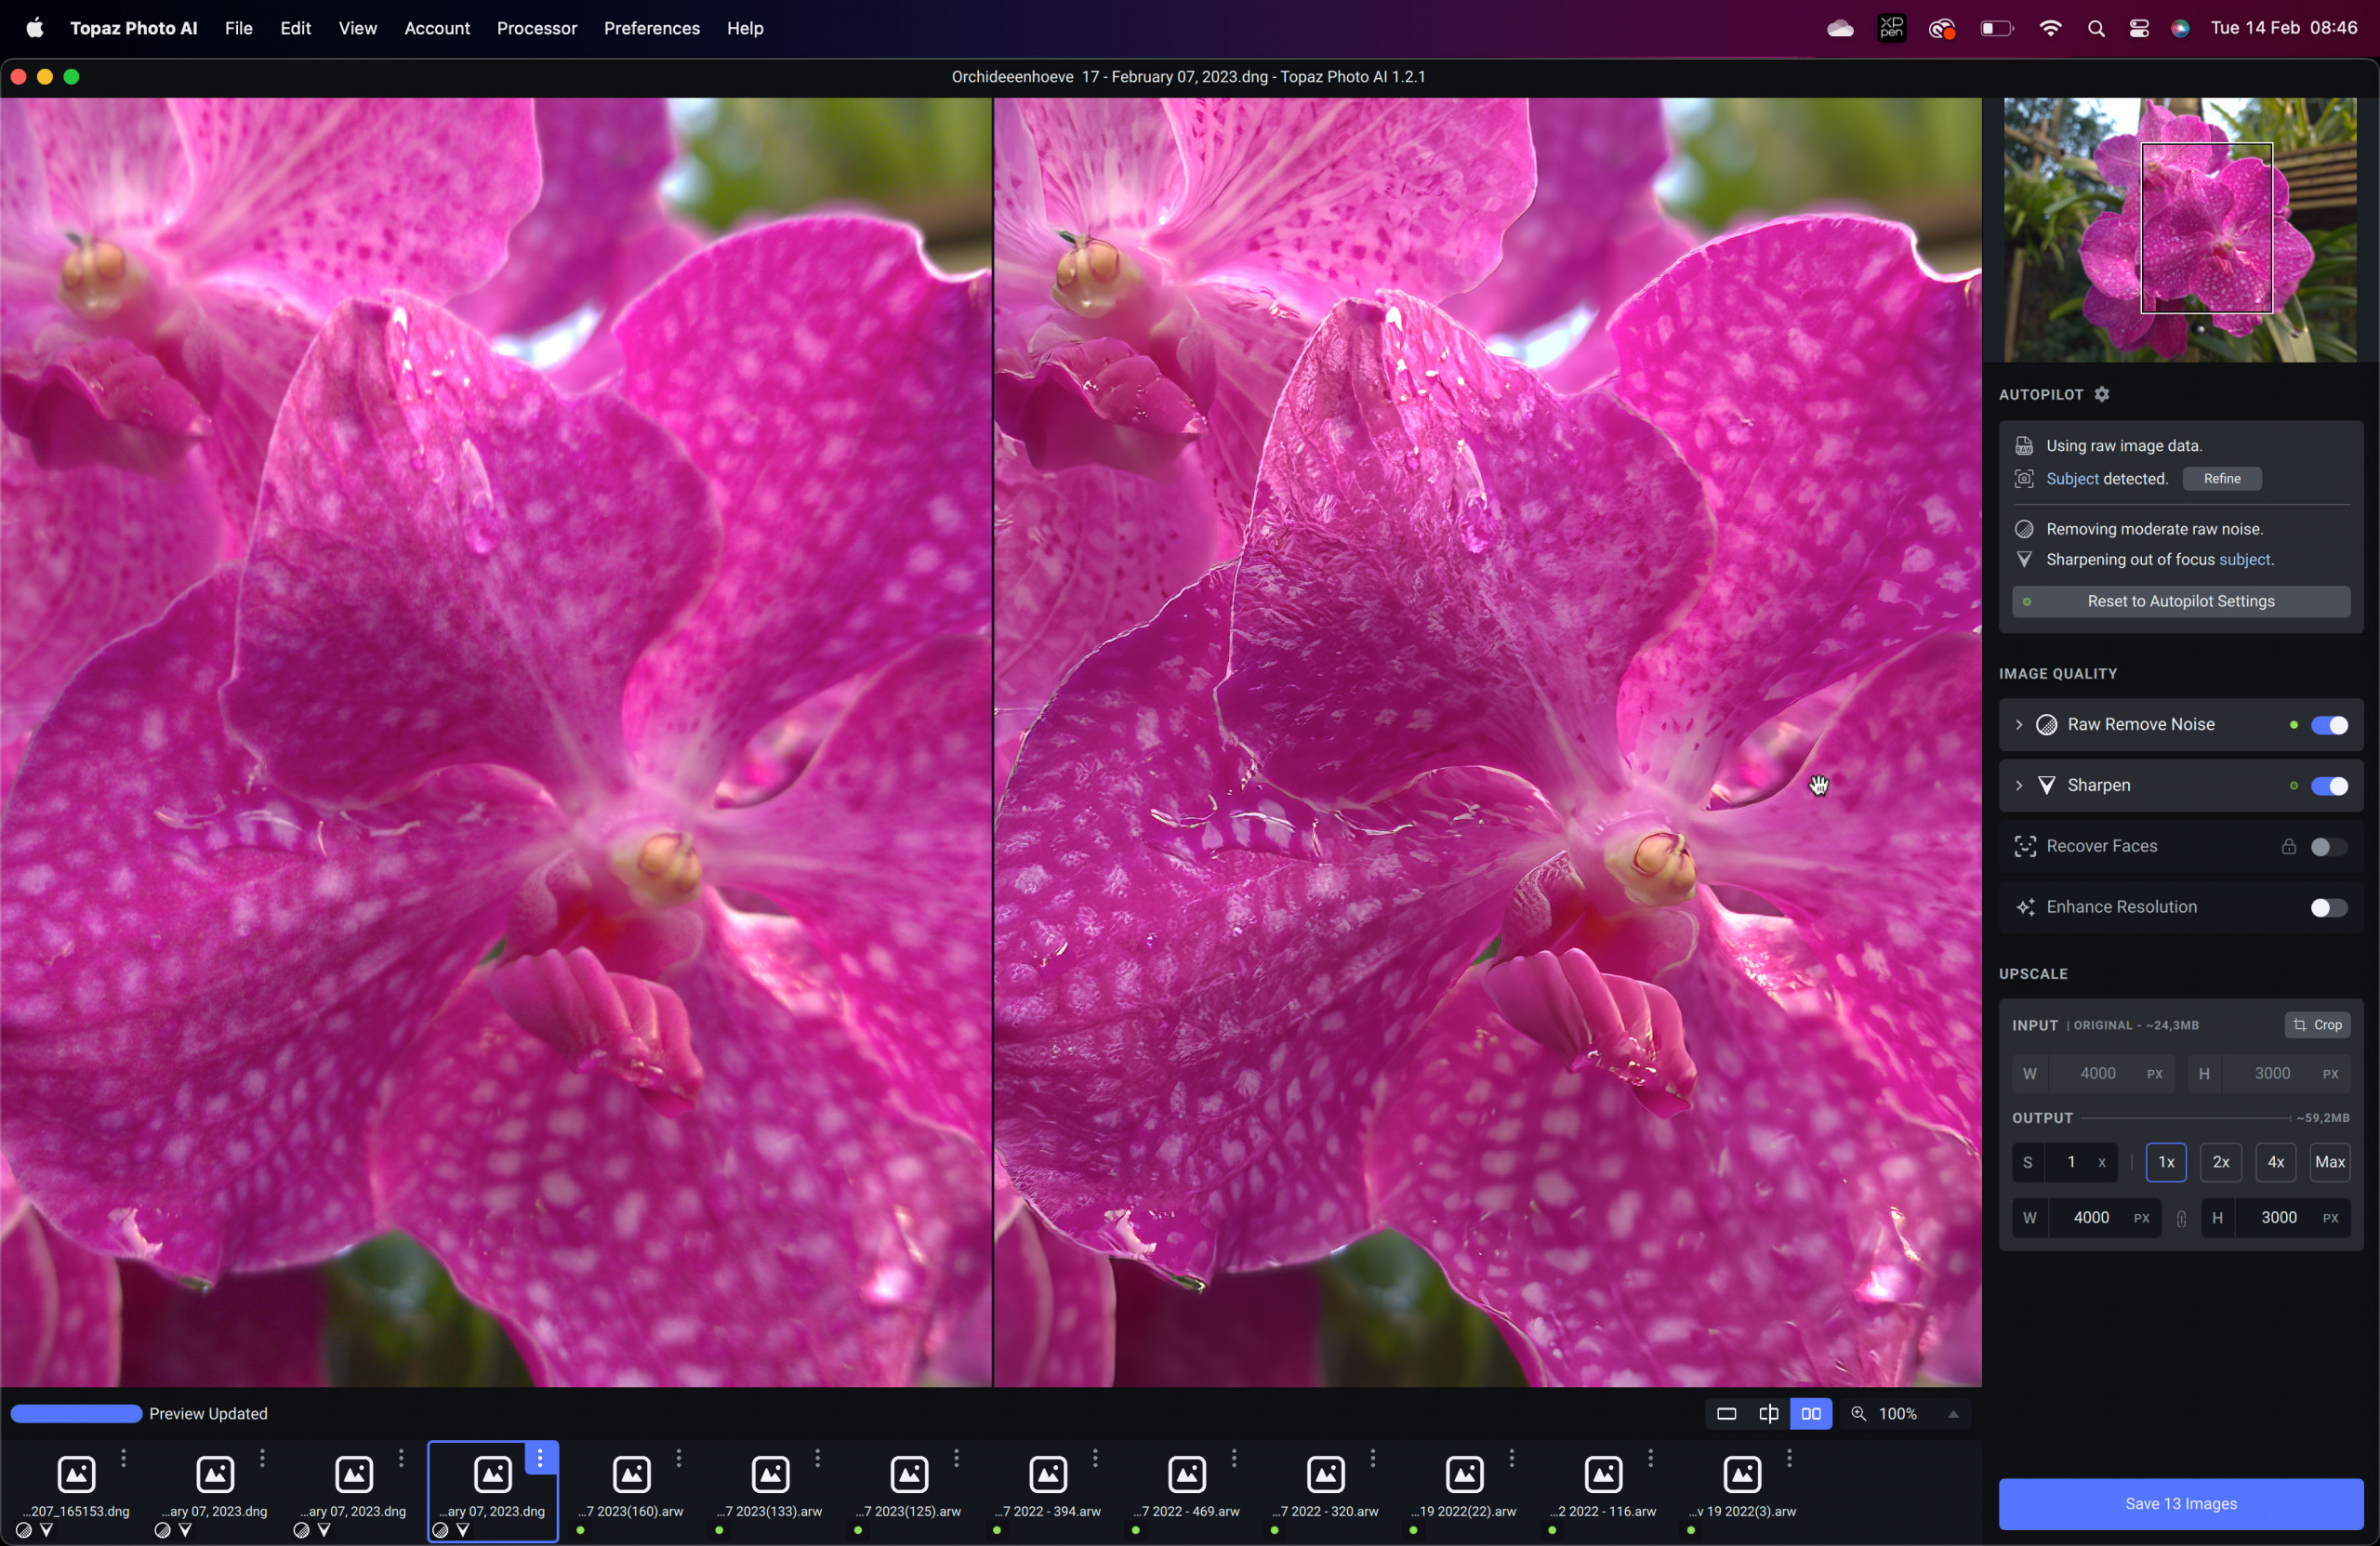
I took this shot during a visit to the Orchideeënhoeve (the largest tropical attraction in Europe).

It’s a screenshot straight out of Topaz Photo AI

I am using the sharpness here on full blast to see the effect of ringing (artifacts) and to be totally honest…. this is so much better than expected. The image really jumps out and is sharp enough to publish. It’s also incredibly handy that the software gives you the option only to affect the subject and not the background. In other words, keep your silky smooth bokeh but fix your foreground….


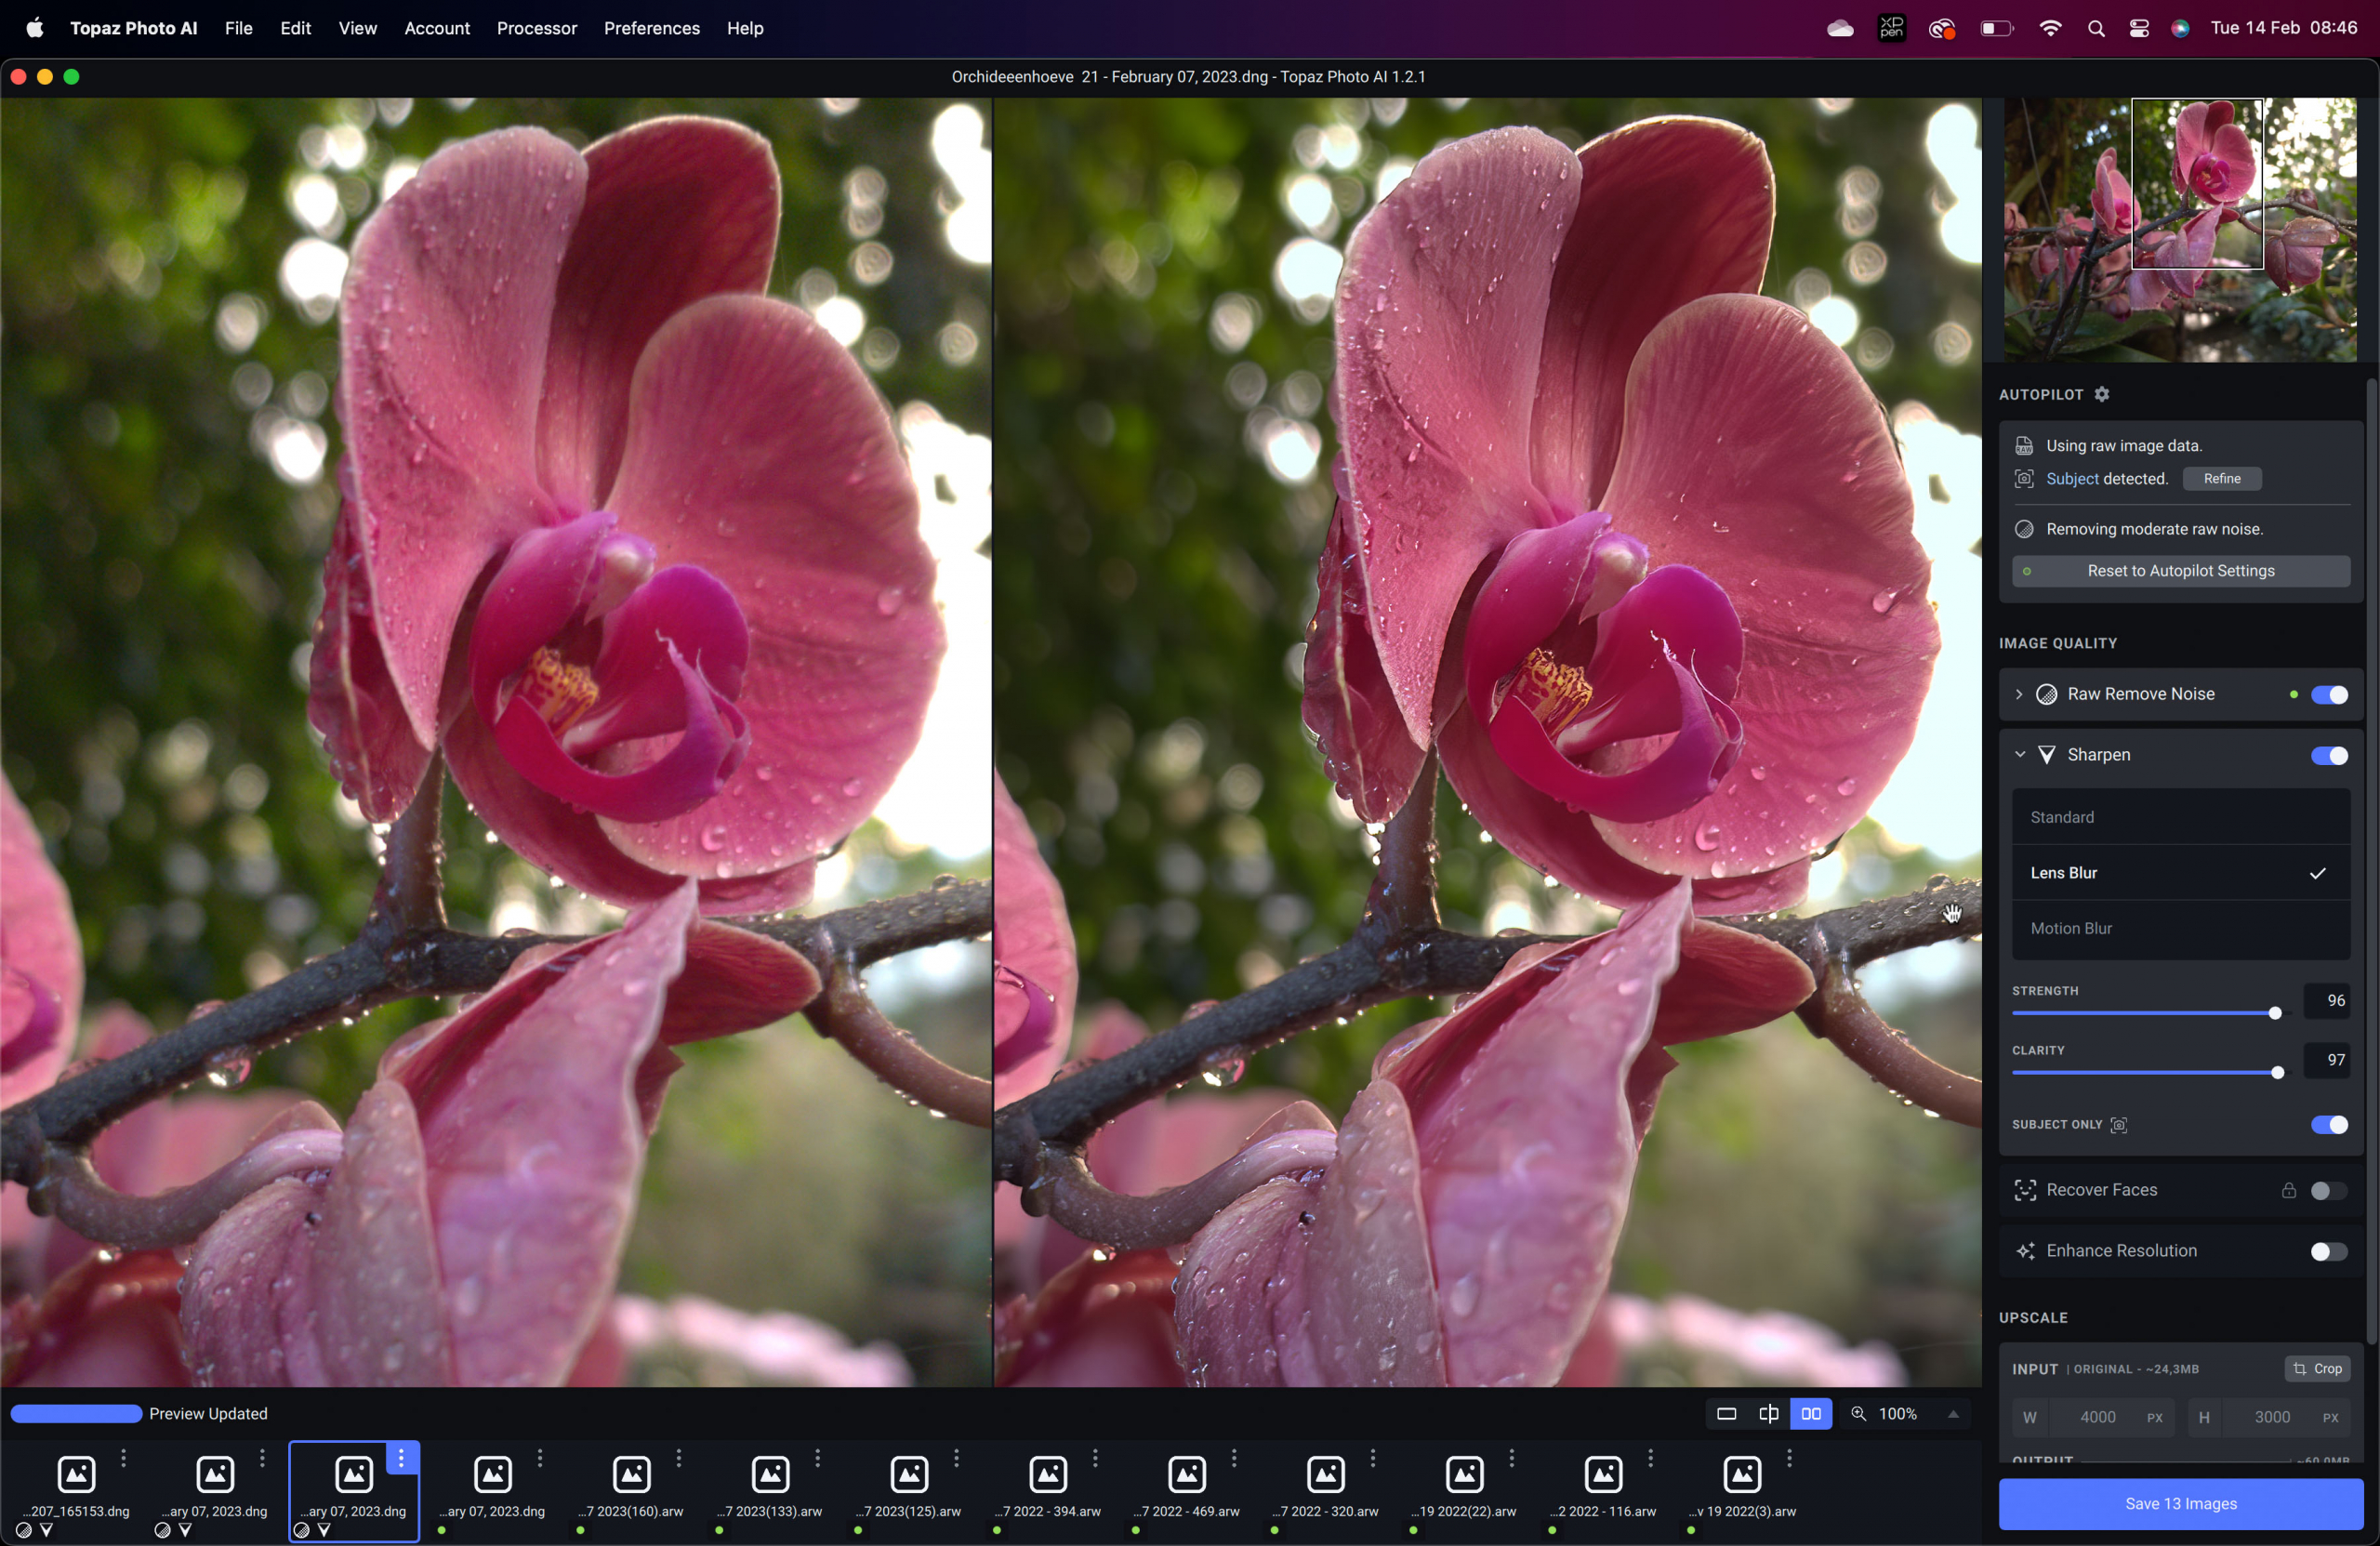
And what about an image where the focus is just slightly off, let’s be honest this happens a lot.

As you can clearly see it’s a HUGE improvement, and you can also see a boost in the 3d look, something I’m always looking for in images.
So it’s pretty clear now it can fix images where you missed focus.


But that’s not all, what if you’re perfect and always shoot sharp images?
How about using it on an image that was already pretty sharp?

Even on an image like this, the improvement is pretty substantial to the point the original actually starts to look soft…..
But lets up the ante a bit.


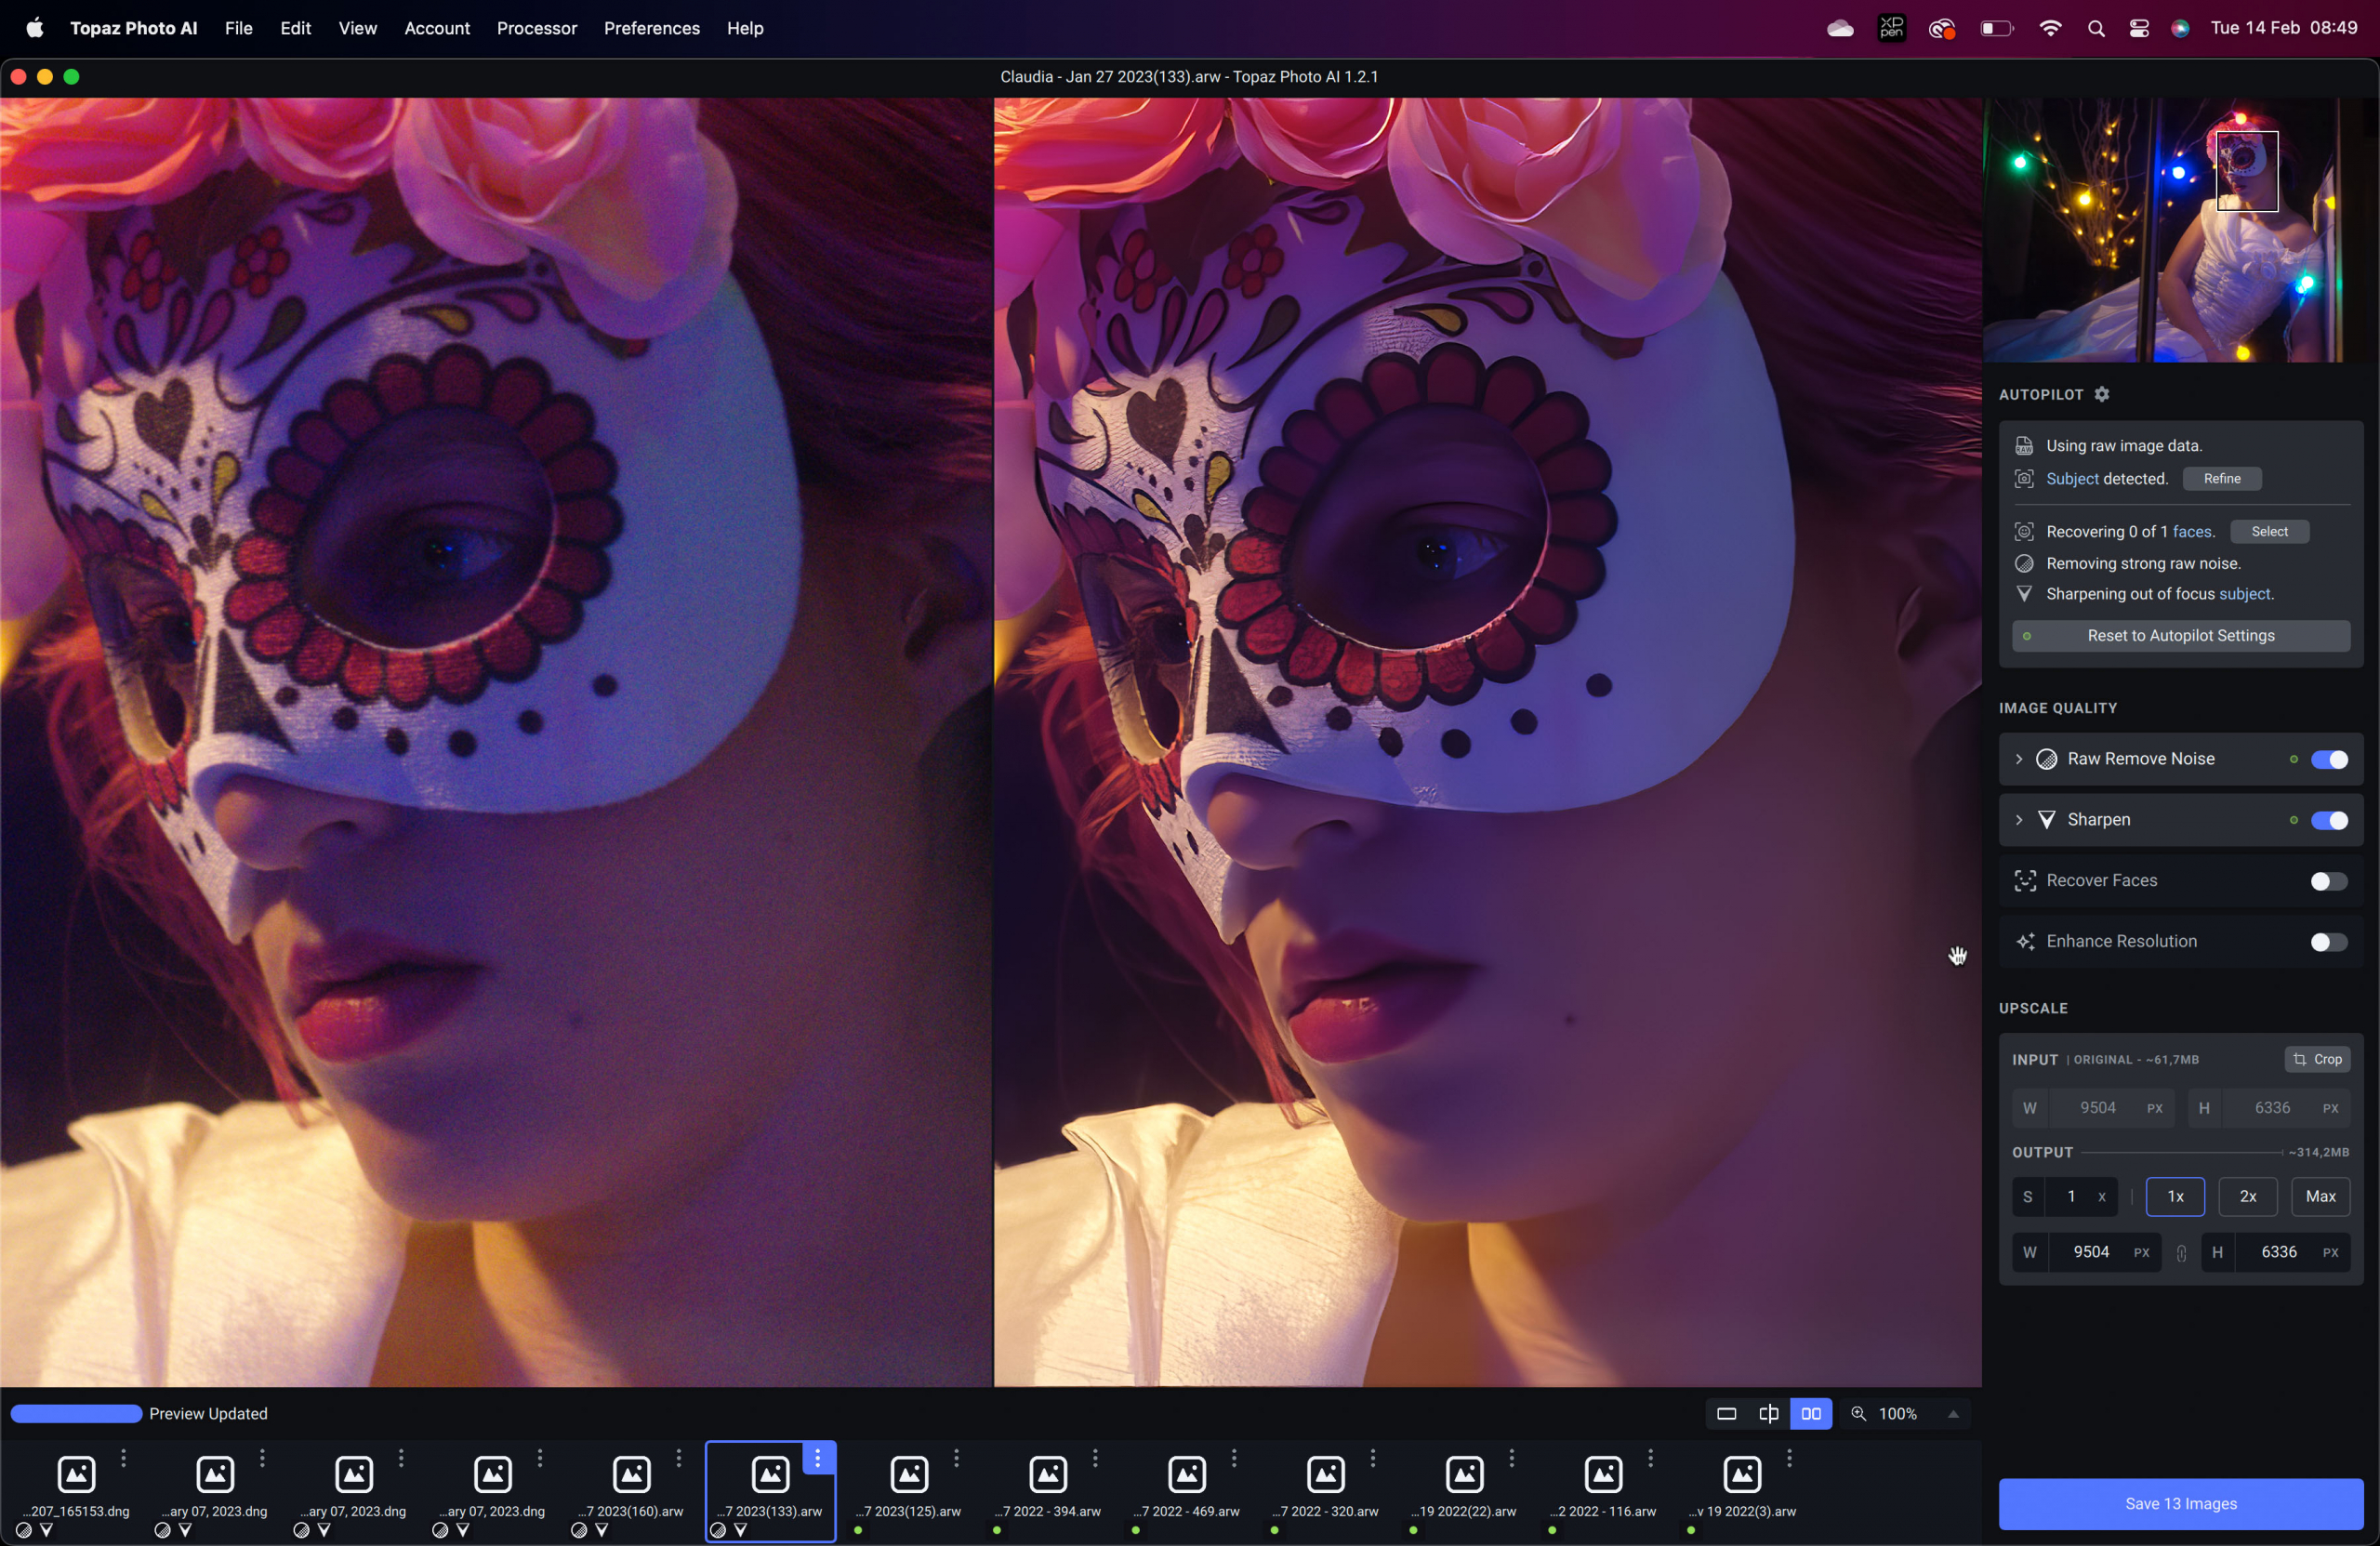
The following image I shot during a workshop with our model Claudia. This was shot with continuous lighting and although my Sony A7RIV is pretty good with noise,  it is still an image that looks a bit flat and noisy. So I was curious to see what it could do with this one… and again I was stunned.


It’s not only the noise that is gone, but look at the depth in the image….. this is just insane.


Depth in an image is always something that is very hard to do in post. It’s a combination of contrast in your lighting, lens choice, and even the sensor has a huge deal to do with this. For example, a Medium Format camera renders depth a lot better than even the best full-frame 35mm camera. Well, at least the Medium Format cameras I used over the years. And I’m totally honest when I say that for the studio Medium Format is awesome, but with Topaz Photo AI for the first time I see that depth also in my Sony images. Look at the way the mask wraps around the face, this is HIGHLY addictive.


By now I was convinced about the magic of Topaz Photo AI and I was ready for the real test.


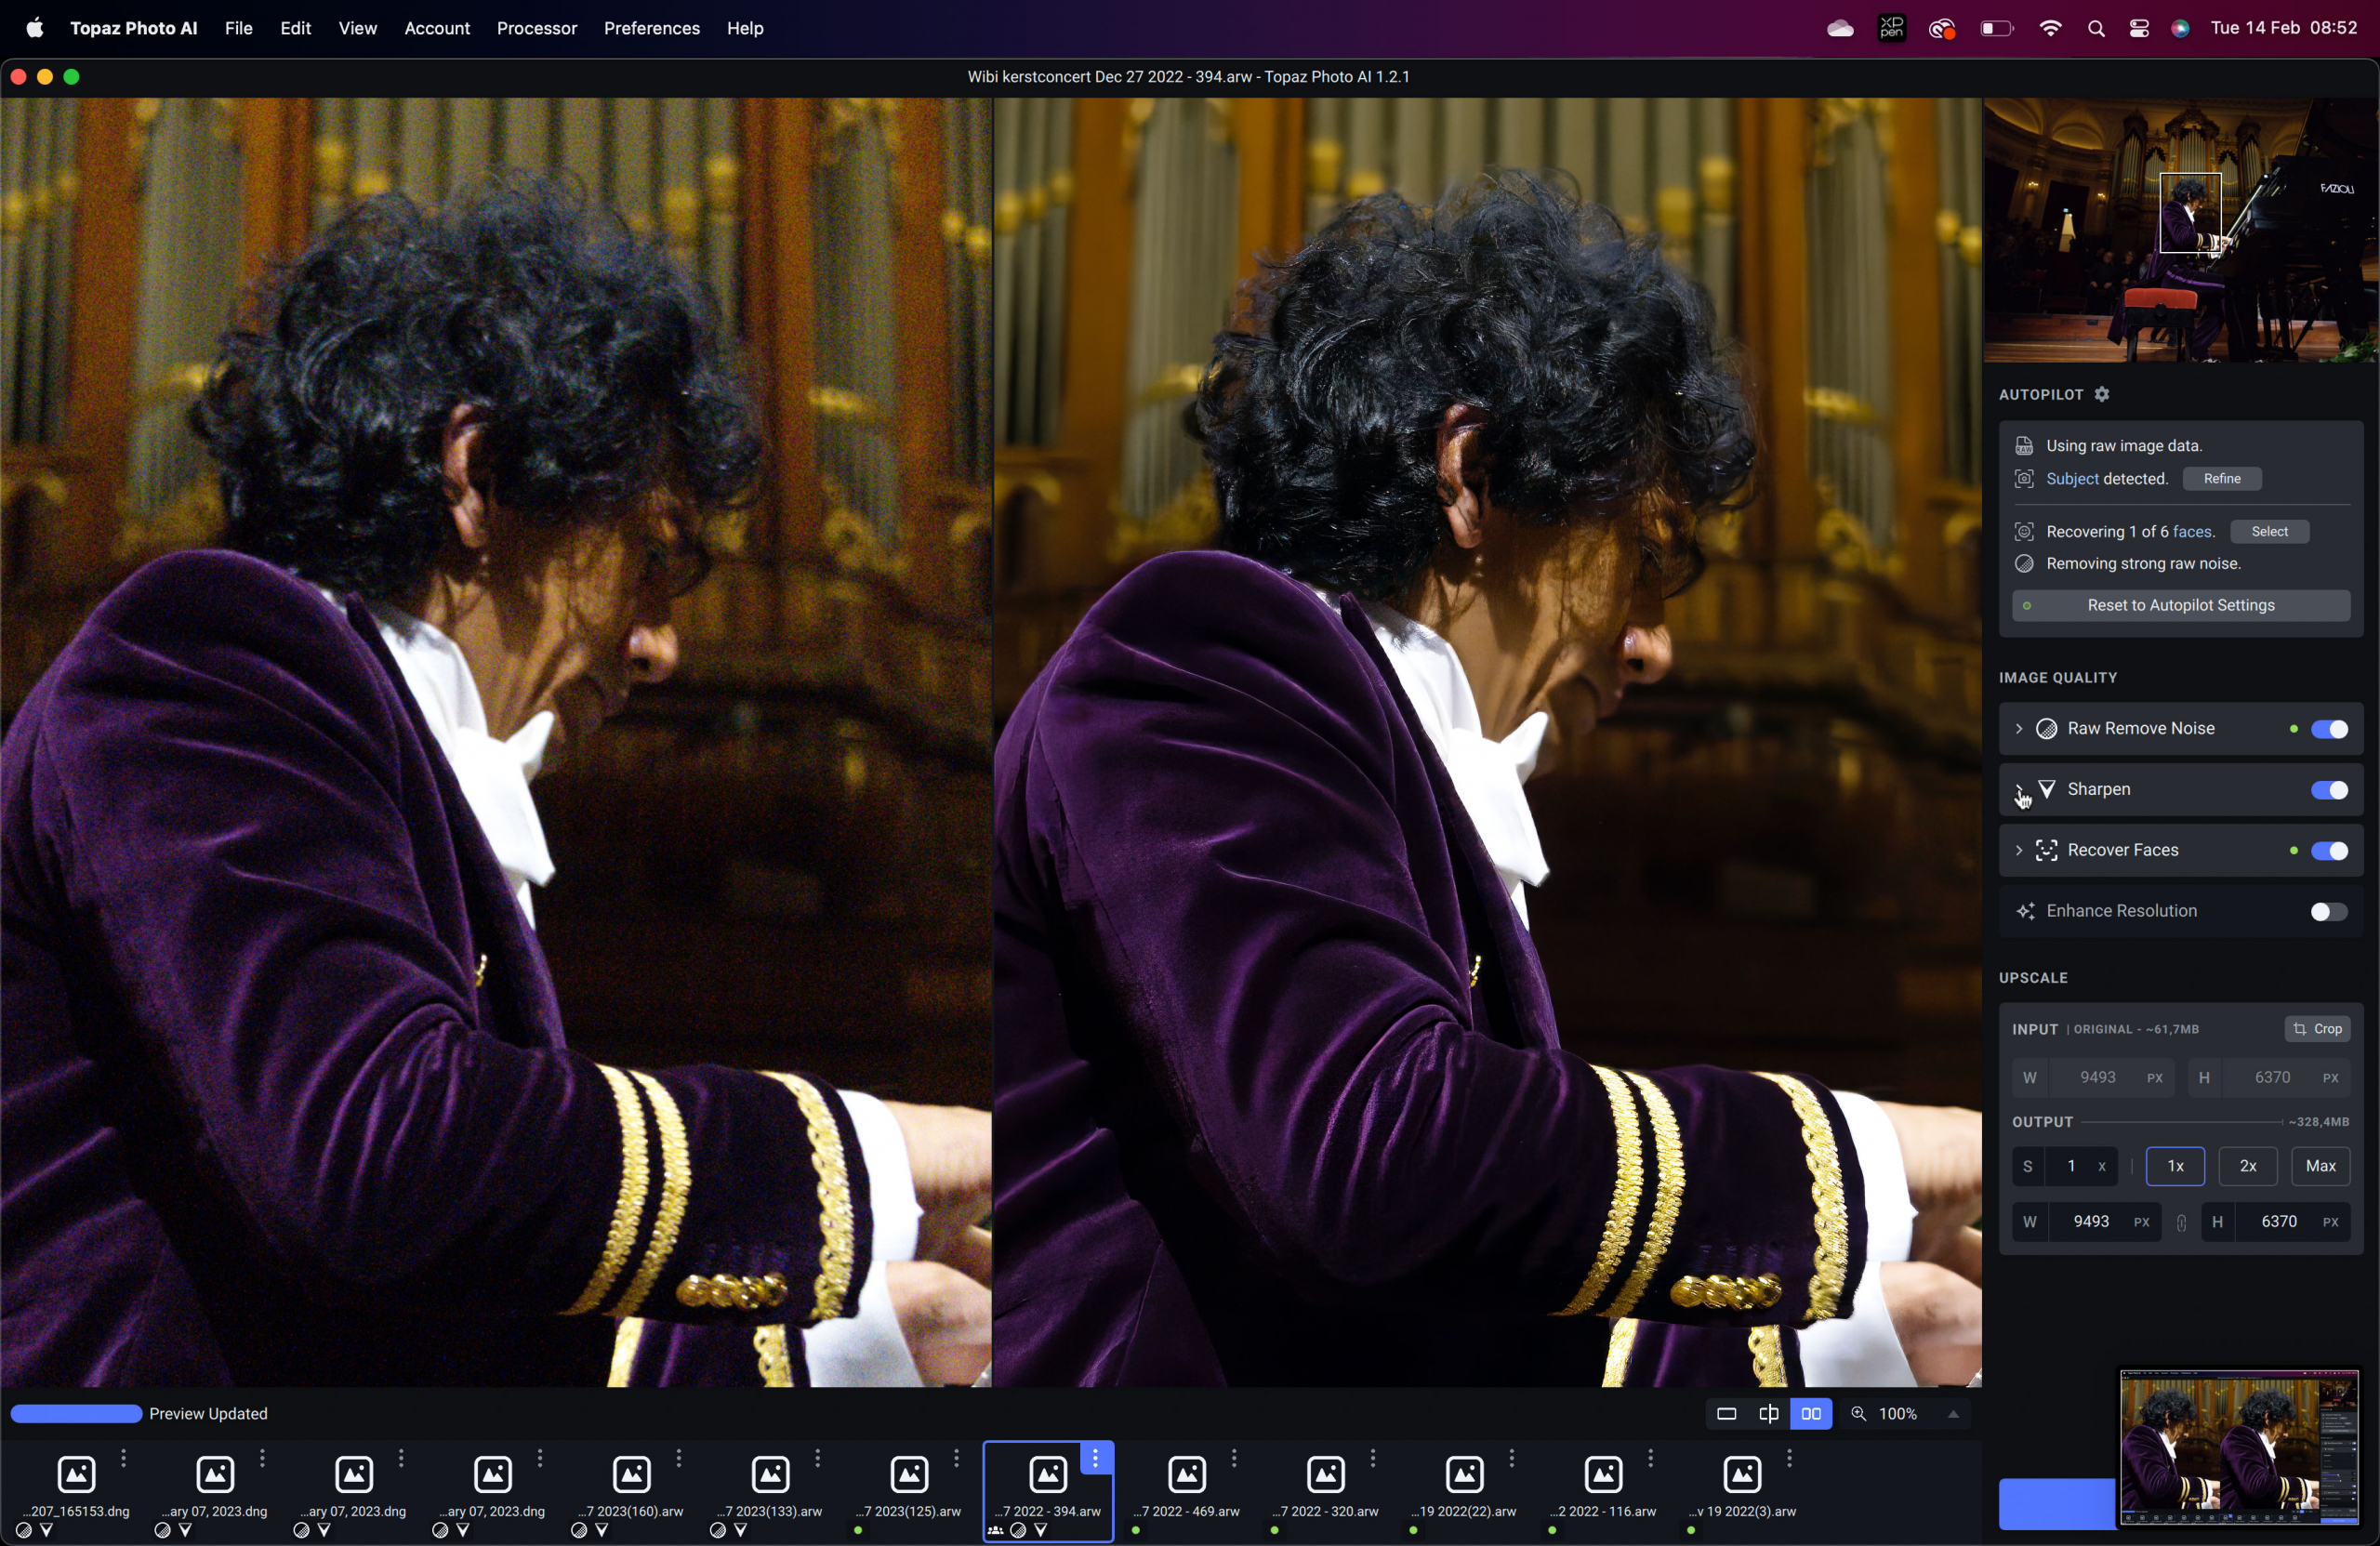
As many of you know I’ve been shooting Wibi Soerjadi for years. One of the highlights is the Christmas concert in the Amsterdam Concertgebouw. But this its also a real challenge for any camera. ISO values of 32000 are almost standard (yes indeed 32000) and in some cases I have to shoot at even higher ISOs to be able to capture Wibi’s hands in motion.

This image is already a real challenge, but as you can see it works like a charm.


When I saw this result I thought “let’s throw something in there that’s really terrible and unusable for publication”.

Let’s be honest when someone is filling the frame noise can be “ok” but when you shoot something with a wide-angle look it can really ruin a shot. The following shot is one of those images where you shoot it more to remember the situation than to ever publish it….. or………


As you can see… this is insane.
No loss of sharpness, no dull colors, no ringing, and all the noise is gone….


But there is more

In this short review, I only show you the tip of the iceberg.
There is also an excellent upscaling engine, and for example, the face recovery option is great for bringing back detail in faces that are shot with low-resolution cameras or are covered in noise.


Conclusion


It doesn’t happen a lot that I have to pick my jaw up from the ground. But while reviewing Topaz Photo AI it happens continuously. It didn’t matter what I threw at it, it did improve every single shot. Now don’t get me wrong, I still strongly believe you should try your best to shoot everything as well as possible on location. But when for one reason or another you don’t get the shot perfectly sharp or there is a lot of noise, there is absolutely no reason anymore to throw it out. I really hope you did save some of your images of loved ones or special locations that were not 100% perfect and in the past seemed unusable.


It might be a bold statement but with Topaz Photo AI you can bring your images/memories back to life and enjoy and keep those special moments forever in much better quality. And only for that, I would love to say to Topaz, “Thank you so very much from the bottom of my heart and from many other photographers out there for saving some of my precious memories which are now looking 100x better”.


As a tool, I think Topaz Photo AI should be installed on all workstations and should be a standard part of your workflow. The improvements are just too good to not use. It doesn’t just act as a great noise killer (one of the best I ever saw) but it also doubles as one of the best sharpening engines I ever worked with. Add the options to select only the subject and change the effect with sliders and add in the upscaler and face recovery option and you probably know why I’m so incredibly enthusiastic.

Buy Topaz Photo AI through our link 

Disclaimer:
I’ve been working with Topaz software for as long as I can remember and I get my software for free from Topaz, however, this has and will never influence my opinion about the software, I’m always 100% honest in my reviews and don’t believe in telling you guys stuff that doesn’t reflect reality. 

iPad Pro current state ….. is it Pro or not?

If you have followed my work over the years you know it’s pretty much a one-man (and a woman) band. Meaning everything you see from photography, video and blog posts are done by me and behind the scenes, Annewiek helps with Tether Tools, Clickprop backdrops and simply put she helps me to do my work for you guys (she’s pretty awesome). Now I’ve been an entrepreneur my entire life and one of the things I quickly learned is “workflow control”, you can do a 12 hour workday in 6 if you have a perfect workflow compared to a shitty one, and when every hour is precious it’s very important to get the workflow down to perfection so there is also some time left for family, games, music etc.

Because we travel quite a lot and I give a lot of demos for companies, tradeshows, workshops etc. over the years we have a pretty solid workflow.
Up till a few months ago, I used the fastest laptop I could get, in my case often the Dell XPS series (present I’m running an i9) and before the Dell always the 15″ MBP with the almost fastest option (simply put the top end is just way too expensive). For tethering I’ve been using Capture One for ages and for storage and quickly editing street/travel photography Lightroom Classic is without a doubt, my go-to companion. For the more heavy editing…. well Photoshop of course.

Now I’m a bit of a workaholic when travelling but I also love to entertain myself on planes/busses etc with some movies, games etc. So when we travelled the standard stuff we brought were :
Annewieks MBP, my Dell XPS, a Wacom tablet, Annewieks iPad and I used a Huawei M5 tablet. This was a perfect outfit that could handle any situation…. except one….. very important one.

When we travel a lot is also done with our RV (when we are in Europe), and truth be told, we are on power a lot but it also happens (quite often) we are not, and editing the images of the day, writing a blog post and editing that day’s vlog on a laptop WITHOUT power… well that’s impossible, I love my XPS machine but when editing photos or video the battery life (of all laptops) pretty much suck, if I manage to get 90 minutes out of it I’m jumping with joy, but when I edit outside it’s more or less 60 minutes with the brightness on full power, and to be honest… it isn’t that bright to begin with when competing with the sun, and don’t even think about editing on a plane, it’s just too tight. My tablet I actually only used on the plane or buses and maybe sometimes in the evening or morning when we have a day where I didn’t shoot a lot.

So, in essence, we are travelling with a lot of gear which all does something, but doesn’t do all.
When Apple released the iPad Pro a few years ago I literally kept hitting the refresh button to order the gift to all creatives, the laptop replacing, powerhouse (I forgot to put magic in there somewhere but you know what I mean) iPad Pro, the real game-changer. Well, it did change the game I think for a lot of people, in fact, it even got me back into drawing again for a short period of time. But that Pro indication….. in fact it was just a blown-up iPad which in fact was a blown-up iPhone…. so why did I buy this thing…… yeah I kept wondering that for over a year after which I sold my iPad pro and never looked back. Over the years I progressed from iOS to Android (mainly due to the cameras and USB connectivity which drove me mad at times with iOS) and from macOS to Windows.
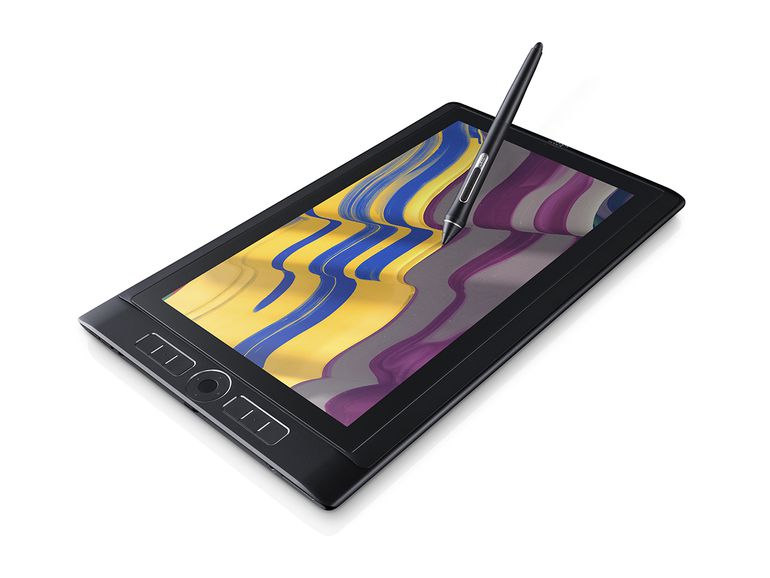
Surface series/Wacom Mobile Studio
In between my new (11″) iPad pro and the first experience I tested the Microsoft surface series twice.
The first time was a disaster, the machine kept crashing on me, the screen was way too small and editing video was… well impossible.
Of course we also had the Wacom mobile studio pro, I got the 15″ and loved it from day 1, but the lack of support and the lack of a proper stand made my love for this device melt like snow in a SoCal sun, I’ve put several videos out there to improve for example accuracy in Photoshop with the Mobile Studio but after every update something else seemed to break down so in the end I just gave up.

The second surface device I tested was “bingo” the surface book 2.
An amazing laptop with an awesome screen you can draw on, the main disadvantages were, however, battery life and the incredible drop in processing power when you went to tablet mode, and let’s be real, just for fun…. try editing an image in Photoshop without touching your keyboard…. impossible, and it’s even worse when you try to run premiere with just touch, it’s almost laughable if it wasn’t such a frustration. But in all honesty, the surface book 2 was the best laptop I ever used, and the only thing that held me back was the fact that there were a lot of “rumours” about a game-changing iOS and some plans with Adobe.

Adobe the Apple salvation?
Apple is not my Apple anymore.
When I see the keynotes I can’t really feel the same feeling I got when the iPad was released or the MacPro or…. Apple always had some cool stuff that nobody else did, integration between devices was flawless. The biggest letdown for me was actually the release of the touch bar MBP, getting someone from Adobe on stage to show Photoshop with her fingers on that HUGE trackpad, I just knew she would walk off and go back like Columbo/Steve Jobs and would say “oh just one more thing, from now on the touchpad is also compatible with the Apple pencil” I was so waiting for that moment but it never came…. I tried the keyboard, I tried to convince myself to be able to live without a card reader and HDMI and that 5000.00 wasn’t really……. ok that’s when I snapped out of it 5000!!!! are they fricking insane? I ordered my Dell XPS the day after for 2500.00 including 24 hours onsite support. I never looked back.

In this same period Microsoft, Huawei, Samsung etc. made HUGE progress in both cameras and connectivity between devices and now even between devices from different brands, almost everything that made Apple so awesome was now on the other side, but………
Lightroom CC and more
Lightroom CC on Android was a game-changer, I never liked Lightroom Mobile, but what Mobile did wrong CC absolutely did right, much better performance and finally, also a way to create your own presets and sync between devices without much of the limitations of Lightroom Mobile. At the moment I still think the Android version of Lightroom CC runs more smoothly on my P30 Pro than on my iPad pro, luckily Adobe finally did upgrade the iOS version to be able to batch edit images (something the Android version already had) so for me both are now about equal for what I need.

But Adobe didn’t stop there.
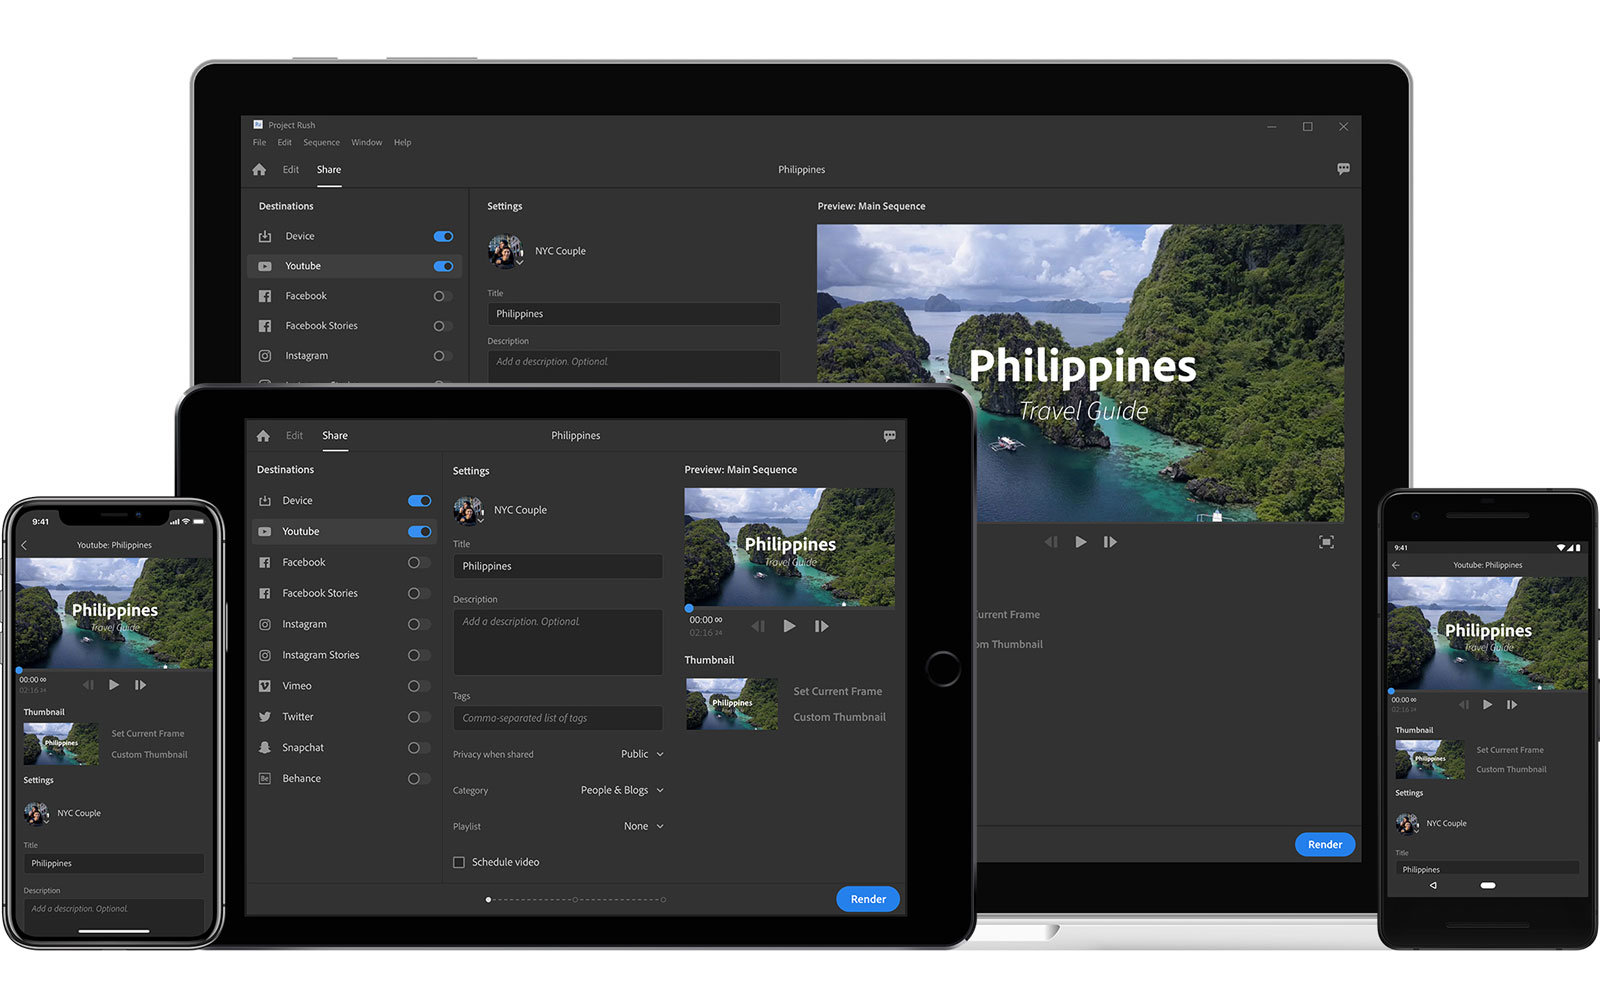
For video I always use my laptop in a workstation I created at home so I don’t spend all my time in the studio, but it’s still a fixed place. When I heard about Project Rush for the first time I was over the moon, finally some video editing that I can use for the vlogs and smaller educational videos, at that time I did try “Power director” for Android and although it’s pretty good it wasn’t really what I could use daily so Project Rush… bring it on.

A few months later we were together with Adobe at Photoshop World and I got the major hit…… Photoshop is coming to the iPad. Slowly I started to look at the iPad pro again but I also had a lot of doubts. How can you work with Photoshop and video if it’s a real pain to get your files on and off your iPad, especially when you don’t have internet or very slow internet. (for years we were stuck at 10mb/s down and 0.7 up (if the winds were right).

Slowly it’s getting together
With the announcement of iOS13 / iPad OS, I knew it.
Adding external hard drives and having a “real” file system that’s it, now we are talking.
So I ordered my brand new USB-C iPad Pro.
At first, I ran the beta version of iPad OS and am now on the final release candidate so I think it’s time for an update.

Software vs Apps
A lot of people will claim that an iPad pro will never be a replacement for the laptop because you don’t run full versions but apps. Well let me put that straight, it’s an excuse (in most cases) take for example the software Lumafusion (you might have heard that name before), Lumafusion is an insane video editor for the iPad pro that for me actually is debit to the fact I hardly use my laptop anymore. I loved premiere and could edit almost blind on it (for what I need) but having an iPad in my lap and being able to do everything with touch is unbelievable, in fact 99% of all the video you see online from us is edited on the iPad pro with a mix of Rush and Lumafusion. And of course the desktop app can do more but in most videos, we don’t use multi-cam and I don’t need face-tracking with object avoidance nuclear radar interpretations…. (although a stabilizer would be cool inside Rush or Lumafusion, but there are very good external apps).

Same goes for office applications, I don’t need the full-featured desktop experience, I need to be able to write, edit and read and that’s it. So apps vs software are in most cases a bit like range anxiety with Electric Cars, you worry about it when you don’t own one when you work with and own one you will quickly see that the benefits highly outweigh the negatives.

But is it really pro?
Well, what is a pro?
Let’s see when an iPad pro can really replace a laptop.
Travelling salesperson or manager: without a doubt
Consumers that surf, read, watch movies etc. : without a doubt
Heavy media users and gamers: without a doubt (but with other games and MUCH longer battery life)
People that love to draw: oh heck yeah, can’t think of any device more suited for that
People that vlog: yep, without a doubt, unless you feel you have to Spielberg
Podcasters: oh yes, without a doubt, in fact, it would be my favourite thing I think.
People that do photography and video:……… you might expect yes but it’s different from that.

I don’t want to say yes or no, let’s just see what I think and experience.
Adobe (again)
Adobe for me is a company I love. I know they get a lot of hate about subscriptions but I would rather get updates weekly and pay 12.00 a month that get an update once a year and pay 199.00 for that update, often people seem to forget that without a continuous income stream you can’t do research and development. That being said, I’m a bit disappointing up till this point on a few key elements that actually make me wonder if I will continue with the iPad pro.

Lightroom CC
Lightroom CC is my mobile world, I can’t stress how much I love this app. It’s on all my devices and it’s the perfect companion when travelling, and because I only use it when travelling even the 100GB cloud space is more than enough, even when I save all the images I take during a 2-week trip. I love how I can work on every device and when I arrive back home all my images are already in Lightroom Classic and the only thing I have to do is check my edits on a calibrated BenQ monitor and I’m done. Absolutely awesome.

However……
Lightroom CC is incredibly crippled by one simple thing.
Why the heck can’t we rename images?
Now I understand Adobe wants us to move everything to the cloud but did they ever think about people (like me) that often don’t have good internet in hotels (try uploading images with 0.07 up) and that being said, I just want to be able to name my images the way I want them and not the way Adobe wants it.

Not being able to rename means that during travels you can’t really export any images to clients because the moment I’m home I’m renaming all my files in Lightroom Classic so I can never find something back on a filename that I send out on the road. Something that’s so essential should be in the software. But let’s not blame Adobe…
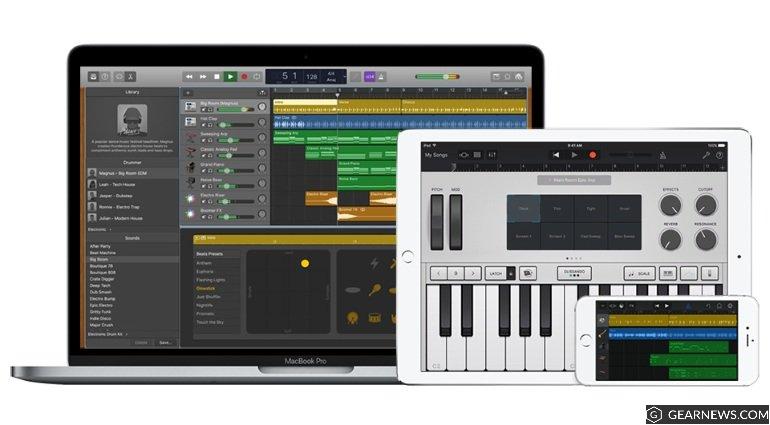
Batch renaming part II
So it doesn’t work in Lightroom CC, ok we can work around that right?……
Well…..
Silence…..
No we can’t.
And I’m still a bit flabbergasted by this.
How can Apple call a device Pro and a file system let alone a laptop replacement if in the WHOLE Apple ecosystem (including apps) there is not ONE option to batch rename images? what’s going on here? this is the first and most important thing I do in my workflow, rename images by location and date. I searched high and low and can’t find ONE app that allows me to batch rename images (if someone does please let me know). In the end I did find a solution via automation but that’s also not really a solution you can work with, it’s a lot of steps and it does take some time. And time… well we don’t have that much.

To be honest this is the biggest problem I have (such a small thing).

Ok so what does work
Let’s be fair, I love my iPad pro and as mentioned before there are always cons and pros, and if the pros outweigh the cons you go for it. So let’s see:

Presentations:
Works like a charm, it did took me a while to find the proper remote but it now really works like a dream. Even editing presentations is fast and almost just as powerful as on the desktop. At the moment I’m mostly using KeyNote but also Powerpoint works great on the iPad.
CHECK 100%

Shooting tethered:
Mixed bag.
When I use the Sony app it can work like a charm, but it can also frustrate the heck out of me. I’ve had situations where images took 4-20 seconds to come in and I’ve had situations where they only would come in when I was 1 meter away from the iPad Pro. For a while, I tested the CamFi (I’m shooting Sony so Camranger and case air don’t work at the moment) and that was a totally different experience, everything came in blazingly fast and even at Photoshop World from a distance of over 30 meters it still didn’t miss a beat. In a few week a new Tethertools product is being released with even better performance (and for Sony) and I can’t wait to test that one out.

Still, I really want a solution where I can also shoot with an USB cable. Let’s be honest wifi is still a risk you take and I just can’t afford to be somewhere and say “sorry… we don’t have images coming in but they are awesome, trust me”. I do believe however that with the opening of the USB-C port it won’t take long before someone will pick this up. And with a rock-solid wifi connection, I’m willing to wait for this (in case of emergency I have a solution on my phone that works with USB-C tethering, and as long as the people see the images it’s fine).
CHECK 80%
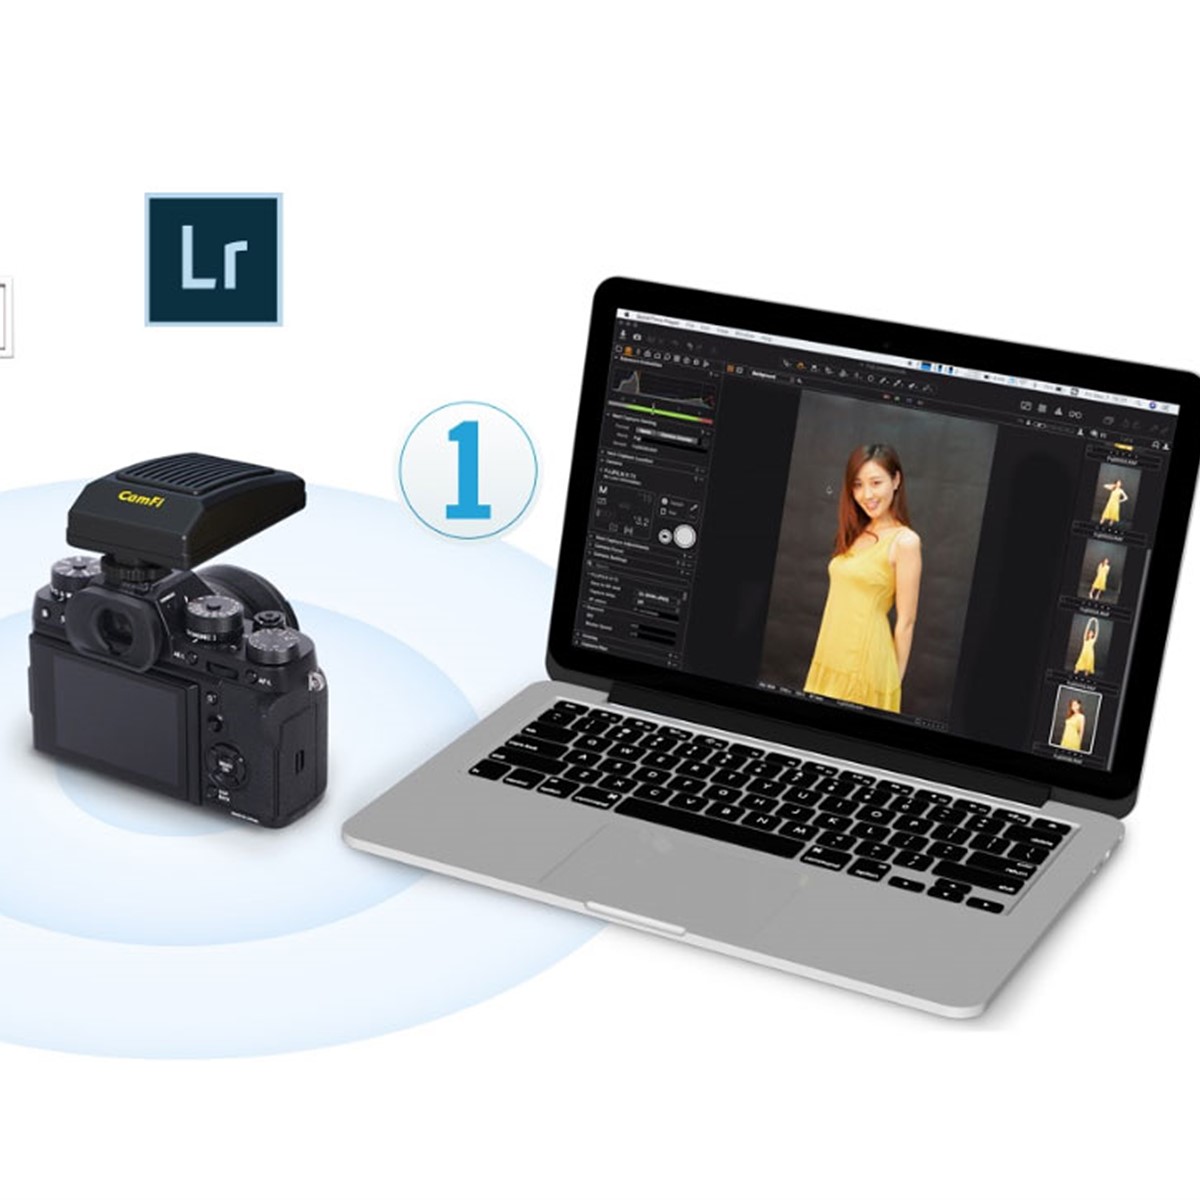
Media consumption and comics/reading/gaming
Duh, not even gonna talk about that
CHECK 100%

Video editing
With both Rush and Lumafusion I almost dare to say that unless you want to create something really special 99% of the edits can be done in Lumafusion and a lot in Rush. Main advantage of Rush is that you can start mobile and do the final edits on the desktop.
CHECK 90%

Music creation
Oh man…… I just can’t express how much I love the iPad for this.
Garageband is insane, combine it with apps like ToneBridge and iRig and you can lock me away for months and I will not get bored for a second. If you want more? there are several Pro DAWs on the app store ranging from ok priced to rather cheap. Also try to connect your iPad pro to your desktop DAW for some cool slider action.
CHECK 100% +++++

Photography
Ok there we go, the moment you’ve been waiting for.
Let me forget about that renaming thing.

For a good conclusion I have to do it slightly differently.
If you’re a traveller and do most of your edits in Lightroom I would say that the iPad Pro is amazing and will without a doubt replace your desktop. Lightroom CC is fast and multi-device (which for travelling is so cool and handy), add to this the fact you already have a backup in the cloud and you can see that this is a winner.

I would say for the travel/nature/street photographer
CHECK 99%

Ok, now we need a bit more.
Panoramic shots
I’m flying my drone and I want a panoramic shot (this would also go for the previous one btw) at the moment Lightroom CC doesn’t stitch, and also the just released Photoshop doesn’t. But don’t worry, there is another app out there called Afinty Photo and believe it or not that one does stitch panoramic shots. But…. the last time I tried it it took Afinity over 20 minutes to do it…. editing a complete vlog in 4K took less render time, so that’s next to useless unless you only have 1-2 panoramic shots.

FAIL 10% (it can be done)

Ok now we take a look at the photos that need editing
On the desktop most of my edits are done in Photoshop with my model photography.
Although with the new texture slider Lightroom can do some good skin smoothing, running a plugin like Portraiture is no competition. Also tinting with Exposure software, or making an image pop with Topaz studio/Luminar is a breeze and very fast. When we take a look at the iPad Pro we have a few options.

  1. Afinity Photo
    This is the best thing you can get at the moment that mimics Photoshop. It’s a mix of frustration and love I have for Affinity. Somehow when I follow my workflow to the letter it “kinda” works, but I’ve had a lot of struggle with layer mask and reselecting them, also merge visible or selected doesn’t work and don’t even try to open something else on iPad iOS 13.2 because somehow they broke multitasking so all your work will be gone.Overall I can almost anything in Afinity, including some pretty good skin work, healing and cloning however feel awkward and although it gets better it’s still very work-intensive compared to the desktop
  2. Photoshop
    Just released so it’s not really fair to give my opinion, but I still going to do it.
    We’ve been waiting for a year (even longer for some) and to be honest the release does disappoint me a bit. I love to tint my images via curves and seeing that there is no curve option just made me sad, I can do it with levels in a similar way but …. come on no curves?
    Also I have a lot of things that simply don’t work, messages like “this is not available on your device” sorry…. what? I’m not running Android where there is a difference between devices, this was designed for the iPad pro and I’m running the latest one…. why?, how?
  3. Snapseed
    We all love snapseed, and I mostly use it for tinting. For real photo-editing? Not really
  4. The others
    There are a LOT of editors on iOS and I don’t want to say they are not good enough to mention, but let’s be honest there are not a lot that have the features of Afinity and Photoshop so I left those out mostly because they have severe limitations in export, resolution etc.

If I look what I’ve done so far, I’m able to deliver the “same” looks and quality to my clients than I would do on my desktop, that being said….. it does take me at least twice as long per image. So I would say
CHECK 80%
Finally the file system
The promise, the thing, the magic of the iPad….

Well for me the disappointment of the iPad, well ok that’s a bit too harsh.
I’m very happy with it, you can now just connect an external SSD, card or whatever and you can easily copy stuff from and to your device, that part is awesome and well needed. So what don’t I like?

Well, it’s the way how.
For example the film roll is still fenced off like crazy, you can’t go to your photos via the filesystem, and if you want to copy for example images to photos you simply can’t….. unless you use the share option. When you are in photos you can share via filesystem so it’s all possible but it’s not like Apple (easy and one-click). I also feel the speed is limited (a lot) making copying huge amounts of data very time consuming, and finally you don’t really see what’s happening, I would love to see an indicator of percentage or time. For me the best way to work with the filesystem is just to have to windows next to each other and just drag and drop.

Another cool addition is the connection to network locations, but in our situation, we often lose the connection and it’s quite buggy when I want to copy files or delete files on my NAS (as in it just doesn’t work or is very slow).

I would say that for normal every day use it’s fine, but it needs a lot of work before you can even add the P from Pro.
Also we really need to see the option in the apps, meaning I can just use the file system in Lightroom CC, Lumafusion, Rush etc. At the moment Rush, for example, is not able to import anything from another location on my iPad than Photos.
Check 51% and 70% if apps start to support it.

Hardware
Finally let’s take a quick look at what I use as hardware
For the cover, I have one cheap cover that just protects the iPad when I don’t need a keyboard.
For the keyboard, I opted for the Logitech which I love, but it does make the iPad pro a bit heavy for reading in bed for example. I think if I would do it all over I would opt for the Apple version, the keyboard is a lot less but it does make the whole experience a lot easier to carry and you don’t have to switch cases.

Apple pencil without a doubt, don’t go for the competition, you will be using it a LOT

For connectivity, I’m using the Hyper solution. I really like this one and opted for Hyper for the simple reason that most of their products are well supported and good quality and seeing I’m using it like a pro device I don’t want any surprises. Do realize you have to disconnect it every time because it does drain the battery.

I’m also using a magic touchpad (I still had that one) for when I want to connect the iPad Pro to a monitor and use a separate keyboard and mouse like functions.
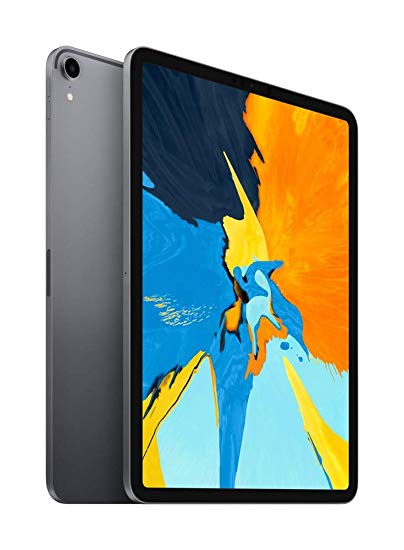
Conclusion
You might think I’m pretty harsh on the iPad pro.
And I might indeed, but let’s make one thing clear…. I strongly believe that in 2 years time we don’t travel with laptops anymore but with tablets like this. The reason is incredibly simple. You can do almost everything you can do on a laptop, in fact you can work faster and longer with creative software, the Apple pencil is just insane in how it works (and I love the new charging option).

The reason I’m harsh is more also towards Apple.
They charge you a premium price for all their products and throw around terms like magic, unbelievable etc. almost every minute in a keynote, this will, of course, strengthen the expectations someone has of a product. I already feel the iPad pro was wrongly launched, although people that draw will disagree and they are right, and after giving the iPad pro a second chance I can’t say I’m overall disappointing but it’s a far cry from what Apple makes you believe. The weird thing is…. it’s 98% there and that’s the most frustrating thing if a device doesn’t work at all you can just throw it out and don’t think about it.

The iPad Pro is a marvel.
I can edit 4K video smoothly on the timeline where my i9 needs proxy for h265 (insane), rendering a 10 minute video takes 8 minutes on my i9 en 10 minutes (real-time) on my iPad Pro (again insane), the screen is double as bright outside as my laptop which is a major deal when teaching workshops on location plus the battery just keeps going.

The apps are great.
Afinity photo is great for almost all photo-editing (but needs some serious bug fixes and performance boosts)
Photoshop I strongly believe in, but not at the moment… I know for sure that in a year we will have a different Photoshop on the iPad than the framework we see now, at the moment it’s a cool start but it doesn’t come close to the features in Afinity, but that being said, I think that in 2 years time Photoshop will be the ruler on the iPad Adobe just needs to start adding things and they already promised a very aggressive upgrade program so I’m full of confidence, and till that moment I can do everything with Afinity I need.

iOS itself is the thing that worries me the most.
Apple is always very “my way or the highway” and I just hope that by opening the USB-C port they don’t limit it for third parties to for example create tethering solutions or external connections.

At the moment I will continue using my iPad pro as a daily driver and my laptop is actually only used at the moment for our live streams and music recording (I like working with cakewalk on the desktop a bit more than the “limited” Garageband for full recordings especially with additions like EZkeys and EZdrummer etc). So overall I can say.


Yes, the iPad Pro can replace a laptop (finally) but if you are a demanding person (like me) there are some sacrifices you have to make. If they finally fix that batch renaming that would be a major improvement.