While setting up for a digital classroom episode Chewie thought it was fun to keep jumping on the chair.
(When you watch the live stream you can actually see him trying to steal the show several times.)
And when your dog jumps into a set, it’s of course time to take some shots.
I hope you guys enjoy Chewie the black labradoodle studio dog.
And yes, we also do pet photography 😀
https://frankdoorhof.com/web/wp-content/uploads/2025/12/Chewie-9-December-10-2025-Edit.jpg8001200Frank Doorhofhttps://frankdoorhof.com/web/wp-content/uploads/2015/03/studioFD_Logo-1FV.pngFrank Doorhof2025-12-12 18:00:342025-12-12 15:08:33Chewie takes the stage
So a special model for todays blogpost.
If you follow our YouTube channel I’m pretty sure you have seen our model of the day a few times.
He loves to “help” with filming tutorials, and sometimes during workshops he just jumps into the scene posing like a real diva.
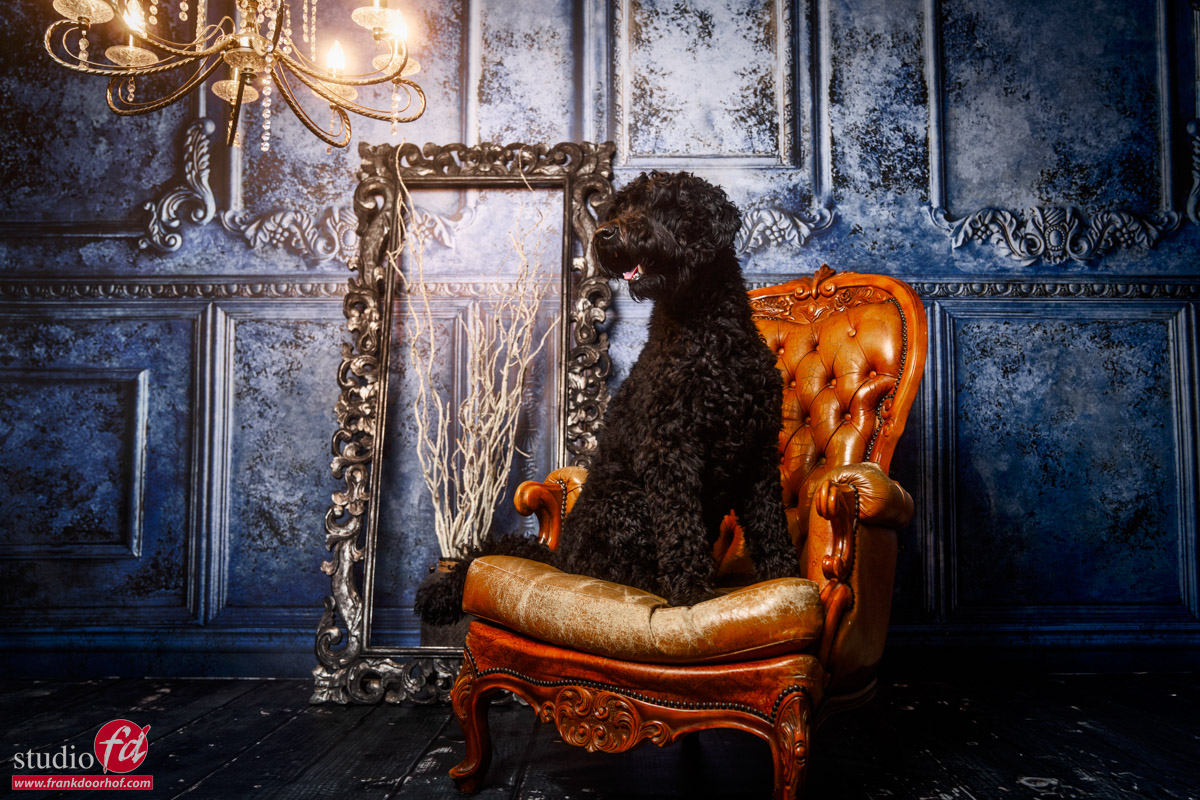
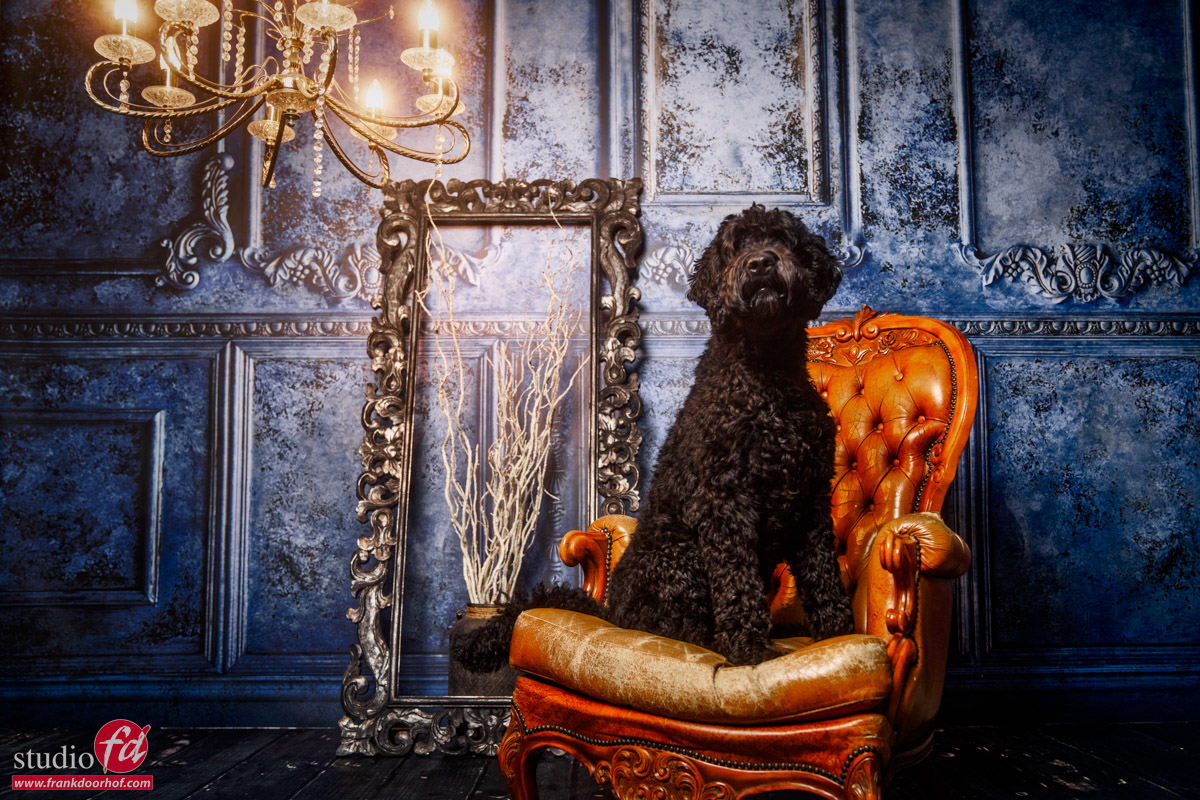
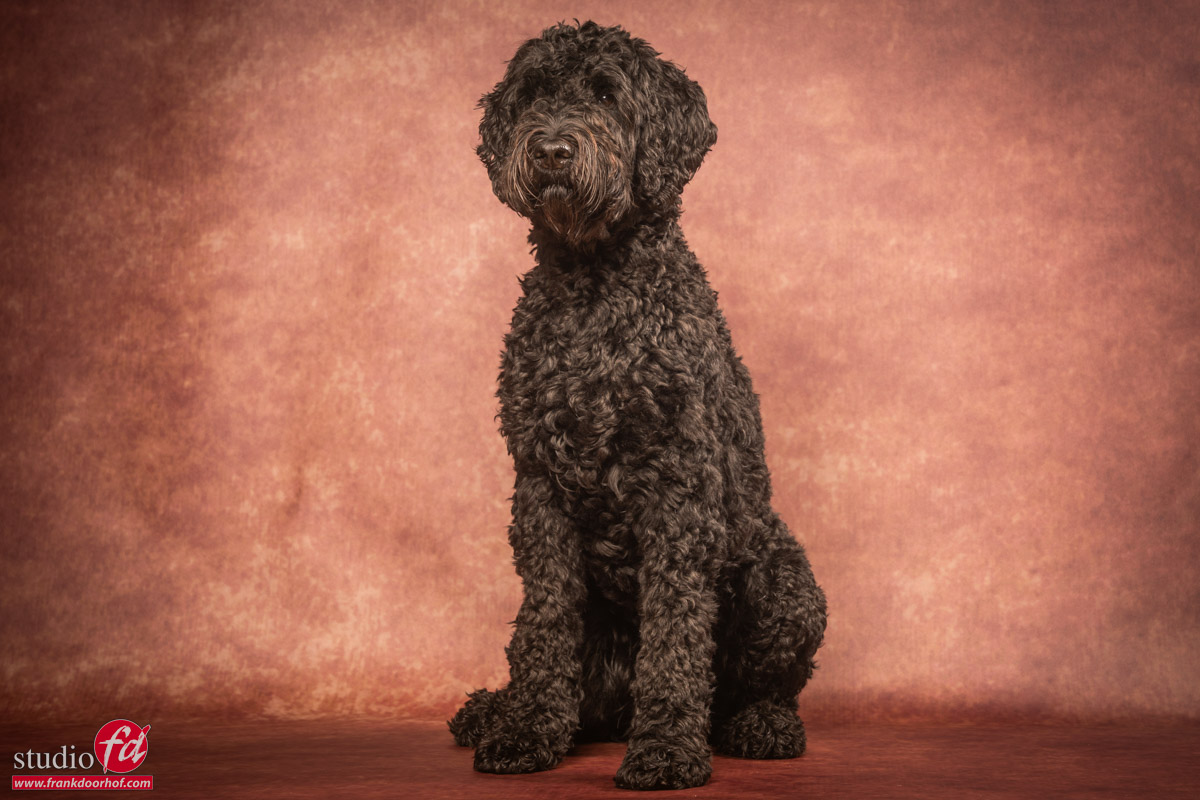
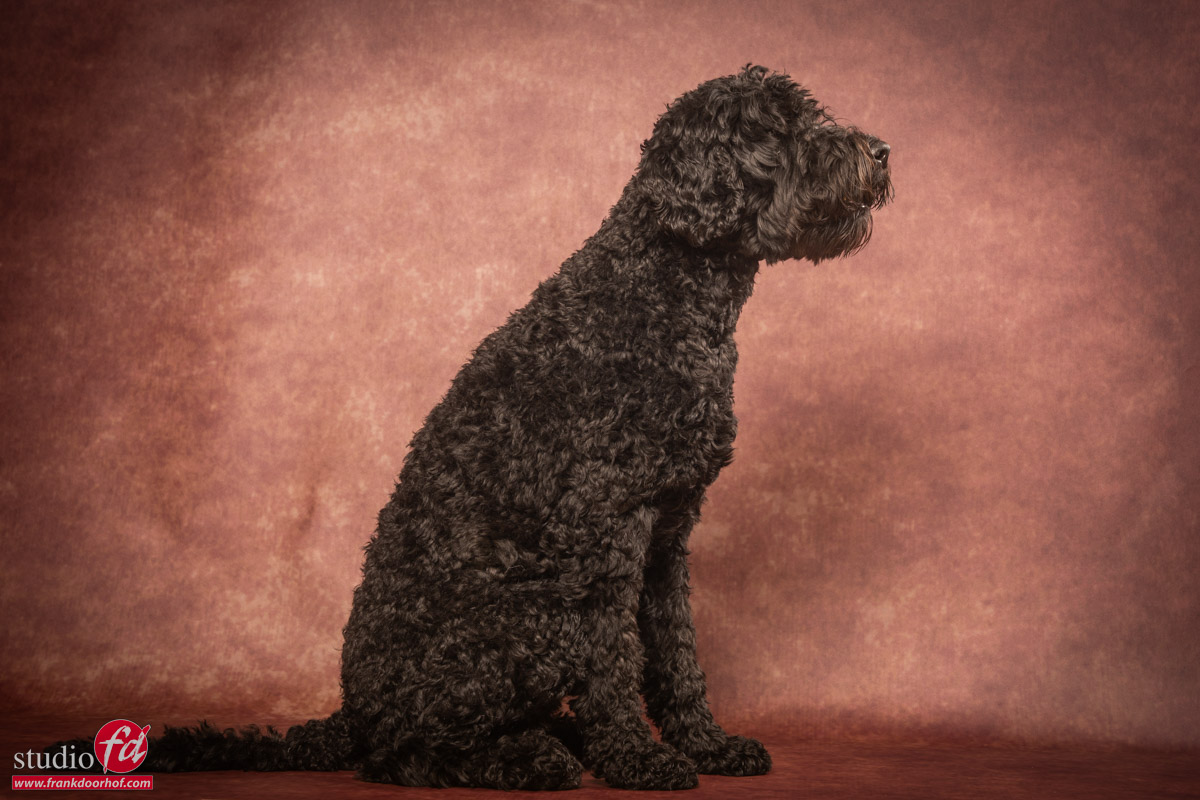
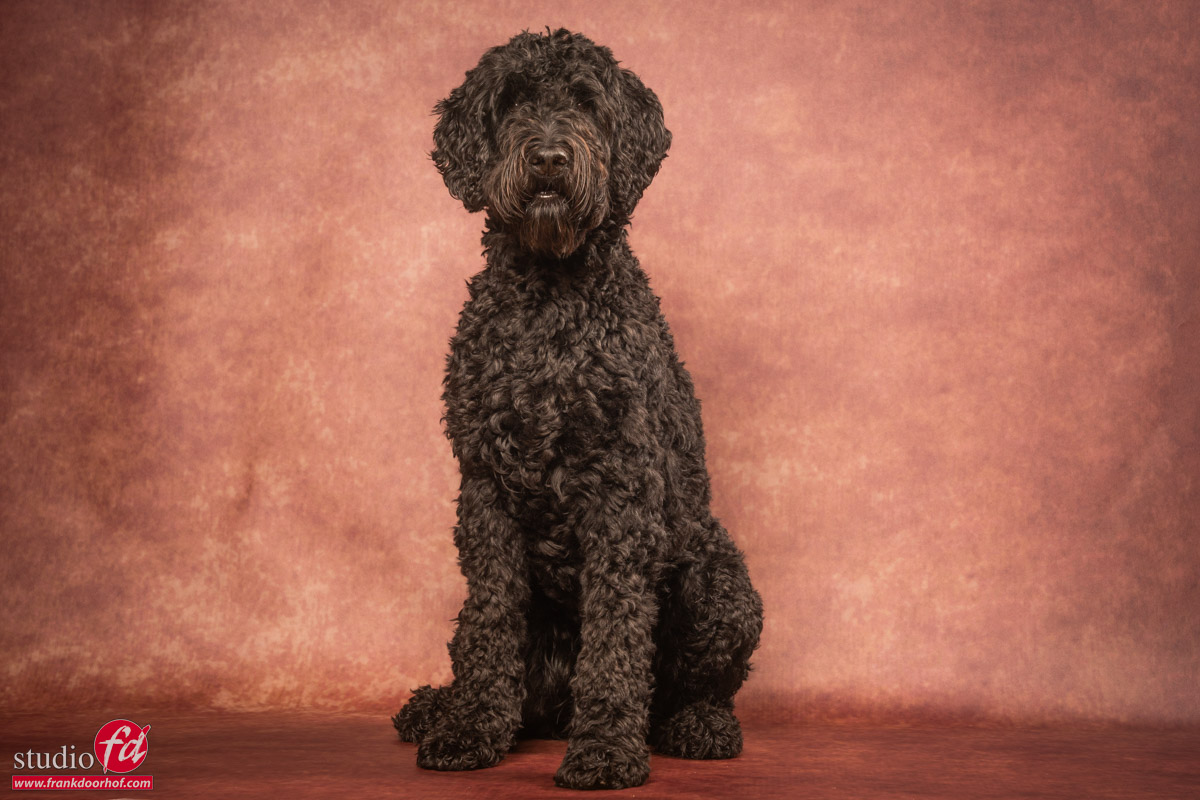
Today in the spotlight our black labradoodle Chewie.
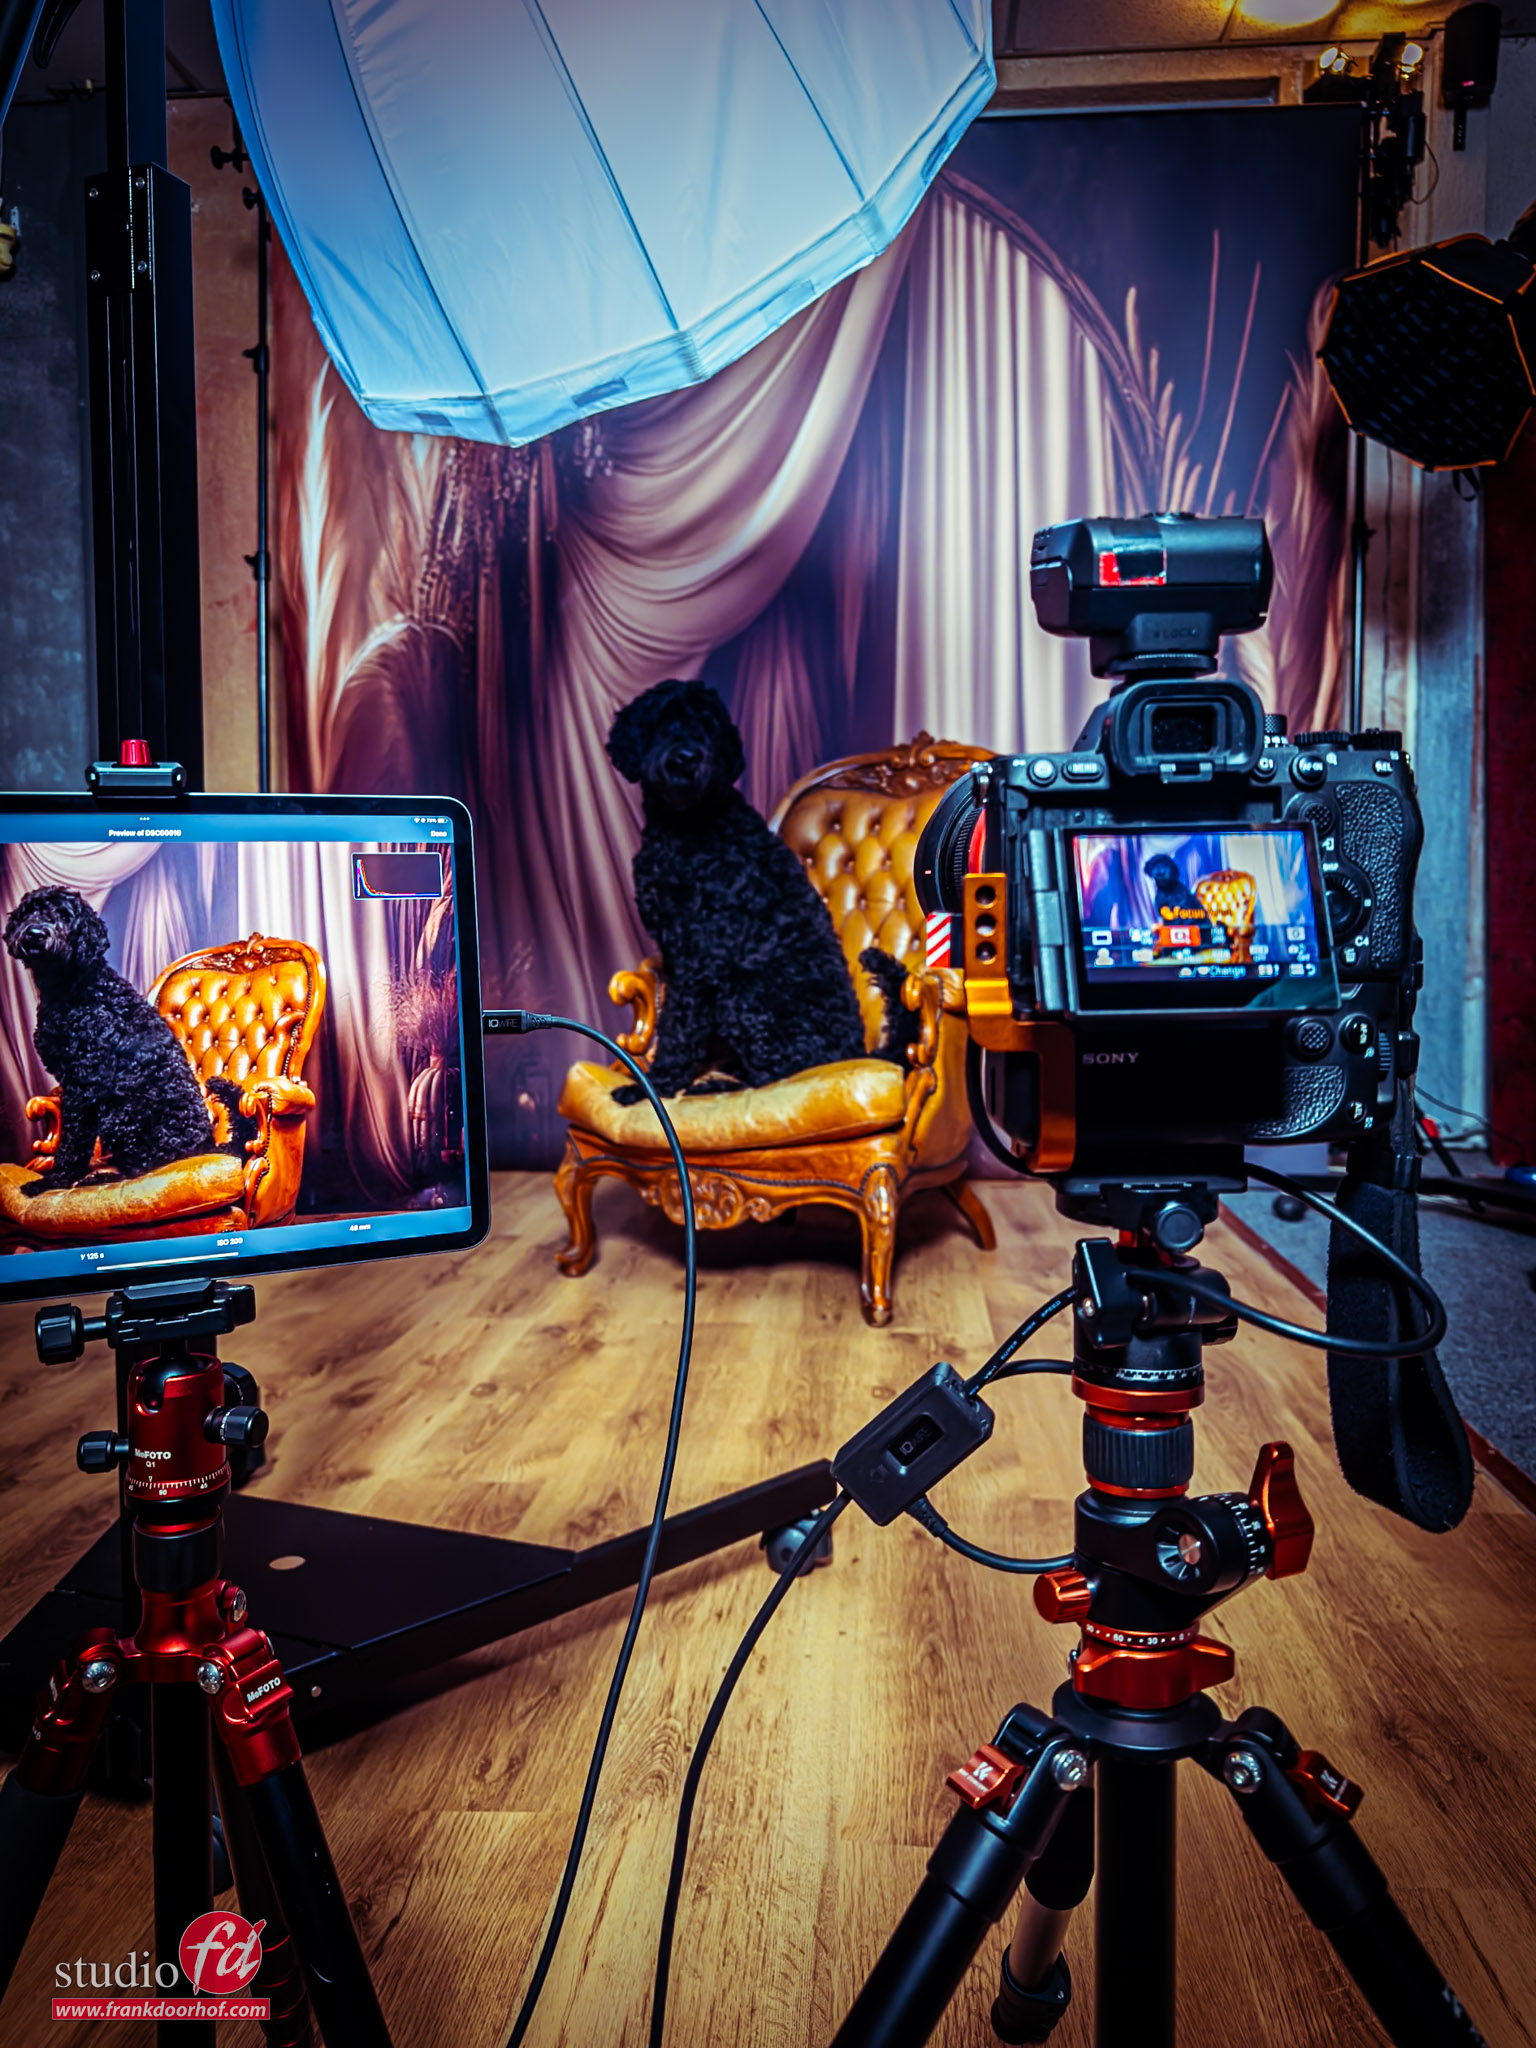
And the behind the scenes setup.
I’m using the Geekoto Lantern as my main light. This is a very nice lightsource to place close to your subject for great detail in for example… a black dog, without getting a real spot effect on the backdrop, so one light to light both the subject and background, by angling the lantern you can control the amount of light hitting the backdrop. It’s super easy.
As accent you can use almost anything, as long as you take into account the light quality.
A smaller lightsource will give a harsher quality of light.
In this case I’m using a small softbox for example the Geekoto Quicky to give a “kick” of light from the side creating some extra depth and fill.By using a grid you prevent spill light on for example the background, and it can prevent lens flare.
I’m using the Sony A7RV straight into my iPad with the iQwire tethering system, both cable and defense system.
On the iPad I’m running the CasCable app and in the background Lightroom to sync with the desktop right into my catalogue.
I hope you spoil your dog just a little bit extra today.
https://frankdoorhof.com/web/wp-content/uploads/2025/08/Chewie-October-24-2024-20.jpg13662048Frank Doorhofhttps://frankdoorhof.com/web/wp-content/uploads/2015/03/studioFD_Logo-1FV.pngFrank Doorhof2025-08-26 14:02:052025-08-26 14:02:05International Dog Day
We are always releasing new backgrounds in the ClickBackdrops line-up.
A very popular system is the Clicki. With the Clicki you can easily shoot great photos on location.
For portraits, the Clicki works like a charm. But sometimes you need a little bit more space. So we also now have the Clicki available in a large 2×2 meters, making it a great option to build a small set for newborns or pets where you use the Clicki both as a background and floor, as you can see in the following samples. This only works with small pets and products.
The Clicki 2×2 Square background
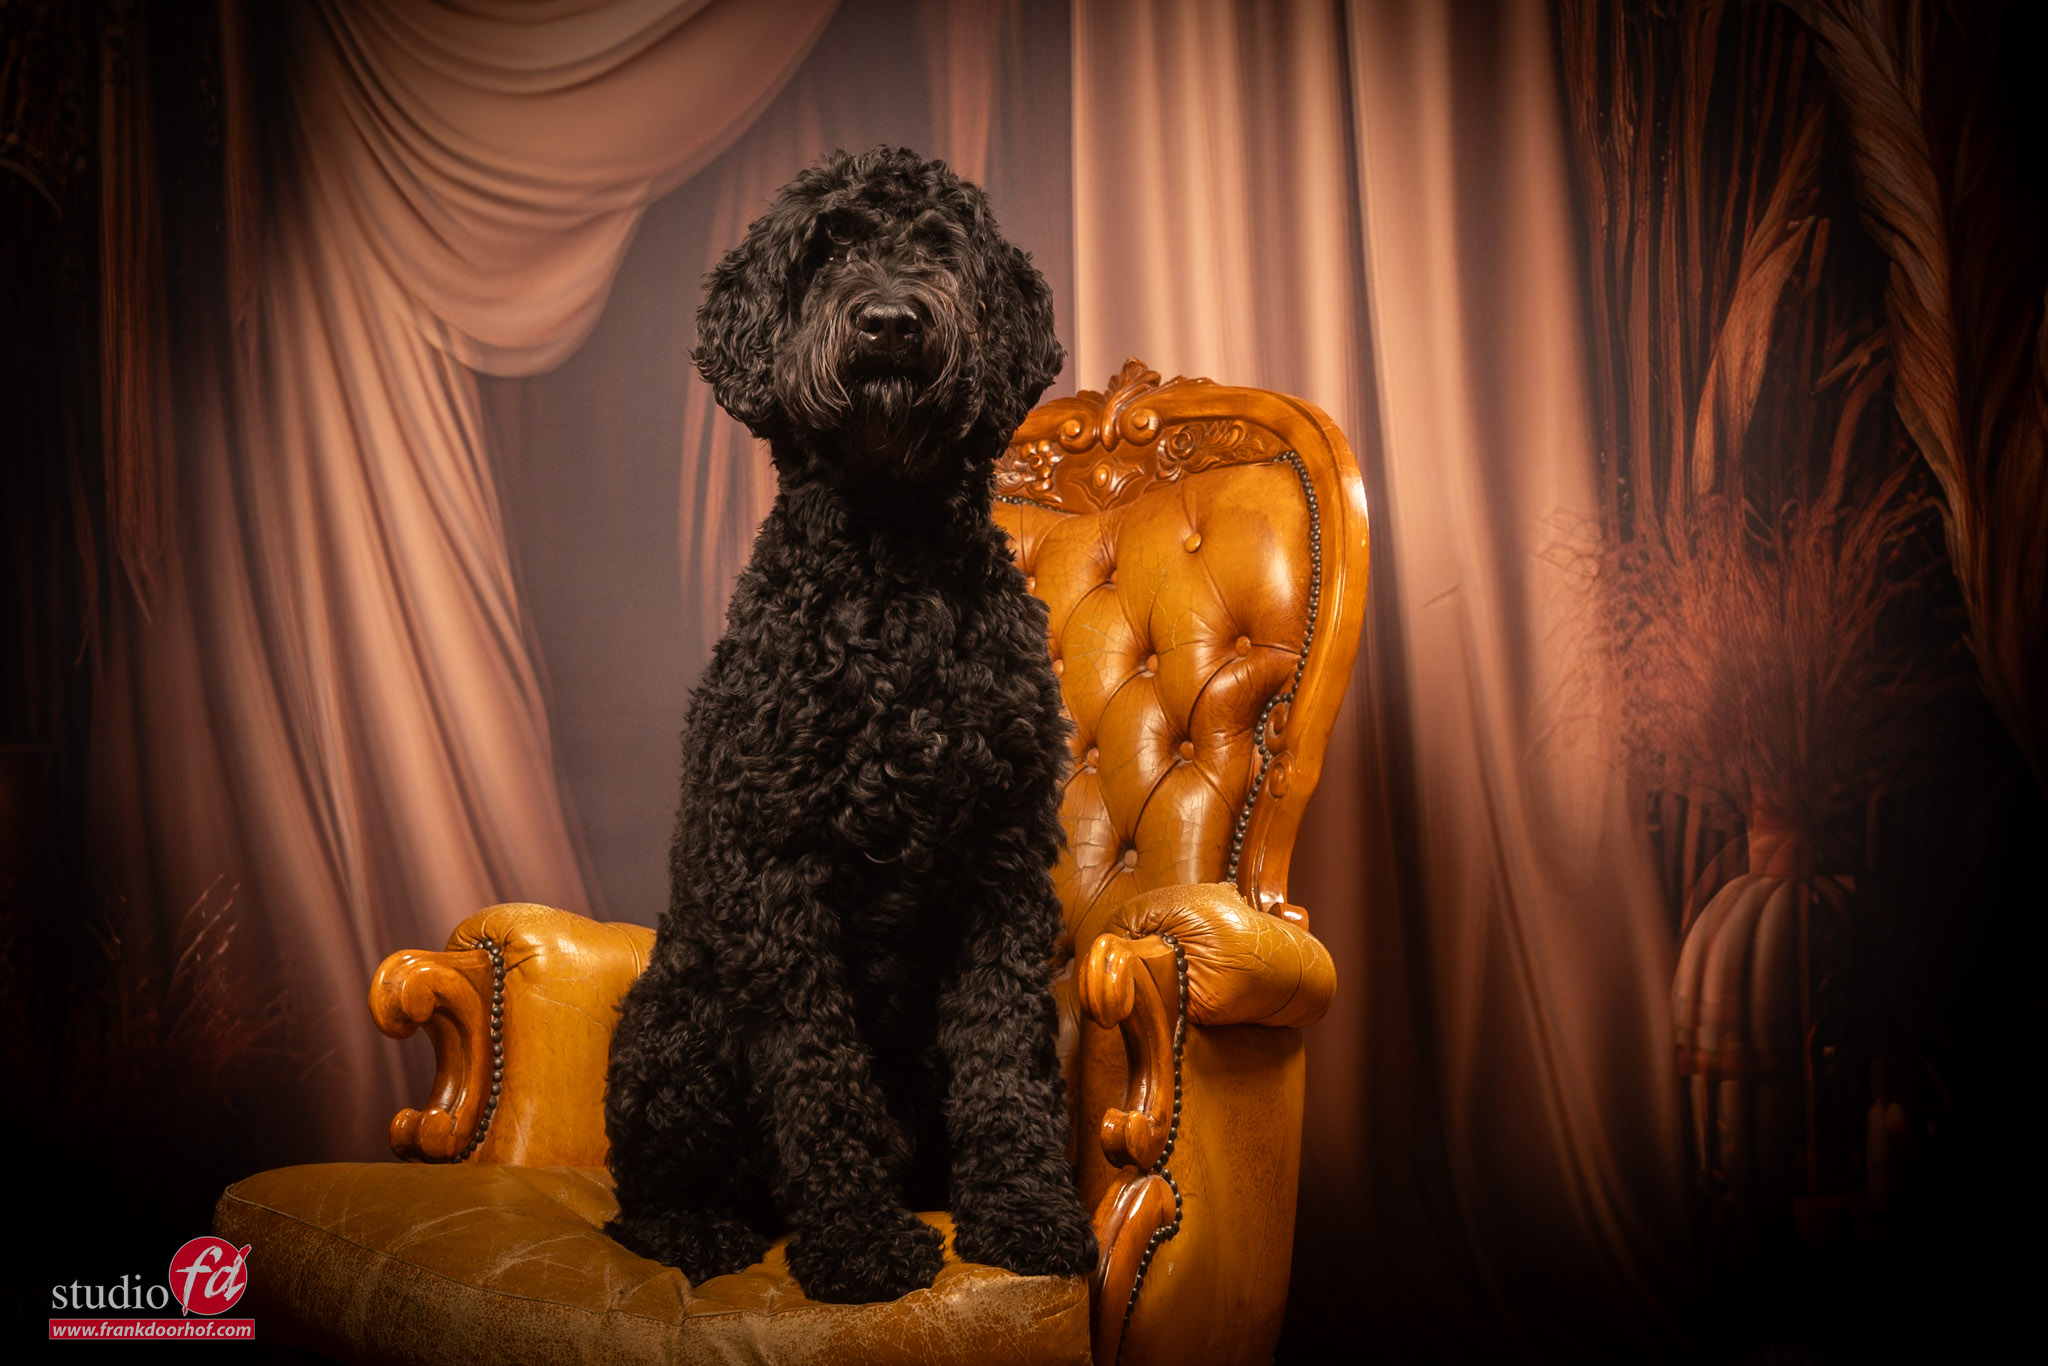
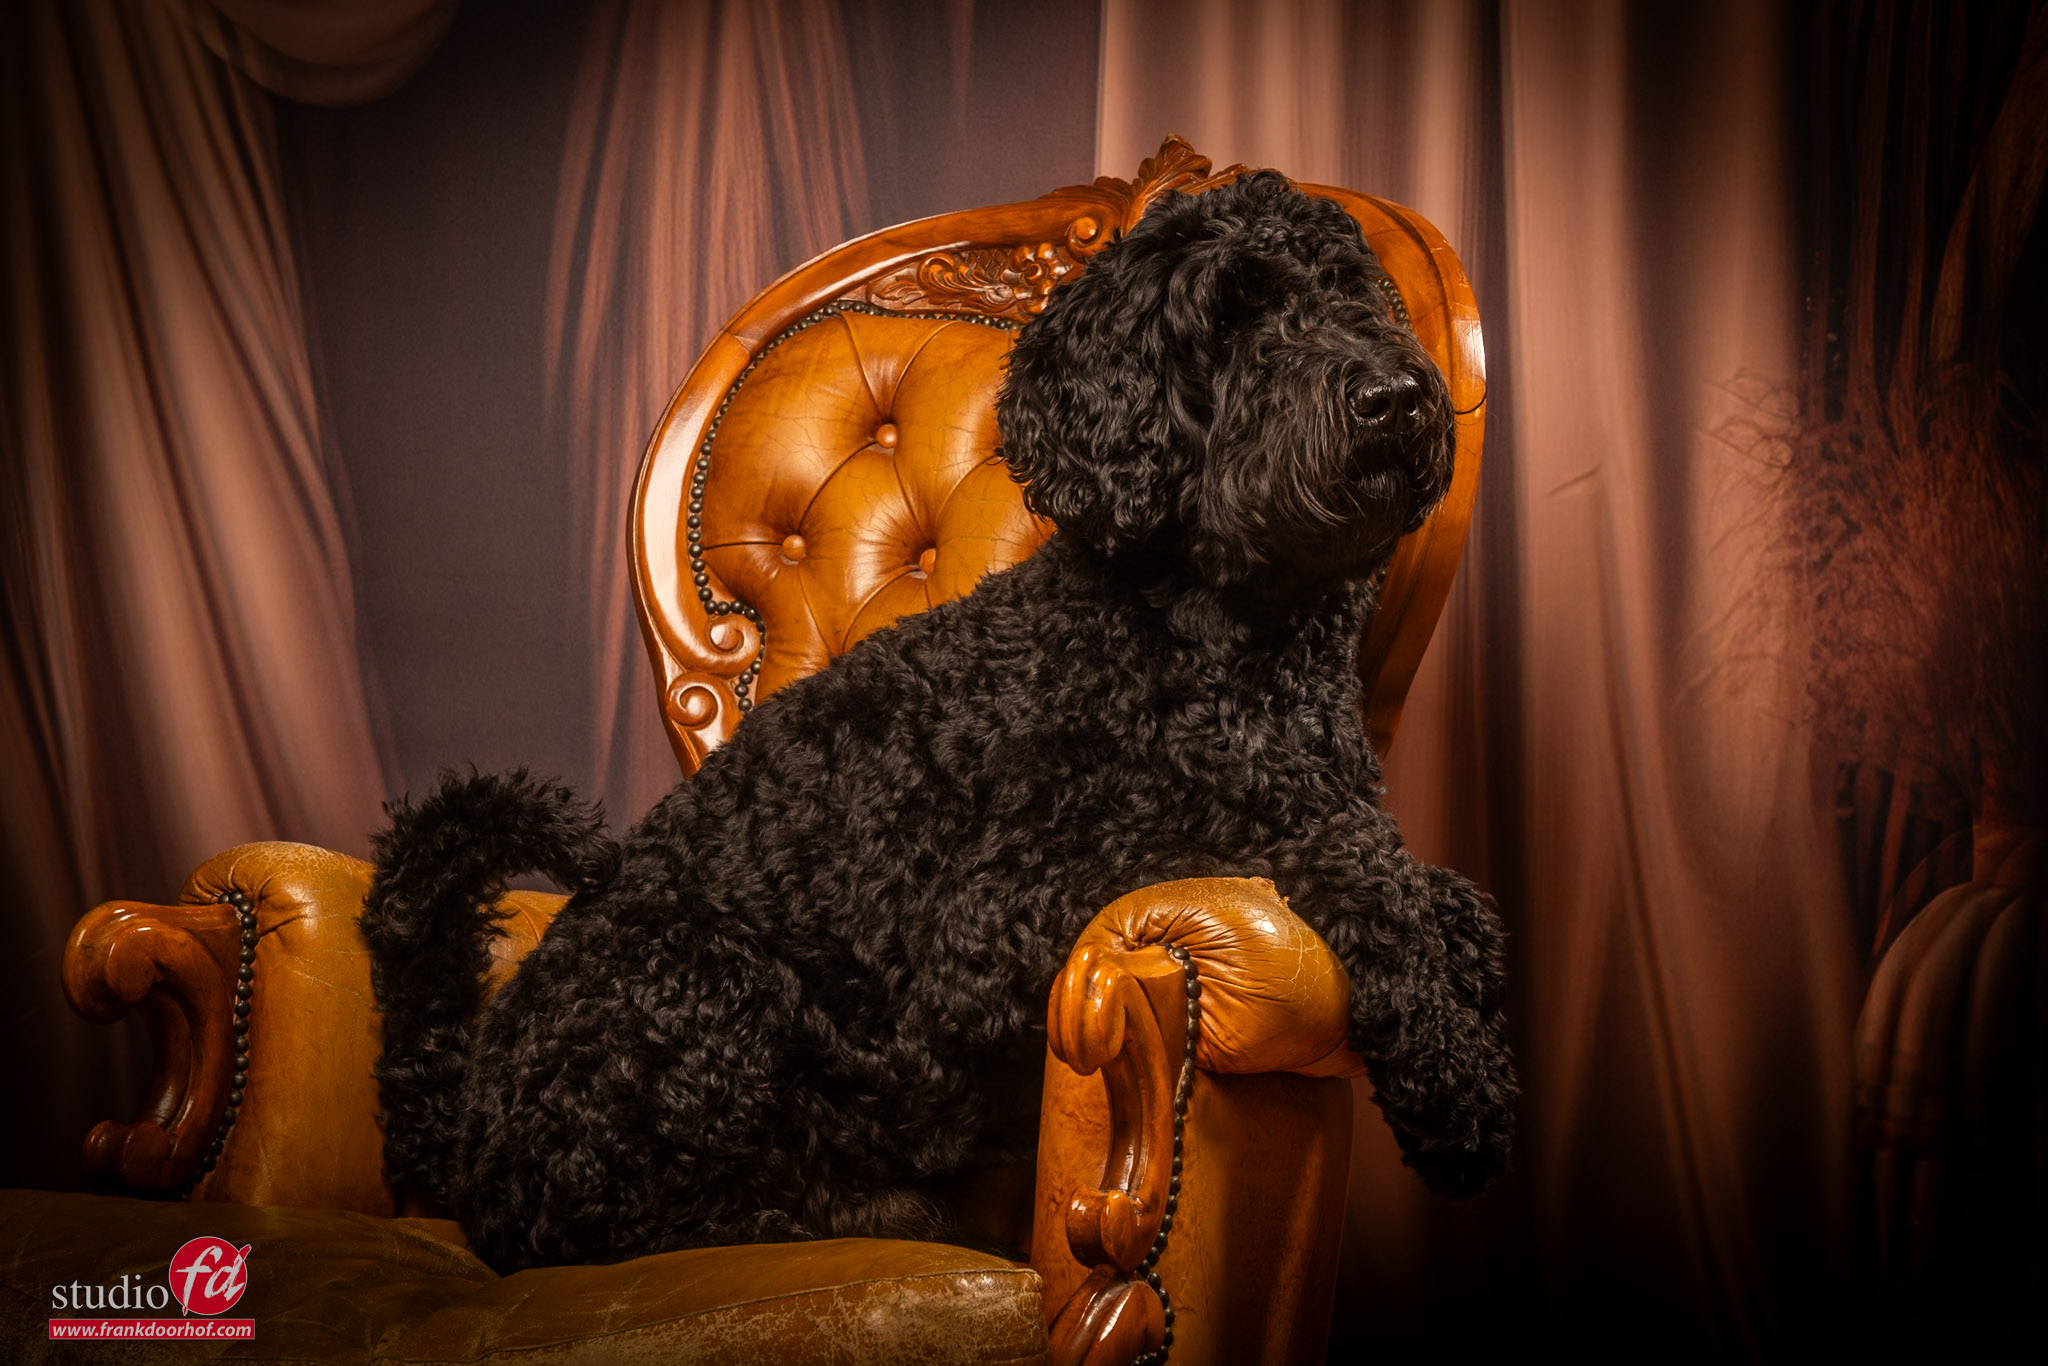
Today in the blog some images I shot with Chewie our Black Labradoodle.
Using the Geekoto GT400 and Geekoto Lantern softbox as the main light and the Geekoto Quicky as the accent light.
As you can see a great way to use the new Clicki.
And if you don’t need the floor you can of course use the Clicki as a 2×2 meter backdrop :D.
We will be shooting some more images soon.
So if you need more interesting backgrounds or small sets on location, check out our Clicki system, You’ll love it!
By the way, if you need another print than the ones we offer don’t worry, Clicki (and all other backgrounds) can be printed on almost all materials and sizes.
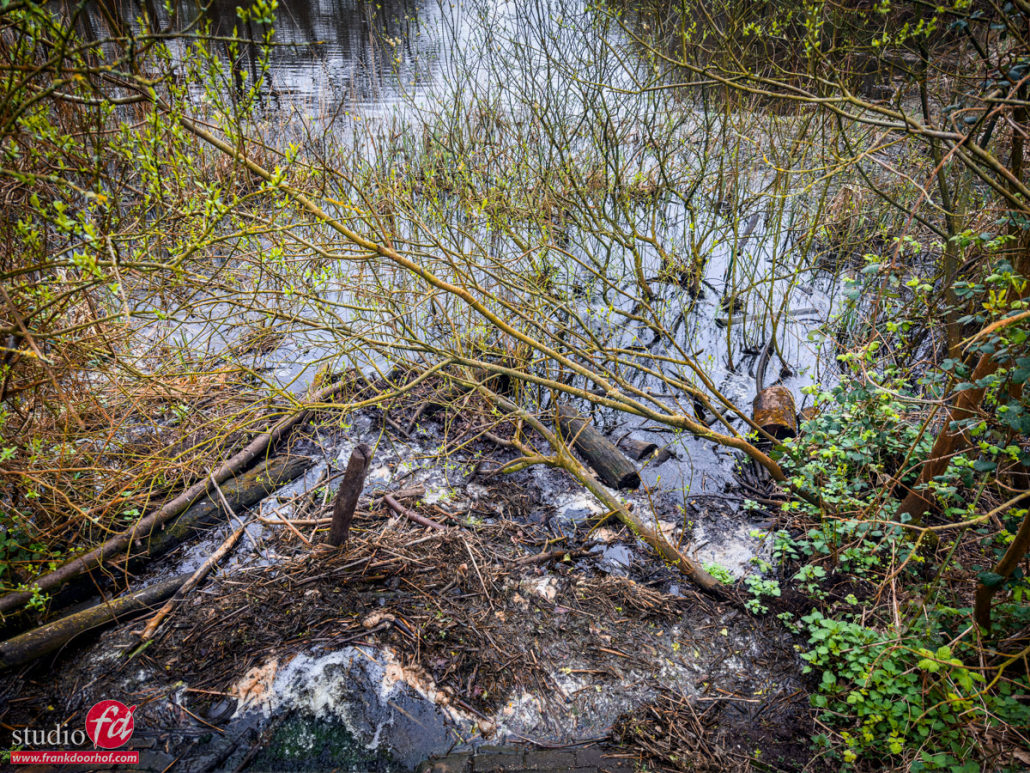
The wide angle is probably one of the most fun lenses. Period. yes i mean the Wide Angle Lens on your iPhone
That might be a very strong expression, but the wide angle is undoubtedly one of those lenses you can have a lot of fun with.
So for today’s blog post I decided to take some wide-angle shots while walking in the forest with Chewie.
The way it was intended… right?
Most of the time we use it just to get a wider view, and let’s be honest, it does really make a difference.
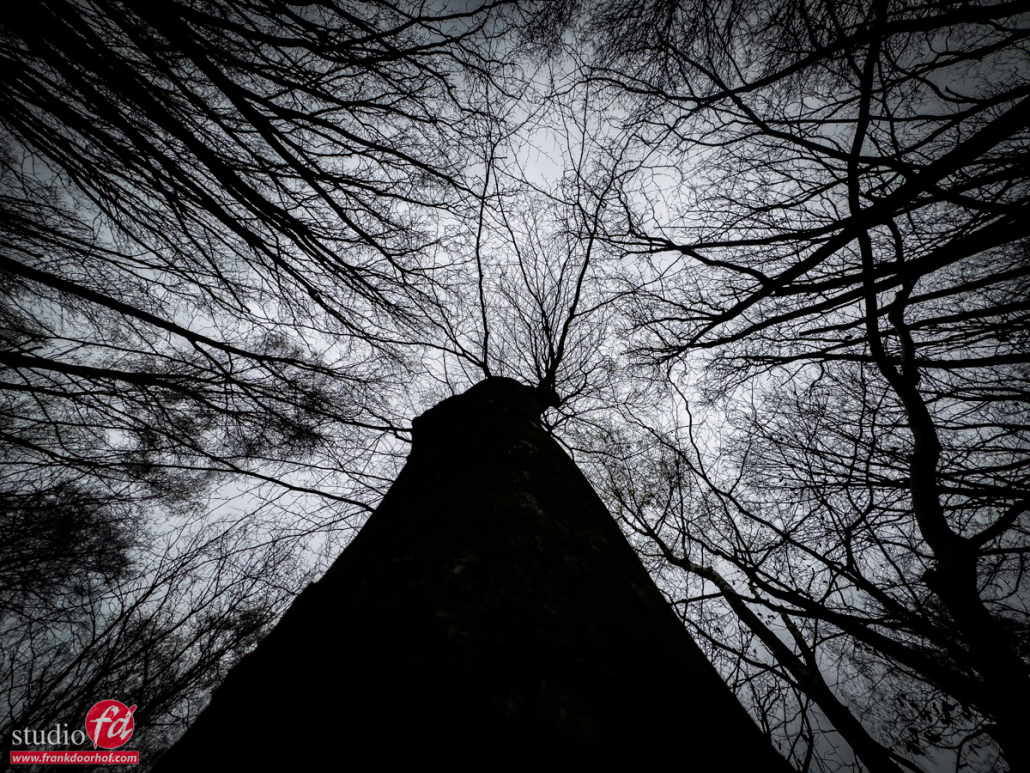
However, for me one of the cool things about the wide angle is not that it just gives you more of the scene. But the way the wide angle distorts.
Now normally distortion is of course a bad word (unless you play guitar :D) but you can also use it creatively.
For example, what about just holding your phone really close to a tree and just aiming it up? The trees will look huge and if you bump the contrast you get some really cool results.
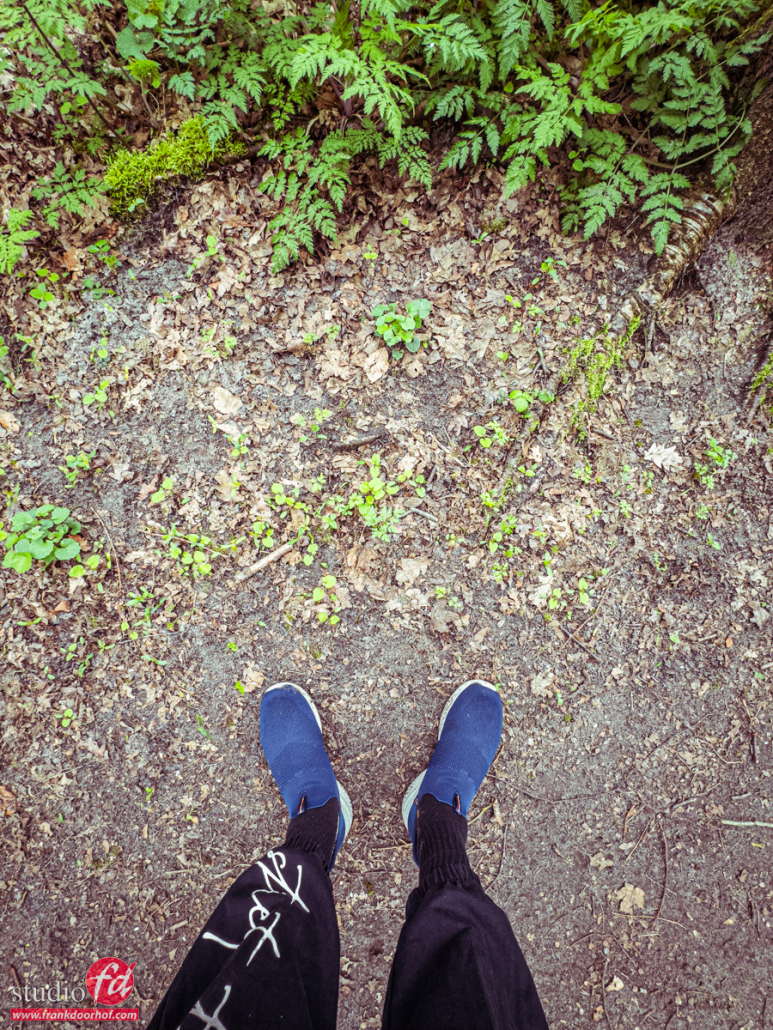
Now it’s also sometimes cool to use the wide angle to include your own feet.
Think about the start of a big hike, or maybe you like a sign that you find on your route and you want to spice the shot up a bit. Why not switch to the wide angle and include your feet?
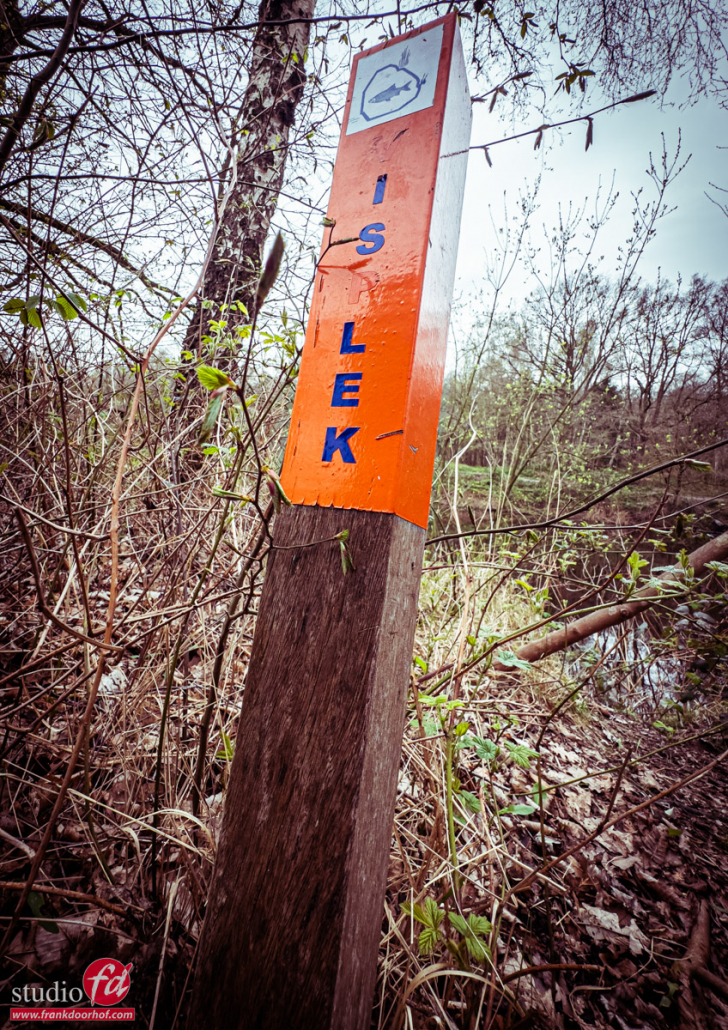
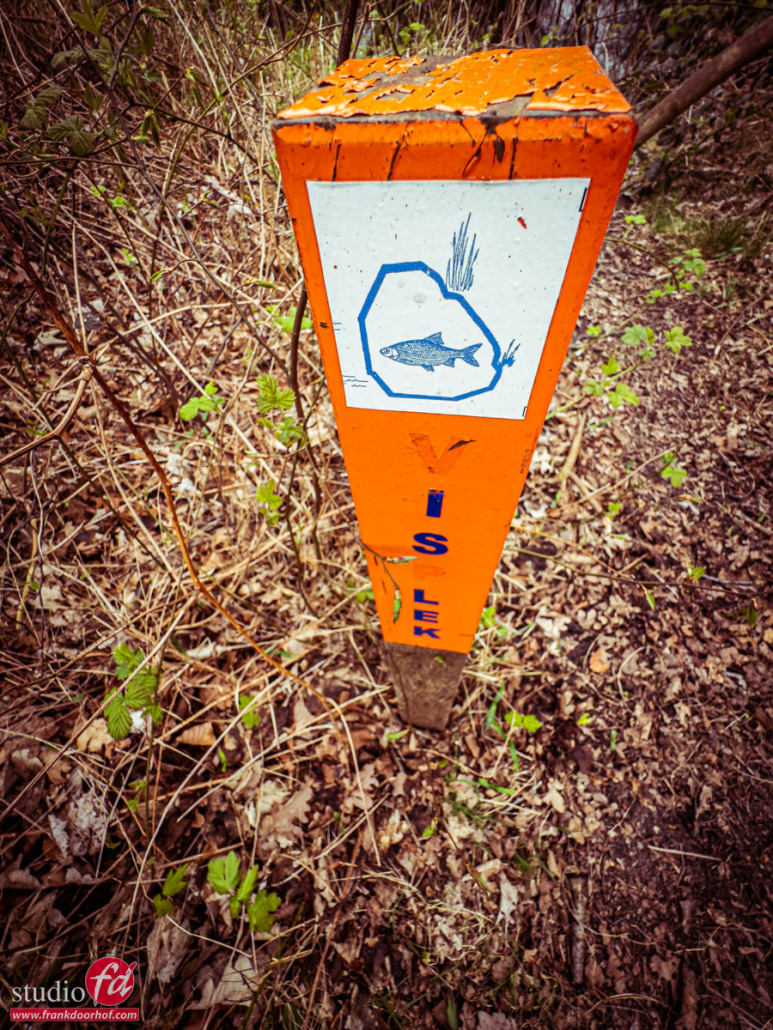
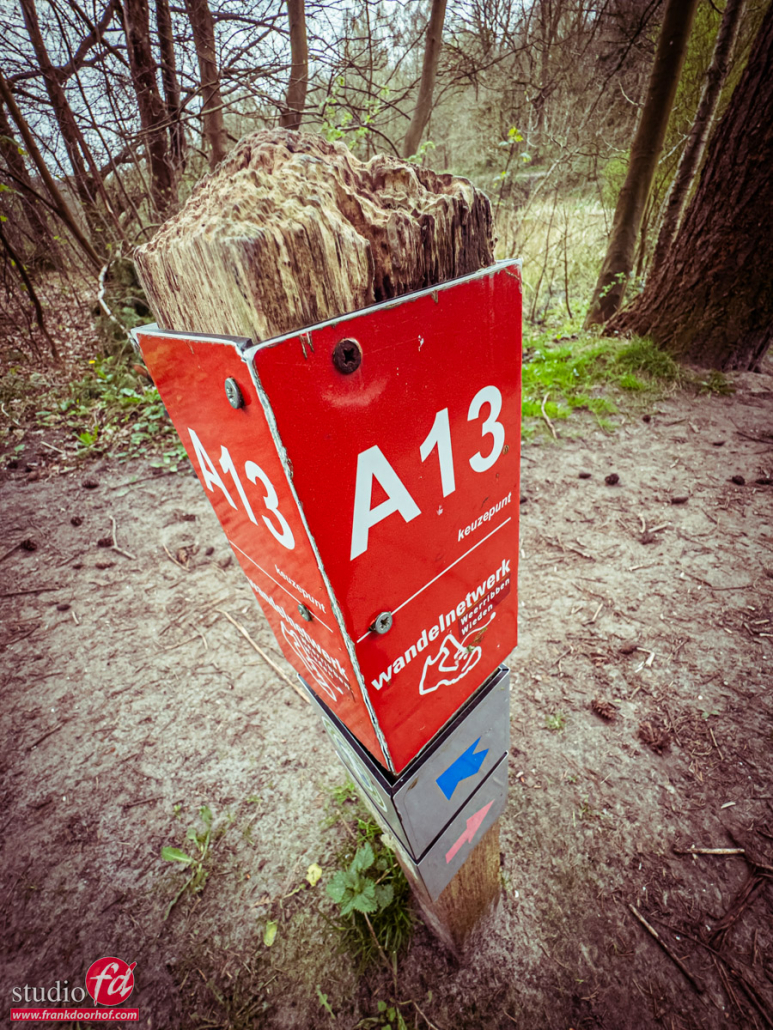
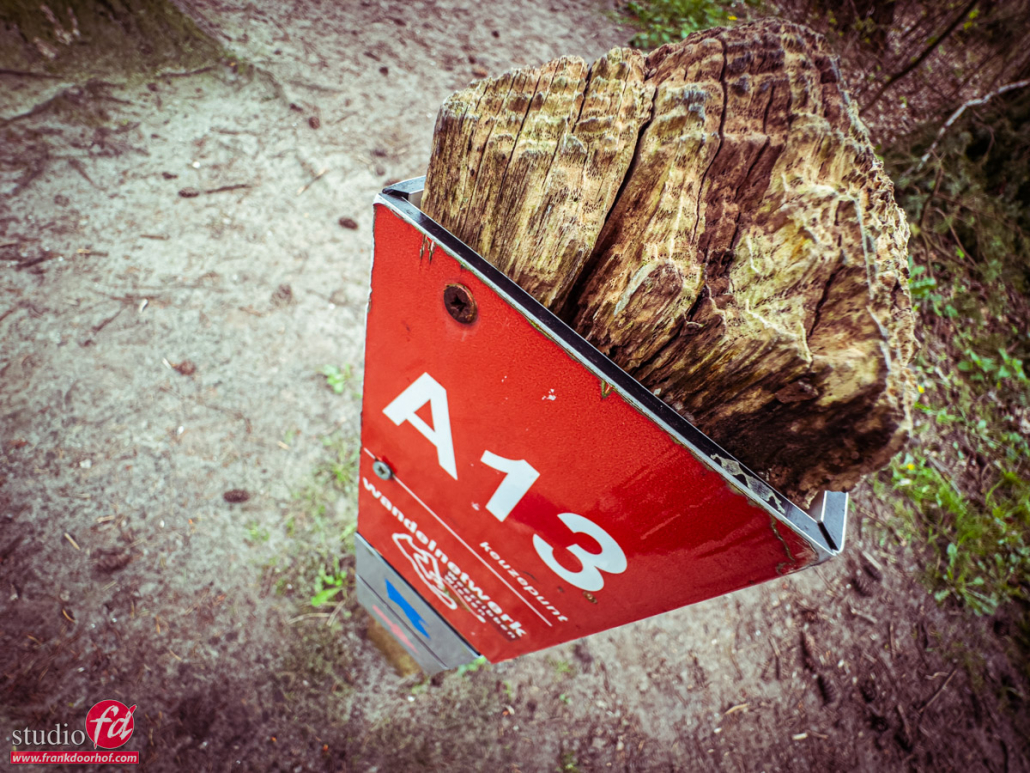
Now talking about signs and angles
Those are actually awesome for the wide angle.
But don’t just shoot them straight on. Try different “funky” angles! Shoot them top down, or just sit on the floor and shoot up.
Signs are great for this, especially with street photography I love to shoot street signs this way. (although they mostly from the bottom up of course).
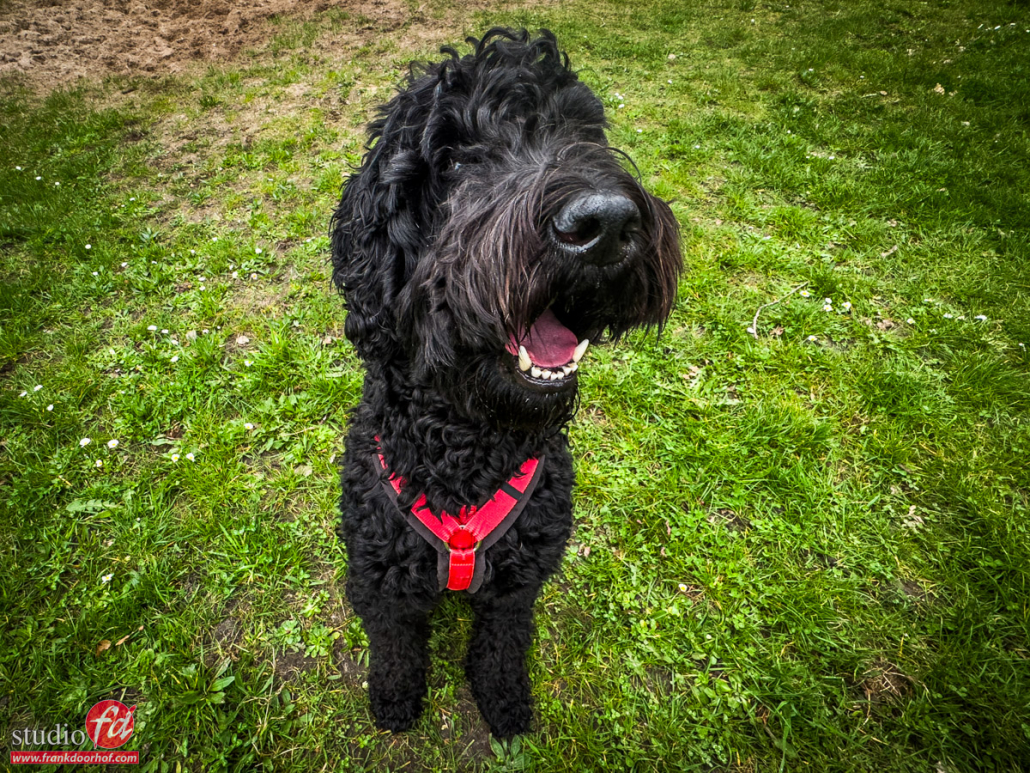
Shooting my pet with a wide-angle
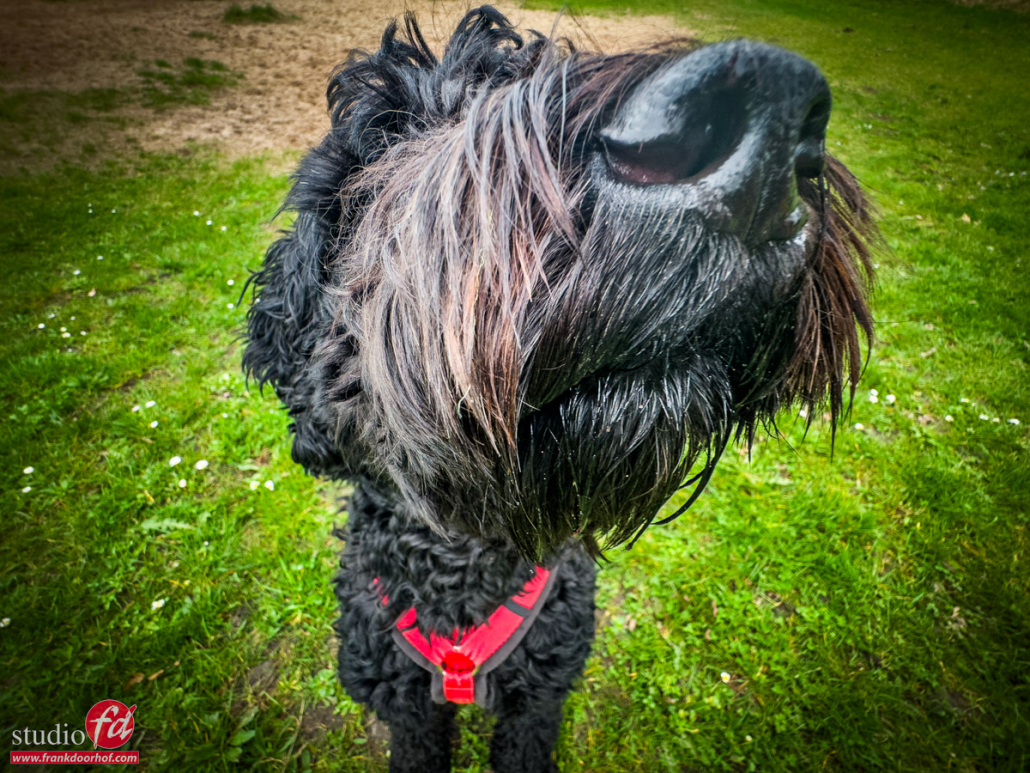
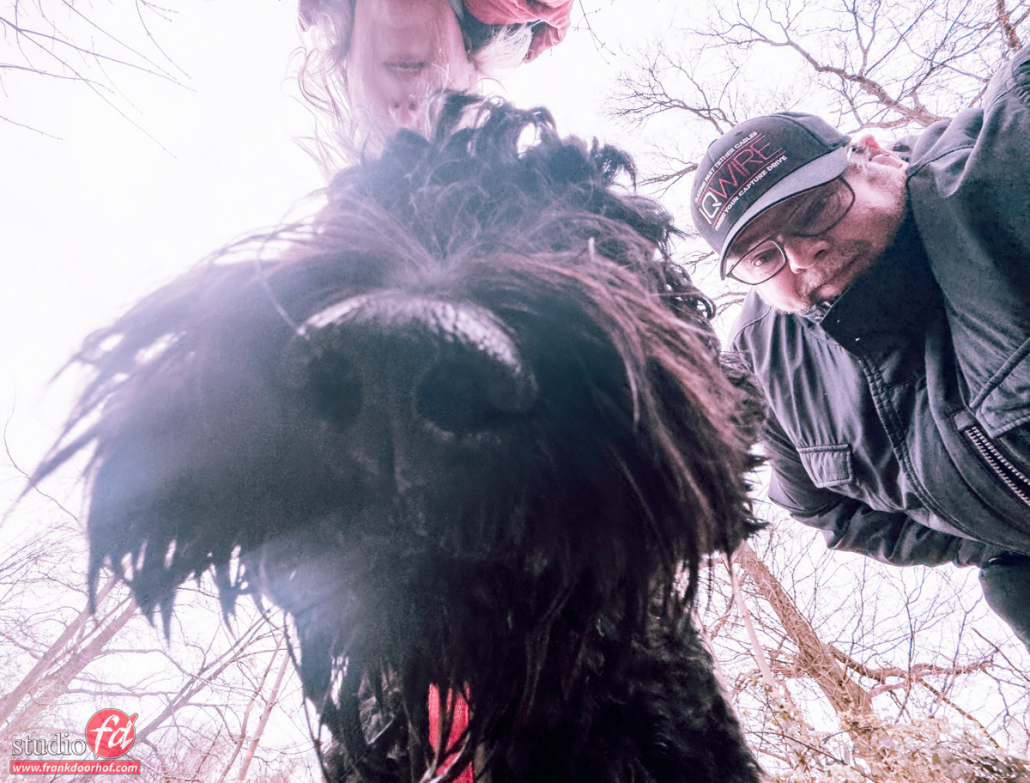
Of course, when walking with Chewie we also had to take some shots of him with the wide angle.
Now you can take a little bit of a distance and it will just appear Chewie has a really big head.
But it becomes so much fun when you get REALLY close up and personal.
Just beware that your phone doesn’t end up as a snack.
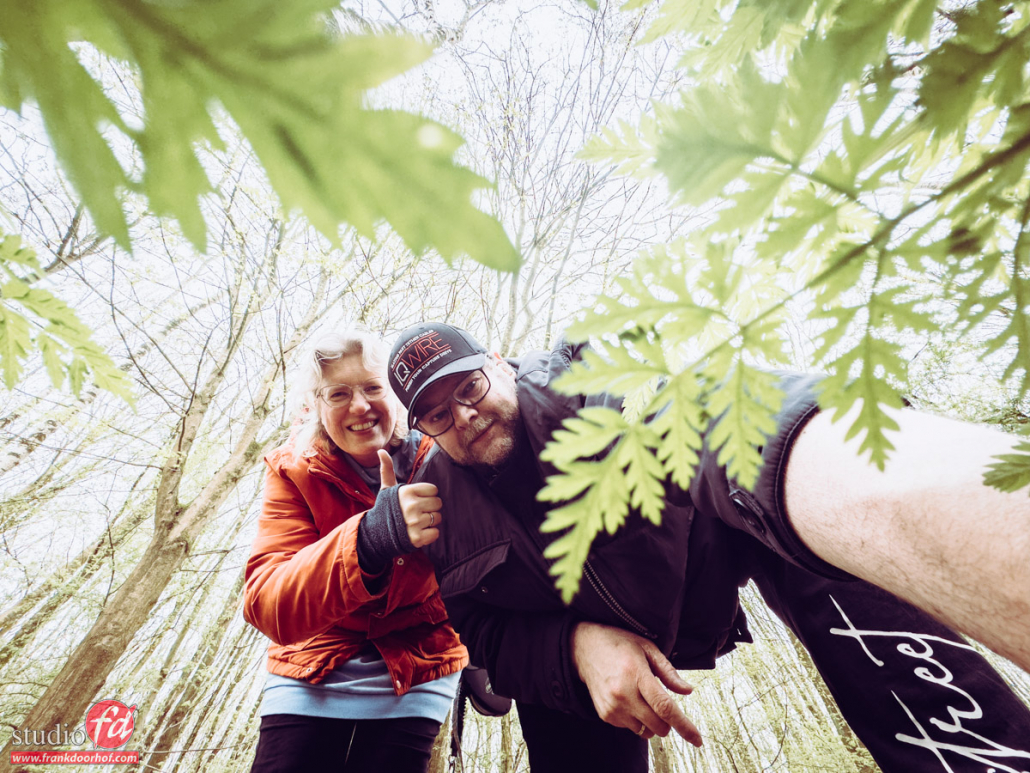
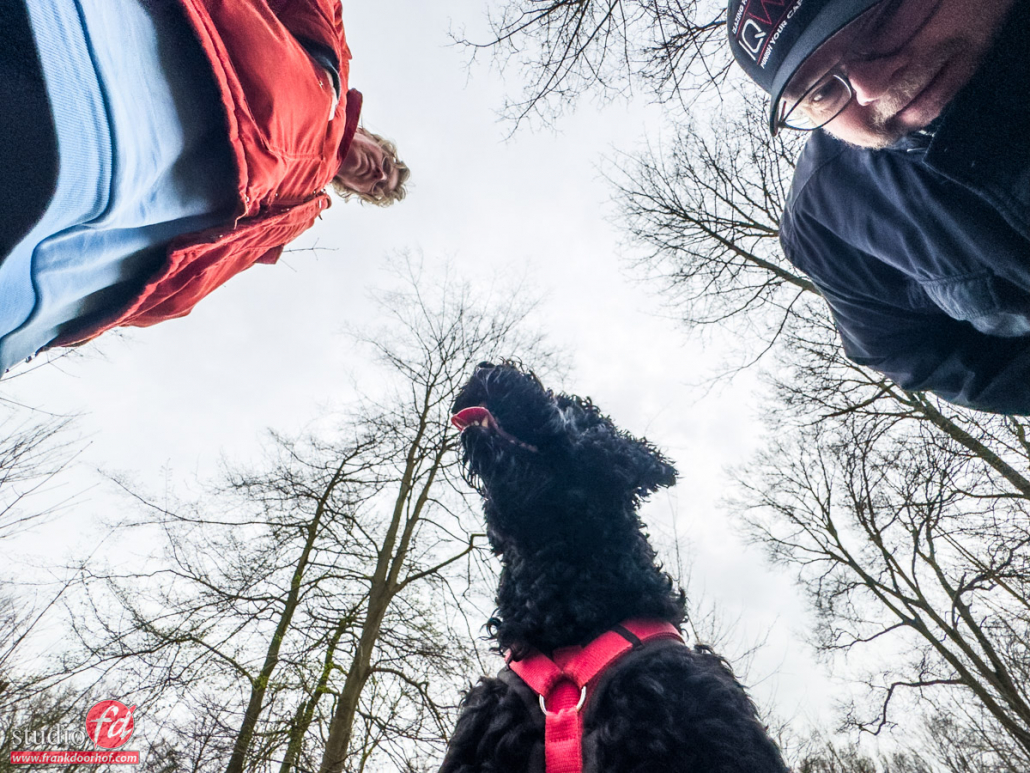
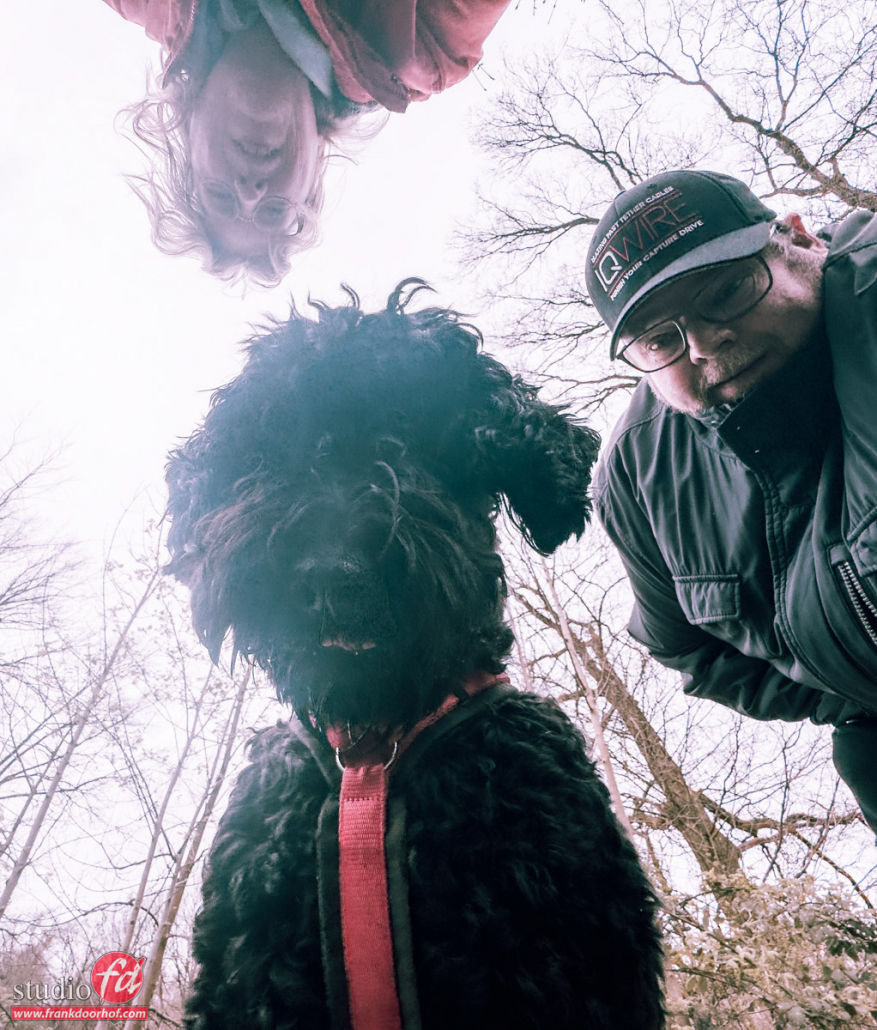
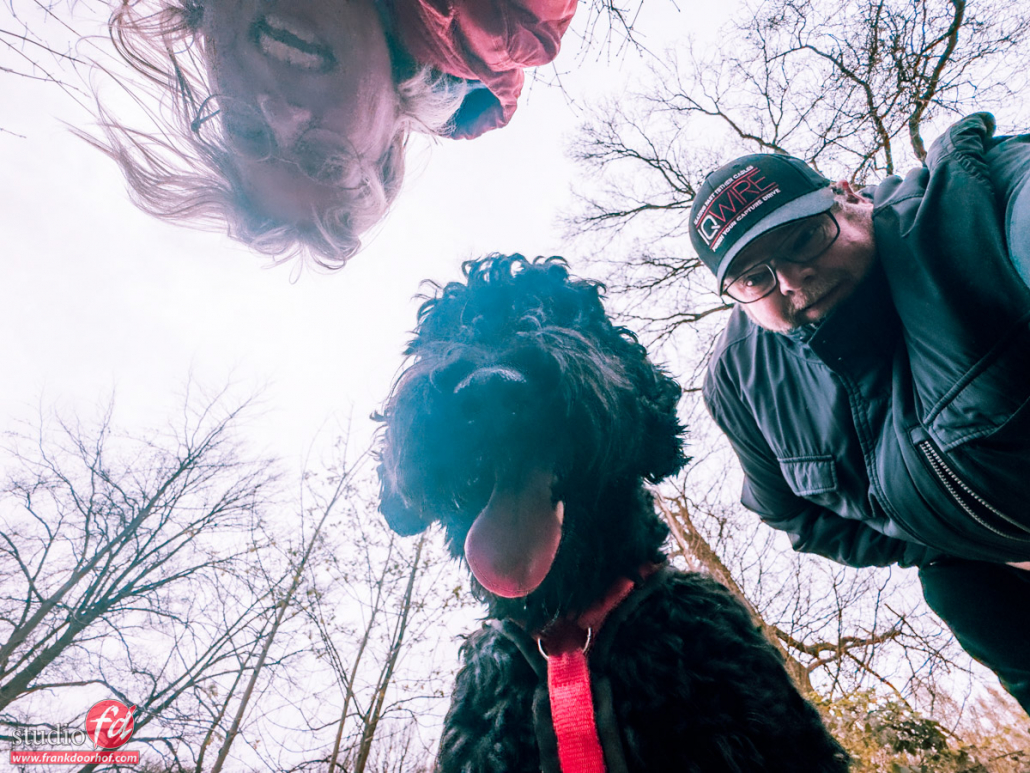
Cool selfies
Now I’m not going to lie, because I want to use the wide angle I can’t see the screen. So the following shots are 99% luck. But when you try enough times you will get some really unique selfies.
Let’s start with the phone on the floor with some leaves in front of it. You can also do this from a higher standpoint of course.
We loved this shot, but it was too easy to get right…. so we decided to throw in Chewie and be a bit more creative with the composition….. It’s not hard to guess, but most images were totally wrong (you can’t see the screen) but when it works… well it’s loads of fun as you can see here.
The wide-angle on your phone is fun
So the next time you use your phone. Use the Wide Angle lens on your iPhone, get close, and take some pictures for more creative shots.
As soon as you start using it you will find that even the most boring things can become really interesting, just due to the distortion and the different angles.
These shots were done with the iPhone 15 pro-Max on the wide-angle setting.
Editing is done in Adobe Lightroom Classic
https://frankdoorhof.com/web/wp-content/uploads/2024/03/Chewie-Kuinderbos-19-March-30-2024.jpg9001200Frank Doorhofhttps://frankdoorhof.com/web/wp-content/uploads/2015/03/studioFD_Logo-1FV.pngFrank Doorhof2024-03-31 18:00:512024-03-30 18:00:04Have fun with the wide-angle option on your iPhone or other smartphone