One (of the many) things I love about my work is that no workshop or shoot is the same.
I actually never prepare my workshops or demos, this way I keep it fresh for myself but also for the attendees that visit our workshops regularly.
This also means that I often listen to the questions the attendees have before the studio part starts (the Q&A) and base my workshop on those questions.
Besides the group workshops I teach weekly in our studio in Emmeloord I also do 1:1 workshops of course. And the cool thing about these is that some people just show up and use it to ask loads of questions and practice in the studio, but there are also workshops where there is a whole story board and idea behind the workshops.
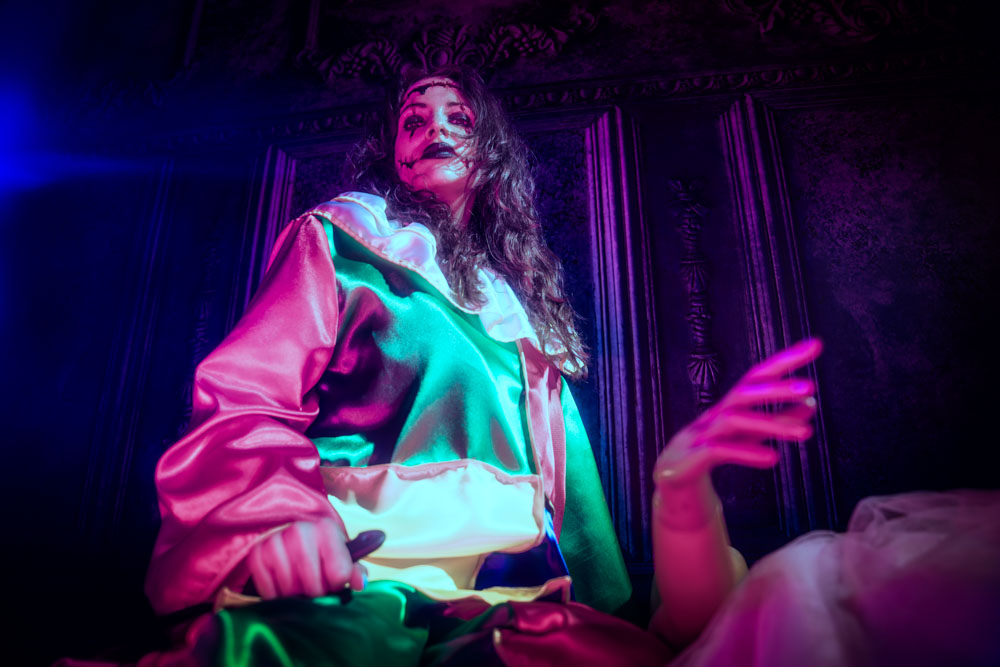
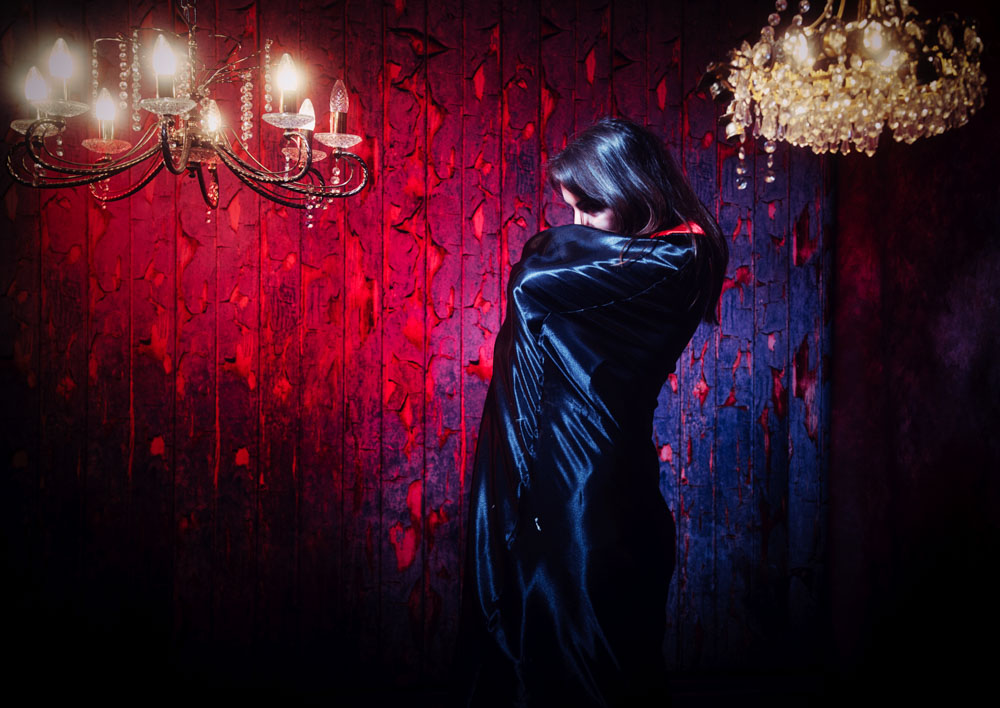
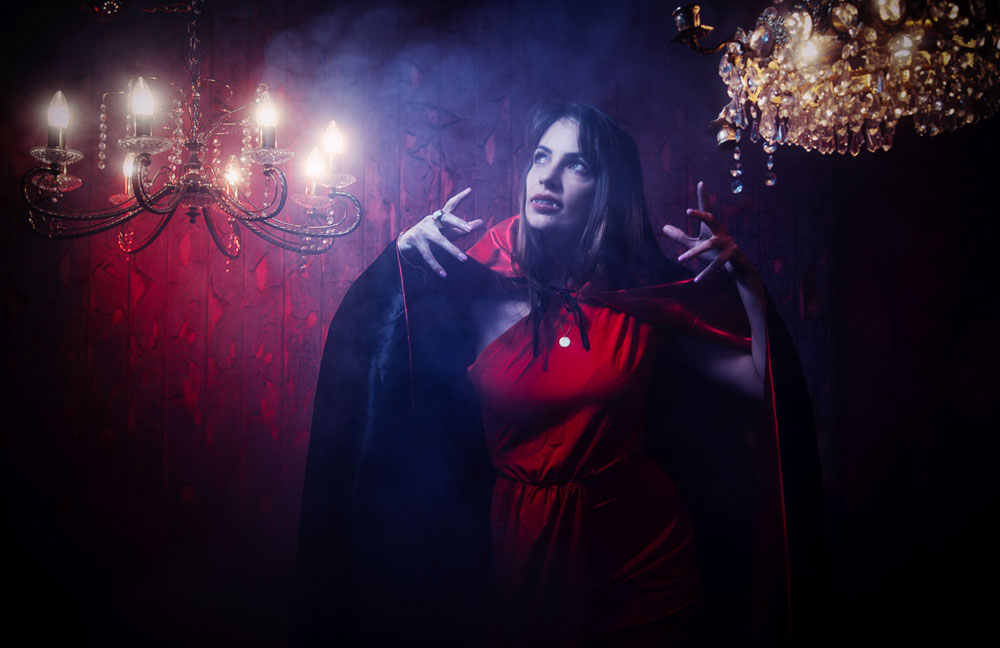
When Gabe asked me if it was possible to do a 3 day workshop with me and work towards end results with several Cosplay outfits I was really looking forward to it, but than Corona hit and travel wasn’t possible for over 2 years. But finally this year Gabe was able to travel to the Netherlands.
Today I want to share three images I shot myself during the workshop.
All three were shot agains the emerald punch from ClickPropsBackdrops. I did this because it is a backdrop that blends really nicely together when you want to add some special effects. Now the idea was to test out the new AI options in Photoshop…. and I actually loved the outcomes, I hope you like them too.
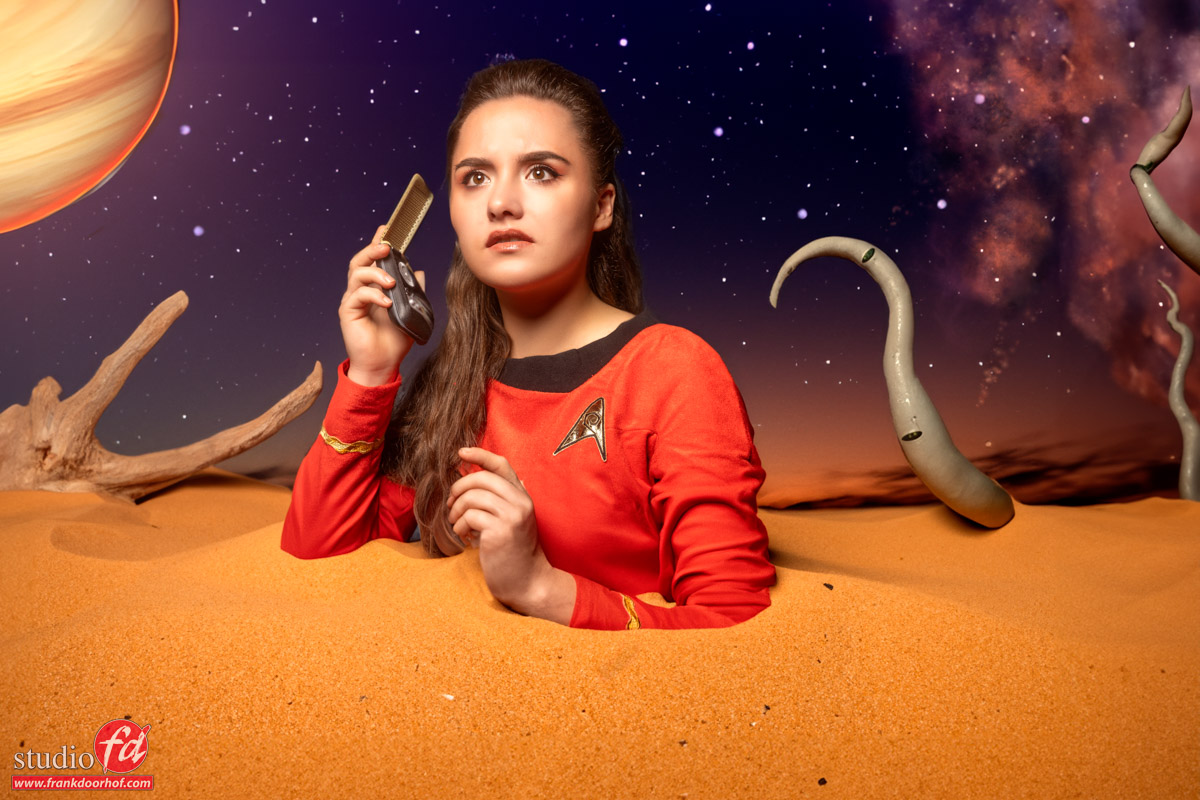
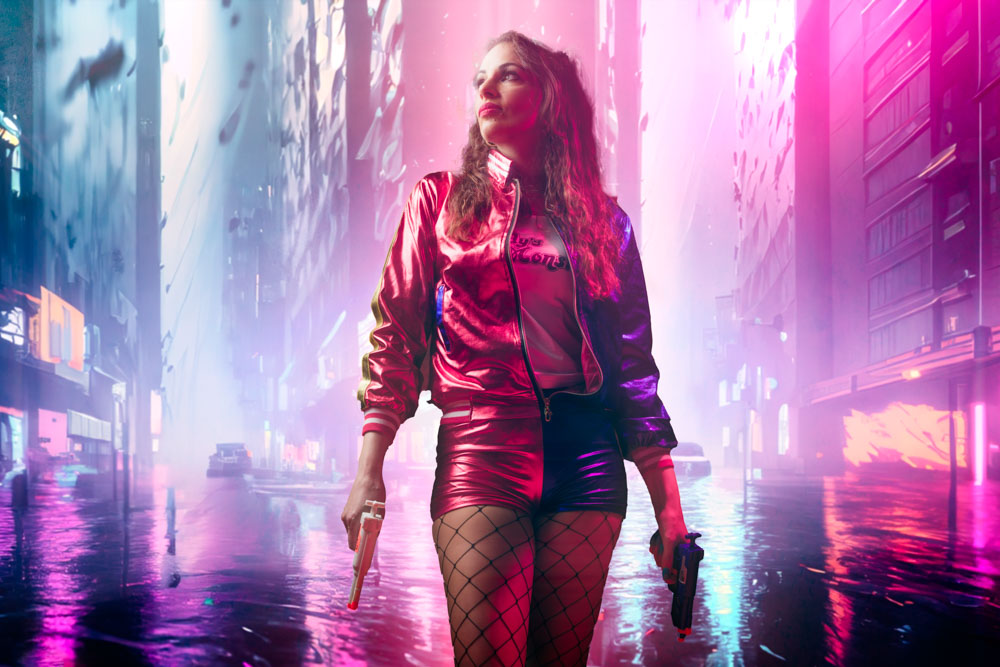
For the first one I thought about the first series and the strange “fake” planets they would visit and where there was always something going wrong of course. So I thought it would be nice to create a sand planet with an obvious fake planet in the night sky.
When I cut out our model Jona and placed her on a separate layer the idea was to create a sand planet where she would be standing. But Photoshop AI had a much better idea and created exactly what you see here the sand part. I immediately admitted AI won here with the idea. I started adding some alien tentacles and bones, a night sky and the planet. Some mist effect and small details and in all honesty it didn’t take me long but most of all I think this way of using AI is SO much better than just using it to go from text to image for a whole scene. The fact Photoshop clones the background and makes everything fit is just insanely handy and really triggers your creative mind.
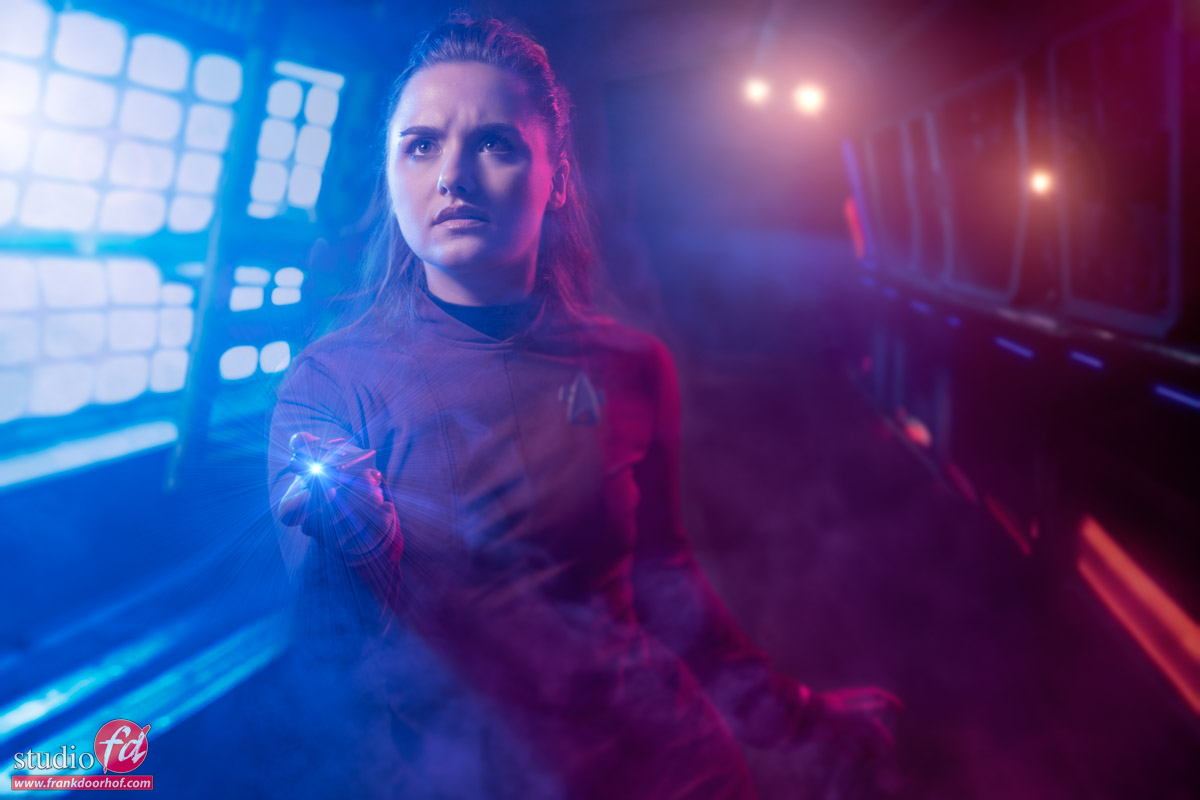
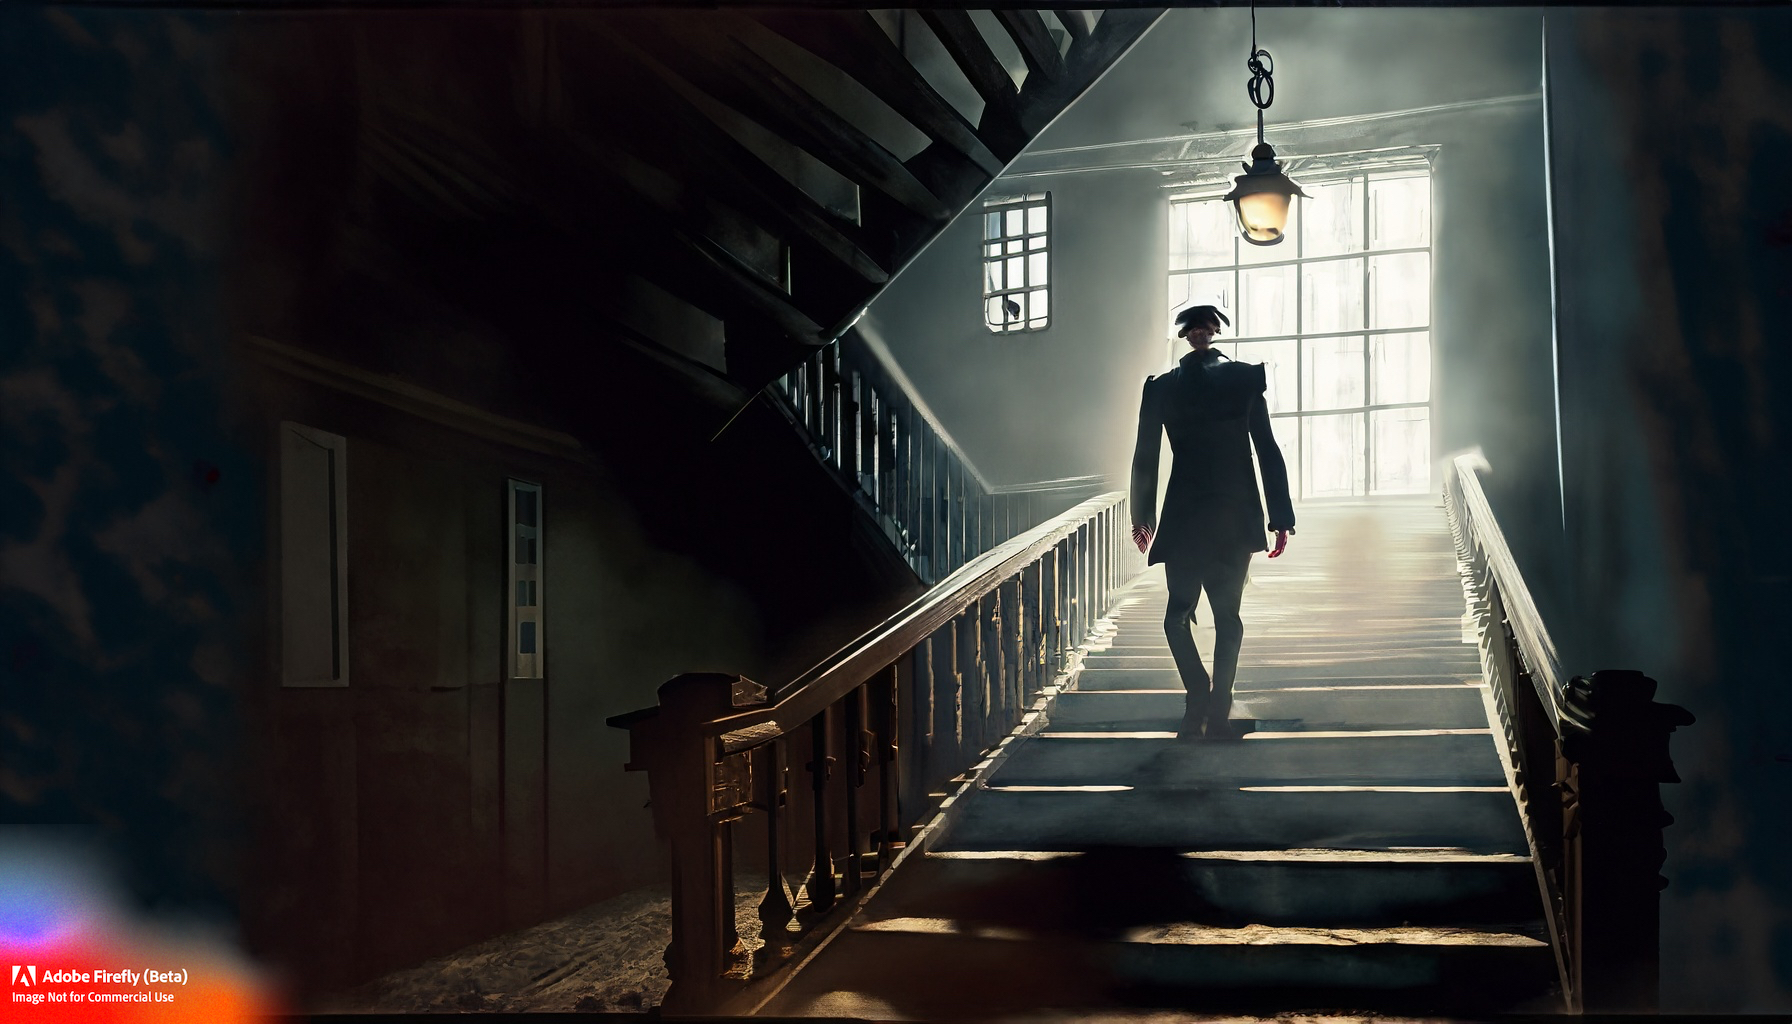
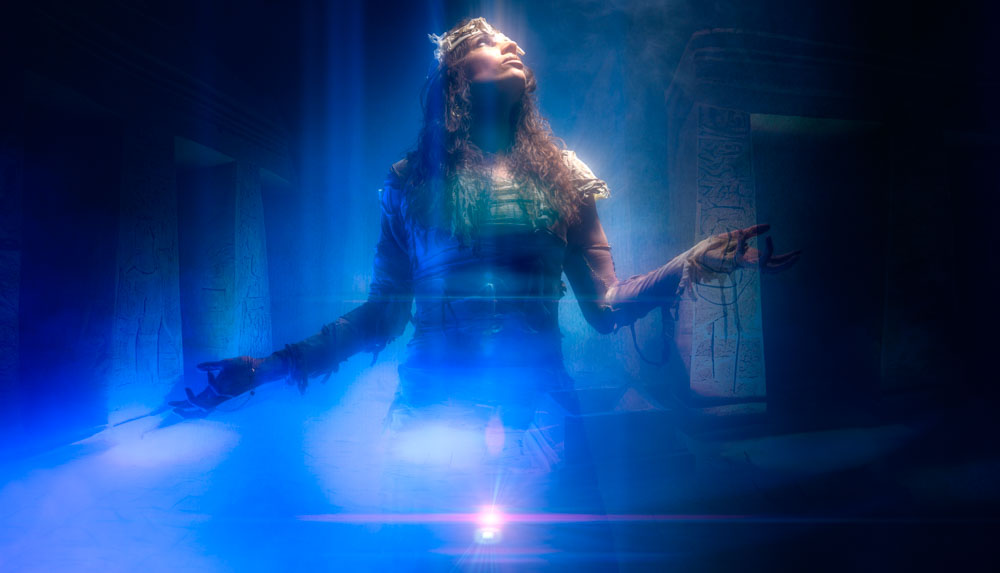
So for the next one I went a step further
We knew what I wanted as an end result, so the smoke and phaser are all real.
When I had the base image I started adding the light bars on the floor, the hallway was two separate parts, all the lights are of course fake. but the colors were determined before the shoot itself. And this makes it much easier but also more frustrated to get to your end result.
In this case it was exactly what I wanted. Blue light from a large window (like the engine room), a dark corridor with blue and red lights (like an alarm) some smoke and ambient effects and a phaser firing. And the AI did exactly that… wow.
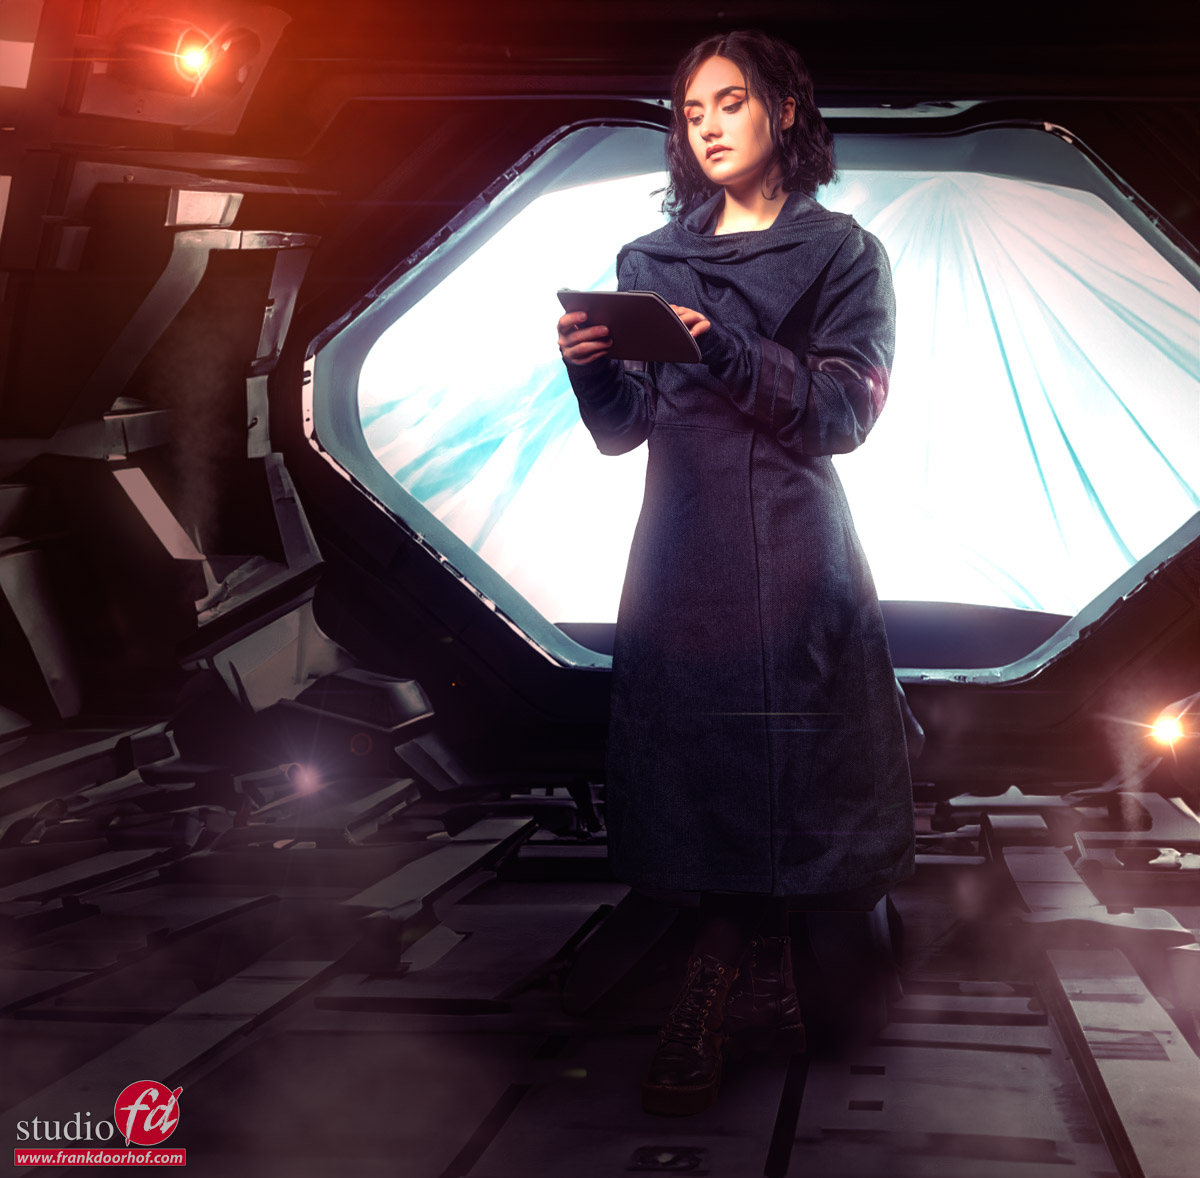
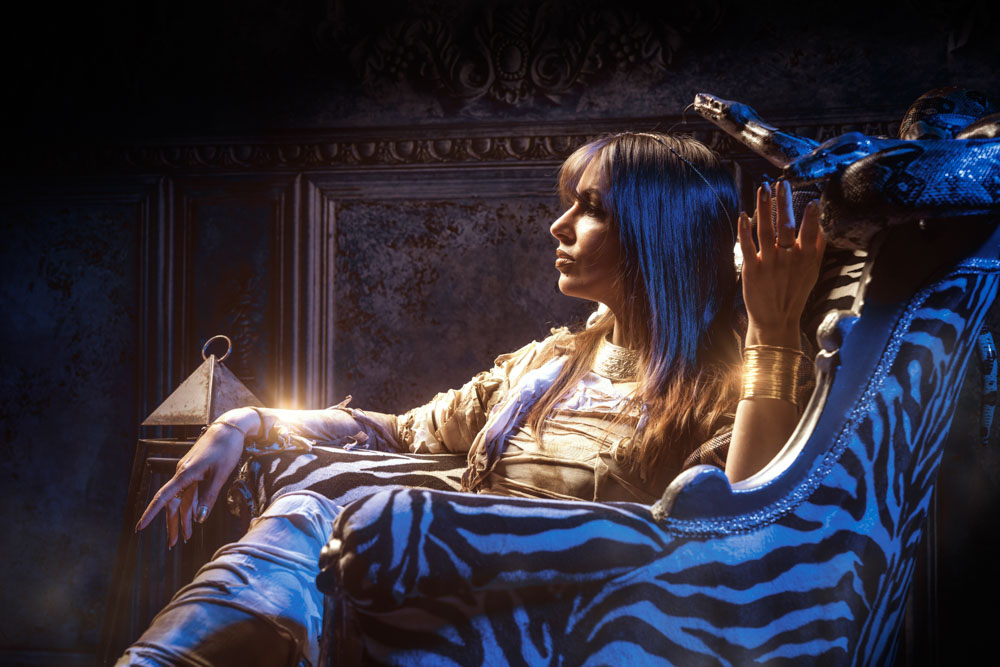
Full of confidence I started with the final image. Picard period.
Well I can say that the end result is what I wanted, but this time is was a disaster to get there.
Loads of times I got messages I broke the rules of Adobe because asking for certain words or selections. So I decided to started with much smaller parts and build it up part by part. This went a lot better and especially the sides have turned out pretty cool. In the back I wanted a large window with a warp trail and although it could have been nicer I think this one looked the best.
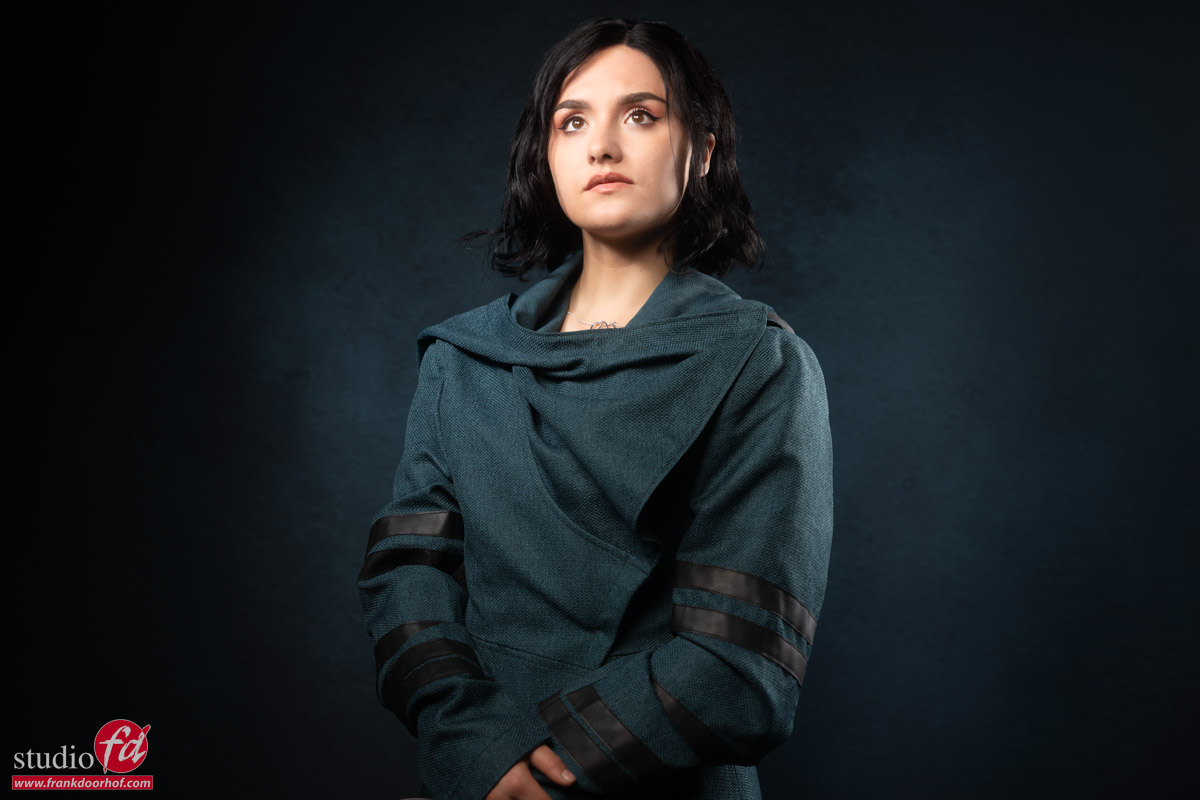
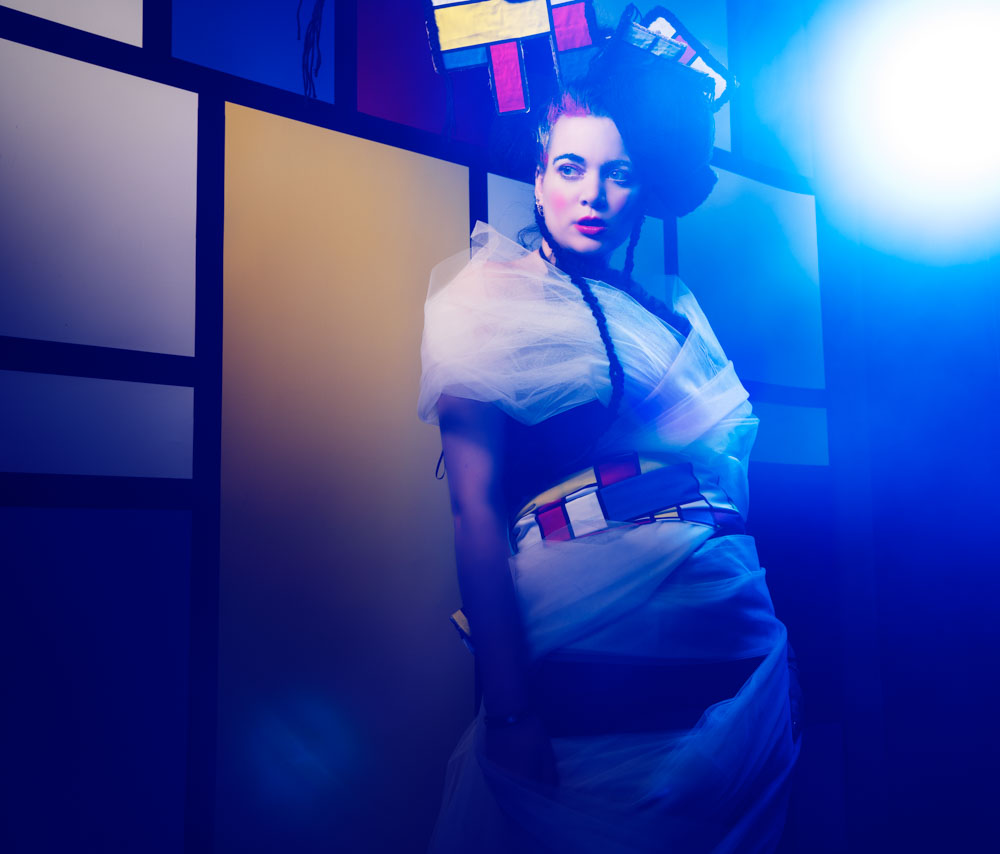
And of course we also did one just agains the backdrop.
Working with AI in Photoshop beta is pretty awesome.
But literally in three images I had three different experiences, and I had this before.
Sometimes the AI seems to read your mind and does exactly what you want it to do, or even better, and almost every “guess” is right.
Sometimes it just does what you want, sometimes you refresh the idea and you put it together.
And sometimes it just doesn’t want to do anything.
You type in realistic laboratory wall with computer panels and cables and you end up with something that could have come out of a lego movie and doesn’t make sense at all, and that’s how that last image actually turned out. Where with the second one everything just clicked together the last image was really an image I almost gave up on, but when I switched to much smaller parts I really came together I think.
Hope you guys enjoyed this overview of the Star Trek series.
Gabe brought all the clothing and from our side we would love to thank him not only for visiting us but also for giving me a great few days shooting cosplay :D.
https://frankdoorhof.com/web/wp-content/uploads/2023/07/JAF0013-copy.jpg8001200Frank Doorhofhttps://frankdoorhof.com/web/wp-content/uploads/2015/03/studioFD_Logo-1FV.pngFrank Doorhof2023-07-19 14:00:582023-07-15 13:41:06As a Star Trek nerd I love these workshops
It’s everywhere, and it’s even worse than the .com hype.
Even things that are so far away from anything even coming close to intelligence is labeled as AI just to ride the wave.
So why this blog post?
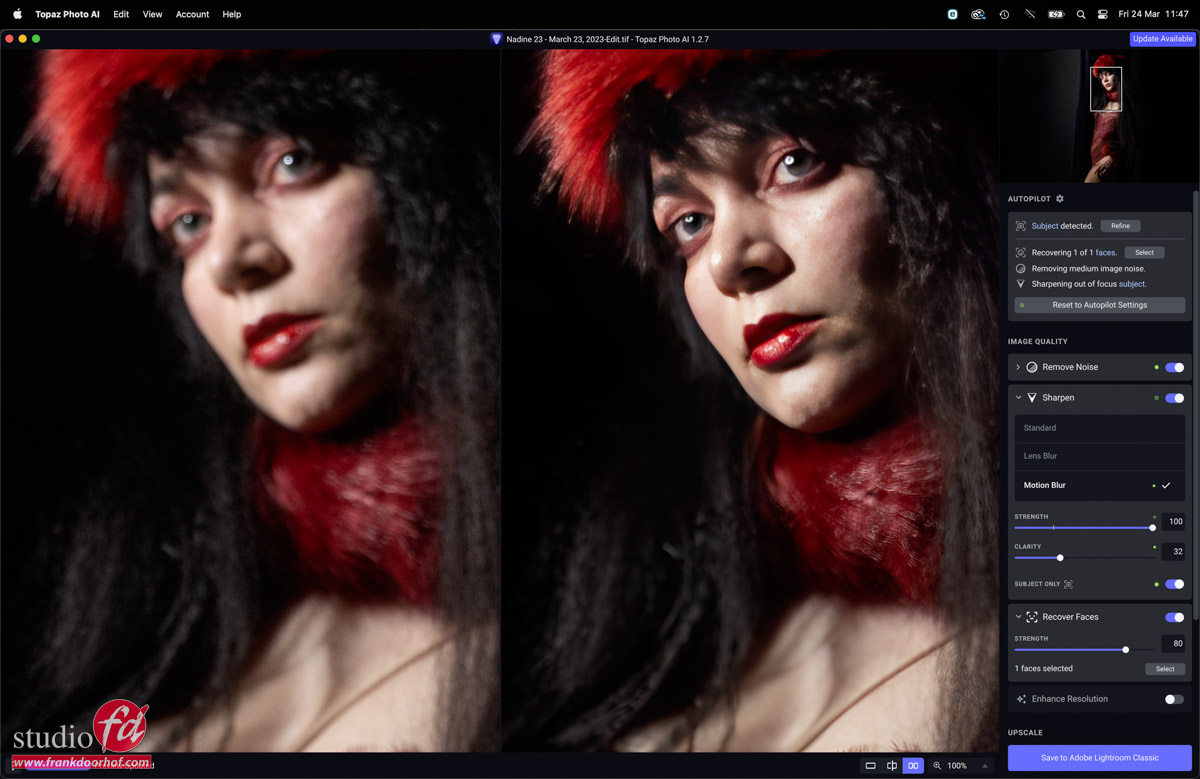
I recently did a review for Topaz Photo Ai.
I absolutely love this app and use it for old scans, event shots that are slightly out of focus or are shot at very high iso’s.
When Topaz asked me to use the video for an add I never expected what happened.
Over the years I’ve tried to build a community that is based on mutual respect, the need to learn and to inspire each other. And I can honestly say I actually never got any negativity. Up until now.
Good griefs, the replies to that add are sometimes bordering on insane.
So let me put some things in perspective about what I think about AI and what it can bring us, or take away.
Chat bots
Yeah, I agree it can get very scary.
And also sometimes very worrying realising that the development is going so fast that it’s already possible to let a mother think they kidnapped her son. This is very scary.
Now do we feel like Skynet is here?
Maybe yes, if it falls into the wrong hands (which it will eventually). But let’s not think about that for now.
Think about the positive things it can do, finally solve some of the worst deceases, or solve our climate problem, design the super efficient new battery for our electric cars and homes, and help us solve world hunger.
But this is a photography blog, so let’s say for now I’m in the centre about my opinion on AI, it scares the living daylights out of me and I can’t wait to see what it brings.
But let’s talk about some other things, more on topic.
Text to image
My opinion on this is pretty straight forward.
It’s not your art, unless YOU create it.
As you can see I also just leave the firefly logo in the images I use that I created with it.
When you type in numbers and words you are NOT creating something I feel, you let someone else create it in a style that’s NOT yours but based on stock, or other peoples work. I also don’t understand the feeling of “look at what I created”.
Now I have to add something to this.
When you write a book you create an imaginary world where the reader can be transported to and if you read a good book you can almost feel and smell the rooms/areas described. Still for me this is different from just text to an image, the imagination of the reader is 100% triggered by what the writer wrote down, meaning he/she has to be genius to make it all real for the reader. But it’s the reader that makes the world real with the help of the writer.
It doesn’t mean I say that AI generated material can’t be art.
Because it is, when you really refine your images, retouch the results to an end result I have no problems with using that for certain things, but I would highly recommend clearly labeling something as AI and when entering competitions it should be a separate category and not within photography, drawing or painting.
Now let’s refine this a bit….
One sentence to create this…. is it fun yes. is it mine…. no
Text to image part II
By now you all probably heard about Adobe’s Firefly and the brand new Photoshop with AI added.
The first thing Adobe does right it using material that is not “stolen”, they will actually work out a form of payment for the creators that offer their material (at least that’s how I understand it). This is not only the right way to do it but the only way I think.
Now there are some examples online about the new “expand background” tricks that Photoshop can do, and let’s be honest it looks fricking amazing, you start with someone on a rock overlooking a lake and you end up with a huge landscape with someone in the distance on a rock. One would almost say “wow look at that insane resolution camera and how far you can zoom in to that person on the rock”….
Personally I would prefer to choose another lens and take a few steps back and shoot it in real life, but I can see loads of situations where this can be very handy.
The difference is for me that we did start with a real photograph setting the mood. Although I have to be honest it’s still not “my thing” to extend something too much.
It does change for me if you look at it from a slightly different angle.
AI to add something
I love creating and recording music.
I know my way around a guitar and a bit of bass, can play keys a little bit, and have some feel for rhythm.
When I write a song I start with guitar and build a base with chords.
When the chords are done I change my simple drums to a more complete drum track.
Now I add my own bass playing.
After that some keys.
Now we have a complete song.
Because I can’t play the drums, I now change the programmed drum track for an AI drummer (build into logic or a plugin) which will follow what I play.
I also add some percussion tracks.
Now the bass is being enhanced by some AI bass, it doesn’t replace the bass but it adds to the bass track.
Same with keys.
Now we have the whole structure and guitars are played again, and again till it works.
The problem is that the song at that point doesn’t flow yet, we need dynamics and soundstages so this is where you start to add samples, loops, arpeggiators etc (don’t worry if you don’t know the terms), now the song really builds, pushes and comes to life.
One could say that in the end only my guitar playing is my own.
The drums overpower my programmed simple drums, the bass and keys are much better than my own playing and the samples really push the music forward. So is it true that I didn’t create the music and it’s all AI and samples?
No of course not, I played everything and used AI and samples to create the song I had in my head, the AI is used purely to save me time and makes my creativity stand out more.
I can actually say that the song is 100% my own, I use the AI drummer, BUT I never use it as it comes out of the software, per bar I change slight things like an extra cymbal hit, maybe some double bass somewhere, maybe a nice break somewhere etc. you keep fine tuning the drum track and same with bass and keys.
The difference for me is that this is something I build from the start with proper knowledge of harmonics, chord progressions, possible and impossible parts (a drummer only has 2 arms, unless you use 2 drummers/percussion so both will sound slightly different) instead of just typing in something and refining something that I never created and also don’t understand how to make it.
In other words, my music I can create from scratch even without the assistance of AI, it will be less produced but the power of the song is there. Take away the text in Text to images and you’re left with…. yes nothing.
Took a bit more time to create this one. Again, loads of fun and impressive but I don’t feel it’s mine.
How I will probably use AI
I’ve been playing around with AI a lot.
I think it’s not a time to resist AI but learn about it and see what it can do in your work, and use it the way you see fit.
For me it will be a super valuable tool for for example my cosplay shots.
I know how to make a selection with the lasso and pen tool, but I use select subject most of the time and just refine it.
I know how to change the background and make it look the way I want it (yeah I pretty much suck at composites, but it’s fun), but I always have to look for something that fits my ideas and in 99% of the cases it means I have to cut some corners because I didn’t shoot every situation in the world I would ever need…..
You see where I’m going?
When I shoot a model in a cosplay workshop I know for 90% where I want to go for the end result.
In the past I was only limited by the availability of props and scenes.
Of course we love using our ClickPropsBackdrops but in some cases you want a more surreal look and it doesn’t really matter that the light doesn’t mimic the background. By using the new AI options in Photoshop it takes my creativity to a whole new level.
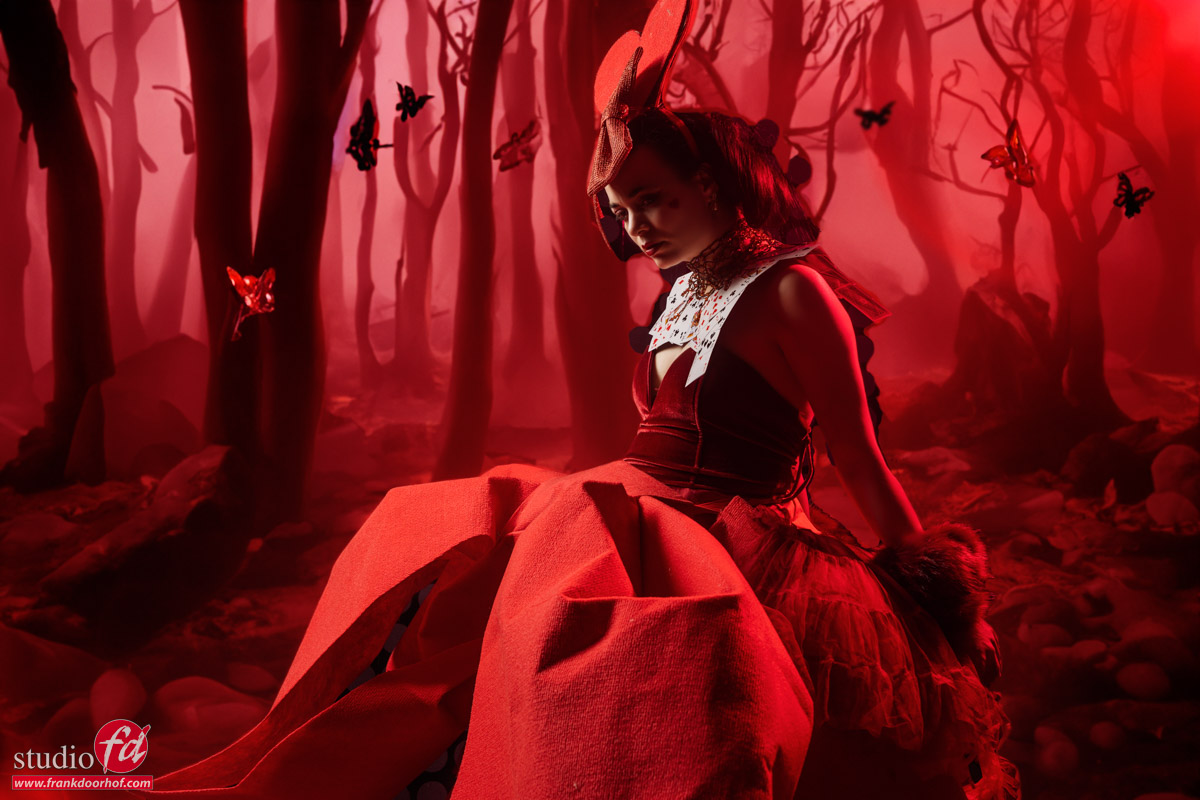
During a recent workshop I shot this image from Nadine.
I knew I wanted a really red surreal forrest scene where it almost looked like a mix from Alice in Wonderland and a vampire nightmare.
Now the AI in Photoshop really helped me out.
Normally I would select an image of a forrest, tint it all red, change some of the lines with warp or lens effects, and combine it, and the results wouldn’t be as on point as what Photoshop did.
I also wanted some butterflies around Nadine and those were also added by AI.
Make the selection where you want it and type in Butterfly and voila you get several options to chose from.
One could say that this is also fake and you are 100% right.
However the difference is that I already set the mood with lighting, colors etc.
The background I tried to blend together better by adding some lighting effects on a separate layer, played with the focus plane and doubted about changing the shadows the trees cast, but somehow I also like that weird unevenness it creates (still in doubt about that one).
In other words, if you understand lighting, position, focus behaviour, colorblending etc. AI can be a TOOL, and although it creates something that wasn’t there I see it the same way as a movie where you use special effects.
In the next two shots I didn’t think about shadows, composition etc.
These were my first experiments with creating custom backgrounds into a shot.
Personally I still prefer real backgrounds.
A real background responds to the light and the gels you use.
But also the lines in the backgrounds are always fitting for the angle you shoot from, this is one of the things AI at the moment can’t get right easily when you start adding backgrounds to models you shot separately.
Here some samples with our own ClickPropsBackdrops backgrounds.
By changing colors, light angles etc. you can always make your background look different, but most of all they “just fit”.
Every time it’s the end of the world and a war online
When the first TVs were released the world would end.
When we saw Photoshop it would destroy photography.
When Apple released the iPhone life would never be the same.
Etc.
Every time we make a jump in our evolution there are people that think the world will end and people that embrace the new technology.
AI is different in the fact that it actually has a very dangerous side that should be very well regulated. But it doesn’t mean that all AI labels means there is a little digital demon in your device out for world domination. (I hope).
When I look at the remarks I got over the Photo AI add from Topaz I think people don’t get this last part.
Now we are getting somewhere. It’s one of my shots and I selected the surroundings to fit the mood and also the artist but also added lighting effects, props, changed things in the background etc. this actually took some work.
AI as a “dumb” tool
Up until now one could argue that AI is having an active creative task in the workflow. And I can agree 100% to that.
However when we look at a tool like Photo AI I think we are totally judging this from the wrong angle.
Software that HELPS the photographer to solve problems are in my opinion (and this is personal) something completely different and could also be labeled as smart software.
When I feed Photo AI an image that is crap it will never create a masterpiece.
If I tell it to add smoke to a shot it will not do anything at all.
The only thing it does is remove noise and sharpen images based on learning models on how images are build up.
The most heard remark was that it changes the images and it’s all fake.
I have to disagree there and it’s actually super simple to explain.
When you are reading this post on a display you are using a form of AI, but rather basic.
The image in this post has a certain resolution and your screen has a certain resolution, and I’m almost sure your display will not show images 100% pixel for pixel on most devices. We call this scaling. And you are doing it constantly when you work in Photoshop. The reason you can zoom in and out is actually a little bit of magic, because it means that in real time your display is able to scale a 60MP file to any zoom you ask it to and it looks great.
The same happens in most TV’s now a days, called frame interpolation.
In simple terms extra frames are created in between the existing frames to make the image look smoother.
Is this really AI?
No, not really.
It’s actually not that difficult as a concept.
If this is 24 frames . . . . . . .
It’s very easy to make it into this ………………
Meaning if this is a ball being shot from left to right it just means the ball doesn’t stutter but it moves smoothly.
Now don’t get me wrong, it might not be super complicated as concept, but making it work is something completely different and that’s where you need soms “smarts”
For EVERY pixel the software needs to determine which position it’s in next by comparing contrast, color, size etc. but it also has to keep it within a certain time frame, otherwise we would have major problems with so called lag. So we need ways to do this smart, and this one could call AI. By using matrix readings you can cut some corners, and the more power you have the finer you can get.
For me this is without a doubt intelligent but it doesn’t change the content, it just makes it easier to watch without the stutters of 24 fps material.
For me personally software like Photo AI, Portrait AI etc. are not the AI programs that are taking away the work from designers or photographers. In other words it’s not a threat to our creativity. By using very smart algoritmes that analyse the content in your images it can determine what is noise (other colors and shape) and what is content, and by changing the color and size of the noise to match the surrounding pixels and making them fade over when needed you are in fact getting your original image back instead of it being covered by a layer of noise. When we dust our home we also don’t create something, we actually take it away so we can see the original scene.
Same remarks I got when demonstrating the focus possibilities.
This shot I took of Nadine during a workshop to see how far I could push the focus engine.
By shooting it in the studio I could see in detail how far the software could be pushed before making it into the familiar water painting effect. As you can see there is a lot possible.
As mentioned before I did this intentional.
The left side would normally end up in the thrash, and to be honest the right one is also not really usable as you see it here, but realise this is a 60mp crop, and that means that if you miss focus just a little bit you can actually save an image quite good.
Now think about using this on your old family photos, in restoration situations etc.
Often we have people visiting our studio with very low resolution images of a dearly departed that needs to be blow up for an A4 (letter) display print, and in some cases you have to work with material that can maybe be printed on a poststamp but not A4 (letter).
In my personal opinion this is where I make the distinction between using AI to create an image out of nowhere, add something to an image you already took and set the mood, or just use smart algoritmes to recover details that were already there in real life but were covered by noise or where the photographer missed focus.
Do remember that focus adjustments can be based on the same concept as upscaling, it doesn’t find a new mouth online and replaces it, it changes the pixels and matches surround pixels based on contrast and depth calculations to get the image back to the original scene you shot and imagined as close as possible.
Conclusion
For me AI is something very scary but also exciting.
It will take jobs away, but it will also give us as creators tools we never had before.
Just like when Photoshop appeared it will make some jobs disappear but look at all the Photoshop experts that are now working in businesses all over the world.
My conclusion is very simple.
Creativity is human, you can type in whatever you want but only a good writer can transport you to that new world. You might be able to create stunning images but if you don’t have the creativity or understanding of story telling, lighting etc. it will never be anything else, just loose images without content. Just like a movie from Bruce Campbell will always be great even if it’s a B movie, but there are plenty of Hollywood movies that are shot with 100x higher budgets and better special effects but they are terrible.
You can record everything to a click track with the best virtual instruments and autotune.
But nothing, nothing can beat the creativity bands like Queen, The Beatles, Led Zeppelin etc. pulled off in the studio. It might sound less polished but at least it’s super creative and even now still sounding fresh.
Real creativity can be enhanced by AI, but it cannot give super powers of creativity to someone that doesn’t understand the basics of story telling. It will be a one hit wonder that will be forgotten with the next release of the software. The real story tellers will embrace AI for what they need it for, telling their stories with more polished looks and giving them options like the green screen once changed the movie industry.
But for the most of us it will also be part of our workflow as just smart algoritmes that have nothing to do with artificial intelligence but just the raw power of modern CPU/GPUs and smart programming.
Tomorrow some fun images I played with for a friend.
Exactly a year ago we introduced a new tether brand: IQwire. We used the 10-meter cable a lot. Problem-free! But there is more. Read this update about 1-year problem-free tethering with IQwire.
Facebook sends you reminders of what happened a year ago. And today Facebook showed the official announcement of us distributing IQwire in Europe.
What is tethering?
Shooting tethered is one of the best upgrades you can do to your workflow. In case you wonder “Tethering?” When we talk about shooting tethered we mean that we connect our camera to a larger display to see the images we shoot right away. This can be on a tablet like Android or iOs, but also Windows or Mac of course.
In the studio or on location this means you can immediately judge your images for focus, lighting, etc. But you can also add presets to the images so your client (or yourself) can get an idea about how the final image will look. Especially when shooting in BW this can be an awesome tool that really makes the difference. But also think about overlays where you are able to shoot the images straight into the publication with all the headlines, text, etc. already laid out so you can get perfect results.
What you might not know is that most modern cameras support shooting tethered. In most cases, software like Lightroom or Capture One supports your camera. But there are also alternatives, most cameras even have their own software which can or cannot be incorporated with Lightroom. Tethering is a serious workflow enhancement, and might I say probably one of the most important ones.
But time moves on and demands also grow
A camera that was cutting edge a few years ago is already surpassed by many generations that followed. This also means that the files are getting larger, but most of all the buffers of the cameras are getting larger, cards are getting faster and we are also able to charge our cameras via USBC. This means that the demands we have for our tethering cables are getting higher and higher.
Today it’s exactly a year ago I made a post on the internet that we would be releasing a new brand for Europe that would be able to solve most if not all problems that people experience when shooting tethered, and after a year let’s look back and continue reading about 1-year problem-free tethering with IQwire
the IQwire logo with slogan
Experience is key
I’ve been shooting tethered for as long as I can remember. It started with the famous yellow composite cable to a CRT monitor. A simple connection from the video out of my camera to the TV. Nothing fancy but it worked like a charm. Later of course I switched to wireless tethering with a special battery grip which in all honesty worked ok for JPGs but was way too slow for RAW files (nothing changed here). I believe that when I switched to Medium Format it was the first time I really was able to shoot tethered the right way via Leaf Capture. At that moment I was running Windows and there actually was no Windows version of Leaf Capture. But thanks to the awesome team at Leaf I was able to run an alpha/beta version of the software. Later I switched to Mac also due to the fact my Windows laptop was way too unstable in heat or wet environments.
Sony A99 could not tether
Fast forward a lot of years and I was asked to do the introduction of the Sony A99. At that moment a groundbreaking camera with an EVF and …. well…. no tethering. Seeing I was asked to do the official introduction in Dubai for an audience this was really a big issue. So I started working together with a small company that actually managed to get me a “working” version of their tethering plugin for Sony cameras, with the STRONG message, please don’t shoot more than 25 images, and please not too fast. To make a long story short it was a demo with not that many shots but I was probably the first one in the world that actually shot tethered with the A99.
Tethering can be complicated
We never stopped looking for better tethering solutions and for many years Annewiek and I worked effortlessly to make tethering problem-free for every photographer. You have to realize that just adding a cable to your camera doesn’t warrant that tethering works. It’s actually in some cases a very complicated process where drivers can block the tethering or power saving can cause lost connections. Dropbox can even totally shut off tethering, hardware drivers aren’t updated or not correctly, etc. I could write a small book about all the problems we experienced over this period.
But as mentioned times changed and we found that more and more photographers (including myself) demanded more from our cables and solutions. For me, it was important to be able to use 10 meters (33 ft) cables without any hassle of adding two different cables together. I want to tethering to work problem-free. Extending cables in reality just doesn’t work reliably. Even when using locks after a few months I started getting lost connections and we had to tape the whole system together. And let’s be honest if you walk on a stage you don’t want to worry about losing connection, you just want to shoot and trust your gear.
And we found a brand that does exactly what the modern photographer wants.
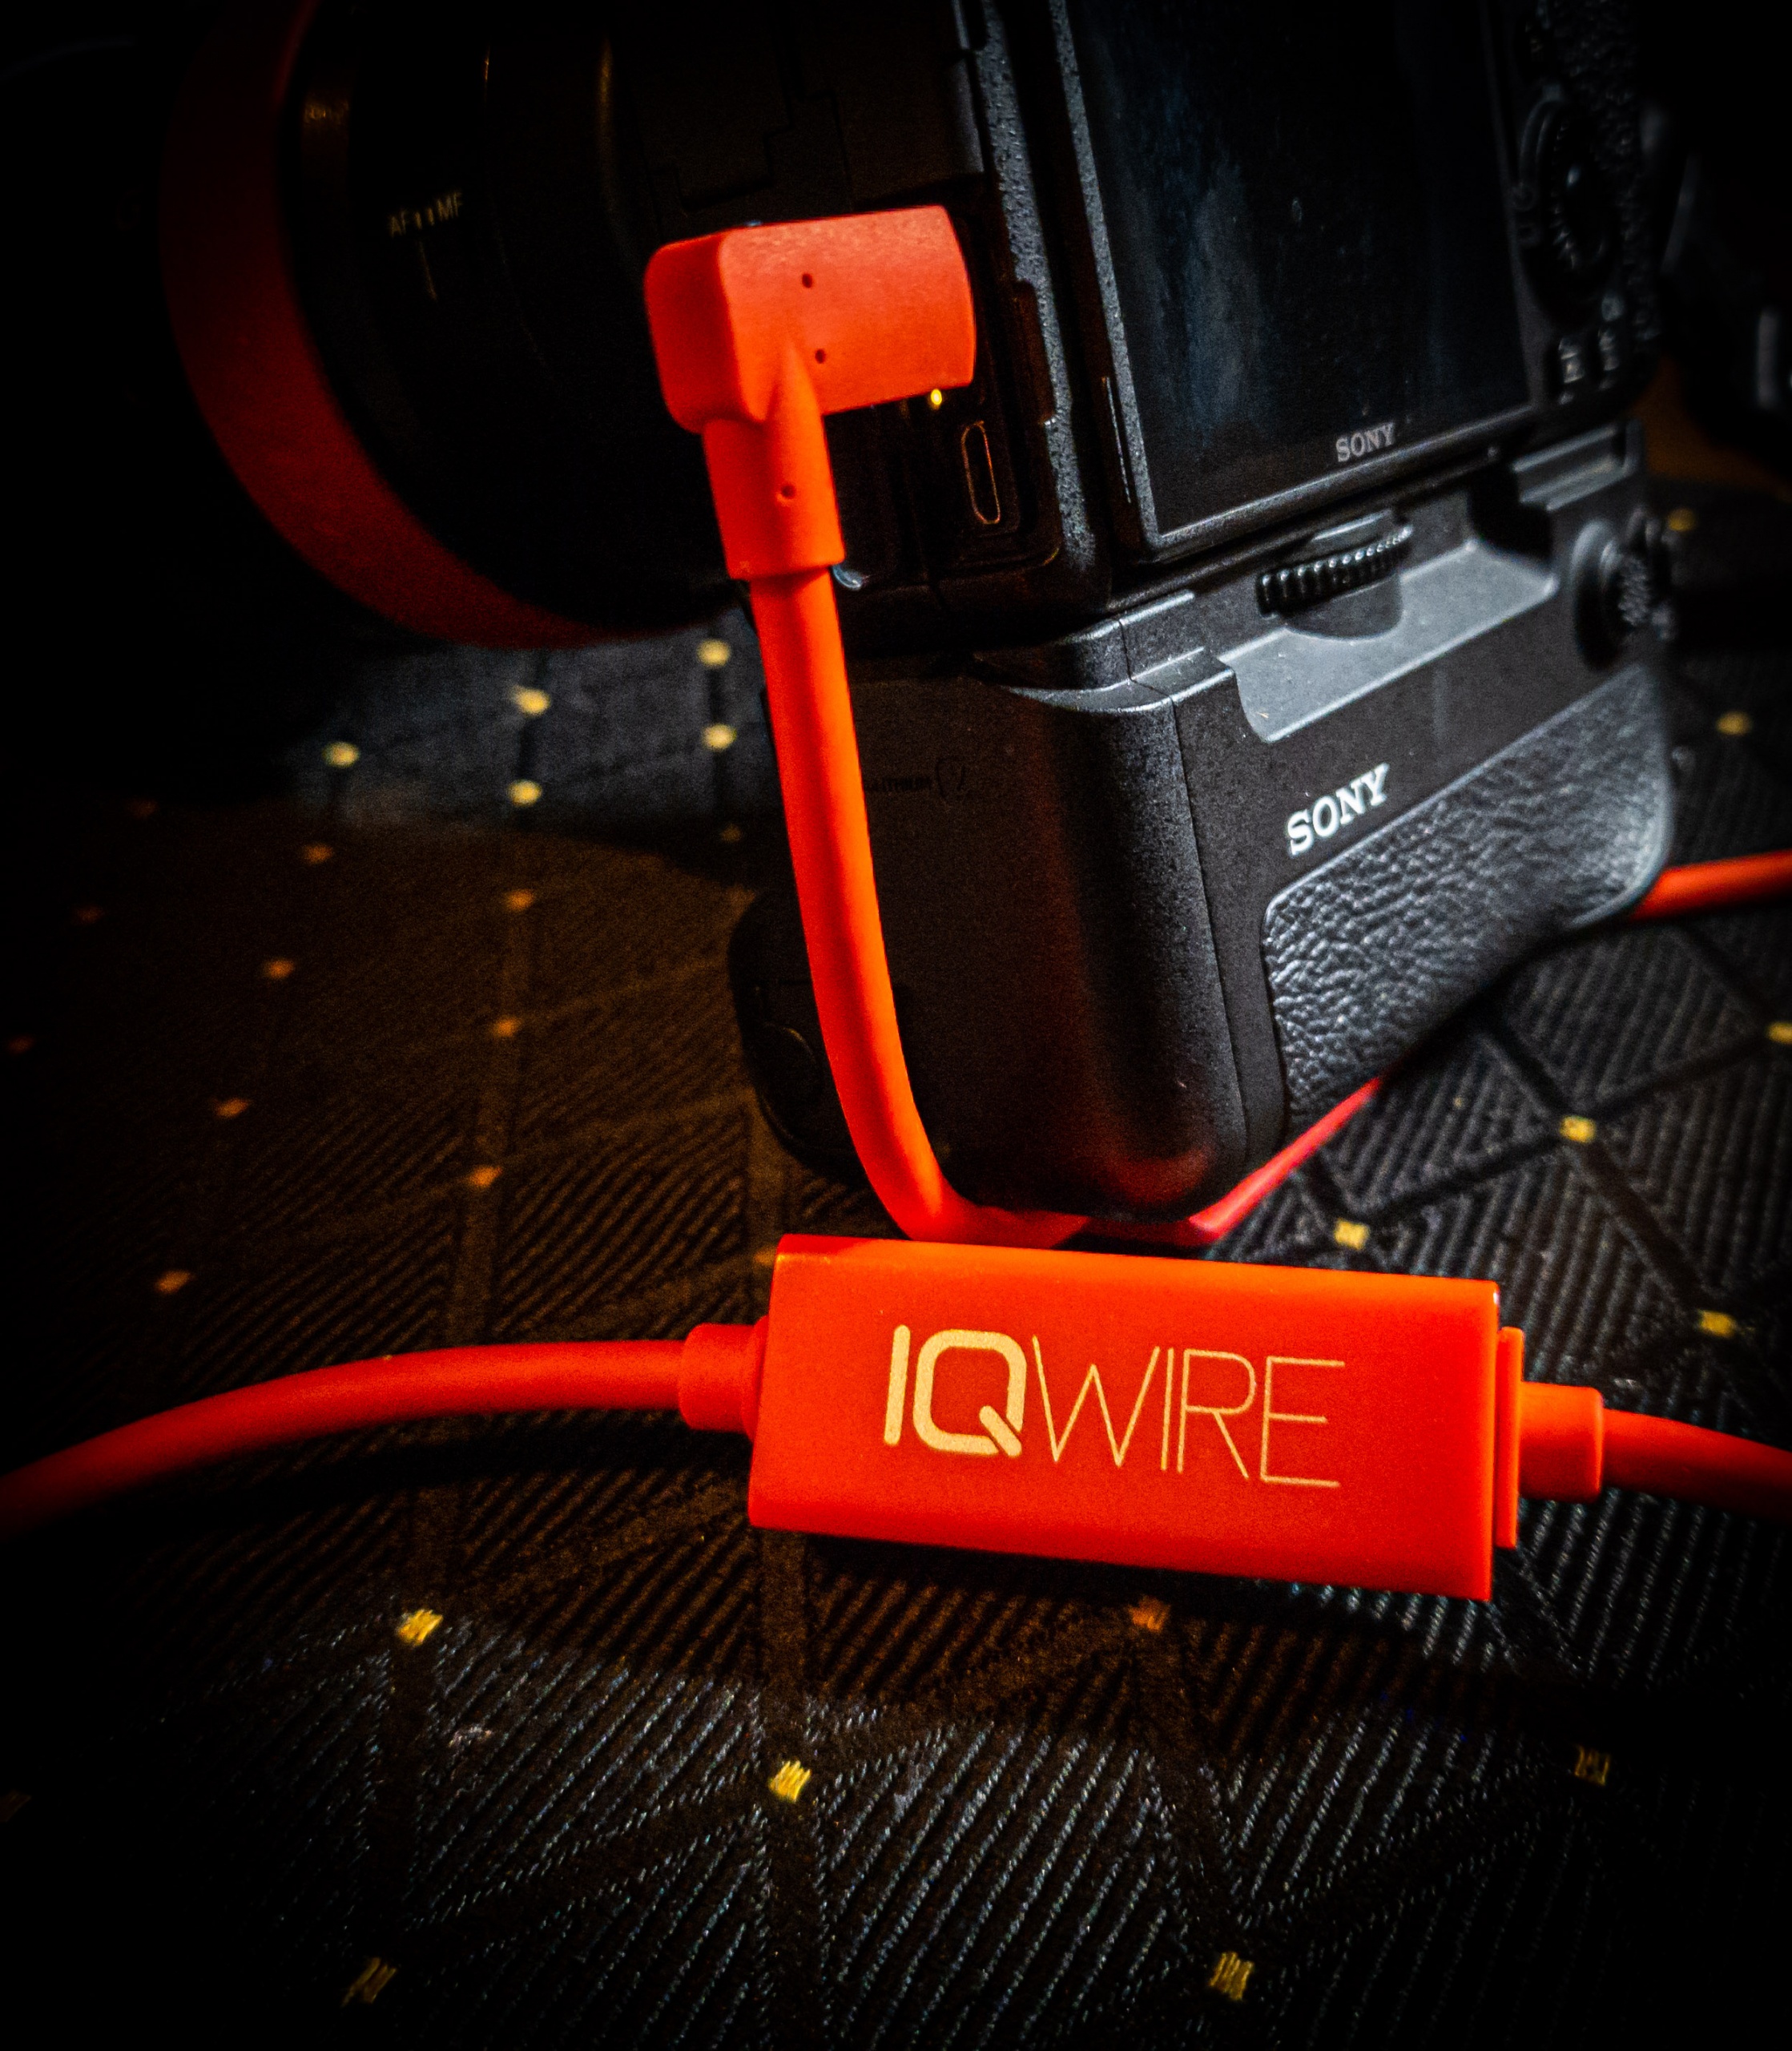
IQwire
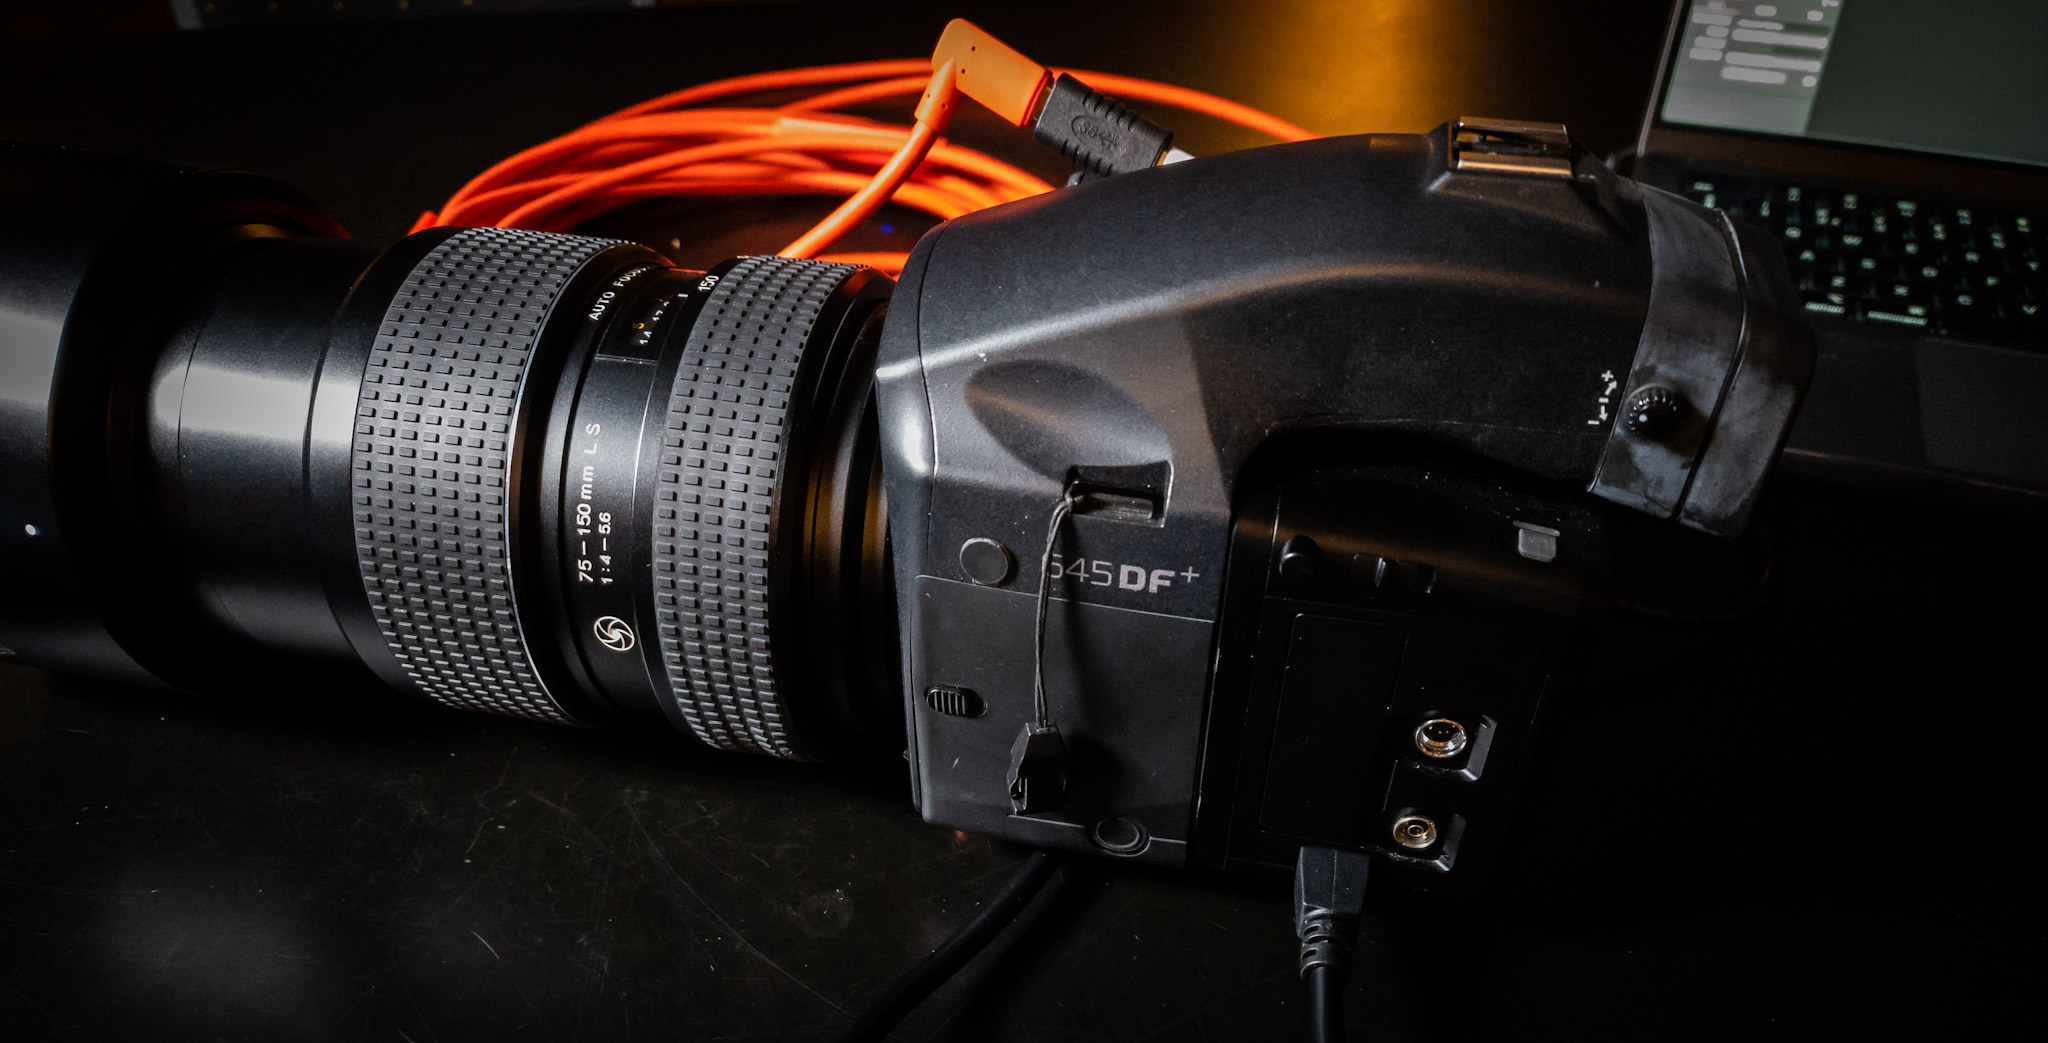
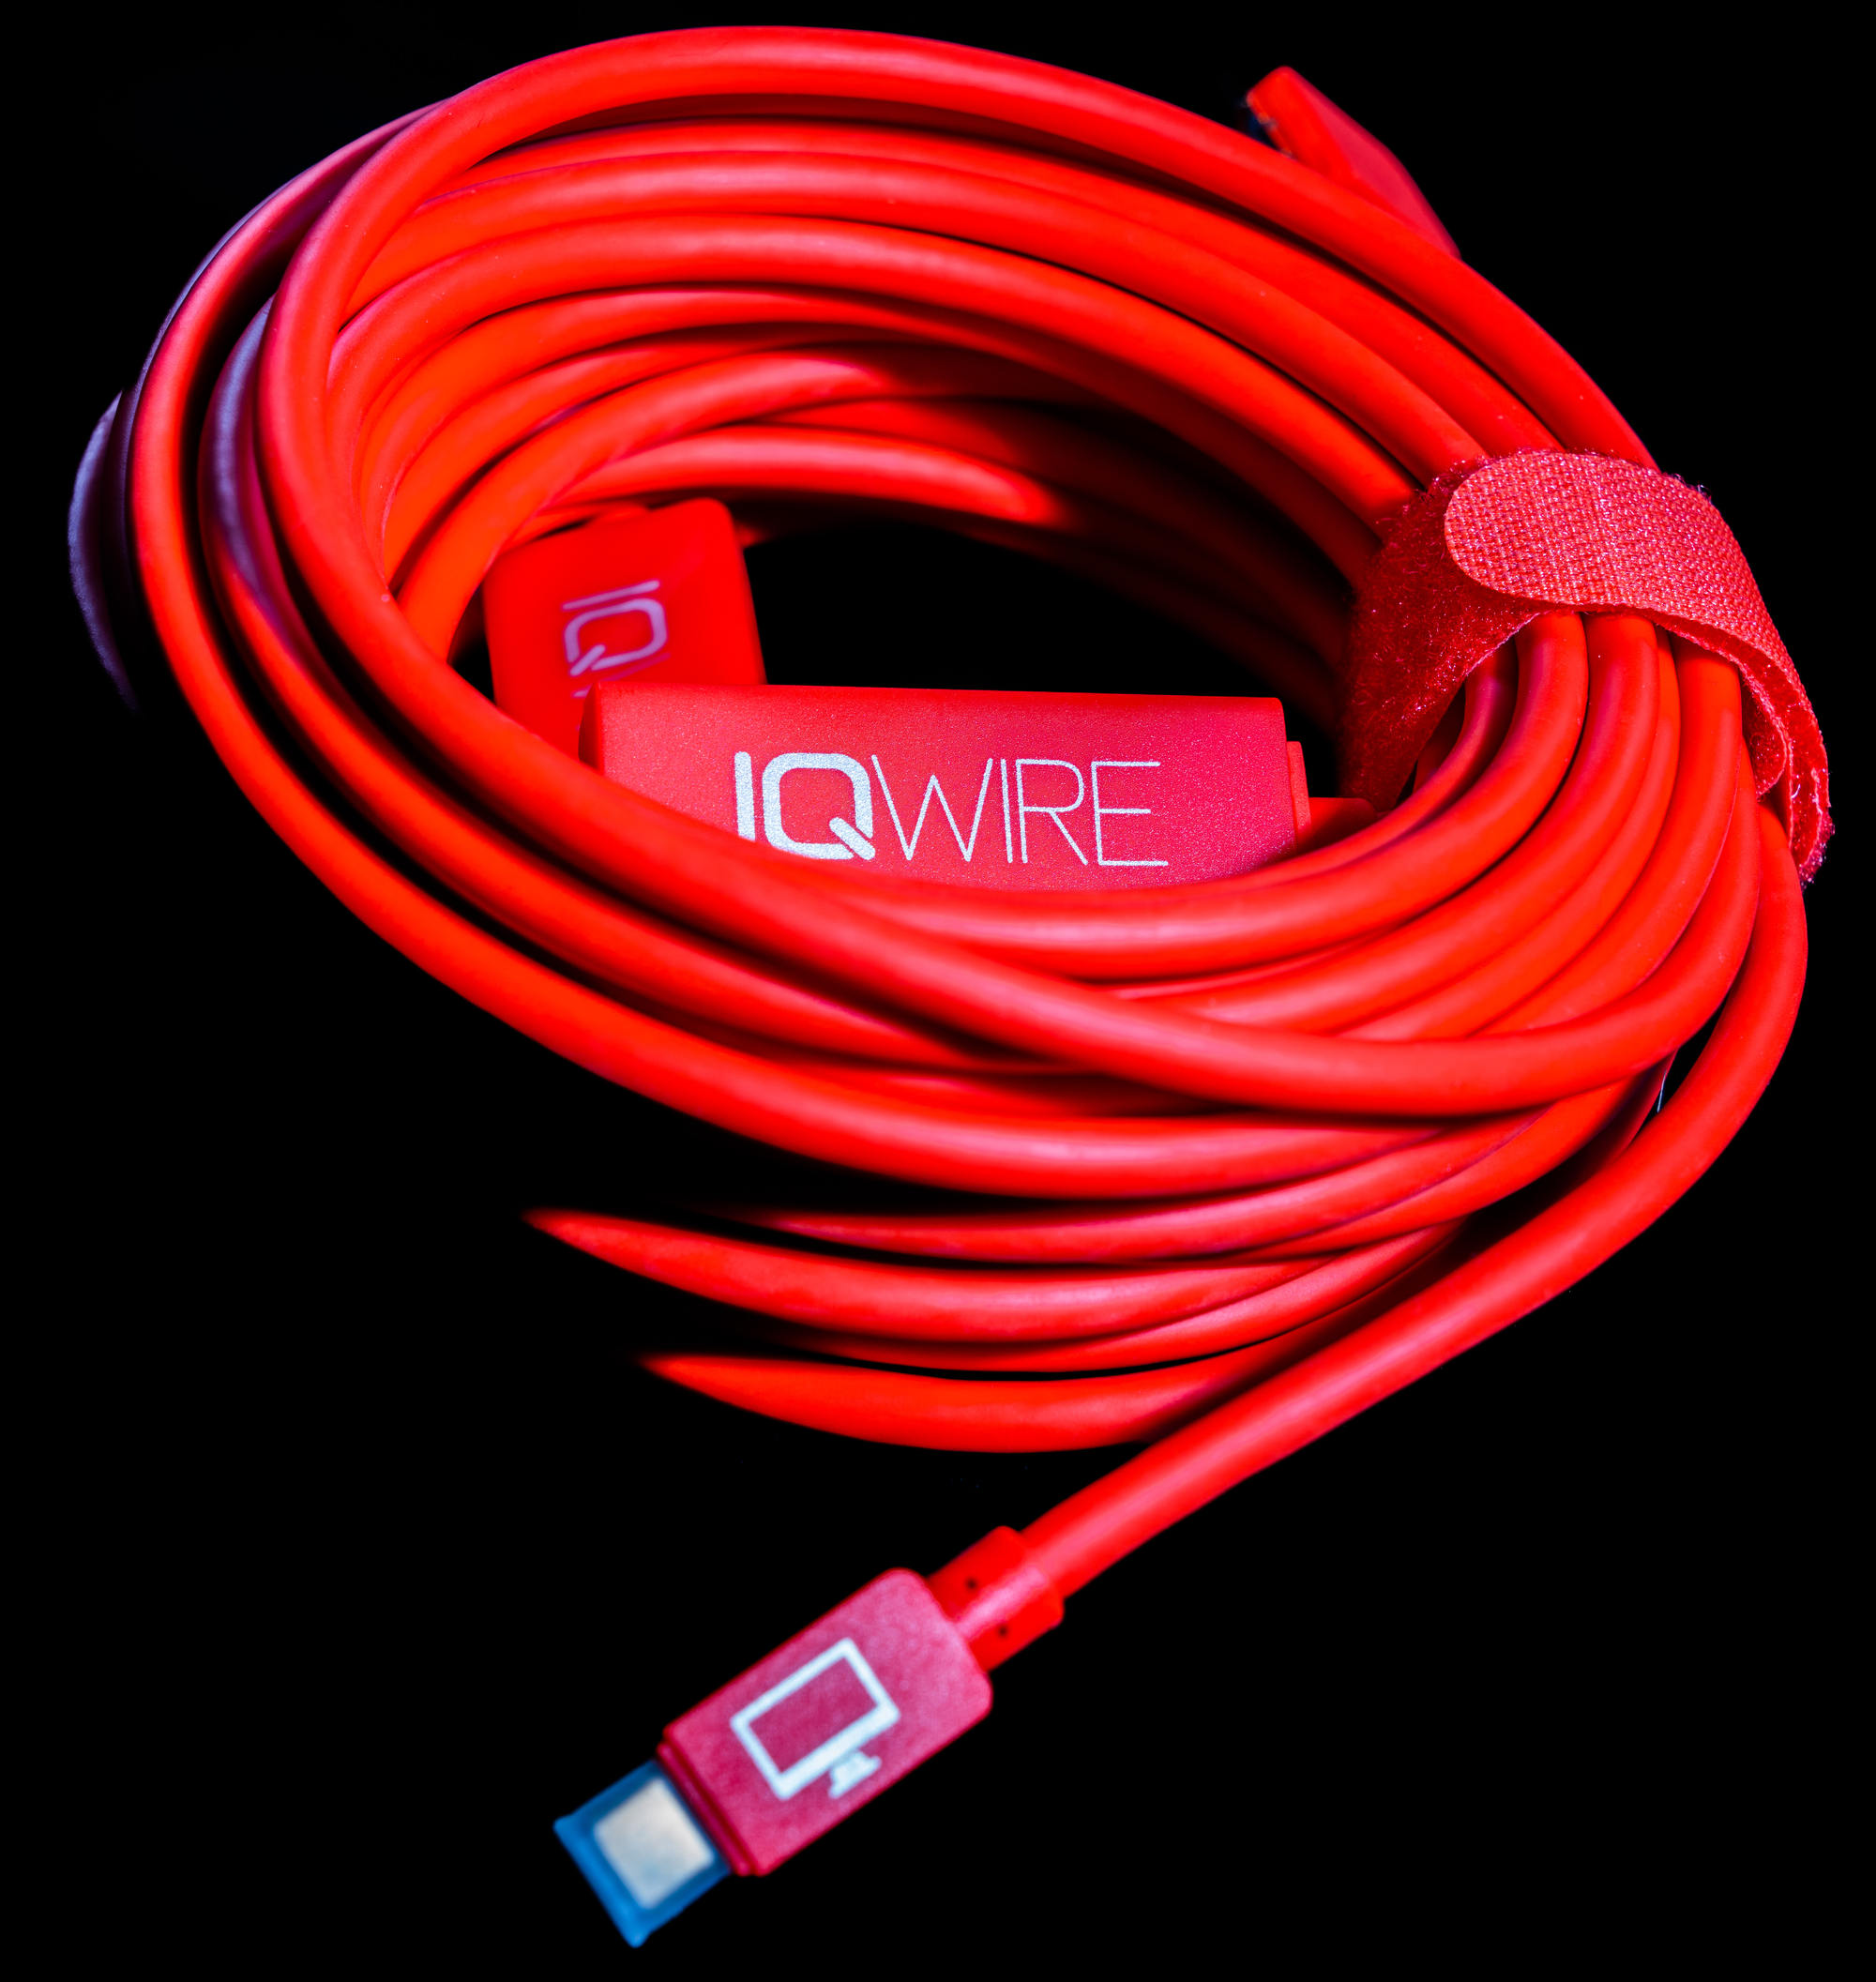
And the IQ is not there for fun or advertising. We deliver the IQwire cables in 5 and 10 meters lengths. So one problem for me was solved (length). However, when using 10 meters you are going beyond the limits of USBC (4.7 meters) so how do we make it work you might ask?
Well in the 10 meters version, you will find 2 boosters, and by using 2 boosters we have some advantages that no other brand has.
First of all of course the length, finally 10 meters without any extra connections.
But by using two inline boosters we are also able to solve another huge problem. The fact that most professional photographers use several cameras. With the IQwire, we are also selling several pigtails and even a USB-A converter. This makes the IQwire literally one cable to rule them all. When you shoot USBC you just use the cable as it is. But if you need USB mini/B/micro or any other connection you are able to connect a so-called pigtail cable where you go from USBcC female to the connector you need. Our pigtails are app 15 cm in length but I did some tests with adding a convertor PLUS a 4.7 meter cable and to my surprise my Medium Format camera didn’t just shoot without any dropouts but even was able to charge on the lowest setting which proves how stable and well build the IQ-Wire system is. So that is what we call problem-free tethering!
And although you don’t really need a booster on 5 mtrs also our 5 mtrs cables have one booster.
But there is more
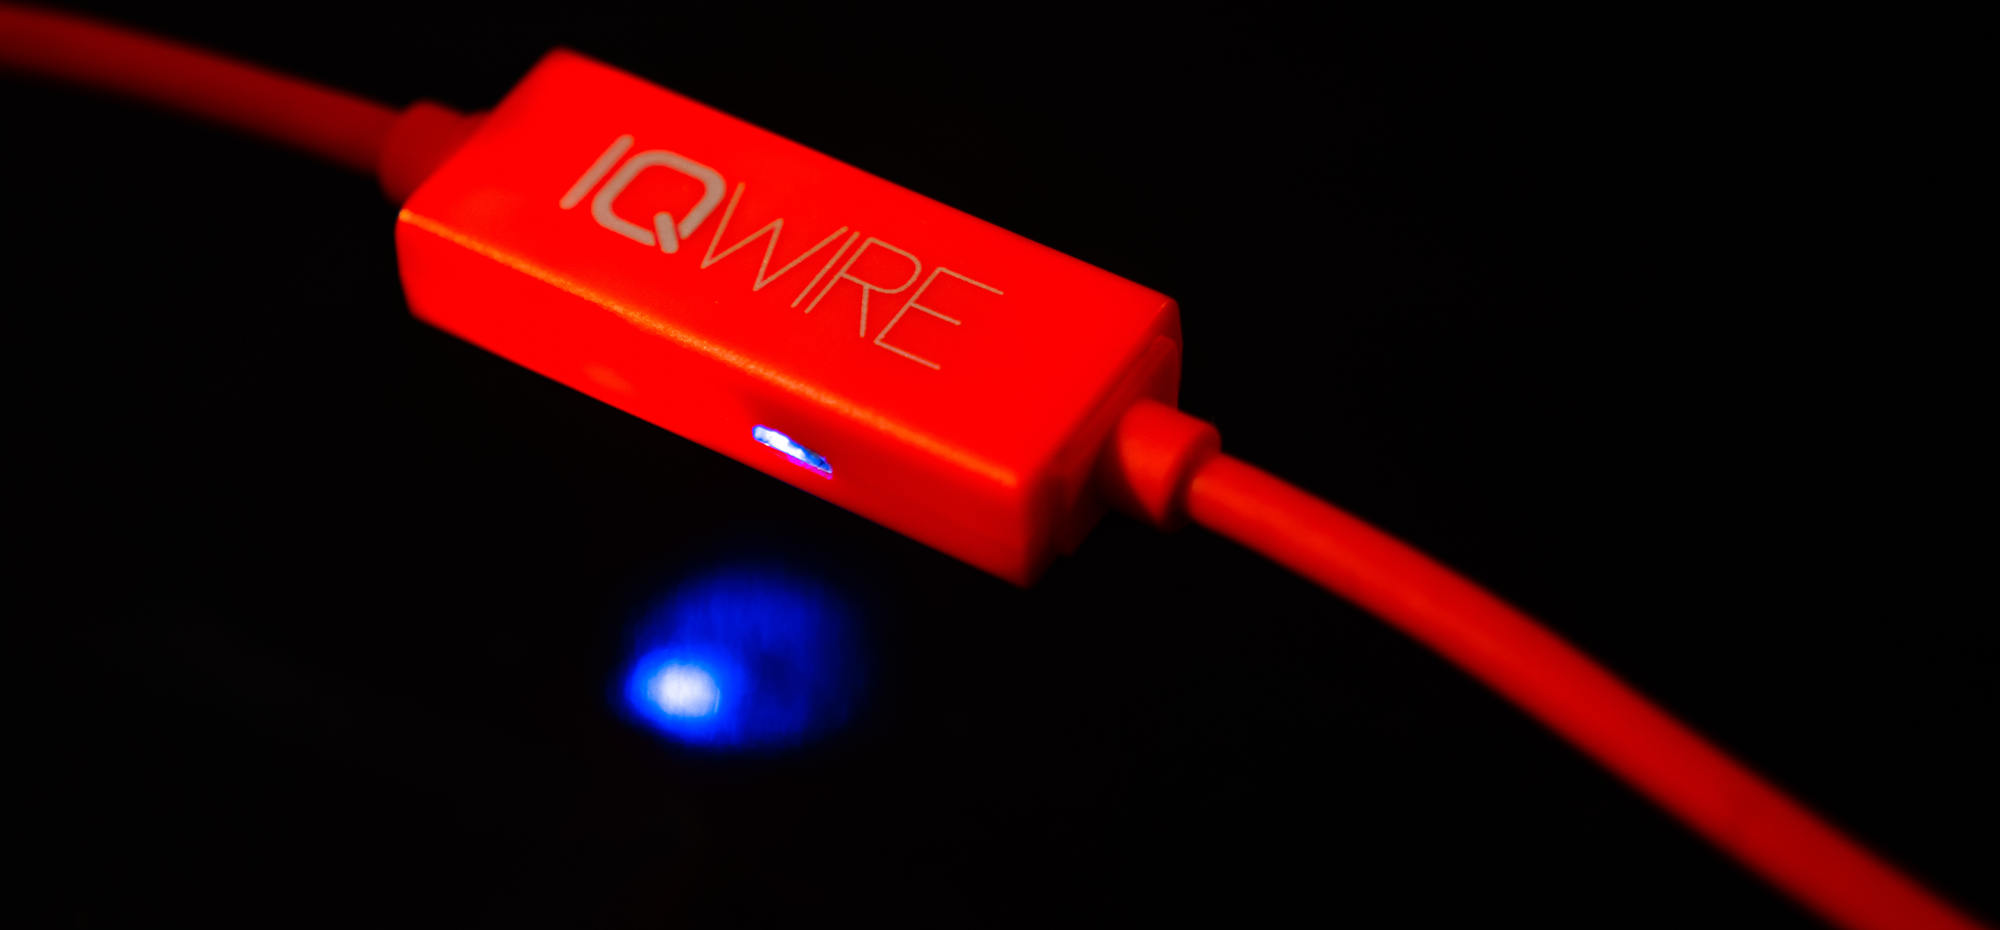
As soon as you connect your camera for the first time you will notice that the connection is blazingly fast. The camera is recognized almost immediately and there are no more pauses or hiccups during the session, all images come in at the same time and speed.
We did several tests ourselves and clocked a difference of up to 20% compared to the best other cables. According to a recent review, the reviewer actually claimed even faster speeds compared to an off-brand cable. The impressive fact from that review was he compared a standard 1-meter cable with our 10-meter cable.
Part of this is of course due to the boosters. But also due to a small piece of hardware called IQ-connect. With IQ-connect you are always sure your camera and computer/tablet have the fastest connection and don’t disconnect the camera during the shoot.
With modern cameras, you can still shoot with standard cables of course, but if you want a reliable professional solution that can take a beating IQwire is the best choice in our personal opinion.
Cascable logo, tethering software for the iPad
And more
When we look at the demands from photographers besides length we also hear being used iPad more and more. And let’s be honest, being able to shoot to a laptop is great, but you always have to carry an expensive piece of gear into environments that are far from friendly for anything that has air vents. Take your laptop to a beach with a little bit of wind and you know what I mean.
The iPad is the perfect solution for shooting tethered. I shoot with the iPad almost exclusively now and would literally never go back to the laptop. More battery life, much more light output, and much much easier to mount on a stand without the risk of falling over.
But you need software for this of course. And as mentioned before we always look for great solutions and found this in an app called Cascable on iOS. Do make sure you check if your camera is supported for wired tethering (they support a lot of cameras and even more wireless so make sure you check for wired too).
You guessed it… there is more
Now that we have the perfect cable in the perfect length, and a good tethering solution there is one thing missing.
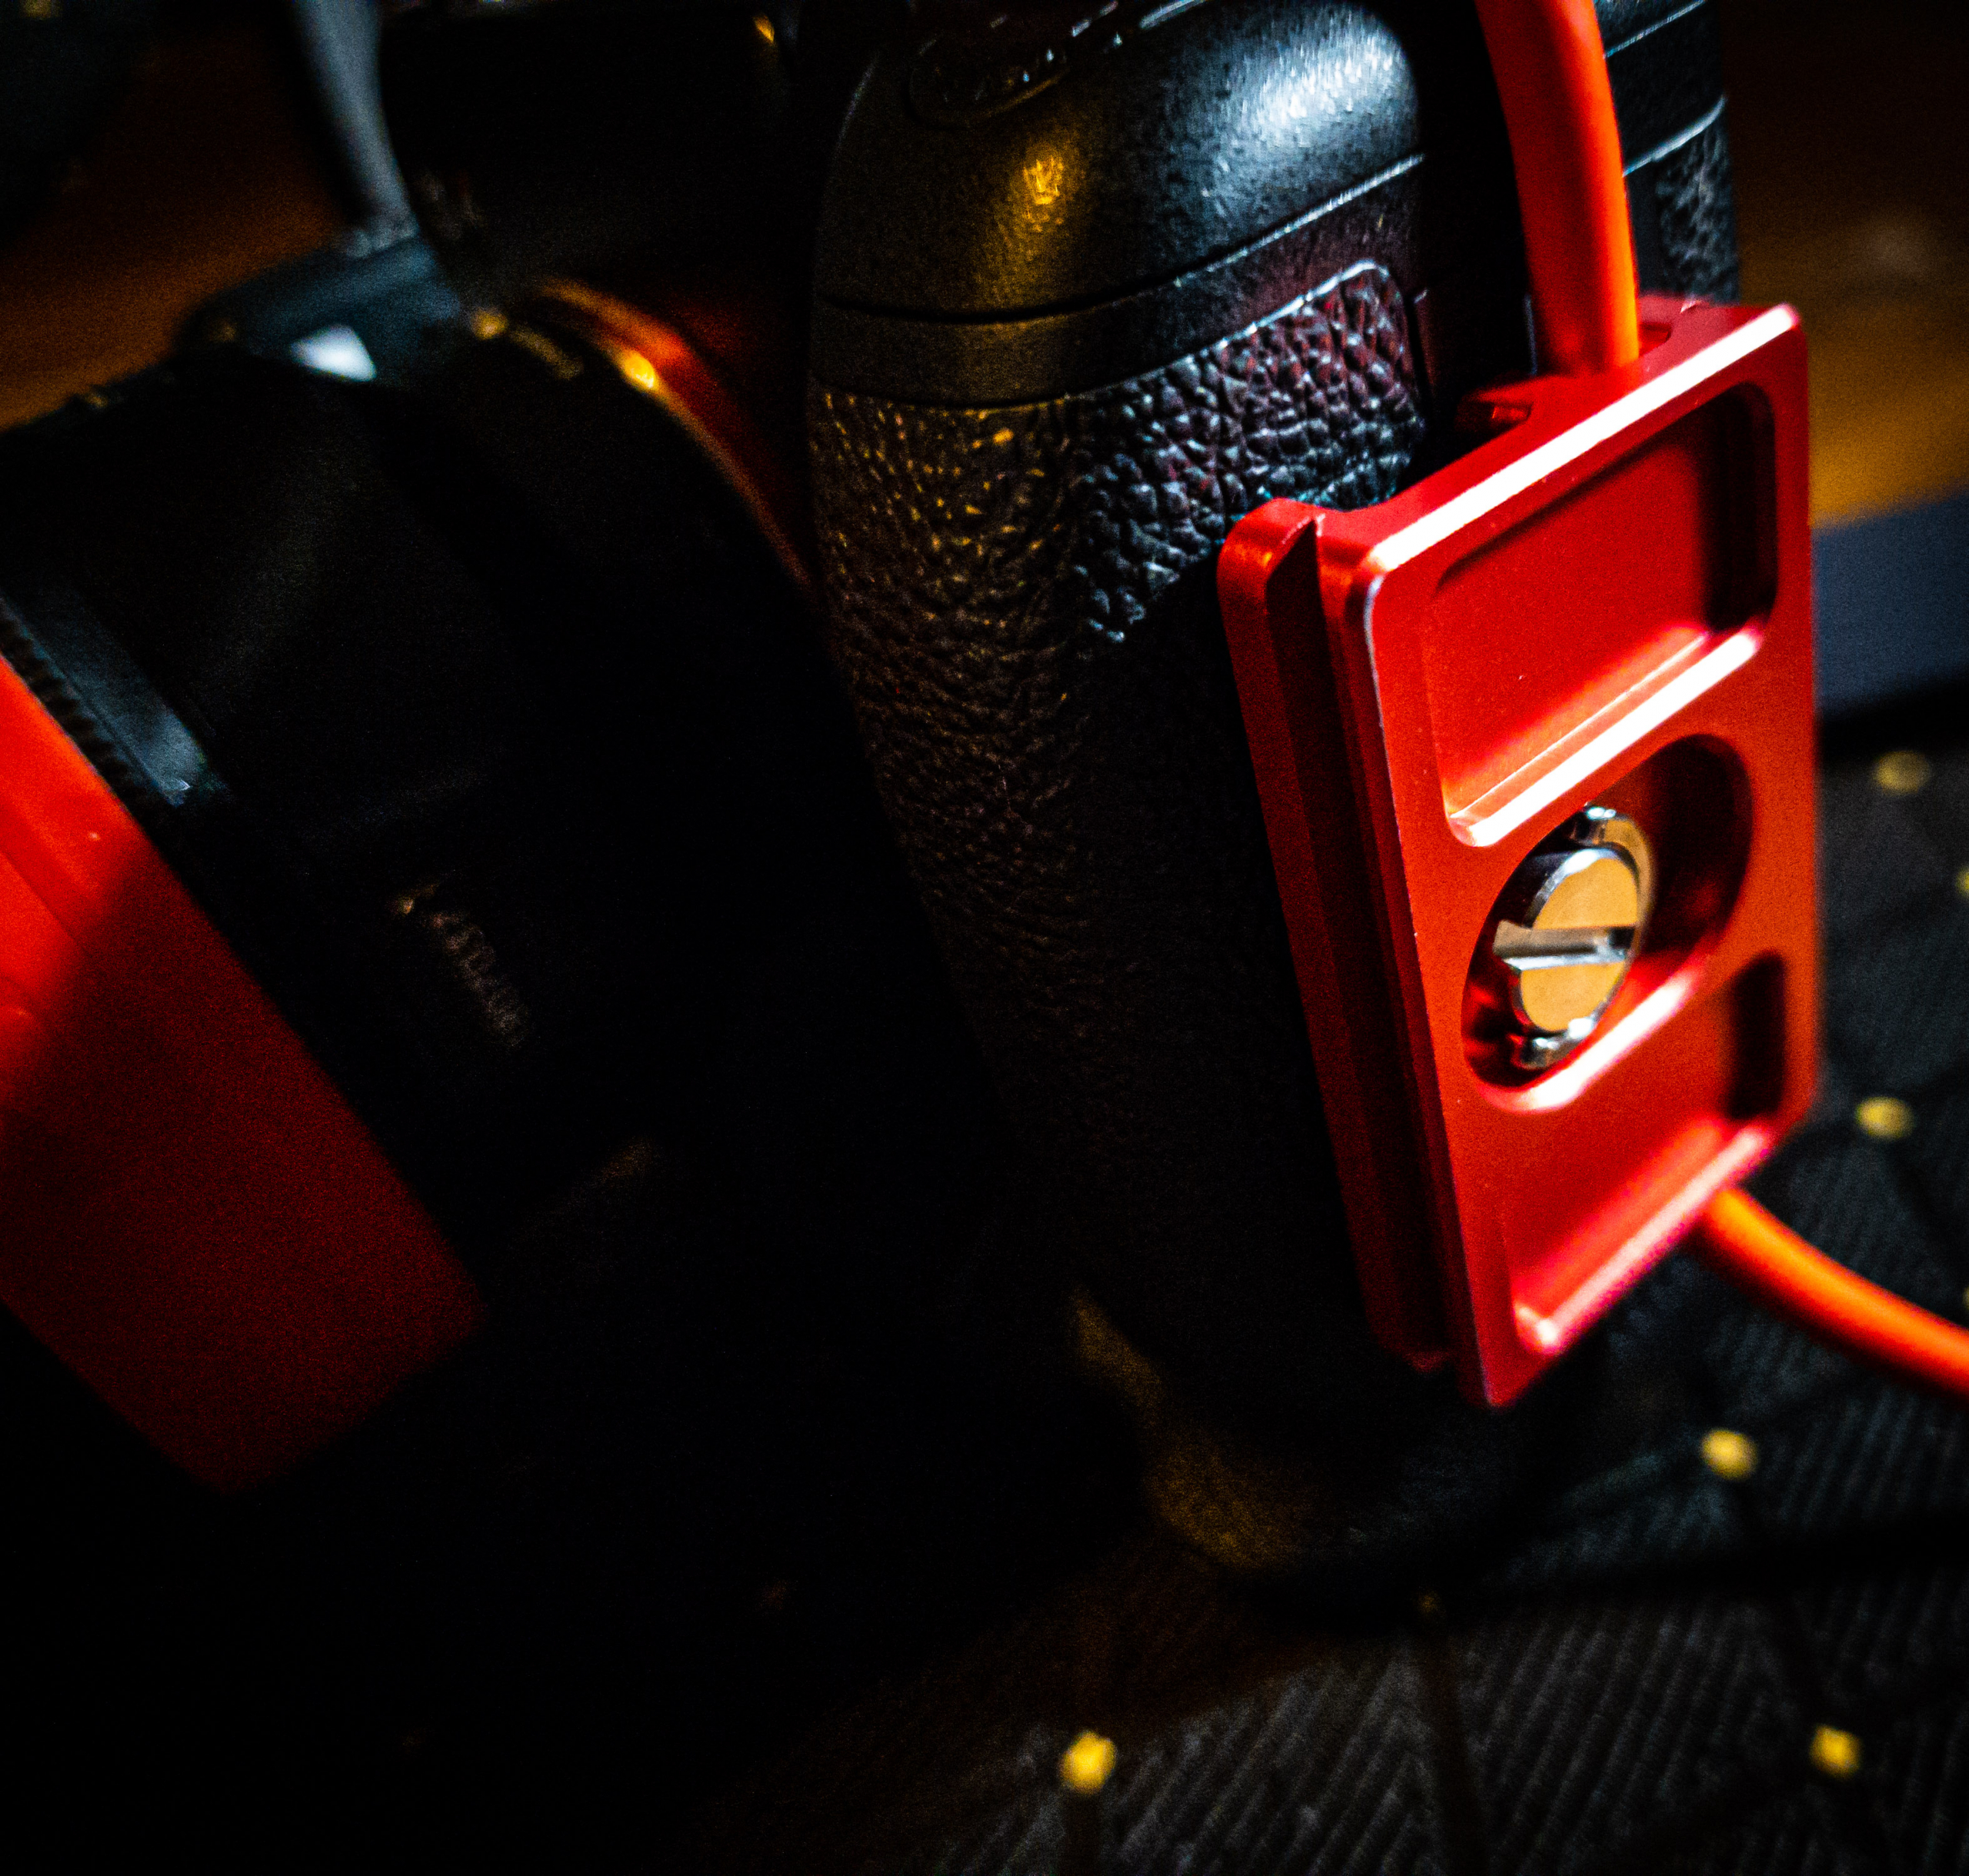
When we connect something to our camera there is always a risk of damaging the port. This is one of the reasons I never advise people to empty their cards via the cameras, so how do we solve this with tethering?
First of all, IQwire uses angled connectors which already bring the risk down when a camera tips over when on the floor. (Never ever place your camera when connected on a stool or table, if someone hits your cable the camera will fall and probably not survive, so always place a connected camera on the floor). Due to the angled design of the IQwire the camera will literally turn over the cable protecting the port. But that doesn’t help when someone stands on your cable (of course you never do that yourself :D).
This is the first reason everyone should consider a 10-meter cable
When you use a 5-meter cable you have to take into account your own length (in my case 1.97) and the height of the laptop or tablet (mostly 1.50 meters). This means that if you don’t want your cable to “float” you already lose roughly 3.50 mtrs which means you can move around 1 to 2 meters around your laptop/tablet before the cable becomes a danger to trip over. With a 10-meter cable, this is much more than double. Now you can move roughly 6.50 mtrs around your laptop/tablet. This makes it not only safer to shoot but also hugely benefits the way you can use your set creatively. Being limited by length is incredibly frustrating.
But even when you use a 10-meter cable the port is still very fragile.
So you need something to connect the cable securely to the camera. Anything that moves around is not safe enough and just a small protection, as long as the cable moves there is a constant movement to the port which will eventually weaken the port and this will lead to lost connections.
For years I’ve used a solution that was expensive, very troublesome to take off and put on and was often cut into my hand. So we decided to create something that would work much better and would be a LOT cheaper.
our CableBlock is red,small and also arca compatible for problem-free tethering
Enter the CableBlock
Our StudioFD “We Know Tether” CableBlock solves many problems you can find in competing products.
First of all, we opted for a smaller form factor. This means that on most cameras you can still access the battery compartment and the CableBlock doesn’t cut into your hand when using smaller cameras. But most of all we wanted an easy way to take the CableBlock off the camera, so we added a clip which you can quickly take the CableBlock off your camera or put it on of course. You can still use a coin or screwdriver but you don’t need to anymore.
And of course, the CableBlock is fire red which makes it stands out. It’s fully Arca compatible and the best thing …. we are able to sell it for 35,00 euros retail. And for the time being it’s actually delivered for free with the 10- meter IQ-wire when bought from our dealers.
Looking back
Introducing a new brand on the market is always a problem. But realizing it’s just one year ago we did the introduction it’s stunning to see we are now being sold in most camera stores in the Benelux. And getting orders from other countries far out of our sales region is nothing less than awesome.
We are very pleased with all the positive reviews we get from magazines, websites, and most of all our users. Everybody seems to love IQwire, and reading that people can shoot without any problems or hiccups is the icing on the cake of course, and the reason we always find the brands that deliver.
For myself
1 year using a 10-meter IQwire meant
ZERO lost connections
Still using the same cable
No visible degrading on the connectors and housing and even the cable itself still looks brand new although there were quite some instances where people and dog stood on the cable and I even (by accident) rolled my chair over the cable during a shoot a few times.
So do you also want to shoot tethered problem-free?
Like with most products there are brands that innovate and brands that keep everything the same. With IQwire we are ready for the future, are you already an IQwire shooter?
Of course, you might wonder “Why should I choose to work with StudioFD?”
First of all, we have an unsurpassed experience with tethering. Without going into details (don’t want to hurt other brands), we’ve been working in the business of tethering for over 15 years building brands from the ground up with almost 24/7 365 support.
As a dealer, you don’t have to think about solving problems for your customer which costs time and often will not solve the problem. Instead, we take over the complete after-sales and will support your customer with all the questions they have and if something doesn’t work… Well, we will make it work (unless a camera doesn’t support tethering of course). Besides an extensive experience with tethering, we also ran a PC/Mac shop for over 20 years so we have a proper knowledge of the software and hardware needed to create a flawless workflow.
https://frankdoorhof.com/web/wp-content/uploads/2022/05/IQWire-Black-05-05-2022-at-15.04.52-10-1.jpg19022000Frank Doorhofhttps://frankdoorhof.com/web/wp-content/uploads/2015/03/studioFD_Logo-1FV.pngFrank Doorhof2023-05-10 18:00:382023-05-10 22:01:42Looking back at the first year of problem-free tethering and connecting photographers…
As you all know this is mostly a photography blog/site, but as with most people active in creative professions music is also for a lot of us an important part of our lives, so sometimes I also throw in something a bit off topic.
For me personally I started playing guitar when I was app 17 years old and absolutely loved it, I played hours a day and for me music was the perfect distraction from everything that happened around me, it was the place I could channel happiness but it also was a great way to get anger or frustration out.
Getting to the start
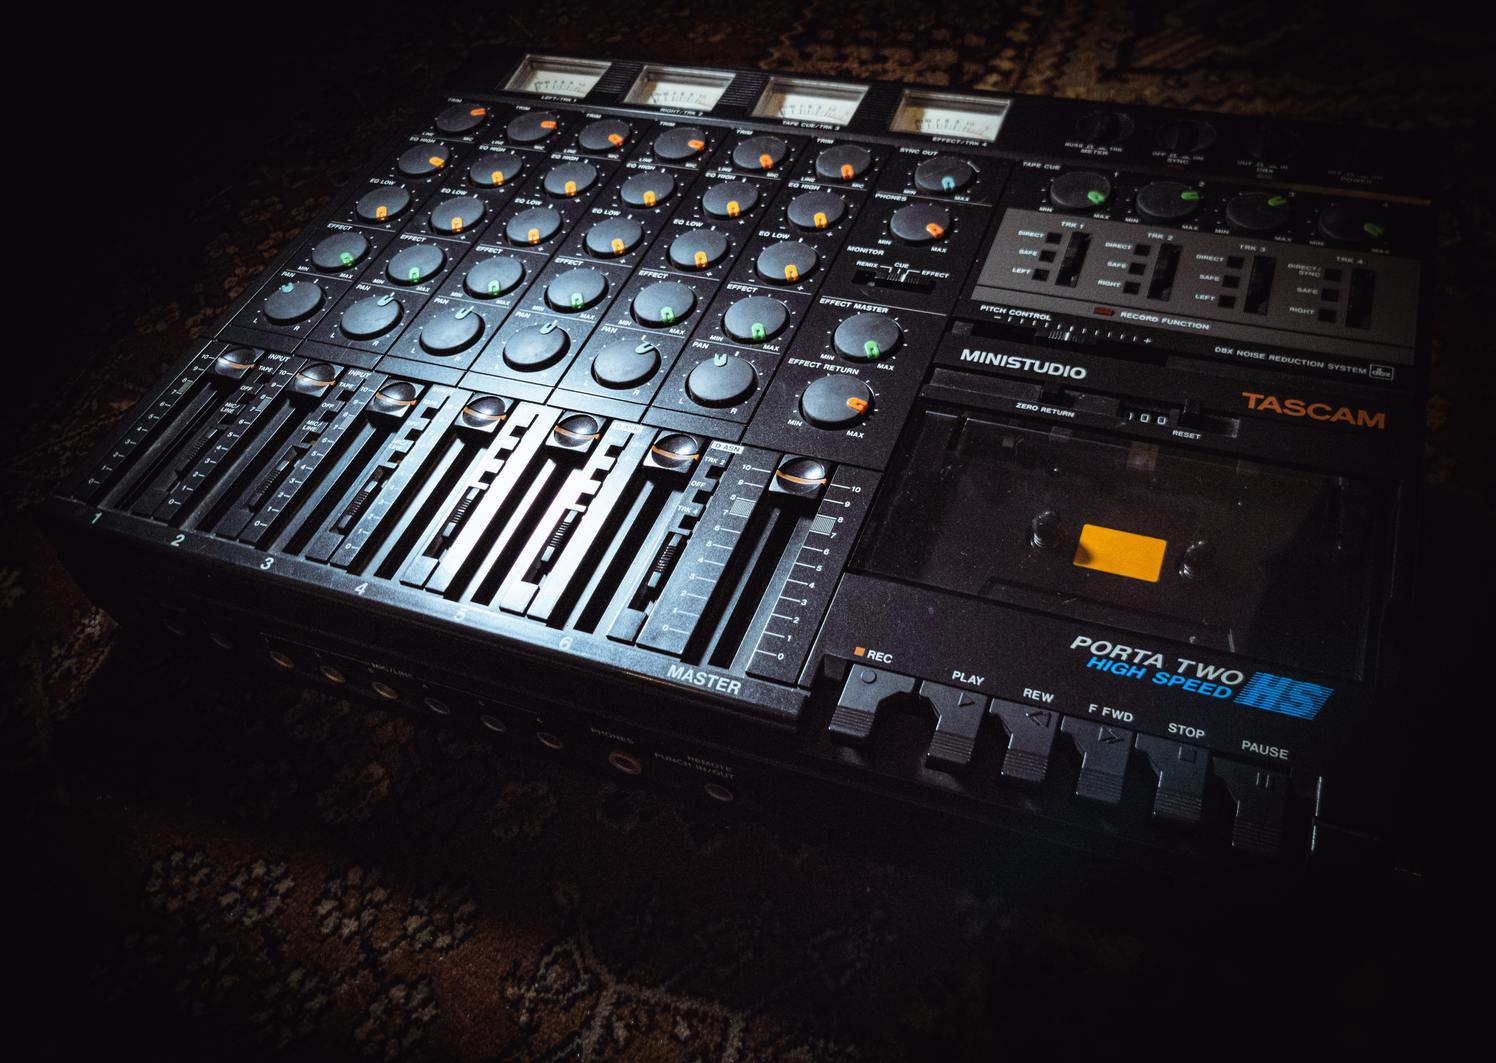
When I started there was no internet and learning guitar was done by waiting for a new magazine or buy a tabbook (song book with guitar parts transcribed in tabs). Recording music was an absolute disaster. I used a very modern (for that time) 4 track recorder which meant I had to record 2 tracks that I could listen back and 2 tracks “blind” only when mixing you could hear those back, later the Tascam recorders started to appear and I absolutely loved that one (still own it), wish it would still work but the tape deck is somehow not working anymore.
When I was done with school my first company was a recording studio which I ran with a friend of mine. It was a huge space which we build ourselves from an old barn behind his parents farm. Although the space was designed as a real studio with a separate drum cage, special acoustics and of course a nice control room with soundproofed glas looking into the recording room… in short it was awesome. But where we were professional in room space even in todays standards the gear…. well… was less impressing.
Recording was done on a large D&R console and the drums were done on a separate Yamaha console routed into the D&R and mixed down to an 8 track tape recorder, this made it also possible to record all instrument separate or all at once with their own channels for that time I felt in absolute recording heaven.
But as with most things, time catches up.
I met Annewiek and we started our life together, for a few years I continued teaching guitar to local people but when we got busier with our business I had to stop this and slowly also stopped playing myself. Luckily I didn’t sell anything but stored in on the attic.
The PhotoshopWorld experience
Many years later (end 40’s) I send one of my demo tapes to Scott Kelby and he absolutely loved it resulting in him asking me to jam with them on stage during PhotoshopWorld. To be short… it was a “disaster” and bloody (no calluses) (sorry Scott for the strings). But it did spark the fire in a huge way. So when I got home we unpacked my old guitars and amps and connected everything.
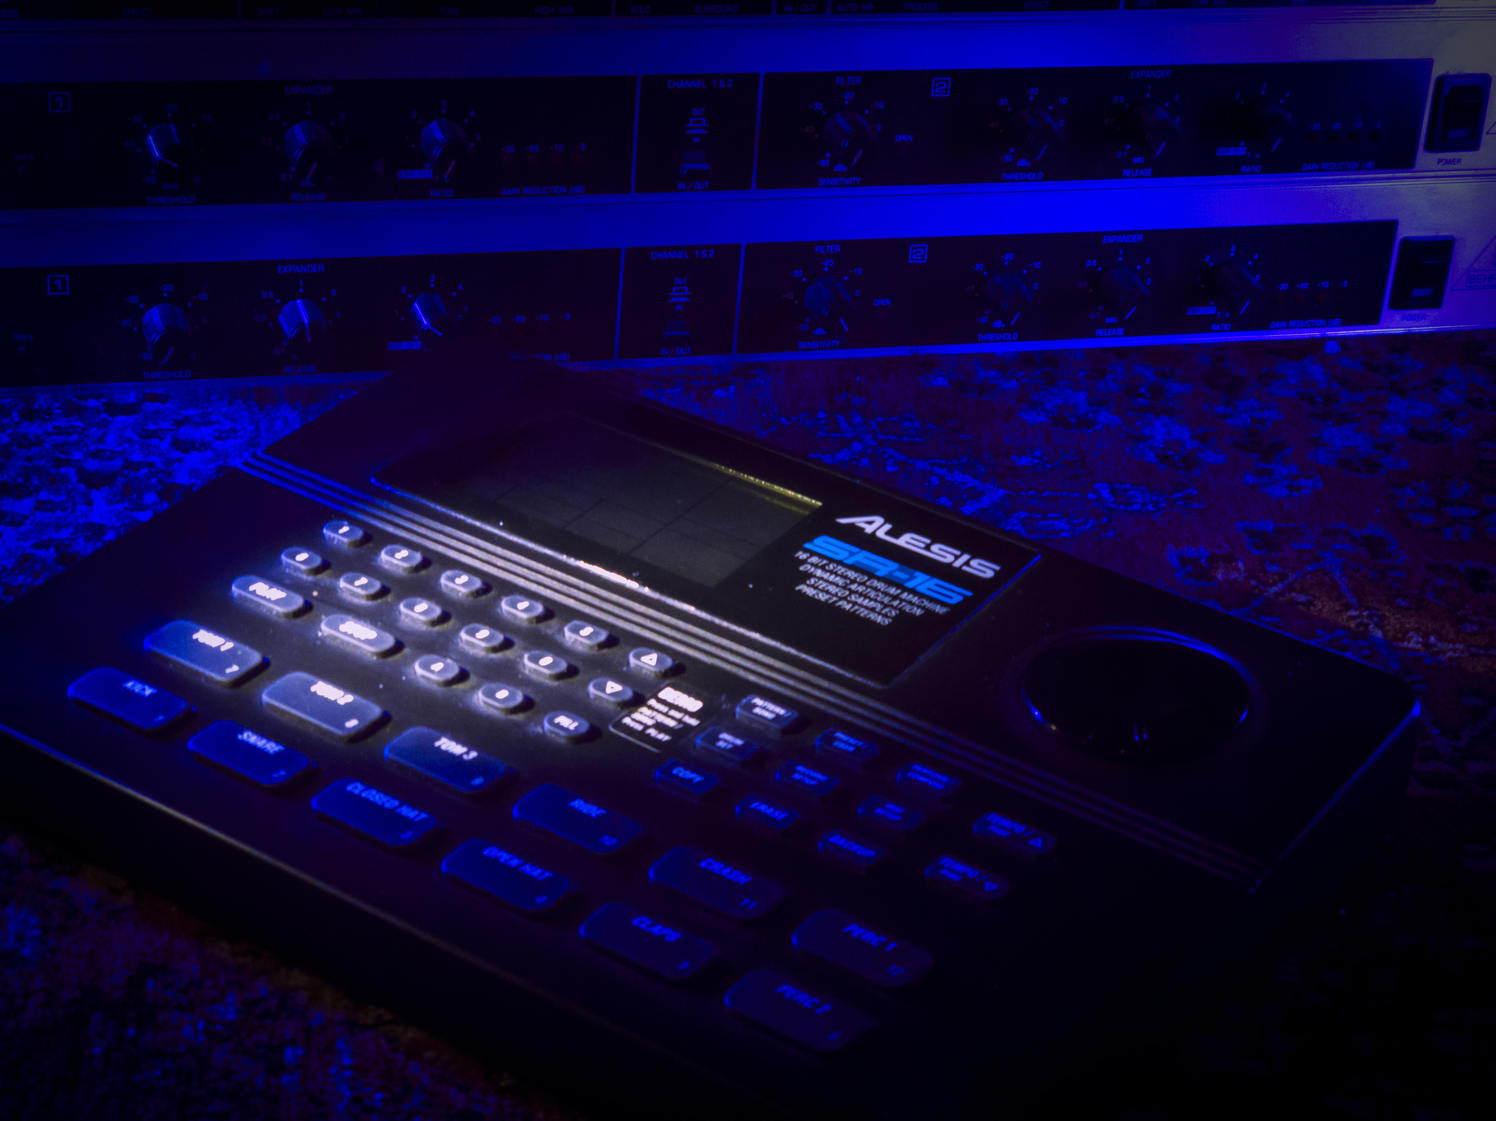
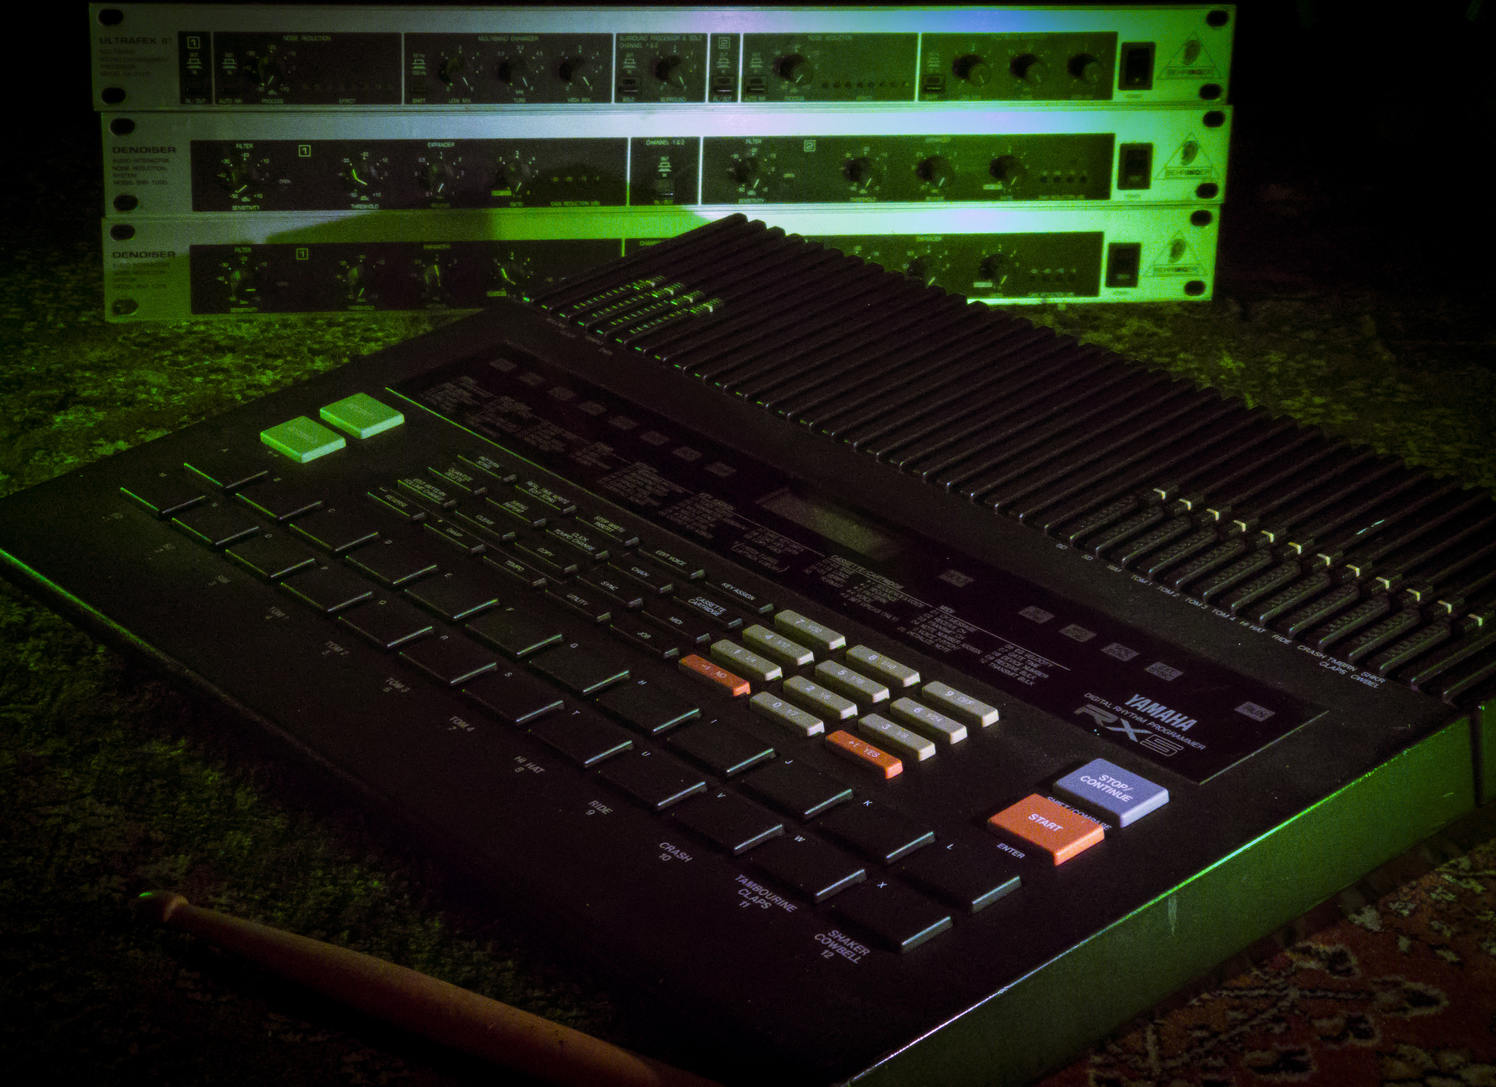
The first thing I wanted was my trusted drum machines.
I sold my SR16 so bought that one back and also added a kawai session trainer.
But….. I don’t use them anymore.
The landscape has changed A LOT.
Man I wish I had all this stuff when I was in my teens, I would have never left my room I’m afraid.
At the moment I’m recording my guitar parts on tube amps at the sound output I want without hearing any sound. To give you an idea, to get a really cool lead tone I love a 100W tube amp just over the point of breakup which often means the sound pressure of a jet-engine at a few feet distance, something you could never do in the past, but today you just disconnect the speaker cab and use something like a Torpedo Twin X and you can select your favourite speakers, add virtual microphones and move them around but without the phasing problems you normally experience. Now in all honesty I was able to do something very basic in my youth because I bought a Marshall SE100 which does something similar but wasn’t as flexible as what we have today and it was incredibly expensive at that time (still own it).
Recording music is also a totally different experience.
Logic has awesome sounds for keys (in the past you had to buy all the keyboards to get the sounds, or use samplers), an awesome drummer plugin and thanks to digital it’s now super easy to record your ideas. Where when I started it was more fighting the limitations and being able to record something in one take (punch in is pretty hard to pull off perfectly on old tapemachines) now you can just play it in a loop and select the takes you like or even glue them together without the listener hearing the cuts.
Now I have to be honest.
I still try to play my music in as little takes as possible and my solos are probably 20 takes but I choose only one and only cut where I messed up a note or slide. Somehow it still feels like cheating when you just “lego” a piece of music.
Getting it out there My first (and only) band was called Royalty (huge Queen fan) and although we played covers the main set was own material which we recorded on that little 4 track in my parents attic and the second demo actually in the studio (Royalty street studios). To get the music “out there” we asked local record stores to showcase our cassette tapes on the desk and once a month we would collect the money, if there was any. It was a time that most people don’t even recognise, and in all honesty it makes me feel very old 😀
Also here the world has changed a lot.
When I was in a band when you wanted to reach outside of your home town you had to do it yourself or get a record deal. Well that first one we did, the second… never ever.
But how do we do it now?
The first thing you will say “internet” and indeed totally right.
Sites like Soundcloud, bandcamp are awesome to showcase your music and of course social media is a great way to build followers, build hype, share images etc. the landscape has turned completely upside down.
Now let’s make one thing clear. I have no ambitions at all in a music career (although I’m always open for offers :D)
But I love sharing my work and when I told someone to check out Soundcloud the answer was often “what?, I know Spotify or Apple” so I started to look what was needed to get my music in an easier to find streaming service.
You can of course upload directly to Spotify, but what about Apple, YT, Tidal etc. etc. there are over 250 streaming services, so where does it stop? I feel a bit like social media, we love to keep you guys updated and it’s a lot of work to reach the most amount of people on different platforms and I was not planning on doing that kind of work for my music.
Enter Distrokid
As soon as I started looking for posting on Spotify the name Distrokid came up, when I watch recording or instructional videos Distrokid is mentioned, the kid seems to be everywhere.
When I looked at the site it indeed looked awesome. For 19.00 a year you’re posted on all streaming services and keep all/most of your royalties, there are unlimited uploads without “hidden” costs and they have a very nice website with special goodies that make my life a lot easier. Remember music is my hobby it’s not work, so I love making and recording the songs but I don’t want to spend hours on getting them online. Well Distrokid is a solution for all of this.
If the song is done you just upload it to DistroKid and enter the needed information, upload the cover art and… well that’s it (ok press or click Enter), but that’s not where it stops.
Within a few hours DistroKid send me an email with a so called pre-save page. This is absolutely awesome because it not only gives the visiter the cover art and a small preview that works in every browser, but you can pre-save the track and when the track is released the same page can be used to select your favourite streaming service. Talk about taking the work out of your hands.
As soon as the track was released I got another mail.
This time with loads of cover designs for social media, I settled on this one.
Now of course you can still do everything yourself, and if you pay a little bit more you can even have your own label instead of DistroKid, for me it doesn’t really bother me so I just got the cheapest option and am already deeply impressed by what it does for you, for 19,00 a year I did not expect this.
Alternatives
Did I look for alternatives?
Yes of course (I’m Dutch :))
But every time I saw one that was “self-proclaimed” better it was often not the case, yes they are free or much cheaper but you pay 5-9 euro per release, that means 3 releases and you’re already over the price of Distrokid.
Now I’m not saying Distrokid is for everyone.
But they do have a great product range from 19 to 80 euro per year ranging from one artist and the DistroKid label to 2 artists and a lot more options plus your own label and even an option for a real label with loads of artists, planned releases etc. and that for under 100 euro a year…. wow.
My plans
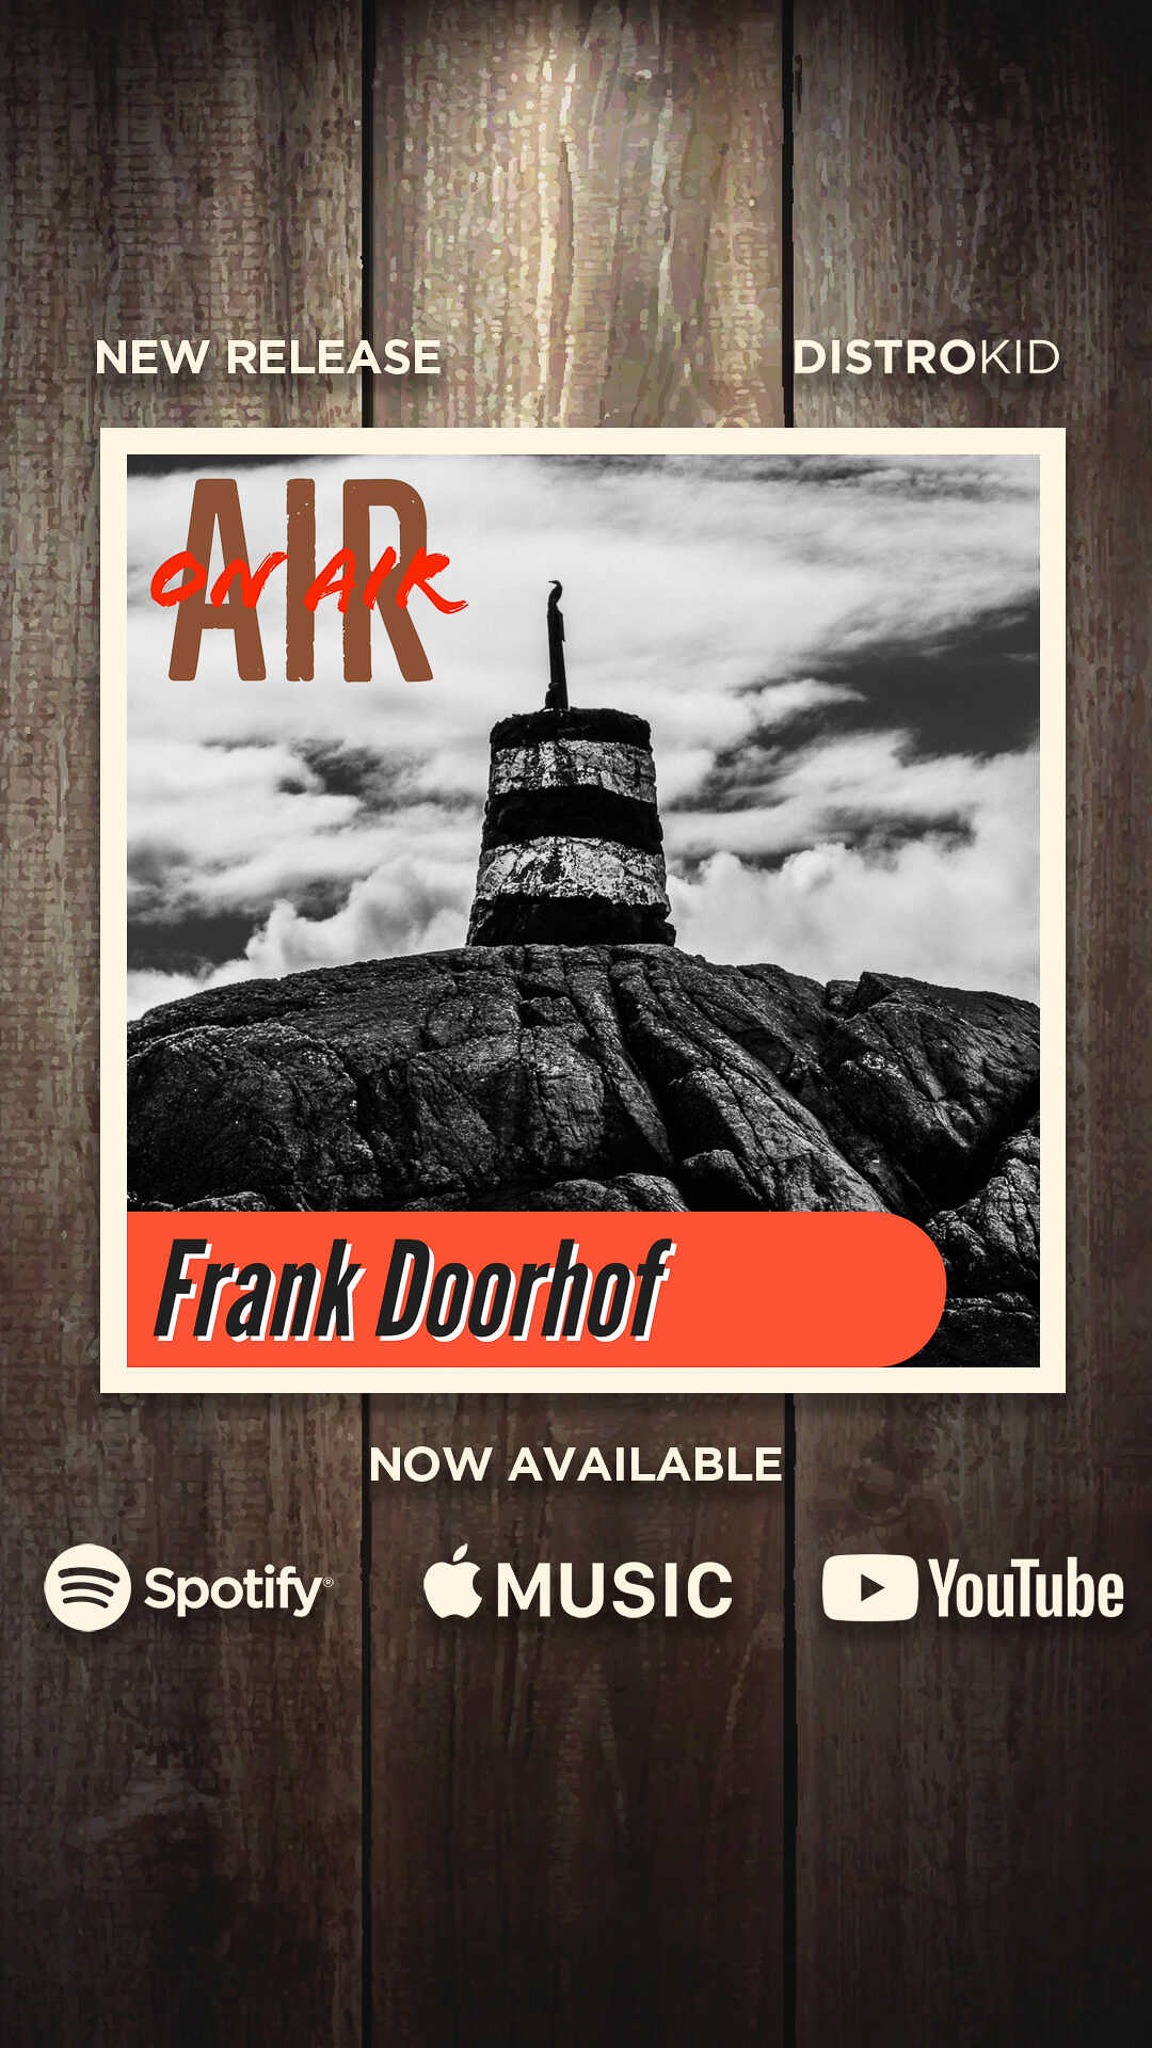
At the moment I have one song on DistroKid called Air on Air.
I recorded this a few days ago in our home studio and it came out pretty cool I think.
I already mentioned I have no ambitions on a music career (although :D) but I will be uploading material regularly, so I would love for you guys to follow me on your favourite streaming service.
At the moment I have 7 songs ready that will be uploaded in the coming weeks (one a week is the plan), after that I will keep uploading material and the challenge for me is to improve with every release and of course find collaborations with other musicians, and because we can record worldwide thank’s to the modern DAWs I think we can look forward to some interesting collaborations.
Feel free to contact me if you want to work on something.
Conclusion
If you want your audio out there and want a solid partner that doesn’t cost you an arm and a leg Distrokid is the right choice I think. Even if you (like me) just love to record music and love to get it “out there” Distrokid does it all for less than what you spend on coffee in a week.
If you also want to share your music or audio, check out DistroKid and use our link for a 7% discount and you also support my work, which I highly appreciate.
Oh and I would love for you guys to listen to my music, share it with friends and if you like more posts about music or recording let me know. We also recently started a Discord server which contains topics about photography but also music, so make sure to also join us there.


You must be logged in to post a comment.